1
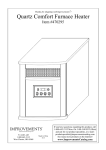
Thanks for shopping with Improvements! Anti Theft Digital Safe Item #453895 Item #453945 Item #453937 Item #453912 .28 CU .62 CU 1.0 CU 1.2 CU To order, call 1-800-642-2112 West Chester, OH 45069 If you have questions regarding this product, call 1-800-642-2112 Mon.-Fri. 9:00-5:00 EST (Ohio) and ask for our product specialists, or e-mail: [email protected] See many more products on the Internet! www.ImprovementsCatalog.com Index Overview of Your Safe Index OVERVIEW OF YOUR SAFE Overview of Your Safe ..................................................................................................2 Congratulations! Opening Your Safe for the First Time.........................................................................3 Test Locking System .....................................................................................................4 Programming a Personal Passcode ...........................................................................6 Emergency Override Key / Battery Replacement ...................................................7 Additional Features ......................................................................................................7 Use, Care and Maintenance ........................................................................................8 Consumer Affairs ........................................................................................................10 Your new First Alert® Digital Waterproof Fire Safe will provide years of safe and secure protection for your valuables, important documents and other personal items. All First Alert® safes are designed and built using the highest manufacturing standards to ensure maximum user satisfaction under a variety of conditions. With proper care, your First Alert® safe will provide peace of mind for many years to come. Handy Hauler® Handle and Wheels .........................................................................12 Safe Identification Record .........................................................................................12 Limited Warranty ........................................................................................................13 Package contents L-10-XZ Z 0-X L1 For Your Protection aDo not remove the serial number tag from the safe. 2 Emergency Override Keys 2 Adjustable Shelves 4 AA Batteries 1 Removable File Rack 1 Removable Handy Hauler® with Plastic Screw Covers aStore emergency override keys away from safe, NEVER INSIDE. aRecord all safe identification numbers on Safe Identification Record on page 12. aSave this manual and NEVER keep it inside the safe. important: do not return safe to store If you are missing parts, have difficulty programming your safe or have any other questions pertaining to its proper use and care, DO NOT RETURN your safe to the store. Please contact Consumer Affairs at 1-800-323-9005, 7:30 a.m. – 5 p.m. Central Standard Time, Monday through Friday. To assist us in serving you, please have the model number, serial number and date of purchase available when calling. 1 2 Opening Your Safe For The First Time 3,4 Test Locking -12 System BG NO first time activation Your safe is ready for activation. To open the safe and prevent it from locking before completing the first-time activation, a solenoid deactivation safety device has been installed. User Activation Install Batteries 1 Turn handle upwards to the right and pull open the safe door. Note: This waterproof safe may require additional force upon initial entry. 3 4 Slide the battery compartment cover forward and remove. The compartment is located inside the safe at the top of the door. Install the four (4) AA batteries. Make sure the batteries are installed in the proper direction as indicated in the battery compartment. Slide the cover back into place. After the batteries are correctly installed, the red and green lights located at the top of the keypad on the front of the safe will blink twice, the keypad backlight will flash once and you will hear a single beep. 1 4 7 1 4 7 2 5 8 0 2 5 8 0 Leave the safe door open and proceed to Electronic Locking System Test. test locking system Electronic Locking System Test With the door still open, you can test the Electronic Digital Lock by manually activating the Locking System. 3 6 9 # 3 6 9 # Locking Push Button 1 4 7 – + + – Green Light * 3 6 9 # 3 6 9 # Keypad Backlight To activate the Locking System, locate the locking push button on the inside of the safe door, push it in and turn the handle to the left. This will cause the live door bolts to extend out and into the locked position. Now with the door open and the live door bolts in the locked position, you may proceed to Testing the Passcode. 2 5 8 0 3 6 9 # Dead Bolt Extended Live Bolts Locking Push Button Dead Bolt Enable/disable sound # 2 5 8 0 Red Light 1 4 7 Once the batteries are installed, if you do not hear a beep when entering the factory pre-set passcode or during the personal passcode re-programming process, enter the following key sequence into the digital keypad: # 2 5 8 0 1 4 7 Battery Configuration Proceed to Activate Lock. Important 3 Activate Lock 1 Locate the small plastic Locking Pin on the inside of the safe door. Grip and pull out completely then dispose of properly. 2 Batteries and Emergency Override Keys Remove four (4) AA batteries and two (2) Emergency Override Keys. They are located in the protective styrofoam insert at the top of the box. 2 5 234 PL-1 Opening Your Safe for the First Time Important UIP G: EQ ATIN ION CE R CT TE TAN R. RO SIS 1 H D P E RE 350 R CO FIR S RE TO LAS C 56 AS This will turn the sound on. Repeat the process if you want the sound turned off. Important Extended Live Bolts Engaging live bolts Closing the safe door with the Live Bolts in the locked position can damage the safe. The locking push button should only be used when testing or programming the safe with the door remaining open. 4 Test Locking System Programming A Personal Passcode programming a personal passcode Testing the Passcode 1 With the safe door open and the Live Bolts engaged, you can now test the Electronic Locking System using the pre-set three digit factory code. Locate the digital keypad on the front of the safe and open up the protective cover to expose the keypad. 2 3 When the cover is opened, the keypad is activated and the keypad backlight will turn on and remain on for approximately five (5) seconds. The keypad is still active even when the backlight turns off. It will turn on again when any key is pressed. 1 4 7 2 5 8 0 3 6 9 # 1 5 9 # After properly entering the entire sequence, the green light will turn on and the lock will click. You now have five (5) seconds to open the safe by turning the safe door handle upward to the right. Important 6 If handle will not turn For added security, the safe will automatically lock out entry for 15 minutes after three (3) attempts to open with an invalid passcode. Open the protective cover on the front of the safe to expose the keypad. 2 With the safe in the open position, press the small reset button located on the inside top edge of the door. 3 Enter your new three to eight digit (3-8) passcode followed by the # key. P A S S C O D E # Minimum 3 Digits P Leave the safe door open and proceed to Programming a Personal Passcode. security lockout periods 1 Immediately repeat the sequence, beginning with the new passcode followed by the # key. If the handle will not turn to the right after the green light comes on, first turn the handle slightly back to the left until it stops, then turn upwards to the right again to open. Once the handle has been turned to the right, the live bolts will disengage and retract into the door. At this point you have successfully unlocked the safe and the door can be opened. Note: This waterproof safe may require additional force upon initial entry. Important Reset Button NOTE: After pressing the reset button, the red and green lights on the keypad will flash to indicate the programming is authorized and you have 10 seconds to begin. Note: All entries are accompanied by a beep and the green light will flash. 5 To program your own unique three to eight digit (3-8) passcode, follow these steps: The pre-set three digit factory passcode is 159. Enter this passcode as follows: * 4 For security reasons, it is very important that you program your own personal passcode into the digital lock. The factory code should be changed immediately. 15 MINUTES A S S C O D E # 4 The green light will light up solid for 5 seconds, indicating your new passcode has been successfully entered. 5 Your new passcode will now be comprised of the three to eight (3-8) digit sequence you selected, always followed by the # sign. The factory pre-set Passcode will no longer open the safe. 6 You may change your passcode at any time by repeating the same steps. 7 It is important that you write down your personal passcode and secure it in a safe location away from the safe. ! NOTE: If you forget your personal Passcode, access to the safe can be made using the Emergency Override key. Once your personal passcode is programmed, the Important factory pre-set code will no longer open the safe. 5 6 Use, Care and Maintenance 2 L-10-XZ 3 Insert the Emergency Override Key into the lock and turn clockwise to the right. 4 Turn the handle upwards to the right to open the safe. NOTE: If batteries need replacing, proceed with step 5. Otherwise, proceed to steps 6-8. 5 Important Slide the battery compartment cover (located inside the safe at the top of the door) forward and remove. Remove and properly dispose of the four (4) nonworking batteries. Install four (4) new AA batteries. Make sure the batteries are installed in the proper direction as indicated in the battery compartment. Slide the cover back into place. 6 Remove the Emergency Override Key, and before replacing the lock cover, enter your personal passcode to make sure the safe will open. 7 Replace the lock cover using the two small screws and return the Emergency Override Key to a secure place away from the safe. 8 Close and lock the safe door by turning handle downward to the left. additional features 1 4 7 2 5 8 0 Red Light 3 6 9 # KeeP THE COVER CLOSED TO PRESERVE BATTERY LIFE. Disable / Enable Sound 1 2 To enable (turn on) the sound during normal operation, press the following key sequence: Repeat the process to turn the sound off. # * # Use, Care and Maintenance Appropriate Use of Your Safe First Alert® Waterproof and Fire Resistant Safes protect paper records and many other valuables. DELTA HINGE First Alert® Safes with Delta Hinge use the patented concealed hinges to prevent a would be thief from prying the door open. They're strong, secure and certain to help you protect what matters most… Verified fire protection for: Shelves To allow for greater flexibility and further accommodate your particular storage needs, this safe includes two (2) adjustable/ removable shelves. This product is NOT INTENDED to protect audio or video cassettes, floppy discs, data cartridges, film and photos or photo negatives from fire. 8GB CDs & DVDs Memory Cards US B 2. 0 HAR Position shelf so that the gripping ridges are on the top and towards the front of the safe. memory card 1TB 1 7 Low Battery Indicator Every time the keypad is activated, the system automatically checks the power level remaining in the batteries. If the power falls below a certain level, the red light will flash every two seconds to indicate the need for new batteries. VE Using a small Phillips head screwdriver, remove the two screws securing the small Emergency Override Key lock cover located just below the digital keypad. Pull forward on the cover to remove and set aside with the small screws. rEMOVABLE FILE RACK For your convenience, this safe also includes one (1) pre-installed removable file rack. If you would like to remove or re-position the file rack, simply grasp it on both sides, pull forward and lift it up and out of the safe. To re-install the file rack, locate the approximate position in the safe where you would like to place it and, using the guides molded into the walls of the safe, slide into place. D DRI 2 Locate the approximate position in the safe where you would like to place it and, using the guides molded into the walls of the safe, slide the shelf into place. MODE SERIAL L: HD122 : 123 344 .444.3 51231 45.677 1 3 6 9 # L10 -X Z 1 2 4 5 emergency override key/battery 7 8 replacement 0safe. Locate and open the protective keypad cover on the front of the Emergency Override Key / Battery Replacement / Additional Features USB Drives Testing shows that the interior temperature of the safe remains below 350°F for one (1) hour during a fire up to 1700°F when used properly. Your safe must be closed and latched in order to properly protect the contents from fire. External Hard Drives 1 HOUR Gripping Ridges 8 Use, Care and Maintenance Moisture Warning We recommend that you place delicate items such as pictures or intricate jewelry into an air-tight container before storing them in your safe. Avoid placing your safe in areas of high humidity. For optimum performance, the safe should be opened and aired out for at least 20 minutes every two (2) weeks. Firearms Warning This safe is not designed to store medication, items with combustible content, guns or other weapons. Consumer Affairs Consumer Affairs Your Safe’s Unique Identification Numbers When contacting Consumer Affairs, you should be prepared to supply some important information that specifically identifies your safe. This information is extremely important to assuring prompt and accurate customer assistance. It is strongly recommended that you identify and record the following information in the Safe Identification Record form located on page 12. Pearls Because pearls sustain heat damage at temperatures below 350° F, we advise that you DO NOT store pearls in this fire safe. Safe Care and Maintenance When properly maintained, your safe will continue to operate accurately for many years. In order to ensure optimum performance of your safe, please follow these simple precautions: Always make sure all batteries match the polarity (+ and -) signs in the open battery compartment. 5 If your safe will not be used for an extended period of time, it is recommended that you remove the batteries. 6 Always promptly remove and properly discard of all used batteries. XZ 0- 4 Key Number The key number is located on the key. If you do not have the key, the number is also located on a sticker on the inside of the emergency override key lock cover. 1 L- Always clean the battery contacts in the battery compartment and on the batteries before installing new batteries. Key Number Locating Model and Serial Numbers Most First Alert® safes include a small metallic silver or gray tag affixed to one of the surfaces. This tag is usually located on the front or right side of the safe. This tag contains the serial number and on selected models a similar tag is attached containing the model number. If a model number tag is not attached to the safe, then it can be located on the front or side panel of the box that the safe was packaged in. Write this number down for future reference. XZ 0- 3 Serial Number 1 L- Battery Maintenance 1 Always purchase and use the batteries as specified by this User’s manual. 2 Always replace all batteries at the same time. It is recommended to replace all batteries at least once a year or sooner depending on amount of use. Model Number 1 4 7 2 5 8 0 3 6 9 # L1234 Clean Hands - Never attempt to operate the digital keypad if your hands have excessive dirt, debris or liquids on them. Clean Safe – To clean the surface of your safe, it is recommended that you use a mild cleaner (e.g., window cleaner) to avoid scratching or discoloring the surface. Always wipe dry and NEVER use abrasive cleansers on the safe or digital keypad. Waterproof – Your new First Alert® Digital Waterproof Fire Safe is designed to help protect your valuables from fire and water. This product is not intended for long term underwater exposure. . Important do not remove tags In case your safe becomes inoperable or you lose your keys, these identification numbers will be needed to correct the problem. It is recommended that the number tags remain in place on the safe. If removal is necessary, then they should be attached to the inside back cover of this manual. Store in a safe and secure place for future reference. For future reference, store this manual in a secure area away from the safe. DO NOT DISCARD! 9 10