1
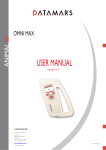
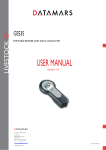
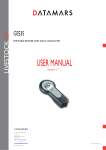
ANIMAL ID
OMNI MAX
USER MANUAL
Version 1.0
Corporate Headquarters:
Via ai Prati
6930 Bedano-Lugano
Switzerland
Phone: +41 91 935 73 80
Fax: +41 91 945 03 30
[email protected]
www.datamars.com
Americas Headquarters:
250 West Cummings Park
Woburn, MA 01801, USA
Phone: +1 781 281 2216
Fax: +1 781 300 7330
Asia Headquarters:
Northern Region Industrial Estate
1/179 Moo 4, T. Ban Klang, A. Muang
Lamphun, Thailand 51000
Phone: +66 53 582 021
Fax: +66 53 582 680
© 2014 DATAMARS
1
INTRODUCTION ......................................................................................................................................... 2
1.1
2
A DESCRIPTION OF THE OMNI MAX UNIVERSAL SCANNER ............................................................................... 2
OMNI MAX BASICS.................................................................................................................................... 3
2.1
HOW TO SWITCH OMNI MAX ON AND OFF ......................................................................................................... 3
Switching On The Scanner .......................................................................................................................................... 3
Switching Off The Scanner .......................................................................................................................................... 4
2.2
ACCESSING THE MAIN MENU ............................................................................................................................... 4
2.3
ACCESSING THE ADVANCED MENU ..................................................................................................................... 4
3
USING OMNI MAX TO SCAN MICROCHIPS........................................................................................ 5
3.1
SCANNING A MICROCHIP...................................................................................................................................... 5
Effective Scanning ....................................................................................................................................................... 5
Which Microchips Is OMNI MAX Able To Scan? ....................................................................................................... 6
4
CHARGING THE BATTERY ..................................................................................................................... 7
4.1
BATTERY INDICATORS ......................................................................................................................................... 7
Battery Discharge/Power Low .................................................................................................................................... 7
Battery Charging ......................................................................................................................................................... 7
Full Power................................................................................................................................................................... 8
5
OMNI MAX SETTINGS .............................................................................................................................. 9
5.1
AUDIO SETTING .................................................................................................................................................... 9
5.2
BRIGHTNESS SETTING........................................................................................................................................... 9
5.3
TIME .................................................................................................................................................................... 9
Setting The Time Format ............................................................................................................................................. 9
Setting The Time ........................................................................................................................................................ 10
5.4
DATE .................................................................................................................................................................. 10
5.5
INFORMATION MENU ......................................................................................................................................... 10
5.6
READING SETTING ............................................................................................................................................. 11
5.7
RECORD SETTING ............................................................................................................................................... 11
5.8
USB SETTING .................................................................................................................................................... 11
5.9
ID CODE DISLAY SETTINGS ............................................................................................................................... 12
5.10 FILE MENU ......................................................................................................................................................... 13
5.11 BLUETOOTH SETTING (ONLY AVAILABLE ON BT VERSION) ................................................................................ 13
5.12 S-ID SOFTWARE................................................................................................................................................. 14
6
COMMAND INTERFACE ........................................................................................................................ 15
6.1
COMMANDS OVERVIEW ..................................................................................................................................... 15
Execute Commands ................................................................................................................................................... 15
Get/Set Commands .................................................................................................................................................... 15
7
TROUBLESHOOTING.............................................................................................................................. 17
8
CERTIFICATIONS .................................................................................................................................... 18
8.1
8.2
8.3
9
EUROPEAN DIRECTIVES ..................................................................................................................................... 18
AMERICAN DIRECTIVES ..................................................................................................................................... 18
CANADIAN DIRECTIVES ..................................................................................................................................... 19
CARING FOR YOUR OMNI MAX READER ........................................................................................ 20
© 2014 Datamars SA. All rights reserved.
Page 1 of 20
OMNI MAX - User Guide
1
Introduction
This guide will help you use the OMNI MAX Scanner to identify pets. An overview of the basic functions and
settings is provided.
1.1
A Description of the OMNI MAX Universal Scanner
OMNI MAX is the newest, portable, universal reader from Datamars with the strongest feature-set of any
microchip reader available, making it a perfect fit for animal identification in any environment.
OMNI MAX is able to read FDX-B (ISO), FDX-A/FECAVA, Trovan, and either HDX ISO or Avid encrypted,
depending on the reader version. From puppies and kittens to seniors, from pocket pets to horses, indoors
and outdoors – OMNI MAX delivers the identification you need.
OMNI MAX has an innovative antenna that runs along the full perimeter of the reader, greatly increasing the
read field for fast and easy scanning. This larger, wider read field improves the read distance and time –
which are critical to making an identification. With OMNI MAX, Datamars delivers the most modern available
technology to ensure the fastest possible microchip ID with every read.
Connect OMNI MAX to your computer via USB or optional Bluetooth wireless. The keyboard wedge allows
microchip IDs to be transmitted directly to your computer, tablet or smartphone and any other Windows or
Mac compatible application as if typed by a keyboard, eliminating the possibility of transcription errors.
Communication with your computer, as well as updating the scanner firmware can be managed through the
S-ID software tool, available for download at www.datamars.com.
OMNI MAX improves the speed and reliability of animal ID for veterinarians, shelters, and animal control
officers around the world. OMNI MAX is delivered in a practical carrier box, including quick start guide, USB
cable and power supply.
© 2014 Datamars SA. All rights reserved.
Page 2 of 20
OMNI MAX - User Guide
2 OMNI MAX Basics
There are three menus:
•
HOME MENU used to start or stop a reading session:
•
MAIN MENU used to set volume, brightness, calendar and to access the info menu:
•
ADVANCED MENU used to select additional, advanced settings:
o single read vs. continuous read,
o enable/disable recording of microchips,
o USB mode,
o select 15/23 digit microchip format,
o access memory folders,
o set/connect optional Bluetooth mode (only if Bluetooth model was purchased)
2.1
How to switch OMNI MAX on and off
Switching On The Scanner
o
o
Press the “on” button, which is located in the center of the scroll-wheel for two seconds.
The Home menu will appear:
© 2014 Datamars SA. All rights reserved.
Page 3 of 20
OMNI MAX - User Guide
Switching Off The Scanner
) located on the Home menu to access the Main menu.
o
Press the right navigation button (
o
Once in the Main menu, press the left navigation button that contains the following icon:
2.2
Accessing the Main Menu
o
o
2.3
Once the reader is switched on, press the right navigation button to access the Main menu.
Rotate the scroll-wheel clockwise or counter-clockwise to access menus and settings:
1. Volume
2. Brightness
3. Time
4. Calendar
5. Info
Accessing the Advanced Menu
o
Once in the Main menu, select the Advanced Settings icon
o
Rotate the scroll-wheel clockwise or counter-clockwise to access menus and settings:
1. Single or continuous reading
2. Microchip Recording
3. USB Mode
4. 15/23 Digit Microchip Format
5. Memory & Storage
6. Bluetooth (if Bluetooth model was purchased)
© 2014 Datamars SA. All rights reserved.
.
Page 4 of 20
.
OMNI MAX - User Guide
3 Using OMNI MAX To Scan Microchips
3.1
Scanning a Microchip
Correctly hold the scanner as shown:
Make sure the reader is on.
Hold OMNI MAX in close proximity to the animal to be scanned, and then press the “on” button located in the
center of the scroll-wheel.
Once the reader is scanning you will see the scanning icon appear on the screen.
OMNI MAX will give an audible sound and you will hear a “beep” when the scanner successfully detects a
microchip.
To cancel or stop scanning, press the “on” button located in the center of the scroll-wheel.
Effective Scanning
© 2014 Datamars SA. All rights reserved.
Page 5 of 20
OMNI MAX - User Guide
■ Hold the scanner close to, or touching the animal
■ Scan slowly and repeatedly over the entire body to ensure whether or not a microchip is present
■ Wave the scanner back and forth lightly while scanning, because microchips can be in various orientations
within the animal
■ Scan first in a horizontal, then a vertical “S” pattern down the animal’s body, as shown in the diagram
below
■ Consider scanning each animal more than once to ensure any present microchip can be localized by the
scanner
Which Microchips Is OMNI MAX Able To Scan?
The OMNI MAX universal scanner can detect the following microchips:
Microfindr™
PetLink™
24 Pet Watch™
Αllflex®
Banfield®
Destron Fearing™
HomeAgain®
Trovan®
Datamars™
Bayer resQ®
AKC CAR/EID™
Avid™
Crystal Tag™
Digital Angel®
Lifechip® Schering Plough™
OMNI MAX should be able to detect all FDX-B and FDX-A microchips commonly used for companion
animals.
If you have purchased Version i, the reader will be able to read HDX microchips instead of Avid Encrypted
microchips.
© 2014 Datamars SA. All rights reserved.
Page 6 of 20
OMNI MAX - User Guide
4 Charging The Battery
OMNI MAX comes with a rechargeable Lithium-Ion battery that can be charged in two ways. You can
connect the USB cable to the wall-mounted adapter and plug it into a standard electrical socket, or you can
connect the USB cable to your computer.
4.1
Battery Indicators
When the reader is switched on, in the upper left corner of the display header you will always be able to see
the battery charge level (
).
If the reader is on and connected via USB to a computer, the battery level indicator will show a thunderbolt,
indicating the reader is in charging mode (
):
The following indicators are shown on the display when the reader is switched off but connected to a power
source:
Battery Discharge/Power Low
The following image will appear when the battery is completely discharged, indicating that you need to
connect the reader to a power source:
Indicates unit is
plugged into the
wall
Indicates unit is
plugged in via
USB
Battery Charging
The following image will appear when the unit is plugged in and the battery is charging:
Indicates unit is
plugged into the
wall
© 2014 Datamars SA. All rights reserved.
Indicates unit is
plugged in via
USB
Page 7 of 20
OMNI MAX - User Guide
Full Power
While still plugged into a power source, OMNI MAX will display one of the following images when fully
charged:
Indicates unit is
plugged into the
wall
© 2014 Datamars SA. All rights reserved.
Indicates unit is
plugged in via
USB
Page 8 of 20
OMNI MAX - User Guide
5 OMNI MAX Settings
A number of different settings can be customized to the user’s preference.
Some are accessible from the Main menu, some from the Advanced menu.
MAIN MENU:
5.1
Audio setting
Volume Icon
The Audio setting allows you to adjust the volume level of the OMNI MAX’s audio signals.
The following values are available:
o
o
o
o
5.2
OFF – OMNI MAX will make no sounds
LOW – this setting should be used in quiet environments or where animals may be afraid of ambient
sounds
MID – this is a medium setting and is suitable for most environments
HIGH – this setting should be used in very noisy environments
Brightness setting
Brightness Icon
The Brightness setting allows you to adjust the brightness of the display.
The following values are available:
o
o
o
5.3
LOW – the dimmest setting
MID – this is a medium setting and is suitable for most environments
HIGH – this is the brightest setting, and should be used in environments with high amounts of available
light
Time
Time Icon
2 Display formats are available to show the time:
o
o
Europe: 24-hour clock
North America: 12-hour clock
Setting The Time Format
Once in the Time menu, pressing the right navigation button will allow you to switch from 24-Hr to 12-Hr time
formats.
© 2014 Datamars SA. All rights reserved.
Page 9 of 20
OMNI MAX - User Guide
Setting The Time
Use the scroll wheel to increase or decrease the value as needed. By pressing the left navigation button you
pass from hours to minutes. When done, press the “selection” button in the center of the scroll wheel to save
your changes and exit this menu.
5.4
Date
Calendar Icon
Date Formats
There are 2 available formats to display the date:
o
o
DAY/MONTH/YEAR
MONTH/DAY/YEAR
Once in the Calendar menu, pressing the right navigation button will allow you to select your preferred date
format.
Setting The Date
Use the scroll wheel to increase or decrease the value as needed. By pressing the left navigation button, you
pass from day to month to year. When done, press the “selection” button in the center of the scroll wheel to
save your changes and exit this menu.
5.5
Information Menu
Info Icon
The Information Menu helps you determine which version of OMNI MAX you are using; it will confirm the
current firmware, current bootloader and proper license number of your unit.
© 2014 Datamars SA. All rights reserved.
Page 10 of 20
OMNI MAX - User Guide
ADVANCED MENU:
(accessible from MAIN MENU by selecting the Adanced Settings icon
5.6
)
Reading Setting
Reading Icons
The Reading Setting allows you to either select Single reading or Continuous reading.
: In Single Read mode, OMNI MAX will scan for microchips for an allotted period of time. Once a
microchips is localized, the unit will stop reading and the microchip’s unique ID code will be displayed. If no
microchip is localized, OMNI MAX will stop reading and display a red X.
: In Continuous Read mode, OMNI MAX will scan for microchips continuously but will only store
unique microchip ID codes once; the system will display each new unique ID code, but it will not store
duplicates. If no microchip is localized during a continuous read session, the reader will stop after an allotted
period and shut down.
5.7
Record Setting
Recording Icons
Record allows you to enable or disable the recording of unique microchip ID codes to the internal storage.
Recorded files can be accessed at a later time for download or reference. To turn the Record setting on,
press the center button until the red dot is visible in the green Record icon.
Recorded files are automatically named by the reader and saved in the following folder:
\session\<current year>\<current month>\s<date>.txt
OMNI MAX will save one file per calendar day. Each microchip ID code is saved with date and time stamp.
5.8
USB Setting
USB mode Icons
USB/Keyboard Wedge:
© 2014 Datamars SA. All rights reserved.
Page 11 of 20
OMNI MAX - User Guide
The Keyboard Wedge feature allows the reader to enter data on a computer, tablet or smartphone
application by simulating the action of a keyboard.
The applications most commonly used with a keyboard wedge are Microsoft Excel, Microsoft Access, and
other custom database and applications like microchip search databases or animal welfare management
applications. This is a useful tool to help speed data entry regarding scanned animals and should help speed
the reunification process.
When using keyboard wedge, place your cursor where you want the ID code to go in your application, and
then press the center button on OMNI MAX to read the microchip. If a microchip can be localized, the unique
ID code will appear automatically in the correct field, just as if you typed it in yourself. The example below
shows what a keyboard wedge entry looks like in Microsoft Excel.
You can also send and receive data through the USB port as though it were a serial/RS232 port.
Instructions are outlined in chapter titled “Command Interface”.
5.9
ID Code Dislay Settings
AID format Icon
A full unique microchip ID code actually contains 23 characters. It’s common in many countries to only
reference the last 15 digits. You can select whether you would prefer to see the full 23 or only 15 characters
of the unique ID code.
o
o
"981000000123456" (15 char)
"A0000000981000000123456" (23 char)
© 2014 Datamars SA. All rights reserved.
Page 12 of 20
OMNI MAX - User Guide
Data transferred to computer, tablet or smartphone will contain the same format as the one selected here.
5.10
File Menu
File Browser Icon
This setting enables the user to browse all the session files recorded by the reader, if recording has been
enabled (see Section 5.7).
o
o
Open: recorded microchip identification codes display on screen.
Delete: will delete a selected file, duplicates or single microchip identification codes.
o
Search for a specific microchip ID code by selecting the Options button in the center of the scroll
wheel.
Transfer only one record or the entire file to your computer, tablet or smartphone according to your
needs.
o
o
5.11
You can browse the microchip codes from any particular day directly from the Home menu by
pressing the left button if Recording is enabled.
Bluetooth setting (only available on BT version)
USB mode Icons
Wireless data transfer to your computer, tablet or smartphone is possible when enabled. You must first pair
OMNI MAX with your device. Please consult your device’s instruction manual for details, but an overview of
the pairing process appears below.
© 2014 Datamars SA. All rights reserved.
Page 13 of 20
OMNI MAX - User Guide
To Pair OMNI MAX with Your Bluetooth-enabled Device:
•
Ensure the computer/device is equipped with Bluetooth
Enable Bluetooth on OMNI MAX – the white and blue Bluetooth icon will appear at the top of the
reader screen
Your device should “find” OMNI MAX. Add OMNI MAX to the list of recognized devices. If the
•
connection is successfully established, the Bluetooth icon will turn green
If asked, use as passkey/pairing code 1234
•
•
SPP (Serial Port Profile): You can send and receive data via Bluetooth as though it were a
serial/RS232 port. This can be very helpful if you’d like to connect your OMNI MAX to a wireless printer
Keyboard Wedge: data is transferred from OMNI MAX via Bluetooth to your device as if entered by a
keyboard. This can help speed microchip search by placing the microchip code directly into the database
search field; or it can help speed data transfer to your management application and eliminate manual
transcription.
Bluetooth OFF: Bluetooth disabled.
5.12
S-ID Software
Datamars makes S-ID Software available to our OMNI MAX customers as a free download from
datamars.com. S-ID will simplify future upgrades, and will help us support your OMNI MAX if it ever requires
service.
© 2014 Datamars SA. All rights reserved.
Page 14 of 20
OMNI MAX - User Guide
6 Command Interface
6.1
Commands Overview
You can transfer data from OMNI MAX to your computer, tablet or smartphone using the USB Virtual Comm
Port or Bluetooth connection (if Bluetooth version purchased).
3 command types are possible:
o
o
o
Get
Set
Execute
A “Get” command is used to read a parameter value from the reader and always starts with the letter “G”, e.g
“G<CMD>\r\n”.
A “Set” command is used to change a parameter value in the reader and always starts with a dot “.”, followed
by the command name and parameter value, e.g “.[CMD]<par>\r\n”.
An “Execute” command is sent to the reader to perform an action. These commands always start with “.”,
and do not have any parameters, e.g. “.<CMD>\r\n”.
Execute Commands
Command
.?
.T
.LBT
.CBT
.RBT
.r
.WO
.WA
.GH
.BMP
Description
Help
Dump signals
Simulate press left function
Simulate press center function
Simulate press right function
Read command remotely
Rotate Wheel clockwise
Rotate Wheel counter-clockwise
Go Home (only for testing)
.BMP -> Create a screenshot of the current display
and store it into SD reader memory
Get/Set Commands
Command
.v
.GB
.YE
.MO
.DA
.DF
.GDF
.GDT
.HO
.MI
.SE
.GTM
.DM
.GDM
.REC
.GREC
.GRB
.RB
.GKB
© 2014 Datamars SA. All rights reserved.
Description
Get reader firmware version
Get battery level
Set the Date/Year: .YExx ( xx = 0-99 )
Set the Date/Month: .MOxx ( xx = 1-12 )
Set the Date/Day: .DAxx ( xx = 1-31 )
Set date format: EU: .DF0, US: .DF1
Get date format
Get reader date
Set the time/hour: .HOxx ( xx = 0-23 )
Set the time/minutes: .MIxx ( xx = 0-59 )
Set the time/seconds: .SExx ( xx = 0-59 )
Get reader time
Set output tag format: LONG: .DM0 , SHORT: .DM1
Get output tag format
Recording on/off, ON: .REC1, OFF: .REC0
Get recording status
Get reading sound status, 1 enabled 0 disabled
Enable | disable reading sound: 1 enabled 0 disabled
Get keyboard sound status, 1 enabled 0 disabled
Page 15 of 20
OMNI MAX - User Guide
.KB
.RT
.GRT
.ST
.GST
.DIAG
© 2014 Datamars SA. All rights reserved.
Enable | disable keyboard sound: 1 enabled 0
disabled
Set the reading timeout: .RTxx ( xx = 10-60 [s] )
Get the reading timeout
Set the auto shutdown timeout: 2Min: .ST0, 5Min:
.ST1, 15Min: .ST2, 30Min: .ST3
Get the shutdown timeout
Set Diagnostic level: NONE: .DIAG0, ERROR:
.DIAG1, INFO: .DIAG2, DEBUG: .DIAG3
Page 16 of 20
OMNI MAX - User Guide
7 Troubleshooting
• Not enough reading distance between the reader and the animal
The optimal reading distance is obtained with the microchip perpendicular to the reader’s
antenna, and aimed at its center. If the microchip is implanted into an animal, its orientation may
not be optimal and therefore the reading distance may be reduced.
Try to reduce disturbances to RFID like computer equipment, video or TV. Move a few meters
away and try again.
Do not use the reader on a metal table. Metal will reduce the performance of the reader.
The reading distance will be somewhat reduced if the microchip is still inside the needle.
• The reader does not read a microchip:
It takes time and patience to effectively scan an animal. Be sure to change the position and
direction of the reader, and try multiple times.
• The reader does not work:
Check to ensure that the ambient temperature is between -5ºC and +55º C (23°F - 131°F).
If you’re still having problems, please contact your local Datamars dealer for assistance.
OMNI MAX is a product developed and produced by DATAMARS.
Should you have any suggestions or require information regarding this or any other DATAMARS
products, please contact your local Datamars dealer or email us at [email protected].
© 2014 Datamars SA. All rights reserved.
Page 17 of 20
OMNI MAX - User Guide
8 Certifications
8.1
European Directives
Datamars SA, Via ai Prati, CH-6930 Bedano declares, under its own responsibility, that the product OMNI
MAX is in accordance with the following standards:
ETSI EN 300 330-1 /
ETSI EN 300 330-2
Electromagnetic compatibility and Radio spectrum matters
(ERM) - Short Range Devices.
ETSI EN 301 489-1 /
ETSI EN 301 489-3
Electromagnetic compatibility (EMC) standard for radio
equipment and services.
IEC/EN 61000-4-2 /
IEC/EN 61000-4-3/
IEC/EN 61000-4-4/
IEC/EN 61000-4-5/
IEC/EN 61000-4-6/
IEC/EN 61000-4-11
Electrostatic discharge, electromagnetic field, electrical fast
transient/burst, surge immunity, radio-frequency fields’ immunity,
voltage variation immunity.
OMNI MAX satisfies the essential requirements of directives 99/5/EC.
8.2
American Directives
Datamars SA, Via ai Prati, CH-6930 Bedano declares, under its own responsibility, that the product OMNI
MAX is in accordance with the following standards:
Part 15 Class B Computing Device Peripheral
FCC Part 15B
FCC Part 15C
Part 15 Low Power Transmitter Below 1705 kHz
This device complies with Part 15 of the FCC Rules. Operation is subject to the following two conditions: (1)
This device may not cause harmful interference, and (2) This device must accept any interference received,
including interference that may cause undesired operation.
This equipment has been tested and found to comply with the limits for Class B Digital Device, pursuant to
Part 15 of the FCC Rules. These limits are designed to provide reasonable protection against harmful
interference in a residential installation. This equipment generates and can radiate radio frequency energy
and, if not installed and used in accordance with the instructions, may cause harmful interference to radio
communications. However, there is no guarantee that interference will not occur in a particular installation. If
this equipment does cause harmful interference to radio or television reception, which can be determined by
turning the equipment off and on, the user is encouraged to try to correct the interference by one or more of
the following measures.
o
o
o
o
Reorient or relocate the receiving antenna
Increase the separation between the equipment and receiver
Connect the equipment into an outlet on a circuit different from that to which the receiver is
connected
Consult the dealer or an experienced radio/TV technician for help
Any changes or modifications not expressly approved by the party responsible for compliance could void the
user’s authority to operate the equipment.
© 2014 Datamars SA. All rights reserved.
Page 18 of 20
OMNI MAX - User Guide
8.3
Canadian Directives
This device complies with Industry Canada license-exempt RSS standard(s) IC RSS 210. Operation is
subject to the following two conditions:
(1) This device may not cause interference, and (2) this device must accept any interference, including
interference that may cause undesired operation of the device.
Le présent appareil est conforme aux CNR d’Industrie Canada applicables aux appareils radio exempts de
licence. L’exploitation est autorisée aux deux conditions suivantes:
(1) l’appareil ne doit pas produire de brouillage, et (2) l’utilisateur de l’appareil doit accepter tout brouillage
radioélectrique subi, même si le brouillage est susceptible d’en compromettre le fonctionnement.
© 2014 Datamars SA. All rights reserved.
Page 19 of 20
OMNI MAX - User Guide
9 Caring for Your OMNI MAX Reader
If properly cared for, OMNI MAX should be a valuable tool for electronic animal ID for years to come. Try not
to drop it on a hard surface. Do not or immerse the reader in water, especially if the USB cap is not properly
inserted and closed.
If the outer casing of the reader becomes soiled, clean it with a damp cloth. Be sure it is not connected to the
charger before cleaning.
If for any reason the reader is not working as expected, please do not attempt to repair it. , Return it to your
local Datamars dealer for repair, or contact us at [email protected].
The OMNI MAX’s display may change color if exposed to temperatures higher than 50°C (122°F). It should
cool and return to normal once brought to cooler area for storage and/or use. At very low temperatures the
display may temporarily lose its contrast.
© 2014 Datamars SA. All rights reserved.
Page 20 of 20