1
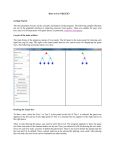
User Manual
www.coachfxlive.com
Contents
1. Setting up your pitch
2. Styling players
3. Setting up equipment
4. Adding players
5. Adding balls
6. Playback Controls
7. Using the cameras
8. Creating a run animation
9. Creating a pass animation
10.Deleting items
11.Deleting animations
12.Adding commentary
13.Adding text to the pitch
14.Saving Sessions
15.Printing
16.Exporting
17.Sharing sessions
18.Sharing playlists
www.coachfxlive.com
Getting Started
1. Setting up your pitch
Within CoachFX 360 you can customise most
aspects of the pitch, players and equipment.
It’s good practice to choose your settings
before you start your drills.
You can customise the following settings:
Players:
• Shirt colour.
• Shirt type (plain, stripes and hoops).
Pitch:
• 7 different pitch types to choose from.
• Hide the default goals and flags from the
setup menu.
Equipment:
• Equipment colours are chosen when you
are adding items of equipment to the
pitch. so you don’t need to set this at the
beginning.
www.coachfxlive.com
Getting Started
2. Styling players
Within CoachFX 360 you can customise most
aspects of the players. This includes:
• Shirt colour
(9 colour variations)
Change here to update all players in the
team.
• Shirt type
(plain, stripes and hoops).
Change here to update all players in the
team.
• Player skin-tone
(5 player types to choose from)
Choose the player type when adding the
player to the pitch
• Player gender
(Adult male and female)
Choose the player gender when adding the
player to the pitch
• Player names
Updating a player name by editing the
text field when a player on the pitch is
highlighted
www.coachfxlive.com
Getting Started
3. Setting up equipment
All equipment items are added from the
equipment panel on the left of the screen.
To add an item of equipment:
1. Click on an item to activate it. Most items
will then give you the option to select a
color. For example, select flag and you will
see the following options...
2. Make your color selection then left-click to
add an item of equipment to the pitch.
3. To rotate an item of equipment when
adding it, hold down the left mouse button
then move the mouse around to get the
rotation correct. Now let go of the mouse
button.
4. The equipment function remains activated,
allowing you to add more items of
equipment.
5. To deactivate the function, click on the
arrow icon on the toolbar.
www.coachfxlive.com
Getting Started
4. Adding players
All players are added from the player panel on
the left of the screen.
To add a player:
1. Click on an player to activate it. For all
standard team players you will get the
option to add a Team 1 or a Team 2 player.
Select your preferred option.
2. If you are adding a referee or assistant
referee you will get the option to select the
skin tone instead.
3. Now left-click on the pitch to add a player.
You can keep adding players until you
deactivate the functionality by clicking on
the black arrow.
4. To rotate a player when adding it, hold
down the left mouse button then move the
mouse around to get the rotation correct.
Now let go of the mouse button.
5. The player function remains activated,
allowing you to add more players to the
pitch.
6. To deactivate the function, click on the
arrow icon on the toolbar.
www.coachfxlive.com
Getting Started
5. Adding balls
You can add balls onto a space on the pitch
or you can balls and attach them directly to
players.
To add balls:
1. Activate the ball functionality
Open the ball panel on the toobar, then
choose to add a ball.
You can now....
2. Add a ball to space
To add a ball to a space, left click on a
space on the pitch. A ball will be placed at
that point.
or...
3. Add a ball to a player
Connect a ball directly to a player by
moving your mouse over the player. You
will feel that the ball ‘snaps’ onto the ball.
Now left click to add the ball to the player.
4. You can continue to add more balls to the
pitch. To deactivate the functionality, click
on the black arrow on the toolbar.
www.coachfxlive.com
Getting Started
6. Playback controls
The playback bar on the bottom of the screen let’s you control all the action for your
animation. The buttons on the control bar are shown below:
Rewind
Record
Return the
playback to the
beginning
Toggle on/
off to activate
recording
Slow motion
Step back
Move backwards
0.2 secs
Play
Play the
animation
Fast foward
Move to the end
of the animation
Step forward
Move forwards
0.1 secs
Toggle on/
off to play the
animation in
slow motion
Loop
Toggle on/off
to automatically
return to the
begin and play the
animation again
www.coachfxlive.com
Getting Started
7. Using the cameras
The camera tools let you get completely immersed in your session creation.
Remember, this is a 3D environment so you can place the camera anywhere on the
pitch: behind the goals, on the touchline, above the pitch looking down. You could even
run a training session with players on the grass outside the of the pitch grounds!
The various camera controls are explained below:
Move
Move the camera position
around the pitch. Click on
the centre button to move
the camera to the caenter
circle.
Rotate
Turn the camera
around on the
current position.
Zoom
Zoom in/out of
the pitch. + gets
you closer to the
ground, - moves
you away from it.
Camera Type
Arrows: Free camera mode lets
you move around the pitch.
1: Fixed camera position in
perspective view.
2: Fixed camera position in
overhead view.
www.coachfxlive.com
Animating
8. Creating a run animation
Animations are created using a combination
of highlighting players and using the control
bar at the bottom of the screen. To animate a
player:
1. Activate the player
Left click on the player to activate it. You
will know which player is active by the
glowing circle underneath it.
2. Activate recording
Click on the record button to activate
recording. As you move the mouse around
the screen you will now see a grey line
appearing from the player. This will follow
the mouse around.
3. Choose the end point for the animation
Now left click on the pitch where you want
the player to run to. You will now see a list
of animation options. Select the option for
‘Forward’. You can now choose the speed
for the player movement.
The speed options are:
1 - Walk
2 - Stride
3 - Jog
4 - Run
5 - Sprint
4. Animation complete!
The player will now move to your chosen
point.
5. Create another animation
You will see that recording remains active
which will allow you to make another
animation using the same player. Click on
the pitch to make the player move to a new
location.
www.coachfxlive.com
Animating
9. Creating a pass animation
Animations are created using a combination
of highlighting players and using the control
bar at the bottom of the screen. To animate a
player:
1. Activate the player
Left click on the player to activate the
player who will be passing the ball. You will
know which player is active by the glowing
circle underneath it.
2. Activate recording
Click on the record button to activate
recording. As you move the mouse around
the screen you will now see a grey line
appearing from the player. This will follow
the mouse around.
3. Choose the end point for the pass
Now left click on the pitch where you want
the ball to be passed. This can be either a
space on the pitch or another player. You
will see a list of animation options. Select
‘Pass’.
4. Choose your pass options
You will see a list of pass options. Click on
the appropriate to tab to pass to a space
or a player. Then customise your pass to
change the height, speed and curve of the
ball.
5. Animation complete!
Click the OK button and the pass will now
show.
www.coachfxlive.com
Editing
10. Deleting items
At any point during your design you can
delete an item from the pitch. To delete an
item:
1. Deleting a player
There are two ways of removing a player.
Either right click on the player and select
the delete option or click on the delete
button on the player information bar that
shows when the player is highlighted.
2. Deleting equipment
Right click on any item of equipment on
the pitch then click on the delete button.
!
Remember, if you delete a player that has
had animated applied to it, you will lose
that animation.
www.coachfxlive.com
Editing
11. Deleting animations
There are various ways of removing
animations that you have created:
1. On any player that has animation applied
to it, you can right click on the player and
select ‘Del actions’.
You can remove animation at any point
during the player’s movement, at the
beginning or duration a run, dribble etc.
2. You can automatically over-write animation
by creating a new animation at any point
during a player’s movement.
3. Remove all actions for a session by going
to the File menu and selecting ‘Delete all
actions’. This will remove all animation that
has been created and leave the players at
their start positions.
4. You can remove all animation, players and
equipment by selecting ‘File’ then ‘Clear
session’
!
As soon as you remove animation for
a player, you will automatically remove
any subsequent animation involving that
player. For example, if player A has a
ball that was later passed to player B
who dribbles with the ball, by removing
animation for player A, you will also
remove the subsequent animation for
player B.
www.coachfxlive.com
Editing
12. Adding commentary
You can add text commentary to your session.
This will show on any print-outs that you
create as well as showing on the playback for
any users that are viewing your session.
To add commentary:
1. Click on the ‘Edit session details’ which sits
above the session designer.
2. You can now update the session title and
add/edit commentary in the text box.
Once you have finished editing, click on the
‘Save changes’ button.
www.coachfxlive.com
Editing
13. Adding text to the pitch
You can add textboxes to the pitch to help
annotate your session.
To add a textbox:
1. Click on the text icon on the toolbar.
2. A blank textbox will now appear in the
middle of the screen. You can drag this
to wherever you want by holding your left
mouse button down on the drag icon and
moving the textbox to it’s new position.
3. Click on the text within the box and enter
your own notes.
You can customise all aspects of your
textboxes. To do this, click on the textbox.
You will now see a range of options at the
top of the screen. This lets you change the
following features of the textbox:
•
•
•
•
Textbox fill color
Textbox Transparency
Font color
Font size
To delete a textbox:
On any textbox, you can click on the cross on
the right hand corner and this will remove the
textbox from the pitch.
www.coachfxlive.com
Editing
14. Saving sessions
To save a session go to the File menu and
select ‘Save Session’.
If you make changes to a session then you
must remember to save the session again
before you leave the screen, otherwise your
changes will be lost.
www.coachfxlive.com
Exporting and Sharing
15. Printing
You can create a print-out of a session,
showing a screenshot from any point during
an animation. If you’ve just created an
illustration then you would take a print-out
from 0 secs in the playback.
To create a print-out:
1. Stop the playback at your chosen point in
the animation.
2. Go to the ‘File’ menu and select ‘Print’
3. You will be prompted to select the
screenshot area.
4. Left click on the corner of where you want
the screenshot to start. Now move the
mouse around and you will see a white box
being created. This box shows where the
screenshot image will be taken from.
5. Left click again to confirm the screenshot
area.
6. A page will open with your page ready to
print. You will see that the page contains
the title of the session along with any
commentary that you have added.
On the File menu you will also see an option
for ‘Print inverted’. This will output a black
and white version of the image and is useful
if you are not wanting to print large blocks of
colour.
www.coachfxlive.com
Exporting and Sharing
16. Exporting
You can export an image from the session
designer which can the be used to email to
someone, insert in a Word or Powerpoint
document, or simply to have on file if you
want to keep a library of images.
To save a screenshot:
1. Go to the File menu and select ‘Save
Screenshot’.
2. You will be prompted to select the
screenshot area.
3. Left click on the corner of where you want
the screenshot to start. Now move the
mouse around and you will see a white box
being created. This box shows where the
screenshot image will be taken from.
4. Left click again to confirm the screenshot
area.
5. The session designer will then process
your image request and your computer will
download an image. On most computers
this will be saved in your ‘Downloads’
folder.
www.coachfxlive.com
Exporting and Sharing
17. Sharing sessions
Once you have created a session, one of the
powerful aspects of CoachFX 360 is the ability
to then share sessions with other users.
On the CoachFX Live website, there are
various ways you can do this:
• Make the session public
All sessions, by default, are set to be
private. You can easily ‘unlock’ a session
by clicking on the padlock icon. When a
session is made public, the padlock will
turn green.
If you click on the red arrow button you
will then go to the public playback page
for your session. You can now share the
session in different ways:
• Click on the Share button to post the
session onto your chosen social media
site
• Select ‘Download Session PDF’ to open,
print and save a PDF of the session.
• Choose to ‘Like’ the session using
the social media links underneath the
playback window. This will make the
session appear on the relevant social
media site.
• Share the session on a playlist
Within the CoachFX Live site you can
create and share playlists with other users:
• On the session designer page, click on
the playlist icon.
• You will then be prompted to add the
session to an existing playlist or you can
create a new one.
• You can find out how to share a playlist
on the next section.
www.coachfxlive.com
Exporting and Sharing
18. Sharing playlists
Once you have created a session, one of the
powerful aspects of CoachFX 360 is the ability
to then share sessions with other users.
Firstly, make sure you have added some
sessions to the playlist. Do this using the
guide on the previous page.
To share the playlist:
1. Go to your account homepage and click on
‘Playlists’ from the left hand menu.
2. Select a playlist that you want to share
3. Now click on the ‘Share’ button at the top
of the page. You will then be prompted to
add email addresses to the list of people
who can access the playlist. Add one email
address at a time. You can remove a user
from seeing the playlist at any time, by
simply clicking on the cross icon beside the
person’s email address.
www.coachfxlive.com