1
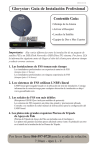
SatHawk GBOX
V3000
USER MANUAL
* DiSEqC 1.2 Positioner & Standalone Positioner
* Compatible with all DiSEqC 1.2 Receivers
* 6 Digits Display
* 60 Pre-stored Satellite Names
* 99 Programmable Memories
* 23 Keys full Function IR Remote Control
* Fine-tune Function for Better Reception
* Short Circuit and Overload Protection
* Anti-Noise Circuit to avoid miscounting
* Software Limits Protection
* Re-synchronize Function
* 180° H-H Mount Compatible
____________________________________________________________________________
Imported and distributed by Sadoun Satellite Sales,
www.sadoun.com
1-888-519-9595
Safety Precautions
WARNING:
TO REDUCE THE RISK OF ELECTRIC SHOCK, DO NOT OPEN THE POSITIONER
OR REMOVE THE TOP COVER.
TO PREVENT FIRE OR ELECTRIC SHOCK, DO NOT EXPOSE THIS POSITIONER
TO RAIN OR MOISTURE.
•
•
•
Do not impede ventilation by covering the vent openings with items such as
newspapers, table-cloths, curtains,
Place no naked flame sources, such as lighted candles, on the apparatus.
Do not expose the apparatus to dripping or splashing objects containing liquids,
such as vases.
Kit Contents
1.
2.
3.
4.
GBOX DiSEqC 1.2 positioner
99-memory remote control
Two AA (SUM-3) batteries
This instruction manual
The DiSEqCTM is a trademark of EUTELSAT.
____________________________________________________________________________
Imported and distributed by Sadoun Satellite Sales,
www.sadoun.com
1-888-519-9595
Introduction
GBOX is a 2-in-1, full-function antenna positioner for motorized satellite antenna
systems. It can work as a traditional, DiSEqC1.2 positioner. Before installing the GBOX
DiSEqC positioner, please verify which type of satellite receiver you are using. You can
give each satellite position a name to help you easily find the satellite.
As a stand-alone positioner
If your receiver is not DiSEqC1.2 compatible, the GBOX will act as a standalone
positioner. The positioner will respond only to commands from the IR remote. No
connection between the GBOX and the receiver is needed.
As a DiSEqC 1.2 positioner
If the receiver is DiSEqC1.2 compatible, the GBOX will act as a DiSEqC positioner, and
the commands for the positioner (move, store, recall, set limit…) will come from the
receiver through the coaxial cable. Therefore, two coaxial cable links, one between the
receiver and GBOX, and one between the LNB and GBOX are needed. The IR remote
is not required in this case, although it can also control the positioner.
Front Panel:
Back View:
6 Digit LED Display
East Button
West Button
Power Button
____________________________________________________________________________
Imported and distributed by Sadoun Satellite Sales,
www.sadoun.com
1-888-519-9595
Remote Control
Receiver Type
Remote Control
Positions
No
99
Fully controlled by receiver.
Yes/Optional
99
Controlled by receiver
optional remote control.
Yes/Necessary
99
Just
like
positioner.
DiSEqC 1.2
Without DiSEqC
Note
or
stand-alone
Remote Control
POWER:
Switch GBOX between stand-by or ready.
0 - 9 numeric keys:
Assign the satellite position to be operated. Such as moving,
storing or re-synchronizing to a specific satellite position, or
used to set designated antenna travel limits.
ESC:
Cancel current operation and programming mode. Stop
antenna moving.
wor8Manual keys :
Manually move the antenna.
OK:
Confirm the current operation. Such as recall, store,
re-synchronize satellite antenna position or set antenna travel
limits.
Resync:
Re-synchronize stored satellite positions.
Store:
Save current location as a satellite position.
Limit:
Program antenna travel limits.
Recall:
Recall saved satellite position.
Name:
Change display situation and set the name for Satellite
position.
____________________________________________________________________________
Imported and distributed by Sadoun Satellite Sales,
www.sadoun.com
1-888-519-9595
Cable Connection
Setting up the positioner:
1. Connect the 4-wire cable between GBOX positioner and the actuator. Connect the
motor to the terminals marked Motor+ & Motor-, and connect the reed switch sensor to
the terminals marked Sensor- & Sensor+.
Caution: A wrong connection could damage the reed switch sensor on the
actuator, but smart design protects the positioner itself.
2. Connect one coaxial cable (RG-6/U is recommended) from the receiver to the
positioner F-connector marked Receiver. Connect another coaxial cable from the LNB
to the F-connector marked LNB. Refer to the Connection Diagram below.
3. Plug the AC cord into the AC outlet. A dot will light up at the lower right of the display.
Note that power to the positioner will turn on/off automatically when the receiver is
turned on/off.
Connection Diagram (DiSEqC 1.2 positioner):
____________________________________________________________________________
Imported and distributed by Sadoun Satellite Sales,
www.sadoun.com
1-888-519-9595
Operation as Standalone Positioner
Setting the software high/low limits:
There are hardware limit switches in the actuators or H-H mounts to prevent the
mechanism from being damaged by obstacles. We still recommend that you set the
software limits for backup protection, although you can use the positioner without
setting the limits.
1. Move the actuator by pressing the 3 4 buttons on the remote to the positions you
intend to set as lower/higher (or East/ West) limits.
If you move the dish to a higher position with the 3 button, the High Limit will be set. If
you move the dish to a lower position with the 4 button, the Low Limit will be set.
2. To set the low/high (or East/West limit), press the Limit key for 2 seconds. The
display will flash LIMITL. Press the Limit button again to switch the display to LIMITH.
3. Press the OK button after the right limit display (LIMITL or LIMITH) appears. When
the set up is successful, the display will show “|-- -- -- -- -- --” (High Limit) or “-- -- -- -- ---| “(Low Limit) to confirm the setting.
After you have programmed the travel limits and the actuator or the H-H mount moves
to its higher or lower limit, it will stop moving and the display will show “|-- -- -- -- -- --” or
“-- -- -- -- -- --|”.
Caution: Wrong limit settings, such as reversing HL and LL, may block the actuator or
H-H mount. If this situation occurs, conduct the “Clear Limit” operation then re-set the
correct limits again.
Clearing the software high/low limits:
Press the Limit key on the remote for 10 seconds. The display will show 10, 9 … 1, |-- --- -- -- --| then the limits setting will be cleared.
____________________________________________________________________________
Imported and distributed by Sadoun Satellite Sales,
www.sadoun.com
1-888-519-9595
Store the Satellite Positions:
Move the actuator or H-H mount with the 3MANUAL4buttons to the proper position.
Press the Store key for 2 seconds: the LED will flash and show
”C--_ _” and “STORE” alternately.
Press number keys to choose the position you want to store (1-99), then press the OK
key to confirm the store operation.
4. Repeat steps 1 through 3 to set up as many satellite positions as you want.
Naming the satellite positions:
Sixty satellite names are already stored in the GBOX for your designation. Also, you
can give names (6-letter maximum) to your favorite satellite positions.
Choosing pre-stored names for satellite positions
1. Move the actuator or H-H mount with the 34buttons to the right position.
2. Press the name button for 2 seconds. The LED will flash the pre-stored
satellite name that is built into the GBOX.
3. Press the ¿ or À to choose the favorite name for satellite positions.
4. Press OK key to confirm; the name you choose will flash three times, then the
assigned position will show the name.
____________________________________________________________________________
Imported and distributed by Sadoun Satellite Sales,
www.sadoun.com
1-888-519-9595
Input any name you like, up to 6 letters
1. Move the actuator or H-H mount with the 34buttons to the right position.
2. Press the name button for 2 seconds; the LED will flash the pre-stored satellite
name that is built into the GBOX.
3. Press the ¿ keys and choose “__ __ __ __ __ __”. After 2 seconds, the
leftmost side of “__” will flash. You can move the cursor by pressing the 3 4
buttons. Then type in the name using the number buttons (1~9).
4. Press the OK key. The name that you choose will flash three times, then the
assigned position will show the name.
5. Thirty empty positions are available for you to name. A name you input will
show a dot, “.”, in the rightmost side of the LED display when you choose it,
but the 60 pre-stored names will not show a dot. You can easily see which
names are pre-stored or named by you.
Other functions of the “Name” button
The name button can alternately display the name, stored number and position count. If
you tap the name button once, the display will switch from name to position count. After
2 seconds, the display reverts to name.
If you tap the name button once, the display will switch from name to position count.
After 2 seconds, the display reverts to name.
Pre-stored 60 Satellite’s Names
15.0°W
20.0°W
22.0°W
24.5°W
27.5°W
30.0°W
31.5°W
34.5°W
37.5°W
40.5°W
43.0°W
45.0°W
50.0°W
53.0°W
55.5°W
58.0°W
61.0°W
61.5°W
63.0°W
65.0°W
Telstar 12
Intelsat 603
NSS 7
Intelsat 905
Intelsat 907
Hispasat 1C
Intelsat 801
Intelsat 903
Telstar 11
NSS 806
Intelsat 6B
Intelsat 1R
Intelsat 705
Intelsat 707
Intelsat 805
Intelsat 9
Amazonas
EchoStar 3
Estrela do Sul 1
Brasilsat B2
70.0°W
72.0°W
72.5°W
73.5°W
74.0°W
76.8°W
79.0°W
82.0°W
83.0°W
84.0°W
85.0°W
87.0°W
89.0°W
91.0°W
93.0°W
95.0°W
97.0°W
99.0°W
101.0°W
102.8°W
Brasilsat B4
Nahuel 1
DirecTV 1
Brasilsat B1
SBS 6
Galaxy 4R
AMC 5
Nimiq 2
AMC 9
Brasilsat B3
AMC 2
AMC 3
Galaxy 28
Galaxy 11
Galaxy 26
Galaxy 3C
Galaxy 25
Galaxy 16
DirecTV
Spaceway 1
103.0°W
105.0°W
107.3°W
110.0°W
111.1°W
113.0°W
114.9°W
116.8°W
119.0°W
121.0°W
123.0°W
125.0°W
127.0°W
129.0°W
131.0°W
133.0°W
135.0°W
137.0°W
139.0°W
148.0°W
AMC 1
AMC 15
Anik F1
DirecTV 5
Anik F2
SatMex 6
Solidaridad 2
SatMex 5
AMC 16
EchoStar 9
Galaxy 10R
Galaxy 14
Galaxy 13
EchoStar 5
AMC 11
Galaxy 15
AMC 10
AMC 7
AMC 8
EchoStar 1
____________________________________________________________________________
Imported and distributed by Sadoun Satellite Sales,
www.sadoun.com
1-888-519-9595
Recall saved satellite position:
With the following procedure, you can move the dish to any stored position.
1. Using the number keys on the remote, enter the satellite position shown above,
or one that you have programmed in; or
2. Press the ¿ or À keys to choose the satellite position. The display will show
the number and name of the new position. After setting the position name, the
display will flash the number and name of the position.
3. Press OK key to confirm. The actuator will move to the stored position and the
display will show the position name and number. If the position has a set name
and number, the display will show the name of the position. If the position has
only a number, the display will show the number in the position you choose.
PS: Once you choose a satellite and the actuator is moving, you can press any key on
the remote to immediately stop the actuator.
Re-synchronize all the Satellite Positions:
In case the positions are not correct or the picture is not clear on any
satellite, the shift (re-sync) function can correct all the positions
simultaneously.
1. Use the RECALL operation to move the actuator or H-H mount to a
stored position (for example, “NSS” and “P03”) as a reference position
for “re-sync” operation.
2. Press and hold the Resync key for more than 5 seconds. The LED will
flash RESYNC and the name or number of the position.
3. Press 3MANUAL4 to fine-tune the actuator or H-H mount to get the
strongest signal.
4. Press the OK key to confirm the operation. The display will show the
name or “PXX” again (for example “NSS” and “P03”). The rest of the
satellite positions in memory will also be fine-tuned. The following
drawing shows the operation.
____________________________________________________________________________
Imported and distributed by Sadoun Satellite Sales,
www.sadoun.com
1-888-519-9595
Count
0
Position
400
01
800
1200
02
1600
03
Count
2000
New Position
0
400
01
800
1200
02
03
1600
To reset the system:
If you want to clear everything stored in the positioner, including
high/low limits and satellite positions, reset the system with this
procedure:
Press and hold the Reset key on the remote for 10 seconds. It will show
10, 9 … 1, then the positioner will be reset. If the RESET is successful,
the display will show “0000”.
Operation as DiSEqC 1.2 Positioner
Notice: All the commands are from the DiSEqC 1.2 receiver. Refer to the
receiver manual. The name of some commands might be different, but
similar.
Set the Software High/Low Limits:
After you send the commands from the DiSEqC 1.2 receiver, the positioner display will
show LIMITL or LIMITH:
Low Limit
High Limit
North Hemisphere
East Limit
West Limit
South Hemisphere
West Limit
East Limit
To cancel the Software High/Low Limits:
After you send the command from the DiSEqC1.2 receiver to clear the positioner limit
setting, the positioner display will show “|-- -- -- -- -- --|”on the LED.
____________________________________________________________________________
Imported and distributed by Sadoun Satellite Sales,
www.sadoun.com
1-888-519-9595
2000
To store the satellite positions:
1. After the DiSEqC1.2 receiver moves the actuator and stores the satellite
position, the display will automatically show the stored position number.
To recall a satellite position:
1. When you change the program from the receiver, the positioner
automatically moves the actuator to the stored position. But if the
position has not been stored, the positioner will not respond. Refer to
your receiver manual.
2. If the channels and satellites are properly set up in the receiver, it will
move the actuator to the proper position when you change the channel.
When the proper position is reached, the display will show the satellite
number as “01” ~ ”99”.
3. You can still operate the GBOX positioner from its IR remote if
necessary.
To re-synchronize satellite positions (re-calculate):
1. Not every DiSEqC1.2 receiver supports this re-sync function. If the
receiver has this function, the GBOX will carry out this command, but the
display won’t show any message.
2. If necessary, you may still use the GBOX IR remote to re-synchronize.
To operate from the front panel push buttons
1. Move the actuator East/West with the 3 and 4
buttons to the desired position. Press and hold the
power button for 5 seconds, and the display will
show ”C--_ _”.
2. Press the 3MANUAL4 buttons to scroll through
the position numbers on the display (1-99) and to
choose the satellite positions you want to store.
3. Within 2 seconds, press the “POWER” button for confirmation. The LED
will show the number you choose. (for example, “P03”)
____________________________________________________________________________
Imported and distributed by Sadoun Satellite Sales,
www.sadoun.com
1-888-519-9595
Troubleshooting
Symptoms
Check points
The Memorized Positions
are not correct.
• First, try re-sync to correct the position.
• If the symptom recurs repeatedly, replace the
reed sensor to see whether it is OK.
The LED displays |------ or
------| and can’t move any
The symbols mean electrical limits, which have been set. To
cancel this setting, use the “Limit Off” function on the
receiver or press the limit key for more than 10 seconds.
The LED will show “|- - - - - -|” when it is clear.
farther.
•
The LED lights but the
positioner doesn’t work (no
response).
•
The manual 34 buttons
drive for only 1 count.
Unplug the AC power. Wait for more than 10 seconds
then reconnect it.
Unstable AC power can cause this problem. To
protect the stored data, the positioner will lock itself in
this situation. A voltage regulator or UPS might be
needed.
These buttons are for fine-tuning only, and the receiver
doesn’t support this function.
Specification
Input Voltage
:
Output Voltage
:
Output Power
Maximum Current
Power Consumption
Position Memories
:
:
:
:
100-120VAC 60Hz
13 / 18 VDC (F Type via Coaxial Cable)
13 / 18 VDC (F Type / According to the Input)
36VDC (via Motor Cable)
60 W (Rated / Motor Cable)
3A
5W (Standby) 90W (Maximum)
99
Protocol
Operating
Temperature
Storage Temperature
Dimensions (WxHxD)
:
:
DiSEqC 1.2
5°C to 40°C (41°F to 104°F)
:
:
-20°C to 60°C (-4°F to 140°F)
230x65x165 mm3 (Net)/260x70x210
(Gross)
1.6 Kg (Net) / 1.8 Kg (Gross)
Weight
:
____________________________________________________________________________
Imported and distributed by Sadoun Satellite Sales,
www.sadoun.com
1-888-519-9595
mm3