1
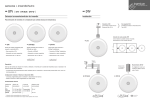
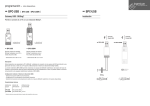
Touch screen Smart Touch v1.0 USER MANUAL Parque Tecnológico de Asturias, Parcela 50, 33428 Llanera – Asturias - Spain Tel (+34) 985 118 859 Fax (+34) 984 283 560 [email protected] www.ingeniumsl.com TECHNICAL SUPPORT Tel (+34) 985 113 339 [email protected] USER MANUAL SMART TOUCH - V1.0 Index 1 General description ______________________________________________________________ 2 2 Working mode __________________________________________________________________ 3 2.1 Introduction _______________________________________________________________________ 3 2.2 Control icons _______________________________________________________________________ 4 2.2.1 2.2.2 2.2.3 2.2.4 2.2.5 2.2.6 2.2.7 2.3 2.3.1 2.3.2 2.3.3 2.3.4 2.3.5 2.3.6 2.4 2.4.1 2.4.2 3 Lights ____________________________________________________________________________________ Dimmers __________________________________________________________________________________ RGB Leds _________________________________________________________________________________ Shutters __________________________________________________________________________________ Thermostats _______________________________________________________________________________ Scenes ___________________________________________________________________________________ List of available icons ________________________________________________________________________ 4 4 5 5 6 7 7 Options menu ______________________________________________________________________ 9 Time ____________________________________________________________________________________ Wi-Fi ____________________________________________________________________________________ Appearance ______________________________________________________________________________ Brightness _______________________________________________________________________________ Security _________________________________________________________________________________ Language ________________________________________________________________________________ 10 11 12 14 15 15 Default actions ____________________________________________________________________ 16 Gesture control ___________________________________________________________________________ 16 List of available default actions _______________________________________________________________ 16 Notes ________________________________________________________________________ 17 Touch screen 1/18 USER MANUAL SMART TOUCH - V1.0 1 G ENERAL DESCRIPTION The Smart Touch is a full colour capacitive 4.3” touch screen to control and monitor any BUSing installation, using 3D plans, photographs, friendly-icons, etc. It allows to program up to 4 pages with 8 icons in each page with which to control lights, shutters, thermostats, RGB leds, executing scenes and control any other BUSing installation devices being ideal to work as a room controller. It incorporates two user levels (normal user and administrator) and the appearance of the pictures, menus and icons shown is completely customizable by the programmer with the programming software SIDE BUSing that allows creating different themes. The appearance theme can be also changed manually by the user or automatically by programmed hours. General characteristics: - Admits up to 4 control pages (background: 3D plans, photographs, etc.). - 8 control icons per page. - Scenes, on/off, dimming, shutter, thermostats, RGB Leds control. - Fully customizable themes (icons, background and menus appearance). - Wi-Fi connectivity for programming and wireless local control via Android/iOS applications. - Programmable automatic theme change by hour. - Two user level modes: administrator and standard user. Touch screen 2/18 USER MANUAL SMART TOUCH - V1.0 2 W ORKING MODE 2.1 I NTRODUCTION The Smart Touch interface is divided in three zones: A central zone where the user find the icons with which to control all the elements of the installation (lights, shutters, thermostats, etc.). It is possible to have up to 4 pages with 8 icons in each page. The internal thermostat control interface that it is shown by sliding upwards the main screen (if the Smart Touch has an internal thermostat incorporated). An options menu that it is shown by sliding downwards the main screen. In this menu can be configured the visual theme, brightness, Wi-Fi, language, password, etc. Only an Administrator user can have access to the options menu. You will find below a detailed explanation of each zone of this user interface. Touch screen 3/18 USER MANUAL SMART TOUCH - V1.0 2.2 C ONTROL ICONS In the following section is explained each of the control functions that can be programmed in the Smart Touch. The available functions could be different depending on the user’s needs and the programming done. Ask the programmer / integrator of the home automation system for further information about the possibilities. 2.2.1 LIGHTS Switch on/off lighting: this icon allows controlling the light of the corresponding room or zone simply by clicking on it. The status of the light is permanently updated and the bulb will be either on or off according to it. 2.2.2 DIMMERS Lightning regulation: this icon represents the current brightness level of a dimmering light. By clicking on the icon, a control dialogue appears and allows setting a new brightness value by sliding the finger (the command is sent when release). It is also indicated graphically as well as numerically the value (in percentage) of the light intensity. Press the arrow at the bottom left to go back to the main window. Touch screen 4/18 USER MANUAL SMART TOUCH - V1.0 2.2.3 RGB LEDS RGB lights control: this icon represents the current colour of an RGB led light. By clicking on the icon, a control dialogue appears and allows selecting a colour from the palette and setting a brightness value by sliding the finger. It is also indicated graphically as well as numerically the value (from 0 to 255) of the brightness and colour intensities. Press the ok button on the right to send a new colour and brightness setting. Press the arrow at the bottom left to go back to the main window. 2.2.4 SHUTTERS Shutter/Blind control: this icon represents the current position of a shutter or blind. Touch screen 5/18 USER MANUAL SMART TOUCH - V1.0 By clicking on the icon, a control dialogue appears and allows setting a new position value by sliding the finger. It is also indicated graphically as well as numerically the value (in percentage) of the current position. Press the arrow at the bottom left to go back to the main window. 2.2.5 THERMOSTATS External thermostat control: this icon allows controlling an external thermostat of the home automation installation. By clicking on this icon, a control dialogue appears and allows to switch on/off the thermostat or setting a new set point temperature by sliding the finger over the circular scroll bar (the command is sent when release). The current measured temperature is also indicated at upper left corner (from 0 to 51 oC). Touch screen 6/18 USER MANUAL SMART TOUCH - V1.0 Use the icons below the set point scroll bar to set the working mode of the thermostat. Working mode (from left to right): - Summer mode: when the set point temperature is lower than the measured one, the thermostat will switch on the cooling system. - Winter mode: when the set point temperature is higher than the measured one, the thermostat will switch on the heating system. - Mix mode: Summer and winter mode simultaneously. Press the arrow at the bottom left to go back to the main window. 2.2.6 SCENES Scene execution: Scene icons allow executing programmed scenarios or moods, this means a group of actions that are executed simultaneously, for example, switch off all the lights, raise up all the shutters, etc. 2.2.7 LIST OF AVAILABLE ICONS The available functions could be different depending on the user’s needs and the programming done. Ask the programmer / integrator of the home automation system for further information about the possibilities. Icons in page 1 2 3 4 5 6 7 8 Touch screen 7/18 USER MANUAL SMART TOUCH - V1.0 Page 1 Position 1 2 3 4 5 6 7 8 Page 2 Position 1 2 3 4 5 6 7 8 Page 3 Position 1 2 3 4 5 6 7 8 Page 4 Position 1 2 3 4 5 6 7 8 Icon Name Function Icon Name Function Icon Name Function Icon Name Function Touch screen 8/18 USER MANUAL SMART TOUCH - V1.0 2.3 O PTIONS MENU The options menu allows configuring the appearance, brightness or language of the Smart Touch among other things. If the menu is unblocked (administrator mode disabled) any type of user will be able to change any configuration. In this case, use the bar at the top of the main window to slide down the menu. It is possible to block this menu depending on the programming of the device, so it can be only available for administrators. If the menu is blocked (administrator mode is enabled) press in the centre of the main window for 5 seconds approximately and use the keyboard to enter the access password. The options menu shows the following 6 submenus that are explained next: Touch screen 9/18 USER MANUAL SMART TOUCH - V1.0 2.3.1 TIME The Smart Touch can work as date and time slave in the BUSing bus by receiving the corresponding data by telegrams from any other BUSing clock. The current date and time can also be configured manually with this option of the menu. Set the desired values using the left and right arrows for every field as shown next: Press the arrow on the left to go back to the main window without saving the date and time changes. Press ok on the right to accept the new configuration. By doing this, the Smart Touch will send the date and time to the other devices of the home automation system. Touch screen 10/18 USER MANUAL SMART TOUCH - V1.0 2.3.2 WI-FI The Smart Touch incorporates Wi-Fi connectivity which allows the user to control the home automation system locally through any wireless device such as smartphones or tablets and also for the programmer to download the project. It works as an access point creating a Wi-Fi network that any PC, smartphone or tablet can connect to, and operate it with the Ingenium Android and iOS available applications. The Wi-Fi network is generated by the Smart Touch with the name (SSID) and password configured in this menu. This network has no internet access, so it is not possible to navigate through the web or control the home automation system from outside the house or installation. The type of security of the network generated is WPA and the password must have at least 8 characters. The Wi-Fi access point creation can be disabled by pressing the on/off button. Press ok at the bottom right corner to accept every configuration setting and create a network. Below the Wi-Fi settings there is information about the IP of the Smart Touch and MAC address. Press the arrow on the left to go back to the main window without saving changes. Press ok on the right to accept the new configuration. The control applications are free and can be found in the corresponding markets (the Android app is called aSC and it is available in Google Play; the iOS app is called iSC and it is available in the App Store). See their corresponding manuals for further information. Touch screen 11/18 USER MANUAL SMART TOUCH - V1.0 2.3.3 APPEARANCE In this option menu, the appearance of the screen icons and colours can be changed by selecting different themes according to the customer likes. The Smart Touch incorporates 3 default themes (predefined) to change the appearance of the screen with different colours and icon styles, but it can also incorporate another 3 themes that can be customized by programming (ask the administrator of your home automation system). 2.3.3.1 Change automatically The device can show a fixed theme or a list of themes that will change automatically by programmed hours, to do so, change the appearance mode to auto and select the time of the day to change. The Smart Touch will show the programmed themes every day at the configured times for each one. Touch screen 12/18 USER MANUAL SMART TOUCH - V1.0 To select a theme to be included in the auto change sequence do click on the upper right corner of it. Then write the desired hour of change with the keyboard by clicking over the clock at the bottom of each theme. Click ok at the bottom right corner of the keyboard to accept the settings and go back to the main window saving changes with the arrow button. 2.3.3.2 Change by bus telegram The appearance can also be changed by bus telegrams from any other device of the home automation system. Ask the programmer / integrator for further information about the possibilities. Touch screen 13/18 USER MANUAL SMART TOUCH - V1.0 2.3.4 BRIGHTNESS This option of the menu allows configuring the brightness behaviour of the screen backlight. There are three parameters to configure that are explained next: Active [3 - 15]: Is the brightness level when the screen is being used. Standby [0 - 15]: Is the brightness level that it is set after a period of idle time. Set this value to 0 to switch off the brightness completely when the Smart Touch is not being used. Time [5 - 60 seconds]: Is the time that the screen waits to set the standby brightness level since the last pulsation. Press the arrow on the left to go back to the main window without saving changes. Press ok on the right to accept the new configuration. Press the arrow on the left to go back to the main window without saving changes. Press ok on the right to accept the new configuration. Touch screen 14/18 USER MANUAL SMART TOUCH - V1.0 2.3.5 SECURITY The Smart Touch can be locked with a 4 digits password to avoid its use. Do click on the corresponding button to enable or disable the lock of the screen (the password is required for any change of this function). The default password is 1234 and it can be changed by clicking on the corresponding button in the centre of the window. If the lock mode is enabled, the screen will ask for the password every time that changes from standby to active mode. If the lock mode is disabled, the Smart Touch can be activated and therefore used by anyone just by clicking on the screen. 2.3.6 LANGUAGE Use this menu to change the presentation language of the Smart Touch. Choose between English, Spanish and French by clicking on the left and right arrows. Press the arrow on the left to go back to the main window and accept changes. Touch screen 15/18 USER MANUAL SMART TOUCH - V1.0 2.4 D EFAULT ACTIONS 2.4.1 GESTURE CONTROL The Smart Touch allows executing some programmed actions by gesture control. When the screen is off or locked it is possible to execute some actions without needing to unlock it, just sliding the finger upwards or downwards. The available functions could be different depending on the user’s needs and the programming done. Ask the programmer / integrator of the home automation system for further information about the possibilities. 2.4.2 LIST OF AVAILABLE DEFAULT ACTIONS The available functions could be different depending on the user’s needs and the programming done. Ask the programmer / integrator of the home automation system for further information about the possibilities. Control gesture Slide upwards Slide downwards Function(s) Touch screen 16/18 USER MANUAL SMART TOUCH - V1.0 3 N OTES Touch screen 17/18 Parque Tecnológico de Asturias, Parcela 50, 33428 Llanera – Asturias - Spain Tel (+34) 985 118 859 Fax (+34) 984 283 560 [email protected] www.ingeniumsl.com Liability limitation: The present document is subject to changes or excepted errors. The contents are continuously checked to be according to the hardware and software but deviations cannot be completely excluded. Consequently any liability for this is not accepted. Please inform us of any suggestion. Every correction will be incorporated in new versions of this manual.