Download The Whistled
Transcript
The Whistled - Manual
Thanks for having bought The Whistled.
We sincerely hope that you will find this platform intuitive and welcome any feedback you may have.
Connecting The Whistled
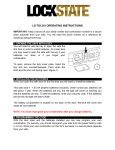
The first steps are fairly simple. Have a look at the picture below:
First, insert each wire of your LED string (or any other device) in the corresponding hole in the terminal block
and then tighten the screw into place.
Finally, insert the 2.1/5.5mm DC jack of your power supply to power the system.
Setting up The Whistled in a room
There aren't any special requirements when placing the platform in a room.
However, it is better to set a minimum distance of 1m20 (or 50") between The Whistled and any sound
emitting device/person to avoid possible false whistle detections:
Switching on/off
Simply whistle two distinctive notes at the platform.
Any whistle sequence will also work, you can even whistle a melody if you want to.
Varying the intensity
In the case you connected LEDs to The Whistled, you can vary their brightness with the following sequence:
- turn them on (see previous paragraph)
- whistle a continuous note for 2 or 3 seconds, then whistle higher or lower:
Technical specs
Here are the technical specifications of The Whistled
- 55x13mm board
- 4.5V to 18V DC input
- max 5A current
- 16 bits PWM at ~100ns per tick
- reverse input polarity protection
- ESD protected input and outputs
If you need any other technical detail or source file, please visit our website www.limpkin.fr or contact us
directly at [email protected] for other enquiries.
Advanced technical details
The Whistled is an open hardware project.
All the files required to reproduce this work can be directly downloaded from our website www.limpkin.fr
The microcontroller on the platform you received isn't write protected, so you can reprogram it with a SWD
programmer using these pads:
A code template is also available on our website to get you started.


