1
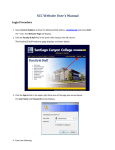
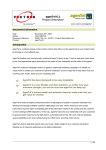
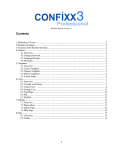
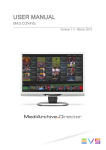
SCC Website User’s Manual Login Procedure 1. Open Internet Explorer and key the following Web address: sccollege.edu and press Enter. The “new” SCC Welcome Page will display. 2. Click the Faculty & Staff link in the Quick Links listing in the left column. The Faculty & Staff welcome page displays as shown below. 3. Click the Sign In link in the upper right‐hand area of the page (see arrow above). The User Name and Password prompt displays. 2 4. Enter the following: •
User Name: RSC\your user name (You must key the letters “RSC” and a backslash “\” before your user name. Your user name is the same as you use to access your district e‐mail account. •
Password: password (Use the same password that you use for your district e‐mail account) Note: user names are not case sensitive but passwords are. 5. Navigate the site to the page you wish to edit. You can use the Quick Links in the left column or you can key the name of the page in the search copy and click Search. The page you wish to edit should be displayed. All pages that you have permission to edit will have a blue Site Actions button and a “welcome” line to the left of it as shown below. (Note: Your display window should show the page to which you have navigated, not the SCC main page as shown below.) 6. Click the Site Actions menu and review the options in the menu. Version 3.0 3 The Site Actions Menu 7. In the Site Actions menu, select the View All Site Content option. In the All Site Content area, notice you have links to a Documents, Pages, and Images folder. These are your site’s Document Libraries. 8. Click the site name to return to the site’s welcome page. The site name is to the left of the “All Site Content” path name at the top of the pages. In the illustration below, the site name is “Students.” Version 3.0 4 Exploring the Page Editing Toolbar 9. Click the Site Action menu and verify that Hide Page Editing Toolbar is listed. If Show Editing Toolbar is listed, click it to show the toolbar. Note: This menu item is a toggle which means that you turn on (show) or turn off (hide) the Editing Toolbar by clicking. The Page Editing Toolbar now appears at the top of your page. 10. Click the Page menu on the Page Editing Toolbar and review the menu items. 11. Click the Tools menu on the Page Editing Toolbar and review its menu items. Version 3.0 5 The Welcome (Default) Page When a site is created, the first page of the Site, which is called the Welcome Page, is also created. The Welcome Page is a special page because it is the first page a visitor will see when they visit your site and; therefore, should not be deleted or renamed. As with all pages, the Welcome Page is stored in the Pages Document Library, which is accessed via the Site Actions menu View All Site Content option (which you explored above). You use the HTML Editor to add and revise content on your pages. The HTML Editor gives you many text editing tools and is very similar to a word processor. You can also “copy” content from MS Word, Excel, and other programs and then “paste” the content into the HTML Editor. Most of the time, copy and paste procedures work well. However, sometimes minor or major reformatting of the pasted content is required in order for your content to look good. Creating a New Page 1. Verify that you are in the site where you wish to create a new page. 2. In the Site Actions Menu, click the Create Page option. 3. On the Create Page form, key a Title and Description, and select one of the templates listed in the listing (see sample below). Version 3.0 6 4. Click the Create button that appears at the bottom of the form. The page is created and is checked‐out to you. You can verify this by looking at the Page Editing Toolbar. Version is set to Checked Out and the Status is set to “Only you can see and modify this page.” The page is in Edit Page mode. Note: When a page is Checked Out, the page cannot be edited by another person until you check the page in or approve the page for publishing. Version 3.0 7 Adding Content to a Page 1. Click in the Page Content window to display the HTML Editor Toolbar. The HTML Editor Toolbar (see below) will display the top of the Page Content region. 2. Add content to the page: a. Position the cursor so that it is at the starting point of the Page Content area and key the following text: This is sample text for this page. I should not press the Enter key until I want to make a new paragraph. Version 3.0 8 b. After keying the text, click on the Spelling icon (the ABC icon on the left) on the HTML Editor Toolbar. Run the spell check to ensure that there are no typos in the text that you keyed. c. After the spell check is complete correct any errors then click OK to continue. 5. Edit the text as following: a. Using the mouse, highlight the first sentence b. On the HTML Editor Toolbar, click the font size dropdown list and select “6.” c. Click the “undo” icon (blue arrow curving to the left) on the HTML Editor Toolbar to return the text to its former size. d. Click the cursor some place in the first sentence, then in the HTML Editor Toolbar, click the font style (Arial). Note that Arial is the only typeface available. 6. Save your changes by clicking the Save and Stop Editing option in the Page menu of the Page Editing Toolbar. Uploading an Image into the Images Library Before you can place an image on your webpage, you must upload the image into the Images Library. 1. Click the Site Actions menu and select View All Site Content. 2. Click the Images link that appears under Documents Libraries. 3. In the Images Library window that displays, select Upload Document in the Upload Menu. Version 3.0 9 4. In the Upload Document form that appears, click Browse and navigate to a graphic (image) file on your computer, then click Open. 5. On the Upload Document form that appears, leave everything as it is and click OK to upload your image to the Images Library. 6. Date set to Immediately and Scheduling End Date set to Never. Click the Check In button. On the Images Properties form, key a title in the Title field. Leave the Scheduling Start You have successfully uploaded your image and checked it in. Now, you need to publish it so other authors in this site will have access to this image should they wish to use it. 7. In the Images Library, which appears after checking in your image, put your mouse over the name of the image you just uploaded, click the down arrow. a. If the menu item “Publish a Major Version” is listed on the menu, continue with the next step. Version 3.0 10 b. If the menu option does not appear , skip to step 15. 8. On the Publish Major Version form, leave the Comments field empty and click the OK button. 9. On the Start Parallel Approval page, click the Start button, which appears at the bottom of the page. Note: It is not necessary to key in a message and due date on this form during this training session. However, in the “real world” you may want to do this. Version 3.0 11 10. After clicking the Start button, you will be redirected to the Images Library. Notice the status of your image is now set to Pending. 11. Next, try to approve the image. Put your mouse over the image name. Select Approve/reject in the menu that appears. 12. If you do not have the necessary permissions, you will get an “Access Denied” error message. If you have the necessary permissions, you will be able to approve the new image. In this training lesson you should have the necessary permissions, so an Approve/Reject page will display as shown below. 13. On the Approve/Reject page, select Approved. This item will become visible to all users.
and then click on the OK button. Note: It is not necessary to put any comments in the Comment field during Version 3.0 12 14. When prompted about the content approval running, click on the OK button to continue. 15. The image is now uploaded, checked‐in, and approved. Version 3.0 13 Adding an Image to Your Page 1. Return to the training page you created: a. Click Sites Actions menu. b. Select View all Site Content option. c. Click the Pages folder icon to display a list of the pages in this folder. d. Click the name of the page you are creating (Sample new page in this training session) to display the page. 2. Click on Edit Page button on the Page Editing Toolbar to return to the page editing mode. 3. Click an insertion point after the last sentence in the Edit Content area and press Enter twice. 4. Click the Insert Image icon on the HTML Editor Toolbar. 5. The Image Manager window will appear. Double click the PublishingImages folder icon the left window to display a listing of your published images. Version 3.0 14 6. Click the name of the image you wish to use. An image of the graphic will display in the area to the right of the image names as shown below. Notice that the path to the image is shown in the Image URL: textbox. 7. Click the Properties tab below the image area to display the Image Editor properties. 8. Click in the Image Alt Text box and key a short description of the image. 9. Click Insert. Your page will display with the image placed on it. Note: The image will display at the size it was when it was saved. You can now adjust the size. 10. To adjust the size of the image: a. Right click the graphic and select Properties from the menu to display Image Properties dialog box. Version 3.0 15 b. Click Specify Size if you wish to use the image in a size other the size as it was saved. If you select this option, indicate the size (in pixels) for the width and height or enter one dimension and click Constrain icon to the right, then click OK. 11. Your image now appears on your page. Saving and Viewing a Page 1. Click on the Page menu in the Page Editing Toolbar and select the Save. 2. Do the following to preview your page in a browser window. Version 3.0 16 a. Select Preview in New Window from the Tools menu located in the Page Editing Toolbar. Note: Ensure that any “pop‐up blockers” are not preventing the new window from opening. b. After previewing, close the preview window and return back to your page which is still in Edit Page mode. Adding a Link to Your Page 1. Display your training page if it is not displayed. 2. Click an insertion point and press Enter twice. 3. Key the following text: Welcome to Santiago Canyon College 4. Highlight the words “Santiago Canyon College.” 5. Click the Link Manager icon on the HMTL Editor toolbar. Version 3.0 17 6. Complete the Hyperlink Manager box by keying the URL as shown below the click OK. Note: Use the Browse button to navigate your website if the link is a page, document, or image on your website. 7. Your page is display with the link in blue as shown below. 8. Save the page and test the hyperlink: a. Click the Page menu on the Page Editing Toolbar and select Save b. Click the Tools menu on the Page Editing Toolbar and select Preview in New Window. Version 3.0 18 9. After previewing the page, close the preview window and return to your page, which is still in Edit Page mode. Publishing a Page
A page must be published before it can be viewed by others. 1. Click on the Publish button in the Page Editing Toolbar. Version 3.0 19 3. Your page is now published and ready for the world to see! You can verify this by looking at the Status: display at the top of the screen. Exiting the Page Editor
You will want to sign out of the page editor once you have finished editing your pages. 1. Click the Welcome menu button to the left of the Site Actions button in the upper right corner of the window. 2. Click Sign Out on the menu to display the Close Window dialog box, then click Yes. Version 3.0