1
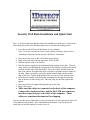
Security Wall Rack Installation and Quick Start
Note: A licensed contractor should perform this installation to make sure it is placed on a
solid sturdy part of the wall, and that proper tools are used for the drilling process.
•
Leave the screen of IDetect folded down as it was shipped.
Note: If you are receiving the security rack without a computer, please refer to
“Installing components into the Security Wall Rack” instructions.
•
•
•
•
Place the security rack on the wall in the desired position.
Mark with a pen where the top center hole will be drilled.
Drill the top hole with a 5/8” drill bit.
Place the anchor supplied in the Installation Bolts package in this hole. The end
of the anchor (not including the end portion of the bolt that is sticking out) should
be flush with the edge of the drilled hole. Place the washer, and the nut on the
bolt of the anchor, and tighten the bolt as it begins to protrude from the anchor in
the hole. Make sure that the end of the anchor remains flush with the outside
edge of the hole. Tighten until the bolt will not come out of the wall any more.
Place the rack onto the wall placing the protruding bolt through the top center
hole in the back of the security rack. Place the wing nut onto the top bolt and
tighten.
Place the master lock supplied through the hole in this bolt.
Plug in the system.
•
•
•
• Make sure the cables are connected on the back of the computer.
Connect the round power line, and the flat COM port connector
into their respective port in the back of the computer. These
cables are sometimes disconnected for shipping.
You may use the nuts to tighten the security rack onto the wall, but removing it at the end
of the night becomes tedious. We recommend that the bottom 1 bolt just be used to
steady the rack and the top bolt be used to secure it.
The lock is shipped with the combination ‘0’ ‘0’ ‘0’. Please follow the directions on the
back of the lock box and change the combination. Please write this combination down
and keep in a safe place. The keys for the 2 locks on the security rack are secured with a
tie on the bottom of the rack. Clip the tie and store the keys in a safe place.
•
•
•
•
•
•
•
•
If you have the IDetect Snap Shot option, plug the camera in to the back of the
computer into the USB port.
If you have the IDetect License Camera Box, plug that camera into one of the side
USB ports, and then refer to the Installing License Camera Box instruction sheet.
Turn the system on. Each system has a different power switch location, but it
should be on top of the system near the screen. In some instances it may be on
the right side of the system on the side of the computer. Locate yours and power
the system on.
After the system boots up, IDetect will already be running. If the screen does not
show IDetect Copyright screen, click on the ‘IDetect - IDetect’ button to the right
of the ‘START’ button.
There is no password assigned yet, so just push ‘ENTER’.
Push ‘ENTER’ on ‘Admission Door’, ‘ENTER’ on password entry, and ‘ENTER’
on the welcome screen.
To scan an ID, place the barcode type id in the back slot of scanner with the
barcode facing down towards the green light.
Place the magnetic strip type id in the front of the scanner with the magnetic strip
down into the scanner facing the green light. Swipe the license through in any
direction. Slide the id quickly; this insures a more accurate scan. If the
scanner beeps but nothing comes up on the screen, push the
ENTER key and try again.
•
Follow the instructions in the Users Manual to review the system in more detail.
The User manual is on the IDetect system. Just double click on the IDetect
Manual Icon on the desktop.
•
If using a cash drawer from IDetect, after the system boots up,
push the cash drawer card that is located on the side of the
IDetect system out until you hear 2 beeps, then in again until 2
more beeps are heard. This starts the card for proper operation,
and must be done every time the system is turned on.