1
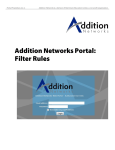
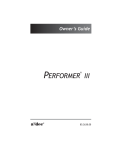
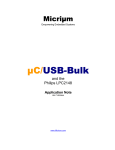
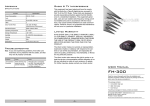
1.
2.
3.
4.
5.
6.
7.
8.
This unit is NOT water proof. Do NOT expose to
water, high humidity or other liquids.
The batteries should not be exposed to excessive
heat such as sunlight, fire or the like.
Do NOT throw used batteries in the trash. Consumed batteries must be properly disposed of.
Danger of explosion if batteries are incorrectly
replaced. Please make sure batteries are installed
correctly.
This camera has no internal memory, so the SD
card must be placed in the unit to have the ability
to record.
The camera records in cycles. It saves the data in
files, and after 50 minutes a new file is automatically created to keep the file sizes manageable.
Between saves there is a 1 – 2 second delay in
which the unit will not record.
When the camera is running and the batteries are
almost depleted the “LOW POWER” light will flash,
and at this time the batteries should be changed.
SPECIFICATIONS:
Resolution
640*480
Consumption current
220mA
SD card (standard)
128MB-2GB
File format
AVI
DC supply voltage
DC12V
Battery supply voltage
4.5V (AAAx3pcs)
Working temperature
-10°c~+50°c
Viewing angle
50°~60°
External dimension
49.6(L) x 109.8(W) x 15(H)mm
Weight
55g
SPY CHEST INC
NOTICE
Car Camera / Mini DVR
With built-in SD Card
I N S T R U C T I O N S
SPY CHEST INC
202 S. Main St.
Crestview, FL 32536
Phone: (850) 683-8787
Fax: (850) 682-0083
Email: [email protected]
T E L :
( 8 5 0 ) 6 8 3 - 8 7 8 7
Car Camera / Mini DVR
User’s Manual
Product Overview
Operation
This product can be used in various types of
vehicles. It records directly to an SD card,
which can be viewed via computer or TV/VCR.
We highly recommend reading this user’s manual in its entirety before using this product.
1.
Dash Mounted Car Camera Set Includes:
• Dash Mounted Car Camera
• Dash Mounting Bracket
• Car Power Adaptor
• Video Output Cable
• Instruction Guide
Provide power to the unit (2 sources)
A. Three AAA batteries
B. Cigarette lighter adapter (12V direct
current):
2. Insert SD card (Use standard SD cards only
512MB – 2 GB) Please insure the SD card write
protection lever is in the unlock position prior to
inserting.
3. To Record: Press and hold the power button for
two seconds to turn unit on and begin recording. The “WORK LED” indicator will start out
as solid then flash, indicating that the unit is
recording to the SD card.
4. To get unit to standby press “Play” and the
“WORK LED” will be solid blue.
5. To resume recording from standby press “Play”
again.
6. In the standby mode (continuously illuminated
“WORK LED”), press and hold the power button
for approximately three seconds to power off
unit.
7. Be sure that unit is in the off position prior to
installing or removing SD cards.
Viewing Video - Two Methods
Computer
1.
2.
3.
Remove the SD card from the device.
Insert the card into the SD reader on your computer (if your computer does not have an SD card
reader you may purchase one at http://
www.spytechs.com/video_accessories/sd-cardadaptor.htm)
Once your computer recognizes the card a
window will open in which you can select “Play
using Windows Media Player” or “Open folder to
view files using Windows Explorer”. Either one
can be used to access the information on the SD
card.
AV Out
1.
2.
Connect the unit to your television by using the
provided cable and plugging it into the AV out
plug on the device, and plugging the other end
into an available video input on a television.
Then power on the unit and press play to view
the videos
Deleting Files
Installation
1.
2.
3.
Position the unit in the desired location in
your vehicle. (Use the laser to determine
the direction of the camera.)
Once the location is decided tighten the
bolt.
Finally, remove the paper and expose the
adhesive tape and set in the desired location.
Removing or deleting files is achieved in the same
manner as you would any other file on your computer.
Simply attach the SD card to your computer. Then go
to the folders / files view and select the files you wish
to remove and delete.