1
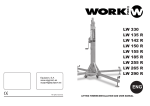
1.
1.1.
1.2.
1.3.
1.4.
1.5.
General information
The user guide
Communications to the manufacturer
Identification plate
Technical Support
Safety and security precautions
2
2
2
2
3
2.
2.1.
2.2.
2.3.
Handling and unpacking
Handling and transport
Unpacking
Control of accessories
3
4
5
3.
3.1.
3.2.
3.3.
3.4.
3.5.
Description of the Central Vacuum Unit
Operating principles and application field
Allowed and improper use
Basic Components
Technical features
Control panel description
6
6
7
8
8
4.
4.1.
4.2.
4.3.
4.4.
4.5.
4.6.
4.7.
4.8.
4.9.
4.10.
Installation
Precautions
Area of installation
Installation spaces
Installation applications
Installation template
Installation on walls
Installation on wooden or plaster walls
Electrical connection
Fixing the central vacuum unit to the installation template
Removing the central vacuum unit from the installation template
8
8
8
9
9
9
9
10
11
11
5.
5.1.
5.2.
Use of the central vacuum unit
Starting of the central vacuum unit
Use of the central vacuum unit
12
12
6.
6.1.
6.2.
6.3.
6.4.
Maintenance
Programmed maintenance
Replacement of the dust container
Replacement of the filter cartridge
Cleaning of the filter cartridge
13
13
15
16
7.
7.1.
Servicing
Servicing criteria
16
8.
8.1.
Spare parts
Spare parts list
17
9.
9.1.
Dismantling
General provisions
17
10.
10.1.
Trouble shooting
Trouble shooting
18
1
Cube 03/07-V01
English
INDEX
English
1 - GENERAL INFORMATIONS
• 1.1
Utilising the user guide
The user guide is a fundamental document written by the builder, to be considered an integral part of the central
suction unit.
We recommend storing and keeping the user guide throughout the whole operating life of the suction unit.
The main purpose of the user guide is to provide a correct knowledge of the user mode in order to exploit the
best performance and to maintain the central suction unit at its best working and security conditions.
It is absolutely forbidden to duplicate copy or release totally or part of this user guide without previous written
authorization by TECNOPLUS Srl, owner of the trademark SISTEM-AIR.
The manufacturer reserves the right to improve or modify the user guide and the machine itself at nay moment,
without prior notice.
• 1.2
Communications to the manufacturer
For any communication or request of assistance, we strongly suggest to always providing the following details,
so to correctly identify the central vacuum unit model:
Central vacuum unit model
Item code
Serial number
Year of manufacturing
Purchase date
Purchase place
Detailed information on the arisen troubles or on the kind of information required
All the technical data related to the central vacuum unit are indicated on the IDENTIFICATION PLATE situated
on the central vacuum unit.
•
1.3 Identification plate
The identification plate is located inside of the unit on the front side. It contains the manufacturer name, the
model, serial number, year of construction, the electrical tension supply (V), the frequency (Hz), the electrical
absorption (A), the installed power (W)..
Manufacturer name
CE compliance data
Central vacuum unit model
____________-___
Type: _______-____
0
I
___ V~ __ Hz _._ A ____W
Mtr.
__-_____-__-__ IP__
Serial number
Technical data of the electric motor
• 1.4
Technical Support
In case of need, exclusively call the Manufacturer Technical Service or an authorized centre always specifying
the technical data indicated on the identification plate and the serial number of the central vacuum unit
Manufacturer Assistance Service
Cube 03/07-V01
Authorized Assistance Centre
2
2 - HANDLING AND UNPACKING
- ATTENTION THE FOLLOWING OPERATIONS MUST BE CARRIED OUT
BY QUALIFIED STAFF
ALWAYS WEAR PROTECTIVE SHOES
AND GLOVES
2.1
Handling and transport
GROSS WEIGHT:
kg 10
PACKING DIMENSION:
cm 80 x 38.5 x H 31.5
CENTRAL UNIT WEIGHT:
kg 4
Place the central unit still packed near the location of installation.
The small dimensions and the light weight do not require any special handling system. If necessary, use a trolley
or ask for somebody's help.
3
Cube 03/07-V01
English
• 1.5
Safety and security precautions
Read carefully any information written in this user guide regarding installation, use and maintenance of the
central vacuum unit.
Never use inappropriately the central vacuum unit.
Never let the children get near the central vacuum unit when it is working and never let the children play with
the suction inlets or with the vacuum unit.
Unplug the central vacuum unit when:
–
The power supply cable is worn out or damaged
–
The central vacuum unit has been exposed to the inclemency of the weather or to excessive moisture.
–
The central vacuum unit has been damaged by an impact or the external container has been damaged
–
The central vacuum unit requires any repairing or overhauling.
Always wear protection gloves and mask when carrying out any maintenance operation and when unloading
the dust container or replacing/cleaning the filter.
Use only original spare parts.
Never use the vacuum unit to remove textile stuff, big-size bits and pieces of any material, burning coals or
ashes.
Never vacuum liquids.
Never block the air exhaust pipes and the cooling inlets of the motor.
Never touch the suction accessories with any part of the body.
Use only one inlet at a time.
Do not let the central vacuum unit running if you are not utilising it and put the switch on the "OFF" position if
you are not going to use it for a long period.
et mettre l'interrupteur en position "OFF" en cas d'une longue pé'8eriode d'arrê'90t.
NEVER use the central unit without the dust bag cover.
NEVER take the central unit out from its template except for repairing carried out by qualified staff.
• 2.2
Unpacking
It is suggested not to unpack the central unit until you put it into service, in order to keep the central unit in
perfect conditions.
ATTENTION:
The packing materials delivered with the central unit are inert solid wastes that must be disposed as per the
regulations in force.
To unpack proceed as follows
English
1
2
LA
TO
AP
ER
TU
RA
SIS
CUTEM
BE
3
Open the top and take out the
packing material and the
accessories placed inside
the central unit.
SIS
CUTEM
BE
0
I
Dispose of the packing as
per the regulations in force.
5
Take out all the accessories
inside the accessories box.
Cube 03/07-V01
4
4
Check of the accessories
N°1 x
N°1 x
N°1 x
N°1 x
N°1 x
N°10 x
N°1 x
M
pe a
rc n
en ua
tra le
li
as T
pi ec
ra n
nti ic
ci o
vi
li
N°1 x
English
• 2.3
0
I
N°1 x
N°1 x
N°1 x
5
Cube 03/07-V01
3 - DESCRIPTION OF THE CENTRAL VACUUM UNIT
English
• 3.1 Operating principles
The central suction system, suitable for any kind of residential building (house, office, hotels, service building)
consists of a of PVC pipes network, under the floors, inside the walls or the false ceiling, spreading in the various
rooms and with the suction inlets placed at the end of each sector.
The central vacuum unit, located in utility rooms, garages or similar places, is connected to the piping network.
The user starts the central vacuum unit by simply inserting the fitting of the suction hose into the suction pipe
inlet.
• 3.2 Allowed and improper use.
The central vacuum unit has been designed to remove the dust, small-size solid bits and pieces and dry materials.
It is forbidden to use the vacuum system to remove textile stuff, big-size bits and pieces, burning and hot
materials.
NEVER vacuum liquids!
Do not vacuum organic material that may ferment.
It is strictly forbidden to remove highly explosive materials (gun powder) or inert materials, which can trigger
dangerous chemical reactions if removed separately and then mixed up in the dust container.
It is strictly forbidden to use the central suction unit in explosion hazard places or in places where temperature,
pressure and moisture are out-of-range.
Any different use is strictly forbidden.
The manufacturer must approve, by means of written authorization, any alteration
or modification of the suction unit to remove a specific material.
Any use different from the original is to be considered improper and health risk for
the user and damage to the suction unit cannot be excluded.
Cube 03/07-V01
6
• 3.3
Basic components
Wall template
English
Centering pins
Electrical box
Dust entrance
Micro line connections
Power supply
Air exhaust
Centering pins
Dust entrance
Gasket
Centring holes
Cover
Dust bag
Gasket
Micro line connection
Power supply
Air exhaust
Main body
Gasket
0
I
ON/OFF switch
Safety Filter
Safety thermal probe
Motor
Motor cover
Electronic card
7
Cube 03/07-V01
Technical features
290
Technical features
77
N° users Max
40
Power supply
Volt ac
220/240
Frequency
Hz
Motor power
kW
Absorption
Inlet power supply
Max air volume
Dust container capacity
50/60
4.5
Volt dc
12
m3/h
178
50
5
72
Safety filter
40
1
A
litri
Ø
310
Ø mm
93
150
Pipes
Ø
82
m2
135
Surface max
40
YES
Weight
kg
4
300
English
68
1
135
• 3.4
0
I
300
• 3.5
280
Description of the control panel
Cover
Switch
0
I
• Cover:
IMPORTANT!
NEVER use the central vacuum unit without its cover because the central vacuum capacity would be missing.
Always make sure that it is properly installed, inserting the cover spigot in the central unit upper perimeter.
• Switch:
"I" (ON): the switch led turns on
The machine is on tension
"O" (OFF): the switch led turns off.
The machine is out of tension.
Cube 03/07-V01
8
4 - INSTALLATION
• 4.1 Safeguards
Here are some main rules to be followed in order to ensure a correct installation inside houses.
Installation must foresee, upstream the central unit, a safety bipolar switch..
• 4.2 Area of installation
Installation of a central vacuum unit presumes the existence of an aspiration pipe network, installed by qualified
staff that should also have spotted the best location for the central unit fixation template.
In case this was not carried out yet, following are some suggestions for a correct installation.
• If the central suction system has to be installed in multi-storey buildings, the suction unit must be located at
the lowest level of the building.
• The central vacuum unit has to be installed in a service room (for example in a garage or in a storage room),
sheltered from atmospheric agents and protected from moisture and temperature changes.
• Chose a space far from heat sources (burners or radiators).
• Provide spaces for the unit air flow entry and exit.
Foresee the air exhausting point outside the house, in a position that would not cause damage or nuisance to
other buildings.
• 4.3 Installation spaces
Leave all around the central unit (approx 200 mm. each side) free and well-lit space to allow trouble-free
maintenance operations, repairing, dust bag replacement and, at the same time, allow the air recycling and the
motor cooling.
For any question do not hesitate to contact the Manufacturer Technical Assistance Service.
• 4.4 Installation applications
The central vacuum unit is fixed to an installation template that is usually prearranged,
during the laying of the pipe network.
It allows the application on:
• walls
• wooden walls
• plaster walls
The wall on which the template will be installed must have the following characteristics:
• must be solid
• must be perfectly vertical
• must not be exposed to vibrations
• must be perfectly flat or the central unit will result instable
• 4.5 Installation template
The installation template is the central connecting support to the wall.
It usually prearranged during the laying of the pipe network.
The installation template is connected to the vacuum and exhausting pipe network and
the electrical connections to the micro line and to the power supply line.
NOTE:
• In case the template and the pipe network are already installed, verify the electric box
installation.
• If also the electric box is already installed, go to the section "Fixing of the central unit
to the installation template"
• In case the template has yet to be installed, carefully read the two following points.
Accordingly to the kind of wall on which it will be installed, carefully follow the
instructions hereafter.
• 4.6 Installation on walls
See illustrating sheet annexed to the instruction manual.
• 4.7 Installation on plaster or wooden walls
See illustrating sheet annexed to the instruction manual.
9
Cube 03/07-V01
English
- ATTENTION THE FOLLOWING OPERATIONS MUST BE
CARRIED OUT BY QUALIFIED STAFF
• 4.8
Electrical connection
English
- IMPORTANT BEFORE CARRYING OUT ANY CONNECTION
TURN OFF MAIN POWER SUPPLY..
- ATTENTION INSTALLATION MUST BE CARRIED OUT
EXCLUSIVELY BY QUALIFIED STAFF!
Before connecting to the power supply verify that voltage corresponds to the one required by the central
vacuum unit).
2
Power supply line must have cables with section diameter not less than 1.5 mm. .
Do not connect the machine to a power line with excessive tension rush (ideal tension = local voltage
± 10%).
Power the low voltage inlet signal with safe very low tension.
It is suggested, during central unit installation, to foresee, upstream the central unit itself, a safety
bipolar switch.
The manufacturer declines any responsibility for damages to persons or objects resulting from connecting
to an electric system not in compliance with the regulations in force.
1
2
Vdc 12V
(Micro line)
1
~ Vac 220/240
Wire the panel connectors to the
wires on the template box.
2
Screw drive the panel on the template
paying attention to the centring notch..
220/240V~
~ Vac 220/240
Suction inlets
L N
Micro line
Pipe network
Cube 03/07-V01
10
1.5 mm2
• 4.9
Fixing the central unit to the installation template
1
English
Alcool Cotton
2
0
I
• 4.10 Disassembling the central nit from the installation template
NOTE: This operation must be carried put ONLY in case of real need, e.g. for extraordinary repairing.
SOFT
0
I
11
Cube 03/07-V01
5 - HOW TO USE THE CENTRAL VACUUM UNIT
• 5.1 Starting the central vacuum unit
Put the main switch, located on the front
of the central unit, to the position "I-ON"
The led on the switch will light, to
indicate the central unit is powered on.
English
1
0
I
• 5.2 Use of the central vacuum unit
2
Fit the appropriate cleaning
accessory on the flexible hose.
Starting
To start the machine, open a suction inlet.
1) Open a suction inlet and insert the flexible hose.
- The vacuum unit starts and the vacuuming begins.
USO - USE - USAGE - USO - BENUTZUNG
2
1
3
PUSH
PULL
Turning off
1) To stop the machine, remove the flexible hose from the suction inlet.
- The central unit will stop automatically. NOTE: allow the central vacuum unit a few minutes to stop.
Cube 03/07-V01
12
6 - MAINTENANCE
• 6.1 Programmed maintenance
According to the accumulated operating time of the central vacuum system, it is necessary to carry out
maintenance operations in order to keep the central unit always well performing and to avoid serious mechanical
problems. It is suggested to carry out the following maintenance operations:
Frequency
Intervention
Dust bag full
Each bag replacement
Once a year
Carried out by
Replacement of the dust bag
User
Cleaning of the filetr cartidge
User
Check the air exhaust obstruction
Assistanzce service
The casing of the suction unit needs periodically cleaning. Use a smooth and damp cloth with some neutral
soap.
Attention: Be sure to use only water or water with neutral soap. Alcohol or other solvents may damage
the unit. Wait until the unit is perfectly dry prior to start it.
• 6.2
Replacement of the dust bag
- ATTENTION NEVER USE THE CENTRAL UNIT
WITHOUT THE DUST BAG
Lift and remove cover
1
0
I
Remove the dust bag from the aspiration feed
2
0
I
Close the bag
3
0
I
13
Cube 03/07-V01
English
- ATTENTION ALWAYS UNPLUG THE POWER SUPPLY CABLE FROM
THE POWER SUPPLY SOCKET AND ALWAYS WEAR
PROTECTION GLOVES AND GOGGLES BEFORE
CARRYING OUT ANY TECHNICAL OR
MAINTENANCE OPERATION
1
English
Gently remove the bag from the central unit.
0
I
2
Place the new bag
ATTENTION: gently move back and forward
the bag so to fit the bag membrane into its slot
0
I
Reassemble the cover, checking that
the central body profile is perfectly
fitted into the cover indent.
3
0
I
Cube 03/07-V01
14
• 6.3 Replacement of the filter cartidge
- ATTENZIONE NEVER USE THE CENTRAL UNIT WITHOUT THE FILTER CARTIDGE.
Englisn
• Lift and remove cover (see previous paragraph)
• Remove dust bag (see previous paragraph)
Lift the filter cartridge from its seat
1
2
Replace the filter cartridge
Push the filter cartridge into its seat, until fixed
4
3
Reassemble dust bag and cover
15
Cube 03/07-V01
• 6.4 Cleaning the filter cartridge
English
- ATTENTIONNEVER USE THE VACUUM UNIT WITHOUT THE FILTER
CARTRIDGE BEFORE CARRYING OUT THE OPERATION
DESCRIBED HEREUNDER, ALWAYS ASSEMBLE A
NEW CARTRIDGE.
The filter cartridge can be washed with
water
ATTENTION: before reassembling the
filter make sure that it is completely
dry
2
Cube 03/07-V01
1
Check if the surface of the cartridge is torn; in this case, the filter cartridge cannot
be used any longer.
16
7 - SERVICING
8 - RECOMMENDED SPARE PARTS
• 8.1 Spare parts list
It is advisable to stock the spare parts more subject to wear. In order to guarantee the best performance of the
central vacuum system, we suggest using only original spare parts.
Please find below a list of spare parts.
Description
Filter cartridge
Quantity
Dust bag
Packing
10 Pieces
1
Spare Part Code
See commercial
brochure
See commercial
brochure
9 - DISMANTLING
• 9.1 General instructions
When dismantling the central suction system, dispose appropriately of used parts or material, which could
endanger human health or well-being as well as the environment if handled improperly.
You must be acquainted with sites/companies authorized to collect and dispose of used parts and materials.
The disposal and/or recycling of any part of the suction system must be carried out in compliance with the legal
regulations in force.
Disposal of Old Electrical & Electronic Equipment (Applicable in the European Union and
other European countries with separate collection systems).
This symbol on the product or on its packaging indicates that this product shall not be treated as
household waste. Instead it shall be handed over to the applicable collection point for the recycling
of electrical and electronic equipment.
To reduce the environmental impact of WEEE (Waste electrical and Electronic Equipment) and
minimize the volume of WEEE entering landfills, please reuse and recycle.
By ensuring this product is disposed of correctly, you will help prevent potential negative consequences for the
environment and human health, which could otherwise be caused by inappropriate waste handling of this product.
The recycling of materials will help to conserve natural resources. For more detailed information about recycling
of this product, please contact your local city office, your household waste disposal service, the shop where
you purchased the product, your local dealer or distributors.
17
Cube 03/07-V01
English
• 7.1 Servicing criteria
It is strictly forbidden to operate on the central suction unit to carry out any maintenance or servicing not
mentioned (and therefore not allowed) in the user manual.
Only qualified providers of the technical assistance service can carry out any maintenance or repair operations.
The guarantee will not apply in case of interventions carried out by non-authorized staff and the manufacturer
cannot be considered responsible for possible injuries to persons and damages to things resulting from this kind
of intervention.
10 - TECHNICAL PROBLEMES
• 10.1Troubleshooting
English
Problem
No air suction in all air inlets
No air suction in only one inlet
Cause
Check for the cause upstream
the central unit
Central unit main switch is on
the "OFF" position
Bring the main switch on to the
"I-ON" position
The central unit is not correctly
connected to the wall template
Check the connection between
the central unit and the plate
The thermal relay of the motor
does not work
Leave the motor cooling down
for a few minutes
The power supply contacts are
cut off or the microswitc of the
inlet does not work
Contact the Assistance Service
Several suction inlets are used
simultaneously
Use only one suction inlet at a time
The hose or the cleaning
accessories are broken/damaged
Check the integrity of the flexible
hose and accessories and
replace them if necessary
The filter cartridge is dirty
Weak air suction
The central vacuum unit keeps
running even when the suction
inlets are closed
Cube 03/07-V01
Solution
No power in the main supply line
Clean or replace the filter cartridge
Top cover damaged or out of place Check the cover integrity
and correct placing
Dust bag out of place or full
Check the correct positioning
of the dust bag. If full, replace it..
The pipes of the suction system
are obstructed
Contact the Assistance Service
Air exhaust piepes are obstructed
Contact the Assistance Service
The micro switch of a single
inlet does not work
Turn off the central unit and
contact the Assistance Service
18