1
11.2 Tours Setup
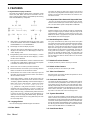
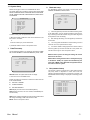
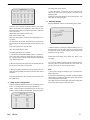
1) Select TOURS SETUP,and then the following list is displayed
on the screen.
TOUR SETUP
========================================
GROUP:01
LENGTH:0007
========================================
STEP
CAM
DWELL
PRE
0001
001
002
010
0002
002
004
020
0003
003
002
088
0004
004
003
099
0005
005
002
100
0006
006
005
000
0007
007
003
011
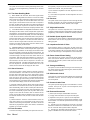
7) Delete: move the joystick to delete the step. Take STEP0005 For
example, press PREV key on the keyboard for more than 2 seconds to delete STEP0005. The 4 steps before the original
STEP0005 remain unchanged, whereas the step numbers after
the original STEP0005 will be changed by decreasing 1.
8)After completing all the above settings, turn the joystick
anticlockwise to return the GROUP number selection menu.
9)Select another GROUP number and repeat above steps to edit
if necessary.Turn the joystick anticlockwise to complete the setting and quit.
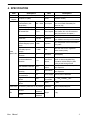
This list is used to edit or program switching sequence. The
system can set and program 30 different switching sequences
each of which has a maximum of 640 steps.Meanwhile, each
step is the video of any camera.The same video is possible to
appear many times in one sequence.
GROUP n: sequence number (1-30 groups).
LENGTH n: the steps in the sequence (1-640 steps).
STEP: step number (1-640 steps).
CAM: camera number of each step (1-32).
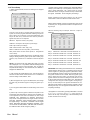
Take the following step for example: there are 7 steps for
GROUP01.
TOUR SETUP
========================================
GROUP:01
LENGTH:0007
========================================
STEP
CAM
DWELL
PRE
0001
001
002
010
0002
002
004
020
0003
003
002
088
0004
004
003
099
0005
005
002
100
0006
006
005
000
0007
007
003
011
DWELL: dwell time of each step video (1-254 seconds).
PRE: preset number of each camera (0-220, 0
current video).
designate the
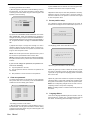
2) After entering the TOURS SETUP menu, the GROUP number
setting is flashing. Move the joystick up and down to select group
number (1-30) ,and then turn it clockwise to enter the sequence
list.
NOTE: If the sequence has been edited (with steps), the steps
will be displayed. If not , only LENGTH 0000 will be displayed (no
steps); now if turning the joystick clockwise, user can add one
step with default setting as 0001 000 000 000; the LENGTH is
displayed as LENGTH 0001.
3) After entering the TOURS SETUP menu, move the joystick up
and down to select STEP number,and then turn it clockwise to
enter the settings of CAM, DWELL, PRE.
4) Move the joystick left or right to the desired item, and change
the value using the numeric keypad or moving the joystick up or
down.
5) Turn the joystick anticlockwise to exit the setting of the current
step.
Step 1: Camera No.1 Dwell Time: 2 seconds Preset No: 10
Step 2: Camera No.2 Dwell Time: 4 seconds Preset No: 20
Step 3: Camera No.3 Dwell Time: 2 seconds Preset No: 88
Step 4: Camera No.4 Dwell Time: 3 seconds Preset No: 99
Step 5: Camera No.5 Dwell Time: 2 seconds Preset No: 100
Step 6: Camera No.6 Dwell Time: 5 seconds Preset No: 0
Step 7: Camera No.7 Dwell Time: 3 seconds Preset No: 011
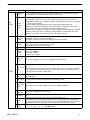
OPERATION: After entering the TOUR SETUP menu, the GROUP
number setting is flashing. Input 1 in the editing area by using the
numeric keypad or by moving the joystick up and down to select,
thus the GROUP01 sequence number is set. Press ENTER or turn
the joystick clockwise to set in details. Move the joystick up and
down to select each step number. For example, firstly turn the
joystick clockwise to access the editing area, and then turn it left
or right to select such items as CAM, DWELL, and PRE,after that
,change their valur using the numeric keypad or moving the joystick up or down,finally turn the joystick anticlockwise to complete and quit this setting.The above operation is applied to set the
following five steps. Turn the joystick anticlockwise to exit after
completing all settings.
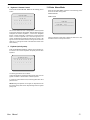
10) Pagedown: It is achieved by pressing PREV/NEXT. The value
6) Insert a step: move the joystick to select the step that is to be
inserted after.Take STEP0005 for example,press the NEXT key
on the keyboard for more than 2 seconds,that is, insert a step
STEP0006 after STEP0005. The STE0005 and the above
steps remain unchanged,whereas the original numbers of all the
steps after STEP0005 will be changed by adding 1 and remain
the original settings . The inserted STEP0006 has the original
data as 0006(STEP), 001(CAM), 001(DWELL), 000(PRE) , so the
user should set the CAM, DWELL, PRE data. After the insertion,
the LENGTH number will be changed by adding 1.
User Manual
of the cursor is autom atically adding to ± 8. If the cursor is not
fixed in the last step of the last page, it will automatically move
forward and flash in the last step.
-18-