1
BATTERY INSTALLATION AND SETUP
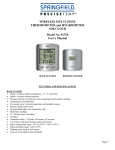
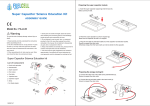
Remove the printed vinyl label from the LCD screen of the base station.
Position the remote sensor near the base station.
Open the battery compartment at the back of the base station.
Remove 2 screws from the back of the remote sensor and open the battery compartment. Slide the channel selector
switch to your desired channel. For the first remote you may select any channel, for additional remotes select any unused
channel.
• Insert (2) AAA batteries into the base station according to the polarity markings. Replace the battery compartment cover.
• The base station will show the current indoor temperature and the RF signal icon
(located to the left of the outdoor
temperature display) will flash for 3 minutes, indicating that the base station is ready to pick up the transmission from the
remote sensor.
• Insert (2) AAA batteries into the remote sensor according to the polarity markings.
• When the OUT temperature reading is displayed on the base station, registration of the remote sensor is complete.
• If you have registered more than one sensor, press the CH (channel) button on the base station to select the remote
channel you want displayed permanently. Or press CH until you see a circular arrow on the base station LCD display
under the channel number. The unit will then auto-scroll, changing from channel to channel every 5 to 10 seconds.
• Occasionally you may experience interference on a particular channel. If your base station has trouble picking up the
remote sensor signal, remove the batteries from the remote sensor, slide the channel selector switch to another unused
channel and re-install the batteries.
• Press the C/F button to display the temperature in °C or °F.
• After setup is complete, replace the battery compartment cover on the remote sensor. If the rubber gasket for the battery
compartment has become dislodged, position it properly to ensure a watertight seal. Re-install 2 screws. Do not over
tighten the screws.
Register the Moisture Sensor When the RF Signal Icon is not Showing
To register a remote sensor when the RF signal icon
is not showing on the base station LCD:
• Press and hold the CHANNEL button for 3-4 seconds until the RF signal icon is showing.
• Install the batteries in the new remote sensor or if the batteries have already been installed, press either the TX or RESET
button, which are located inside the remote sensor battery compartment.
•
•
•
•
Locating the Base Station and Moisture Sensor
• Choose a suitable place for the base station and remote outdoor sensor, within the transmission distance.
• Place the base unit near a window, but away from direct sunlight or sources of heat or air conditioning to ensure accurate
temperature readings.
• Gently push the ground spike into the soil at your desired location. If you feel strong resistance, try another spot as you
may have hit a stone or root. Recommended depths from the surface of the soil to the tip of the spike are 3” for an
average lawn and 4” for the average garden planting. Root depth can vary significantly with different vegetables,
shrubbery or plants. Mature plantings might have a deeper root system and younger plantings a shallower root system.
• For outdoor applications, if possible locate the moisture sensor out of direct sunlight. Exposure to direct sunlight will
affect the outdoor temperature reading.
• The location you choose is critical for maximizing the transmission range. The remote sensor is designed to transmit up
to 100 ft. unimpeded. Transmitting through walls, metal doors and metal framed windows may reduce the transmission
range. To optimize the transmission distance, the remote and base station should be positioned in a location that
minimizes these obstructions. Interference from other sources such as home security systems, wireless doorbells and
wireless home entertainment equipment may interrupt the transmission signal temporarily.
• Bring the remote sensor indoors during periods of snow, ice or extremely cold weather. Under these conditions the sensor
cannot perform its primary function of
soil moisture measurement and this will
prevent damage to the unit.
OPERATING INSTRUCTIONS
SOIL MOISTURE LEVEL
Indoor Temperature
Alert
Your moisture meter will indicate the
d ik
Th l l i h
i
b
C/F
moisture level of the soil at the tip of the
Indicator
hOutdoor
t t thTemperature
b tt
f /thChannel
b
t ti LCD