1
Revision 1.0
WebRelay-QuadTM Users Manual
Section 2: Installation and Setup
Installation consists of connecting WebRelay-QuadTM to an IP network, providing power, configuring via a web
browser, and wiring relay contacts to the device(s) that will be controlled.
2.1 Connection
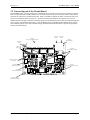
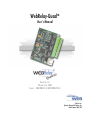
Connection to power and relay contacts is made through the 14-pin connector (provided). The network (and power
on POE units) is connected through the RJ-45 connector on the front of the unit. Pin 1 of the 14-pin connector is the
pin furthest away from the Ethernet connector.
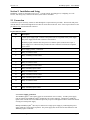
14-pin connector pinout:
Pin
1
Description
+5VDC power supply input. Connect to the positive side of a regulated 5VDC power supply.
The power supply must be able to deliver at least 500mA.
WebRelay-QuadTM units that have the power-over-ethernet option (-POE) do not require a
power supply to be connected to this pin when the unit is connected to an 802.3af compliant
power source.
2
Power supply ground (-) connection.
3
Relay 1 Common Contact
4
Relay 1 Normally Closed Contact
5
Relay 1 Normally Open Contact
6
Relay 2 Common Contact
7
Relay 2 Normally Closed Contact
8
Relay 2 Normally Open Contact
9
Relay 3 Common Contact
10
Relay 3 Normally Closed Contact
11
Relay 3 Normally Open Contact
12
Relay 4 Common Contact
13
Relay 4 Normally Closed Contact
14
Relay 4 Normally Open Contact
2.1.1 Power Supply Connection
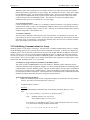
The WebRelay-QuadTM unit requires power for its internal web server circuitry. A 5VDC power supply
must be connected to WebRelay-QuadTM through the relay socket connector. Alternatively, WebRelayQuadTM units with the Power Over Ethernet option may be powered through the Ethernet connection instead
of using an external power supply.
Multiple WebRelay-QuadTM units may be connected to a single power supply by connecting their power
supply inputs to a power supply in parallel. The power supply must be rated for at least 400mA for each
WebRelay-QuadTM connected.
Xytronix Research & Design, Inc.
page 6