1
Revision 1.0
WebRelay-QuadTM Users Manual
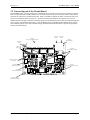
WebRelay-QuadTM units with the Power Over Ethernet option may be connected to an 802.3af compliant
Ethernet port instead of connecting a 5V power supply. This eliminates the need for a 5VDC power supply
because WebRelay-QuadTM is powered through the Ethernet port. The power in the Ethernet port comes
from an 802.3af compliant hub, switch, or power injector which may be located in a utility closet which
could be a distance away from WebRelay-QuadTM. This option is very useful for WebRelay-QuadTM
installations where power is not available for a 5V power supply.
2.1.2 Network Connection
Connect the Ethernet port to a 10 Base T or 10/100 Base T Ethernet connection. This typically connects to
an Ethernet hub, switch, or router. For configuration, WebRelay-QuadTM may be connected directly to the
Ethernet port on a computer using a “crossover” cable. Otherwise for connection through a hub or router, a
standard “straight-thru” cable should be used.
2.1.3 Relay Connection
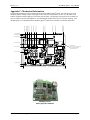
The relay contacts internally connect directly to the 14-pin connector. No internal fuse is provided. The
relay contacts are rated at 1 Amp (24VDC). If the power source connected to the relay contacts can deliver
more than 1 Amp, an external fuse or circuit breaker should be used. Direct access to Common, Normally
Open, and Normally Closed contacts are provided.
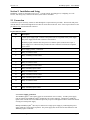
2.2 Establishing Communications for Setup
WebRelay-QuadTM is set up using a web browser. The first task is to establish communications between a computer
and the WebRelay-QuadTM device so that the browser-based configuration can begin. To do this, the computer and
WebRelay-QuadTM must be physically connected to the same network and both must have IP addresses on the same
network. There are two ways to set up the computer and WebRelay-QuadTM so that they are on the same network.
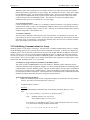
The first way (Option 1) is to change the IP address of WebRelay-QuadTM to an address that is on the same network
as the computer. The second way (Option 2) is to change the IP address of the computer to an address that is on the
same network that WebRelay-QuadTM is set to by default.
2.2.1 Option 1: Assign a temporary IP address to WebRelay-QuadTM
This option is used to TEMPORARILY assign an IP address to WebRelay-QuadTM without the need to
change the IP address of the configuration computer. It is the recommended method for establishing initial
communications. Note that WebRelay-QuadTM will only use this IP address as long as power is maintained.
Once power is lost and restored, WebRelay-QuadTM will use the IP address assigned in the setup page and
not the temporary address assigned here. This means that once communications are established, the desired
IP address should be entered into the network setup page using the browser.
To assign the temporary IP address...
1.
Make sure WebRelay-QuadTM and the configuration computer are connected to the same physical
network. This will not work through routers or gateways.
2.
Assign the address as follows...
Windows:
Open a Command Prompt (on Windows XP, select START, then RUN, then type “cmd”).
Type...
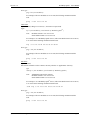
arp -s {new IP address} {serial number of WebRelay-QuadTM }
Note:
IP address format is: xxx.xxx.xxx.xxx
Serial number format is: ss-ss-ss-ss-ss-ss
For example, to set a WebRelay-QuadTM device (with serial number 00-0C-C8-01-00-01 )
to 10.10.10.40 the following command would be used.
arp -s 10.10.10.40 00-0c-c8-01-00-01
Xytronix Research & Design, Inc.
page 7