1
Date: 10.10.2011 1253
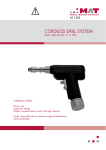
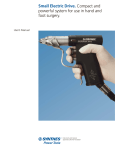
BATTERY DRILL SYSTEM
User Manual
Easy to use
Ergonomic design
Simple, compact battery packs with high capacity
Small, robust drill with an extensive range of attachments
Steam-sterilisable
Intended use:
The Drill 22/4400-00 is used in bone surgery for drilling and tapping, inserting and removing screws and placing Kirschner wires. The drill
has a cannulated drive shaft, so that drill wires can be briefly inserted and fed through the drill (diameter of cannulation: 3.2mm) for
safe working. The tool holders (attachments) permit quick and easy chucking of the required tools. A choice of chucks and holders
(attachments) ensure compatibility with various tool ranges.
Warning!
Only attachments from LEIBINGER GmbH&Co.KG are approved. If attachments from other manufacturers are used, we will not give any
warranty. Mixing of components from other manufacturers is not permitted!
Method of operation:
The electric motor of the Battery Drill System 22/4400-00 is powered by a rechargeable battery and delivers 0-750 rpm with infinitely variable
electronic speed control. The Battery Drill System has triggers labeled R and L. Lower trigger L = double function: main switch and reverse
rotation. Upper trigger R = infinitely variable clockwise rotation. Press both triggers and regulate the speed with the upper trigger. The
Battery Drill System switches off automatically if not used for approx. 5 minutes. If this happens, first press the lower trigger L again and release it. Then press only the upper trigger R for infinitely variable clockwise rotation. For infinitely variable reverse rotation, hold down
both triggers R and L. Specifically, reverse rotation is required for procedures such as releasing bone screws and removing Kirschner
wires. Reverse rotation must be used exclusively for the above-mentioned procedures.
Note:
The Rechargeable Battery 22/4416-00 may not be sterilized, but must be treated with the same care as a surgical instrument, even
though it is not categorized as a medical device.
Preparing for use:
To use the Battery Drill System 22/4400-00, you require the following items:
• Desktop Charger 22/4413-00 or 22/4411-00 (for rapid charging of the Battery 22/4416-00)
• Rechargeable Battery 22/4416-00
• Battery Drill 22/4400-00
• Appropriate attachments for the planned procedure
Before using the Battery Drill System for the first time, please ensure that you have the necessary attachments. You will need the Charger
22/4413-00, 22/4414-00 or 22/4411-00, 22/4412-00 and at least one Battery 22/4415-00 or 22/4416-00.
Note:
Before using the Charger 22/4413-00, 22/4414-00 or 22/4411-00, 22/4412-00, read the accompanying instruction manual.
Functional check:
Before using the Battery Drill System, always test it with the appropriate attachments fitted. Briefly operate the Battery Drill System in both directions of rotation. Ensure that the attached chuck (attachment) and the required tool are properly connected to the Battery Drill System, and
check for correct direction of rotation and smooth running (wobble if not correctly connected). For this functional check, first insert a
charged Battery 22/4415-00 or 22/4416-00 into the Battery Drill System.
2
Cleaning, disinfection, sterilisation:
Cleaning and disinfection
Wipe the surfaces immediately after use with a lint-free cloth moistened with a cleaning agent or disinfectant, or use a disinfectant
spray, to prevent exudates or other contamination from drying on. For this manual wipe--down, use a cleaning agent or disinfectant
approved for surface disinfection under national regulations (DGHM - German Association of Hygiene and Microbiology). Please
follow the manufacturer's instructions for correct dilution, exposure time etc. In the case of heavy contamination, the Battery Drill System
22/4400-00 can also be cleaned under running water (machine cleaning is not permitted).
Note:
Excessive exposure to saline solutions or solutions containing iodine or chloride may cause harmful reactions. Damage may also be
caused by strong acids and alkaline solutions or incorrectly used disinfectants. The quality of the water used for cleaning and rinsing
is another possible factor affecting corrosion or surface damage for the drill and attachments. The Battery Drill System 22/4400-00 must never be
immersed in water or cleaning solutions, or boiled. Always close the cap of the Battery Drill System 22/4400-00
before cleaning!
CAUTION!
Machine cleaning and ultrasonic cleaning in thermo disinfectors are not permitted!
Disinfection is required after every surgical intervention to destroy microorganisms. Today, health professionals and patients are at
constantly increasing risk, so appropriate cleaning and disinfection of these drills and attachments is extremely important. If in doubt,
contact LEIBINGER GmbH&Co.KG and the manufacturer of the disinfectant and cleaning agent used!
Note:
Please observe the "Instructions for use of attachments" (with the exception of the Rechargeable Battery 22/4415-00; 22/4416-00 and Desktop
Charger 22/4413-00, 22/4414-00 or 22/4411-00, 22/4412-00). See the section "Cleaning, disinfection and sterilization of attachments".
Sterilisation:
The Battery Drill System 22/4400-00 with end cap and funnel can be sterilized at up to 2 bar at 134°C in the steam sterilizer. It is advisable to
place the equipment on a cloth or wrap it in a cloth to prevent external or internal damage. To ensure proper sterilization, the end cap
must be screwed onto the Battery Drill System 4-807.
CAUTION!
The Rechargeable Battery 22/4416-00 may never be sterilized because if it is heated to above 65°C, it will be irreparably damaged.
Maintenance:
The Battery Drill System 22/4400-00 itself requires no maintenance. Nevertheless, we recommend annual inspection. This must only be entrusted
to the manufacturer or qualified persons authorized by the manufacturer. The maintenance interval depends on the number of times
the Battery Drill System 22/4400-00 is sterilized.
Note:
The battery compartment of the Battery Drill System 22/4400-00 has a watertight cap that also keeps out germs. You should, therefore, regularly
inspect the sealing ring on the cap and the sealing surface on the handle.
3
Transport and storage conditions:
To prevent damage!
The Battery Drill System 22/4400-00 and attachments must be transported in such a way that no damage can occur. This particularly means ensuring suitable packaging. The same attention must be paid to correct storage. This device must only be kept in a dry, closed place!
Safety instruction: Remove the battery from the Battery Drill System
1. Before sterilization
2. If any fault occurs
3. For transport or storage when not in use
4. Before sending for servicing
If, for any reason, the drill is stored or transported differently, this may result in damage which is not covered by the manufacturer's
or dealer's warranty.
Troubleshooting:
Fault
Cause
Motor runs too slowly or torque
is to low
Lower trigger not pressed
NiMH battery is to weak
Symptom
Recharge Battery 22/4415-00;
22/4416-00
NiMH battery is defective or
depleted
Inspect Charger 22/4413-00,
22/4414-00 or 22/4411-00,
22/4412-00 If necessary, change
the battery
NiMH = nickel-metal hydride
Motor does not run
Motor defective
Control system defective
Trigger switch defective
Gears or friction bearing
defective
Drill cannot be switched from
reverse to clockwise rotation
Rectification
No sound when trigger is
pressed
Send to manufacturer for repair
(R or L trigger pressed)
Remark:
The lower trigger has a double
function: main switch and re- verse
rotation( upper trigger = clockwise
rotation)
Solenoid switch (trigger) defective
Reversing function does not
react
Control system defective
Continuous running or wrong
direction of rotation
Send to manufacturer for repair
Repairs:
LEIBINGER GmbH&Co.KG only accepts responsibility for the safety, reliability and performance of the Battery Drill System 22/4400-00 if
• the Battery Drill System 22/4400-00 is used in compliance with the instructions in the User's Manual.
• installation, additions, adjustments, modifications and repairs are carried out by LEIBINGER GmbH&Co.KG or by qualified persons expressly authorized by LEIBINGER GmbH&Co.KG.
Only original spare parts from LEIBINGER GmbH&Co.KG may be used for repairs.
The operator is required to obtain a list detailing the type and scope of work performed, with the company stamp, date and signature
of the repairer.
SERVICING:
We recommend sending the Battery Drill System 22/4400-00 to LEIBINGER GmbH&Co.KG for servicing after a year or after 120 sterilization cycles
(surgical operations).
WARNING!
All equipment must be cleaned and sterilized before sending for servicing!
4
Technical data:
Type of equipment: Type BF
Mono Block Battery
oscillating Saw 22/4410-00
Voltage
Battery Drill System
22/4400-00
9,6 V
Rated capacity of the Rechargeable Battery 22/4416-00
1.2 Ah
1.2 Ah
Speed, infinitely adjustable
0-750 rpm
0-14000 rpm
Max. torque
4 Nm
Weight incl. battery
1250 grams
1500 grams
Motor output
70 W
70 W
IP66
IP66
9,6 V
Type according to Directive:
EN 60601-1-2
EN 60601-1 / IEC 601-1
MED.UMW
Degree of protection, as per DIN EN 529 =>
Electromagnetic compatibility (EMC):
Manufacturer's certificate:
It is hereby certified that the Battery Drill System 22/4400-00; 22/4410-00 has been tested and is interference-suppressed in compliance with the EMC
provisions of EN60601-1-2. This Battery Drill System 22/4400-00; 22/4410-00 has been tested by our notified body for a Class II.a product with internal
or external energy source, as per 93/42 EEC Annex II.3
Tested in accordance with:
•
•
EN 60601 - 1 / IEC 601-1
EN 60601 - 1 - 2 / DIN EN 60601-1-2
Medical electrical devices:
• EN 1455 (Clinical data: evaluation of evidence on the basis of literature and a clinical trial MEDDEV 2.7.1)
• EN14971 ( Risk analysis: evaluation of risk analysis)
• Evaluation of the check list of Fundamental Requirements for this medical device
Attachments:
Description
Order of Number REF.:
Battery Drill System with end cap
22/4400-00
Medical Device
Mono Block Battery oscillating Saw
22/4410-00
Medical device Medical
Long rechargeable battery, with extension
22/4415-00
device Medical device
Standard rechargeable battery
22/4416-00
Medical device
Funnel for inserting rechargeable battery into Battery Drill System 4-807
22/4417-00
No medical device
Desktop Charger, mono 240/115 V - charging time 60 minutes
22/4413-00; 22/4414-00
No medical device
Desktop Charger, dual 240/115 V - charging time 60 minutes Three-jaw
22/4411-00; 22/4412-00
Medical device
chuck up to dia. 7.0 mm
Round and triangular shanks
With chuck key
22/4534-00
Reduction gears with AO standard clutch, large
Speed 0-150 rpm
22/4450-00
Medical device
Oscillating saw; AO connection
for saw blades AO connection
22/4550-00
Medical device
Sternum saw
22/4455-00
Medical device
Quick-action chuck for drill wires up to dia. 2.5 mm
22/4535-00
Medical device
Protection & guidance sleeve for Kirschner wires
22/4540-00
Medical device
AO chuck
22/4536-00
Medical device
DIN Chuck (Aesculap medullary reamer)
22/4537-00
Medical device
Harris chuck
22/4538-00
Medical device
Hudson chuck
22/4539-00
Medical device
5
Disposal:
LEIBINGER GmbH&Co.KG will dispose of the Battery Drill System 22/4400-00 and attachments (without any environmental contamination) in accordance with the
provisions of MED. UMW
LEIBINGER GmbH&Co.KG will deal with disposal!
Key to the symbols:
Symbol description:
R= clockwise rotation
L= reverse rotation
6
Symbol 1
Observe instructions in User´s Manual!
Symbol 2
Classification Type BF
Symbol 3
Recyclable
Symbol 4
CE 1253 in accordance with Directive 93/42 EEC
Symbol 5
Protection class II device
OVERVIEW:
1
6. Clockwise rotation
7. Main switch and reverse rotation
R
L
2
1. Battery Drill
2. Battery Compartment
3. Rechargeable Battery
4. End cap
5. Chuck with Drill Bit
6. Clockwise Rotation
7. Main switch and reverse Rotation
3
4
Important
To obtain full power from the drill during the surgical operation, always use freshly charged batteries.
Preparation
Step 1. Open the end cap (4) by turning in the direction indicated by the arrow
Step 2. Insert the rechargeable battery (3) into the battery compartment (2) in the direction shown by the arrow, at an angle of not
more than 10° to 15°. (insert gently to avoid damaging the contacts)
Step 3. Replace the end cap (4) and close it by turning in the direction indicated by the arrow
Step 4. Test the drill to ensure it operates properly (see "Method of operation" and "Functional check" on page 2.)
7
Overview of attachments:
NOTE:
All the clutches and chucks for the Battery Drill System are mounted in the same way!
• Step 1. Slide the clutch collar (1) in the direction indicated by the arrow
• Slide the chuck (2) onto the shaft (3) as far as it will go
• Release the chuck collar (1)
• Turn the chuck slightly until it engages in the shaft (3)
• Check the connection
• Hold the chuck (4) with your left hand and pull it away from the drill
Fault
Clutch does not engage in shaft
Rectification
If due to dirt, clean the clutch;
if due to damage, send to Customer Service
<=>
1
3
4
2
8
ATTACHMENTS FOR BATTERY DRILL SYSTEM 4-807
( GB )
Overview of attachments:
Order number
Description:
1.) 22/4415-00
Long rechargeable battery with extension for Battery Drill System 22/4400-00 increased power output
2.) 22/4416-00
Standard rechargeable battery
3.) 22/4417-00
Funnel for inserting Rechargeable Battery 22/4415-00 or 22/4416-00 into Battery Drill System 22/4400-00 (to avoid
contamination
of the Battery Drill System. If it is not used, there may be a loss of sterility)
4.) 22/4413-00
22/4414-00
Desktop Charger, mono 240V and 115V: charging time 60 minutes (Please state required voltage when
ordering)
5.) 22/4411-00
22/4412-00
Desktop Charger, dual 240V and 115V: charging time 60 minutes (Please state required voltage when
ordering)
6.) 22/4534-00
Three-jaw chuck, 0.5 mm to 7.0 mm capacity for round and triangular shanks, incl. chuck key
7.) 22/4450-00
Reduction gears with AO standard clutch, large. Speed 0-150 rpm
8.) 22/4550-00
Oscillating saw with AO connection for saw blades
9.) 22/4455-00
Sternum saw
10.) 22/4535-00
Quick-action chuck for Kirschner wires, dia. 0.5 to 3.0 mm
11.) 22/4540-00
Protection & guidance sleeve for Kirschner wires (screws onto Battery Drill System 22/4400-00 )
12.) 22/4536-00
Chuck for AO and Aesculap attachments, Standard small
13.) 22/4537-00
Chuck for DIN attachments (Aesculap medullary reamer)
14.) 22/4538-00
Harris chuck
15.) 22/4539-00
Hudson chuck
9
Cleaning, disinfection and sterilization of attachments:
(except Rechargeable Battery 22/4415-00; 22/4416-00 and Desktop Charger 22/4413-00, 22/4414-00 or 22/4411-00, 22/4412-00 because these
products are not categorized as
medical devices )
CLEANING AND DISINFECTION:
CARE AND MAINTENANCE
Care and maintenance are vital to keep the attachments in good condition and fully functional!
Causes of corrosion with stainless steel used for instruments.
Corrosion is damage or where that can be caused by a chemical reaction, e.g. due to:
1.) Damaged surfaces
2.) The effect of surgical exudates: blood, suppuration or bodily secretions in prolonged contact with instruments.
3.) Excessive exposure to certain solutions: saline and iodine solutions, chloride and strong acids, alkaline solutions and incorrectly
used disinfectants
4.) Poor water quality when cleaning, steam-sterilizing or rinsing instruments and attachments: e.g. due to rusty water pipes or
penetration of rust and metal particles into steam sterilizers.
5.) Inadequate maintenance of instruments and accessories: If rust forms, it may be transferred to other instruments and
attachments (avoid contact at all costs because it is very dangerous for sterilization).
Constant use of instruments and attachments constitutes natural wear, which shortens the service life correspondingly.
Instruments and attachments that are used often should be replaced at regular intervals.
MEASURES TO PREVENT CORROSION:
1.) Careful laying out of correctly packaged and sterilized instruments before the operation: selection according to the type of i n tervention. Always ensure that the outer packaging is intact and the expiry date has not elapsed.
2.) Check the sterilization indicator inside the tray to ensure that the contents have been sterilized.
3.) Arrange the instruments and attachments according to the sequence of use during the operation: if any instruments are not
needed, leave them in the tray; only prepare instruments and attachments a short time before the operation.
4.) Remove blood and other exudates from instruments and attachments during the operation: replace instruments and attachments. in their assigned place after use.
5.) Flush through cannulated instruments to prevent blood and bone powder from drying on.
6.) Use Ringer's lactate solution or saline solution to clean instruments and accessories, but do not immerse them in solutions.
7.) Start cleaning immediately after the operation: instruments and attachments used during the operation are regarded as contaminated. Instruments used on patients with possible infections must be similarly disposed of; wipe off any blood, bone powder and
tissue remnants.
8.) Clean instruments in a designated place within the surgery department. If the instruments are sent directly to the central sterilization area, first cover them up to prevent any risk of contamination for staff or the environment. Wear protective clothing when
disposing of contaminated instruments and attachments!
DISMANTLING FOR CLEANING:
Instruments and attachments with removable parts should be dismantled. Keep all screws, nuts, bolts and other small parts together,
ensuring it is clear which instrument they belong to. The persons responsible for dismantling and reassembling instruments should
be appropriately trained. Clean the individual parts to remove any remaining blood or bone powder and prevent drying on during
sterilization and consequent irreparable damage.
DISINFECTION:
When using chemical disinfectants, the manufacturer's instructions must be strictly followed: but always dilute solutions before use.
For thermal disinfection with hot water, the water must be free of foreign bodies.
Please note: Instruments and attachments made of anodized aluminium should not come into contact with certain disinfectant solutions or cleaning agents, so always check the solution before use to avoid subjecting the metal to a chemical reaction.
CLEANING:
Whether cleaning mechanically or manually, check carefully which cleaning agent is used with which
method. Always observe the instructions for dilution and use. Recommended pH: between 7.0 and 8.5.
10
1. MECHANICAL CLEANING:
Mechanical cleaning is the preferred method. Strictly follow the instructions supplied by the manufacturer of the cleaning machine.
Prepare the instruments and attachments for mechanical cleaning. Multipart instruments and attachments that can be dismantled
must be taken apart or opened for cleaning. All tips and delicate parts should be cleaned manually. Do not overfill wire trays; place
heavy parts on the bottom of the tray. Heavily contaminated parts (cannulated instruments and attachments) may need soaking and
flushing through before they are put in the washing machine.
2. ULTRASONIC CLEANING (classified as a type of mechanical cleaning):
Remove excess exudates before placing instruments or attachments in the ultrasonic bath. Ultrasonic baths are recommended, e.g.
for taps or instruments and attachments with deep grooves. Ultrasonic cleaning must be followed by normal rinsing.
3. MANUAL CLEANING:
Requires various nylon brushes, blowing tube and nozzle, clean compressed air device, cleaning agents and solvents as for mechanical cleaning. Observe the manufacturer's instructions for cleaning additives! Do not use steel wool or wire brushes. Treat anodized
aluminium with extreme care. Any residues remaining after brushing must be removed completely.
4. DRYING:
Every instrument and attachment must be completely dried inside and outside to prevent rust formation and malfunctioning. A compressed air system can be used for hollow parts and hinges. Please note: If the instruments and attachments are to be reused immediately and sterilized without packaging, then drying is not necessary.
5. LUBRICATION:
The joints and all moving parts of instruments and attachments must be cleaned and lubricated after use. Only use biological oils and
acid-free lubricants: pure cooking oil is recommended. If special instrument oil solutions are used, the instruments and attachments
can be immersed for a certain period of time. With some instrument washing machines, the lubrication process is incorporated. No
rinsing is required after lubrication. Remove any excess oil before packaging the instruments and attachments!
STERILISATION:
Clean and dry instruments immediately after use. Do not use clean agents or disinfectants with strongly acid or alkaline additives (e.g.
soda, sodium hydroxide solution or acids)! The gentlest cleaning method is machine (mechanical) cleaning, as already described in
the User´s Manual.
ONLY STEAM-STERILISE INSTRUMENTS AND ATTACHMENTS!
TECHNICAL SPECIFICATIONS FOR STERILISATION
Before operation, check the instruments and attachments are in perfect condition and functioning correctly!
STERILISER:
Steam autoclave, temperature = 121°C to 123°C; pressure = 15 to17 psi (1 to 1.2 bar); at least 30 minutes in packaged state. At a
temperature of 131°C to 133°C and a pressure of 15 to17 psi (1 to 1.2 bar), the required exposure time decreases to approx. 20
minutes
Autoclave with prevacuum: during the prevacuum phase, the air is evacuated from the chamber before the steam flows in. Standard
cycle for packaged objects = 132°C to 135°C at 27 to 30 psi ( 2 to 3 bar ) with a minimum exposure time of 4 to 10 minutes.
IMPORTANT INFORMATION:
Before using or sterilising any instruments, always check that all parts are functioning correctly.
IF IT IS SHOWN THAT THIS USER´S MANUAL HAS NOT BEEN ADHERED TO, ALL WARRANTY RIGHTS SHALL LAPSE
11
Instructions for use of attachments: Desktop Chargers 4-814/4-816
Version: 28.04.2008
1. Main switch/pilot lamp <=> Switch is alight when the charger is ON
2. Charge indicator lamp
<=> Glows steady red when a depleted RECHARGEABLE BATTERY 22/4415-00; 22/4416-00 is being charged
2. Charge indicator lamp
<=> Glows green when RECHARGEABLE BATTERY 22/4415-00; 22/4416-00 is fully charged
3. Charging compartment <=> For inserting the RECHARGEABLE BATTERY 22/4415-00; 22/4416-00 in the direction indicated by the arrow
4. Battery
<=> Rechargeable battery 22/4415-00; 22/4416-00
4
1
2
3
Preparing for use:
Step 1. Plug in power plug at the socket; switch on at main switch (1); triple-function lamp (2) glows red ( see description in Step 3).
Step 2. Insert RECHARGEABLE BATTERY 22/4415-00; 22/4416-00 (4) into the charging compartment (3) in the direction of the arrow.
Step 3. The charge indicator lamp (2) must first flash red for 20 seconds if the BATTERY 22/4415-00; 22/4416-00 is depleted. After approx.
20 seconds, it glows steady red to indicate that the battery is being charged. When the battery is fully charged, the lamp changes
to green. (4) The charging time for a depleted BATTERY 22/4415-00; 22/4416-00 (4) is approx. 60 minutes. The lamp glows green to indicate
when charging is complete. During charging, the Charger 22/4413-00, 22/4414-00 or 22/4411-00, 22/4412-00 and the BATTERY 22/4415-00;
22/4416-00 warm up, but this does not indicate a fault. As soon as the BATTERY 22/4415-00; 22/4416-00 is fully charged, the lamp glows green (2)
Chargers 22/4413-00, 22/4414-00 or 22/4411-00, 22/4412-00 switch off automatically when the BATTERY 22/4415-00; 22/4416-00 is fully charged.
This means that you can leave the BATTERY 22/4415-00; 22/4416-00 in the operational Charger 22/4413-00, 22/4414-00 or 22/4411-00, 22/4412-00
for a prolonged period so that it is always charged to full capacity without any risk of overcharging
The BATTERY 22/4415-00; 22/4416-00 should be checked and recharged before use!
Fault:
After inserting BATTERY 22/4415-00; 22/4416-00 (4) in the charging compartment (3), the charge indicator lamp (2) on the Charger 22/4413-00,
22/4414-00 or 22/4411-00, 22/4412-00
fails to light up.
FAULT RECTIFICATION:
Turn the BATTERY 22/4415-00; 22/4416-00 (4) slightly in the charging compartment (3), the charge indicator lamp (2) on the Charger 22/4413-00,
22/4414-00 or 22/4411-00, 22/4412-00
fails to light up.
NOTE AND WARNING:
if there is a power fialure, neither of the pilot lamps (1) amd (2) will glow.
Chargers 22/4413-00, 22/4414-00 or 22/4411-00, 22/4412-00 and BATTERIES 22/4415-00; 22/4416-00 are not medical devices, and therefore
should only be used in closed rooms outside the operating theatre. Only use in rooms that are free of dust and moisture.
IMPORTANT: SAFETY INSTRUCTION!
Only store in the original packaging, in a dry, closed room. Never sterilise the BATTERY 4-809/4-810 or the Charger
22/4413-00, 22/4414-00 or 22/4411-00, 22/4412-00. Only use compatible BATTERIES 22/4415-00; 22/4416-00 from LEIBINGER GmbH&Co.KG.
Combination with other makes is forbidden. Do not immerse Charger 22/4413-00, 22/4414-00 or 22/4411-00, 22/4412-00 or
BATTERY 22/4415-00; 22/4416-00 in liquid.
12
Care and maintenance:
Unplug from the power supply before cleaning. Use a damp cloth for cleaning the Charger 22/4413-00, 22/4414-00 or 22/4411-00, 22/4412-00 and
BATTERY 22/4415-00; 22/4416-00.
Do not use cleaning agents. Make sure that the contacts of BATTERY 22/4415-00; 22/4416-00 are kept free of moisture. Similarly, protect the
charging compartment (3) of the Charger 22/4413-00, 22/4414-00 or 22/4411-00, 22/4412-00 against moisture. Never immerse in liquid or clean under
flowing water!
Repair:
LEIBINGER GmbH&Co.KG only accepts responsibility for the safety, reliability and performance of the Charger 22/4413-00, 22/4414-00 or 22/4411-00,
22/4412-00 and BATTERY 22/4415-00; 22/4416-00 if:
• the Charger 22/4413-00, 22/4414-00 or 22/4411-00, 22/4412-00 and BATTERY 22/4415-00; 22/4416-00 are used in compliance with the instructions
in the User's Manual.
• installation, additions, adjustments, modifications and repairs are carried out by LEIBINGER GmbH&Co.KG or by qualified persons expressly authorised by LEIBINGER GmbH&Co.KG.
Only original spare parts from LEIBINGER GmbH&Co.KG may be used for repairs.
The operator is required to obtain a list detailing the type and scope of work performed, with the company stamp, date and signature
of the repairer.
WARNING!
All equipment must be cleaned before sending for servicing!
Transport and storage conditions:
To prevent damage!
The Charger 22/4413-00, 22/4414-00 or 22/4411-00, 22/4412-00 and BATTERY 22/4415-00; 22/4416-00 must be transported in the aluminium case
provided, which has a special foam
insert. The same applies for correct storage of this device. This device must only be kept in a dry, closed place!
Safety instruction:
1. If any fault occurs
2. For transport or storage when not in use
3. Before sending for servicing
If, for any reason, the device is stored or transported differently, this may result in damage which is not covered by the manufacturer's
or dealer's warranty.
Transport and storage conditions:
Electromagnetic compatibility (EMC):
Manufacturer's certificate issued by LEIBINGER GmbH&Co.KG:
It is hereby certified that the Chargers 22/4413-00, 22/4414-00 or 22/4411-00, 22/4412-00 have been tested and are interference-suppressed in
compliance with the EMC provisions of EN60601-1-2:1993. These Chargers 22/4413-00, 22/4414-00 or 22/4411-00, 22/4412-00 have been tested in
compliance with EN60335-2-29/ A11:1998 and conform to Germany's equipment safety regulations (GSG) for placing into commerce.
13
Technical Data:
Type of equipment:
Chargers 22/4413-00, 22/4414-00 or 22/4411-00, 22/4412-00
Rated voltage
240 V and 115 V
Rated frequency
50 HZ
Rated input
14 VA
Rated output voltage
12 V
Rated output current
1100 mA max.
Protection class
II
Degree of protection, as per DIN EN 529
IPX0
Function:
The Chargers 22/4413-00, 22/4414-00 or 22/4411-00, 22/4412-00 are controlled and monitored by a microcontroller. Irrespective of the charge level of
the battery, the controller measures the momentary capacity, and controls the charging process.
14
Notice:
15