1
349320 - 349321
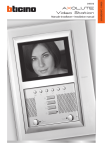
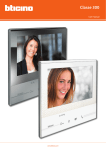
AXOLUTE
Nighter & Whice
Installation manual
09/09-01 PC
Contents
1 Introduction
4
1.1 Warnings and tips
4
1.2 Package content
4
2 Description 5
2.1 Main functions
5
2.2 Front view
6
2.3 Video door entry function keys 7
2.4 Navigation keys
7
2.5 Rear view
8
3 Installation
3.1 Wall installation with metal base supplied
9
9
4 Quick configuration
10
5 Advanced configuration
13
5.1 Flexibility in composition
13
5.2 Customisation of texts
14
5.3 Other functionalities
15
5.4 Connection to the pc
16
6 Settings 6.1 Configuration menu
17
18
6.1.1 Options
19
6.1.2 Handset configuration
20
6.1.3 Reset
21
7 Trouble shooting
7.1 Push to talk mode
8 Appendix
22
23
24
3
Installation manual
AXOLUTE
Nighter & Whice
1 Introduction
1.1 Warnings and tips
Before proceeding with the installation read this manual carefully. The guarantee is automatically
cancelled in the case of negligence, incorrect use and tampering by unauthorised people.
Thus the Axolute Video Station:
- must only be installed indoors;
- must not be exposed to drips or splashes of water;
- must only be used on BTicino digital 2-wire video door entry systems.
1.2 Package content
The package contains:
• Axolute Video Station
• Metal base for wall installation
• Installation manual
• User manual
• CD
• Cleaning cloth
4
2 Description
2.1 Main functions
The BTicino Axolute Video Station is the evolution of the video handset which can be used in managing the home system. As well as all the 2-wire digital door entry functions, in systems combined
with the My Home multimedia system, Axolute Video Station can manage the home: from security
to well-being to entertainment (display of the alarm state, sound system, temperature setting in
single rooms) with sound system amplifier function.
It has an 8" colour LCD screen, audio stereo loudspeakers, icon menu, capacitive keypad with blue
LED backlit keys for navigation in the menu and video door entry function keys.
Combinations
Communication:
Allows access via the main menu page to a set of predefined video door entry function keys:
INTERCOM – intercom call to an audio handset
CAMERA – direct activation of the camera associated to the entrance panel or separate for video
CCTV
ACTIVATION – direct activation of the actuator associated to the entrance panel
SEQUENTIAL SWITCHING – sequential activation of the cameras in the system
Scenarios:
Can activate the first five scenarios saved in the scenario module.
Alarms:
Can display the divided zones, the system state and the last three alarms received with information
on them (date, time and type of alarm).
Sound system:
Can manage the BTicino digital sound system: cycle the sources and the tune/station of the active
source and adjust the volume of the local amplifier (if locally supplied).
Temperature control:
Can monitor the state of the temperature control unit, display and adjust the temperature (manual) in the single zones of the home and set the Protection/Week/Off state.
Multimedia:
Can access and manage the multimedia system.
5
Installation manual
AXOLUTE
Nighter & Whice
2 Description
2.2 Front view
1
2
3
4
1 -8" colour LCD screen
2 -Microphone
3 -Navigation keys
4 -Led and Video door entry function keys
6
2.3 Video door entry function keys
Mute
Disables/enables the microphone during a sound connection. Activating the Mute during
the conversation the connection key LED turns red.
Activation Entrance Panel/Cycling
Activates the switching ON of the associated Entrance Panel and cycles any other Entrance
Panels/cameras.
Staircase lights
Activates the staircase light relay.
Call Exclusion
Disables/enables the call bell. If the bell is disabled, the exclusion LED lights up and the
Connection LED signals the call (flashing)
Door lock key
In connection opens the door lock of the connected Entrance Panel, at rest that of
the associated Entrance Panel.
The LED signals its operation.
Connection key
Activates/deactivates the connection. If a call is received the LED flashes, during the
conversation it shines steadily.
At rest activates the paging function (if enabled).
2.4 Navigation keys
key
Gives access to the menu; confirms the selection made.
keys
Inside the menus selects the previous or next item.
keys
Inside the menus change the value set.
In audio/video connection allow quick access to the audio/video adjustments.
key
Returns to the previous screen. If on the first screen switches the display OFF.
7
Installation manual
AXOLUTE
Nighter & Whice
2 Description
2.5 Rear view
1
7
2
6
5
3
3
3
4
1 -Configurator socket
2 -Mini-USB connector for connection to the PC
3 -Loudspeakers to play voice and stereo sound
4 -Screw to fasten the Video Station to the metal base
5 -Connector for extra power supply
6 -Connector for connection of the BTicino 2-wire digital system BUS
7 -Stretch end ON/OFF microswitch
8
3
3 Installation
3.1 Wall installation with metal base supplied
To fasten the base use screw anchors and screws of the correct size.
Do not fasten the base directly to the flush-mounted box.
1
2
3
4
5
346000
BUS
2
1
230 Vac
After making all the connections fasten
the Axolute Video Station to the base
being careful to arrange the wires so
that they are not damaged.
6
7
8
Make sure that the nut
is positioned at the
lower end.
To complete the installation turn the fastening screw
in the lower part of the Video Station anticlockwise.
9
Installation manual
AXOLUTE
Nighter & Whice
4 Quick configuration
Quick configuration by means of M configurator
Note:If the apartment has the 2-wire apartment interface item 346850 the Axolute Video Station
should be configured using Advanced Configuration
The quick configuration is recommended for standard video door entry systems where no special
functions are required and short installation times are important.
In this case the device is configured physically, inserting the configurators in sockets N, P and M.
The configurator in M defines the video door entry mode corresponding to a predefined set of five
video door entry functions.
CAUTION
If the device is configured by configurations the configuration CANNOT BE EDITED from the menu
N = (in double figures) address of the device in the video door entry system
P = address of the Entrance Panel associated with the device
M = mode (defines the main menu page and thus the functions which can be used)
10
Selection of mode M
The main menu page will be made up of a set of predefined video door entry functions which can
be selected with M = 0 – 6.
M= 0
M= 4
INTERCOMMUNICATING I
M= 1
CAMERA I
M= 5
CAMERA I
M= 2
ACTIVATION I
M= 6
ACTIVATION I
M= 3
CAMERA I
INTERCOMMUNICATING I
The main menu page always has
the five selected functions plus
SETTINGS which goes to a page
dedicated to the device settings
and configurations.
11
Installation manual
AXOLUTE
Nighter & Whice
4 Quick configuration
IINTERCOMMUNICATING: intercommunicating call to the Handset with address N same
as the number indicated by the icon selected. (e.g.: INTERCOMMUNICATING 4 intercommunicating call address to the Handset with N = 4)
CAMERA: direct activation of the camera with the same address as the associated Entrance
Panel increased by a number equal to that indicated by the icon selected. (e.g. CAMERA 2
activates the camera with address P+2)
ACTIVATION: activation of the actuator with the same address as the associated Entrance
Panel increased by a number equal to that indicated by the icon selected.
(e.g. ACTIVATION 3 opening of the Entrance Panel door lock (configured with P+3) directly
without the call or activation of actuator item 346200 (configured with P+3 and MOD=5)
or activation of actuator item 346230 (configured with P+3)
CYCLE CAMERAS: cyclically activates the cameras in the system starting from the associated Entrance Panel P (just one complete cycle is performed)
Completing the Quick Configuration
After the Axolute Video Station has been configured and switched on the red “connection LED”
flashes, to indicate that the configuration must be finished.
Press any key, the Axolute Video Station display shows the language selection menu.
LANGUAGE SELECT.
LANGUAGE: -ENGLISH+
>CONFIRM
Select the language required from those offered
Select CONFIRM
Press OK to confirm the selection
The display shows a mask summarising the configuration
made
SUMMARY CONFIG.
ADDRESS N : 01
ADDRESS P : 02
MODE M : 06
>CONFIGURATION END
12
Press OK to confirm the configuration
The display and the connection LED go out.
The Axolute Video Station is ready for normal working.
5 Advanced configuration
Configuration from PC by means of the TiAxoluteNighterAndWhiceStation software in the CD supplied lets you configure the main menu page without being limited to a predefined set of functions. The type, parameters and text of each function can be customised.
• Greater flexibility in composing the menu.
• Customisation of texts.
• Other ways of managing the house-automation systems
5.1 Flexibility in composition
• the first page can be written with the functions and the house-automation systems which
your system effectively has
• the call to a second-level page containing mixed functions can be entered
PERSONAL
BEDROOM
• enter the PROFESSIONAL STUDIO, HANDSFREE, PAGING and MULTIMEDIA commands, which
otherwise can only be called from the SETTINGS menu, in the first page or in a second level
page.
PERSONAL
PAGING
13
Installation manual
AXOLUTE
Nighter & Whice
5 Advanced configuration
5.2 Customisation of texts
The items in the Axolute Video Station menu (e.g. SCENARIO 4 = Night SCEN,
COMMUNICATION = Intercom in the home) can be customised.
The following are also possible for the following systems:
ALARMS
• customise the messages associating a descriptive text to the zone where the alarm comes from
• change the channel combination - type of alarm.
BEDROOM
10/06 10:20
SOUND SYSTEM
• customise the description of 6 Rooms/Amplification sound points
• customise the description of 4 sources
DRAWING
CD
TEMPERATURE CONTROL
• customise the description of 10 system zones
KITCHEN
20.5 °C
22.5 (+2)
18.5 °C
14
5.3 Other functionalities
SCENARIOS and COMMUNICATION
More than one call for scenarios and communication can be added in the first page.
In this way up to 30 scenario or communication functions can be entered
COMMUNICATION
INTERCOMMUNICATING I
SCENARIO I
In the example at the side 12 communication functions and 18 scenarios can be entered.
SOUND SYSTEM
• can select and control up to 6 Rooms/Amplification sound points, specifying the address
wanted
• can select and control up to 4 Sources, specifying the address wanted
TEMPERATURE CONTROL
• select and control up to 10 system zones, specifying the address wanted
15
Installation manual
AXOLUTE
Nighter & Whice
5 Advanced configuration
5.4 Connection to the pc
To transfer the configuration made with the TiAxoluteNighterAndWhiceStation software or update the firmware connect to the Axolute Video Station to the PC using USB-miniUSB cable.
BUS
In order for the communication to occur, the Axolute Video Station must be powered and not
physically configured.
16
6 Settings
After configuring the Axolute Video Station, you can view and modify the configuration settings
in the SETTINGS menu.
SETTINGS
CONFIGURATION
SETTINGS
ADJUSTMENT
SERVICES
MESSAGGES
For information about these
menus please consult the User
manual in the CD enclosed.
BELLS
INFORMATION
! WARNING !
CONFIGURATION
AREA RESERVED FOR
CONFIGURATION OF
THE DEVICE
OPTIONS
PARAMETER MODE
H CONFIGURATION
RESET
17
Installation manual
AXOLUTE
Nighter & Whice
6 Settings
Access to the Configuration menu
Select SETTINGS
Press OK to confirm
SETTINGS
6.1 Configuration menu
Select CONFIGURATION
Press OK to confirm
CONFIGURATION
A WARNING message is displayed
! WARNING !
AREA RESERVED FOR
CONFIGURATION OF THE
DEVICE
>QUIT
CONTINUE
! WARNING !
AREA RESERVED FOR
CONFIGURATION OF THE
DEVICE
QUIT
>CONTINUE
18
Select QUIT
Press OK to quit
Select CONTINUE
Press OK to confirm
6.1.1 Options
On selecting OPTIONS access is possible to the following system settings.
>OPTIONS
PARAMETER MODE
H CONFIGURATION
RESET
>SLAVE
<NO>
MASTER CLOCK <NO>
PAGING <NO>
DEFAULT
Select OPTIONS
Press OK to confirm
Select (e.g.: SLAVE)
Select <NO>/<YES>
SLAVE – the Video Station configured <YES> allows the
installation of several Video stations configured with
the same N address (max. 3: 1 MASTER – 2 SLAVE).
MASTER CLOCK – the Video Station configured <YES>
periodically sends the devices on the system a frame to
synchronise the time
PAGING – the Video Station configured <YES> is enabled to transmit the paging call.
Press C to return to the next page
SLAVE
<NO>
MASTER CLOCK <NO>
PAGING <NO>
>DEFAULT
Select DEFAULT to return to the factory settings
(all <NO>)
Press OK to confirm
19
Installation manual
AXOLUTE
Nighter & Whice
6 Settings
6.1.2 Handset configuration
On selecting H CONFIGURATION the address (N) of the Axolute Video Station and/or the associated Entrance Panel (P) can be edited.
OPTIONS
PARAMETER MODE
>H CONFIGURATION
RESET
H CONFIGURATION >ADDRESS N :01
ADDRESS P :00
CONFIRM
Select H CONFIGURATION
Press OK to confirm
Select ADDRESS (N) and/or (P)
Set the address
Select CONFIRM
Press OK to confirm
H CONFIGURATION
ADDRESS N :01
ADDRESS P :00
>CONFIRM
20
Select CONFIRM
Press OK to confirm
6.1.3 Reset
Selecting RESET cancels all the data and returns the Axolute Video Station to the factory settings.
OPTIONS
PARAMETER MODE
H CONFIGURATION
>RESET
Select RESET
Press OK to confirm
The following message is displayed
CANCEL THE
CONFIGURATION OF THE
DEVICE ?
>QUIT
CONTINUE
CANCEL THE
CONFIGURATION OF THE
DEVICE ?
QUIT
>CONTINUE
Press OK to quit the menu
Press C to return to the previous page
Select CONTINUE to cancel the device configuration
Press OK to confirm
21
Installation manual
AXOLUTE
Nighter & Whice
9
MEMO CARD
7 Trouble shooting
PROBLEM
SOLUTION
- check that the handset and entrance panel have
been correctly wired and configured (must have
On pressing the Entrance panel Activation/Cycling
the same P address);
( ) key no picture appears
- the audio/video channel may be busy, wait for it
to become free and try again.
On pressing the Door lock (
mand is not performed
) key the com-
- check that the handset and entrance panel have
been correctly wired and configured (must have
the same P address).
On pressing the OK key the menu does not switch - the audio/video channel is busy, wait for it to beon and the handset gives a busy sound
come free and try again.
When called the handset does not ring
- check that the handset and entrance panel have
been correctly wired and configured;
- check that the “Call Exclusion” function is not active or that the bell volume has not been zeroed.
When called the handset rings but the monitor
- check that it has not been set as “Slave”.
does not switch on
At the entrance panel it is difficult to hear the
caller
- check that the handset is not on “Mute”;
- reduce the volume of the entrance panel microphone;
- you can communicate in PUSH TO TALK mode (see
description on next page).
At the handset it is difficult to hear the caller
- check the volume setting on the Axolute Video
Station;
- make sure that there are no strong noise sources
near the Axolute Video Station;
- you can communicate in PUSH TO TALK mode (see
description on next page).
22
7.1 Push to talk mode
Receiving a call from the entrance panel.
Press the Connection key to answer the call.
The LED is ON.
During the conversation you can activate the
PUSH TO TALK function.
Press the Connection key for at least 2 seconds to talk to the entrance panel.
The LED remains ON.
Release the key to hear from the entrance
panel.
The LED becomes red.
To end the connection press the connection
key briefly.
The LED goes out.
23
Installation manual
AXOLUTE
Nighter & Whice
8 Appendix
TECHNICAL DATA
Power supply
from SCS bus: 18 – 28 V
Absorption (Max)
600 mA (when there is no audio signal)
Operating temperature
0 – 40 °C
24
Notes
25
Installation manual
AXOLUTE
Nighter & Whice
Notes
26
BTicino SpA
Via Messina, 38
20154 Milano - Italy
www.bticino.com
BTicino SpA reserves at any time the right to modify the contents of this booklet and to communicate,
in any form and modality, the changes brought to the same.