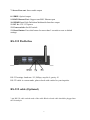
1
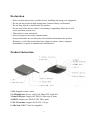
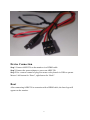
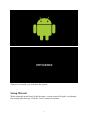
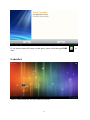
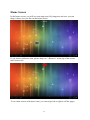
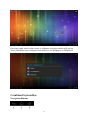
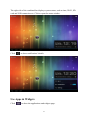
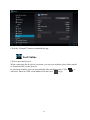
ProDVX Europe BV Model: ABPC 520 Android Box User Manual Version: 0.3 Date: 2013/09/30 Content Declaration ............................................................................................................................ 2 Product Instruction ................................................................................................................ 2 RS-232 Pin Define……………………….………………………………………………….3 RS-232 Cable (optional)..……………….………………………………………………….3 Device Connection ................................................................................................................ 4 Boot ....................................................................................................................................... 4 Setup Wizard ......................................................................................................................... 5 Launcher ...............................................................................................................................11 Home Screen ....................................................................................................................... 12 Combined System Bar ......................................................................................................... 13 Use Apps & Widgets ........................................................................................................... 15 Settings ................................................................................................................................ 17 Wi-Fi .............................................................................................................................. 18 Ethernet (Wired Network) .............................................................................................. 18 More Network Settings .................................................................................................. 18 Sound .............................................................................................................................. 18 Display ........................................................................................................................... 18 Storage ............................................................................................................................ 19 Apps ............................................................................................................................... 19 Location service ............................................................................................................. 19 Security........................................................................................................................... 19 Language & input ........................................................................................................... 19 Virtual Keyboard ............................................................................................................ 19 Switch Input Methods .................................................................................................... 20 Backup & reset ............................................................................................................... 20 Date & time .................................................................................................................... 21 Accessibility ................................................................................................................... 21 Developer options .......................................................................................................... 21 About MediaBox ............................................................................................................ 21 Browse Files ........................................................................................................................ 21 Install & Uninstall Apps ...................................................................................................... 22 Install Apps ..................................................................................................................... 22 Uninstall Apps ................................................................................................................ 23 Surf Online .......................................................................................................................... 24 Play Media........................................................................................................................... 25 Upgrade System .................................................................................................................. 25 Remote Control ................................................................................................................... 27 Q&A .................................................................................................................................... 27 Specification ........................................................................................................................ 28 1 Declaration Please read the instructions carefully before installing and using your equipment. Do not put the product in high temperature, humid or dusty environment. Do not drop, knock or disassemble this product. Do not turn off the device when it’s formatting or upgrading, otherwise it will cause operation system error. This product is non-waterproof. Only use approved accessory enhancements. Non-professionals are not allowed to disassemble and maintain the product. Warranty is void if the product has been subject to misuse, abuse, improper maintenance or repair, or unauthorized modification. Product Instruction 1. IR: Support remote control 2. LED Indicator: Power supply ON: Blue OFF: Light Off 3. Dual USB port: Supply two USB 2.0 Host type A ports 4. RS232: Supply two EIA RS-232C DB-9 ports 5. Wi-Fi Antenna: Support Wi-Fi 802.11 b/g/n 6. SD Card: SDHC Class10 compatible 2 7. Stereo Line-out: Stereo audio output 8. SPDIF: Optical output 9. RJ45 Ethernet Port: Support one RJ45 Ethernet port 10. HDMI Port: High Definition Multimedia Interface output 11. DC In: 12V/1.5A power 12. Power switch: On/Off switch 13. Reset Button: Press this button for more than 5 seconds to reset to default settings. RS-232 Pin Define RS-232 settings: baud rate: 115,200bps, stop bit: 8, parity: N. RS-232 cable is custom made, please check with vendor for your inquiries. RS-232 cable (Optional) 3 pin RS-232 cable on both ends of the cable. Black colored cable should be plugged into the Ground pin. 3 Device Connection Step 1 Connect ABPC520 to the monitor via a HDMI cable. Step 2 Connect the power adapter to power on ABPC520. Step 3 Use a remote control or plug in a mouse or keyboard via USB to operate. Mouse’s left button for “Enter”, right button for “Back”. Boot After connecting APBC520 to a monitor with a HDMI cable, the boot logo will appear on the monitor. 4 After a few seconds, you will enter the system. Setup Wizard When using this media box for the first time, a setup wizard will guide you through the settings after boot up. Click the “Next” button to continue. 5 Language Press the “English (United States)” button and select your language from the list. TV display layout Press the “display position” button to enter the monitor position adjusting page. 6 Press Enter key to switch zoom in/out, and then press the four direction keys to adjust the monitor position. After adjusting the position, press Back key to return to the setup wizard. Ethernet configuration Press the “Ethernet Configuration” button to change the Ethernet settings. 7 Check the “Ethernet” box to turn on Ethernet function, and click the “Ethernet Configuration” item below to bring up the Ethernet setting window. 8 Select a connection type from DHCP and Static IP, and fill in relevant information. After confirming the settings, please click “save” and press Back key to return to the setup wizard. Wi-Fi Press the “Wi-Fi Configuration” button to change the Wi-Fi settings. 9 Check the box to turn on Wi-Fi function, and click the “Wi-Fi settings” item below to enter the Wi-Fi setting page. Select an available wireless AP to connect. After setting the Wi-Fi, press Back key to return to the previous page, and press Back key again to return to the setup wizard. Finish Now the setup for your media box is completed. Click “Finish” button to close the setup wizard. 10 If you want to enter this setup wizard again, please click the app OOBE start. Launcher This is a usual launcher for most android systems. 11 to Home Screen In the home screen, you will see some app icons. By long-press an icon, you can drag it where ever you like on the home screen. If you want to delete an icon, please drag it to “×Remove” at the top of the screen until it turns red. To see other screens with more icons, you can swipe left or right to roll the pages. 12 Press any empty space on the screen, a wallpaper selection window will pop up. You could choose your wallpaper from Gallery, Live Wallpapers or Wallpapers. Combined System Bar Navigation Buttons 13 1. Back: Return to the previous page. 2. Home: Enter the launcher’s home screen. 3. Recent: Switch between recently used apps. To remove an app from the list, you could long press the icon to select “Remove from the list”, or directly swipe the app item left or right. Status Notifications 14 The right side of the combined bar displays system status, such as time, Wi-Fi, SD card and USB connection etc. Click to open the status window. Click to show notifications’ details. Use Apps & Widgets Click to show the applications and widgets page. 15 There are many pre-installed apps, you can open an app by pressing its icon. To easily access an app, you can create a shortcut by long pressing an icon and drag it to the home screen. Click the “WIDGETS” tab, you will see the widgets for the apps. 16 You can also drag the widgets to the home screen for easy access. System Settings Click to open the system setting app. In this app, you can set or check the system parameters according to your own requirements or preferences, such as network, sound, display, storage, security, input method, system language and time, etc. 17 Wi-Fi Switch the Wi-Fi button to ON, and the device will scan available wireless networks automatically. Select your SSID and input the password to connect. Ethernet (Wired Network) DHCP connection: Set the connection type to “DHCP”. Save the configuration. Static IP connection: Set the connection type to “Static IP”, and input IP address, netmask, DNS address and Gateway address. Save the configuration. PPPoE connection: PPPoE connection isn’t provided in “Settings”. You can use a separate app to set it. The app “PPPoE” is specifically for setting a PPPoE connection. Open this app, input User name and Password and save the configuration. After saving, plug the network cable into the Ethernet port. More Network Settings VPN: Before setting VPN network, you must set a lock screen PIN or password. Click “add VPN network” and configure name, type and server address to set a VPN connection. MPPE and advanced options such as DNS search domains, DNS servers and forwarding routes is provided. Portable hotspot: When Wi-Fi is turned on, the device can be set as a hotspot. Set a SSID and encryption for the hotspot before turning it on. Proxy Settings: Set hostname and port for proxy servers. You can also set websites bypass the proxy server. Sound Volumes: Slide left or right to adjust the following three types of volume: Music, video, games & other media; Ringtone & notifications; Alarms. Touch sounds: Click to open or close touch tone. Digital audio output: Click to select one digital audio output modes from PCM (Pulse Code Modulation) and RAW. Display Wallpaper: Click to select wallpaper via Gallery, Live Wallpapers or Wallpapers. ‐Gallery: User’s pictures in storage. ‐Live Wallpapers: System default and user installed live wallpapers. ‐Wallpapers: System default wallpapers. Output mode: Click to select output resolution and frequency. HDMI auto output mode: Open or close auto match the best output resolution. Dual output mode: Click to select CVBS (Composite Video Broadcast Signal) output resolution. Display position: Operate as the steps on the pictures to adjust the display position. 18 Font size: Click to select an appropriate front size. Storage In this option, you can check out your storages for details, including internal and external storages. Besides, you can also unmount an external storage to safely remove it and erase all data on an external storage. Apps View and manage the installed applications. Select an app and enter it, you can force stop, clear its cache or data, change its installation location or uninstall it. Location service Let apps use data from sources such as Wi-Fi and Ethernet to determine your approximate location. Security Password: Click to set password visible. Device administration: Manage device administrators, and choose whether or not to allow unknown source. Credential storage: View, install or remove certificates. Language & input Language: Setup system language according to your preference. You can also set spelling correction and personal dictionary. Keyboard & Input method: System default input methods: Android keyboard (support English) and Remote controller input method (support English/Chinese). Click “Default” to change the default input method. You can manually install other input methods. Speech: Set the parameters for speech input. Mouse/Trackpad: Adjust the pointer speed. Virtual Keyboard The device provides a virtual keyboard for typing. When you click in a text input box, the virtual keyboard will appear at the bottom of the screen. To collapse the virtual keyboard, you can click in the system bar. 19 Switch Input Methods In any text input box, click the keyboard icon input method from the pop up window. at the system bar. Select an Backup & reset Reset function is used to set the system back to factory default settings. This operation will delete all your personal data on the device (you can choose whether to delete SD card data). It is recommended to backup your personal data before reset the device. 20 Date & time In this option, you can set date &time, time zone, time notation and date format. Date and time can be synchronized automatically with network time, and can also be set manually. Accessibility Accessibility provides some options to help you navigate your devices more easily, which includes large text, Speak password, Touch & hold delay and Install web scripts. Developer options Developer options integrated a variety of system and application control switches. They are accessed and used by developers and users who need to tinker with their devices. About MediaBox This option is used to check out the system information of this device, such as status, legal information, model number, android version, kernel version and build number. Browse Files You can open the app FileBrowser to view local files. Click to select one or several files, and click it again after selecting. Click share. to do file operations, such as cut, copy, paste, delete, rename and 21 Install & Uninstall Apps Install Apps Before installing apps, please download an app (.apk) to your external storage via the browser, or copy a downloaded app directly to the external storage from your PC. Then you can open the app AppInstaller to install the downloaded app. 22 Choose “External Storage Card”, the .apk files in your external storage would be automatically scanned. Click the app to install it. Uninstall Apps To uninstall an app, please go to Settings > Apps. In this option, you will see the installed apps list. Click the app you want to delete to enter the detail page. 23 Click the “Uninstall” button to uninstall the app. Surf Online Click to open the browser. When connecting the device to a network, you can visit websites, play online media or download files via the browser. In a browser window, you can open multiple tabs simultaneously. Click to add a tab. Enter in a URL in the address bar and click to go. 24 Play Media With the provided apps, you can play your media files on your storage, such as pictures, music and videos. Picture Player: Support jpg, gif, png, bmp, tiff, etc. Music Player: Support mp3, m4a, aac, flac, ape, ogg, wav, wma, etc. Movie Player: Support 3gp, mp4, mpeg, avi, rm, rmvb, mkv, wmv, asf, dat, vob, mov, flv, mts, m2ts, tp, ts, etc. Upgrade System The app Upgrade is provided to upgrade system. Step 1 Download upgrade package from the website. Step 2 Unzip the downloaded package and copy the upgrade files “update.zip”, “uImage”, “uImage_recovery” and “factory_update_param.aml” to SD card root directory. Step 3 Enter the upgrade app. The update files will be automatically scanned. Select 25 the correct “update.zip” to upgrade. Step 4 After upgrade, system will reboot. Remote Control Please go to Settings->Language & input-> Keyboard & Input Methods to check for the current setting. When the input method is set to “Default (English (US) – Android keyboard)”, the remote control functions as below: Up – move cursor up Down – move cursor down - – move cursor left + – move cursor right Return – exit When the input method is set to “Remote controller input method”, the remote control not only functions as described above, it can also be used as soft keypad controller (for entering URL etc.). 26 Q&A Q1 No displays or display flicker on the monitor: A1 Please check if the HDMI cable has been tightly connected between the media box and the monitor. Q2 Cannot start the media box: A2 Please press the reset button for more than 5 seconds to set the system parameters back to factory default. (Please backup your important data before 27 resetting the system.) Q3 Cannot read files in SD card: A3 Please check if the SD card format is correct and the SD card is securely inserted. Q4 Cannot read files in USB device: A4 Please check if the USB device is tightly connected and "USB Debug Mode" is opened in “Settings”. Q5 Restart system automatically: A5 Please check if the device is getting enough power supply. Unstable voltage will cause the system to restart automatically. Specification Model ABPC520 CPU Cortex A9 1.2GHz GPU Mali 400 3D Graphic Engine OS Android 4.2.x ICS DRAM 1GB DDR3 Flash Memory 4GB NAND Wi-Fi I/O Remote Control Support Wi-Fi 802.11 b/g/n HDMI × 1, SPDIF x 1, 3.5mm Stereo jack × 1, USB 2.0 × 4, SD Card slot × 1, RS232 x 2, RJ45 Ethernet port × 1 Supported AC adapter DC 12V/1.5A LED Power (Blue) Housing Material Metal Case Dimensions 154.8 (W) x 130.4 (H) x 30.9 (D) mm Weight Accessories 469.8g (main body only, excluding AC adapter) AC adapter × 1; Remote control × 1 (optional); Mounting bracket 28 Media Format Video: MPEG-4 (H.264), WMV Image: JPEG Flash: Adobe Flash Lite 3.0 (swf/flv) 29