1
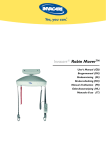
Invacare® Robin MoverTM
User's Manual (GB)
Brugermanual (DK)
Bruksanvisning (SE)
Brukerveiledning(NO)
Manuel d’utilisation (FR)
Gebruiksaanwijzing (NL)
Manuale d’uso (IT)
Table of contents
1. Purpose and application. . . . . . . . . . . . . . . . . . . . . . . . . . . . . . . . . . . . . 3
1.1
1.2
1.3
1.4
1.5
1.6
1.7
Manufacturer:. . . . . . . . . . . . . . . . . . . . . . . . . . . . . . . . . . . . . . . . . . . . . . . . . . . . . . . . . . . . . . .
Purpose and application. . . . . . . . . . . . . . . . . . . . . . . . . . . . . . . . . . . . . . . . . . . . . . . . . . . . . . .
Important/warnings. . . . . . . . . . . . . . . . . . . . . . . . . . . . . . . . . . . . . . . . . . . . . . . . . . . . . . . . . .
Sling’s. . . . . . . . . . . . . . . . . . . . . . . . . . . . . . . . . . . . . . . . . . . . . . . . . . . . . . . . . . . . . . . . . . . . .
Unpacking and preparation. . . . . . . . . . . . . . . . . . . . . . . . . . . . . . . . . . . . . . . . . . . . . . . . . . . .
Installing the charging station . . . . . . . . . . . . . . . . . . . . . . . . . . . . . . . . . . . . . . . . . . . . . . . . . .
Installation af Robin MoverTM prior to first use . . . . . . . . . . . . . . . . . . . . . . . . . . . . . . . . . . . .
3
3
4
5
5
5
6
2. Inspection. . . . . . . . . . . . . . . . . . . . . . . . . . . . . . . . . . . . . . . . . . . . . . . . 7
2.1 Approvals. . . . . . . . . . . . . . . . . . . . . . . . . . . . . . . . . . . . . . . . . . . . . . . . . . . . . . . . . . . . . . . . . . 7
2.2 Before first-time use. . . . . . . . . . . . . . . . . . . . . . . . . . . . . . . . . . . . . . . . . . . . . . . . . . . . . . . . . 7
3. Description of functions. . . . . . . . . . . . . . . . . . . . . . . . . . . . . . . . . . . . . 7
3.1
3.2
3.3
3.4
3.5
3.6
Description of the hoist´s main parts. . . . . . . . . . . . . . . . . . . . . . . . . . . . . . . . . . . . . . . . . . . . 7
Operation . . . . . . . . . . . . . . . . . . . . . . . . . . . . . . . . . . . . . . . . . . . . . . . . . . . . . . . . . . . . . . . . . 8
Safety guidelines. . . . . . . . . . . . . . . . . . . . . . . . . . . . . . . . . . . . . . . . . . . . . . . . . . . . . . . . . . . . . 9
Charging. . . . . . . . . . . . . . . . . . . . . . . . . . . . . . . . . . . . . . . . . . . . . . . . . . . . . . . . . . . . . . . . . . . 9
Charging an emergency battery . . . . . . . . . . . . . . . . . . . . . . . . . . . . . . . . . . . . . . . . . . . . . . . 10
Battery maintanance . . . . . . . . . . . . . . . . . . . . . . . . . . . . . . . . . . . . . . . . . . . . . . . . . . . . . . . . 10
4. Accessories. . . . . . . . . . . . . . . . . . . . . . . . . . . . . . . . . . . . . . . . . . . . . . 11
4.1
4.2
4.3
4.4
4.5
4.6
Accessories. . . . . . . . . . . . . . . . . . . . . . . . . . . . . . . . . . . . . . . . . . . . . . . . . . . . . . . . . . . . . . .
EC-GantryTM . . . . . . . . . . . . . . . . . . . . . . . . . . . . . . . . . . . . . . . . . . . . . . . . . . . . . . . . . . . . . .
EC-Gantry TraverseTM . . . . . . . . . . . . . . . . . . . . . . . . . . . . . . . . . . . . . . . . . . . . . . . . . . . . . .
Flexiscope . . . . . . . . . . . . . . . . . . . . . . . . . . . . . . . . . . . . . . . . . . . . . . . . . . . . . . . . . . . . . . . .
Mounting of 4-point and 2-point spreader bar. . . . . . . . . . . . . . . . . . . . . . . . . . . . . . . . . . . .
Track switch, manual. . . . . . . . . . . . . . . . . . . . . . . . . . . . . . . . . . . . . . . . . . . . . . . . . . . . . . . .
11
12
13
14
15
16
5. Dismounting & transport. . . . . . . . . . . . . . . . . . . . . . . . . . . . . . . . . . . 17
5.1 Dismounting. . . . . . . . . . . . . . . . . . . . . . . . . . . . . . . . . . . . . . . . . . . . . . . . . . . . . . . . . . . . . . . 17
5.2 Transport. . . . . . . . . . . . . . . . . . . . . . . . . . . . . . . . . . . . . . . . . . . . . . . . . . . . . . . . . . . . . . . . . 17
6. Maintenance & Storage. . . . . . . . . . . . . . . . . . . . . . . . . . . . . . . . . . . . 18
6.1 Cleaning. . . . . . . . . . . . . . . . . . . . . . . . . . . . . . . . . . . . . . . . . . . . . . . . . . . . . . . . . . . . . . . . . . 18
6.2 Storage. . . . . . . . . . . . . . . . . . . . . . . . . . . . . . . . . . . . . . . . . . . . . . . . . . . . . . . . . . . . . . . . . . . 18
6.3 Maintenance performed by owner. . . . . . . . . . . . . . . . . . . . . . . . . . . . . . . . . . . . . . . . . . . . . 18
7. Service & lifetime. . . . . . . . . . . . . . . . . . . . . . . . . . . . . . . . . . . . . . . . . 19
7.1
7.2
7.3
7.4
7.5
Service & lifetime. . . . . . . . . . . . . . . . . . . . . . . . . . . . . . . . . . . . . . . . . . . . . . . . . . . . . . . . . . .
Battery. . . . . . . . . . . . . . . . . . . . . . . . . . . . . . . . . . . . . . . . . . . . . . . . . . . . . . . . . . . . . . . . . . .
Adjustment of driving wheels. . . . . . . . . . . . . . . . . . . . . . . . . . . . . . . . . . . . . . . . . . . . . . . . .
Maintenance. . . . . . . . . . . . . . . . . . . . . . . . . . . . . . . . . . . . . . . . . . . . . . . . . . . . . . . . . . . . . . .
Troubleshooting . . . . . . . . . . . . . . . . . . . . . . . . . . . . . . . . . . . . . . . . . . . . . . . . . . . . . . . . . . .
1
19
19
20
21
22
8. Technical specifications. . . . . . . . . . . . . . . . . . . . . . . . . . . . . . . . . . . . 23
8.1 Symbols. . . . . . . . . . . . . . . . . . . . . . . . . . . . . . . . . . . . . . . . . . . . . . . . . . . . . . . . . . . . . . . . . .
8.2 Installation options of the charger IP41/IP67. . . . . . . . . . . . . . . . . . . . . . . . . . . . . . . . . . . . .
8.2.1 IP41. . . . . . . . . . . . . . . . . . . . . . . . . . . . . . . . . . . . . . . . . . . . . . . . . . . . . . . . . . . . . . . . . . . .
8.2.2 IP67. . . . . . . . . . . . . . . . . . . . . . . . . . . . . . . . . . . . . . . . . . . . . . . . . . . . . . . . . . . . . . . . . . . .
23
24
24
24
9. Disposal. . . . . . . . . . . . . . . . . . . . . . . . . . . . . . . . . . . . . . . . . . . . . . . . . 25
10. Important safety notes for the operation of the Robin Mover. . . . 25
11. Service schedule. . . . . . . . . . . . . . . . . . . . . . . . . . . . . . . . . . . . . . . . . 26
2
1. Purpose and application
1.1 Manufacturer:
on behalf of:
as electronics
Kantstrasse 10
D-72663 Grossbettlingen
Invacare® Rea AB
Box 200, Växjövägen 303
S-343 75 Diö
1.2 Purpose and application
Purpose
Robin MoverTM is a ceiling mounted hoist, meeting the requirements for hospitals, housing for the elderly,
institutions and private homes. Robin MoverTM is intended for moving clients weighing a maximum of 200 kg
including clothing, hoist sling and other accessories. The hoist is designed for indoor use in normal temperatures
and humidity. If you wish to use the hoist in any other environment, contact Invacare® for advice and instructions.
Use of the hoist for purposes other than transfer of people is not advised and is undertaken at ones own risk.
Conditions
It is a condition of sale that the purchaser of the ceiling hoist must receive training from Invacare® personnel or an
authorised dealer.
When the Robin MoverTM ceiling hoist is used in an institution or in a nursing home, it should always be
operated by specially trained staff, and used in recommended track. systems. The track system must be installed by
Invacare® personnel or an authorised dealer.
Seated to seated transfer
During a seated transfer e.g. from a wheel chair, the Robin MoverTM
should be positioned close to the person to be lifted. The suspension
hooks should ideally be positioned level with the chest and ideally no
further than over the middle of the thigh.
Place the suspension hooks parallel with the user’s shoulders.
See picture.
The sling may now be attached to the suspension hooks.
For placement of the sling, see section »Placement of the sling«.
Lying to lying transfer
Position the suspension hooks above the person to be lifted, aligned to
the users shoulders (see picture). If possible, raise the back portion of
the bed so that the user may be lifted in a seated position.
The sling may now be attached to the suspension hooks.
For placement of the sling, see section »Placement of the sling«.
3
Placement of sling
The sling straps are to be hooked in pairs (one from the back and one from the leg) on their own suspension
hook.
(Attachment of the sling is described in the respective user manual, the text and picture below is only a principle
explanation).
With the person to be lifted in sitting position, the sling is placed behind the user’s back, e.g. between the back
support of the chair and the user. The client should not sit on the sling. The leg straps are guided forward along
the outside of the thigh and in under the thigh between the knee and the hip joint.
The leg straps are crossed between each other in front of the user. All four sling straps are now ready to be
mounted into the suspension hooks.
When the client is lying down, he/she should be log rolled onto their side. Position the sling in such a way that the
upper edge is in line with the crown of the head. The user is then repositioned onto his/her back and log rolled in
the opposite direction. The sling is then rolled to be flat under the user when he/she is rolled onto his/her back.
The leg straps are then guided in under the thigh bone and crossed in between each other. All four (six) sling
straps are now ready to be attached.
If there is doubt as to the use of the sling, please contact Invacare®.
1.3 Important/warnings
•
•
•
•
•
•
•
Read the entire manual before using Robin MoverTM.
Robin Mover’s max. load of 200 kg must not be exceeded.
If accessories are rated with a lower load than 200 kg, this determines Robin Mover’s maximum load.
Robin MoverTM must only be used to move a patient.
Robin MoverTM must not be used where there is a risk of contact with water.
If the Robin MoverTM is damaged, it must be taken out of use. Call your local Invacare® dealer or Invacare’s
service department.
The cord for emergency stop/emergency lowering is to be adjusted so it is within the user’s range.
Risks when using the hoist:
Risk of entrapment between hook and hook housing.
Risk of entrapment between hooks and sling, when lifting.
Risk of injury to client and carer caused by dangling hooks or hand control.
A caregiver should always operate the hoist.
If the hoist in special cases is to be used by a disabled person, then the installer shall provide a
communication device, so that in the event of an emergency the disabled person is able to call for help.
The sling attachments must be checked each time the sling is removed and replaced, to ensure that it
is properly attached before the patient is transferred from a stationary object (e.g. bed, chair or commode).
4
1.4 Sling’s
Use only CE-marked sling’s with a rated load equal to or lower than that of the Robin Mover’s max load.
The sling must be suitable for 2 or 4 point spreader bars (please look at Invacare’s brochure concerning slings),
i.e. with sewn lifting loops that can be mounted onto a 2 or 4 point spreader bar
1.5 Unpacking and preparation
Perform a visual inspection of Robin MoverTM. If the packaging is damaged upon arrival, Robin MoverTM parts must
be thoroughly examined for visible damage or defects. If there is any suspicion of damage, Robin MoverTM must
not be used before qualified service personnel or service technicians have approved the hoist.
It is to be expected, that the hoist´s battery is discharged on account of self-discharge. The hoist must therefore
be charged for up to 2 hours before first time usage, refer to section »Charging«.
The following is to be included in the package:
1. Robin MoverTM.
2. Hand control.
3. Quick guide. (The charging unit must be ordered separately).
1.6 Installing the charging station
The charging unit should be attached to the wall, or the most practical place, within reach of a socket outlet, to
park the hoist when not in use. It is important to make sure that the hand control can be readily placed into the
charger holder when being charged. Therefore place the charger at a maximum distance of 95 cm under the rail in
which the hoist is mounted.
It is important to make sure that there is access to the mains where the charger is placed.
To mount the charger:, first insert wall fitting with 2 screws, then connect the cable from the charger to the
actual holder, and press the holder onto the mounted wall support.
The wall support for the charger must be mounted with three screws under the holder and at a distance that suits
the length of the charger cable.
Connect the charger to the socket outlet and check that it is operational.
More than one charging unit can be mounted for one hoist, as these can work independently.
Be aware that only an IP67 charger can be mounted in a wetroom, see section 8.2.
5
1.7 Installation af Robin MoverTM prior to first use
The trolley is built-in on Robin MoverTM, and can therefore not be pre installed in the rail.
When installing Robin MoverTM, the end stop must be removed, and the hoist´s wheels inserted into the rail.
See picture.
It is not important in which direction the Robin is facing when mounted.
Finally the end stop is installed again.
NB! Remember to tigthen the bolt with min. 30 Nm.
If too much resistance is experienced when the hoist is pulled, or the hoist moves too freely and unintentionally,
then the friction brake must be adjusted accordingly.
See picture.
When the system is installed, the hand control must be connected, and the cord for the emergency stop/lowering
must be adjusted so it is within the user’s reach.
The system must be inspected before use; see section »Before first time use«.
Robin MoverTM is now ready to be used in the EC-TrackTM system.
6
2. Inspection
2.1 Approvals
The Robin MoverTM ceiling hoist has been tested and approved in accordance with Lift standard EN/ISO 10535,
and is TÜV approved.
The hoist is CE-marked in accordance with the medical directive and standard EN/ISO 10535.
2.2 Before first-time use
Before first use, all features of the hoist system must be inspected by a authorised Invacare® installer.
The hoist is not intended to be used together with MEDICAL ELECTRICAL EQUIPMENT.
3. Description of functions
3.1 Description of the hoist´s main parts
Directional arrows
Control button UP
Control button DOWN
Connection for
hand control
Connection for
emergency battery
Indicator light
Hand control
Lifting straps
Retainer for
hand control
(accessory)
Emergency stop/
lowering strap
Strap hooks
7
3.2 Operation
Operating forces of buttons:
Max. 5N
Up
Down
Hand control and indicator light
When the up/down function of the hand control is activated a blue light on the underside of the RobinTM will
illuminate. The blue indicator light illuminates when Robin MoverTM is in use, and turns off automatically after
approx. 30 seconds.
The hoist is lifted and lowered by operating the two upper buttons of the hand control. The control buttons on
the underside of the hoist may also be used for this purpose. The control buttons work independently of the hand
control.
Transport in the rail system is done by depressing either of the lower buttons on the hand control. See picture.
NB! The hoist will automatically run at high speed upwards as well as downwards, when it is not loaded.
The straps must be straight to ensure that they feed into the apertures correctly. The straps are held taught by
the weight of the hooks, therefore the lifting straps should be freely suspended when the unloaded hoist is running
upwards and downwards.
When the hoist is loaded with a weight of more than 10 kg, the speed will automatically be reduced to a safe level
when moving in both directions.
Robin MoverTM has a built-in soft start, ensuring a more comfortable lifting and lowering movement of the user.
The unloaded hoist is moved in the rail system by pulling the two lifting straps. The hand control for the emergency
strap must not be used for moving the hoist. When Robin MoverTM is loaded, the hoist is moved in the rail system
by pressing the two lower buttons on the hand control. Both direction buttons are shown on the rail motor.
NB! It is not possible to activate both transport functions and lifting/lowering functions simutaneously. When the
transport function is activated, the blue function light on Robin´s underside will not light up.
8
3.3 Safety guidelines
Emergency stop
If the hoist straps´ moves unintentionally upwards or downwards, pull the »emergency stop« chord.
When the emergency stop is activated, the hoist will not operate. If the emergency stop button is pushed up, the
hoist will be ready for use again.
Emergency lowering
The emergency lowering feature can be used in order to lower a client to the transfer surface if the hoist has
become inoperable. Emergency lowering is operated by continuously pulling the cord.
When the emergency lowering function is activated, all end stops and security functions are
deactivated. It is thereby possible to wind up the lifting straps back up, when activating the
emergency lowering for prolonged periods.
Strap securing/pinch protection
If the lifting straps are guided incorrectly in and out of the hoist, i.e. if the straps has become twisted, the hoist will
automatically turn off.
Note! When attaching the sling to the hooks, and the straps are twisted, the straps will rotate and stretch out,
thus ensuring trouble-free operation.
The pinch protection feature automatically turns off the hoist, if a client unintentionally traps his/her hand in the
lifting strap during a lift. The hoist will stop immediately when the hand makes contact with the strap inlet.
If Robin MoverTM is loaded with a weight of more than 200 kg, the hoist will automatically turn off to safeguard
against overloading.
Electromagnetic interference between the hoist and other electrical products can occur.
To reduce or eliminate such electromagnetic interference, increase the distance between the
hoist and the products or switch off the products!
All installations must comply with the national rules and standards. Use only approved installation
components. At every point of suspension, the roof/ceiling structure must be able to absorb a load
of at least 300 kg.
3.4 Charging
A sound indicator and the flashing indicator light signals when the hoist needs to be charged. The hoist must be
moved along the rail system and parked nearby the wall mounted charger. Attach the hand control to the charger
unit. LED on the charger indicates that charging is taking place. We recommend parking the hoist in the charging
position when not in use.
LED indication
Function
Function duration
Yellow
Battery not connected
-
Yellow
Initializing and analysis of battery
12 - 14 seconds
Red
Fast charge
5 min - 2 hours
Green
Trickle charge
-
Alternating red and green
Fault condition (battery defect)
-
There will still be sufficient power to lower the user from the time when the hoist indicates that charging is
needed.
If the battery should become totally discharged while a transfer is in progress, an external battery may be temporarily connected to the hoist. See the section »Battery«.
NB! It is recommended to interrupt the charging and pull the emergency stop, when the lifter has not been used
for more than 4-6 weeks.
9
Note! It is not possible to use the hoist whilst charging the battery.
If the sound indicator of the Robin Mover beeps, and the blue function lights flash after Robin that has been fully
charged and has been in use for only a short period of time, the battery may be ready to be replaced by a new
one. See section »7,2 Battery«. Another possible option could be that the battery needs to be excercised. See
section »3.6 Battery maintanance«.
3.5 Charging an emergency battery
The emergency battery package is charged by placing the plug in the charger socket. A special adapter is necessary.
The LED light turns green to indicate the unit is fully charged (appox. charging time 2 hours).
3.6 Battery maintanance
If the sound indicator of the RobinTM beeps, and the blue function lights flashes after the hoist has been fully
charged and has been in use for only a short period of time, the battery might need to be exercised.
To enable the battery to be charged fully, it is neccessary to exercise the battery from time to time.
Following a long period of storage, it could be neccessery to exercised the battery.
It is also suggested that the battery is exercised in situations where Robin MoverTM is used infrequently, and/or
where the hand control is placed in the charger for long periods of time. In this situation, there will always be
capacity enough for a few lifts, but we recommend to exercise the battery as soon as possible afterwards.
Exercise of the battery can be done by charging and discharging RobinTM completely several times.
This is done by charging the battery until the light indicator turns green. The hand control is then removed from
the charger, and the straps with load are lowered and raised for one minute, with a 10 minutes break, continuing
this procedure until the battery is completely discharged (continue even when the sound signal for low power
beeps and the blue light flashes). Charge the battery and lower and raise the straps until the battery is decharged
again. Repeat this procedure 2-3 times.
10
4. Accessories
4.1 Accessories
Order no.:
Article:
1493139
1492102-7035
1492047-7035
1451909-7035
1451910-7035
1451911-7035
1451912-7035
1451913-7035
1451914-7035
1450290-7035
1449668-7035
1446269-7012
1488974-7012
1492967-7012
1492968-7012
1485474-7035
1449228-7035
1450289
1449383-9010
1485183-9010
1485183-9006
1451620-7012
1493132
1504765-7012
Battery 2 Ah., 4/5 SC NiMH.
Charger kit IP41 for hand control, grey (with 1,2/2 m cable, bracket and retainers).
Charger IP41 for hand control, grey (with 1,2/2 m cable).
Charger kit IP67 for hand control, grey (with 0,1/1 m cable, bracket and retainers).
Charger kit IP67 for hand control, grey (with 0,1/2 m cable, bracket and retainers).
Charger kit IP67 for hand control, grey (with 0,1/3 m cable, bracket and retainers).
Charger kit IP67 for hand control, grey (with 1,2/1 m cable, bracket and retainers).
Charger kit IP67 for hand control, grey (with 1,2/2 m cable, bracket and retainers).
Charger kit IP67 for hand control, grey (with 1,2/3 m cable, bracket and retainers).
Clamp for charger for wall mounting (without transformer), bracket and retainers.
Charger for external battery, grey.
Distance clamp (Flexiscope).
4-point spreader bar, 45 cm.
2-point spreader bar, 35 cm.
2-point spreader bar, 45 cm.
Retainer for wall mounted charger.
Retainer for hand control, strap mounted.
Gearwheel grease (3 g tube).
Hoist trolley Inalto/Invacare.
Room-to room trolley (white) EC-Track.
Room-to room trolley (grey) EC-Track.
Extended lifting straps with hooks and emergency lowering strap (extra length must be
specified when ordering).
Ergolet spreader bar with weight scale.
Stretcher with sling.
11
4.2 EC-GantryTM
The EC-GantryTM is used where there is a requirement for a free standing rail system.
Height range for EC-GantryTM without wheels: 216-251 cm
Height range for EC-GantryTM with wheels: 195-230 cm
The EC-Gantry is available with or without wheels.
The wheels of the EC-GantryTM must be locked before performing any lift.
To increase the height of the EC-Gantry, pull the leg section upward.
To decrease the height of the EC-Gantry, pull the handle as indicated above, adjust the EC-GantryTM to the desired
height and then release the handle to allow the leg section to lock back into place.
Wih regards to the safety of the patient, it is recommended that the EC-GantryTM is not moved
with a patient hanging in the sling.
It is important that the EC-GantryTM is placed on a level surface with regards to the risk of tipping.
Please observe that there is a risk of the patient swinging into the EC-Gantry´s legs.
There is a risk of carer stumbling over foot of the EC-GantryTM system.
There is a risk of tipping if the patient is very unsettled or suffers from spasm in the sling.
Never leave a patient in the sling unattended.
12
4.3 EC-Gantry TraverseTM
The EC-Gantry TraverseTM is used where there is a requirement for a free room covering standing rail system.
Height range for EC-Gantry TraverseTM: 218-253 cm.
It is important that the EC-Gantry TraverseTM is placed on a level surface with regards to the risk
of tipping.
Please observe that there is a risk of the patient swinging into the Gantry´s legs.
There is a risk of tipping if the patient is very unsettled or suffers from spasm in the sling.
Never leave a patient in the sling unattended.
13
4.4 Flexiscope
Scope
FlexiscopeTM is used with the Invacare© Robin MoverTM ceiling hoist in connection with the transfer or moving of
disabled patients who require extended distance between the slings shoulder straps. Max. load: 200 kg.
Installation
Installation of FlexiscopeTM on
the lifting straps is carried out
according to the illustrations.
Adjustment
Alignment of the width is made by pulling the button A while moving the strap bar B to the desired position.
Note! Ensure that the bar is correctly engaged.
Maintenance and cleaning
Cleaning in connection with daily use:
• All painted surfaces can be whiped off with a damp cloth. Only household detergents are allowed.
Never use acids, alkalines or solvents such as acetone or cellulose thinner.
• Desinfection of FlexiscopeTM - it must be whiped over with officially approved detergents only.
• The black cover is removed from FlexiscopeTM and can be mashine washed at 70ºC - do not tumbledry, bleach or
dry clean.
14
4.5 Mounting of 4-point and 2-point spreader bar
•
Lower the Robin MoverTM lifting straps down to a suitable height and mount the spreader bar shown on the
illustration below.
•
Use only the spreader bars produced for Robin MoverTM.
•
Ensure that the spreader bar suits the client and the type of lift required.
Ensure the spreader bar is correctly mounted before use.
15
4.6 Track switch, manual
The track switch is used in track systems where a change in direction is required during movement of the patient.
The track switch is operated by pulling the cords on either side - this change in direction must be carried out
before the client is guided into the drive switch area. The direction is changed, and the hoist will take the direction
to the side where the cord is pulled.
The track switch is mechanically secured against derailing.
16
5. Dismounting & transport
5.1 Dismounting
Robin MoverTM is dismantled in reverse order of assembly, see section »1.7 nstallation of Robin MoverTM«.
When replacing the battery or carrying out a service, it is necessary to remove the hoist from the rail motor.
The two plastic shells are removed by taking away the screws and pulling the shells from each other.
The M6 screw attaching the rail motor to the hoist is removed - the rail motor can now be separated from the
hoist.
NB! It is posssible to remove the hoist from the rail motor while RobinTM is located in the rail system - please
remember to support the hoist when removing the M6 screw.
5.2 Transport
The emergency strap must be pulled, when the Robin MoverTM motor is demounted from the tracks, for transport
or storage, otherwise the Robin MoverTM can be accidentally activated. See section »6.2 Storage«.
During transportation, the hoist must be placed on a soft surface, e.g. a cloth or foam rubber mat. Make sure that
Robin MoverTM remains upright whilst being moved.
We recommend using the original packaging for transportation under the following conditions:
•
•
•
Temperature between -30° and +50°C.
Humidity between 10 og 70% RH.
Pressure between 700 og 1.100 hPa.
-30 → 50°C
-22 → 122°F
17
10 → 70%
700 → 1.100 hPa
6. Maintenance & Storage
Only Invacare authorised personnel should perform maintenance and service. Daily inspection should be carried
out by the carer after reading the manual. Six monthly inspection according to UK LOLER 1998 regulations should
be done also. Spare parts list and wiring diagram can be obtained from Invacare®or be down loaded from www.
invacarebeds.dk.
6.1 Cleaning
Cleaning in connection with daily use:
•
•
•
•
Lifting slings are to be washed in accordance with manufacturers instructions.
Robin MoverTM and the hand control can be wiped with a moistened cloth. Only common cleansing agents must
be used; never use acids, and solvents.
The strap hooks must be cleaned with water and common cleansers.
If disinfection is required, dry thoroughly with known brands of liquid detergent.
6.2 Storage
RobinTM should be stored in a dry place under conditions mentioned in section 5.2 »Transport«.
Pull the emergency strap before the Robin is stored, to avoid unwanted activation of the Robin and furthermore to
protect the battery from damage, when the hoist is stored for a longer period without being used.
If the emergency strap is not pulled the capacity of the battery will deplete completely, and will be irreparably
damaged.
When the emergency strap is pulled during storage it will be possible to regain the entire capacity of the battery
by exercising the battery, see section »3.6 Battery maintanance«.
6.3 Maintenance performed by owner
Check the lifting straps on a regular basis. If there are signs of damage in any way, do not use the hoist. Contact
your local Invacare® dealer for advice. The straps must only be replaced by persons authorised by Invacare®.
18
7. Service & lifetime
7.1 Service & lifetime
To ensure the optimal function and safety of Robin Mover, it is important to perform service and maintenance in
accordance with the manual.
Maintenance must be carried out following national regulations, and at least yearly.
According to the Factories Inspectorate regulations, Robin Mover has to undergo an annual service by an
Invacare® authorised person.
Durability and lifetime expectancy is based on an annual service programme performed by an Invacare®
authorised dealer or Invacare®.
Robin Mover has an expected lifetime of approx. 10 years. After 10 years use, it must be inspected by qualified
personnel before further use.
If the hoist is used in localities with increased humidity, a reduction in lifetime must be expected.
Spare part list for Robin Mover and EC-Track can be obtained from Invacare®.
7.2 Battery
To change battery.
If battery replacement is necessary, Robin MoverTM must be removed from the track system. Please see section
»Dismounting«. When the rail motor is removed from the hoist, the battery is replaced as shown below.
1
2
3
4
5
6
7
Remove the battery pack inside the hoist by unplugging the wires, and replace it with a new one.
Re attach the upper part of the housing.
Important! Use only Invacare®recommended batteries, see section »Accessories«.
The battery must be located as shown in picture 7.
If the battery housing is damaged, do not use the battery.
It is not necessary for an approved service person to carry out the battery change.
19
After dismantling, the M6 self locking nut on the screw connecting rail motor with hoist must be
replaced.
Use of emergency batteries
Should the need for immediate use of Robin MoverTM arise at a time when the hoist has a discharged battery, a
Invacare®emergency battery can be used.
This battery is connected to the underside of the motor, hanging freely during client transportation.
Use the emergency battery only when absolutely necessary. Always recharge this battery after use, please
see section »Charging«.
The emergency battery is an accessory that can be ordered from your Invacare® dealer, see section »Accessories«.
Important! Use only Invacare®recommended emergency batteries.
7.3 Adjustment of driving wheels
When the driving wheels are worn, it may become necessary to adjust them in order to ensure adequate driveand braking force.
20
7.4 Maintenance
When performing annual or regular maintenance, all parts designed to carry load must be as a minimum tested
with maximum load (both hoist and track system). All safety features must be checked according to
EN ISO 10535: 2006 Annex B.
During the service, all parts that is exchanged and all work carried out, must be documented. The worn and
defective parts must be replaced with new spare parts from Invacare. Inspection of the hoist and track system
must be carried out by a qualified Invacare® authorised dealer.
To record the details, please use the service schedule on page 30.
EC-Track system inspection
•
•
•
•
•
•
All bolts/fixtures in walls and ceiling must be checked and re tightened if necessary.
The end stop on the tracks is checked, adjusted if necessary and re tightened.
Systems with track connections should be checked and realigned if the connection has become mis-aligned
during use.
Test the trolley and the traverse trolley. Check for noise and smooth movement.
For a traverse system, check all functions and connections.
Check the friction brake on both the hoist- and traverse trolley, and adjust accordingly.
Hoist inspection
Mechanical parts:
• Check suspension- and locking screw between hoist and rail motor.
• Check the steel- and plastic gear wheels for wear and damage.
• If the gearwheels are dry, use the gearwheel grease (see »Accessories«).
• Check the loose strap sensor and adjust, if necessary.
• Check the guide cylinder and the end stop.
• Check the straps for wear and damage.
• Check the hooks for damage. Check the screws and pins.
Electrical parts:
• Check the wiring for damage and secure connections.
• Check the micro switches for clamping and their mechanical function.
• Check the hand control for damage and function. Make sure that the hand control is securely connected.
• Check the emergency stop/lowering.
21
7.5 Troubleshooting
Service and maintenance of Robin MoverTM must only be performed by personnel who have received the necessary
instruction and training.
Symptom
Possible cause
Action
The hoist is not responding
correctly when pressing the hand
control buttons, and the up/down
buttons on the hoist are not
functioning.
1) The emergency stop is acti
vated.
1) Depress the emergency stop
button.
2) Put the hoist on charge or use
the emergency battery.
3) Replace the fuse.
2) The battery is discharged.
3) The fuse is blown.
The hoist is not responding correctly when pressing the hand
control buttons, but the up/down
buttons on the hoist are
functioning.
1) The hand control is not
connected correctly.
2) The hand control is defect.
1) Secure the plug.
The straps will only move
downwards and not upwards.
1) The battery is nearly discharged.
1) Put the hoist on charge or use
the emergency battery.
2) Reduce the load (the hoist is
equipped with a over-current
safety system). Check the hand control, it´s connection and
the re-entering endstop.
2) The load is to high.
2) Replace the hand control.
The straps will only move upwards and not downwards.
1) The hand control is defect.
2) The loose strap function is
activated.
1) Replace the hand control.
2) Check the loose strap switch.
The hoist speed is the same with
and without load.
1) The non-load quick movement
function is activated perma nently.
1) Check the quick movement
switch.
The lifting straps are twisted, and
do not straighten out.
1) The lifting hooks do not turn
freely enough.
2) The straps are frayed.
1) Clean or replace the hooks.
The hoist emits excessive noise
when activated.
1) Defect bearings, gearwheels or
motor.
1) Replace the hoist.
The hoist can move up and down,
but not horizontally in the rails.
1) Worn driving wheels
2) The hand control defect
1) Adjust driving wheels.
2) Replace the hand control.
2) Replace the straps.
If the above mentioned does not solve the problem, please contact Invacare® Service Department.
22
8. Technical specifications
31x47x25 cm.
Dimensions (HxBxD)
Max. lifting capacity
200 kg.
Number of lifts per charge
65 lifts of 0.5 m with 80 kg.
Lifting velocity at 200 kg load
2 cm/s.
Max lifting interval
250 cm.
Height from celling to sling hook
47 cm.
Total weight without sling
9,5 kg.
Electrical connection of charger
230V AC 50Hz
Voltage/current between charger/hoist
24V DC 900mA / 50mA.
Charging time (with 2 Ah battery)
Max 2 hours
Batteries
20 pcs. 1.2V / 2.0 Ah., 4/5 SC NiMH
Intermittence
8%
Operating speed in the tracks
14 cm/s
8.1 Symbols
Warning.
= 200 kg
SWL (Safe Working Load) = Max. load (patient + sling + other accessories).
Class II equipment.
Type B equipment - patient not separated from ground.
CE - marking.
The product should be reused where possible.
23
8.2 Installation options of the charger IP41/IP67
8.2.1 IP41
May not be used in a wetroom environment.
8.2.2 IP67
The charger is designed according to IP67, and can therefore be used in wet locations according to these illustrations:
Bath tub
Shower basin
Bath tub
Shower without basin
Shower with fixed partition
Shower head
Shower head
Installation of the charger is recommended in zone 2 and 3.
24
9. Disposal
This product has been supplied from an environmentally aware manufacturer that complies with the Waste
Electrical and Electronic Equipment (WEEE) Directive 2002/96/CE
This product may contain substances that could be harmful to the environment if disposed of in places (landfills)
that are not appropriate according to legislation.
The »crossed out wheelie bin« symbol is placed on this product to encourage you to recycle wherever possible.
Please be environmentally responsible and recycle this product through your recycling facility at its end of life.
All electrical parts must be removed and disposed of as electrical components.
Plastic parts must be recycled or incinerated.
Steel- and aluminium parts must be disposed of as metal scrap.
Batteries: Local and national regulations for environmental recycling must be followed.
Batteries must always be delivered to an approved collection place.
Disposal must always follow the relevant local laws and regulations for waste and scrap.
10. Important safety notes for the operation of the Robin Mover
The hand control of the Robin MoverTM is protected against splash water (IPX4). It
must however not be immersed in liquids, even for short times. Avoid any contact
with water or other liquids.
25
11. Service schedule
Service and maintenance of the hoist must be carried out only by trained/experienced personnel
Personnel hoist serial number: __________________________________
Inspection point:
Date:
Inspection of the track system
All bolts/fixtures to wall and ceiling must be checked and
re-tightened if necessary.
End stops on the tracks must be checked, moved if necessary
and re-tightened.
Systems with track connections should be checked and
re-aligned if the connection has become mis-aligned during
use.
Check trolley and traverse trolley.
Check trolley wheels for smooth movement and abnormal
noise.
Check friction break adjustment on trolleys.
Adjust if necessary.
Inspection of hoist
Mechanical parts:
Check suspension- and locking screw between hoist and
rail motor.
Check steel- and plastic gear wheels for wear and damage.
If gear wheels are dry, apply gearwheel grease
(see »accessories«)
Check loose strap sensor and adjust if necessary.
Check guide cylinder and end stops.
Check straps for wear and damage.
Check the lifting hooks, screws and pins for wear and damage.
Electrical parts:
Check the wiring for damage and correct connections.
Check micro switches for clamping and mechanical function.
Check hand control for damage and function.
Make sure that the hand control is connected correctly.
Check emergency stop and emergency lowering.
26
Customer Sales and Service
Denmark
INVACARE A/S
Sdr. Ringvej 39
DK-2605 Brøndby
Phone: +45 36 90 00 00
Fax: +45 36 90 00 01
www.invacare.dk
[email protected]
Belgium & Luxemburg
INVACARE N.V.
Autobaan 22
B-8210 Loppem, Brügge
Phone: +32 50 83 10 10
Fax: +32 50 83 10 11
www.invacare.be
[email protected]
France
INVACARE Poirier S.A.S
Route de St. Roch
F-37230 Fondettes
Phone: +33 2 47 62 64 66
Fax: +33 2 47 42 12 24
www.invacare.fr
[email protected]
Sweden & Finland
INVACARE AB
Fagerstagatan 9 / Box 66
S-163 91 Spånga
Phone: +46 8 761 70 90
Fax: +46 8 761 81 08
www.invacare.se
[email protected]
Netherlands
INVACARE B.V.
Celsiusstraat 46
NL-6716 BZ Ede
Phone: +31 318 695 757
Fax: +31 318 695 758
www.invacare.nl
[email protected]
Italy
INVACARE MECC SAN S.R.L.
Via dei Pini 62
I-36016 Thiene (VI)
Phone: +39 0445 38 00 59
Fax: +39 0445 38 00 34
www.invacare.it
[email protected]
Norway & Iceland
INVACARE AS
Grensesvingen 9
Postbox 6230 Etterstad
N-0603 Oslo
Phone: +47 22 57 95 00
Fax: +47 22 57 95 01
www.invacare.no
[email protected]
Germany
INVACARE AQUATEC GmbH
Alemannenstrasse 10
D-88316 Isny
Phone: +49 75 62 700 0
Fax: +49 75 62 700 66
www.invacare-aquatec.com
[email protected]
United Kingdom & Ireland
INVACARE LTD
South Road
Bridgend Industrial Estate
UK-Bridgend, CF31 3PY
Phone: +44 1 656 664 321
Fax: +44 1 656 667 532
www.invacare.co.uk
[email protected]
Spain
Portugal
INVACARE Lda
Rua Senhora de Campanhã 105
P-4369-001 Porto
Phone: +351 225 1059 46/47
Fax: +351 225 1057 39
www.invacare.pt
[email protected]
New Zealand
INVACARE NZ
4 Westfield Place,
Mt. Wellington
Auckland
Phone: +64 9 917 3939
Fax: +64 9 917 3957
www.invacare.co.nz
[email protected]
Switzerland
MOBITEC REHAB AG
Benkenstrasse 260
CH-4108 Witterswil
Phone: +41 61 487 70 80
Fax: +41 61 487 70 81
[email protected]
Australia
INVACARE Australia Pty Ltd
1 Lenton Place, North Rocks
NSW 2151
Phone: +61 2 8839 5333
Fax: +61 2 8839 5353
www.invacare.com.au
[email protected]
Austria
MOBITEC MOBILITÄTSHILFEN GmbH
Herzog Odilostrasse 101
A-5310 Mondsee
Phone: +43 6232 5535 0
Fax: +43 6232 5535 4
www.mobitec-austria.com
[email protected]
Invacare® Rea AB
Box 200, Växjövägen 303
343 75 Diö
Sweden
Ident. no.: 1492214
Version:06
Date:20.09.2012
Manufacturer (on behalf of Invacare):
as electronics
Kantstraße 10
D-72663 Großbettlingen
INVACARE S.A.
C/Areny S/N
Poligon Industrial de Celrà
E-17460 Celrà (Girona)
Phone: +34 972 49 32 00
Fax: +34 972 49 32 20
www.invacare.es
[email protected]