Download Untitled - Shopify
Transcript
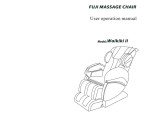
Thanks for purchasing this product. Please read this manual instruction carefully in order to know how to use this product correctly before operation. Please pay more attention to some important safety warning and keep this manual book properly for future use. Note: Our Company reserves the right to revise the design and description of this product without any further notice. Please refer to the actual color of this product. CONTENTS Safety and maintenance 02 Name and function of components 04 Function 05 Method of usage 06 13 Product specification 01 Safety and maintenance Safety and maintenance 1.IMPORTANT SAFETY WARNING. Don t allow children to touch moveable part of this product. Please use well-grounding power supply suited to this product. Please pull out the plug after use or before cleaning to avoid injury or Damage to the product. Please operate this product according to this manual instruction. Don t use accessories which are not recommended. Don t use this product outdoors. Please read this manual instruction carefully before operation. Any other usage that is not listed in this manual instruction is forbidden. 15 minutes of usage each time is recommended. Please don t use it if the leather is broken or damaged. Please don t use it if the cover or leather is damaged. Please don t use it if the radiator hole is covered or blocked. Please don t drop anything into this product. Please don t fall asleep while using this product. Please don t use it if drunk or feel unwell. Please don t use it within one hour after having meal. Please don t make the massage function too strong for avoiding Injury. 2. Environment for usage. Please don t use it under high temperature and moist environment such as bathroom. Please don t use it immediately while the environmental temperature changes sharply. Please don t use it under heavy-dusty or caustic environment. Please don t use it where there is not enough space or not good ventilation. 3. People who are not suitable to use this product. People who are suffering from osteoporosis are not suitable to use this product. People who are suffering from heart disease or carrying electronic medical equipment such as heart pacemaker are not suitable to use this product. People who are suffering from fever are not suitable to use this product. Pregnant women or women that are in menses period are not suitable to use this product. People who got injured or skin disease are not suitable to use this product. Children under 14-year old or people mentally unbalanced without being Supervised are not allowed to use this machine. People who are told by doctor to have rest or people who feel unwell are not suitable to use this product. People whose bodies are wet are forbidden to use this product. 4. Safety. Check the voltage if it is suitable to the specification of this product. Don t use wet hand to pull the plug. 02 Don t make water go inside this product to avoid electric shock or cause damage to this product. Don t damage the wires or change the circuit of this product. Don t use wet cloth to clean the electric parts such as switch and plug. Be away from this product under power cut state to avoid injury if the power comeback suddenly. Stop using this product while it works abnormal, and please consult local agent immediately. Stop using this product if you feel unwell, and please consult health care doctor. This appliance is not intended for use by persons (including children) with reduced physical, sensory or mental capabilities, or lack of experience and knowledge, unless they have been given supervision or instruction concerning use of the appliance by a person responsible for their safety. Children should be supervised to ensure that they do not play with the appliance. If the supply cord is damaged, it must be replaced by the manufacturer, its Service agent or similarly qualified persons in order to avoid a hazard. The appliance has a heated surface. Persons insensitive to heat must be careful when using the appliance. 5. Maintenance. This product should be maintained by certain appointed agents, users are prohibited to disassemble or maintain by themselves. Please don t forget to cut the power after usage. Don t use this product if the socket looses. If this product will be left unused for long, please curl up the wires and reserve this product in dry and dustless environment. Don t reserve this product under high temperature or near fire and avoid longtime direct sunshine. If the detachable cord / supply cord is damaged, it must be replaced by the manufacturer, its service agent or similarly qualified persons in order to avoid a Hazard. Please clean this product by dry cloth. Don t use thinner, benzene or alcohol. The mechanical components of this product are specially designed and made, it is not necessary to be specially maintained. Don t use edged res to thrust this product. Don t roll or pull this product above uneven ground, it should be lifted before moving. Please use it intermittently; don t make this product work continuously for long. 6. Solution of ordinary malfunctions. It is nature movement voice if the motor sounds while in usage. If the controller can t work normally, please check the plug and socket if they are connected strongly and make sure the switch is turned on. If the rated working time is over, the product will automatically activate the power-off button; If this product works continuously for long, the temperature protector will make the product automatically power-off, it should be used again after half an hour s r est. 03 Name and function of components Function 1 2 8 3 9 10 4 5 1.Head Cushion 2.Upper arm air bags assembly 3.Hand controller 4.Arm Airbags 5.Seat Cushion 6.Legs Frame 7.Foot Frame 8.Back Cushion 9.Armrest 10.Decoration Strip 11.Back Cover 12.Air Vent 13.Hand controller holder 14.Caster 15.Power Line and Plug 16.Switch 17.Fuse Box 18.Socket 6 7 11 12 Function Designed with a set of vertically movable, four wheel driven muted intelligent massage hands. Automatically scan and adjust the massage point of the upper body and the position of shoulder. Designed with emulation massage methods of shiatsu, kneading, flapping, knocking, simultaneous kneading and flapping. Designed with five automatic massage function: comfort, stretch, neck&shoulder, back&waist, full air pressure. Designed with three kinds of memory function: memory mode can reserve the mode and the angle currently as you like, you can call out next time when you turn on the machine. Manual massage for the upper body with three options, fixed, partial and overall massage, with five levels of speed adjustable. In the state of flapping, shiatsu and knocking, the width between the two kneading balls is adjustable, with three levels: wide, medium and narrow. On partial and fixed point, the massage hands can move up and down to adjust the massage point accurately. Air pressure massage function with three modes: full body air pressure, lower body, arms, set with 41 airbags, three intensity optional. Back heating function: with carbon fiber as infrared heating. Upper arms can move up and down, can fit for different body height. Designed with buttock vibration and intensity adjustable. Calfrest can extend stepless and turn over freely. Calfrest and backrest can be reclined and declined, lying mode can be adjusted. Automatically sit up and restore massage hands to original position when turn off the machine. VFD display. 13 14 15 16 17 04 18 05 Method of usage Method of usage 1.Switch on the power supply of the whole unit Position of the power switch Connect method figure 2.Start to massage NOTE: this is for reference only, please take practicality as standard 1) Press the red power button to start massage. 2) Automatically detecting shoulder position and massage points, please wait till the di-di...di... alarmed, can adjust the shoulder position. And the massage chair can adjust to an angle automatically. In shoulder and massage point detection process, you can choose Characterized auto massage mode(Memory A Massage, Memory B Massage, Memory C Massage)and Auto Massage(comfort, stretch, neck and shoulder, back and waist, full air pressure) and any button in auto massage mode to massage,(can skip steps 3,4 directly),and the auto adjust angle stop. 3) If there is difference with the massage balls and the actual shoulder position, you Can adjust the up and down button to a suitable position. Shoulder position has 5 Grades adjustable. Move the massage balls upward to a suitable position Shoulder position adjustment (Upper button) Move the massage balls downward to a suitable position Shoulder position adjustment (lower button) KNEAD FLAP KNEAD&FLAP SHIATSU KNOCK SPEED WIDTH Shoulder adjust High shoulder position suitable shoulder position Low shoulder position ARM LOWER BODY INTENSITY A B C VIBRATION TIME COMFORT STRETCH BACK HEAT 4). Default into ease mode, you can choose other massage modes to massage A.Characterized massage, upper body auto massage ADJUSTING SHOULDER NECK& SHOULDER BACK& WAIST Timing set AIR PRESSURE 06 Function Button Time set TIME Description Time setting has four grades adjustable:15 20 25 30min. Follow by cycle. 07 Display Method of usage Method of usage Characterized auto massage Function Function Characterized auto massage Memory A Massage Restore to the stored massage Status A to massage Memory B Massage Restore to the stored massage Status B to massage Memory C Massage C Fixed position (fixed point) massage Back stretch Back stretch Restore to the stored massage Status Cto massage Upper body (overall) back and forth COMFORT Comfort massage STRETCH Stretch Automatic Massage BACK& WAIST Neck and shoulder massage Back and waist AIR PRESSURE Small area (partial) massage back and forth Back stretch Massage Feature Button MassageContent NECK& SHOULDER Display Back stretch Automatic Massage Function Description Button Massage Feature Button MassageContent Air pressure mode Display Status Relax body physique F1 Auto Promote blood circulation F2 Auto Massage focus on neck and shoulder F3 Auto Massage focus on back and waist F4 Auto Massage on arms, buttock, foot. 3 grades intensity adjustable. Arm Feet buttocks Massage point adjust(in fixed point, partial modes you can adjust the massage position) Massage hands move up Lower Adjust Massage hands move down Upper Adjust Air pressure massage Function Description Button Display Air pressure massage on arms. ARM ARM B.Upper body manual massage, lower body manual massage Upper body manual massage Function Button Massage Feature Kneading:massage manipulation,speedadjustable LOWER BODY Technique KNEAD&FLAP SHIATSU KNOCK LOWER BODY INTENSITY INTENSITY SPEED width WIDTH Strength: arm air pressure strength has 3 levels adjustable Feet buttocks Tapping: massage manipulation, speed and width adjustable Kneading and tapping: massage manipulation, speed Adjustable Shiatsu: massage manipulation, speed and width adjustable Other manual function Function BACK HEAT knocking: massage methods, speed and intensity area adjustable. Button BACK HEAT VIBRATION VIBRATION speed buttocks Display Status KNEAD FLAP Feet Air pressure massage on buttock, calf, foot. Speed: with 5 levels available Description Far infrared back heating function, feel warm 3 minutes after start Vibration function is divided into three modes: strong, weak, and close.Three modes circulation function. Width: 3 levels available (in taping and kneading massage mode) 08 09 Display Method of usage Method of usage 3.The angle of back rest and calf rest Buttons Description Auto lie-down mode: with 3 auto lie-down modes, when press the button, turn into one mode. Display Cut off the power of the whole machine Figure (figure of the power cut off). 01 ~ 03 Calf rest lifting button: press this button, calf rest lifting slowly, stop when release it. Calf rest decline button: press this button, calf rest decline slowly, stop when release it. Back rest lifting button: press this button, back rest lifting slowly, stop when release it. Method for cutting off the power supply 5.Calf rest extend infinite or turnover freely Calf rest using extend infinite adjust function, fit for different heights using foot support turn over freely, massage on foot at any angle. Ahead driving Turnover Back rest decline button: press this button, back rest decline slowly, stop when release it. Position for switching the power supply off Linkage upward: press this button, the back rest lifting slowly, and the calf rest decline slowly at the same time, stop when release it. Linkage downward: press this button, the back rest decline slowly, and the calf rest lifting slowly at the same time, stop when release it. 4.Turn off power, stop massage 1) Press red power button during massage to stop all massage functions immediately, the backrest and footrest will return to original position Automatically. After rated working time, all massage functions will be finished but backrest and footrest won't return to original position. 2) After rated working time or switch off, the handle controller displayed "Memory Set On" and glitter, and remind the users whether need to store the massage mode before turn off, you can choose the memo function buttons A, B, C as your requirement, store the massage mode. Press the red button again, the machine turn off, and the massage hands will restore to the original position, or wait for 10 seconds, the machine turn off automatically, and the massage restore to the Original position. Calf rest turnover freely Calf rest extend infinite 6.Upper arms installation Zipper the upper arms open which on the rear end, connect the air tubes between backrest frame and upper arms; insert the guide post on the upper arms into corresponding holes on the backrest frames, avoid to bending.( Figure 1) Pressing the upper arms and fixing it on the backrest frame with two screws, check the air tube whether it is bending and the zipper is pressing before it is fixed.(Figure 2) Pull zipper to the bottom, flapping the surface to make it smoothly(Figure 3). The installation finished. Note: do not yank, press and twist with force when using it. (Figure 4) Zipper NOTES If the massage is time up, and without press memory function, backrest and calf rest cannot restore automatically. Figure 1 10 Figure 2 Figure 3 11 Figure 4 Method of usage Method of usage NOTES 1. When you stand up, cannot with your body press on the two sides top edge of armrest, see figure 1 2. Cannot press inward on the top edge of arm rest see figure 2 3. Cannot sit on the top edge of armrest see figure 3 WARNINGS Ready for the handle controller tray, steel pole, take out the fixed screws on the handle controller tray. (Figure 1) Insert the ball joint of the steel pole to the concave spherical of the handle controller tray.(figure 2) Figure 1 ( Figure 1) WARNINGS WARNINGS Figure 2 ( Figure 2) Screw the screws in to the hole which got in step 1 and tighten it, take care the direction, should be screw it from right to left. (Figure 3) Prepare the cylindrical fixed pipe.(Figure 4) Figure 3 ( Figure 3) 7.Handle controller frame installation Handle controller tray ( Figure 4) Put the cylindrical fixed pipe in to the hole on the right armrest, take care that the sthere hole on the fixed pipe should be one to one corresponded with the hole on the arm rest ofthe flange plate. (figure 5) Screw three screws to tighten it ( figure 6) Screw Frame Handle controller frame assembly Note: the gap should be face down and vertical to the earth ( Figure 5) 12 ( Figure 6) 13 Method of usage Method of usage Prepare the handle controller frame assembly in step 3.(figure 7) Insert the handle controller frame assembly in to the cylindrical fixed pipe, be carefully that the two groups hole out side and inside should be one to one correspond.(figure8) 8.Controller installation and usage Insert the handle controller in to the frame (figure 1), the frame can turn left and rig ht freely. (Figure 2) and the handle controller can swing freely in horizontal direction. ( Figure 7) ENLARGE FIGURE ( Figure 8) ( Figure 1) Prepare two screws which tighten on two sides (figure 9) Screw the two screws on two sides make it tighten, finish the installation( figure 10) ( Figure 2) ( Figure 9) ( Figure 10) ( Figure 3) 9.Pillow and backrest pad's dismounting and use manual. Using pillows can reduce the kneading massage intensity on shoulder and neck, according to your needs to decide whether the pillow pad is needed (recommend head cushions). Backrest cushion and backrest connected by zipper (1), head cushion and backrest pad connected by thread gluing (2) Zipper ( Figure 1) 14 15 Fastener ( Figure 2) WAI KI KI I F uj i Ma s s a geCha i r