1
DIGITAL RAIN GAUGE
Model WS9004IT
Instruction Manual
!!Please read carefully before operating!!
INTRODUCTION:
Congratulations on purchasing this tiny 915MHz digital rain gauge
which displays the total rainfall and rainfall amount of the last 24
hours. With only two simple keys, this innovative product is userfriendly and ideal for domestic use.
1
« Instant Transmission+» is the up and coming state-of-the-art new
wireless transmission technology, exclusively designed and developed
by LA CROSSE TECHNOLOGY.
“IT +” offers you an immediate update of all your outdoor data
measured from the transmitters: follow your climatic variations in
real-time!
2
FEATURES:
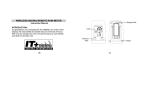
The digital rain gauge station
Display of the total rainfall amount in inches
Display of the rainfall amount of the last 24 hours in inches
Alarm function for the last 24-hour rainfall amount
Heavy rain /light rain indicator displayed on the LCD
Low battery indicator for both the digital rain gauge station and
rain sensor
Table standing or wall mountable (foldout table stand)
3
The Outdoor Rain sensor
Remote transmission of rainfall
measurements by 915 MHz
signal.
Can be fixed onto a horizontal
panel with the screws provided.
SETTING UP:
1.
First, insert the batteries into the outdoor rain sensor. (see
“How to install and replace batteries into the rain sensor”
below).
4
2.
3.
Within 1 minute of powering the rain sensor, place the
batteries into the digital rain gauge station (see “How to
install and replace batteries into the digital rain gauge”
below). Once the batteries are in place, all the segments will
light up momentarily and a beep sound will be heard.
Then the digital rain gauge will start to receive data from the
outdoor rain sensor. Total rainfall and 24 hour rainfall readings
will then be displayed as "0.00" on the LCD. If this does not
happen after few minutes, the batteries will need to be
removed from both units and reset from step 1.
5
Note:
Both the "Total Rain" and "24h Rain" readings should be "0.00"
before any water has fallen into the rain sensor when setting up. If
the readings are not "0.00" initially, you may need to remove
batteries from both units and reset from step 1.
4.
Once the rainfall readings have been received and are
displayed on the digital rain gauge, you may set up a desired
rainfall alarm value for the 24-hour rainfall and the digital rain
gauge will start to operate normally.
6
How to install and replace batteries into the digital rain gauge
1.
2.
3.
Flip open the battery cover at the back of
the digital rain gauge.
Checking the correct polarization, insert 2
x AAA, IEC LR3, 1.5V batteries into the
battery compartment.
Replace the cover.
7
How to install and replace batteries into the rain sensor
1.
Unlock the main cover from
the rain sensor base and
remove the cover.
2.
Remove the battery cover
at the top of the rain sensor.
Press to unlock
3.
Insert 2 x AAA, IEC LR3,
1.5V batteries into the
battery compartment,
observing the correct
polarity.
4.
Replace the battery cover
and the main cover on the
unit.
8
Note:
In the event of changing batteries in any of the units, all units need to
be reset by launching the setting up procedures. This is because a
random security code is assigned by the rain sensor at start-up and
this code must be received and stored by the digital rain gauge in the
first minutes of power being supplied to it.
BATTERY CHANGE:
It is recommended to replace the batteries in all units every 36
months to ensure optimum accuracy of these units.
Please help in the preservation of the environment.
Return used batteries to an authorized depot.
9
Function Keys:
There are two easy-to-use function keys on the digital rain gauge
reset/ + key
alm /set key
10
reset/ + key
Press and hold for over 4 seconds to reset the main rainfall
counter (a beep will be heard after 2 seconds, then the
counter will be reset and a beep will be heard after 4 seconds)
Press to adjust the alarm value by one unit (0.05” to 4.00”) in
alarm setting
Press to stop the sound of the alarm
alm/ set key
Press and hold this key for 2 seconds to activate/ deactivate
the rainfall alarm (the alarm icon will be displayed). Pressing
the key again for 2 seconds will deactivate the alarm, as for a
traditional alarm clock.
11
Press and hold for more than 2 seconds to enter the alarm
setting (a beep will be heard, the value will be flashing on line
2, preset to 0.00”). Press again to exit the alarm setting (there
is also a 15 second timeout.) A beep wil be heard in both
cases.
Press to stop the sound of the alarm
12
LCD SCREEN
Total
Rainfall
Light Rain &
Heavy Rain (shown)
Indicators
User Defined
Rainfall Alarm
Low Battery Indicator
Rainfall for
Past 24 Hours
View Alarm,
Enter Alarm
Setting
Reset Total
Rainfall, Set Alarm
13
RAINFALL READING
There are two rainfall readings shown on the LCD:
1.
Total Rain
It is the amount of rainfall accumulated and measured since
the digital rain gauge has started working or since the last
reset of the digital rain gauge.
2.
24h Rain
It is the amount of rainfall accumulated and measured during
the last 24 hours. This reading will be updated every hour.
14
HEAVY AND LIGHT RAINFALL INDICATOR
The digital rain gauge will show a rainfall icon which indicates the
rainfall level.
Light rain icon Appears when any amount of rainfall is detected
Heavy rain icon (moving) Appears when the measured rainfall is more than
0.2” in the last 10 minutes
15
ALARM SETTING MODE
Rainfall alarm function is provided with this digital rain gauge. User
may set a rainfall alarm value for the 24-hour rainfall amount. (The
alarm value can be up to 4”).
You may perform the following steps to set up the rainfall alarm:
1.
Press and hold the alarm/ set key for about 4 seconds, The
"Alarm On" icon ((( ))) will appear and the digits will be
flashing.
2.
Press the reset/+ key to adjust the rainfall alarm value.
3.
Press the alm/set key to confirm the setting and return to the
normal display mode.
16
Note
In normal display mode, user may press the alm/set key to
activate [ ((( ))) shown] or deactivate [ ((( ))) not shown] the
rainfall alarm.
When the 24-hour rain amount reaches the preset alarm value
and the alarm is activated, the alarm will sound for 2 minutes.
You may then press any key to stop the sound yet the 24-hour
rainfall digits will keep flashing.
RESETTING THE TOTAL RAINFALL READING
If you want to clear the accumulated total rainfall reading, you may
reset the total rainfall reading to zero by following these steps:
17
1.
Press and hold the reset/+ key for over 4 seconds - with a
beep after 2 seconds and a reset and a beep after 4 seconds.
Then the Total Rain reading will be reset to "0.00".
Note:
The 24-hour reading will remain unchanged after the Total rainfall
reading has been reset.
POSITIONING
THE DIGITAL RAIN GAUGE:
The digital rain gauge comes complete with a convenient stand that
offers the option of table standing or wall mounting. Before wall
18
mounting, please ensure that the distance between the digital rain
gauge and the rain sensor is not larger than 100 metres.
To wall mount:
1.
Fix a screw into the desired wall, leaving the
head extended out by about 5mm.
2.
Carefully hang the station onto the screw by
the hanging hole
Note: Always make sure that the unit locks onto the
screw head before releasing.
19
OUTDOOR RAIN SENSOR:
The Outdoor rain sensor is supplied with two screws which allow you
to fix the rain sensor onto a horizontal panel.
Horizontal panel
20
CARE AND MAINTENANCE:
Extreme temperatures, vibrations and shocks should be
avoided as these may cause damage to the units and give
inaccurate forecasts and readings.
When cleaning the displays and casings, use a soft damp
cloth only. Do not use solvents or scouring agents as they may
mark the LCD and casing.
Do not submerge the units in water.
Immediately remove all low powered batteries to avoid
leakage and damage. Replace only with new batteries of the
recommended type.
Do not make any repair attempts to the units. Return it to its
original point of purchase for repair by a qualified engineer.
21
Opening and tampering with the units may invalidate its
guarantee.
Do not expose the units to extreme and sudden temperature
changes, this may lead to rapid changes in forecasts and
readings and thereby reduce their accuracy.
SPECIFICATIONS:
Rainfall measuring range
Total
:
up to 199.99”
(“OFL” displayed if outside this range)
24-hour
:
up to 5” in the past 2 consecutive hours
(“OFL” displayed if outside this range)
22
Data checking interval
Transmission range
Power Supply:
Digital rain gauge
Outdoor rain sensor
Battery life cycle
Dimensions (L x W x H)
Digital rain gauge
Outdoor rain sensor
:
:
every 6 seconds
up to 100 metres
:
:
:
2 x AAA, IEC LR3, 1.5V
2 x AAA, IEC LR3, 1.5V
approximately 36 months (Alkaline
batteries recommended)
:
:
62.3 x 24.1 x 97.8 mm
144 x 54.6 x 88 mm
23
LIABILITY DISCLAIMER:
Please ensure that all discarded packaging and unwanted electrical
items are discarded in a correct and responsible manner. All
recyclable material should be deposited at relevant recyclable waste
collection points.
As stated on the gift box and labelled on the product, reading the
“User manual” is highly recommended for the benefit of the user.
This product must however not be thrown in general rubbish
collection points.
The manufacturer and supplier cannot accept any responsibility for
any incorrect readings and any consequences that occur should an
inaccurate reading take place.
This product is designed for use in the home only as indication of the
rainfalls.
24
This product is not to be used for medical purposes or for public
information.
The specifications of this product may change without prior notice.
This product is not a toy. Keep out of the reach of children.
No part of this manual may be reproduced without written
authorization of the manufacturer.
This product is guaranteed for the period of 12 months from date of
purchase against failure to operate correctly to its listed
specifications due to any manufacturing defects.
Distributed by:
Sontax Australia
Phone: 1800 653 238
Email: [email protected]
Website: www.sontax.com.au
25