1
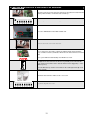
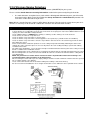
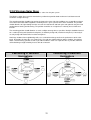
2.2.1 Setting up the SIM Card
IMPORTANT NOTE: The Watchguard SMS 2010 requires a GSM SIM Card. You must purchase this from a
telecommunications provider. Also, it must not be PIN code locked – please follow the instructions below to
‘deactivate (turn off) the PIN code’ if locked.
If the SIM asks you for a PIN code, place it in an existing mobile phone and deactivate (turn off) “PIN code
request.” You may need to refer to your mobile phone manual on how to do this. After deactivating the
request, insert the SIM card into the Watchguard SMS 2010.
Save the system’s phone number in your phone to easily recall for sending SMS commands e.g.
‘WGSMS2010’ or Home Alarm or another meaningful name. This way when the system calls because an SMS
did not get through or sends a normal status message you will know that it is the alarm that has attempted to
contact you and be able to take immediate action.
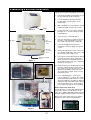
2.2.2 Main Control Unit
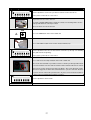
The Main Control Unit requires 12VDC power – the plug pack must be connected to AC voltage at all times.
Therefore, it should be located as close as possible to a power outlet, preferably mounted out of sight. For
maximum wireless range, mount the unit at a height of 1.5m or greater from the ground and ensure there are no
metal objects directly adjacent to the antenna.
Note: Make the antenna as straight as possible, as even small bends can reduce the wireless range
significantly. DO NOT ever attempt to shorten or lengthen the antenna.
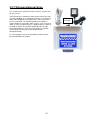
Note: The Watchguard SMS 2010 system has been designed with most single and two storey residential /
business premises in mind. In some instances however, (due to the construction of the building) range may be
diminished, and this may require you to either locate the main control unit, the wireless solar siren, or the alarm
detector closer to one another to achieve reliable performance. Carrying out a Walk Test (Refer Page 13) will
ensure best operation.
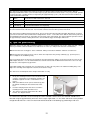
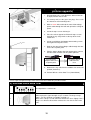
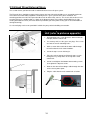
Mounting the Main Control Unit
Antenna – Keep vertical
& straight
1.
Drill the mounting holes (7mm Diameter) into the chosen
location (preferably 1.5m or greater from the floor).
2.
Install the unit so the antenna is straight and vertical.
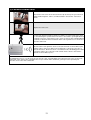
3.
Push the supplied wall plugs into the holes then mount the
unit on the wall using the supplied screws.
4.
Plug the power adapter (with the right angle plug) into your
power point (leaving it switched off), and connect the right
angle plug into the Main Control Unit.
5.
Insert the SIM card into the slot and lock it in place using the
slide.
6.
Turn the power point on where the power adapter is
connected.
7.
Now you can setup SMS messaging (see page 35).
NOTE: Ensure you hold a record of the programmed numbers
and the unit’s SIM card number – this can be done in the
‘Programmed Numbers Reference’ at the start of this manual.
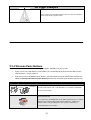
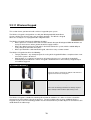
Note: The main control unit must also be turned on with the unit keys provided. The
keyswitch is primarily used for programming in features and optional accessories and is not
necessary after system setup. Once the alarm is configured, the main unit keyswitch should
remain on. See page 28 for more information on the keyswitch.
9