1
Wireless RF Keypad
Part No: WKP
Owner’s Manual
REV 2.1
Thank you for purchasing a Rhino Wireless Keypad (WKP). Please read this manual carefully
before operating and keep it in a safe place for future reference.
Master Code:
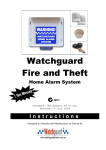
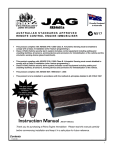
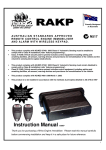
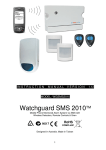
Your WKP can be utilized with any
of the products shown below:
2
Contents
CONTENTS ........................................................................................................................................................... 2
FEATURES ............................................................................................................................................................ 2
Main Features..................................................................................................................................................... 3
OPERATION .......................................................................................................................................................... 3
Activating the Wireless Keypad .......................................................................................................................... 3
Changing User PIN ............................................................................................................................................ 3
Learning in the Wireless Keypad........................................................................................................................ 4
Programming A WKP To Work With Your Watchguard Wireless Home Alarm System.................................... 4
Transmission....................................................................................................................................................... 5
Example:............................................................................................................................................................ 6
Description ........................................................................................................................................................ 6
FUNCTION OF EACH BUTTON ............................................................................................................................... 6
Battery Replacement ........................................................................................................................................... 7
Replacement Procedure: ................................................................................................................................ 7
CARE AND CLEANING .......................................................................................................................................... 8
TROUBLESHOOTING & WARRANTY INFORMATION .............................................................................................. 8
Features
The Rhino Wireless Keypad is designed for use with any product that can currently utilise Rhino
Code Hopping Remote Controls. The WKP can replicate the function of any of the individual
buttons on nay Rhino Code Hopping Remote Control (up to 7 channels). The Wireless Keypad
offers the security of a user-programmable 4 Digit PIN number.
The Rhino WKP is designed primarily for the following applications:
•
Prevents unauthorised use due to loss of remote controls.
•
Where the added security of a PIN number is required to activate the system, with the
added ability to easily change the PIN number at any time i.e. when staff are terminated.
•
For use with hardwired alarm systems where it is impossible or not cost effective to run a
keypad to the preferred customer’s keypad location. Using a low cost Rhino Receiver with a
WKP is a perfect solution in this case.
Note: No function that requires a button to be held can currently be replicated by the WKP.
-2-
3
Main Features
Compatible with all Rhino Code Hopping Remote Control products.
Secure Code Hopping transmission encryption, utilizes over 4 billion random combinations
to prevent scanning, code grabbing and duplicating.
Secure user programmable 4-Digit PIN number to avoid unauthorised use.
Long Life Lithium Batteries.
Up to 7 secure transmission channels.
Backlit buttons for use during low light conditions.
Audible confirmation for each button press and on correct PIN number entry.
Audible low battery warning.
Wall mountable or portable.
SAW locked transmitter will never drift off frequency for reliable operation.
Concealed on-board antenna.
Operation
Activating the Wireless Keypad
The Wireless Keypad is first activated by pressing the ‘#’ key. A single beep tone will be sounded
to indicate the keypad is active, and the LED lights behind the buttons will also switch on.
The Wireless Keypad will be automatically deactivated if no keys are pressed within three seconds.
Changing User PIN
From factory, your Wireless Keypad is supplied with a unique Master Code. This code is required
when changing the User PIN for the first time. The Master Code can be found on the front cover of
this manual, as well as on a small sticker on the rear of your WKP. For security purposes, remove
this sticker from the WKP once you have programmed in your own User PIN number.
-3-
4
Example:
If your master code is “0000” and you wish to have a User PIN “1234”.
Master Code: 0000
New User PIN: 1234
Key
Description
‘#’
This activates the keypad.
“0000”
Enter the master code or the current user PIN.
‘#’
To enter “new PIN programming mode”.
“1234”
Enter the new PIN.
“1234”
Enter the new PIN again.
Long beep, backlight off
Confirms the new PIN has been usefully accepted.
Please Note: After a new PIN has been programmed, the Master Code will still remain functional this is in case you ever forget your chosen PIN. Please store this manual which contains your
Master Code on the cover page in a safe place.
Learning in the Wireless Keypad
In order for the receiver to recognize the Wireless Keypad, the receiver must learn the keypad into
its memory. Learning the Keypad can be done in the same way when you learn a new remote
control for you receiver.
For information on how to learn in a new remote control, please refer to
the Instruction Manual of your receiver. Instructions for programming a WKP into a Rhino
Watchguard Wireless Home Alarm are contained on this page as a ready reference.
Programming A WKP To Work With Your Watchguard Wireless Home Alarm System
TO ADD A WIRELESS KEYPAD FOLLOW THESE STEPS:
Step
Procedure
1.
Disarm the system (if it is not already disarmed) with an original
remote control by pressing Button 2. You do not need to enter
programming mode.
Press 1 time
2.
Press and hold Button 2 (for approximately 3 seconds) on the
original working remote control until the siren starts to beep
continuously, then release the button.
-4-
5
The main unit will beep 9 times to confirm you are adding a new
remote control or wireless keypad.
3.
Siren beeps 9 times
As soon as the beeps finish, activate Channel 2 on your WKP.
4.
Example:
User PIN: 1234
Press
# 1234 2
Activate Channel 2.
The Wireless Keypad is now programmed into your Watchguard
Alarm. To confirm this, activate channel 1 from the WKP to check
that it arms the system.
5.
If the system does not arm, begin this procedure again from the
start.
Activate Channel 1
to test.
Transmission
The Wireless Keypad is equipped with seven (7) RF channels. These channels duplicate the
function of any Rhino RCTX Series Code Hopping Remote Control.
Remote Control Button
Channel Output
Red (or Blue on single button remote)
1
Green
2
Blue
3
Red + Green
4
Red + Blue
5
Green + Blue
6
Red + Green + Blue
7
Note: No function that requires a button to be held can currently be replicated by the WKP.
-5-
6
The transmission of each channel can be triggered by firstly activating the keypad with either the
Master Code or the user PIN.
To transmit, press the hash (‘#’) key then enter either the user PIN or master code, and then simply
select the channel number that is to be used for transmission. The valid channels are channel one
to channel seven (1-7).
A successful transmission is confirmed with a long beep. The button backlighting will turn off
immediately after the transmission.
Example:
If your user PIN is “1234” and you wish to transmit channel 2.
User PIN: 1234
Transmit: Channel 2
Key
Description
‘#’
This activates the keypad.
“1234”
Enter the Master Code or the user PIN.
‘2’
Transmitting channel 2.
Long beep, backlight off
Confirms transmission has occurred.
Function of Each Button
Numerical Buttons:
The Numerical Buttons are labeled with numbers from ‘0’ to ‘9’, ‘*’ and ‘#’; they can be use
for selecting transmission channels and pin numbers.
Activation Key:
The Activation Key is labeled with the “hash” character ‘#’. You press this key first when you
wish to use the Wireless Keypad. This illuminates the keypad buttons, and advises the keypad to
be ready to accept a PIN code.
Backlit Keys:
The Wireless Keypad is equipped with LED backlighting, allowing you to read the buttons
even if the room is dark.
-6-
7
Battery Replacement
Your Rhino Wireless Keypad is powered by long-life lithium batteries. The batteries are expected
to last up to one year in the average home environment.
The Wireless Keypad is capable of
audibly indicating when the batteries need replacing by generating two low tone beeps (instead of
normal single high tone beep) when the hash ‘#’ key is pressed to wake it up. When this occurs,
replace the batteries as soon as possible.
The Wireless Keypad uses two CR2025 type lithium cell batteries. Using incorrect batteries will
damage the device, and will not be covered under warranty.
Replacement Procedure:
Open the case:
To replace the batteries, the first step is to open the case of the Wireless Keypad. The case
of the keypad can simply be prised open up by gently inserting the
flat blade of a small screwdriver (or tip of a knife) into the small notch
in the bottom of the case (see picture right). Once the halves are
separated, the circuit board and the metallic battery compartment should be visible.
Please only
hold the circuit board by its edges, to prevent any damage to the electronic components.
Remove the old batteries:
The old batteries can be removed by pushing them out of the compartment using a nonmetallic object.
Insert the new batteries:
The Wireless Keypad uses two batteries. Whenever replacement is needed, both batteries
must be replaced at the same time.
When inserting the new batteries, make sure both batteries
are orientated correctly; that is both batteries placed on top of one another, with the positive (‘+’)
sides face up. See illustration below:
+
Side View of Battery Holder Showing
Correct Battery Insertion
_
-7-
8
Care and Cleaning
•
•
•
The keypad must maintain free from grease and any liquid.
Avoid placing heavy objects on the Wireless Keypad such as books and magazines.
Clean the device if required with a soft cloth.
Troubleshooting & Warranty Information
Symptom
Cannot activate the Keypad.
The receiver is not responding.
Check
Low battery - Check the batteries and replace them if
necessary.
Out of range or keypad not learned properly -confirm the
keypad is learned in and try the transmission with shorter
distance.
LIMITED WARRANTY
The manufacturer (Cornick Pty Ltd) warrants its products to be in conformance with its own plans and specifications
and to be free from defects in materials and workmanship under normal use and service for twelve months from the
date of original purchase. The manufacturer’s obligation shall be limited to repairing or replacing, at its option, free of
charge for materials or labor, any part which is proved not in compliance with its specifications or proves defective in
materials or workmanship under normal use and service. The manufacturer shall have no obligation under this Limited
Warranty or otherwise if the product is altered or improperly repaired or serviced by anyone other than the
manufacturer.
FOR WARRANTY SERVICE:
Return transportation prepaid along with a copy of your proof of purchase to:
RhinoCo Technology
9 Hannabus Place
McGraths Hill NSW 2756 Australia
Please include your full contact details as well as a detailed description of the fault.
The manufacturer has no obligation to attend the buyer’s location to retrieve the goods or make repairs onsite.
There are no warranties, expressed or implied, of merchant ability,
which extend beyond the description on the face hereof. In no
consequential or incidental damages for breach of this or any other
basis of liability whatsoever, even the loss or damage is caused by its
or fitness for a particular purpose or otherwise,
case shall seller be liable to anyone for any
warranty, express or implied, or upon any other
own negligence or fault.
Seller does not represent that the products it sells may not be compromised or circumvented; that the products will
prevent any personal injury or property loss by burglary, robbery, fire or otherwise; or that the products will in all cases
provide adequate warning or protection. Customer understands that a properly installed and maintained alarm system
may only reduce the risk of a burglary, robbery, or fire without warning, but it is not insurance or a guarantee that such
will not occur or that there will be no personal injury or property loss as a result.
Consequently, seller shall have no liability for any personal injury; property damage or other loss based on a claim the
product failed to give any warning. However, if seller is held liable, whether directly or indirectly, for any loss or damage
arising under this limited warranty or otherwise, regard less of cause or origin, seller's maximum liability shall not in any
case exceed the purchase price of the product, which shall be the complete and exclusive remedy against seller.
This warranty replaces any previous warranties and is the only warranty made by the manufacturer of this product. No
increase or alteration, written or verbal, of the obligations of this Limited Warranty is authorised.
-8-