Download multipointelite™
Transcript
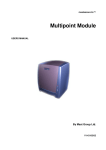
Instruments multipointelite USER AND MAINTENANCE MANUAL By MAST Group Ltd. V0.1-01/11/03 ‘SOLUTIONS THROUGH PARTNERSHIP’ Contents 1.0 Introduction 3 2.0 Preparing the multipointelite For Use 4-9 2.1 Unpacking the multipointelite 4 2.2 Components Checklist 4 2.3 Siting The multipointelite 5-6 3.0 Operating the multipointelite 7 3.1 Button/Display Panel 7 3.2 Routine Use 8 3.3 Automatic Operation 9 3.4 Changing or Removing Inoculating Heads 9 3.5 Turning off the multipointelite 10 3.6 Waste Disposal 10 4.0 General Maintenance 11 5.0 Returning a multipointelite to MAST 12-15 6.0 Trouble Shooting 16 7.0 Technical Information 17 7.1 Supplied Components 17 7.2 Required Components 17 7.3 Optional Components 17 7.4 Technical Data 18 8.0 Contacting Mast 19 User Manual Page 2 Version 1.0 ‘SOLUTIONS THROUGH PARTNERSHIP’ 1.0 Introduction Multipoint technology is a well recognised method for microbial identification and susceptibility testing of bacteria. The procedure is dependent on the accurate transfer of bacterial suspensions from sample wells to the surface of culture media plates. It is imperative that the volume of suspension dispensed and the position of the inoculation is precise and reproducible. The multipointelite (Figure 1) is designed to transfer 0.3 or 1.0 µl of suspension and inoculate in the same position every time to the nearest 0.15mm. The multipointelite™ can be operated using the control panel on either single or continuous mode. Alternatively a foot-operated switch is supplied. This manual will guide the operator on how to unpack, use and clean/maintain the multipointelite™ routinely. Figure 1 multipointelite User Manual Page 3 Version 1.0 ‘SOLUTIONS THROUGH PARTNERSHIP’ 2.0 Preparing the multipointelite™ for Use 2.1 Unpacking the multipointelite™ Unpack the multipointelite™ and all parts from the box to verify contents and examine to ensure there is no damage to the physical appearance of the exterior including the transparent lid. Remove the Transit Bolt, located on the bottom of the instrument using an allen key.. This must be done before any power is supplied to the instrument (Figure 2). See page 17, “Contacting MAST” if any items are missing or damaged. Retain the original packaging. Figure 2 Removing The Transit Bolt 2.2 Components Checklist 1 x Inoculator fitted with Transparent protective lid and Transit Bolt 1 x Reversible Specimen Platen (90mm Petri dishes/96 microwell plates) 1 x 47-63Hz, 100-240V universal external power supply. 1 x Footswitch 1 x Decontamination Certificate 1 x Head Retainer Screw User Manual Page 4 Version 1.0 ‘SOLUTIONS THROUGH PARTNERSHIP’ 2.3 Siting the multipointelite™ The multipointelite™ should be located on a firm and level laboratory bench within 2m of a power supply and with adequate space left and right to accommodate ready to use and inoculated plates. Make sure there is sufficient room above the instrument to allow the cover to be lifted. Figure 3 Back of the Inoculator 2.4 Assembling the multipointelite™ Select which side of the Reversible Specimen Platen (Figure 4) is to be used and fix into position on the multipointelite™. Important Note: Always remove the Reversible Specimen Platen before moving the multipointelite™. The Reversible Specimen Platen should be removed by lifting vertically using both hand-holds. Never lift it from one side only. Figure 4 Positioning The Reversible Platen User Manual Page 5 Version 1.0 ‘SOLUTIONS THROUGH PARTNERSHIP’ If the Foot Operated Switch (figure 6) is to be used then connect to the back of the multipointelite™. The connection is a push fit. Figure 6 Foot Operated Switch Choose the correct Inoculation Head (accessory provided separately) and attach to the Head Carrier and fix in place using the Retaining Screw, Figure 7 Figure 7 The Head Carrier User Manual Page 6 Version 1.0 ‘SOLUTIONS THROUGH PARTNERSHIP’ 3.0 Operating the multipointelite™ 3.1 Button/Display Panel The multipointelite™ is operated using the Button/Display Panel on the front of the machine, Figure 8. Single Cycle Inoculation Continuous Cycle Start Cycle Load/Park Position Stop Cycle Delay Selector Delay Selector (LED Display) Figure 8 Button/Display The display panel is a single continuous membrane array that can be easily decontaminated using a none-corrosive antimicrobial fluid. The functions on the panel are activated by a single gentle press with a fingertip on the buttons. Attach the external power supply to the multipointelite™ at the rear of the instrument (Figure 3) and turn the machine on. This will activate the instrument and guide the Head Carrier into the load position (vertical). The LED will illuminate indicating that the instrument is set to single cycle operation. Important Notes: Do not switch off the multipointelite™ while the Head Carrier is moving. Always press the STOP Button and allow it to come to rest then turn it off using either the rear panel rocker switch or the mains supply to the external power supply. Never operate the multipointelite™ without an inoculator head in place. User Manual Page 7 Version 1.0 ‘SOLUTIONS THROUGH PARTNERSHIP’ 3.2 Routine Operation Place the specimen pot or microwell plate with all the bacterial suspensions on the platen whilst the Head Carrier is in the Park position. Put the first plate to be inoculated on the other side of the platen in the inoculation position (Figure 9). Microwell plates locate into the cut channels on one side of the specimen platen on the other cams can be adjusted to allow secure placement of 9cm Petri dishes and the inoculum pot. Figure 9 Loading Plates Press plate. on the control panel or depress the footswitch to inoculate a single Remove the inoculated plate and repeat for each of the plates to be inoculated. User Manual Page 8 Version 1.0 ‘SOLUTIONS THROUGH PARTNERSHIP’ 3.3 Automatic Operation The multipointelite™ can be set to automatic by pressing the button that represents This will turn off the light representing and turn on the light representing The delay indicator LED strip will also illuminate at position “2”. Load the first plate and press this will then automatically inoculate plates with a delay in between plates of 2 seconds. The delay time can be altered while the multipointelite™ is in automatic mode and is stationary. The delay can be set between 1 and 3 seconds in 0.5 second increments using the button to increase the delay. The LED corresponding to the delay time is illuminated. Pressing the button when the delay is 3 seconds resets the delay to zero and extinguishes the LED’s. Pressing the button again sets the delay to 1 second and illuminates the “1” LED. Pressing the STOP Button, cycle is completed. , stops the unit after the current inoculation 3.4 Changing Or Removing Inoculating Heads When all the plates within a plate run have been inoculated the Head can be removed or changed by pressing .. The Inoculum Head will move into the Park position allowing access to remove the Head. Unscrew the Head Retaining screw and take off the Head. If another set of plates is to be inoculated then secure next Head in place with the Head Retaining Screw. Replace the inoculum pot or microwell plate with the next set of specimens. Load the first plate to be inoculated Press User Manual to begin the next cycle. Page 9 Version 1.0 ‘SOLUTIONS THROUGH PARTNERSHIP’ 3.5 Turning Off the multipointelite™ The multipointelite™ should be turned off when not in use. At the end of inoculating operations stop the inoculator with the “Stop”. Park the inoculum head and remove. Remove any inoculum container or specimen plates, switch off the machine using the rocker switch on the rear panel, replace the Head Retaining bolt and lower the protective lid. 3.6 Waste Disposal Observe approved biohazard precautions and aseptic techniques while handling live cultures. Sterilise all biohazard waste before disposal according to local regulations and laboratory policy. User Manual Page 10 Version 1.0 ‘SOLUTIONS THROUGH PARTNERSHIP’ 4.0 General Maintenance It is recommended that the instrument is decontaminated periodically to avoid cross contamination and keep the multipointelite™ clean. A non-chlorine based disinfectant is recommended. Before cleaning the multipointelite™ must be switched off and the mains plug disconnected. All surfaces of the multipointelite™ should be wiped with a soft cloth soaked in the relevant disinfectant. Abrasive materials such as scouring pads should not be used and the multipointelite must be protected from aggressive chemicals. All accessories from the SCAN range except for the inoculator must be autoclaved to remove bacterial contamination in between plate runs. Alternatively the inoculum pins can be left in the Inoculum Head and placed in 70% v/v aq. isopropyl alcohol for a period of time then taken out and air dried. The multipointelite™ contains no user serviceable parts. User Manual Page 11 Version 1.0 ‘SOLUTIONS THROUGH PARTNERSHIP’ 5.0 Returning a multipointelite™ to MAST In the unlikely event that a machine needs to be returned to MAST a Decontamination Certificate needs to be completed and the instrument decontaminated appropriately. It is also necessary for MAST Customer Services to authorise return of instruments (See page 17 “Contacting MAST”). MAST will not process any returned instruments without appropriate authorisation and a completed Decontamination Certificate, which should be faxed to MAST before shipment or placed in the box the multipointelite™ will be packed in. The certificate should be placed on top of the multipointelite™ inside the packaging. A Decontamination Form is supplied with the instrument and included in this manual. If a certificate is lost or needs replacing contact either the Customer Services or Instruments Support Teams who will send replacement certificates. Alternatively the Decontamination Form in this manual can be photocopied and used for any return of goods. To decontaminate the instrument use a suitable non-chlorinated disinfectant Wipe all surfaces using a soft/non-abrasive cloth soaked in disinfectant. Allow all surfaces to dry before packing the instrument. Clearly state the disinfectant used on the Decontamination Form. MAST will not process any returned instruments if the disinfectant used is deemed insufficient for the purpose of biological decontamination. It is highly important that before packing the instrument for return to MAST the Transit Bolt is put in to position and tightened to prevent any damage in transit. Ensure the machine is in the Park position. Screw the Transit Bolt through bottom of the chassis and into the bottom of the Head Carrier. The multipointelite™ can now be placed into the box it was supplied in and despatched to MAST. The decontamination form comprises the following 3 pages:- User Manual Page 12 Version 1.0 ‘SOLUTIONS THROUGH PARTNERSHIP’ Decontamination Certificate Decontamination Prior To Inspection. Servicing Or Repair Of Medical And Laboratory Equipment 1. We are seeking co-operation from all our customers to ensure that our sales staff are not exposed to health risks arising from exposure to residues of hazardous or potentially hazardous materials. 2. We require an authorised Decontamination Certificate for all equipment which we service, maintain or repair on site or which is returned to our premises or after a period of loan or demonstration. 3. Under the Health and Safety at Work Act (c.37 Pt. 1.3-(1). "It shall be the duty of every employer to conduct his undertaking in such a way as to ensure, so far as is reasonably predictable, that persons not in his employment who may be affected thereby are not thereby exposed to risks to their health or safety ." 4. Guidelines issued by the DHSS can be found in HEl No.98 January 1982 Appendix D. 5. We reserve the right to delay the commencement of any work until such a Decontamination Certificate has been completed by the customer evidencing that the equipment has been decontaminated and IS free from significant health or safety risks. 6. Where equipment is being returned to our premises we ask you to first contact the Customer Services Manager -See Para 8.. You will be issued with a "Returns Authorisation Number" which will be your reference for future correspondence. You will be required to include a signed Decontamination Certificate within the packaging in an easily accessible place. A Returns Authorised label must be attached to the outside of the packing where it can be clearly seen. 7. IN ALL CASES WE REQUIRE COMPLETION BY THE CUSTOMER OF A SIGNED DECONTAMINATION CERTIFICATE. 8. All enquiries regarding this form and its use should be directed to: THE CUSTOMER SERVICES MANAGER MAST GROUP L TD., MAST House, Derby Road, BootIe, Merseyside L20 1 EA United Kingdom 9. All enquiries for Returns Authorisation, queries etc, should be directed to: THE CUSTOMER SERVICES MANAGER MAST GROUP L TD., MAST House, Derby Road, Bootle Merseyside L20 IEA United Kingdom User Manual Page 13 Version 1.0 ‘SOLUTIONS THROUGH PARTNERSHIP’ Decontamination Certificate Decontamination Prior To Inspection. Servicing Or Repair Of Medical And Laboratory Equipment TO: (Manufacturer/Supplier): Make & Description of equipment: …………………………………….. …………………………………….. …………………………………….. …………………………………….. …………………………………….. …………………………………….. ……………………………………. ……………………………………. ……………………………………. ……………………………………. ……………………………………. ……………………………………. Returns Authorisation Ref.: Model/Serial/Batch No: ……………………………….…… ……………………………………. Customers Ref./Order No Other distinguishing Marks: ……………………………………. ……………………………………. Has this equipment been exposed internally or externally to any of the following. Please answer all questions by deleting Yes/No as applicable and by providing details in Section B below: 1.Blood, body, pathological specimens 2.Chemicals or substances hazardous to health YES/NO Provide details below YES/NO 3.Other biohazards 4.Radioactive substances. State below names and quantities of isotopes and checks made for residual activity YES/NO Provide details below YES/NO User Manual Page 14 Version 1.0 ‘SOLUTIONS THROUGH PARTNERSHIP’ Decontamination Certificate Decontamination Prior To Inspection. Servicing Or Repair Of Medical And Laboratory Equipment 5.Biodegradable material that could be hazardous. 6.Other Hazard YES/NO Provide details below YES/NO Provide details below B. Please provide details of any hazard present as indicated above. Include details of names and quantities of agents as appropriate. ………………………………………………………………………………………… ………………………………………………………………………………………… ………………………………………………………………………………………… ………………………………………………………………………………………… C. Your method of decontamination (please describe ) ………………………………………………………………………………………… ………………………………………………………………………………………… ………………………………………………………………………………………… ………………………………………………………………………………………… D. Are there likely to be areas of residual contamination (please specify) ………………………………………………………………………………………… ………………………………………………………………………………………… ………………………………………………………………………………………… ………………………………………………………………………………………… I declare that the above information is true and complete to the best of my knowledge and belief. Authorised Signature: …………………………Date: …………………..………... Name (Printed): ………………………………..Position: ………………………… Customer' s Name………………………….......Tel:………………..….………….. Dept Address: ………………………………………………………………………………………… ………………………………………………………………………………………… …………………………………………………………………………………………. User Manual Page 15 Version 1.0 ‘SOLUTIONS THROUGH PARTNERSHIP’ 6.0 Trouble Shooting Problem Solution Switch on machine and it produces a humming noise then stops Ensure the Transit bolt has been removed No lights are on and the buttons do not respond Ensure the power supply is connected properly at both ends The automatic mode is too fast Press the Stop Button then select a longer delay using the Delay Button All Front Panel LED' s flash The unit has detected an internal error. Turn off and back on. If the error repeats contact MAST. User Manual Page 16 Version 1.0 ‘SOLUTIONS THROUGH PARTNERSHIP’ 7.0 Technical Information 7.1 Supplied Components The multipointelite™ is always supplied with the following components: 1 x Inoculator 1 x Reversible Specimen Platen (90mm Petri dishes/96 microwell plates) 1 x 47-63Hz, 100-240V universal external power supply. 1 x Transparent protective lid 1 x Footswitch 1 x Decontamination Certificate 1 x Retainer Screw 1 x Transit Bolt 1 x Assembly Marker 7.2 Required Accessories To operate the multipointelite™ at east one of the following must be purchased separately: SCANES019 EQUIPMENT SET FOR 19 POINT INOCULATION SCANES019NEQUIPMENT SET FOR 19 POINT INOCULATION (NCCLS) SCANES036 EQUIPMENT SET FOR 36 POINT INOCULATION SCANES036N EQUIPMENT SET FOR 36 POINT INOCULATION (NCCLS) SCANES096 EQUIPMENT SET FOR 96 POINT INOCULATION SCANES096NEQUIPMENT SET FOR 96 POINT INOCULATION (NCCLS) Depending on the country where the instrument is to be used an IEC socket replacement lead made be required to fit connect the external power supply to the mains 7.3 Optional Accessories The versatility of the multipointelite™ allows inoculation in different formats depending on the plate type and size. A wide range of accessories is available. Details of all accessories can be found in the Mast Price List. User Manual Page 17 Version 1.0 ‘SOLUTIONS THROUGH PARTNERSHIP’ 7.4 Technical Data External Power Supply Mains Voltage 100-240VAC, 47-63Hz Output 12VDC, 4A UK Mains Plug 5A, 240V AC 50Hz Power Consumption 50VA On-Off Duty Cycle 100% Operating Temperature 15o – 50oC Dimension 430mm wide x 210mm high x 350mm deep Weight 12 Kg (including accessories) Regulatory Compliance The equipment is CE marked to indicate conformity to the following standards:In vitro Diagnostic Medical Devices Directive (IVDD) - 98/79/EC Electromagnetic Compatibility Directive (EMC) - 89/336/EEC. Low voltage Directive - 73/23/EEC. BS EN 61326:1998, IEC 61326-1:1997 Electrical equipment for measurement, control and laboratory use. EMC requirements User Manual Page 18 Version 1.0 ‘SOLUTIONS THROUGH PARTNERSHIP’ 8.0 Contacting MAST For more advice and help there are many ways to contact MAST. TELEPHONE CUSTOMER SERVICES +44 (0)151 472 1444 This line is open from 8.00am to 6.00pm Monday to Friday. TECHNICAL SERVICES +44 (0)151 472 1473 This line is open 9.00am to 5.00pm Monday to Friday with an answer machine all other hours. MAIN SWITCHBOARD +44 (0)151 933 7277 This line is open from 9.00am to 5.00pm Monday to Friday with an answer machine all other hours. FAX +44 (0) 151 944 1332 E-MAIL [email protected] User Manual Page 19 Version 1.0


