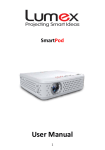
Download User Manual - Projector Central
Transcript
料 号 :4000xxxx
平 面 尺 寸 :360X260MM
成 品 尺 寸 :90x130mm
颜色:单黑印刷
材 料 :128g铜 板 纸
OVERVIEW
操作
OPERATION
REMOTE CONTROL FUNCTIONS
FRONT VIEW
1
SRC
STARTUP AND SHUTDOWN
STARTUP - Connect the external power supply to DC in jack on projector, see
connection 1 , press Power key on remote control or long press the middle wheel
key on the projector to turn on the device.
SHUT DOWN - when the projector is ON, press Power key on remote control and
long press the middle wheel key to turn off the device.
12
11
1. Projection Lens
2
2.Cooling Holes
1
LEFT VIEW
3
3.IR Sensor
2
3
OK
4.Power Supply Receptacle
4
5.LED Indicator
5
6
MIRROR
7
VOL-
6.Focus
7.Wheel Key
FOCUS ADJUSTMENT
The focus can be adjusted by turning the wheel located at the front of the projector.
AUTO
8
ESC
MUTE
VOL+
10
CONNECTION DIAGRAM
9
Power supply
RMT- 800
Upper wheel key
4
6
5
7
RIGHT VIEW
8
10
9
11
BUTTON VIEW
Select loop/ Volume +
1.Power On /Off
Down wheel key
2.Up/Down/Left/Right
Return/ Volume -
3.Ok
Middle wheel key
4.AUTO(detect the external input signal again )
Short press: Confirm
Long press: Turn off
5.Rotation/Mirror
iPhone4、iPad2、
DC、Blu-ray Disc
9.VGA Input/AV Input
8.Mute
10.TF Card Slot
9.Volume Up
11.USB Input
10.Return to upper menu
AV
(FIGURE 1)
6.Play/Pause
7.Volume Down
AV INPUT
Connect with AV cable, please see 3 ,
connect the projector with any device with
AV output. Press “ /
” on remote
control or the wheel key “
” on projector,
then you can project the video from
external source by press “ OK ” key on
remote control or middle wheel key on the
projector.
HDMI INPUT
Connect with HDMI cable, please see 2 ,
plug the HDMI cable into the mini HDMI
jack on the projector, the other side into the
HDMI device . Press “ /
” on remote
control or the wheel key “
” on projector,
select “HDMI input” then you can project
the video from external source by press
“ OK ” key on remote control or middle
wheel key on the projector.
1
8. HDMI Input
BATTERY CHARGING
This device is with built-in lithium battery, indication light is red when charging,
indication light becomes green when battery is full. In case the indication light is
abnormal, it indicate the battery is in unusual condition or damaged, please
stop using the device to prevent from the danger, and contact with the service
center for maintenance.
CD / VCD / DVD
MP3/MP4
Media player
HDMI
(FIGURE 2)
12.Reset
11.Brightness(Circular select brightness mode)
13.Magnet
12.Return to main menu directly
VGA INPUT
When using VGA input terminal to connect
to the video output of other device, the
projector project the video out. Connect
VGA cable, please see connection 4 ,
plug mini VGA terminal to the VGA jack on
projector, the other side to the VGA device.
Press “ / ” on remote control or the
wheel key “
” on projector, select “VGA
Input ”, then you can project the video from
external source by press “ OK ” key on
remote control or middle wheel key on the
projector.
2
12
13
3
4
5
6
5
6
VGA
(FIGURE 3)
7
WARNINGS
8
ACCESSORIES
SRC
OK
AUTO
Caution: To prevent electric shock, match the wide blade on the power cord plug
to the wide slot on an electric outlet. If the plug does not fit, consult a licensed
electrician to replace the obsolete outlet. Do not modify the power cord plug, or
you will defeat this safety feature.
ESC
MIRROR
VOL-
MUTE
VOL+
RMT- 800
REMOTE CONTROL
POWER ADAPTER
VGA CABLE
AV CABLE
HDMI
HDMICABLE
CABLE
Important Safety Instructions
1.
2.
3.
4.
5.
6.
7.
U S ER MANUAL
PORTABLE PROJECTOR MX-60
Read these instructions.
Keep these instructions.
Heed all warnings.
Follow all instructions.
Do not use this apparatus near water.
Clean only with dry cloth.
Do not block any ventilation openings. Install in accordance with the
manufacture's instructions.
8. Do not install near any heat sources such as radiators, heat registers, stoves,
or other apparatus (including amplifiers) that produce heat.
9. Protect the power cord from being walked on or pinched particularly at plugs,
convenience receptacles, and the point where they exit from the apparatus.
10. Only use attachments/accessories specified by the manufacturer.
11. Unplug this apparatus during lightening storms or when unused for long
periods of time.
12. Refer all servicing to qualified service personnel. Servicing is required when
the apparatus has been damaged in any way, such as power-supply cord or
plug is damaged, liquid has been spilled or objects have fallen into the
apparatus, the apparatus has been exposed to rain or moisture, does not
operate normally, or has been dropped.
13. The apparatus shall not be exposed to dripping or splashing and that no
objects filled with liquids, such as vases, shall be placed on the apparatus.
14. The mains plug or an appliance coupler is used as disconnect device, the
disconnect device shall remain readily operable.
15. Do not use this apparatus in the box or in the cabinet, it should be placed on a
ventilation area.
16. Warning: To reduce the risk of electric shock, do not remove the cover or
back, do not expose this apparatus to rain or moisture. There are no userserviceable parts inside. Refer servicing to qualified service personnel.
USER MANUAL
PORTABLE BAG
TRIPOD
For warranty information and registration, please log onto
www.shopprojector.com.
2
3
MULTIMEDIA PLAYER
Player supports the following formats:
Picture format: JPEG、BMP、PNG
Audio format:WMA、MP3
Video format:MPEG、H.264、MJPEG、MOV、AVI、RMVB、RM、MKV、MP4
Text format:TXT
SPECIFICATIONS
1/ 1
Retrun
1ce Age- Dawn
Photo, Audio, Video and Text file can be accessed via TF card and USB. Turn on
the projector, go into the default main interface, please see as below:
Rro 1080P.mp4
DCIM
MISC
Alizee.La.lsla.B.
MADAGA-1.MP4
Rio 1080P.mov
Rlo 1080P.mp4
PROJECTION SYSTEM
Resolution:
Brightness:
Contrast Ratio:
Aspect ratio:
Noise:
Projection Size:
Projection Lens:
Lamp:
Projection Angle:
Rro 1080P.mp4
(FIGURE 6)
USB
Select “
” , press “ OK ” key on remote control or the wheel key on
projector, the files on USB and TF card will be shown. See picture 6, select the
photos you want to browse, and press “ PLAY ” key on remote control or the
middle wheel key on projector to start the browse. Under projector mode, you
can control the setup menu by press “ OK ” key on remote control or the middle
wheel key on projector. Control menu include the functions as below,
Play/Pause, Preview, Next, Stop & Exit, Repeat, background music On/Off,
Play list, Information of current photo play, Clockwise rotate, Counterclockwise
rotate, Zoom out, Zoom in, Move.
(FIGURE 4)
Insert the USB and TF card into the projector (see connection on page 7 at
” wheel key to select to enter into menu of
5 6 ), press “ / ” key or “
USB and TF card. Then press “ OK ” key on remote control or middle wheel key
on the projector to enter into next menu.
MENU SETTINGS
In any mode, press “ SETUP ” key to return to main menu. Press “
remote control or “
/
The Projector needs proper maintenance.
VGA (640x480)
60 ANSI-Lumens
1000:1
4:3
<28 dBA
Available Size 25 ~ 90 inch
Manual Focus
30,000 Hours
33.6°
GENERAL SPECS
Audio/Video Input:
” on wheel key of projector, select and enter in “ SETUP ”
menu, you can set up the video, sound, time, setup, specific setup is as below.
PHOTO
Lens Cleaning - You should keep the lens clean and free of dirt and debris by
using a soft lint-free cloth.
General Cleaning - To clean the projector, first unplug the projector and wipe the
projector with a soft lint-free cloth. Slightly moisten cloth as needed. Do not use
alcohol, benzene, or other cleaning detergents as this may cause discoloration or
warping of the case.
Lamp Replacement – The projector use a 20,000 hour LED lamp that does not
need replacement. Do not attempt to replace the LED lamp.
Stereo Audio
Composite Video (CVBS)
built-in 1 x 1W speaker
PC VGA
Standard 4 Pin USB
Type C
SDHC
Input: AC100 - 240V, 50Hz/60Hz
Output: 5V
2A
8 Watts
Lithium battery 2000mAh/3.7V
0°C - 40°C
25% - 88%
English, Spanish, Portuguese, French,
Deutsch, Italian
150g
75*75*22mm(LxWxH)
Audio Output:
VGA:
USB:
HDMI:
SD/MMC Card:
Power Adaptor:
Power Consumption:
Battery:
Operating temperature:
Operating humidity:
Supported Languages:
” on
MAINTENANCE
Weight:
Dimensions:
Opening the Projector – There are no serviceable parts in the projector. Do not
attempt to open.
Remote Control Battery Replacement – The Remote control uses a CR2025
battery. Please use only CR2025 type batteries for replacement.
(FIGURE 5)
Choose video, music, photo, text in the same way to start playing video, music,
photo, text and so on, the operation is almost the same. Take browsing photo as
example:
First select menu “ PHOTO ” and press “ OK ” key on remote control or middle
wheel key on the projector to enter into next menu.
9
10
VGA PORT DOES NOT WORK
TROUBLESHOOTING
Possible Causes
THE PROJECTOR DOES NOT TURN ON
Possible Causes
On power
Over heating
Solution
Check to ensure the power plug or battery
source is good. Check the power adapter to
ensure a proper connection with the wall
outlet as well as the projector.
VGA cable is not connected
properly
Reconnect VGA cable to ensure proper
connection
Laptop does not switch to
external VGA mode
Switch laptop to external VGA mode
Possible Causes
Solution
HDMI cable is not connected
properly
Reconnect HDMI cable to ensure proper
connection
Lens protective film is not
removed
Please tear off the protective film.
Laptop does not switch to
external VGA mode
Switch laptop to external VGA mode
The lens is dirty
With a soft , lint-free cloth to wipe the projector
lens.
HDMI output mode is not in
range of specification of the
projector
Signal
Refresh rate (HZ)
Composite
video
NTSC
60
720* 480
PAL
50
720*576
640* 480
Analog RGB
(VGA)
Solution
Adjust the focus with the focus adjustment
dial until the image comes into focus.
The Projector is not in focus
Source
See page 15: The projector supports common
formats
HDMI PORT DOES NOT WORK
IMAGE IS BLURRED
See page 15: The projector supports common
formats table
The remote control is dead
AV PORT DOES NOT WORK
Solution
Replace the battery with comparable CR2025
battery
Possible Causes
TF CARD IS NOT RECOGNIZED
Possible Causes
Solution
TF Card is not inserted
properly
Re-insert TF Card
TF Card is damaged
Replace TF Card
VGA
60/66/72/75
56/60/72/75
800* 600
XVGA
60/70/75
1024*768
SXVGA
Solution
60/70/75
1152*864
60/75
1280*960
60/72/75
1280* 1024
60/75
1280*768
60
1360*768
60/75
1280*800
60
1400*900
SDTV(480i)
60
720* 480
SDTV(576i)
50
720*576
SDTV(480P)
60
720* 480
SDTV(576P)
50
720*576
AV cable is not connected
properly
Reconnect AV cable to ensure the correct
connection.
HDTV(720P)
50/60
1280*720
HDTV(1080i)
50/60
1920* 1080
External video device, has
not display
Ensure external video device has output.
HDTV(1080P)
50/60
1920* 1080
THE BATTERY CAN NOT BE CHARGED
Possible Causes
USB DOES NOT RECOGNIZE
Possible Causes
HDMI
Resolution
SVGA
WXVGA
REMOTE CONTROL DOES NOT WORK
Possible Causes
12
THE PROJECTOR SUPPORTS COMMON FORMATS
Solution
PC VGA output mode is not in
range of specification of the
projector
Wait until the projector has fully cooled to
restart.
Possible Causes
11
Please contact with service center for maintenance
(do not unpack in person).
the battery is over-heat
Please turn off the device and then re-charge when
cool down.
Solution
USB is not inserted properly
Re-insert Removable Disk
USB is damaged
Replace Removable Disk
Solution
the battery is damaged
Description: DLP, DLP logo and DLP badge is a trademark of Texas Instruments Incorporated .
Tip: product pictures, information may be nuances and physical, if it updated without notice .
13
14
15
16


