1
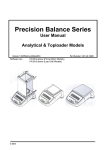
The Intelligent Investment
Intell-Lab Precision Toploading Scale
TB Series
User Operation Manual
CO NTE NTS
1 INTRO DUC TIO N……… ……………………………… ………………………1
2 I NS TALL A TIO N …… …… … …… …… …… …… ……… … …… ….. …… …. 3
3 K E Y D ES C RIP TI O NS …… … …… …… …… …… ……… … …… …… … …4
4 O PE R A TI O N… …… ……… … …… …… …… …… ……… … …… …… . …..5
4 .1 Z eroi ng the dis pla y …… . … …… …… …… …… ……… … …… … … … . .5
4 .2 Tarin g… …… …… ……… … …… …… …… …… ……… … …… …… … .. .5
4 .3 W e i g h i n g a s a m p l e …… … … … … … …… … … … … . .
… … …… . . .5
4 .4 Perc ent wei ghin g… …… ……… …… …… …… ……… … …
.. . … .. ….5
4. 5 Parts c ounting……………………………………… ………..
…… .. .6
4 6 A c c u m u l a t e d … … …… … … … … … … … … … … … … … … … . . …
.… . 6
5 B A T T E R Y O P E R A TI O N … … … … … … … … … … … … … … … … … . . … 7
6 R S- 2 3 2 O U TP U T… … … … … … … … … … … … … … … … … … … … … … . . 8
7 P A R A M E TE R S … … … … … … … … … … … … … … … … … … … … … … … 9
8 A P P E N D I X … … … … … … …… … … … … … … … … … … … .
8 .1 Er ror c ode …… …… …… .. …… …… …… …… … …… … … …
…… 11
.. 1 1
8 .2 W e i g h i n g u n i t l i s t i n g … … … … … … … … … … … … … … … … … . … . 1 1
1. INTRODUCTION
The TB series of electronics balances provides an accurate, fast and versatile
series of general purpose balances with counting and % weighing functions.
All models have stainless steel weighing platforms on an ABS base assembly.
All the keypads are light touch switches and the displays are large easy to read
liquid crystal type backlit displays (LCD). All units have a parts counting function.
All units include automatic zero tracking, automatic tare and an accumulation
facility that allows the count to be stored and recalled as an accumulated total.
2. INSTALLATION
3.1 GENERAL INSTALLATION
The scales should be placed in a location that will not degrade the accuracy.
Avoid extremes of temperature. Do not place in direct sunlight or near air conditioning
vents.
Avoid unsuitable tables. The tables or floor must be rigid and not vibrate. Do not
place near vibrating machinery.
Avoid unstable power sources. Do not use near large users of electricity such as
welding equipment or large motors.
Avoid high humidity that might cause condensation. Avoid direct contact with water.
Do not spray or immerse the scales in water.
Avoid air movement such as from fans or opening doors. Do not place near open
windows.
Keep the scales clean.
Do not stack material on the scales when they are not in use.
3.2 INSTALLATION of TB SERIES
Level the scale by adjusting the four feet. The scale should be adjusted so that the
bubble in the spirit level is in the center of the level and the scale is supported by all
four feet. If the scale rocks, readjust the feet.
Attach the adapter to the connector on the side of the scale. Please make sure the
power supply voltage matches the label on the adapter.
3. KEY DESCRIPTIONS
Zero or Enter
Set the zero point for all subsequent weighing. The display shows zero. A
secondary function, as "Enter" key when setting parameters or other functions.
Tare
Tares the scale. Stores the current weight in memory as a tare value, subtracts the
tare value from the weight and shows the results. This is the net weight.
%
Enters the percent weighing function.
When in percentage mode and current value is zero, press this key to return to the
normal weighing mode.
Print or Accumulation
To print the results to a PC or printer using the optional RS-232 interface. It also
adds the value to the accumulation memory if the accumulation function is not
automatic. The secondary function (ESC), is to return to normal operation when
the scale is in a parameter setting mode.
MODE
This key will select either kilograms, pounds or ounces for the weighing unit when
in the weighing mode.
A secondary function is to change the current value for parameters or other
functions.
When in the counting mode, it allows the weight, unit weight and count to be seen
when parts counting.
Smpl
Use this key to enter the counting mode when in the normal weighing mode. Also
use this key to return to the normal weighing mode when in the counting mode.
ON/OFF
Use this key to turn the power on or off.
4. OPERATION
4.1 ZEROING THE DISPLAY
You can press the ZERO/ENTER key at any time to set the zero point from which
all other weighing and counting is measured, within 10% of power up zero. This will
usually only be necessary when the platform is empty. When the zero point is
obtained the display will show the indicator for zero.
The scale has an automatic rezeroing function to account for minor drifting or
accumulation of material on the platform. When the weight goes over 20% of the
full capacity, the “read zero” function is obsolete.
4.2 TARING
Zero the scale by pressing the ZERO/ENTER key if necessary. The zero indicator will
be on.
Place a container on the platform. A value for its weight will be displayed.
Press the TARE key to tare the scale. The weight that was displayed is stored as
the tare value and that value is subtracted from the display, leaving zero on the
display. The "TARE" indicator will be on. As product is added only the weight of the
product will be shown. The scale can be tared a second time if another type of
product is to be added to the first one. Again, only the weight that is added after
taring will be displayed.
When the container is removed a negative value will be shown. If the scale was
tared just before removing the container this value is the gross weight of the
container plus all product that was removed. The zero indicator will also be on
because the platform is back to the same condition it was when the ZERO/ENTER
key was last pressed.
4.3 WEIGHING A SAMPLE
To determine the weight of a sample first tare the empty container then place the
sample in the container. The display will show the weight and the units of weight
currently in use.
4.4 PERCENT WEIGHING
The scale will allow a sample weight to be shown as 100%. Then any other weight
placed on the scale will be displayed as a percentage of the original sample. For
example if 350g is placed on the scale and the % key is pressed the display will
show 100.00%.
If you remove the 350g weight and put a 300g weight on the scale the display will
show 85.71%, as 300g is 85.71% of 350g.
Note: the scale may jump by large numbers unexpectedly if small weights are used to
set the 100% level. For example if only 23.5g is on a scale with 0.5g increments
and the scale is set to 100%, the display will show 100.00%, however a small
change of weight will cause the display to jump to 102.13% as one scale division
(0.5g)
Pressing the % key will return the scale to weighing.
4. 5 P A R T S C OU N T I N G
When the scale is in the weight mode, pressing the SMPL key will start the
parts counting function.
Before beginning, tare the weight of any container that will be used, leaving the
empty container on the scale. Place the number of samples on the scale. The
number should match the options for parts counting, 10, 20, 50, 100 or 200
pieces.
Press the SMPL key to begin. The scale will show "SP 10" asking for a sample
size of 10 parts. The display will cycle through the options: 10, 20, 50, 100, 200
and back to 10.
Press the SMPL key again when the number matches the number of parts used
for the sample. As more weight is added the display will show the number of
parts (pcs).
Press the MODE key to display unit weight (g/pcs), Total weight (kg) or the
count (pcs). Press the SMPL key to return to normal weighing.
4. 6 A C C U M U L A T I O N
When the scale is set to manual accumulation the weight displayed will be
stored in memory when the PRINT key is pressed and the weight is stable.
The display will show "ACC 1" and then the total in memory for 2 seconds
before returning to normal. If the optional RS-232 interface is installed the
weight will be output to a printer or PC.
Remove the weight, allowing the scale to return to zero and put a second
weight on. Press PRINT, the display will show "ACC 2" and then show the new
total. Continue until all weights have been added.
To view the totals in memory press the PRINT key when the scale is at zero.
The display will show the total number of items "ACC xx" and the total weight
before returning to zero.
The totals will also be printed via the RS-232
interface.
To erase the memory press PRINT to view the totals and then press the SMPL
key to clear the memory.
5. BATTERY OPERATION
When the battery needs charging the
indicator will turn on. Please charge the
battery or use the AC adapter after this indicator turns on.
The scales can be operated from the battery if desired. The battery life is
approximately 50 hours.
To charge the battery simply plug into the mains power. The scale does not need to
be turned on.
The battery should be charged for 12 hours for full capacity.
There is an LED to indicate the status of battery charging. When the scale is
plugged into the mains power the internal battery will be charged. If the LED is
green the battery has a full charge. If it is Red the battery needs charging and
yellow indicates the battery is being charged.
As the battery is used it may fail to hold a full charge. If the battery life becomes
unacceptable then contact your distributor.
6. RS232 OUTPUT
The TB Series of scales can be ordered with an optional RS-232 output.
Specifications:
RS-232
output of
weighing
data ASCII
code
9600 Baud
8 data bits
No Parity
Connector: 9 pin d-subminiature socket
Pin 2
Output
Pin 3
Input, not used at this time
Pin 5
Signal Ground
TB can connect with PC, remote display or mini printer, setup see section 8
7. PARAMETERS
The scale has 8 parameters that can be set by the user plus a method of entering the
calibration section.
To set parameters press the MODE key during self checking
The display will show the first function, "F1 UNT".
Pressing the MODE key will cycle through the other functions.
Pressing the ZERO key will allow you to set the function. Use the PRINT/ESC key
to leave a parameter unchanged.
When the display shows “TECH”, press ZERO key to enter, display shows “PIN”,
press SMPL, PRINT, TARE key, and press ZERO key to enter technical
parameters setting mode.
FUNCTION
F1 UNT
F2 EL
F3 PRT
TECH
P1 LIN
P2 CAL
P3 CNT
P4 AZN
DESCRIPTION
Sets the units you want to use: g / ct / lb / oz / d / gn / ozt / dwt /
mm / tl.T / tl.c / tl.t / t. Use MODE to switch, use ZERO key to set.
Set the backlight to be on, automatic or off,
EL on: EL backlight always on
EL Au: EL backlight automatically turn on
EL of f : El backlight always off
Use MODE key to switch, use ZERO key to set.
Set RS-232
P1 PRT connect with mini printer
P2 RE connect with remote display or PC
Use MODE key to shift, use ZERO key to set.
Pi n
Enter the programming and calibration menus by entering the correct
password (SMPL, Print, TARE) and press ZERO key to enter.
Linear calibration
After you press the ZERO key, display will show PIN again, press
PRINT, SMPL, % key and ZERO key to enter, display will show
UNLOAD, remove all weight from the pan and then press the ZERO
key to set zero point. The display will then show the first calibration
weight request. Put this weight on the platform and then press the
ZERO key when stable. The scale should be stable before pressing
the ZERO key to accept a weight. The stability indicator will turn on
to show the value is stable. After first weight is calibrated, display will
show the next calibrate weight, add calibration weight as display
shows, then press ZERO key.
After all calibration weights
completed, press ZERO to complete the calibration. The scale will
begin counting back to zero after the last weight has been selected.
Normal calibrate
After entering cal mode, the display will show "unLoAd". Remove all
weight from the pan and then press the ZERO key to set the initial
zero point. The display will then show the calibration weight
requested, you can use MODE key to select the calibrate weight you
selected on the platform and then press the ZERO key when stable.
The scale should be stable before pressing the ZERO key to accept
a weight. The stability indicator will turn on to show the value is
stable. The scale will begin counting back to zero after the
last weight has been selected.
This display will show xxxxxx for indicating the internal counts, you
can press ZERO key to escape
This option is used to select the auto zero maintain
Options : 0.5d, 1d, 2d, 4d, press ZERO key to sure, press PRINT key
to escape