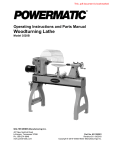
Download Instructions - Draper Tools
Transcript
- Blank page -
9A
- Blank page -
9B
6.
TECHNICAL DESCRIPTION
6.1 IDENTIFICATION
Cable and non re-wireable plug.
Door latch.
ON/OFF switch.
Variable speed dial.
Hand wheel.
Digital display.
Headstock.
Drive spur.
Tool rest.
10B
Tool rest locking bolt.
Tool rest base.
Drive spur.
Tailstock.
Tail spur adjustment knob.
Locking handle.
Motor plate.
7.
UNPACKING & CHECKING
7.1 PACKAGING
Carefully remove the product from the packaging and examine it for any sign of damage
that may have happened during shipping. Lay the contents out and check them against
the parts shown below. If any part is damaged or missing; please contact the Draper
Helpline (the telephone number appears on the Title page) and do not attempt to use the
product.
The packaging material should be retained at least during the guarantee period: in case
the machine needs to be returned for repair.
Warning! Some of the packaging materials used may be harmful to children. Do not leave
any of these materials in the reach of children.
If any of the packaging is to be thrown away, make sure they are disposed of correctly;
according to local regulations.
7.2 WHAT´S IN THE BOX?
As well as the lathe; there are several parts not fitted or attached to it.
Hex. keys.
Push rod.
Spanner.
Face plate.
10A
10. BASIC WOOD TURNING
10.9 USING A SKEW CHISEL - FIGS. 29 - 32
Two skew chisels 12, 25mm are all that are required for
general use although other sizes are available (refer to
Draper Catalogue). This chisel is used mostly for making
finished cuts, to cut vees and beads and square shoulders.
When correctly used, it will produce the best finish that
can be obtained with a chisel. It should not be used for
scraping as this will quickly dull it.
For finish cutting, the skew should be held with the
cutting edge considerably in advance of the handle and
should be bevel against the work. Good practice is to
place the skew well over the workpiece and pull it back
until the edge begins to cut; then swing the handle into
position to advance the cut. Both the toe and the heel of
the skew can be used for making light cuts; but do not
penetrate the wood too deeply without cutting clearances
as you may burn the tip of the tool. Refer to Figs.29, 30,
31, 32 & 33.
FIG.29
Swing tool
Pull back
FIG.30
Path of cut
Direction of cut
FIG.31
Using toe
FIG.32
No support
FIG.33
Edge does not cut
Using heel
19
10. BASIC WOOD TURNING
10.10 USING A PARTING CHISEL - FIGS. 34 - 35
FIG.34
A parting chisel has one primary purpose - to cut straight
into the workpiece as deep as desired, or all the way
through the workpiece to make a cut off. This is a very
narrow chisel, approximately 3mm wide and is shaped to
cut its own clearance, so the cutting edge will not burn.
But when used as a scraper, it should be backed off at
regular intervals to prevent overheating. See Fig.34, 35.
FIG.35
10.11 USING SCRAPING CHISELS - FIGS. 36 - 38
Finally, three more types of chisel should complete the list
of chisels for the average craftsman, these are 12mm
spear point, 12mm round nose and 26mm flat nose. Each
of these chisels may be purchased in various sizes, (refer to
the Draper Catalogue) for special jobs. All of these are
very useful for diameter scraping (see Figs.36, 37, 38)
operations and for circumference scraping when cutting
methods cannot be employed.
The spear point chisel is used for fine scraping and
delicate operations such as the forming of beads, parallel
grooves and shallow vees. Edges and bowl contours can
be rounded with the round nose chisel. Any flat surface
can be scraped with the flat nose chisel.
FIG.37
20
FIG.36
FIG.38


