1
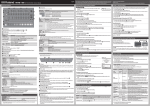
®
Contents
3
Introduction
4
Guitar Anatomy
5
Care and Maintenance
6
How to put on a Guitar Strap
7
Tuning
8
Setting up Your Electric Guitar
9
Truss Rod
10
Connecting Your Guitar to an Amp
11
Guitar Equalisation
12
Built-in Digital Tuner
13
Changing Strings
14
14-Day Returns
14
1 and 3-Year Warranties
an introduction
to your guitar care
Lindo Guitars has developed this handbook to offer electric and
acoustic guitar owners an informative guide to maintaining and
caring for their instrument.
It is extremely important that you look after your guitar to ensure
it lasts as long as possible and plays as it should for the duration
of its lifetime.
The guide starts with simple procedures in cleaning and conditioning
which helps to keep your guitar looking as good as new. We also
explain how temperatures and climate can affect your guitar and
how important it is that you store your instrument correctly.
This handbook also covers guitar tuning and general setup so
that your guitar sounds great and is easy to play. We have also
included guidance on connecting your guitar to an amplifier and
guitar equalisation so that you can really expand your knowledge
and experience on what your guitar can do!
Lastly, we cover routine procedures like changing your strings
and adjusting hardware. We finish with an overview of our return
policies and how to register your warranty.
We wish you all the best with your guitar and if we can be of any
help, please do not hesitate to contact us.
guitar
anatomy
Machine
Heads
4
Pole/
Eyelets
Headstock
Nut
Frets
Inlays
Fretboard
Neck
Body
Pick-ups
Switch
Bridge
Knobs
Care &
maintenance
Cleaning
• Wipe down the fretboard with a clean soft, dry cloth after every use.
Sweat, oil and dirt can build up very quickly. Regular cleaning will not
only prolong the life of your strings by removing the dirt that makes
them deteriorate but will make cleaning the frets much easier.
• Clean the frets each time you re-string. All that oil and dirt from
playing build up on your fretboard. After you have removed the strings
wipe the fretboard down with a soft cloth.
Fretboard Conditioning
About once or twice a year we suggest conditioning the wood of the
fretboard. This will help prevent the wood from cracking. There are
various products on the market such as Dr Ducks Ax Wax or Jim
Dunlop Fretboard 65 Lemon Oil.
Humidity and Temperature Control
Guitars are made of wood which is affected by temperature and
humidity. Acoustic guitars are made of thin/curved wood and the affects
of the temperature and humidity are more severe when compared to
a solid wood body electric guitar. A room at 22-25 degrees Celsius is
ideal for storing your guitar. For an extensive overview on temperature
and humidity, please refer to our warranty manual.
Maintenance
• Regularly check and tighten screws, strap buttons, output and preamp
where applicable. This will stop any rattling and keep hardware secure.
• Never leave your guitar leaning on an amp or wall. We would
recommend buying a guitar stand if you would like to keep your guitar
safe on display.
5
how to put
on a guitar strap
Only One Strap Button?
If your guitar has the traditional one guitar strap button this is so that
the other end of the strap can be attached around the guitar headstock
with a cord. This makes for a more evenly weighted and comfortable
playing position.
Instructions for One Strap Button
1
Attach the bottom of the strap to the button on the bottom of the guitar.
2
Using the cord supplied with the strap, make a loop with the cord
around the neck of the guitar just above the nut/base of the headstock
and underneath the strings.
3
Secure knot back through the top strap eyelet.
If you need further help with putting on your guitar strap there are also
plenty of videos on Youtube demonstrating the assembly.
6
Tuning
Guitar Tuning
You will need to tune your guitar on arrival. Standard guitar tuning is
from the low E string (which is the thickest) to the high E string (which
is the thinnest): E A D G B E
Stretch the Strings
Before you tune your guitar, it is important to stretch the strings.
1
2
3
4
Loosen all strings a little, but make sure there is still a good amount of
tension to them.
One string at a time, place your thumb under the string just above the
sound hole and gently pull it upwards by about 15mm. Do this 3 or 4
times and then move gradually up the fret board 4 frets at a time, again
gently pulling the string upwards.
Once you have done this on all the strings, it’s time to tune the guitar!
Concentrating on one string at a time, tune the string gradually until
you reach the required note.
Repeat the stretching process as per point number 2. You will notice
that once you have stretched the string, it will go out of tune again.
This is perfectly normal and is not indicative of a fault with the strings.
Tune the string again and repeat the stretching process until the string
stays in tune, which will take approximately 4 or 5 stretches. Please
be gentle when doing this as claims cannot be accepted under your
warranty for broken strings.
Replacement
It is also important to change your guitar strings regularly as they are
not made to last forever! When you play your guitar; sweat, moisture
and your skins natural oils build up on the strings over time causing
them to tarnish and weaken. This will also make the guitar sound
quite dull. There is not a recommended amount of time you should
have a set of strings on your guitar for. You will need to gauge this
depending on how often you play and if (when you look at the strings
close up) there is any tarnishing. If so, it’s time for a new set of
strings! Professional musicians change their strings before every gig.
7
Setting up
your ELECTRIC Guitar
Saddle Adjustment
Due to the many styles of playing and personal preference for string
gauge, your guitar will not necessarily be set-up to your requirements.
Whilst it will tune and play perfectly straight out of the box, there are
adjustments you can make to make it perfect for you. You may find
that the action is a too light, or even too heavy. Your guitar has height
adjustable saddles so you can adjust the action to suit your playing
style. You will find this a great thing to learn as it will increase your
technical guitar knowledge, it will also help to tailor the guitar to your
playing style, making sure it sounds its absolute best.
Use the Allen keys provided to make these adjustments but be careful
not to lower the height too much or you will cause “fret buzz”. The
fretboard of your guitar has a radius to it and you should follow this
radius when adjusting the saddle height, thus creating a curve with
the strings. Remember, it’s only a subtle curve so to the naked eye the
strings will look similar.
Intonation
You can also move the saddles backwards and forwards and this will
adjust the “intonation” of the guitar. The distance between the nut and
the saddle has to be precise to allow each note to be at perfect pitch
when fretted along the entire neck. You can check this easily with your
guitar tuner. Working on one string at a time, tune the open string to
pitch. Then finger the 12th fret. If your guitar is perfectly intonated then it
will register as in tune on your tuner display. If it registers as sharp, then
you will need to move the saddle back away from the fretboard thus
increasing its length from the nut. If your tuner is showing as flat then you
will need to move the saddles closer to the fretboard thus decreasing
its length from the nut. Be sure to adjust the intonation after you have
adjusted the saddle height as this can also affect the intonation.
In the future, you may want to change the strings to a lighter or
heavier gauge, again depending on your playing style, so please bear
in mind that you will also need to make fine adjustments in order to
compensate for this.
8
Truss Rod
The Truss Rod
The truss rod is located on the heel of the neck which is visible through
the sound hole (on acoustic guitars) or via the guitar headstock.
Loosen the strings off and using an Allen key of the appropriate size
you can turn this clockwise to tighten or anti clockwise to loosen a
quarter of a turn at a time, depending on the curve you are trying to
achieve.
Because guitars are mainly made from wood, they tend to flex and
change shape over time which can cause problems with fret buzz,
intonation and high action. The truss rod adds strength and provides
adjustability, if required, to correct the aforementioned issues.
Ideally the neck should be relatively straight with a small amount
of natural relief (bow) which establishes the ideal distance between
the strings and frets (action). However, this is a personal preference
depending on what is comfortable for you and the music you play!
Neck Conditions
Bow: When there is too much relief in the neck it can increase the
distance between the strings and fingerboard (action). When the
tension on the truss rod does not counteract the string tension, it will
cause the head to pull up (hindering playability). This can also affect
how the strings intonate up and down the neck. You can correct this by
tightening the truss rod (clockwise).
Back bow: A back-bowed neck is where the truss rod is pulling the
neck backwards and causing the strings to touch the frets. This will
cause fret buzz, making the guitar unplayable. You can correct this by
loosening the tension on the truss rod (anti- clockwise).
9
Connecting
your Guitar to an Amp
Interference
If you have purchased an electric, bass, or an electro-acoustic guitar,
then you may be connecting it to an amp. The first thing to bear in
mind is that the amp should not be plugged into a multi socket or
extension lead as this will cause unwanted electrical interference which
will be amplified through the speaker.
A guitar cable that is not plugged into the guitar but is plugged into a live
amp can act like an antenna and create interference. If your volume is
turned right up then this interference could damage your speaker.
Feedback
Remember not to sit right in front of your amplifier with your guitar
pointing straight at the speaker as this will cause feedback. The pickups
of your guitar are essentially microphones and if they are too close to
an amplifier, the pickups amplify the noise coming from the amplifier
speaker, creating a loop which manifests itself as a screeching noise.
Connecting Your Guitar to an Amp
1
Firstly make sure the power on the amplifier is off and before you turn
on your amplifier, make sure that the volume and equalisation controls
are turned down.
2
With the amplifier still turned off, connect a 1⁄4” jack cable to the
amplifier input. Now connect the other end of the jack cable to the
guitar’s output.
3
4
If you are playing an electric or bass guitar, you will want the guitar
volume on full when you power on the amp. We don’t recommend
turning an electro-acoustic volume knob up to full to achieve a
balanced output. With both ends of the jack connected, you can now
turn on the amp.
Next, gradually begin to increase the volume on the amplifier to reach
the required level and adjust the EQ settings as needed.
10
Guitar
Equalisation
11
What is Equalisation
Equalisation, or EQ, is the control and manipulation of sound
frequencies. These frequency controls are mostly simplified by bass,
middle and treble. The key to getting the best sound from your guitar
and amplifier is to experiment. Your electro-acoustic guitar preamp
is powered by a 9-volt battery, this is included but please ensure the
battery is unwrapped and inserted in its compartment.
1
With all of the EQ controls turned to ‘0’ on your amplifier, you will have
a very thin sound.
2
Start by adding a little bass - try a quarter of the way up to begin with.
This will sound quite muffled so you will then need to add some middle.
3
Adjust the middle to about a third - you will immediately notice that the
sound is much brighter.
4
Now time to experiment! If you are playing rhythm guitar then you
should be aiming for a warmer sound which is created by a little more
bass and middle but with less accent on the higher treble frequencies.
If you are playing lead guitar solos, try some treble at about half way to
enhance the higher frequencies and create a more ‘cutting’ tone.
Equaliser on Your Electro-Acoustic Guitar
You will notice that you have bass, middle and treble controls. On
selected models you will also have a prescence control. The prescence
control is an extra boost to the upper frequencies and should be used
carefully. When these controls are set to ‘0’ - this indicates that no EQ
is being added or taken away. These controls should only be used for
slight enhancements in sound.
Volume
The volume control will need to be up full for maximum output from
the pickup, but by dropping the volume back somewhat, you can also
use this as a way to boost the volume independently from the amp if
required for a lead/solo passage for example.
Built-in
Digital Tuner
Auto Tuning Mode
On selected models of electro-acoustic guitar, the preamp has a built-in
tuner. To operate this, press the “Power” button and the LCD will light
up, this will also mute the output. It will default to “Auto” mode when
powered up and this will be shown in the LCD. This means that the tuner
will automatically detect the note you are trying to tune.
Alternative Tuning
If you wish to use an alternative tuning then you can press the “Note”
button multiple times to scroll through and select which note you would
like to tune to. The LCD screen will show a needle moving backwards
and forwards depending on model of preamp. Above the screen are 3
LED lights which indicate flat, in-tune or sharp.
Save Battery Life
Remember to turn the tuner off once you have finished with it as it
doesn’t need to be on for the pickup and preamp to function. On
selected preamp models, the LCD will automatically turn off after a
period of inactivity.
Youtube
Check out our Youtube channel for demonstrations and help on our
whole range of preamps - www.youtube.com/lindoltd
12
Changing
Strings
13
Acoustic Guitar (Steel-Strung)
1
2
3
Remove the string by popping out the pin on the bridge or pull the
strings through if the guitar has a ‘string-through’ bridge. Unwind the
machine heads and discard the string.
Thread the ball end of a new string into the bridge pin hole and secure
it with the pin. If the guitar has a ‘string-through’ bridge, a bridge pin
will not apply.
Stretch the new string up the neck, into the nut and through the eye of
the machine head of the guitar. Ensure you leave enough slack so that
the string can be coiled around the peg at least 3 times. Sharply bend
the string to help hold it in place on the peg.
4
Turn the machine head counter-clockwise to tighten the string. While
you turn the machine head, apply light pressure to the pin to keep it
from popping out as tension develops.
5
Pull the string with your thumb and index finger to stretch the new
string (follow the section on page 2 regarding stretching strings), and
then turn the machine head a bit to retighten it.
6
Use wire cutters to snip off the string excess, leaving as little as possible
protruding from the string eyelet. You can now tune up your string!
14-day
returns
14
Changed Your Mind?
You have 14 days from the receipt of your Lindo guitar where you can
change your mind and decide to return the guitar – you are entitled to a
full refund. You will need to cover the return postage costs and the item
must be returned in the packaging it was originally sent in. It is your
responsibility to make sure the guitar is not in danger of being damaged
on return otherwise you will be liable for all related costs/claims.
1-Year and 3-Year Warranty
After the first 14 days of receiving your Lindo guitar, you will be covered
by a 12-month repair or replace warranty and a 3-year warranty if you
purchase one of our ‘select’ models. Your guitar is also covered against
manufacturing faults for this period of time which starts on the day you
receive your item.
All service of this instrument must be performed by Lindo Guitars.
Any service performed on this instrument by anyone other than Lindo
Guitars will terminate this warranty.
To register your warranty, visit - www.lindoguitars.com/warranty
If you have any other queries, please contact our Customer Support
before returning any items to us.
+44 (0)117 300 9806
[email protected]
Excluded from warranty - (A) Any non-factory installed electronic components or hardware; (B) Damage
or defects due to alteration, misuse, abuse, wear and tear, extremes of normal temperature, humidity or
abnormal strain; (C) Accidental or intentional damage; (D) Damage in shipping; (E) The repair or replacement
of any expendable maintenance items including but not limited to, strings or scratched pick guards; (F) Fret
wear; (G) Plating on metal parts; (H) Cracking or damage to the finish; (I) Any damage from accessories;
(J) An instrument whose serial number has been defaced; (K) Tonal characteristics; (L) Any instrument
purchased anywhere other than directly from Lindo Guitars or an authorised retailer.