1
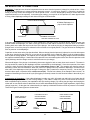
After using your kit for a while, some of the wire ends may break off. If so, you should remove about 3/8 inch of insulation
from the broken end with a wire stripper or scissors.
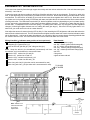
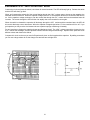
Before You Begin: The rows of the breadboard are marked with letters (some rows are marked “+” and “–”) and the
columns are marked by numbers, this allows each hole to be identified individually. We will use this notation to smoothly
guide you through the experiments. Depending on the size of your breadboard, several sets of rows may be marked with
the same letter, but only a portion of the overall breadboard will be used so this will not be a problem. The row and column
numbers will be expressed as a row/column number. For example, a connection at row b, column 26 will be called hole
b26. And a connection at row +, column 3 will be called hole (+)3. Some examples of this are shown below:
IDENTIFYING HOLE LOCATIONS
column 3
row (+)
hole h6
hole e15
row b
hole (-)7
column 26
7