1
GB
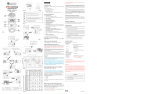
1. Remove the screws on the Rain collector as indicated in the
diagram and insert the batteries in accordance with the
polarities shown.
RAIN COLLECTOR: FEATURES
a
b
a.
2. Remove the fiber tape from the Rain Collector assembly.
Antenna
3. Position the main unit and rain collector within effective
range of each other (up to 100 feet).
-Transmits signal to main unit
b.
Cross
- To level the rain collector
4. Place the rain collector on a level surface. Add a few drops of
water; if the water collects at the center of the cross, the
collector is level.
BATTERY INSTALLATION: MAIN UNIT
The main unit uses 2 UM-3 or AA alkaline batteries.
1. Unscrew the battery door at the bottom of the unit.
2. Remove the battery door and insert batteries in accordance
with the polarities as indicated.
3. Select the display unit by the [IN/MM] switch.
Not Level
4. Replace the battery door and fasten the screw.
Level
5. If collector is not level, rotate the metal ring(s) on the feet
of the collector to adjust and level.
AA
AA
Metal Ring
Battery
door
6. Press the [RESET]
operation.
BATTERY INSTALLATION & SETTING
UP: RAIN COLLECTOR
button on the main unit to initiate
7. Press [SINCE] to display the default start date. Press and
hold to reset the start date to current date.
The Rain Collector uses 2 UM-3 or AA alkaine batteries.
2