1
Operator Interface Installation
MOUNTING INSTRUCTIONS
CONNECTING TO EARTH GROUND
The protective conductor terminal is bonded to conductive
parts of the equipment for safety purposes and must be
connected to an external protective earthing system.
FOOT MAY BE REMOVED
FOR THICKER PANEL
INSTALLATIONS
The third pin of the power connector of the G07 is chassis ground for the unit.
Your unit should be connected to earth ground (protective earth).
The chassis ground is not connected to signal common of the unit.
Maintaining isolation between earth ground and signal common is not required
to operate your unit. But, other equipment connected to this unit may require
isolation between signal common and earth ground. To maintain isolation
between signal common and earth ground care must be taken when connections
are made to the unit. For example, a power supply with isolation between its
signal common and earth ground must be used. Also, plugging in a USB cable
may connect signal common and earth ground.1
1
USB’s shield may be connected to earth ground at the host. USB’s shield in
turn may also be connected to signal common.
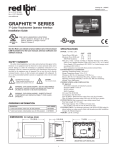
This operator interface is primarily designed for
through-panel mounting. Four VESA mount tapped
screw-holes (M4 x 0.7, 5 mm deep) are present on the rear
of the panels to allow for stand or wall mounting. Care
should be taken to remove any loose material from the
mounting cut-out to prevent that material from falling into
the operator interface during installation. A gasket is
provided to enable sealing to NEMA 4X/IP66 specification.
Install the nine mounting clips provided and tighten to 6.0
pound-force inch (96 ounce-force inch) evenly for uniform
gasket compression.
ALL NONINCENDIVE CIRCUITS MUST BE
WIRED USING DIVISION 2 WIRING
METHODS AS SPECIFIED IN ARTICLE 501-4
(b), 502-4 (b), AND 503-3 (b) OF THE
NATIONAL ELECTRICAL CODE, NFPA 70
FOR INSTALLATION WITHIN THE UNITED
STATES, OR AS SPECIFIED IN SECTION
19-152 OF CANADIAN ELECTRICAL CODE
FOR INSTALLATION IN CANADA.
POWER SUPPLY REQUIREMENTS
The Graphite panel requires a 24 VDC power supply. Your unit may draw
considerably less than the maximum rated power depending upon the features
being used. As additional features are used your unit will draw increasing
amounts of power. Items that could cause increases in current are modules,
additional on-board communications, SD card, and other features programmed
through Crimson.
In any case, it is very important that the power supply is mounted correctly if
the unit is to operate reliably. Please take care to observe the following points:
– The power supply must be mounted close to the unit, with usually not more
than 6 feet (1.8 m) of cable between the supply and the operator interface.
Ideally, the shortest length possible should be used.
– The wire used to connect the operator interface’s power supply should be
at least 22-gage wire suitably rated for the temperatures of the environment
to which it is being installed. If a longer cable run is used, a heavier gage
wire should be used. The routing of the cable should be kept away from
large contactors, inverters, and other devices which may generate
significant electrical noise.
– A power supply with an NEC Class 2 or Limited Power Source (LPS) and
SELV rating is to be used. This type of power supply provides isolation to
accessible circuits from hazardous voltage levels generated by a mains
power supply due to single faults. SELV is an acronym for “safety extralow voltage.” Safety extra-low voltage circuits shall exhibit voltages safe
to touch both under normal operating conditions and after a single fault,
such as a breakdown of a layer of basic insulation or after the failure of a
single component has occurred.
PANEL CUT-OUT
7.060 (179.3)
4.869
(123.7)
4X R.10 (2.5)
MAX.
All tolerances ±.059" (±1.5 mm)
I/O MODULE INSTALLATION
Modules must be installed beginning with slot 1 (left-most slot), with no
empty slots between the modules, and the order must match the modules order
in the Crimson database. Torque screws to 6.0 pound-force inch (96 ounceforce inch).
VESA MOUNT (MIS-D 75) DIMENSIONS
1.48 (37.5)
2.95 (75)
2.95
(75)
REMOVE RUBBER
MODULE PLUG
1.73
(44)
WARNING: Disconnect all power
to the unit before installing or
removing modules.
2