1
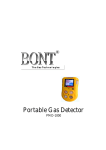
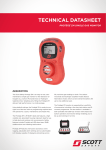
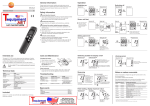
BX616 Portable Multi-gas Detector Using Manual
BX616
Portable Multi-gas Detector Using Manual
Amtech Industry Co Ltd
0
BX616 Portable Multi-gas Detector Using Manual
1. Brief Introduction
BX616 portable multi-gas detector could detect combustible gas, O2 and other two types toxic
gases continuously and simultaneously. It is widely used in the area where explosion-proof is
required or toxic gas leaks, like underground channels or mining industry, so as to protect the
workers’ life and avoid damage on the relevant equipments.
2. Main features
z
Natural diffusion sampling method and high-sensitivity sensor, with high sensitivity and
repeatability.
z
32-bit built-in MCU, high reliability and self-adaptation ability.
z
Full functions, easy operation.
z
CSTN colorful LCD, more intuitionistic, abundant and clear indication.
z
Compact design, easy carrying.
z
High strength engineering plastics and compound anti-slippery rubber; high strength,
water-proof, dust-proof and explosion-proof.
3. Technical Data
Default
Default
TWA
STEL
low alarm
high alarm
Alert
Alert
25%LEL~80%LEL
20%LEL
50%LEL
5ppm~15ppm
15ppm~30ppm
10ppm
15ppm
10ppm
15ppm
0~1000ppm
25ppm~100ppm
100ppm~500ppm
35ppm
200ppm
35ppm
200ppm
0~30%vol
16%vol~19.5%vol
22.5%vol~24%vol
19.5%vol
23.5%vol
Target
Detecting
Gas
Range
CH4
Low-alarm range
High-alarm range
0~100%LEL
10%LEL~25%LEL
H2S
0~100ppm
CO
O2
Gas sampling method: natural diffusion
Gas sensor type: Catalytic(for combustible gas) and electrochemical (for H2S, CO and O2)
Detecting gas:
Combustible gas, H2S, CO, O2
Accuracy:
≤±5% F.S.
Response Time: ≤30s
Indication:
LCD displays real-time and system status;
LED, audio and vibration alert for gas leakage, fault and low voltage.
Working environment: -20℃~50℃, <95%RH (no dew)
Power Source:
DC3.6V Li-on battery, 1800mAh
Charging time:
≤ 6h
Working time:
≥ 8h continuously (without alarming)
Gas Sensor Life:
2 years
Explosion-proof grade: ExiadIICT3
Protection Grade:
IP65
Weight:
Appr. 200g (with battery)
Dimensions:
116mm×66mm×30mm(L × W × H)
4. Structure & Function
1
BX616 Portable Multi-gas Detector Using Manual
4.1 Appearance
No.
Name
No.
Name
1
Alarm light
7
Hang ring hole
2
LCD screen
8
Buckle
3
Buzzer
9
Alligator clip
4
Power on/off button
10
Label
5
Calibration hole
11
Charging/Communication port
6
Detection window
4.2 Indication information
No.
Function
No.
Function
1
Time
5
TWA or STEL alert
2
Detecting gas
6
Gas concentration
3
Battery indication
7
Unit
4
Gas type
8
H-alarm or L-alarm
Figure 2
4.3 Button function
Button
Functions
z
Turn on: Press it for 1s, the detector is power on.
z
Turn off: Press it for more than 3s, the detector is power off.
z
Muffle: When alarming, press it once and the audio alarming will be off.
z
Quit libration: When alarming, after audio alarming is off, press it once and shaking alarming is off.
z
Detector status checking: When the detector is in the status of detection, press it to check max. gas
level, min. gas level, STEL, TWA, current time, serial number and version number.
z
Calibration: When the detector enters detection menu, press it continuously even the screen is
closed. After 10 seconds, when the screen is open again and it shows calibration status, then you
can release it and to calibrate the device.
2
BX616 Portable Multi-gas Detector Using Manual
5. Operation instruction
5.1 Turn on
Press the button for 1s and then release it. After the buzzer gives short sound once, the
detector is turned on. On the screen, it displays in turns “Welcome”, “Warm up”, “Self test”, “High
alarm”, “Low alarm”, “STEL”, “TWA”. After that, it enters detecting status. At this time, it displays
the concentration of O2, H2S, CO and Combustible gas in the environment.
Note: If the detector is set to auto zero calibration after turning on, then the user should turn
on the detector in the clean air. Otherwise, the user should be responsible for the testing result.
When the detector leaves the factory, it is set to auto zero calibration after turning on.
5.2 Turn off
Under power on status, press power on/off button for more than 3s, the buzzer gives short
sound twice and long sound once. After that, the detector will be power off.
5.3 Alarming
(1) When the gas concentration reaches the presetting alarming levels, the detector will give
relative alarming: the LED light twinkling, vibrating, and buzzing. The user can cancel audio and
shaking alarming by press the power on/off button: the first press to cancel audio alarming④, and
the second to cancel vibrating⑤.
(2) When the detector is turned on and kept under the environment with the target toxic gas, if
the gas concentration is more than the maximum average level of TWA or STEL, the detector will
give TWA or STEL alert. At this time, the user can also cancel the audio and shaking alarming by
pressing the power on/off button as above Section (1).
Besides, the detector will make alarming sound when its sensor meets fault or at low battery
status. Please refer to the LCD display for details.
Note: ④ and ⑤ are available only when these functions are activated in the scene mode.
5.4 Working status checking
When there is no alarm in the detection status, or the alarms are canceled in the alarming
status, press the power on/off button by time, the LCD screen will display max. gas level and min.
level⑥, STEL⑦, TWA⑦, current time, serial number(SN) and version number(VER) in turn.
Notes: ⑥ Only O2 sensor has such indication.
⑦ Only toxic gas sensors have STEL and TWA alert.
5.5. Calibration
When the detector is under power on status, keep pressing the power on/off button even the
tester is power off. After 10 seconds, the LCD screen will display again and it enters calibration
mode, then lease the power on/off button. After warming up, the detector begins zero calibration
firstly. Please put the detector into the clean air environment. When the screen displays the
calibration level, please inject the standard gas into the tester like the indication of the following
picture. The detector will automatically analyze the gas and process the calibration. After
calibration, the screen will display the calibrated gas name and relative items. If need to make
other gases’ calibration, please repeat the above process.
If need to calibrate different gases in the same time, please inject different standard gases
and follow the above procedures, the tester will make the calibration automatically, too.
3
BX616 Portable Multi-gas Detector Using Manual
No.
Name
1
Gas input hole
2
Calibration map
3
Screwing nut
6. Data upload
Connect the detector to computer through the data cable (Min USB terminal connects to the
interface on the bottom of the detector, and DB9 terminal connects to COM port of computer).
Turn on the tester and run the software. Then you can choose to upload the testing record to the
computer. Please refer to the using manual of the software for more details.
7. Charging
Please charge the detector when it shows low battery or the detector can’t be turned on due
to low battery. Before charging, please turn off the detector. After you connect the charger correctly
between the detector and AC power source, the detector will be turned on automatically. On the
screen, battery indication will show you how much the battery is charged. When the battery mark
on the screen is full and doesn’t change any more, it means the charging is completed. Please pull
off the charger.
Warning: During charging status, the detector can’t detect the gas leakage. Please do not try
to charge it at testing places to avoid fire or explosion. Please do not charge it when the detector is
working to avoid potential damage.
8. Using and replacement of the gas sensor
The detector adopts gas sensor module. Please pay attention to the life of the gas sensor and
replace it in time. In order to assure the accuracy of the gas sensor, please calibrate it every half
year.
For replacement, we only send out separate gas sensor and calibration file. You can replace
the old gas sensor, and then write the calibration program into the detector’s MCU through our
software. After that, replacement is completed.
9. Possible fault and corresponding solution
Possible fault
The detector can’t be turned on
No response to the gas
Possible reason
Corresponding solution
Too low battery
Please charge it in time.
The detector dies
Please contact the manufacturer of dealer
Fault of electric circuit
Please contact the manufacturer of dealer
Warm up is not finished
Wait till warm up is finished
Fault of electric circuit
Please contact the manufacturer of dealer
4
BX616 Portable Multi-gas Detector Using Manual
Inaccurate indication
Sensor is overdue
Please contact the manufacturer or dealer to
replace the gas senor
Uncalibrated for long time
Please calibrate it in time
Battery voltage is used up
Please charge it and reset time
Strong electromagnetism disturb
Please reset time
Zero calibration is unavailable
Too much zero drift of gas sensor
Please calibrate or replace the gas sensor
Minus gas level displayed
Gas sensor drift
Calibrate zero point
Sensor fault indication
Sensor fault
Please contact the manufacturer or dealer to
Fault indication of time
replace the gas senor
10. Notices
10.1 Falling down from high places or strong shake is prohibited.
10.2 The detector may not work properly at interferential high-concentration gas.
10.3 To avoid incorrect result or possible damage to the detector, please operate and handle the
detector in accordance with the manual.
10.4 The detector should be not stored or used neither under the circumstance with caustic gas
(such as Cl2), nor under the other rugged circumstances, including excessive high or low
temperature, high humidity, electromagnetic field and strong sunshine.
10.5 If there is dust on the surface of the detector after a long-term use, please clean it lightly with
clean soft cloth. The surface may be scraped or destroyed with caustic solvent or hard
things.
10.6 To assure the testing accuracy, the detector should be calibrated periodically. And the
calibration period should be less than one year.
10.7 Please put the used Lithium batteries to the appointed places or send to our company. Don’t
discard them into the dustbin at random.
11. Standard accessories:
Charger 1pc
Calibration cap 1pc
Communications cable 1pc
CD driver
1pc
User manual
1pc
Relative portable accessories
1set
5