1
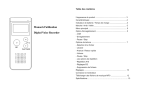
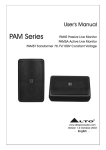
Contents User Manual Product Appearance………………………………………………..…2 Features…………………………………………………………....……3 Battery Indicator/Charging Times…………………………………..3 On/Off/Standby……………………………………………...………....4 Main Menu……………………………………..……………………..…4 Record Option…………….…………………………………..………..4 - VOR - Recording Digital Voice Recorder - Pause/Stop Playback Options………………………………………..…………….5 - Selecting a file - Playback - Fast forward/Rewind Playback Options (cont)………………………..…………………….6 - Volume - Pause/Stop - Repeat options - A-B Repeat Playback Options (cont)……………………………………………...7 - EQ Settings - Deleting Files Settings………………………………………..……............................8 Computer Connection/uploading MP3 Music Files….………….10 Specifications……………….………………..…………………….…11 Product Appearance Features - 4 GB memory capacity - Recording time: Super High Quality (192 kbps) : 2760 minutes High Quality (128 kbps) : 3840 minutes Short Play (64 kbps) : 8460 minutes Long Play (32 kbps) : 16560 minutes - Voice Operated Recording (VOR) - 7 EQ modes - A-B repeat function - MP3 function - Different languages - Delete function - USB connection, for uploads and downloads - Built-in speaker - Built-in rechargeable lithium battery - Battery life expectancy: Up to 20 hour continuous recording Up to 13 hour continuous playback Battery Indicator/Charging Times Charge time between 3 to 4 hours, turn on voice recorder before charging Battery display (3) and (4), functions maybe limited, please recharge On/Off/Standby On/off slide switch is located on the right side of the voice recorder. Slide the switch up to turn on or down to turn off the voice recorder. The voice recorder includes a standby mode. To enter or exit standby, hold the play button for 2 seconds. Main Menu Once on, the unit will first show the ‘Record Mode’ option in the Main Menu. To change menus, press the Up or Down button. Options available are: Record Recorded Playback Press the Menu button to select an option. Music Playback Settings Record option VOR: When record option is selected, press the Menu button to access the Voice Activated Recording (VOR) function. Press the Menu button again to select VOR then press Up or Down to ‘open’ or ‘close’ the VOR function, press the Menu button to confirm. Recording - When the record option is selected, press the Rec button to begin recording. While recording, the LED will illuminate red. On the screen, the ‘First Track’ will display which numeric sequence the recording is being save as and the duration while recording. NOTE: Pressing the Rec button during any status or modes (beside while playing a file) will enter record mode. Pause/Stop recording: - Press the Rec button while recording to pause or resume recording. The LED will flash when the recording is paused. - Press the Stop button to complete and save recording. Exiting Record Option To exit the Record option, hold on to the Menu button for 2 seconds. The voice recorder will go back to the menu. Playback options & Selecting a file When Voice Mode (Recorded playback) or Music Mode (Music playback) is selected, it will first display the most recent recorded track or music file. - Before or during playback, press the Up or Down button to select a file. - Press the Menu button and select the Local Folder option. Press the Menu button to enter the Local Folder. This option will display available files in list form within a folder. Press the Up or Down button to select a file then press the Menu button to confirm. NOTE: While selecting a file by pressing the Up or Down button, when the voice recorder reaches the end of the recorded playback list, the music playback list and files will become available and visa versa. Playback Press the Play button to begin playback. Fast forward/Rewind - During playback, hold the Down button to fast forward, let go to resume playback. - During playback, hold the UP button to rewind, let go to resume playback. Volume Before or during playback, press the Vol+ or Vol- button to increase or decrease the sound. The volume is adjustable in 32 steps. Pause/Stop playback - Press the Play button during playback to pause or resume playback. - Press the Stop button to stop playback. Repeat options: During playback, press the Menu button and select the ‘Repeat’ settings. Press the Menu button to enter the Repeat settings, then press the Up or Down button to select. The options available are: - Normal (NOR), for normal playback - Repeat one (ONE), for repeating a single file - Folder (ROOT), for once over playback of all files in on one mode only, i.e. recorded playback or music playback - Repeat folder (RT_A), for repeating all files in one mode - Repeat all (ALL), for repeating all files across both modes - Random (RAND), for random file selection in one mode - Intro (INTR), plays only the first 10 seconds across all files in one mode Press the Menu button to select a repeat option. A-B Repeat During playback, press the DEL/A-B button to enter the A-B repeat function. - Once pressed, the ‘A’ mark will be selected. Press the button again to select the ‘B’ mark. - Then the file will repeat from the ‘A’ mark to the ‘B’ mark. - To restart the marks, press the DEL/A-B button and repeat process. - To resume normal playback, press the Menu button. EQ Settings During playback, press the Menu button and select the ‘Equalizer’ settings. Press the Menu button to enter the Equalizer settings, then press the Up or Down button to select. The available EQ settings are: - Natural (NOR) - Rock (ROCK - Pop (POP) - Classic (CLAS) - Soft (SOFT) - Jazz (JAZZ) - DBB (DBB) for Dynamic Bass Boost Press the Menu button to select an EQ option. Deleting Files - Select a file to delete by pressing the Up or Down button, then press the DEL/A-B button. A prompt will appear, ‘Delete file’. Press the Up or Down button to select Yes or No. Press the Menu button to confirm selection. - To delete all files within a mode, press the Menu button and select ‘Delete all’ option. Press the Menu button to confirm. Exiting Playback Options To exit any playback option, hold on to the Menu button for 2 seconds. The voice recorder will go back to the main menu. Settings Power Off There are two functions under this option: When settings mode is selected, press the Up or Down button to move through the settings options. Press the Menu button to enter an option. - ‘Off timer’ is the idle off time function. Adjust in 10 minute steps between 10 to 60 minutes by pressing the Up or Down button. Press the Menu button to select an Off time. 0 minute is to turn off this function. Once the unit is idle for the selected Off time, the voice recorder will enter standby. Hold the Play button for 2 seconds to exit standby. Record type There are 4 recording quality’s to choose from. Press the Up or Down button to move through options: - SHQ / Super High Quality (192 kbps) - HQ / High Quality (128 kbps) - SP / Short Play (64 kbps) - LP / Long Play (32 kbps) Press the Menu button to select a quality. - ‘Sleep time’ will turn off the unit within the selected minutes even while the voice recorder is in use, i.e. recording or playback. Adjust in 10 minute steps between 10 to 120 minutes by pressing the Up or Down button. Press the Menu button to select a sleep time. 0 minute is to turn off this function. Once the selected sleep time lapses, the voice recorder will enter standby. Hold the Play button for 2 seconds to exit standby. Backlight Adjust the backlight brightness for the LCD. Press the Up or Down button to increase or decrease brightness. Adjust in 5 steps from 0 to 50. Press the Menu button to select brightness. Contrast Adjust the contrast for the LCD. Press the Up or Down button to increase or decrease the contrast. From 1 to 15 steps, press the Menu button to select contrast. Language Press the Up or Down button to move through the Language options: English (Default), Japanese, Korean, Simplified Chinese or Traditional Chinese. Press the Menu button to select language. Memory Info Shows the amount of available memory left in a percentage. Press the Menu button to exit. Firmware Version Show the current Firmware Version. Press the Menu button to exit. Exit Press the Menu button to exit settings mode and to go back to the main menu. Computer Connection/Uploading MP3 Music files - While on, connect the Voice recorder to a computer’s USB socket using the provided USB cable. The voice recorder will confrim connection when the following image appears on the LCD: The voice recorder will come up as a Removable Disk or a Mass Storage Device on My Computer. Access the voice recorder then open the Record folder then the DVR folder. The DVR folder contains recorded files which you can save on to your computers hard drive. Specifications Features Specifications Memory capacity Record times SHQ (192 kbps) Record times HQ (128 kbps) Record times SP (64 kbps) Record times LP (32 kbps) Frequency Maximum output - To upload MP3 music files on to the Voice Record, access the voice recorder using My Computer and transfer music MP3’s in to the main location. There is no folder to save MP3’s in or a need to create one. 4GB 2760 Mins 3840 Mins 8460 Mins 16560 Mins 8GB 5520Mins 7680Mins 16920Mins 33120Mins 20Hz - 20KHz 300mW Storage Media Embedded flash Built-in MIC Omni-directional microphone External Dynamic 20mm,16ohm S/N(Ratio) 80db Display 128 X 64 Lattice Screen Stereo earphone Note: The LCD on the voice recorder will indicate the following images during data transfers between the voice recorder and PC. Always safely remove the voice recorder before unplugging it from the computer. Never disconnect during this time or a data loss may occur. Downloading: Uploading: 2GB 1380Mins 1920Mins 4230Mins 8280Mins External input External Microphone USB Cable 3.5mm Stereo socket 3.5mm Stereo socket PC Interface USB 1.1/USB2.0 Recording format MP3 Supported Music file MP3 / WMA Dimensions 83mm*35mm*12mm Weight 40g(Including battery) Operating Temperature 0 - 60 C 0 Battery Recording Up to 20 hours (Full charge) Playback Up to 13 hours