1
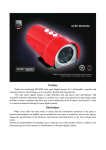
Scuba Series WP720
Underwater Digital Camera Mask
User Manual
This manual explains how to safely operate the Underwater Digital Camera mask.
Please read these instructions carefully before using the camera.Keep this manual
in a safe place for later reference.
第 1 页 共 25 页
PDF 文件使用 "pdfFactory Pro" 试用版本创建 www.fineprint.cn
Preface
Thanks for purchasing HD WP720 underwater digital
camera mask. It’s a fashionable, exquisite and hyper
waterproof
device
which
provide
you
a
wonderful
experience of convenience, safety and flexibility.
It allows you to dive underwater up to 30 meters. As a
main function,the camera can be used separately, also can
be used together as a digital camera mask at random,. What
is more, it is attractive with reasonable price, super
waterproof and silicon gel made with multifunction, but it’s
only the same price as the shell of a normal digital camera
mask.
第 2 页 共 25 页
PDF 文件使用 "pdfFactory Pro" 试用版本创建 www.fineprint.cn
Disclaimer
While every effort has been made to ensure that the information
contained in the guide is accurate and complete, no liability can be
accepted for any errors or omissions. Shenzhen TAT Electronics
Co.Ltd reserves the right to change the specifications of the
hardware and software described herein at any time without prior
notice.
Shenzhen TAT Electronics Co.Ltd declines all responsibility for
damages due to improper use of this product, failure to adhere to
the instructions given in this manual,or modifications to the
UNDERWATER DIGITAL CAMERA MASK.
The Underwater Digital Camera Mask is a sophisticated
electronic device and should be supervised by an adult at all
times. This product should not be used by children under 13
years. This product is not a toy. The inserting of memory cards,
USB cable, and batteries must be performed by an adult 18
years or older who has read and understands this manual. An
adult must always check all water tight compartments prior to
each use.
第 3 页 共 25 页
PDF 文件使用 "pdfFactory Pro" 试用版本创建 www.fineprint.cn
CONTENTS
1.0 Get to know your Camera Mask Scuba Series
1.1 Features
1.2 Specifications
1.3 System Requirements
2.0 Functional Parts
3.0 Set up
3.1 Power ON/OFF
3.2 Auto Power OFF and PC-Charging
3.3 Mode Switch
3.4 LCD Function
3.5 TV Out Setup
3.6 PC Setup Time/Date
3.7 Disassemble and Assemble
3.8 Caution Sound
4.0 Recording Images and Video
4.1 Recording
4.2 Shooting
4.3 Forcusing and Framing
第 4 页 共 25 页
PDF 文件使用 "pdfFactory Pro" 试用版本创建 www.fineprint.cn
4.4 Turn on the Fill Light
4.5 PC Camera
5.0 Transferring Still Images and Videos
5.1 PC Video/Images Transferring
5.2 Play on TV
6.0 Camera Test Instructions
7.0 Care and Maintencance
第 5 页 共 25 页
PDF 文件使用 "pdfFactory Pro" 试用版本创建 www.fineprint.cn
GET TO KNOW YOUR CAMERA MASK Scuba Series
1.1 Features
HD 720P
Still images
Video Clips
Micro SD Card support up to 32GB
Driver free for Windows 2000/ME/XP/Vista/7 and Mac 9.x
and X.x
Separate use for camera and mask
1.2 Specifications
1/2.5" 5.0 Mega Pixels CMOS
Image Sensor
sensor
Image Resolution
Still Image:2560*1920
Video:1280*720,HD720P
Lens Aperture
F/2.4 f=3.0mm
Lens
4G+IR(100 Degree Fov)
Storage Medium
Micro SD/SDHC(up to 32GB)
Lens Focus
1.2m to infinity
Status Display
Status LCD Panel
Data Format
Picture:JPEG,Video:AVI
第 6 页 共 25 页
PDF 文件使用 "pdfFactory Pro" 试用版本创建 www.fineprint.cn
Interface
USB 2.0 High Speed
Power Supply
3.7V/600MAH Li-Battery
Weight
306(Camera 86g, Mask 220g)
Dimensions
Camera:14.1cm*3.8cm*3.6cm
Mask:19.5cm*8.7cm*7.0cm
1.3 System Requirements
Operating System Windows 2000/ME/XP/Vista/7 and Mac 9.x or X.x
CPU
Pentium II or above
RAM
At least 64MB
Interface
USB port
CD
4x speed CD ROM or above
2.0 Functional Parts
2.1 Included Parts and Accessories
Please check the contents now (before use) to confirm that it
is complete.
USER MANUAL
UNDERWATER DIGITAL CAMERA MASK
USB CABLE
第 7 页 共 25 页
PDF 文件使用 "pdfFactory Pro" 试用版本创建 www.fineprint.cn
WARRANTY
BUILT IN LI-BATTERY
8 GB MICRO SD CARD
NOTE: The UNDERWATER DIGITAL CAMERA MASK will be
referred to as the "CAMERA MASK" and "CAMERA" and
"MASK" throughout this instruction manual.
WARNING: NEVER OPEN THE CAMERA BODY THAT IS
FACTORY SEALED WITH SCREWS. THIS WILL VOID ANY
WARRANTY. NEVER USE A SCREW DRIVER TO OPEN ANY
PORTION OF THE CAMERA MASK.
第 8 页 共 25 页
PDF 文件使用 "pdfFactory Pro" 试用版本创建 www.fineprint.cn
3.0 Set Up
CAUTION: An adult 18 years or older should
perform this function. Always make sure the
CAMERA
MASK
is
completely
dry
before
performing these steps. Set up should always
take place in a clean dry space with a controlled
environment. These steps should be performed
indoors to avoid exposure to the elements.
3.1 POWER ON/OFF
Power ON:To insert a TF Flash card into your camera, press
and hold the LEFT button for at least 2 seconds until the
blue and red indicator light on,system starts to initialize with
alert.
Power Off: Press and hold LEFT button for at least 2
seconds until the blue indicator off and alert ended.
NOTE:This is HD 720P Video format,we suggest using
Speed CLASS 6 TF card , in case of any worse shooting or
第 9 页 共 25 页
PDF 文件使用 "pdfFactory Pro" 试用版本创建 www.fineprint.cn
abnormal operation caused.
●Attention
After starting up camera without a TF card,the blue LED
indicator sprinkles quickly.
3.2 Auto Power Off and PC Charging
1.When system starts,the built-in Li-battery used up,the blue
indicator and red indicator will sprinkle slowly and alternately
with alarm,and it will auto power-off in about 10 seconds.
2.No memory Notice for Take Out the TF Card and Auto
Power Off: When shooting/recording, both the red indicator
and blue indicator will sprinkle quickly if take the TF card out
from camera or Memory is full,it will auto turn off with alarm
in about ten seconds.
Connect camera via USB cable, 3 hours needed for charging. Green
indicator lights on when charging and off when full. (Battery charger
applicable for charging also.)
第 10 页 共 25 页
PDF 文件使用 "pdfFactory Pro" 试用版本创建 www.fineprint.cn
3.3 Mode Switch
After starting up the camera,each press LEFT button will be
changed over circulatory.
1.Video Mode: Manual
video recording standby,blue
indicator lights on, recording icon appears on the LCD.
2. Shooting Mode: Manual shooting standby,red indicator
lights on, shooting icon appears on the LCD.
3. Playback Mode: When camera connects with the AV
cable, it will access to TV-Out playback mode.
●NOTICE
>It is available when camera connected with the AV cable
unless it will skip this mode.
>Press LIGHT/LEFT button to view images,press LEFT
button to play videos.
>Press and hold the RIGHT button for at least 2 seconds to
enter/exit to select Menu,press LIGHT/LEFT button to select.
Press RIGHT button to enter select menu.
3.4 LCD Function
The
modes
on
top
of
LCD
from
第 11 页 共 25 页
PDF 文件使用 "pdfFactory Pro" 试用版本创建 www.fineprint.cn
left
to
right,
shoot/record/memory/battery
1.Under the recoding mode,the 4 digits Sec/Sec/Mins/Mins
will appear in the middle of LCD, it is the rest time for
recording,the maximum time is 9960, it means the available
time is 99 minutes and 60 seconds.
When shooting, it will start to make timekeeping when press
the RIGHT button.
2.When shooting,there are 4 digits in the middle of the
LCD,it shows the rest quantity for shooting,the maximum is
9999,the digits will decrease one by one with each shooting.
NOTICE: Due to the different shooting scenes,the digits has
slight difference.
3.5 TV Out Setup
Please refer to TV-OUT instructions , connect the camera
with AV cable, press and hold RIGHT button for at least 2
seconds to access to setup menu.Functions are as follow :
>Press RIGHT button to setup menu.
>Press and hold RIGHT button for at least 2 seconds to exit
and save.
第 12 页 共 25 页
PDF 文件使用 "pdfFactory Pro" 试用版本创建 www.fineprint.cn
>Press LIGHT/LEFT button to modify parameters.
>Press RIGHT button to setup for modify parameters.
1.Time/Date
Press RIGHT button to access to setup,press LIGHT/RIGHT
button to modify parameters. press RIGHT button to exit and
save setup.
2.Caution Sound:Shake and Sound,OFF button for setup for
caution sound.The caution sound for fill light is DEEP.
3.LanguageSetup
English/Deutsoh/Franoais/Espanol/Italiano/Portugues/ 中文
繁体/中文简体/日本語
4.Frequency:50Hz/60Hz
NOTICE: This setup is for light frequency ,please set it
accordant with relevant frequency , in order to eliminate
blinking of shooting under daylight lamp.
5. TV Mode:NTSC/PAL
第 13 页 共 25 页
PDF 文件使用 "pdfFactory Pro" 试用版本创建 www.fineprint.cn
NOTICE:Wrong color will occur when using the incorrect
format,please match the correct format for video output.
6.Format: Internal Memory/SD Card
NOTICE: TF card’ format option to format Micro SD card.
7.Default Setting: Cancel/OK
NOTICE: Press RIGHT button for setup menu and select
OK/Cancel to Return menu setting defaults.The system time
will not be reset.
8.Resolution:1080P/720P/WVGA/QVGA;
Setup for pixel: HD 720P is the default setup.Higher pixel for
better quality of shooting and recording, and memory
consumption increases as well.
NOTICE :Recommend to use CLASS 6 TF Card or above in
order to avoid worse shooting and camera irregularly
working.
9..VideoTime: 5 Mins/10 Mins /20Mins/ Off
第 14 页 共 25 页
PDF 文件使用 "pdfFactory Pro" 试用版本创建 www.fineprint.cn
NOTICE: Setup for single clip time for recording, each clip
recorded will switch to the next clip automatically. OFF
mode is for free recording.
10.Auto Delete:OFF/ON
NOTICE: When the TF card is out of memory, under
circulatory coverage function,the videos and pictures will be
deleted automatically and memory capacity will be valid for
new shooting and recording;but it will auto power off when
circulatory coverage function is closed.
11. Data Print:ON/OFF
Setup for timing watermark on video.
12. Version
Software version information
3.6.PC Setup Time/Date
Please make the following setup if the time is not in
accordance with the time on images/videos.
Method one : Use TV as a monitor.Please refer to TV out
第 15 页 共 25 页
PDF 文件使用 "pdfFactory Pro" 试用版本创建 www.fineprint.cn
Setup3.5.
Method two : Use a computer.
>Connect to computer via USB cable
>Click into removable disc.
>Create an TXT file SETTIME.TXT in root directory
> Access SETTIME.TXT file, type in the data from the
second line , such as :
>The format will be
Year(YYYY),Month(MM),Day(DD),Hour(HH),and
Minute(MM). Second(SS) Watermark
Please refer to the time format:
Video with time watermark: 2012 03 06 18 00 00 Y
Video without time watermark: 2012 03 06 18 00 00 N
A space is needed in between
Year(YYYY),Month(MM),Day(DD),Hour(HH),and
Minute(MM). Second(ss),also between Watermark, Y:video
with watermark, N:video without watermark.
It is not applicable to launch on the recorded video clip.
>Save & Exit
第 16 页 共 25 页
PDF 文件使用 "pdfFactory Pro" 试用版本创建 www.fineprint.cn
>Reboot the system, system time will be renewed.
NOTICE: In case battery run out , system time will be reset
by default..
3.7 Disassemble and Assemble
>Disassemble: Press the lock portion on the back of the
camera , pull towards right to take it out from the mask.
> Assemble: Pull the camera toward at the groove of
mask ,and push towards left.
3.8 Caution Sound
Caution Sound:Shake and Sound,OFF button for setup for
caution sound.Please refer to the system setup.
4.0 Recording Images and Videos
4.1 Recording
Press RIGHT button to record, blue indicator twinkles slowly.
Press RIGHT button again, blue indicator lights on,
recording ends.
●NOTICE
>Video will be saved automatically after 5 minutes’
第 17 页 共 25 页
PDF 文件使用 "pdfFactory Pro" 试用版本创建 www.fineprint.cn
recording, then will start next recording. Optional
time
setup,e.g.10 minutes/ 20 minutes and OFF.
>When using the camera on the earth,please keep the
waterproof cap uncovered for better audio effect.
>When lacking of storage memory(When Auto Delete
is OFF)it will auto power off ,when out of battery or without
operation for 180 seconds.
4.2 Shooting
Press RIGHT button to shoot.
●NOTICE
>The red indicator will be off when shooting.
> When lacking of storage memory,it will turn off
automatically when out of battery or without operation for
180 Seconds(When Auto Delete is OFF).
4.3 Focusing and Framing
>Best Focusing Distance: 0.5 to 3 meters in the front of
camera.
>Viewfinder: when using the camera separately , please
open the window of viewing for framing.
第 18 页 共 25 页
PDF 文件使用 "pdfFactory Pro" 试用版本创建 www.fineprint.cn
4.4 Turn on the fill light
2 highlighted fill lights built in, press LIGHT button to Turn
on/off the fill light.
4.5 PC Camera
Computers comes with this driver.
1.Please connect this camera via USB cable.
2.Camera will be detected and installed.
3.After installation,click in My COMPUTER,new PC-C icon
will appear for launching.
4. EXIT menu appears for quit.
Function
>Camera is applicable for 3rd party software also savable
ie.Amcap.
>Tun on the the fill in light for better image shooting.
>Green indicator lights on when charging, and off when full.
5.0 Transferring Still Images and Videos
第 19 页 共 25 页
PDF 文件使用 "pdfFactory Pro" 试用版本创建 www.fineprint.cn
CAUTION:
ALWAYS
FOLLOW
THE
CARE
AND
MAINTENANCE INSTRUCTIONS
FOR RINSING IN FRESH WATER AND DRYING THE
CAMERA MASK PRIOR TO
OPENING THE MEMORY COMPARTMENT.
The CAMERA MASK has two ways to transfer your image
and video files to a computer. The CAMERA MASK comes
with a USB cable to connect your CAMERA MASK directly
to a computer. You may also choose to purchase and use a
commercially sold Micro SD Card to store and transfer
images and videos that were taken with the CAMERA
MASK.
5.1 PC Video/Images Transferring
>Connect the camera to PC via USB cable
> Click into MY COMPUTER and access
to directory
DCIM/100DSCIM,videos are available for copy.
>Please copy the video clips to your computer for better
playing.
NOTICE:Press LIGHT button for lightening.
第 20 页 共 25 页
PDF 文件使用 "pdfFactory Pro" 试用版本创建 www.fineprint.cn
Under this mode ,green indicator lights on when charging,
and off when full with USB characters on LCD.
5.2 Play on TV
>Connect Video Camera with AV cable(USB port) to TV
with (Yellow/White port).
>Press RIGHT button for playback.
>Video Playback
1.Manual Playback : Press LIGHT/LEFT button to browse,
Press RIGHT button to play, and adjust the TV volume to
get the proper audio.
2.Auto play: Press RIGHT button to play. Images preview
within 5 seconds and auto playing for videos.
3.Pause : Press RIGHT button to pause or continue.
4.Exit:Press and hold RIGHT button for at least 2 seconds to
exit.
NOTICE: It takes a few seconds or longer for large size
video playing.
第 21 页 共 25 页
PDF 文件使用 "pdfFactory Pro" 试用版本创建 www.fineprint.cn
6.0 CAMERA TEST INSTRUCTIONS
Part One - Taking test images and video:
Before using this product in water and before capturing
important digital images and video, be sure to first record a
test image and test video to confirm that your camera is set
up and ready to go. It is best to move slowly when taking
pictures and videos and avoid moving your head side to side
as the video will be bouncy and the pictures will be blurry.
Shenzhen TAT Electronics Co.Ltd declines any claim for
compensation for recorded contents etc. in case of
recording failure due to a camera or card flaw.
7.0 CARE AND MAINTENANCE
When you are finished using the CAMERA MASK,
always clean and wipe away any water, sand, salt, or
other debris before opening or storing. Always clean
with FRESH WATER.
1. Check the cap for water tight closure before exposing to
water.
第 22 页 共 25 页
PDF 文件使用 "pdfFactory Pro" 试用版本创建 www.fineprint.cn
2. Always rinse the CAMERA MASK in FRESH WATER to
remove any sand, salt or other debris. Do not use hot water
or high pressure which may damage camera.
3. Use a soft dry cloth to thoroughly remove all water.
Carefully press around the seams of all compartments to
absorb any water left in the cracks.
4. Once the camera is completely dry on the outside, check
to make sure that you are also thoroughly dry including your
hands, hair, and clothes before opening any compartments.
This precaution is necessary so that you will not drip water
into or onto the camera.
5. Gently open each compartment. If you find any moisture,
sand or debris caught inside the threads of the outer
compartment wall, immediately remove them with a cloth or
cotton swab.
6. If any moisture or debris has accumulated inside a
compartment use a cotton swab to remove it, being careful
not to touch the CAMERA MASK electronic components.
7. Before closing any compartment, replace any loose parts.
Then inspect and clean the inside of the cap prior to
positioning over the open compartment.
第 23 页 共 25 页
PDF 文件使用 "pdfFactory Pro" 试用版本创建 www.fineprint.cn
8.Please screw the rubber ring after disassemble it in case
of leakage.Please screw the spiral shell tightly for
waterproofing. Please dry completely before use it. Please
replace the rubber ring if it is aging. Contact your retailer if it
doesn't work.
9. Store the CAMERA MASK in a dry place away from direct
sunlight.
10. Keep the CAMERA MASK at normal room temperatures
that do not fluctuate widely. Do not store next to a heater or
an air conditioning unit. The extreme temperatures may
damage the CAMERA MASK. Exposure to extreme
temperatures or temperature fluctuations may cause
condensation inside the CAMERA MASK which may
damage the device. If you notice condensation, do not use
the CAMERA MASK. Set in a dry area with room
temperature until the condensation disappears.
Run a camera test to check its function prior to regular use.
Do not use a hair dryer.
11. HUMID CLIMATES - Make sure to only open the camera
briefly in Humid Climates as moisture in the air may be
第 24 页 共 25 页
PDF 文件使用 "pdfFactory Pro" 试用版本创建 www.fineprint.cn
trapped in the inner compartments if the camera caps are
left opened for a period of time. This will result in
condensation on the LENS when the CAMERA MASK is
submerged in warm water.
12. Safe Operating Temperature: 0 to 40°C (32 to 104°F)
/ Safe Storage Temperature: -20 to 60°C (-4 to 140°F) /
Safe Operating Humidity: 30 to 90% (when no condensation
is visible)/ Safe Storage Humidity 10 to 90% (when no
condensation is visible).
第 25 页 共 25 页
PDF 文件使用 "pdfFactory Pro" 试用版本创建 www.fineprint.cn