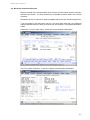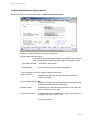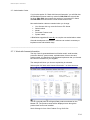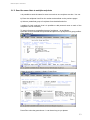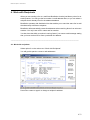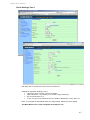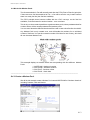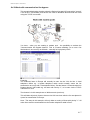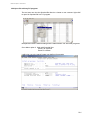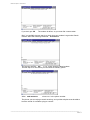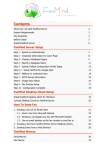
1
Application System/400TM BlueSeries users manual eXpress’it ! Version 10.2 BlueSeries eXpress´it version 6.1 ptf0130 Printed februar 2012 Copyright 2002 - 2012 System & Metode A/S, All rights reserved System & Method International Håndværkersvinget 8 DK-2970 Hørsholm Tlf. +45 70 20 36 10 Fax +45 70 20 36 18 www.blueseries.com [email protected] BlueSeries eXpress’it Users Manual 1-2 BlueSeries eXpress’it Users Manual 1. Introduction to BlueSeries...................................................................................... 1 1.1. About this manual........................................................................................................................... 1-1 1.2. Principles of development .............................................................................................................. 1-2 1.3. Screen layout ................................................................................................................................. 1-2 1.4. Search in screen image.................................................................................................................. 1-3 1.5. System requirements. .................................................................................................................... 1-4 1.5. Fax Modem .................................................................................................................................... 1-6 2. Chapter. Installation ............................................................................................ 2-9 2.1. Installation on the iSeries (AS/400)................................................................................................ 2-9 2.2. BlueSeries main menu. ................................................................................................................ 2-10 2.3 Work with communication line........................................................................................................ 2-1 2.3.1. Work with fax priorities. ............................................................................................................... 2-5 2.3.2. E-mail Priority . ............................................................................................................................ 2-5 2.3.3. Fax Priority & Bundling in general............................................................................................... 2-6 2.4. Work with the BlueSeries e-mail module. ..................................................................................... 2-7 2.5 BlueMail configuration ..................................................................................................................... 2-8 2.5.1 Activate the BlueMail module..................................................................................................... 2-11 2.5.2 Work with inbound e-mail ........................................................................................................... 2-14 2.5.3 BlueMail trouble shooting ........................................................................................................... 2-16 2.6.Work with BlueSeries System Values. .......................................................................................... 2-18 2.7. Authorization Codes. .................................................................................................................... 2-24 2.7.1. Work with license information ................................................................................................... 2-24 2.7.2 About Usage count for PC clients. ............................................................................................. 2-26 2.7.3. Upgrade to new versions. ......................................................................................................... 2-27 2.7.4 Install fixes.................................................................................................................................. 2-28 3. Chapter. Send & receive a fax – Send an e-mail ............................................. 3-30 3.1. Send a NOTE. ................................................................................................................................ 3-1 3.1.1. Send a Note to a known recipient ............................................................................................... 3-1 3.1.2. Send a Fax Note to a "unknown" recipient.................................................................................. 3-2 3.1.3. Send the same Note to multiple recipients ................................................................................. 3-3 3.2. Send a spool file as fax or e-mail. .................................................................................................. 3-6 3.2.1 Add a Cover page. ....................................................................................................................... 3-6 3.2.2 Time of dispatch ........................................................................................................................... 3-9 3.2.2 Send a file via FTP ..................................................................................................................... 3-10 3.2.3 Send a email in HTML format .................................................................................................... 3-12 3.3. Work with job log. ......................................................................................................................... 3-13 3.4 Work with session defaults............................................................................................................ 3-14 3.4.1 View the status for outbound faxes ............................................................................................ 3-14 3.4.2.View status for outbound e-mail................................................................................................. 3-15 3.5 Work with inbound fax ................................................................................................................... 3-15 3.5.1. Route the inbound fax ............................................................................................................... 3-17 3.5.2. Route the inbound fax using DTMF .......................................................................................... 3-18 3.6 Work with the BlueSeries Web Client ........................................................................................... 3-21 3.6.1. Start the Web Client from a 5250 panel .................................................................................... 3-27 3.6.2. Multiple installations on the same machine .............................................................................. 3-28 3.6.3. Create multiple URL paths ........................................................................................................ 3-31 4. Work with Recipients ........................................................................................ 4-33 4.1. Work with recipients. .................................................................................................................... 4-33 4.2. Create/edit an address. ................................................................................................................ 4-34 4.3. Group profiles............................................................................................................................... 4-37 4.4. Distribution lists. ........................................................................................................................... 4-38 4.5. Work with users............................................................................................................................ 4-39 5. Chapter. Work with graphics............................................................................... 5-1 5.1. Cover page Wizard......................................................................................................................... 5-1 5.1.1 Design of a new fax cover page................................................................................................... 5-3 5.1.2. Start Cover page Wizard ............................................................................................................. 5-5 5.2. Work with fax Overlay. ................................................................................................................. 5-10 5.3. Import signatures and graphics as fax image. ............................................................................. 5-12 5.4. Programming of fax cover pages. ................................................................................................ 5-15 5.4.1. Cover page commands ............................................................................................................. 5-16 5.4.2 Apply Cover pages to F4=List .................................................................................................... 5-17 5.4.3. Work with Overlay ..................................................................................................................... 5-18 1-3 BlueSeries eXpress’it Users Manual 6. Chapter Work with the Subsystem ..................................................................... 6-1 6.1. BlueSeries subsystem.................................................................................................................... 6-1 6.2. Line, controller and device. ............................................................................................................ 6-1 6.3. Work with output queues for monitoring......................................................................................... 6-2 6.3.1 Create a monitored Output Queue for an assigned recipient. ..................................................... 6-2 6.3.2 The keyword (.FAXNO) technique ............................................................................................... 6-4 6.3.3 The Spooled File Expert............................................................................................................... 6-6 6.3.4 Work With Spool File Expert (WRKXSPLEXP) ........................................................................... 6-7 7. Chapter. Work With Fonts .................................................................................. 7-1 7.1. Install extra fonts/typefaces............................................................................................................ 7-1 8. Chapter. Configure a fax line using TCP/IP........................................................ 8-1 8.1 TCP/IP configuration ....................................................................................................................... 8-2 8.2 Hardware implementation ............................................................................................................... 8-2 8.2.1 How to configure your Moxa 5110 Device Server........................................................................ 8-3 8.2.2 HyperTerminal for modem test..................................................................................................... 8-7 8.3 Add a TCP/IP fax line. ................................................................................................................... 8-10 8.4 Work with Modem Pools................................................................................................................ 8-13 8.4.1 Create a Modem Pool. ............................................................................................................... 8-13 8.4.2 Work with communication line bypass. ...................................................................................... 8-17 9. XML Support for BlueSeries ............................................................................... 9-1 9.1 From Spool file to XML File ............................................................................................................. 9-2 9.2 XML - Extensible Markup Language ............................................................................................... 9-3 9.3 BlueSeries Scripting. ....................................................................................................................... 9-5 9.4 Interface to the “business object”. ................................................................................................... 9-6 9.5 Iterating on multi occurrences nodes. ............................................................................................. 9-6 9.6 Using dynamic SQL......................................................................................................................... 9-7 9.7 Interfacing with CL........................................................................................................................... 9-7 9.8 Creating the XML document. .......................................................................................................... 9-8 10. Spooled file handling on the PC Client ........................................................... 10-1 10.1 Spooled collection commands. ................................................................................................... 10-1 10.1.1. Add Collection node Entry - ADDDXCOLE ............................................................................ 10-2 10.1.2. Change Collection node Entry - CHGXCOLE........................................................................ 10-4 10.1.3. Display Collection node Entry - DSPXCOLE ......................................................................... 10-4 10.1.4. Remove Collection node Entry - RMVXCOLE ....................................................................... 10-5 10.1.5. Work with Spooled Collections - WRKCOL ........................................................................... 10-5 10.2 Open file with any PC program. .................................................................................................. 10-6 11. Print Barcode labels........................................................................................ 11-1 12. Various Information....................................................................................... 12-11 12.1 Trouble shooting & how to test your modem. ........................................................................... 12-11 12.1.1. Country codes for Multitech modem MT5600BA V92........................................................... 12-14 12.2 Uninstall / delete BlueSeries from the system. ......................................................................... 12-15 12.3 Disaster recovery. ..................................................................................................................... 12-15 12.4 Security and principles for communication................................................................................ 12-16 12.5. Arrangement with a fax machine.............................................................................................. 12-18 12.6 Q & A ......................................................................................................................................... 12-19 12.7 License terms ............................................................................................................................ 12-21 1-4 BlueSeries eXpress’it Users Manual 1. Introduction to BlueSeries BlueSeries is a turnkey solution that allows you to distribute you iSeries documents using e-mail, XML FTP and fax. BlueSeries is a modular concept that gives you the ability to improve on document handling. Ranging from e-mailing an individual spool file entry - to faxing documents to your customers. BlueSeries has it all - including support for your PC client users with fax services from their desktop environments. First, your iSeries (AS/400) terminal user can send any SCS or AFP prints as fax or as e-mail in PDF or TIFF formats. The graphics for e.g. on an invoice copy, are identical on both the fax and on the e-mail. BlueSeries can also convert spooled files into XML. Terminal users can send fax or e-mail individually or automatically to a predetermined location. Documents can be sent to individual fax destinations or to a list of destinations in a distribution list. With a few simple changes, your system applications can even create output directly to fax or mail as TIFF or PDF attachments. You can send on plain paper or you can merge the information from your spool file with a forms overlay to produce a document to replicate your company forms. With this feature, you can send invoices, statements, purchase orders and more directly from your application programs. The Fax module (Fax) is a turnkey fax product. No special hardware is needed for the iSeries. The only prerequisite is a communications port, a fax modem and a telephone line. You can even use iSeries own built in modem. It is very easy to start sending faxes. Load the software, attach the modem to the system and plug in the phone line. Typical installation time is around 30 minutes. The e-mail module (BlueMail) is just as easy to install. All you need to know is the address of you local POP3 server. The BlueMail module can be used to distribute XML files. That applies for sending as well as receiving via email. BlueSeries can send output from existing AS/400 applications with little or no programming changes. "You are already prepared for BlueSeries, if you can print SCS, or AFP print from your application ". The outbound fax capability is very fast and uses little system overhead – BlueMail takes even less. Support is included for adding logos and signatures to outbound documents. Fax and Spooled file handling on attached PC's. The BlueSeries PC client enables users to send faxes directly from their favorite wordprocessing software, spreadsheet software, database software and more. Any Windows PC-client can use the fax server features. There is even support for Terminal servers. The BlueSeries allow users to set up a personal tree view of spooled files and view the file using the built in viewer or e.g. Notepad, Word etc…. BlueSeries combines e-mail and fax ! The combination of the Fax and the BlueMail modules improves the handling of inbound faxes dramatically. The BlueMail module is connected as an "alternative fax line" which lets you receive your faxes - as e-mail! The fax image is now received as an attachment to the e-mail. The graphics for e.g. on an invoice copy is identical on both the fax and on the e-mail. 1-1 BlueSeries eXpress’it Users Manual Many typefaces. BlueSeries comes standard with Courier and the scaled typefaces CG Times, Univers and Arial. Other typefaces can be implemented separately with the Font Import utility. Latin2 is also supported. Support for PCL print. BlueSeries will easily integrate to a variety of Forms products for the iSeries (AS/400). Most PCL documents will be faxed or e-mailed, “as is” without any delay. The combination of these products enables you to collect and automate the complete document flow in your company. Example: An invoice is generated on the iSeries (AS/400). The hardcopy is printed via a Forms product on a connected laser printer, a copy is sent as fax or e-mail via BlueSeries. Everything is done in the same process. If an invoice copy is needed at a later date, an exact replica is drawn from an Archive system and is faxed or e-mailed direct to the recipient. The LDLC feature saves your money. LDLC is our abbreviation for "Long Distance Low cost”. This feature enables you to send faxes via TCP/IP using a "TCP/IP thin server". All Fax customers who have their iSeries (AS/400) placed in one location will be able to send faxes via a remotely located office incurring only a local call charge – (The remote location could be in another country). A modem pool will ensure that faxes to local companies can be sent without a country prefix. The LDLC feature will also enable you to create a “fall back” environment. If a local telephone line fails, the system will automatically route high priority faxes to be sent from the nearest available fax line. Basic features: Full graphic support for overlay and scaled fonts. The “Spool File Expert” will make spooled files from any ERP solution available for BlueSeries. Automated upgrade of the PC clients. Runs very fast and uses little system resource. Easy to use for any terminal operator. Send documents directly from any terminal session. Include logos and signatures for use in documents. Incoming faxes can be printed on HP LaserJet or a compatible printer. Incoming faxes can be routed as e-mail to any user. "Send Note" feature allows you to create a note on any terminal and send it as a fax or e-mail Maintains its own job log and provides complete status on all activities. Built-in fax telephone book simplifies sending transmissions to the same location. Existing address databases can be merged into the system. Support for IBM modems: All internal modems supplied with the iSeries e.g. the 9771 Adapter Card with the integrated 56Kbps 2771 modem. System operates in its own subsystem. Can be started automatically during an IPL. Full SAA standard. Runs on any model iSeries or AS/400. 2 BlueSeries eXpress’it Users Manual 1.1. About this manual This manual will describe how different tasks can be performed with BlueSeries. It is basically the same process that ends up with a document being sent as a fax or an email. When the term “Send fax” is used in this manual, it will normally equal the term “Send E-mail”. Exceptions are the obvious fax only situations. It can be necessary to use other manuals to find information about different topics, especially third party software. The brand names; System i, iSeries and AS/400 does in this manual cover the same platform. You should also know that the modules Fax and BlueMail are the names for the fax and e-mail engine in BlueSeries. Most panels in this manual are displayed as “5250 emulation”. You can today use different applications that will give you a GUI interface but that will not change the basic functionality in the panels. This manual refers to the folder systems on the AS/400 - viewed from the PC side consequently referred to as the I: drive. This goes disregarding the fact that the folder system can have other names seen from connected third party PC software. The terms Incoming fax/Inbound fax and Outgoing fax / Outbound fax are used randomly in the manual. _______________________________________________________________________________ Who needs this Manual ? This manual is intended for the system operator who is responsible for the daily use of BlueSeries. Some chapters can be distributed to daily users. _______________________________________________________________________________ The structure of the Manual The functionality is double sided. You have a) the manual transmission where you send a fax or email by hand and b) the automatic functions that integrate BlueSeries as a natural part of the ERP system running on the iSeries. We have chosen to let the first chapters of the manual guide the first time user. Installation A detailed description of the first time installation of BlueSeries Send and receive a fax or send a e-mail.. For users who needs to send a Note or a Spooled File manually as email or fax and how to handle inbound faxes. Just have in mind that BlueSeries is a e-mail pump and is not to be compared with programs like Outlook nor Notes. Work with recipients. Work with recipients describes how you can create and edit addresses, groups and distribution groups. Work with Graphics. This chapter describes how you can import logo, graphics and signatures to BlueSeries and how to design a cover page. 1-1 BlueSeries eXpress’it Users Manual LDLC A description of the LDLC (Long Distance Low Cost) concept and how to create a TCP/IP fax line. Various Test modem. Security aspects - license terms. Programmers reference - Integration to other programs. The Programmers Reference Manual describes how you can use BlueSeries in conjunction with third party programs e.g. financial systems from where you can fax invoice copies or email statements of accounts. BlueSeries PC Client . You can send faxes from any word processing program. Full graphical interface. View all faxes in the BlueSeries fax log. You can edit user and recipient’s data from the PC client. _______________________________________________________________________________ 1.2. Principles of development The following principles have been emphasized on the system development: Simple installation. The operation of the system must be simple, and easy to learn. Complete on-line check of all input, and built-in prevention of operation errors. Few and compact files, which automatically adjust to the specific users need for space. Insensitivity to power failure. Small and simple programs which are easy to develop further. Full SAA (System Application Architecture) standard. _______________________________________________________________________________ 1.3. Screen layout All screen images in BlueSeries have been constructed in three parts: 1) A header that shows the title on the subject you are presently working with. If you call a submenu that will layer new headers on top of the first, the image for the headline of previous images will always be visible, so you do not loose track of the process. 2) The body of the screen shows the specific information as info- and/or input -fields. All fields open to input are underlined. When several occurrences are listed, you will be able to specify the values: 2=Change 3=Copy 4=Delete 5=Display Occurrences are displayed, changes can be made. The occurrence can be copied. The occurrence can be deleted. The occurrence is displayed and the record is protected against changes. The system will inform you, whether it is allowed to change or delete in the field. 3) The bottom of the screen shows the function keys and gives a brief description. All active function keys described at the bottom of the screen display observes the standardized IBM terms: 1-2 BlueSeries eXpress’it Users Manual F3=Exit Exits function. F4=Prompt Displays a list of possible values. F5=Refresh Shows the image with possible changes. F6=Create Creates new records. F9=Retrieve Retrieves the previous command line. F11=Info Displays hidden text to the right of the screen image. F12=Cancel Cancels the image. Finally, there are a few special function keys that are implied and which do not always appear on the screen. F1=Help Gives entry to online help text. F2=@ To be used in e-mail addresses. Roll up To be used to roll the display information forward, if more is stipulated. Roll down Used to roll the display information backwards through the list. BlueSeries has been created in a way that enables you to display a summary of possible values in all the fields where specific values must be entered. This is done by activating the F4=Prompt with the cursor in the field. Then you can option out the value you want, and it will automatically be transferred back to the field. _______________________________________________________________________________ 1.4. Search in screen image BlueSeries has a built-in search system that makes it very easy for the user to find, list and/or qualify information. It is always possible to search on the specific username, group-name...etc.. by pressing the F4 key in the field where you need a listing. 1-3 BlueSeries eXpress’it Users Manual 1.5. System requirements. Before you install BlueSeries please look on the requirements for the different features. Minimum 100 MB disk. OS/400 Version V5R1 or later. A 5250 terminal or 5250 emulation The BlueSeries Fax module Faxing from BlueSeries can be performed trough: The internal modem that is standard issue in all iSeries Via the V.24 line and an external modem. Via TCP/IP using a fax modem that is connected to a Thin Device Server. It is possible to operate multiple TCP/IP fax lines from the same iSeries and distribute the fax line lines on different locations. Each location must however have its own Device Server and fax modems. The different connection forms can be combined. You can connect as many fax lines you want. BlueSeries Fax is delivered with one (1) fax line. Additional fax lines must be ordered separately. Count one (1) external fax modem per telephone line. The internal iSeries modem can (depending on type) connect direct with one to four telephone lines. Multiple internal modems can be installed in your iSeries allowing for X number of fax lines. Check with your hardware supplier for the maximum number of modems. Optional requirements for the Fax module: 1-4 A HPIII compatible laser printer(or better), The printer is only used when you need to print inbound faxes or hardcopies of outgoing faxes. If you need to fax AFP print: ”Product option 8 AFP Compatibility Fonts” must be installed. (See ”go licpgm” option 10) BlueSeries eXpress’it Users Manual System requirements to the BlueSeries Mail module TCP/IP is installed and active on your iSeries You have already access to an Internet Service Provider (ISP) and can connect to a SMTP mail server. You must know the IP-address of your SMTP mail server. BlueSeries configuration & flow 1-5 BlueSeries eXpress’it Users Manual 1.5. Fax Modem MultiTech is the manufacturer of all modems supplied for IBM System i, iSeries and AS/400. It is consequently the only supported brand for the platform - and we have adapted the same policy. The only supported fax modems from BlueSeries V6R10PTF0126 and forward are: All the various Internal modems for System i and iSeries (all MultiTech) The MT5600BA modem http://www.multitech.com/en_US/PRODUCTS/Families/MultiModemII/ The MT5656ZDX modem http://www.multitech.com/en_US/PRODUCTS/Families/MultiModemZDX/ BlueSeries Fax has support for the following discontinued modems: MultiTech ZDX5600 modem IBM 7852 Option modem. (Only in conjunction with the V.24 cable). Just remember that the "dipswitch 12" must be in "upward position". NOTE !!! Connect the external modem to the V.24 cable. Use the original black IBM cable. (P/N 22F0152 (9023) EC 899845) The Internal modem is connected like all other modems using option 12 on the menu. Before connecting the internal modem please make sure that the country code is set in OS/400”Network Attributes.” Find an OS/400 command line and write: Scroll to last page. DSPNETA The country code must display the physical location of the iSeries 400. If e.g. : ”Modem country ID . . . . . . . . . . . . . . . . : *SAME” Then set the country code to e.g. DK for Denmark. (You can use a F4 list to find the right country code) Use the command CHGNETA _____________________________________________________________________________ 1-6 BlueSeries eXpress’it Users Manual Combine internal and external fax modems If you have a iSeries it will include a #9771,#9793 or #9794 adapter card with integrated 56kbps (internal) modem. This feature is a two-line WAN adapter, with one RVX port supporting multiple protocol communications. You can connect the external faxmodem to this Port 1. Use the IBM cable: #0348 - V.24/EIA232 Cable. It will substitute the V.24 adapter and you can connect Other fax modems Other brands of fax modems can be connected to BlueSeries Fax. But we can not guarantee, that other fax modems than the mentioned MultiTech modems will work on BlueSeries Fax. The “unsupported” modems used for BlueSeries Fax must be asynchronous Class2 faxmodems. Class2 is a genuine modem standard and is not to be confused with Class1, Class2.0 Class2.1 nor Class3. Run your own test. You might already have a usable modem in-house. See chapter 12 to see how you can test and learn if it is a genuine class 2 Modem. Always remember to use the original power supply for external modems. The mentioned MultiTech modems are in case of fax problems, the only modems covered by the BlueSeries maintenance agreement. Support issues related to other modems will be charged per the hour. _____________________________________________________________________________ 1-7 BlueSeries eXpress’it Users Manual Connect the BlueFax module Internal modem Phone socket Phone cable FAX V.24 line Phone # External modem Faxing from BlueSeries can be performed trough a) The internal modem that is standard issue in all iSeries or b) via the V.24 line and an external modem. Use this simple checklist to be prepared before you begin the installation. Some of the bullets are rater obvious but have proved to be worth checking. Phone line Does the phone socket work with a normal phone? Is a dial prefix needed to dial out? Do you have the phone number for inbound faxing? Internal modem. Will the phone cable reach from the iSeries to the phone socket? What is the resource name? Vary of any jobs that are using this resource. External modem. What is the resource name for the V.24 line? Vary of any jobs that are using this resource. Is it a genuine “Class 2” fax modem? Is it the original phone Cable and Power Supply? Is the Power on ? _____________________________________________________________ 1-8 BlueSeries eXpress’it Users Manual 2. Chapter. Installation BlueSeries will run without key-codes for 8 days counting from the date of installation. You will then need to enter separate Key codes for the modules FAX, BLUEMAIL and FAXPC. The BlueSeries installation can best be described as a four-stage rocket: 1) The LODRUN command will install BlueSeries on your iSeries. When you are installing for the first time you will automatically be prompted for “System Values” (see chapter 2.6). 2) The second step - is the configuration of the fax line in the Fax module enabling you to send a fax from a "green-screen" 5250 workstation. You are also able to print inbound faxes on a laser printer. 3) The third step is the configuration of BlueMail (the e-mail module) and activating the email communication line. 4) The fourth step is the installation of the "Fax Client 2000" on the connected PC. The BlueSeries license gives you automatically right to ten (10) free Fax clients. Extra PC clients can be ordered separately and requires their own authorization codes. This is what we call the basic installation. You can always add extra fax lines, TCP/IP lines as well as extra PC clients. _____________________________________________________________________________ 2.1. Installation on the iSeries (AS/400). Install from a CD media. Approximate 30 minutes. The installation will automatically install BlueSeries for a 30-day trial period. An authorization code is required to make the installation permanent. 1. Load the media. 2. Sign on as QSECOFR. 3. Type LODRUN [dev] <enter> (dev =TAP01,DKT01, *OPT ...). 4. Select product. 5. Select preferred language. 6. Type product prefix. 7. Type company name in system values. 8. Type modem information. 9. Type GO BLUESERIES. 10. Press 17 to start the subsystem. You can now proceed, with the configuration of the communication lines. 2-9 BlueSeries eXpress’it Users Manual 2.2. BlueSeries main menu. Type the command: GO BlueSeries <enter> to access the main menu. Please note there is a command for each entry option. 2-10 BlueSeries eXpress’it Users Manual 2-11 BlueSeries eXpress’it Users Manual 2.3 Work with communication line. Both the number of the communication lines and the communication resource used are defined in this screen. For each active line it is possible to see the status of the actual operation. Remember to key F5=refresh to retrieve updated status from the communication lines. If you are going to use more than one line, you must make sure that your password matches with the number of lines you want to use. See chapter 2.4 Program authorization codes. Select item 12 on the main menu, "Work with Communication Description". Key F6 to create a new line - or key 2 to change communication description. 2-1 BlueSeries eXpress’it Users Manual Communication status: Displays the present status on modem. IDLE SENDING RECEIVING ERROR INACTIVE MSGW Waiting for incoming faxes. Now sending a fax. Now receiving a fax. The modem has activated an error code. The modem is inactive. Inactive - message waiting. Last Active: Displays the last date and time the line was used. Next Active: Displays the next date and time when the line will be activated. Next event in seconds: Displays, in seconds, how much time will pass before next event occur. Modem manufacturer: Displays the manufacturer of the modem. The modem contains the name of the manufacturer of the modem. When the line is configured, the information from the manufacturer is automatically retrieved from the modem. Modem product Revision: Displays the product revision of the modem. The modem contains a product revision. When the line is configured, the information is automatically retrieved from the modem. Enter new communication description or use BlueSeries own values as default. Resource Name: The resource name for the communications line. A typical name would be LIN011. The field must be filled in. Press F4 to list the available communication resources. The resource name will also indicate if the communication line used for fax, fax via TCP/IP or E-Mail Modem pool: Is used in combination with the LDLC facility. (Fax via the TCP/IP line). The modem pool will ensure that the transmission is routed through the correct modem. Nick Name: It can be a good idea to give the line a Nickname if you have many communication resources on your system. Modem Type: Press F4 to locate the type of modem you are using. (New modems will be added to the list.) Capability: You can preset the line to handle in and outbound faxes. Set the direction of the transmission with the digits 1=receive, 2=Send or 0=both. Dial Prefix: In several companies the modem will be connected through a switchboard. This field is used for placing digits to be sent, before the phone number. If a switchboard is used, it should typically say "9W". It means that you normally will have to press "9" in order to reach a outgoing line. "W" is a modem command that tells the modem to wait for a dial tone. If the switchboard does not give a normal dial tone, you can use "," in stead of "W", to tell the modem to wait, but not listen for a dial tone. 2-2 BlueSeries eXpress’it Users Manual Modem Init String: Normally blank Modem AT commands are digits being sent to the modem before Fax dial-up. A list of AT commands is supplied along with the modem. BlueSeries will automatically set correct string when you select a supported modem. Post Init string: Modem commands that can be sent to the modem after a message have been delivered to the operator. A list of commands is supplied along with the modem. Scroll to the panel Incoming Output queue: Shows the output queue to receive incoming faxes. If *DFT is shown, it means that the output queue from the system values are used. If *DFT shows, Library cannot be filled-in. Incoming Out queue Library: Shows a Library name or *LIBL for library list. Incoming Message Queue: Shows the name of the message queue which are to receive a message when a fax arrives to this fax line.If *DFT is shown, it means that the message queue from the system values is used. If *DFT is shown, library name is not filled-in. Library Shows a Library name or *LIBL for library list. Forward to e-mail address: Only to be used in connection with the BlueMail module. This is the email address that will receive the incoming fax as email. It can be the address of a person e.g. the receptionist. The email address must be a valid address. 2-3 BlueSeries eXpress’it Users Manual Primary baud rate: When sending a fax, this is the communication speed preferred. That does not mean that at older and slower fax machines are unable to communicate if at high value is selected. Fax and the remote fax are able to negotiate from that communication rate (speed) to whatever speed the receiving fax is able to cope with. This speed is used for ensure a fast and reliable connection. If the communication fails because of a bad communication line to a specific remote fax, then you are able to control the preferred communication speed by selection of "reduced line speed" in the Work with recipient panel. Fall back baud rate: The fall back line speed is used when the primary line speed can not be achieved. For example, when a specific remote fax location is flagged with the "reduce line speed" parameter or if this is a connection retry. 2-4 BlueSeries eXpress’it Users Manual 2.3.1. Work with fax priorities. It can make sense to send a fax at night and in weekends as the fax charges are lower. This can be controlled from BlueSeries. Work with Communication Priority is a function that gives you the possibility to control the outbound traffic by setting the fax priority from 1(high) to 9(low). You can thus ensure that it only are the important - "here and now" - faxes with high priority that are being sent during the daily hours. Faxes with low priority will be sent to the low fares in the night and weekend hours. Key 12 in the main menu for "Work with Communications Description" and select 8 for priority. In the example shown below you will find that it is priority 5 that is the limit for "Important faxes". An important fax could be a Fax Note, Invoice copy, an Acknowledgment of a order, etc - the type of fax you would like to send right away. Other types of faxes do not require the same haste; it could be Campaign Offers, Statements of accounts, etc. with a lower priority than 5 will only be sent in the nighttime and weekends according to this example. If you have more than one line, it is also possible to use the priority to dedicate a line to inbound faxes. Example: If the priority is set to 3 on a specific line, it will only be high priority fax notes sent from terminal and PC-clients, which will pass as outbound on this line. And the line will, as a result, often be free for inbound faxes. (This also depends on the actual number of users on the system). 2.3.2. E-mail Priority . You can use the priority list to control the priority of the emails you are sending from BlueSeries Priority 1, 2 & 3 = High Priority 4, 5 & 6 = Normal Priority 7, 8 & 9 = Low An email stating, “Email opened” will be returned to the email address of the sender if the recipient opens an email, which is sent as “High priority” Please note. The statement “Email opened” will normally not be returned from email addresses originating from “Webmail” mailboxes. 2-5 BlueSeries eXpress’it Users Manual 2.3.3. Fax Priority & Bundling in general. When two fax machines communicate the process is as follows: Handshake “Hello” 20 seconds – Fax Transmission X seconds – Handshake “Goodbye” 20 seconds. To send one standard portrait*) page from BlueSeries will take you close to one minute, with only 20 seconds of actual transmission. So if you have multiple faxes waiting to be sent to the same recipient, you can understand that it will make sense to bundle faxes to be sent in the same transmission. Example: The default priority is set to 5 as described in the previous chapter. This will cause faxes with priority 6 to 9 wait in line. Priority Monday - Friday 8:00 - 19:00 Max Priority = 5 Priority 1 2 15 15 3 4 5 69 6 7 8 9 Monday - Friday 19:00 - 07:59 69 Max Priority = 9 1 2 3 4 5 6 7 8 9 These faxes are going to be sent in the FIFO order of the queue – but with one exception. Whenever BlueSeries sends a fax, it will always check if there are other faxes with a lower priority waiting to be sent to this recipient and bundle these faxes. If you during the daytime send a fax e.g. an order confirmation to Volvo, and you already have e.g. accounts payable waiting to be sent as a low priory fax –these two faxes will be bundled together. Bundling Bundling Volvo To: Volvo Volvo High priority FAX To: Volvo To: Volvo High priority low priority FAX FAX To: Volvo low priority FAX An other example of how bundling can be used: A provider of auto spare parts has a customer who on daily bases will send in a number of orders. The orders will be filed during the workday. Every order will generate an Invoice copy that will be added as a low priority fax in the fax queue. The provider will in the end of the day send an order confirmation to his customer and all the documents will be bundled in one and the same fax transmission. *) In ‘High Resolution’. Note - It can take up to two minutes to send one page in landscape. PLEASE NOTE: Faxes set with deferred delivery will not be bundled! E-mails will not be bundled. 2-6 BlueSeries eXpress’it Users Manual 2.4. Work with the BlueSeries e-mail module. This chapter describes the configuration of the BlueSeries e-mail module hereafter named BlueMail . BlueMail is the e-mail module that enables you to distribute your SCS, PCL or AFP print as e-mail. The image is sent as a PDF or TIFF attachment to the e-mail. The graphic's on e.g. an invoice copy is identical on both the fax and on the e-mail. You can also use the BlueMail module to email files and objects direct from and to the iSeries. Please have in mind that BlueMail is an email pump working on the iSeries. It shall not be compared with PC tools like Outlook or Notes. When you need to send a "fax" as an email, simply replace the fax number with an e-mail address. The image that is normally known as a fax is now sent as an attachment to the e-mail. The graphic's on e.g. an invoice copy is identical on both the fax and on the e-mail. Let BlueMail receive all your faxes! The BlueMail feature improves the handling of inbound faxes. Let the inbound fax can be distributed internally via e-mail. The person who is set as the default BlueMail recipient can handle the distribution manually. You can of course also use the facilities in your local e-mail system (e.g. Notes or Outlook) to distribute the fax to a group of people. System requirements to the BlueMail module: a.) BlueSeries is installed and active. b.) TCP/IP is installed and active on your iSeries. c.) You have already access to an Internet Service Provider (ISP) and can connect to a mail server (SMTP server). d.) You must know the IP-address of your SMTP mail server. PLEASE NOTE: The BlueMail configuration cannot proceed unless the 4 options above are in order! 2-7 BlueSeries eXpress’it Users Manual 2.5 BlueMail configuration BlueMail requires that you have access to a mail server (SMTP server). You will normally connect BlueMail via an Internet Service Provider. Example A). The connection to you ISP (Internet Service Provider) are established via an ISDN router. The DNS address you are using is the address of the ISP your ISDN line is connected to. Note - The actual mail server can also be located at a third party ISP on the net. Example B). Here is the connection to your ISP established direct via SLIP Dial up from your AS/400. The DNS address you write in BlueSeries is the address of the ISP, which is connected to your AS/400´s SLIP. Example C) The connection is established via a PC which got WINGATE installed. The DNS address you write in BlueSeries, is the address of the actual PC which is connected to your ISP. Example D) An alternative is to connect a mail server direct on your own AS/400. The DNS address indicated in BlueSeries, is the AS/400´s own IP address. This solution is only recommended to companies who already uses their AS/400 as Internet server Example E) Works as seen in example A. But with that difference that the AS/400 communicates with a local mail server, that handles all the outgoing communication. See next page for explanation of special terms. 2-8 BlueSeries eXpress’it Users Manual ISDN (Integrated Services Digital Network) An international telecommunications standard for transmitting voice, video and data over digital lines running at 64 Kbps. The telephone companies commonly use a 64 Kbps channel for digitized, two-way voice conversations. ADSL Short for Asymmetric Digital Subscriber Line, a new technology that allows more data to be sent over existing copper telephone lines (POTS). ADSL supports data rates of from 1.5 to 9 Mbps when receiving data (known as the downstream rate) and from 16 to 640 Kbps when sending data (known as the upstream rate). ADSL requires a special ADSL modem. Mail server A computer in a network, that provides "post office" facilities. It stores incoming mail for distribution to users and forwards outgoing mail through the appropriate channel. The term may refer to just the software that performs this service, which can reside on a machine with other services. DNS (Domain Name System) Name resolution software that lets users locate computers on a UNIX network or the Internet (TCP/IP network) by domain name. The DNS server maintains a database of domain names (host names) and their corresponding IP addresses. In this hypothetical example, if www.mycompany.com were presented to a DNS server, the IP address 204.0.8.51 would be returned. DNS has replaced the manual task of updating HOSTS files in an inhouse UNIX network, and of course, it would be impossible to do this manually on the global Internet, given its size. POP3 (Post Office Protocol 3) A standard mail server commonly used on the Internet. It provides a message store that holds incoming e-mail until users log on and download it. POP3 is a simple system with little selectivity. All pending messages and attachments are downloaded at the same time. POP3 uses the SMTP messaging protocol. ISP (Internet service provider) An organization that provides access to the Internet. Small Internet service providers (ISPs) provide service via modem and ISDN while the larger ones also offer private line hookups (T1, fractional T1, etc.). Customers are generally billed a fixed rate per month, but other charges may apply. For a fee, a Web site can be created and maintained on the ISP's server, allowing the smaller organization to have a presence on the Web with its own domain name. IP address (Internet Protocol address) The address of a computer attached to a TCP/IP network. Every client and server station must have a unique IP address. Client workstations have either a permanent address or one that is dynamically assigned to them each dial-up session. IP addresses are written as four sets of numbers separated by periods; for example, 204.171.64.2. SLIP (Serial Line IP) A data link protocol for dial-up access to TCP/IP networks. It is commonly used to gain access to the Internet as well as to provide dial-up access between two LANs. SLIP transmits IP packets over any serial link (dial up or private lines). 2-9 BlueSeries eXpress’it Users Manual SMTP (Simple Mail Transfer Protocol) The standard e-mail protocol on the Internet. It is a TCP/IP protocol that defines the message format and the message transfer agent (MTA), which stores and forwards the mail. SMTP was originally designed for only ASCII text, but MIME and other encoding methods enable program and multimedia files to be attached to e-mail messages. SMTP servers route SMTP messages throughout the Internet to a mail server, such as POP3 or IMAP4, which provides a message store for incoming mail. TCP/IP (Transmission Control Protocol/Internet Protocol) A communications protocol developed under contract from the U.S. Department of Defense to internetwork dissimilar systems. This de facto UNIX standard, which is the protocol of the Internet, is becoming the global standard for communications. TCP provides transport functions, which ensures that the total amount of bytes sent is received correctly at the other end. UDP is an alternate transport that does not guarantee delivery. It is widely used for real-time voice and video transmissions where erroneous packets are not retransmitted. IP provides the routing mechanism. TCP/IP is a routable protocol, which means that all messages contain not only the address of the destination station, but the address of a destination network. This allows TCP/IP messages to be sent to multiple networks within an organization or around the world. Every client and server in a TCP/IP network requires an IP address, which is either permanently assigned or dynamically assigned at startup. 2-10 BlueSeries eXpress’it Users Manual 2.5.1 Activate the BlueMail module Before you install the module make sure that you have checked the four bullets in chapter 8. Open option 12 on the BlueSeries menu "Work with communication Description". Press F6 to create a BlueMail communications line. Select *EMAIL in "Resource name". 2-11 BlueSeries eXpress’it Users Manual You must now state the SMTP name (Your mail server name) either as a typed address or as an IP address. You can use the option "Send a test E-mail ?" to check you are using a valid name or IP address. The e-mail connection is now established. You must now enter the value of the default recipient of inbound "faxes" in Fax. Inbound faxes in Fax will be sent as an e-mail with an Tiff attachment to this address. Find option 15 "Work with system values" 2-12 BlueSeries eXpress’it Users Manual Find the field “E-mail address". This field is used to indicate the default E-mail address for system replies. NOTE - It is very important that this field is filled, and contains a valid e-mail address ! 2-13 BlueSeries eXpress’it Users Manual 2.5.2 Work with inbound e-mail The BlueSeries email module can handle inbound e-mail. The basic idea of this feature is to allow the iSeries users to receive an email with an attachment – e.g. an XML file so this file can be processed by the ERP system. This feature is primarily a machine-to-machine interface and is in no way meant to compete with Outlook or Notes. Inbound email and attachments will be stored on the IFS, but you can use the normal log (Option 3. Work with Jobs) to view the status. Press 9=View to display the mail graphically in Outlook Express. Press 11=Display log to view the transmission details Create an account The first step is to create an account that will handle the inbound Email. Write the command WRKXACC to activate inbound E-mail. 2-14 BlueSeries eXpress’it Users Manual It will open the panel “Work with Email accounts”Press F6 to create an email account on your SMTP server. Handle ID Internal ID for the account. Mail Server or IP address Your email server Mail Server port Default 110 Mail Server Account name The email address Mail User ID Supplied by you web provider. Mail Password Supplied by you web provider. Post process program The program that are activated when e.g. a e-mail with an XML file are received. Library Mail Path Where the E-mails are located on the IFS Wait after Pool the mail server for new mail every X sec. Keep Mail on Server Leaves copy on server Yes / No Active Account **** Put he account on hold Yes/No BlueSeries is now ready to receive email. *** Post process program Please Note It is your Post process program(s) that will ensure the integration to other programs. Inbound files can be: Passed on to the ERP system. Scanned Archived direct These are just examples and you can probably think of many other ways to put this feature to use. See the example program RCVEMAIL in QSAMPLE 2-15 BlueSeries eXpress’it Users Manual 2.5.3 BlueMail trouble shooting If there are problems with activating the BlueMail module, you should try to look for 3rd party reasons. You can run a test - using Telnet - that will show if your connection to the POP3 server is working OK. Write: telnet ’<POP 3 server ip address>’ port(25) as shown: 2) The system must answer”220 xxxxxx ” as shown below: xxxxxx is your server name. This will confirm that you have access. End session by pressing Type QUIT and enter enter 2-16 BlueSeries eXpress’it Users Manual Problems related to BlueMail "Relay". You can when installing BlueMail find yourself in a situation, where BlueMail is denied access to the local SMTP server. A reason for this could be a local "fire-wall" or filter that have been established to protect the system from unauthorized access. Filter/ Fire-wall Such a Filter will as default deny all traffic also from the AS/400 - and thus also for BlueMail. All mail-servers will operate with a "Inbound Controls" that will give controlled access to known IP-addresses. Your local Mail administrator should thus indicate the AS/400 "Host-name" or AS/400 in the "Inbound Control list". This example shows how you in Domino can give access via "Inbound Relay Controls". Write your AS/400 "Host-name" or "IPaddress" that will give access for BlueMail to send e-mail. ************************************************** Allow Relay in Microsoft Exchange: 1. Start the Exchange System Manager Console 2. Select Properties on the Virtual SMTP Server: Press ”Relay” to Add the IP Address of the iSeries 3. Press the Authentication Button and verify that the Anonymous Mode is activated. 2-17 BlueSeries eXpress’it Users Manual 2.6.Work with BlueSeries System Values. Select menu option15 from the main menu to "Work with System Values". Enter the standard information used for outgoing fax. Sender name and Fax number: The contents of the fields will be written in the header of any fax being sent. Typical entries in this field might include your company name. Voice phone number: To be used in the fax note. E-mail address: It must be filled out with a valid e-mail address. Type information, on how to handle outgoing transmission. Queue Timeout: Displays in seconds, the time interval to pass before the queue is activated. No Connection Redial Delay: Displays in seconds, the time to pass before the fax queue will try to resend a fax that has not yet been sent. Maximum Retry: Shows how many times the fax queue will try to re-send a fax before it receives an error code. Send System Name: Is the description (in the header of this page) to be "pasted" on all pages to be sent ? 0=No 1=Yes Scroll to next panel 2-18 BlueSeries eXpress’it Users Manual Days to keep images: Shows the number of days to pass before a fax image will be deleted from the system. Days to keep logs: Shows the number of days to pass before the log entry will be deleted from the system. The log entry does not contain the image. Default cover page: Cover Page Member name (CFCFCFNM). Enter the name of the cover page in this field. Press F4=List to see a list of the cover pages. Banner Text Program Enter the name of the program. Use F4 to prompt a list. Left Margin in pixels: (SYMARG) In this field you determine the number of digits for left margin. Hardcopy Output Queue: It is possible, to get a hardcopy of every fax you send. State the name of the output queue. Library Name, *LIBL Print option When do you want to see a hardcopy? 0="Always", 1= "When Sent OK" or 2="When Error" Pages to print This option allows you to print the first page of the fax,or all the pages in the fax. *FIRST will only print the first page and a status line of the whole transmission. Message Queue (SYOMQN) Specify the receiver of a system message when a fax is sent. *USER Enter *USER if it is the user who is to receive a message about the outgoing faxes. Name Enter the message queue to receive message of outgoing faxes. 2-19 BlueSeries eXpress’it Users Manual Attach Cover page in email *YES in this field will enclose a graphical image of the (fax) cover page in the email sent when Sending a Note only or Sending a Spool file with a note. *No in this field will omit the cover page copy. Auto bundle faxes Bundling is per default active. Se Chapter 2.3.3 Forward to E-Mail address: You can get an email copy of every fax transmission. Delivery form: When do you want to receive an e-mail? 0="Always", 1= "When Sent OK" or 2="When Error" Resolution Default : Shows whether faxes are to be sent as high or low resolution. (200x200 or 200x100 options) Preferred Image File Format Type the preferred Image File Format for the “documents that is sent as e-mail via the BlueMail module. You can choose between TIFF and PDF. This value are used for ALL the sending e-mails (route of inbound faxes, route hardcopies, etc.). But it is also used as the default image type for recipients. 2-20 BlueSeries eXpress’it Users Manual PCL rear Duplex behavior Used for PCL documents with a fixed backside e.g. conditions of delivery. *INCLUDE *OMIT *LASTONLY The backside is included for each front-page. The Backside is omitted in this transmission. The backside is the last page of the total transmission of e.g. many invoices. Type default information on how to handle inbound faxes. Incoming Output queue: Shows the Output queue to receive incoming faxes. It is possible to specify independent output queues on specific fax lines and fax addresses. Incoming Output queue Library: Shows a Library name or *LIBL for library list. Incoming Message Queue Name: Shows the name of the message queue to receive a message when a fax arrives. It is possible to specify independent message queues on each fax line and on specific fax addresses. Incoming Message Queue Library: Shows a Library name or *LIBL for library list. User profile Set the user profile of the person who are to receive the inbound faxes. *PUBLIC is used when "public access" is needed. Forward to e-mail address: Type the email address of the person/mailbox who will receive the incoming fax as e-mail. BlueMail must be active. You have 60 characters and you can enter more names using semicolon as a separator. Scroll to next panel. 2-21 BlueSeries eXpress’it Users Manual Escape character in HEX (SYUE) When the Spool File Expert is running through a Spool File, it is possible to "join" a User Exit program. The User Exit Program is called every time the chosen Character is found in the Spool File. Blank 00-FF No Character defined. Hexi-decimal value for the character defined as start Escape sequence. Config Communication Prefix (SYCFG) Line, controller and device is named after the contents in this field. Typically BLUEX. BlueServer IP Port 03610. This value is used for the PC client. Local IP Address. This value is used for the PC client - if blank, use the command 2-22 BlueSeries eXpress’it Users Manual CFGTCP and select option 1 to find the TCP/IP address Autostart SBS after IPL *YES, *NO Server and root location This root is used when you are using the view option from WRKxJOB to locate the IFS file from the PC point of view. You will normally enter you iSeries NetServer name concatenated with \root (e.g. \\MyServer\root). When a user then selects the view option from within the WRKxJOB, the attached document for the job will be displayed on the users pc. Image File Path /QDLS/FAX The path of the fax images folder. 2-23 BlueSeries eXpress’it Users Manual 2.7. Authorization Codes. If you look at option 50 ”Work with license information” you will find that the BlueSeries license need key codes for BSL-FAX that controls the fax lines, BSL-PCC that controls the number of connected PC clients and BSL-EML that controls the e-mail module and so forth. New authorization codes are needed when you change: Your license with e.g. more fax lines or PC clients. Serial number Model Processor Feature code System name. A BlueSeries upgrade will normally not require new authorization codes. General development in hardware / software can make it necessary to implement new authorization keys. ____________________________________________________________________________ 2.7.1. Work with license information The Key Code is generated based on iSeries model, serial number, processor feature, system name, expiration date, license size and product name. It is therefore of the greatest importance that you forward the correct information to your supplier. The example will show you how an expired key is activated. Select option 50 "Work with License information " on the main menu. This is a general panel for all Agent Data products enclosed on the Master CD. The product names will be displayed even though the product itself never was installed. Set 2=Change in from of the Product ID e.g. BLS-LSA. 2-24 BlueSeries eXpress’it Users Manual This will display the panel “Change Key Code”. Write *PERM in the field "Expiration date" for a permanent installation. "Max Limit" is the size of the installation. Enter the Key Code in the field "Authorization code". Press Enter to activate the code. The Status column will read that the module is permanent and active. This is how you read the panel: BSL-PCM *DEMO This product is on trial. BSL-BAS *ACTVE This product is permanently installed. Max Limit is 100 % –. Usage Count e.g. is "25 %" will be display if BlueSeries is installed in a partition on e.g. ¼ of the full capacity. 2-25 BlueSeries eXpress’it Users Manual BSL-FAX *ACTVE This product is permanently installed. Max Limit is 10 – That means that you can create 10 Fax lines. Usage Count is "2" stating that there is 2 active fax lines. BSL-FAX *ERROR The key is incorrect. The Key Code is generated based on iSeries (AS/400) model, serial number, processor feature, expiration date, license size and product name. One or more of these parameters is incorrect. BLUECD *INACTIVE This product have never been installed. BSL-LSA This product have been on trial, but expired. *EXPIRED ***************************************************************************************** If you want to test the other product from the list just install them from the CD. The trial period is 8 days counting from the day of installation. Manuals are also available on the CD. _______________________________________________________________________________ 2.7.2 About Usage count for PC clients. The BlueSeries standard package comes with 10 PC clients. You will see 10 stated in Max Limit in the panel 50 “Work with License information”. Whenever a PC client is created it will be added to the BlueSeries user profiles. Please Note - If a user has one user profile on the PC and another on the iSeries (AS/400) this user will be counted twice in the system. It will cause the Usage Count to reach the Max limit before the actual quota is used. It can in such a situation be necessary to disable the PC client access for the exceeding profile. Select option 8 “Work with User Profiles”. Press 2=Change to edit a user profile. Find the field PC Client User. If the default is “1” = Yes, it means that this particular user will be counted and added to the Usage Count. Simply change to “0” = No if you want to disable this user as a PC client user. _______________________________________________________________________________ 2-26 BlueSeries eXpress’it Users Manual 2.7.3. Upgrade to new versions. When upgrading BlueSeries please make sure that: 1) You are QSECOFR. 2) Nobody uses BlueSeries. You can check this with the command: WRKOBJLCK OBJ(FAXDB) OBJTYPE(*LIB) In order to avoid problems with object FNS01 and FNS00 please check if this object is used by other jobs: WRKOBJLCK OBJ(xxx/FNS01) OBJTYPE(*FILE) (where xxx is install prefix e.g. FAX) Remove any Object Locks in case they occur. 3) The BlueSeries subsystem is closed. Follow the normal procedure for installing BlueSeries. Note: Never install from a BlueSeries command line! Always remember to backup before installing new versions. Backup the libraries: (The name will always follow the Installation-prefix.) BlueX BlueXDB Folder Fax _______________________________________________________________________________ You can at any time check your version of BlueSeries. Select option " 15. Work with System Values” The BlueSeries version is displayed in the top right corner. Learn about the latest PTF level from our homepage www.BlueSeries.com . The latest version can at all times be downloaded from: www.BlueSeries.com 2-27 BlueSeries eXpress’it Users Manual 2.7.4 Install fixes BlueSeries is constantly improved. Things need correction and new features are implemented. A fix is created whenever a task is solved and the fix will, with other fixes, eventually be implemented in a new BlueSeries release. It can from time to time be practical, to add a fix to BlueSeries instead of waiting for the new release. A fix can be downloaded from the web or distributed via email or CD’s. There will be a separate instruction for this. A fix is labeled with the syntax e.g. FIXBE0090C where “0090” is the PTF level and “C” is the internal modification level. You must run the matching version e.g. BlueSeries 6.0 ptf0090 in order to install a fix. Once the fix is on your iSeries use the BlueSeries main menu option 53 to install the fix. This panel will automatically display the current product version and PTF level. Do as follows: Stop the subsystem Option 18. Select option 53. Apply Program Temporary Fix ( APYXPTF ) Modification level Type the Modification level e.g. “C” Device Specifies the name of the device used for the save operation. The device name must already be known on the system by a device description. Press enter to install the fix. Restart the subsystem using Option 17. 2-28 BlueSeries eXpress’it Users Manual A history log is created and you can view the log using option 54. 54. Work with Program Temporary Fix WRKXPTF You can read; when the full version was installed, when a particular fix was installed and also how the installation actually took place. 2-29 BlueSeries eXpress’it Users Manual 3. Chapter. Send & receive a fax – Send an e-mail This chapter describes how you manually can send fax and e-mail from an ordinary terminal or 5250 emulation. Send a note as fax or e-mail. Send a Spool file as fax or e-mail. Work with inbound faxes. Note: Most examples in this chapter use fax number, as the recipients address, but it can just as well be an email address. BlueSeries handles both types equal and a group transmission can handle both fax number and email addresses in the one and same transmission. The chapter does also describe how you can work with and distribute inbound faxes as print or e-mail. _______________________________________________________________________________ Type Go BlueSeries to enter the BlueSeries main menu: This chapter will work with the options: 1. Send a Note 2. Work with Spooled Files 3. Work with Jobs 3-30 BlueSeries eXpress’it Users Manual 3.1. Send a NOTE. Select option 1 on the main menu "Send a Note" or write SNDXNTE on a command line. A note can be sent to one or more recipients at a time. It is also possible to add personal notes to the "main note" which is sent to multiple recipients. _____________________________________________________________________________ 3.1.1. Send a Note to a known recipient If the recipient already exists in the BlueSeries phonebook just type the recipients ID and press F6 to write the note. You can use the F4 key to prompt a list of Recipient ID's . Write the note - it can be as long as you please. Press Enter to end. Press F10 to send the faxnote. 3-1 BlueSeries eXpress’it Users Manual 3.1.2. Send a Fax Note to a "unknown" recipient If the recipient is unknown to the system - just enter his fax number and select 2=Change. (* see also bottom page) Write the note - it can be as long as you want it to be. You must also enter the Recipient Information such as Company Name and Attention Name. Press Enter to end and press F10 to send the Fax Note. *) You can also select the following procedure: Press F6 Write the Note, press Enter Type the fax number, Select 2=Change. Type Recipient Information, press Enter Press F10 to send the Fax Note. 3-2 BlueSeries eXpress’it Users Manual 3.1.3. Send the same Note to multiple recipients It is possible to send the same fax note to more than one recipient at a time. You can: b) Enter the recipients UserID or fax number as described on the previous pages. a) Select a predefined group of recipients from the distribution list. It applies for both methods, that it is possible to add personal notes to each of the recipients it this is necessary. To send a faxnote to a predefined group of recipients - do as follows: Place the cursor in the field Group Profiles and press F4 to prompt a list of group profiles. (See chapter 4.3) Select the group by pressing 1=Select, Press Enter Press F6 to write the general note - it can be as long as you please. 3-3 BlueSeries eXpress’it Users Manual Press Enter to end the note and press F10 to send the Fax Note. Add an extra Note You can add a extra note to each of the recipients, just after you have ended writing the general Fax Note as mentioned above. After you have ended the general note, you will have to select the user who needs an additional note with 2=Change. You can now write the extra note to the recipient. You can - as shown in this example also edit the attention person in the same procedure. Press Enter to end the Note. 3-4 BlueSeries eXpress’it Users Manual Note - The recipient who have an additional text is marked with an > . Press F10 to send the faxes. You can add extra messages to all recipients on the list. 3-5 BlueSeries eXpress’it Users Manual 3.2. Send a spool file as fax or e-mail. This works just as if you created printed output from your iSeries. But instead of sending the job to a printer, you just send the job as a fax or e-mail. You are probably familiar with the OS/400 command WRKSPLF. BlueSeries adds a new command named: WRKXSPLF. To send a fax/email, just send the page to the spool file as you would do with a normal report, printkey, query etc.. Select option 2 "Work with spool file" this will bring you to this panel: Select the print you want to transmit with 1 and press Enter. This will bring you to the panel "Send a Note" described in the previous Chapter. _____________________________________________________________________________ 3.2.1 Add a Cover page. You can at any time add a cover page to the fax you send from the spool file. The cover page can contain a general text used for multiple recipients and a personal text for meant single recipients. Press F6 if you want to add a cover page to your fax. 3-6 BlueSeries eXpress’it Users Manual Write the text to the recipient. It is possible to select another Cover page under Cover page ID. Press enter to return to the main menu and press F10 to send the fax with the same cover page to the recipients on the list. But even though you are sending the same fax to multiple users - you will often find it necessary to add a personal message to different recipients. To add a personal message key 2 in front of the recipient. Write the personal message you want to add to the recipient. 3-7 BlueSeries eXpress’it Users Manual When you leave this panel it is possible to edit in other faxes or chose to send all faxes by pressing F10. You will see, that the text that you write for the cover page also will be included in an e-mail if you choose to forward the forward spool file as an email. 3-8 BlueSeries eXpress’it Users Manual 3.2.2 Time of dispatch BlueSeries has a built-in calendar function. It gives you the ability to postdate a fax with date and time so you can send the fax in period when the telephone charges are lower. On the time of transmission you type the date and time you wish to send the fax. For example, you could choose 1.30 p.m. on following day. If you have any doubts regarding the date, press F4 on the time of transmission. The system will show you a calendar where you mark the date you want the message sent using the cursor. You can also scroll in the calendar with "page up" and "page down". 3-9 BlueSeries eXpress’it Users Manual 3.2.2 Send a file via FTP The BlueSeries mail module can forward files by use of FTP. There are only two steps: 1. Create a recipient 2. Activate FTP using the command SNDXOBJ Select option 5. “Work with Recipients” and Press F6 to create a FTP recipient. Use the fields “Recipients description” and “Attention” to fill in FTP user and Password. The field “E-Mail address is used for the IP number of the FTP recipient. Forwarding form must be 2=FTP. Press Enter Send via FTP Prepare the command SNDXOBJ to forward the file. 3-10 BlueSeries eXpress’it Users Manual Scroll one to next page Press Enter to forward the file via FTP. Just rename the object to send a new file. 3-11 BlueSeries eXpress’it Users Manual 3.2.3 Send a email in HTML format You can use BlueSeries Mail to send pages in HTML format. There are basically two different ways this can be done. 1) You can enter the HTML tags right into the SNDXOBJ command: Example: SNDXOBJ RCP(('[email protected]')) SUBJECT(Text) TEXT('<html><h1>This is a mail sent in HTML format</h1></html>') Or even more flexible: 2) You can store the html document in a separate file on the IFS. When using the SNDXOBJ command you will only need to enter the full file path (starting with the "/"): SNDXOBJ RCP(('[email protected]')) SUBJECT(Text) TEXT('/IFSLIB/filename.htm') The example is TEXT (embedded in the email), but you could as well want to send the HTLM file as an attachment. Or use a combination where TEXT is HTML and the attachment is e.g. an Invoice copy in PDF format. In case you want to forward a particular HTML document manually, the specific HTML document can also be sent using the option “1 Send note” feature. Use F6 create Note Write /IFSLIB/filename.htm Pres enter Send the note. **** It is possible to enclose the HTML tags in the note. Just have in mind to start in top left corner. <html><h1>This is a mail sent in HTML format</h1></html> Please Note The HTML document – will when sent from BlueSeries, include HTML text only. It will NOT include graphics like GIF, JPG etc. All graphics must for this reason, have external links (accessable from the Internet) in order to be displayed in the email. Please refer to your HTML manuals for this issue. 3-12 BlueSeries eXpress’it Users Manual 3.3. Work with job log. Select option 3. "Work with job" This WRKXJOB panel will display the status for all in and outbound jobs in BlueSeries. Use 1=Resend to resend a job. Use 2=Change, to edit the recipients information for jobs still NOT sent. Use 3=Copy, Copy a job and resend to a new recipient as fax or e-mail. Use 4=Delete, delete the job. Use 5=Display, to display all info related to the job. 6=Hld/Rls is used when you have a job in queue and decide to hold it back for later transmission. Use 8=Print print the job on a laser printer. Use 9=View to display the image. Use 11=Display log to display the transmission in detail. Use 12=Display Image 3-13 BlueSeries eXpress’it Users Manual 3.4 Work with session defaults F13="Work with session defaults" is an option which helps you to maintain the overview over the job log. The session default, can either be set permanent (use F17=save) or used as a search utility if you need to search for a specific fax /e-mail. Note - The time used is "Time period for Queue Time". So if you are looking for a fax/email you have sent on a specific date or time - please have in mind, that it is not necessarily the same time as when the fax is actually sent to the recipient. _______________________________________________________________________________ 3.4.1 View the status for outbound faxes The fax recipient can be busy or even turned of his fax. View status for in- and outbound fax You can always display a full status on the fax. A code gives you a quick overview: SPOOL SND-QUE SND-CMN SND-OK SND-HLD SND-ERROR Still in queue on your iSeries. You are still able to recall and edit. The fax is in queue. The fax is transmitted but is not yet received by the recipient. The fax is received by the recipient. The fax is held back for later transmission. Check if the fax number is correct and the communication line and modem is working SND-PREQUE The fax is being built by more than one items e.g. Cover Page and Spooled File. . _______________________________________________________________________________ 3-14 BlueSeries eXpress’it Users Manual 3.4.2.View status for outbound e-mail The status messages are principle the same as above, but with one major exception. There can be situations where the log will display SND-OK even though the e-mail transmission actually failed. This is due to the international e-mail standard. If you look at: [email protected] you will find that ”mail” is the Actual Recipient while ”agentdata.com” is the Main Mail Server. SND-ERROR will be displayed in the log if the Main Mail Server is misspelled. An example is ”[email protected] or [email protected] The transmission will fail because the name of the Main Mail Server is unknown on the Internet. But the situation will be different if the Actual Recipient is misspelled e.g. [email protected]. The Internet knows the Main Mail Server account and the e-mail is passed on to the mail servers on the Internet. This is why the e-mail will get status SND-OK in the Job Log. The Main Mail Server will reject the mail due to the misspelling, and the negative response will be sent to your personal Outlook/Notes account. _______________________________________________________________________________ 3.5 Work with inbound fax There are many ways to handle inbound faxes. You can route faxes from known senders to e.g. the sales department, while faxes from other persons should go to the receptionist. The faxes can always be viewed with the PC client ”Fax Client 2000” Outook or Notes can be used when BlueMail is active. Route to e-mail ABC Ltd. BlueFax BlueMail Inbound faxes forward to a e-mail address will all get the header "Fax from……". 3-15 BlueSeries eXpress’it Users Manual Central handling Let the Company Receptionist receive all faxes. She will read the Fax on her screen and print the fax on the printer closest to the actual recipient. She can forward the fax as e-mail, or chose to fax it to a new fax recipient. Decentral handling The inbound fax can automatically be routed to a to a special location or recipient in your organization based on the information connected to the inbound fax. Fax number - If you are using more than one fax line on Fax, it is possible to let a fax number be dedicated to a certain communications line in Fax (example: fax no. 123-456-789 is dedicated to Line0032). All inbound faxes that are sent to this fax number will be sent directly to a certain location (output queue of your choice). Whereas faxes sent to another number (example: fax no. 126-543-555 is dedicated to Line0031) will go to the output queue of the receptionist. Sender ID - If an inbound fax arrives from a know company or a known Sender ID - you can let this fax be routed to a certain location in your organization. If you use the BlueMail module to automatically forward an inbound fax by email you can sometimes combine it with the forwarding rules you can activate in Outlook or Notes. A few practical notes: Is it a direct number or do you use a switchboard? Can the fax be routed trough the switchboard? Both the laser printer and the iSeries must be active and connected if you want inbound faxes to be printed automatically. If the iSeries is active but the printer is disconnected, the fax will be stored in the iSeries until the printer is turned on. The fax will be rejected on the senders fax machine if your iSeries is shut down or running a IPL, _____________________________________________________________________________ 3-16 BlueSeries eXpress’it Users Manual 3.5.1. Route the inbound fax You can prepare the Fax module to route an inbound fax to a special destination printer, queue person or e-mail address. You can control this routing by using parameters a) Line b) System Value and c) Sender. You have also the option to use DTMF routing see next chapter. Line If you have more than one fax line, the simple thing to do, is to let the fax line determine the recipient of the inbound fax. System Value You can also let the System Value set the default of the destination that will be used unless something else is indicated Sender BluSeries gives you the possibility to route a fax from a known sender to a message queue or faxlog of you own choice. But to do so, requires a "Handshake" between Fax and the sending fax machine which will determine the senders ID once and for all. A "Handshake" is activated and the ID is registered in Fax once you either send a fax or have received a fax from that other fax machine. Once the ID is established you can 1) Enter the BlueSeries main menu point 5 "Work with Recipients" 2) Find the senders address and type information on how to handle inbound faxes. Sender Line System Value Fax Log *DFT *DFT Public Joe Joe To Joe Joe To public *DFT Public To Public Public *DFT Example 3 Public *) Joe Example 4 Public *) *DFT Example 5 *DFT *DFT Example 2 Joe *) Public System Joe Joe Joe Joe Joe Resulting in Fax log Joe Joe Public Public Public Sender record *) From a known sender Inbound line Example 1 *DFT Public 3-17 BlueSeries eXpress’it Users Manual 3.5.2. Route the inbound fax using DTMF DTMF Routing of fax to personal email. Requirements: BlueSeries version 6.1 ptf 126 or later The BlueSeries Base + fax + email modules. Modems: Multitech MT5600BA (recommended for DTMF routing) Multitech MT5656ZDX can be used for DTMF routing - but test has shown that it is sensible for network noise that can cause errors. Faxes that are sent to BlueSeries can be forwarded to individual email addresses. Say the main fax number is 11223344 It is now possible to create recipients that have an optional extension to that fax number. Example: You can create a recipient Mr. Smith with extension no. ‘1’. All faxes that are sent to fax number 11223344 ‘wait’ 1 will be forwarded to Mr Smith as an email. The length of extension is optional. You can e.g. create Mr. Jones with extension 123 Most manual fax machines will have a ‘Pause’ button that will activate the ‘wait/pause’ signal. Different fax software will normally use characters like commas ‘ ,,, ‘ or ‘W’ for ‘wait’. Prepare DTMF Routing of personal fax to email. Type: Go BlueSeries Select option 12 Work With Communication Description Use 2=Change on the fax line that is dedicated for the DTMF routing. (The fax line must be connected to one of the above mentioned modems.) Scroll to the last panel. Set inbound DTMF detection to 1=Yes Press Enter Return to the main menu. 3-18 BlueSeries eXpress’it Users Manual Select Option 15 “Work with system values” Scroll to the 3rd panel Make sure that the field “Forward to E-Mail address” is Blank or *NONE (This field is used for default fax routing (not DTMF) ) Return to the main menu. Select option 5 “Work with recipients” First step is to create a “Main” user profile that will forward faxes that is sent to the main number. It will also work as a “catch all” for mistyped numbers Pres F6 to create the Recipient Set Recipient ID to : * (Asterisk) Description: ‘Main number’ or similar E-mail address.: The email address used to receive faxes set to the main number. 3-19 BlueSeries eXpress’it Users Manual Create a personal recipient Fill in the values for: Recipient ID: * (asterisk) is mandatory. The number is optional and can differ from *1 to *999999999 Recipient Description: Name E-Mail Address The recipient email address. Forwarding Form 1=Email Note The email address can of course also be for a group of persons. Example: A fax to extension number *2 is forwarded to the sales department on e.g. the address [email protected]. 3-20 BlueSeries eXpress’it Users Manual 3.6 Work with the BlueSeries Web Client The BlueSeries Web Client equals option. 3 ‘Work with jobs’ (WRKXJOB) on the BlueSeries menu. See also chapter 3.3. Installation The BlueSeries Web client is built on IceBreak technology. This means that it depends on a web server that is installed from within IceBreak. You can use the free ‘IceBreak Community Edition’ for this. Enter this site: http://www.system-method.com/Download/BlueSeries/Modules Follow the instructions for downloading the ‘BlueSeries Web Client’. It will install an IceBreak server that is the “engine” for the BlueSeries Web client. The installation of IceBreak™ finishes by displaying the administration menu. Select 'Application Store' Then locate: ‘BlueSeries Web Client’ Press on Download . Successful download to PC will display this panel. Then press “Install application on server” button located in top right corner. Follow the instructions on the screen. The BlueSeries Web Client will open a browser using the URL http://MYSERVER:7064/bs_logon.asp MYSERVER = Your IBM i (AS/400) This URL should be distributed to all the users who should save the URL in their favourites. 3-21 BlueSeries eXpress’it Users Manual Log on using your IBM i (AS/400) password It will display the transmission log. The transmission job equals option. 3 ‘Work with jobs’ (WRKXJOB) on the BlueSeries menu. 3-22 BlueSeries eXpress’it Users Manual Use double click - or right click - on a transmission to view a fax. Attachments in e-mails are displayed and can be opened. 3-23 BlueSeries eXpress’it Users Manual Right click and use’ Show Log’ to display the transmission log in detail. Columns can be moved for your convenience. You will get access to a dropdown list of you ‘mouse over’ a column header. Columns can be sorted in ascending / descending order. Use a list of checkboxes to control which columns that are to be displayed in the log. 3-24 BlueSeries eXpress’it Users Manual Two search functions Preferences and Search Preferences Will allow advanced search on: Status codes Job selections Period Search Will search for any values displayed in the columns: Recipient. Subject User 3-25 BlueSeries eXpress’it Users Manual Right Click features Open. Images and details are displayed in the panel. Open in new window Images and details are displayed in a new window Show log Transmission info is displayed in detail. Resend Resend any transmission. The transmission ID will remain the same. Delete Delete the transmission entry from the log. Hold/Release Any entry that is queued for later transmission can be held and released manually. ______________________________________________________________________________ IceBreak license information The BlueSeries Web Client needs the IceBreak “engine” to be present on your System i (AS/400), but you will NOT need any license key to run the BlueSeries Web client. www.IceBreak.org The installation does however contain a full IceBreak Enterprise version and you are at all times welcome to try this product. The IceBreak manuals are available here: http://www.system-method.com/Support/IceBreak First time usage - where you create your own server - will trigger a 30-day trial period. You can once the trial period is up, decide to do as follows: 1. Order IceBreak Enterprise at [email protected] 2. Order you free IceBreak Community license at [email protected] 3. Do nothing. The BlueSeries Web Client will continue to run. 3-26 BlueSeries eXpress’it Users Manual 3.6.1. Start the Web Client from a 5250 panel The web client is as mentioned, powered by IceBreak. So you will work with IceBreak in order to open the web client from scratch. Type: Go IceBreak on a 5250 command line. Select option 12 “Work with IceBreak servers” Locate BSWEBLCI and type ’21’ to start the web client in a new browser. 3-27 BlueSeries eXpress’it Users Manual 3.6.2. Multiple installations on the same machine You can be in a situation where you have installed BlueSeries in multiple libraries. It is possible to: 1) Change the default URL path for the different libraries. 2) Create multiple URL paths matching each library. Do as follows to change the default path. Log on to a 5250 command line. Type: Go IceBreak Select menu option 12. Work with IceBreak Servers. Locale BSWEBCLI Use: 15=Change Job Description press Enter 3-28 BlueSeries eXpress’it Users Manual Then Press F10=Additional Parameters Scroll to second panel. Locate ‘Initial library list..’ Change the default values BLUEXDB and BLUEX to a library list of your choice. Press Enter 3-29 BlueSeries eXpress’it Users Manual Then restart the BSWEBCLI server. Press 13=End server and then 12=Start Server. Finally use 21=Start in Browser Distribute the new URL’ to all the users who should save the URL in their favourites. __________________________________________________________________________ 3-30 BlueSeries eXpress’it Users Manual 3.6.3. Create multiple URL paths Use 3=Copy on the BSWEBCLI server. Fill in new values for: IceBreak Server ID Description TCP/IP port and press enter. Then follow the procedure “to change the default path” mentioned above. Remember to restart the server(s). 3-31 BlueSeries eXpress’it Users Manual Finally use 21=Start in Browser Distribute the various URL’s to all the users who should save the URL’s in their favourites. _____________________________________________________________________________ Requirements IBM i / OS400 V5R2 Adobe PDF viewer. Any Browser. ‘IceBreak Community’ or ‘IceBreak Server’ or ‘IceBreak Enterprise’. 3-32 BlueSeries eXpress’it Users Manual 4. Work with Recipients When you are sending a fax or e-mail from BlueSeries it works just like any other fax or email systems. You can type the fax number / e-mail address direct, or you can select a recipient that is already found in the address database. BlueSeries operates with distribution lists that enable you to send the same fax /e-mail simultaneously to different recipients. BlueSeries will automatically create fax-addresses when receiving faxes from unknown senders. You only have to fill in name and fax number. You also have the ability to monitor incoming faxes if you want a email message stating that you have received a fax from a particular fax address. _____________________________________________________________________________ 4.1. Work with recipients. Select option 5 on the main menu "Work with Recipients." You will get this panel to create or edit addresses. Press F6 to create or type 2 to change a recipient’s address. 4-33 BlueSeries eXpress’it Users Manual 4.2. Create/edit an address. The daily routines flow will go smother if you create a Recipient of the most common contacts. That would be both fax/e-mail addresses. Remote Local ID: This is the address or telephone number you normally see in the header of the incoming fax. Recipient ID: This field has three values: Name, *UNKNOWN and *nnn Name Type the ID e.g. XYZname, when you create your Business Partner (the recipient) in the system. The name e.g. XYZname will be displayed in the fax log along with the fax number. *UNKNOWN You can also receive faxes from your Business Partner. *UNKNOWN is automatically added as ID if a fax is received from a person/fax machine unknown to your system. *UNKNOWN will be displayed in the fax log along with the fax number. *nnn You can add a personal extension to your company fax number. Example: You can give the user 'Joe Smith' the extension *123. Your Business Partner can now send faxes direct to Joe, using your normal fax number and the extension. Say your fax number is 987654321. The syntax for the sender is then: 987654321 wait/pause 123 Note: * is not a general pause character. The "wait/pause" feature is activated differently on different fax machines/systems. Note: Your modem must be prepared for DTMF recognition and the BlueSeries line MUST be configured with "Inbound DTMF detection" YES. Use the commando WRKXCMND for more information. 4-34 BlueSeries eXpress’it Users Manual Address description: Normally just type the company name or recipients name. Fax Number: Type the recipients fax number. Remember country code, if any. E-mail address Type the recipient's e-mail address. Forwarding form: Default forwarding form for this Recipient. 0=Fax, 1=Email and 2=FTP. Pref. Image File Format: Used in connection with the BlueMail module. Type in the file format (PDF or TIFF) preferred by this recipient. *DFT uses default from the system value. Reduce Line speed: Default = 0. When Fax is starting to communicate with another fax, it is always done with the highest possible line speed. If it is impossible for Fax to establish connection, Fax automatically disconnects the line and makes an automatic retry with a lower line speed until the connection is made. If you have a recipient with a known lower line speed, it is possible for you to pre-set a low line speed. This will speed up the connection with the recipient caused by the reduced number of retries. Type information of how to handle incoming faxes. Reject: Incoming faxes from known senders can be rejected. Output queue: Type the name of the printer/output queue, which is to receive the fax. *DFT is default. Fax uses the system record. From here you can route the incoming fax to the printer of your choice. Library: Shows a Library name or *LIBL for library list. 4-35 BlueSeries eXpress’it Users Manual Incoming Message Queue: If you want a message stating that you have received a fax from this, particular address’s you can enter the your user ID or *DFT. User profile Here you can choose the option for incoming faxes. You can write the name of the profile, you can choose default (*DFT), you can make it public, that is, that all users have access to the ingoing faxes, and you can also select one from the list by pressing F4. Forward to E-mail address Used in conjunction with the BlueMail module. Any fax sent from this Select the default recipient of the fax from this fax address. 4-36 BlueSeries eXpress’it Users Manual 4.3. Group profiles. Work with group profiles and distribution lists. Fax-addresses can be attached to group profiles through distribution lists. This option is used when working with group profiles and distribution lists. Select option 6 on the main menu "Work with group profiles". Press F6 to create a Group profile or select 2 to change the Group profile. In this example the group name is ALL. It is possible for a recipient to be created in more than one group at a time so members of the group ALL can also be a member of say the group EU. 4-37 BlueSeries eXpress’it Users Manual 4.4. Distribution lists. Distribution lists control all relations between user and group. To access this area choose option 8 Distribution list from Work With Group profiles. You will now see the screen; Work With Distribution lists as shown below. This is where you attach the different users to the group. Press F6 to Add a Fax address to a group. You will then receive a list of all the users in the system. The users are listed on the screen; Work with user profiles. Choose one or several users by typing 1=Choice on the line in front of the user. Now the user/users are attached to the group via the distribution list. 4-38 BlueSeries eXpress’it Users Manual 4.5. Work with users. Use option 8 on the main menu "Work with users" to set the profile of the daily BlueSeries users. Type the specific user information User Profile User ID User Address Description Standard user information from OS/400 -"OS/400 system name. Information is only entered if it is different from the general user profile on OS/400. Voice & fax phone Enter only he Information if it is different from the information already typed in "Work with system values". PC Client User. "1=Yes" indicates if this user is an active PC-client user of the Fax Client 2000. Use "0=No" to deactivate the user. Default Queue Priority Group Profile Set the priority of faxes sent from this user profile. Set the standard group profile from this user. This field is only active if *GRPPRF is the value set in the "User Profile" in the next panel (scroll). The field does normally reefer to a group profile called *USRPRF. The base idea is, that BlueSeries inherits the basic properties from the AS/400 to keep maintenance to a minimum. This field can point to another user profile e.g. enabling "Smith" to see "Jones" job log. Another option is to create a "dummy profile" which is an (disabled) AS/400 user profile. The name could e.g. be "PROJECT " and be used by a number of selected users. NOTE - the term "Group profile" in this chapter must not be confused with the same term in Chapter 4.3. 4-39 BlueSeries eXpress’it Users Manual User Class: The field are used to indicate the actual user have got when working with the job log (the WRKXJOB command). The values can be as follows: *USRPRF *USER *SYSOPR *PGMR *SECADM *SECOFR *USER – The user cannot edit the field ”User Profile” when using "F13=Session Defaults" (See option 3 on the Fax main menu). This means, that the system administrator can preset the "fax log view" for selected users. *SYSOPR, *PGMR, *SECADM and *SECOFR – Users with these classes can access all fax logs, when using F13 from the WRKFAX log. *USRPRF – The OS/400 user profile determines to which user class, the user is connected. The OS/400 user classes uses the same properties, as those mentioned above, and this are why the classes can be inherited from the users own OS/400 user profile. SCROLL TO NEXT PANEL Hardcopy Output Queue Name: Enter the name of the output queue in this field. Press F4=prompt to see a list of output queues. Standard Cover Page ID: Only used if a certain cover page should follow this particular user. Enter the name of the cover page in this field. F4=List to see a list of the cover pages. Specified Fax log properties for the user. Set the users standard entry in the faxlog: Start panel to be displayed : Select panel 1 through 4. 4-40 BlueSeries eXpress’it Users Manual User Profile: Name Specific user profile. *ALL, For all fax users. *CURRENT For current fax user. *GRPPRF Group profile (See "Group Profile" scroll up to the previous panel). Display type as default: Error OK Queue Communicate Spool/Print. Display direction: Send, receive or both directions. ************************************************************ User Profile - *DFT It is possible to create an user profile a *DFT. This user will then be default for all new user profiles. It applies both for the user profiles that are created manually and the user profiles that are created automatically in BlueSeries. The basic idea of *DFT is that the system administrator should be able to create a standard. Example: If the administrator decides that all auto generated users, only should be able to view the log of a certain group, the "User Class" in *DFT is set to *USER. This limits the user to view the faxes or jobs determined by the administrator. 4-41 BlueSeries eXpress’it Users Manual 4-42 BlueSeries eXpress’it Users Manual 5. Chapter. Work with graphics The Fax module handles two forms of graphics "Fax image" and "Overlay". This makes it easy to integrate logo and graphics in your faxes. Please note the difference between a Fax Image and an Overlay. A Fax image is graphics - e.g. a signature - which can be placed anywhere on the page. An Overlay is principally the same as a cliché - graphics with a fixed position. The Overlay is often used in Cover pages, Invoice copies etc. This chapter describes how you handle graphics in Fax. It is first described, how you - by using the Cover page wizard - easily can integrate your own fax cover page into Fax. It is then followed by a more detailed description of how you can import overlays and Fax images like signatures. _____________________________________________________________________________ 5.1. Cover page Wizard. Cover page Wizard is a feature, which makes it easy to design your own fax cover pages in BlueSeries. The Cover page Wizard redesigns the layout of the note, which comes standard with BlueSeries. A cover page, is built in the Cover page Wizard simply by running trough 6 panels, where each panel specifies a step to be taken or a "box" to be placed: 1). The overlay it self - typically containing the company logo and the general font type and font size used on the cover page. 2). Size and placing of "Senders Company name". The name is fetched from the System Record if noting else is indicated. The name can also be omitted completely. 3). Place "Sender information". 4). Place "Recipients information". 5). Place "Date and page number". 6). Place "The main text." 5-1 BlueSeries eXpress’it Users Manual Before you use the wizard to implement a new cover page, we recommend you to first design/draw your new cover page in e.g. Word or similar programs. Use a ruler to find the coordinates of senders company name and for the "boxes" 3 - 6. The starting point is defined as the top left corner of each "textbox ". Example: The x, y coordinate for "box" 2 containing "Senders Company name" (Agent Data ApS in the example above) is : x position = 14,76 cm and y position = 0,97 cm. We will on the following pages show how you can replace the BlueSeries logo with another "Smiley" logo. We will keep the placing of the "boxes" main text and the "Sender" and "Recipients" information. But - "Box 5" containing "Date" and "Page number" (Box 5) will for the course of the example be moved to the middle of the page. 5-2 BlueSeries eXpress’it Users Manual 5.1.1 Design of a new fax cover page. Draw/design your new overlay in your word processing program - e.g. Word. Remember, an Overlay is graphics with a fixed placing on the page. The "Smiley" logo is in this example, placed in the top left side - but please note, the logo can be placed at any location on the page. You must now move your overlay to Fax. The easy way is to do this, is simply to use your Fax PC client and fax or email the document to the nearest fax machine or recipient (you can also use a dummy number). NOTE. It is a good idea to give the transmission an expressive name that makes it easy to find the fax in the fax log. 5-3 BlueSeries eXpress’it Users Manual Go to the BlueSeries main menu on the AS/400 and select point 3. "Work with in and out going faxes ". Mark the fax with "17=Import Overlay". You can now import the overlay for later use. Type: The name of the Overlay Library Description Press "Enter" to return to the BlueSeries main menu. You are now ready to run the "Cover page Wizard" for the first time. 5-4 BlueSeries eXpress’it Users Manual 5.1.2. Start Cover page Wizard Select point 45. "Start Cover page Wizard" from the BlueSeries menu. Press "Enter" to be guided through the program. The panels will explain them self. We will in this example show how we can replace the BlueSeries logo with a "Smiley" logo. We will keep the standard for font type and font size. We will also keep the Unit of measure in inches. Note - The name of the overlay you just imported can be found by pressing F4 list by the point "Overlay name" Press Enter to continue. 5-5 BlueSeries eXpress’it Users Manual Unaltered - press Enter Unaltered - press Enter Unaltered - press Enter 5-6 BlueSeries eXpress’it Users Manual We in this example, set the new placing for "Date and Page number". Set "Start horizontal position" to 3,2 inches. Press "Enter" Unaltered - Press Enter. 5-7 BlueSeries eXpress’it Users Manual You are now finished and ready to build the cover page. Press Enter to compile. Press 1= yes to replace the Cover page ID. Note. "SMILEY" have now replaced the standard cover page in Fax. (This can be verified by steeping to point 15 "Work with System values " on the BlueSeries main menu. "SMILEY" will now be displayed as default fax cover page.) 5-8 BlueSeries eXpress’it Users Manual This is the result "Before and After". Before: After: The Fax logo is now replaced with a "Smiley" logo and the field "Date and Page number" is now found in the middle of the page. You will probably work some more with the "Smiley cover page" before you are satisfied with the result. "Cover page Vizard" will not save the values before a new session - so remember to make notes of the values, and coordinates, you are using. __________________________________________________________________________ 5-9 BlueSeries eXpress’it Users Manual 5.2. Work with fax Overlay. An overlay (or cliche) is defined as a graphics with a fixed position. There are two methods to transfer an Overlay to Fax: a) Import the overlay via the Fax PC client. or b) Save direct as a TIFF class F file. Read also about IMPFAXOVL in Programmers reference manual. Method A) Design your overlay in e.g. Word using the Word facilities. Fax the Word document by use of the Fax PC client. It can be to any fax number of your choice. This will cause the document to be found in the BlueSeries job log. Sign on to the BlueSeries main menu. Select menu point 3. Work with jobs. Find the document in the job log. Mark the document with 17=Import to overlay. You will then get this panel. Set Overlay name and description. 5-10 BlueSeries eXpress’it Users Manual Note - The path indicates that user KAJ have sent the overlay. Method B) The method described here requires that you have a drawing program on your PC. And - very important - your drawing program must be able to save graphics as TIF Fax CITT3 or TIF Class F format. Make the design of the overlay. Save the overlay. Example: I:\qdls\Fax\Invoice1.TIF Sign on to your AS/400 and write Go Fax on a command line. Select menu option 11 on the main menu "Import Fax Overlay from TIFF files" 5-11 BlueSeries eXpress’it Users Manual 5.3. Import signatures and graphics as fax image. You use the facility, if you need to place graphics e.g. a signature in a variable location in the document. This facility gives you the possibility, to fax a graphical image - e.g. a signature into BlueSeries and define and rename it as a object. When you need to add the object in your din spool print, you simply use the command .FAXIMG(name) to indicate the actual placing of the object in the fax document. To import a signature, simply: a) Write your signature on a sheet of white paper so the signature falls within the frame of the "signature box", found on page 49. b) Fax the page with the signature into the Fax module Select option 3 - find the fax in the log, and import with use of option 18. Press F10 for more additional Parameters. Fax Image Name Write the name of the object - and use a meaningful name. John Doe's signature is called JOHNDOE. 5-12 BlueSeries eXpress’it Users Manual Library: Your library e.g. FAXDB. Description. e.g. "Johns signature". Replace or Merge: Replace or merge the object with one with a similar name. Page number: The actual page number where the graphic is found. (Normally page 1) Import as: *IMAGE - Default, normally, used for importing signatures as described in the last page of this chapter. * USER - used if you are in need of cutting graphics out of a page with other images . Strip for blanks. *YES. Default. Authority Standard IBM procedures for ownership to objects are used here. It is only John who has got access to his own signature. 5-13 BlueSeries eXpress’it Users Manual Import of signature by the "box method". Put a blank / white sheet of paper exactly on top of this page. Write your signature so your signature falls within the frames of this box. Give room for the margins, Example: Fax the page with the signature into Fax. NOTE !!! It is important to send the fax in high resolution (Fine" on some fax machines) ******************* You can use the same technique to import smaller sized images into Fax . It however important that the location of the image falls within the box. For bigger images, use the cut facility USER Defined. 5-14 BlueSeries eXpress’it Users Manual 5.4. Programming of fax cover pages. This chapter explains how you can program and add your own cover pages to a spool file. The cover page will often contain information regarding sender, recipient, data, time, number of pages etc., but the actual layout will differ from company to company. And you need the following method to program your own cover pages. Once you have designed your cover pages, it enables you (the sender) to decide which cover page to use when sending a fax. The cover page can dynamically be changed and added to the note or to the user profile Note Write the note either direct from menu Option 1, or in conjunction with a spool file. You can simply select the cover page with a F4 list after typing the note Select the cover page you want to use on this transmission. When you have selected a Cover page ID, simply send the fax. ********* The Techniques behind cover pages handling. When you press F10=Send to activate the fax transmission, a request is sent to the fax queue FAXPREP, which is used as a carrier of the information connected to the transmission. The job FAXPREP in subsystem FAX is activated and the fax is built. Note It is not the online job that is strained by building the fax, but the job FAXPREP in subsystem FAX. (This is why response time can be kept to a minimum, even though Fax are heavily used.) The actual fax is built in FAXPREP and a call is made from here, to the cover page program. It is due to future development of cover page programs, essential NOT to be locked by parameter lists. This is why data are "moved" to the cover page program with retrieve commands. These retrieve commands can e.g. be used in a CL program. 5-15 BlueSeries eXpress’it Users Manual A cover page will typically be programmed in three parts. 1) A header - with general information such as overlay (company logo), Recipients Company, attention name, fax number etc. 2) A body - used for the actual text sent to the recipient 3) End of page QSAMPLE in library FAX contains an example of how the cover page BASIC is programmed. 5.4.1. Cover page commands The following commands are used especially for programming cover pages. Change Cover page (CHGCPGFNT) This command enables you to change fonts in a cover page or in a banner text program. CL var for STATUS (3 0) STATUS Specifies the name of the CL variable that receives any Error status. The variable must be a 3-digit decimal variable. Font Name (FONT) Enter the name of the font you want to use. Standard font names in Fax are as follows: COURIERBD (Courier Bold) COURIERIT (Courier Italic) COURIERBDI (Courier Bold Italic) COURIER (Courier) ARIALBD (Arial Bold) ARIALIT (Arial Italic) ARIALBDIT (Arial Bold Italic) ARIAL (Arial) CGTIMESBD (CG Times Bold) CGTIMESIT (CG Times Italic) CGTIMESBDI (CG Times Bold Italic) CGTIMES (CG Times ) UNIVERSBD (Univers Bold) UNIVERSMDI (Univers Medium Italic) UNIVERSBDI (Univers Bold Italic) UNIVERSMD (Univers Medium) More AGFA © Fonts can be ordered separately. Retrieve Cover page Attributes (RTVCPGA) Retrieve Cover page Text (RTVCPGTXT) Retrieve Fax Users (RTVFAXUSR) Retrieve Fax Values (RTVFAXVAL) Write Cover page Overlay (WRTCPGOVL) Write Cover page Text (WRTCPGTXT) 5-16 BlueSeries eXpress’it Users Manual 5.4.2 Apply Cover pages to F4=List Work with Fax Cover pages WRKFAXCPG After you have ended the programming of a Cover page, you must apply the cover pages to F4=lists in Fax. Use command WRKFAXCPG or enter point10 on the Fax main menu. Press F6=Create a Cover page Enter the information for name and placing. 5-17 BlueSeries eXpress’it Users Manual 5.4.3. Work with Overlay You will basically use overlay on your outbound fax in two situations. Overlay Link 1) Use overlay on spool print WRKFAXOVLL 2) Use overlay on a cover page WRTCPOVL (OVLL) An overlay that is imported to a spool print, can be given characteristics for when it pasted to a spool print and faxed. It is possible, by use of keywords to create links, so the overlay are used automatically if the spoolfile are connected to a special printer file, type, form, or source drawer. NOTE - There can only be set one (1) type of link (printer file, type, form, or printer drawer) on the actual time import. Use command WRKFAXOVLL (Work with fax overlay) if more than one link are used for the overlay. It is possible to overwrite the spool parameters "Rotation" and "Page Length" . Printer file If you want to create an overlay link to a printer file the name of the printer must be keyed in this parameter. Form type If you want to create an overlay link to a Form, the name of the Form Type must be keyed in this parameter. Source Drawer If you want to create an overlay link to Source Drawer in the printer, the number of the drawer must be keyed in this parameter. The overlay will automatically be pasted to the fax - if the output are sent to the Source Drawer - and this parameter are set. Rotation This parameter can set the rotation of overlay so it can match the rotation of the spool file. The rotation of the page, is the same as the Spool File Attribute; "Degree of Page Rotation" Rotation parameters are horizontal, landscape and degrees. Page length in Print file This parameter makes it possible to set the page length of the page to be sent. The parameter is typically used, if you want bottom text on pages with company address etc. Example: If the spool file you are sending has only 51 lines and your fax letter is 71 lines ( 1/6") - you will set 70 in this parameter. The length of this pages are the same as the Spool File Attribute, "Page size - lines per page) The actual length of the page is entered here. 5-18 BlueSeries eXpress’it Users Manual 6. Chapter Work with the Subsystem If the Subsystem is active when an IPL occurs - BlueSeries will automatically activate the subsystem after the IPL is ended. BlueSeries has been designed to run it's own subsystem. In this subsystem there is always just one job running at a time. BlueSeries will place minimal processing strain on your system. ____________________________________________________________________________ 6.1. BlueSeries subsystem. Select option 20 on the main menu to work with the BlueSeries subsystem. ____________________________________________________________________________ 6.2. Line, controller and device. Select option 21 on the main menu to get access to the Fax modules status for line, controller and device: It is here possible to see how the Fax communication works, and for instance see if a modem is inactive. _____________________________________________________________________________ 6-1 BlueSeries eXpress’it Users Manual 6.3. Work with output queues for monitoring. BlueSeries will monitor each output queue you define in this list. Whenever a spool print is placed into one of these output queues, the contents will be sent as a fax or e-mail. There are basically four diffent ways to use the output queue. 1) Recipient 2) *SCAN 3) *SPLEXP 4) *USRPGM Uses an assigned recipient. Uses the keyword (.FAXNO) technique. Uses the Spooled File Expert Call user Exit programs 6.3.1 Create a monitored Output Queue for an assigned recipient. The simplest way to use a monitored output queue, is to prepare a queue for a recipient, that is already created in option 5 ”Work with Recipients”. Do as follows: Select option 13. ”Work with output queues to be monitored” (WRKXMON) Press F6 to create a new Output Queue. 6-2 BlueSeries eXpress’it Users Manual Select the field ”Recipient ID/Function. (*SCAN is just default value.) Type the name of the recipient or select the recipient using the F4 prompt. F4 will bring to the BlueSeries address book. Press “1” to select the user. Press enter. Fill in the values for the Output Queue name. Press enter The Output Queue ADFO is now ready. Any spooled file that appears in this queue will automatically be faxed (or e-mailed) to the company named ADFO. 6-3 BlueSeries eXpress’it Users Manual 6.3.2 The keyword (.FAXNO) technique The only information, which is required for the transmission, is the fax address. It may be entered in the user data field or it may be contained in the spool data as well. To change the user data type CHGSPLFA ... USRDTA('12 34 56 78') and it will be sent to that number. If the spool file contains the number, the first page must contain a keyword somewhere in the following format .FAXNO(12 34 56 78) . The placing on the page is optional but it MUST stand alone on a line by itself. It is possible for a programmer to integrate other programs with BlueSeries. For this you need different .FAX - keywords which must be written on the first page to be faxed. Put the print in the fax output queue. .FAX - keywords - remember "period" in front of FAXNO: .FAXNO(number) contains one or more fax numbers. .FAXNO('42860191') .FAXNO('42860191' '45768191' '42158087') to a maximum of 20 numbers. .FAXNO(‘[email protected]’) .FAXID(faxadresse ID) contains one or more Faxadresse ID. .FAXID(Smith) .FAXID('Smith' 'Jensen' 'Clinton') to a maximum of 20. .FAXOVL(library/name) Library and Name of an Overlay. .FAXOVL(INVOICE1) .FAXIMG(library/name) Library and Name of an Overlay. .FAXIMG(SIGNATURE) .FAXFNT(libray/name size proportional) Library and font name size .FAXFNT(ARIAL18 *yes) .FAXDFR(Time Stamp) .FAXDFR('1999-09-17-12.25.00.000000') .FAXUSRKEY('xxxxxx') 20 bytes .FAXUSRDTA('xxxxxx') 256 bytes You can use both keywords on the same line - but if you use more than one keyword on the same line, you must NOT use a period ( . ) on the following keyword. .FAXNO('123456') FAXUSRKEY('Hi there') FAXUSRDTA('This is a test') You can also use multiple .FAX keywords: .FAXNO(12345678) FAXOVL(INVOICE1) Note ! - Period (.) is only placed before the first keyword ! 6-4 BlueSeries eXpress’it Users Manual Program Example You might use this example to see how .FAXNO is used . * --------------------------------------------------- * * Program . . . : EKS001 * * Firma . . . . : Agent Data ApS * * Design . . . : Niels Liisberg * * Funktion . . : Just a smal sample with .FaxNO * * * * Af Dato PTF Description * * NL 01.09.95 Nyt program * * ----------------------------------------------------* FEKS001P O E 50 PRINTER * ----------------------------------------------------* * MAIN BODY * * ----------------------------------------------------* C* Insert .FAXNO(xxxxxx) in the data stream C MOVEL'45768191'FAXNO C WRITEDIAL C* Print the logo C WRITELOGO C* and some underlined text C WRITEUNDERL C* and some normal text C WRITENORMAL C* that`s all for to day... C MOVE *ON *INLR ooo000000OOOOO0000ooo Here is a DDS-description to an extern printer file: R DIAL 1 FAXNO 20 1'.FAXNO(' +1 +1')' R LOGO 2 5'?' R UNDERL 10 5'Some underlined text' UNDERLINE 11 5'Some normal text' R NORMAL 6-5 BlueSeries eXpress’it Users Manual 6.3.3 The Spooled File Expert The function "BlueSeries Spool File Expert " enables you to automate the transmission of Spool Files. The general idea is that you can pick up data from the print itself, convert it and - if needed - fetch recipients data from a third party database like you database. You can thus integrate your user applications without programming. Setup The following must be prepared before BlueSeries can interpret the spool file: One or more output queues must be created. The Output Queues must be enrolled as monitored queues (WRKXMON) in BlueSeries. The type must be * SPLEXP. One or more spool Spool File selections (WRKXSPLEXP), must be created in order to let the Expert determine which type of print you want to work with. Define one ore more page formats in the Spool File Expert. *SPLEXP: "Spool File Interpretation". This function is used to automate the fax /email transmission of Spool files. The Output queue is created automatically if it does not already exist. If the monitoring of an output queue are to be ended it is done by deleting the queue manually from the list. The 4=delete function will only disable the actual monitoring activity - the output queue itself is not deleted. 6-6 BlueSeries eXpress’it Users Manual 6.3.4 Work With Spool File Expert (WRKXSPLEXP) The Spooled Files Expert is found as option 14 on the BlueSeries main menu. This function enables you to automate transmissions of Spooled Files. The general idea is that you can pick up data from the print itself, convert it and - if needed - fetch recipients data from a third party database like you database. You can thus integrate your user applications without programming. The following must be prepared before this function will work: - One or more output queues must be created. - The Output Queues must be enrolled as monitored queues (WRKFAXMON). The type must be *SPLFITP. - One or more spool Spooled File selections, must be created. - Define one ore more page formats. The first thing to do is to create one or more Spool File selections. This is to determine the type of print you want to interpret. The interpretation will follow the sequence number, staring low, and the first match determines the next step: Which "Spool File Attributes" will trigger the interpretation. The simple way is to select your Spool Files using "Spool File FormType". Example: If you work with two types of print - an Invoice (INVOICE) and an Order confirmation (ORDCOM) - you will only need two primary selections. The Interpreter will work starting from the first match. 6-7 BlueSeries eXpress’it Users Manual 6-8 BlueSeries eXpress’it Users Manual Page Interpreter When a Spool File match is found, the interpretation of the Spool File data itself will begin. Different actions are taken all depending of the content of the page. Example: Some Spool application contains a page one with information regarding the user, number of pages etc. This is typically page you normally want to omit from your fax transmission. You can also find yourself in a situation where some print covers more that one page pr. recipient. An example is an invoice covering two pages. A new fax transmission will start each time the word "Page 1" is found on a given location on the print. Other "trigger words" can of course also be used. The sequence number is - just like for the Spool File Selection - the key for the succession of the interpretation of the actual page. If a page format e.g. does match to sequence number 10 the interpretation will start to work with this, and only this, page. It is always the lowest sequence number, which gets the first priority. Use option 8 from the list of Spool File selections (WRKSPLFITP), to work with the maintenance of the page formats. The list is empty the first time you enter the panel and you will need to press F6 to create a page selection. The already created page formats are displayed with comments and type. The "Type" indicates "the action" to be taken e.g. *DROPPAGE. 6-9 BlueSeries eXpress’it Users Manual Maintenance of the page format The maintenance panel is the menu seen below: Use option "1=Select" to set the conditions in the Page Format. The action (*DROPPAGE) in this example triggered as follows: The front page (page one of the spool file) must NOT be sent as a fax. The page is omitted if "USER ID" (length 7 bytes), are found in line 20 position 35. Definition of an external database You can be in a situation where information regarding the recipient, must be fetched from an external database, as it is not found on the print itself. Select "External Data base" from the "Page selection menu: 6-10 BlueSeries eXpress’it Users Manual You will in this example "tell" that you will fetch data from a physical file named "ADRESSER" in library ADRESSERDB. The key field ( in this case a unique customer number) with the name AKEY, is numeric, and are placed in 19 position 56 and with a length of 10. Return to the "Create Page Selection". Select "Recipient pick up", to define the filed which determines the fax number, recipient- and attention name in third party database: It is as you have seen, possible to fetch information direct from the data found in the print. You can thus combine data from the print and from the external database. Enclose Subject from the print The subject to be enclosed can also be picked up from the data in the print. The subject will be displayed in the subject line in the cover page. The information in the subject can be picked up from the print, and can be information like order #, Our reference, etc. Line, position and length of data must also be indicated. 6-11 BlueSeries eXpress’it Users Manual User key and user data pickup As it applies for the "Subject", "User Key" and "User Data" will follow the fax, until it is deleted from the system. Many places in BlueSeries can refer to these fields. It can e.g. be cover page programs (handling of cover page) and the fax log (WRKXJOB). Line, position and length of data must also be indicated. Overlay information Use this panel to determine which overlays are to be used with the fax. Example: If you print an invoice, you will typically select the printer drawer containing paper with company logo. Overlay on a fax is used in a similar way. See also InterForm. Cover page information The function is used to automatically add a cover page to the fax. The cover page is the standard BlueSeries cover page with company logo, senders name, page number and main text. The main text can be fetched from the print where you as usual define the line, position and length of data you want to pick up and add to the cover page. InterForm This function is only available if InterForm is installed on your AS/400. If this is the case it is possible to use the InterForm builder program to send this type of page. See separate chapter. 6-12 BlueSeries eXpress’it Users Manual 7. Chapter. Work With Fonts You have the possibility to select between different default typefaces when you are sending faxes/e-mails from BlueSeries Standard typefaces in BlueSeries: Courier and the scaled typefaces CG Times, Univers and Arial. If you need other typefaces, you must use the “Font Toolkit” enclosed on your master CD. 7.1. Install extra fonts/typefaces. (The words font and typeface have equal meaning in this document). Extra fonts/typefaces can be imported from the iSeries folder system (QDLS), direct to BlueSeries. It is a requirement that the fonts are in a special format, which is delivered by the Agent Data "Font Toolkit". When do you need to install extra typefaces in BlueSeries ? When you want to use other typefaces than; Courier, CG Times, Univers and Arial, which are delivered standard with Fax. If you need to use another Symbol Set - e.g. Latin2 - than the one delivered with BlueSeries. How to install the extra typefaces? The typefaces delivered by Agent Data, consists of a number of PC files with .SFP as prefix. These files must be placed in a folder on the AS/400 where the typefaces are to be used (e.g. \QDLS\BLUEFONT\LATIN2). Start the import module (IMPFAXFNT). Select the parameter "Folder" and set the name of the folder, which contains all the .SFP files for one font. Example: If the Arial (Latin2) is to be installed, the folder will be named: ”BLUEFONT\LATIN2\ARIAL” (E.g. .: IMPFAXFNT FRMFLR('bluefont/latin2/arial'). Example of how to install all the Latin2 fonts: All sub directories containing special fonts ( is located on the CD in folder BLUEFONT) must be copied to the AS/400 in a folder named BLUEFONT ( QDLS\BLUEFONT if viewed from a PC). Start the import with the following command: IMPFAXFNT FRMFLR('bluefont/latin2/arial’) IMPFAXFNT FRMFLR('bluefont/latin2/courier’) IMPFAXFNT FRMFLR('bluefont/latin2/univers’) IMPFAXFNT FRMFLR('bluefont/latin2/cgtimes’) Note! It is a good idea to use e.g. submit Job (SBMJOB) SBMJOB CMD(IMPFAXFNT FRMFLR('bluefont/latin2/courier’)) (Will import the courier font to BlueSeries). 7-1 BlueSeries eXpress’it Users Manual 7-2 BlueSeries eXpress’it Users Manual 8. Chapter. Configure a fax line using TCP/IP This chapter describes the TCP/IP configuration of the LDLC line used with the Fax module. LDLC is our abbreviation for Log Distance Low Cost" and the feature enables you to send faxes via TCP/IP using a Moxa NPort 5110, 5210, 5410 or 5610 Device Servers. Save money on long distance calls. The telephone fee for the "classic" long distance call, is charged for the full distance from the sender - to the recipient. The LDLC concept can lighten the cost of this burden. This mean that Fax customers who had their iSeries in one location can be able to fax locally - from their office located in another country - or other end of the same country. The figure illustrates a scenario where the iSeries (with Fax) is located in Denmark and the local sales offices are in USA, Brazil, South Africa, Australia. When a fax is sent from Fax, the actual fax transmission is all online. A "modem pool" will route the fax to the right destination. The TCP/IP fax line can of course also be used locally and just substitute the V.24 adapter on your iSeries. 8-1 BlueSeries eXpress’it Users Manual 8.1 TCP/IP configuration The following minimum configuration must be used, if you want to use the LDLC concept: It is possible to operate multiple TCP/IP fax lines from the same iSeries and distribute lines on different locations. Each location must however have its own Device Server. Moxa NPort 5110 = support for 1 line. Moxa NPort 5210 = support for 2 lines. Moxa NPort 5410 = support for 4 lines. Moxa NPort 5610 = support for 8/16 lines. (You can also connect the "LANTRONIX MSS 100 Universal thin Server" but this works for outbound fax only.) The Fax module must be installed with minimum one fax line - pr. external office. One telephone line per modem. TCP/IP must be installed and active. You must be able to "ping" an IP-address at the network in actual local office where you want to install the Device Server. The Moxa NPort Device Server must have access to the local network via a HUB, Switch or Router. Recommended modem: MultiTech Multimodem MT5600BA or MT5656ZDX ___________________________________________________________________________ 8.2 Hardware implementation Important note! Read the whole chapter 8 in order to get a full understanding of the concept. Also read the Installation Guide enclosed with the Moxa NPort hardware. You can NOT create and implement the TCP/IP line chapter 8.3 unless the hardware is ready! The person in charge of implementing the hardware and TCP/IP line is required to have a working knowledge of TCP/IP. __________________________________________________________________________ 8-2 BlueSeries eXpress’it Users Manual 8.2.1 How to configure your Moxa 5110 Device Server This description in made on request only - and we can not guarantee that it is up to date. We recommend that you consult the original Moxa manuals. Use the enclosed CD to install the ‘Administrator-Configuration’ tool on your PC. Turn on the power and connect the Moxa NPort5110 to your network. The new device will be listed automatically: Right click on the line displaying the unit. Select ‘Web’. (192.168.127.254 is the default address). This will trigger a browser that will handle the remaining configuration. You can in the future use the browser to edit the configuration. Just type the ip-number e.g. http:// 192.168.5.92 (e.g. the IP-address in this very example) Select ’Network Settings’: 8-3 BlueSeries eXpress’it Users Manual Network settings: Insert the new ip-address that the unit go ton the network. Insert the Netmask (if Blank) Set the IP Configuration to ’Static’. Press ’Submit’ to save the settings. Note. It happens that the unit denies the IP-address. Then try to set the IP Configuration to DHCP and use Save/Restart. The unit will now get an IPaddress from the network. Press Submit to save. It is now possible to edit and change the IP-address to one of your choice. 8-4 BlueSeries eXpress’it Users Manual Serial Settings, Port 1 Set ’Baud rate’ to 115200 and ’Flow control’ to RTS/CTS Settings for ’Operation Settings’, Port 1: ’Operation mode’ must be TCP Server Mode ’Max connection’ = 4 (enables you to create a HyperTerminal) Set ‘Force transmit’ to 10 ’Local TCP port’ must match the port you define in BlueSeries, menu option 12. Note: To avoid loss of data please save your setup (using ’Submit’) for each setting. The Moxa NPort 5110 is now configured and ready for use. 8-5 BlueSeries eXpress’it Users Manual Network considerations. The values for ‘Line Speed’ and ‘Duplex’ must be set to *AUTO in your Ethernet Port configuration. (These are the default values on your iSeries and seldom altered). Do as follows to check the values: Type: Go Hardware on a command line. Locate the Ethernet Port and use option 5. Make sure that ‘Line speed’ and ‘Duplex’ is set to *AUTO. 8-6 BlueSeries eXpress’it Users Manual 8.2.2 HyperTerminal for modem test HyperTerminal You can use the HyperTerminal to test if the modem is working properly. Then connect to the modem via the Moxa box and a ’HyperTerminal’. Create the HyperTerminal on a PC: Start/Programs/Accessories/Communication/HyperTerminal The HyperTerminal will by default try to connect via a telephone line – Just pres ‘Cancel’ and ‘Yes’ until you get this panel: Write the connection name e.g. Moxa Select TCP/IP (Winsock) 8-7 BlueSeries eXpress’it Users Manual Write the IP address of your Moxa NPort Write Port number. (This is the Port Number you are unsing in the Moxa box AND in BlueSeries menu option 12) You can use the HyperTerminal to see/read the commands that BlueSeries Fax actually sends to the Moxa Device server You can now test the modem: 1) Write AT and press ’Enter’. The reply from the modem must be: OK 2) Write at+fclass=2 press ’Enter’. The reply from the modem must be: OK 3) Test that the modem is connected properly. Just write ATDT xxx… where xxx.. is the phone number to the phone closest to you e.g. ATDT 12345678. Press ‘Enter’. This will trigger a dial-up call to the number and the phone must ring. 8-8 BlueSeries eXpress’it Users Manual Problem solving: Check the MOXA NPort. There must be green light in ’Ready’ and ’Link’ The modem must have light in ’TR’ Is the phone cable connected to the ‘Line’ plug-in on the modem. Is the IP-address on the MOXA NPort the same as in BlueSeries menu option 12 Is the Port number on the MOXA NPort the same as in BlueSeries menu option 12 Set ’Primary Speed to 14400 in BlueSeries menu option 12 Set ’Secondary speed to 14400 in BlueSeries menu option 12 8-9 BlueSeries eXpress’it Users Manual 8.3 Add a TCP/IP fax line. Use option "12. Work with Fax configuration" to add a TCP/IP fax line. You can add as many TCP/IP fax lines, as you want. You must only make sure that there is a match with your Fax authorization codes where a TCP/IP fax line equals a "normal" fax line. Press F6 to create a line. Write *TCPIP as resource name. Select modem. 8-10 BlueSeries eXpress’it Users Manual You will only have to fill in a few values. Modem Pool: Which "Modem Pool" is to be used - see chapter 8.3 Nick Name: A Nick Name than can be helpful and ease recognition when working with the job log. A good idea could be to use the name of the physical location. Capability: NOTE. This version can only handle 2=SEND. Attached to phone number: Type the phone number of which this fax line is connected to. The number must be in international format starting with a "+" (e.g. +45 12345678). Dial Prefix: Used only if the local modem is connected to a switchboard. Modem Init String *******Scroll to the last panel ****** 8-11 BlueSeries eXpress’it Users Manual TCP/IP Address This is the self-elected IP number of the Moxa NPort Device Seriver. The TCP/IP Address will be validated on-line so the connecting hardware must be installed and ready. Please read the Moxa "Installation Guide" instructions of how to configure the Moxa NPort. for Note. The value "192.168.5.209" is an example only! Press "Enter" to create the TCP/IP line. The TCP/IP fax line is now ready for use. Restart the subsystem or activate the line with the command: STRFAXLIN __________________________________________________________________________ 8-12 BlueSeries eXpress’it Users Manual 8.4 Work with Modem Pools. The fax transmission in Fax will normally work after the FIFO (First In First Out) principle. If there are more fax lines attached to Fax - a fax will be sent the very instant moment there is a ready fax line (the first line available). The FIFO principle does however collide with the LDLC concept, as the first line available, could be located in another location - even continent. This is why we have made it possible to organize modem pools, where predetermined fax number series, will be routed predetermined modem pools. You can even determine fallback lines that will be used in case a local fax line should fail. Any Modem Pool is only created once, and will handle the numbers for an unlimited number of fax lines. You can thus create a number of fax lines for one Country, which will all use the same Modem Pool. This example displays a scenario where we are operating with four different Modem Pools. 1. NORTHAM - Northern America 2. SOUTHAM - Southern America 3. SOUTHAF - Southern Africa 4. SOUTHAS - South Asia ____________________________________________________________________________ 8.4.1 Create a Modem Pool. We will in this example create a Modem Pool named NORTHAM for "Northern America" including Canada, USA and Mexico. 8-13 BlueSeries eXpress’it Users Manual Select the field "Modem pool" and press F4=Prompt. This will bring you to the panel "Work with Modem Pools". Press F6 to create a Modem Pool. Fill in the "Modem Pool ID" and the "Description". Press Enter The next step is to add the list of the telephone numbers included in the Modem Pool. Use "8=Work with Modem Pool Lists" and press F6 to create a list. 8-14 BlueSeries eXpress’it Users Manual Enter the values and press Enter. Description: The geographical area Low value: The lowest value for the area. Use international format. High values: The highest value for the area. Use international format. The fields "Low value" and "High value" are in this example only used for country codes. The Modem Pool "NORTHAM" include two number series: 1) USA & Canada and 2) Mexico. But you can also find yourself in a situation, where the "Modem Pool" is created for use the same country e.g. "USA". The fields' "Low value" and "High value" will in such a situation, be used to include the number-series for e.g. "The State of California". 8-15 BlueSeries eXpress’it Users Manual Please Note. Fax requires international format in all senders' information to operate the Modem Pools. This mean that all telephone numbers (both voice and fax) must be in international format. This does apply for all the places where the numbers are used permanently in Fax. Please check the following places on the Fax main menu: Option 8. Work with Fax Users Option 12. Work with Fax configuration Option 15. Work with Fax system values Fax user can once everything is set - operate with local numbers as usual. So the user will NOT have to use international format to send a fax "next door". ____________________________________________________________________________ 8-16 BlueSeries eXpress’it Users Manual 8.4.2 Work with communication line bypass. This scenario displayed a situation where the iSeries is located in Europe with a "normal" V.24 fax line. The modem pools shown are used to distribute faxes around the world using the TCP/IP connection. You have - when you are creating a modem pool - the possibility to activate the "Communication line Bypass timeout". This is a feature enabling you to use a fax line/modem in one country as fall back - normally for high priority faxes. Example: The outbound faxes in Europe will normally be sent via the V.24 fax line. A local telephone failure e.g. a broken telephone cable would normally cause the fax transmission to end up with "Transmission failure". But the feature "Communication line Bypass timeout" will enable e.g. all faxes with Priority "1", to be sent via the TCP/IP connection in USA. The timeout is in this example set to 3600 seconds (one hour). This will allow all priority faxes to be sent via USA one hour after the fax was placed in queue for transmission in Europe. Note - The setup in this example, will only allow re-routing of faxes with priority "1". All other faxes must be reactivated once the broken telephone cable is fixed. 8-17 BlueSeries eXpress’it Users Manual 8.4.3 LDLC Trace & Analyses The trace & analyses utility to will help to analyse the actual routing of a fax. The program will create a list on the screen that displays all the information that concerns the fax-routing and modem pools. The program is called via WRKxJOB (option 3 on the menu) Select 21=Modem pool analyses. A resulting list can look like this : . 8-18 BlueSeries eXpress’it Users Manual 9. XML Support for BlueSeries BlueSeries can convert data from any Spooled file on the iSeries - direct into XML files! Use BlueSeries to send e.g. invoices direct – using email or FTP – as a file in the correct XML format and deliver it, according to the specifications set by the recipient. You can also use BlueSeries and FPT e.g. a price list direct to a web page. XML handling is integrated with the BlueMail module in BlueSeries. The forwarding formats Fax The Internet There is also a legal aspect. A XML file is itself impossible for read for ordinary people. An electronic invoice must therefore e.g. by most laws - be available as a readable copy as file attachment, fax or hardcopy by choice. This is why BlueSeries is the perfect choice for you. Why XML? You are probably aware of the EDI (Electronic Data Interchange) concept. It is the electronic communication of business transactions, such as orders, confirmations and invoices, between organizations. Third parties provide EDI services that enable organizations with different equipment to connect. Although interactive access may be a part of it, EDI implies direct computer-to-computer transactions into vendors' databases and ordering systems. The Internet has given EDI quite a boost, but not by using private networks and the traditional EDI data formats (X12, EDIFACT and TRADACOMS). Rather, XML has been the glue that connects businesses together using the Web as the communications vehicle. BlueSeries can transform Spooled files with e.g. invoices, order confirmations and purchase orders to XML documents, without changing anything in the existing ERPsolution. Missing data will be taken from the ERP-solution via SQL Database look-ups and small Scripts. Further BlueSeries handles the transportation via FTP or e-mail and keep track of all events in a log. When arrangements are made to send XML files, a DTD (Document Type Definition) that describes the format of the XML message - is agreed upon between the parties and published on an Internet site. BlueSeries takes this definition from the Internet and displays the data definitions in a tree-like structure using a visual data-modeling tool. The individual levels/fields can be added a script, which can be used to collect non-exiting information and reformat existing information. 9-1 BlueSeries eXpress’it Users Manual 9.1 From Spool file to XML File The process from Spool File to XML file will introduce you to three BlueSeries terms 1) The spooled file Expert 2) The “Business Object” and 3) The “Output Expert”. The “Spooled File Expert” enables you to automate transmissions of Spooled Files. The general idea is that you can pick up data from the print itself, convert it and - if needed - fetch recipients data from a third party database like you database. (See Programmers Reference manual). The “Business Object” is best compared to an Item list containing all the data needed for the XML document. The “BlueSeries Output Expert” is a PC tool that enables you to see the data in a tree view and to work with the data from the “Business Object “ matching it with the DTD resulting with the XML file. From Spool to XML Say that your Spooled file all ready contain all the data and information we need to forward the XML file. It will take you trough the following process: You will use the “Spooled File Expert” to pick up the essential data from the Spooled file and place them in the “Business Object”. The Spooled file Expert BUSINESS OBJECT Spool Data BlueSeries Output Expert DTD XML File You will use the “BlueSeries Output Expert” to match the data from the business with the details of the DTD and place them in the XML file. The XML file is forwarded as an email or via FTP. Scripting The Spooled file Expert Scripting Scripting You might find yourself in a situation where you need to add extra data from e.g. a SQL data Base. This will not prove a problem as you can add this data by the using Scripting. You can also use scripting direct on the BlueSeries Output Expert creating the XML file on the fly. Spool Data DTD BUSINESS OBJECT SQL data BlueSeries Output Expert Scripting XML A gate to other applications File Scripting BUSINESS OBJECT Other Applications The ability to handle scripting gives you in short a flexible tool that can convert data from other formats than the spooled file. DTD BlueSeries Output Expert SQL data Scripting XML File 9-2 BlueSeries eXpress’it Users Manual 9.2 XML - Extensible Markup Language Extensible Markup Language (XML) is a markup language for documents containing structured information. A markup language is a method to specify structures in a document. The XML specification defines a standard way to add markup to documents. XML is also a language for describing other languages (a metalanguage) which lets user design her own markup. A predefined markup language like HTML (HyperText Markup Language) defines a way to describe information in one specific class of documents: XML, in turn lets user describe his own customized markup languages or different documents or purposes. XML is defined as an application profile of SGML that means that XML documents are conforming SGML documents. SGML is the Standard Generalized Markup Language defined by ISO 879. XGML has been the standard, vendor-independent way to maintain repositories of structured documentation for more than a decade. An example of XML code: XML document structure XML describes a documents structure and meaning. It does not describe the formatting of the elements e.g. on the page. Formatting can be added to documents using style sheets, but the document itself only contains tags that describe the contents of the document, not the appearance of the document. Each XML document has both a logical and a physical structure. Physically, the document is composed of information units called entities. An entity may refer to other entities to cause their inclusion in the document. A document begins in a "root" or document entity. Logically, the document is composed of declarations, elements, comments, character references, and processing instructions, all of which are indicated in the document by explicit mark-up. The logical and physical structures must nest properly. ____________________________________________________________________________ Elements Elements are the most common form of mark-up. Delimited by angle brackets, most elements identify the nature of the content they surround. Elements begin with a start-tag, <element>, and end with an end-tag, </element>. Some elements may be empty in which case they have no content. Example Description <Elementname>elementvalue</Elementname> element ‘Elementname’ with value ‘elementvalue’ <Elementname></Elementname> empty element ‘Elementname’ <Elementname/> empty element ‘Elementname’ 9-3 BlueSeries eXpress’it Users Manual One XML-document contains one or more elements, which in turn can contain zero or more child elements. There is exactly one element, called the root, or document element, no part of which appears in the content of any other element. For all other elements, if the start-tag is in the content of another element, the end-tag is in the content of the same element (elements nest properly within each other). Element type declarations identify the names of elements and the nature of their content. A typical element type declaration in DTD (Document Type Definition) is like following: <!ELEMENT Example (child1+, child2, child3?, child4*)> This declaration identifies the element named Example. Its content model follows the element name. The content model defines what an element may contain. In this case, an Example element must contain child1 and child2 and may contain child3 and child4. The commas between element names indicate that they must appear in that given order. The plus (+) after child1 indicates that it may be repeated more than once but must occur at least once. The question mark (?) after child3 indicates that it is optional (it may occur zero times or exactly once) A name with no punctuation, such as child2, must occur exactly once. A ‘*’ character A after child4 means, that the element can appear zero or more times. Attributes Attributes are name-value pairs that occur only within start-tags and empty-element tags after the element name. For example; <Elementname attributename="attributevalue"> is a ‘Elementname’ element with the attribute ‘attribute name’ having the value ‘attributevalue’. In XML, all attribute values must be quoted. Attributes are used to associate name-value pairs with elements. The purpose of the attribute-list declarations is to specify the name, data type, and default value of each attribute associated with a given element type. In an attribute declaration, #REQUIRED means that the attribute must always be provided, #IMPLIED that no default value is mandatory. The #FIXED keyword states that the attribute must always have the default value. ____________________________________________________________________________ DTD A Document Type Definition (DTD) provides a list of the elements, tags, attributes, and entities contained in the document and their relationship to each other. DTD’s specify a set of rules for the structure of a document. DTDs may be included in the file that contains the document they describe or they may be linked to from an external URL. A validating parser reads a DTD and checks the validity of an XMLdocument. An XML document is valid if it has an associated document type declaration and if the document complies with the constraints expressed in it. Example of DTD and the Output Expert <!-- BlueSeries XML- Price Liste Sample 2 --> <!ELEMENT PriceList (PriceData*)> <!ATTLIST PriceList version CDATA #REQUIRED id CDATA #REQUIRED > <!ELEMENT PriceData (CurrencyPrice*)> <!ATTLIST PriceData Product CDATA #REQUIRED Group CDATA #REQUIRED > <!ATTLIST CurrencyPrice Currency CDATA #REQUIRED Price CDATA #REQUIRED > 9-4 BlueSeries eXpress’it Users Manual XML Schemas XML Schemas are in many cases more expressive than DTDs. XML Schemas are an XML language for describing and constraining the content of XML documents. XML Schemas are currently in the Candidate Recommendation phase of the W3C development process. The purpose of an XML Schema is to define and describe a class of XML documents by using schema constructs to constrain and document the meaning, usage and relationships of their constituent parts: data types, elements and their content, attributes and their values. In schemas, a constraint defines what can appear in any given context. There are basically two kinds of constraints: content model constraints describe the order and sequence of elements and data type constraints describe valid units of data. ____________________________________________________________________________ Namespaces The aim of using namespaces is to guarantee uniqueness for the names of element types, attributes, etc., for example when: A document contains mark-up defined in multiple schemas, which may have been authored independently. The vocabularies of various languages (DTDs) are combined to reuse parts of already-written modules. The aim is to allow search engines or other tools to operate over a range of documents that vary in many respects but use common names for common element types. XML namespaces are based on the use of qualified names, which contain a single colon, separating the name into a namespace prefix and the local name. The prefix, which is mapped to a URI, selects a namespace. The combination of the universally managed URI namespace and the local schema namespace produces names that are guaranteed universally unique. ____________________________________________________________________________ 9.3 BlueSeries Scripting. The scripting engine in BlueSeries is based on the REXX language, which is available on every iSeries. The fact that it is very close to the operating system makes it at good choice for scripting purposes in general. Scripting in the Output expert - Returning data to the output. Each node in the editor tree is able to perform a script. The script is responsible for returning data to the final output. This is achieved by the BlueSeries built-in function “Evaluate”. Just Click on any node in the open output format and you will see the scripting window. Try e.g. to return the text “TEST” to the output, by entering the following script: Evaluate(“TEST”); It is essential to terminate the line with a “;” and no blanks is allowed between the “Evaluate” and the first parenthesis. ____________________________________________________________________________ 9-5 BlueSeries eXpress’it Users Manual 9.4 Interface to the “business object”. It is the ”Setting” and ”Getting” variables that accomplish the interface. The syntax is: Setvar(‘VariabelName’ , Value); Value = GetVar(‘VariabelName’); Subscription is allowed for any Array/List in the business object. The object maintain at boundary attribute for the upper boundary called “Ubound” (Like in Basic). E.g.: SetVar(‘MyObject.1’ , ‘First value’); SetVar(‘MyObject.2’ , ‘Next value’); SetVar(‘MyObject.3’ , ‘Last value’); Then the X=Getvar(‘MyObject.Ubound); Returns that X has the value of “3” ____________________________________________________________________________ 9.5 Iterating on multi occurrences nodes. To traversing the definition tree repeatedly we need a way to know which occurrence is the current and when to stop. In this particularly case a build-in variable called “N” is available. To test whether a loop is finished or not the repetition continues as long as the node returns bolean TRUE ( a value not equal to zero). An iteration that repeats sub-nodes 10 times might look like: evaluate(N <= 10); Or used with the above example on upper boundary on a business object: evaluate(N <= getvar(‘MyObject.Ubound’)); ____________________________________________________________________________ 9-6 BlueSeries eXpress’it Users Manual 9.6 Using dynamic SQL. To simplify the use of SQL BlueSeries has a number of build-in function wrappers. The use of cursors and host variables is essential like in any other SQL environment. The fetching sequence is the same: Fetch data while data is available SQLdeclare( 'Cursor name','Select statement’); address execsql 'execsql Open “Cursor name”'; address execsql 'execsql Fetch “Cursor name” INTO :´ScriptVariableName, ...); Close the cursor SQLdeclare( 'Cursor name'); Monitor SQL events MonSQL(); Declare a cursor Open cuesor That looks like: /* Declare a cursor for the sql tables used, here it is called C1 */ SQLdeclare('C1', 'Select MyColoumb from MyTable '); /* Open the cursor, by addressing the command processor to SQL */ address execsql 'execsql Open C1'; call SQLmon; /* Repeat while more data to fetch */ do while (SqlCode = 0); address execsql 'execsql Fetch C1 INTO :Productid'; /* Test for serious errors */ if (SqlCode <> 0) then do; call SQLmon; end; /* Data is fetched, now store them in a business object */ else do; i = i + 1; setvar('MyObject.'i'.Productid', Strip(Productid)); end; end; /* remember to close the cursor */ SQLclose('C1'); ____________________________________________________________________________ 9.7 Interfacing with CL. The scripting engine is normally addressed to the command processor. So executing commands is very similar to CLP. All commands has, however, to be surrounded by quotes and terminated by “;” . variables is addressed like in CLP with the prefix “&”. Example: ‘RtvNeta Sysname(&MySysName)’; returns the system name. 9-7 BlueSeries eXpress’it Users Manual 9.8 Creating the XML document. This example will take you through a scenario where the spooled file contain all the data and information we need to forward in the XML file. We take the Spooled file contains all the data and information we need to forward the XML file. It will take you trough the following process: From Spool to XML The Spooled file Expert You will use the “Spooled File Expert” to pick up the essential data from the Spooled file and place them in the “Business Object”. You will use the “BlueSeries Output Expert” to match the data from the business with the details of the DTD and place them in the XML file. Spool Data DTD BUSINESS OBJECT BlueSeries Output Expert XML File The resulting XML file can be forwarded as an email via FTP and can also be displayed graphically in a browser. The following example will take you trough X steps: Step 1 Get the spooled file. 9-8 BlueSeries eXpress’it Users Manual Step 2 Select option 14. Work with Spooled File Expert. Press F6 to Create the entry “Payment Advise” Step 3 Press Enter and use 8=Work with Page Selections. 9-9 BlueSeries eXpress’it Users Manual Step 4 Press F6 to “Create the Page Selections” x Select “Define Business Objects” for field definition. Start with the Header Field (“Field Benificiar” in this example.) 9-10 BlueSeries eXpress’it Users Manual Define the field in details. You can use F4 to display the spooled file for easy definition of the coordinates of the field. F4 can be used on Variable Length, Start Column, Start Line or Number of Lines 9-11 BlueSeries eXpress’it Users Manual Step 5 Work with ”Detail Lines” Define the area (covering more lines) 9-12 BlueSeries eXpress’it Users Manual Use F4 on “Variable Length”, “Start Column”, “Start Line” or “Number of lines” to display and select the area covering the detail lines. Step 6 Define the fields within the detail line(s). Press 1=Next Level to access the field definitions. 9-13 BlueSeries eXpress’it Users Manual Work with the Field on detail line F4 can be used in Variable Field to mark the coordinates of the field. 9-14 BlueSeries eXpress’it Users Manual Step 7 You are now ready to create the Output definition in the XOF Script. XOF is our abbreviation for eXpert Output Format. From Spool to XML The Spooled file Expert Spool Data DTD BUSINESS OBJECT BlueSeries Output Expert XML File Output Definition in the XOF-Script 9-15 BlueSeries eXpress’it Users Manual Part two: 9-16 BlueSeries eXpress’it Users Manual Part three: 9-17 BlueSeries eXpress’it Users Manual Step 8 Merge the Spooled File with the Input and Output Definition CVTXSPLF FILE(FAX325A) JOB(186103/KEG/QPADEV000C) SPLNBR(000002) CVTTYPE(*EXPERT) TOOBJ('/MyDir/Payment.xml') RPLCTOOBJ(*YES) EXPINPFMT(PAYMENT) EXPOUTFMT(PAYMENT) Resulting text-format: 9-18 BlueSeries eXpress’it Users Manual Step 9 The XML file is now ready to be forwarded to the recipient. You can prepare a style sheet in order to display the XML file in a Internet/Intranet Browser. 9-19 BlueSeries eXpress’it Users Manual . . 9-20 BlueSeries eXpress’it Users Manual 10. Spooled file handling on the PC Client This chapter describes how you can view Spooled print on you BlueSeries PC client. Open the BlueSeries PC client and Press on “Spool”. You will see that you have default access to your own print. There is total transparency between the “Green Screen” environment and the PC client. = The end user works with the PC client only and the programmer can prepare the “tree view” in the green screen. ____________________________________________________________________________ 10.1 Spooled collection commands. You will in the BlueSeries main menu find the following commands: 90. Add Collection node Entry 91. Change Collection node Entry 92. Display Collection node Entry 93. Remove Collection node Entry 94. Work with Spool Collections ADDXCOLE CHGXCOLE DSPXCOLE RMVXCOLE WRKXCOL 10-1 BlueSeries eXpress’it Users Manual 10.1.1. Add Collection node Entry - ADDDXCOLE Use this command to add a Collection node Entry. Collections are used to help PC Client users view lists of Spooled File. When the user selects the Spool tap from the PC client, a tree list of Collections is showed. The Collection list can be maintained from the os/400 part of BlueSeries so that the programmer or system operator can manipulate the users Collection tree list directly on the PC. Collection node ID (COLID) The ID is used to identify the Collection added, removed, displayed, changed or referenced to from the child Collections "Parent Collection node ID". Description (TEXT) The object description is keyed in this field. NOTE: For Command RTVFAXVAL this keyword means: Specify the name of a variable used to return the address from the Fax Values (WRKFAXVAL). In control language (CL) programs, this should be a character variable of length (30). NOTE: For Command WRTCPGTXT this keyword means: The text which is to be written on the coverpage is filled in this parameter. The parameter can be a concatenation expression or a built-in function. TEXT('To . . :' !> %SST(&NAME 1 10)) Parent Collection node ID (PRNTCOLID) Use this ID to identify the Parent for this Collection node. If you create a node with reference to a "Parent Collection node ID" the parent's node will have a plus (+) in the PC's tree view to indicate that there is “children” underneath. 10-2 BlueSeries eXpress’it Users Manual Form Type selection (FORMTYPE) The form type whose files, are included in the list. The form type is the value specified on the form type parameter of the printer file. *ALL Files for all form types. *STD Only files that specifies the standard form type. name Specify the form type whose files are included in the list. User Data selection (USERDATA) The user-specified data value whose files are to be included in the list. User profile selection (SLTUSRPRF) The name of the users whose files, are included in the list. *ALL Files created by all users. *CURRENT Files created by the current user name Specify the names of the users whose files are included in the list Device selection (SLTDEV) The devices included in the list. *ALL Files with any device values are included in the list. name Specify devices to be included in the list. Output Queue selection (SLTOUTQ) The names of the output queues and the libraries they are using. The spooled files in those queues are the files included in the list. *ALL Files on all output queues. When you use this value, the library name must be blank. You can use these values for the library name when only one output queue name is given: *LIBL The library list *CURLIB The jobs current library 10-3 BlueSeries eXpress’it Users Manual Status selection (SLTSTS) The status of the spooled files included in the list. *ALL Files with any status values are included in the list 10.1.2. Change Collection node Entry - CHGXCOLE Use this command to change a Collection node Entry. Use Collections to help PC Client users view lists of Spooled File. When the user selects the Spool tap from the PC client a tree list of Collections is showed. The Collection list can be maintain from the OS/400 part of BlueSeries so that the programmer or system operator can manipulate the users Collection tree list directly on the PC. 10.1.3. Display Collection node Entry - DSPXCOLE Use this command to Display a Collection node Entry. 10-4 BlueSeries eXpress’it Users Manual 10.1.4. Remove Collection node Entry - RMVXCOLE Use this command to remove a Collection node Entry. 10.1.5. Work with Spooled Collections - WRKCOL Use Collections to help PC Client users view lists of Spooled File. When the user selects the Spool tap from the PC client a tree list of Collections is showed. The Collection list can be maintain from the os/400 part of BlueSeries so that the programmer or system operator can manipulate the users Collection tree list directly on the PC. F6 =Create will bring you to the “Add Collection node Entry” (ADDXCOLE) Panel 10-5 BlueSeries eXpress’it Users Manual 10.2 Open file with any PC program. The end user can view the Spooled file direct in a viewer or use a mouse “right click” to open his Spooled file in a PC program. Notepad and Word is default setting and the administrator can add other programs. Go to Menu option 2 Work with Spooled files Press F16 =Options Press F6 =Create It will bring you to the panel Create user defined Commands 10-6 BlueSeries eXpress’it Users Manual 11. Print Barcode labels Printing Barcode labels from the iSeries, have often proved to be a challenge. The Spooled file Expert can help you by combining the BlueSeries spool handling with the printer drivers in various Barcode label printers. The only requirement for the Barcode Label printer is, that it supports the “Direct Print” format. The process is simple, once the setup has been made. T he Barcode label is designed in the designer tool, provided by the printer manufacturer/supplier. The label is then “printed” to a file. BlueSeries will use the Input expert to read the spool file and pickup the relevant information. These data are stored in Business Objects. The Output expert merges the print file and the Business Objects with a resulting ASCII Spool file that is routed to the Barcode Label Printer. You can print the labels as a spool job, or by choice connect directly to the printer. 11-1 BlueSeries eXpress’it Users Manual Before you proceed you must, be familiar with the “The BlueSeries Spooled file Expert” Please read programmers reference page 48 and forward. Requirements Printer The solution is tested on Intermec Easycoder PF4i label printers only. Other Intermec Labels printers can be used but printer command languages MUST support “Direct Protocol Applications”. ( www.intermec.com ) BlueSeries modules Barcode printing is due to technicalities in the “Direct Print Format”, part of the XML module. Install the Base+XML modules to handle barcode printing. LabelShop LabelShop PRO Net 6 version 6.11 - or later. Prepare the Label printer The first step is to make sure that your Label Printer is connected to your iSeries. You will need: a) Use command CFGTCP and option 10. “Work with TCP/IP host table entries”. Create the printer using the OS/400 Host file. b) A print file. The print file USRASC is distributed with BlueSeries and the attributes are: DEVTYPE=*USERASCII and RPLUNPRT=*NO. c) An output Queue e.g. OUTLABEL. The Attributes are: RMTSYS=printer name in the host file, RMTPRTQ=PR1, AUTOSTRWTR=1, CNNTYPE=*IP, DESTTYPE=*OTHER, MFRTYPMDL=*WSCST, WSCST=Must refer to INTERMEC wscst. Use the same attributes for additional output queues. 11-2 BlueSeries eXpress’it Users Manual Designing the Label Design the barcode label by use of the design tool, provided by the printer manufacturer e.g. Intermec. BlueSeries support the “Direct Print format” and the label must for this reason be printed as a file and saved on the IFS. BlueSeries will NOT support the internal format(s) used by the printer supplier. In the design of the label please refer to the manual of LabelShop. The following example is only to be seen as a guideline. Design the label Insert the barcodes and the variable fields. It is important to have the variables in mind. The variable fields names will have to match the fields in your spool file. Name the variable field e.g. VAR2 matching the field name in the spooled file. Print the label 11-3 BlueSeries eXpress’it Users Manual Check the printer Check the settings. Make sure that “Send only….” is <Activated> Save your label definition on the IFS. Example: /BlueSeries/LBL01.xt 11-4 BlueSeries eXpress’it Users Manual Convert the Print file to a definition file You will now need to convert the print file into at format that can be handled by BlueSeries. Use the commands Go BlueSeries IMPXDP DEFSTMF('/blueseries/LBLxx.txt') STMFOUTPUT('/blueseries/LBLxx.def') The command will convert the print file into a print definition file. The file is to be used by the Output Expert. Preparing the Input Expert Prepare your Spooled file with fields that matches VAR2, VAR3, ..etc. in your print file /print definition file (Barcode label) The next step is to prepare the Business Object. 11-5 BlueSeries eXpress’it Users Manual Select option 14 Work with the Spooled File Expert. Press F6 to Create an Expert Entry. 11-6 BlueSeries eXpress’it Users Manual You will now use the “Spooled File Expert”, to create the Business Object. Use “8=Work with Page Selections” on the label entry. Use “2=Change” on the label Press “1” to Create the Business Object. Use “2=Change” to work with the actual declaration of the layout and placing of the variable fields. 11-7 BlueSeries eXpress’it Users Manual Work with the Layout: Work with a Variable e.g. “Var1”: 11-8 BlueSeries eXpress’it Users Manual Work with the output Expert You are now ready to merge the label layout and the spool file. You need to use an XOF. That is our abbreviation for “Output eXpert Format” and is actually a XML file. a) You are provided with a LABELXOF that is a save file from the IFS expert. LABELXOF contains: Dplabel.xof – the xof that joins the Business Object and label layout. LBLxx.def – the label layout. b) A Workstation Customization Object e.g. INTERMEC The XOF will display the attributes within Expert\Output\Format that are used to control the process. LabelLayoutFile – Layout and the complete path. The Business Object (BO) can overrule LabelLayoutFile using Layout name. LabelCleanup – Handles automatically clean up of the layout file. Printername – The printer name in the host table. It is used if you want to write direct to the printer. The BO can overrule printername, using prtname printerport – is used if you want to write direct to the printer. The BO can overrule printerport, using prtport printerfile – the name of the print file when you are using the spool system. The print file must use the attributes: (DEVTYPE=*USERASCII and RPLUNPRT=*NO). The BO can overrule printerfile, using prtfile 11-9 BlueSeries eXpress’it Users Manual Print the label Use and execute the command CVTXSPLF in order to print the labels. The command must refer to both the input expert and the XOF. Example: Use BlueSeries option 13 “work with Output queues to be monitored” to automate the printer process. 11-10 BlueSeries eXpress’it Users Manual 12. Various Information This chapter describes different information regarding BlueSeries. Modem test. Delete BlueSeries from your system. Disaster recovery Security principles. License terms. ____________________________________________________________________________ 12.1 Trouble shooting & how to test your modem. You can find yourself in a situation where have connected a modem correctly to Fax, but you are still unable to fax. This chapter could help you to establish the reason. Checkpoints: Work with "Communication resources" (Option 12 on the Fax menu) What is the capability ? It must be set to 0=both or 2=Send. Are you using a direct line or a switchboard ? Check dial prefix in "Communication resources". Do you need a prefix to dial out of the building ? Also check the phone line with an ordinary phone if you are unable to connect. Is the line active ? The situation could be caused by a defect on a) your modem, b) the communications line or c) the outbound telephone connection. You must check if the modem will; a) React on an at command. b) Is a genuine Class 2 modem. The modem could have been delivered to you under the pretext of being a Class 2 modem. c) can reach a phone. The basis of this tests a situation where you have switched on the modem (power on) and have connected in to Fax via the v.24 line. You must thus be able to find both the modem and the communications line under option 12 "Work with Fax configuration" on the Fax menu. Start the test by ending the Fax subsystem. Use option 18 on the Fax menu. Select option 21 "Work with Fax line, controller and Device " on the Fax menu. 12-11 BlueSeries eXpress’it Users Manual Vary on the line by use of "1=Vary on". Write stritf fax001 on the command line. This command will get you to the next panel. You can now check that your modem is active and reacts on an "at" command by writing: at The modem must answer: OK 12-12 BlueSeries eXpress’it Users Manual If you don't get OK The modem is defect, so you must find a new modem. But if you get OK, the next step is to check that your modem is a genuine Class2 modem. Write the following command : at+fclass=2 The answer must be: OK If not - find a genuine Class2 modem. The last step is to check that you can reach an ordinary phone. Write: atdt xxxxxxxx where xxx.. is the phone number. The phone your are trying to reach must ring, and you/the recipient must be able to hear the sound of a modem trying to connect. _____________________________________________________________________________ 12-13 BlueSeries eXpress’it Users Manual 12.1.1. Country codes for Multitech modem MT5600BA V92 The MultiTec MT5600BA V92 will in some countries not act stable, unless the specific country code is entered in the firmware. Display country code: Change Country code ATI5 AT+GCI=xx xx= country Country Argentina Australia EuroNam New Zealand Taiwan International Japan Malaysia Singapore at+gci / ati5 01 09 B5 03 02 99 00 6C 04 Austria Belgium Brazil Bulgaria Canada China Czech & Slovak Denmark Finland France Germany Greece Hong Kong Hungary India Ireland Israel Italy Korea Luxembourg Mexico Netherlands Norway Philippines Poland Portugal Russia South Africa Spain Sweden Switzerland UK 0A 0F 16 1B 20 26 2E 31 3C 3D 42 46 50 51 53 57 58 59 61 69 73 7B 82 89 8A 8B B8 9F A0 A5 A6 B4 12-14 BlueSeries eXpress’it Users Manual 12.2 Uninstall / delete BlueSeries from the system. Important Note: If BlueSeries was installed using a prefix other than BLUEX, the libraries referenced in item 1, 2 and 3 will start with the prefix used at the installation time. If BlueSeries is to be deleted from the iSeries the following objects must be removed: 1. Library BLUEX – Use command DLTLIB 2. Library BLUEXDB - Use command DLTLIB 3. Library BLUEXDBnnn Use command DLTLIB (where nnn is serial number 001-999) 4. Object BLUESERIES, EXPRESSIT and FAX *MENU from library QGPL – Use command DLTMNU to delete the menus 5. Folder FAX with all subfolders – Use command DLTDLO 6. Line, controller and device for the communication – Use commands DLTLIND, DLTCTLD and DLTDEVD. 7. Start job from QCTL: RMVAJE SBSD(QCTL) JOB(STRFAX) 8. The User Profile: BlueBoxUsr. Wrkobj BlueBoxusr - use '4-Delete' NOTE: The user profile BlueBoxUSr is also used in the BlueNote and IceBreak programs and should not be deleted if they remain active. _______________________________________________________________________________ 12.3 Disaster recovery. Install (from your backup media) the libraries: 1) BlueX (The name will always follow the Installation-prefix.) 2) BlueXDB 3) Folder Fax Then 4) Install the latest version of BlueSeries from a CD or download from www.BlueSeries.com. All fax images are stored in the “Image file path” (See option 15, last panel). Old fax images can only be viewed if the “Image file path” is restored on the new iSeries. **** or **** Install a total backup of all programs, data and libraries. Note. The line configuration might be different, if the total backup is reinstalled on another machine (e.g. at IBM). 12-15 BlueSeries eXpress’it Users Manual 12.4 Security and principles for communication. "Can hackers get access to the AS/400 data via Fax" ? The Fax module is, as you know, communicating via the V.24 lines and a modem that in principle is available for use around the clock. This chapter will describe the security aspects regarding this issue. Every fax line that is created in Fax is provided with a serial number ranging from 001 to 999. The communication resources are such called FAX001 for den first line, FAX002 for the second etc. The necessary resources are automatically created, when configuring the fax lines and they look as follows: Line description FAXnnn Which is created as a type *ASYNC with connection type *SWTPP Controller description FAXnnn Device description FAXnnn (nnn = 001-999) Security in the ACTIVE Fax communications program. The fax lines, which are configured, will always be attached to a program, when Fax is active. The program will ensure that the modem that is physically attached will be in FAX mode. This means; that if a caller with "data modem" are trying to access the Fax modem, the caller will "hear" a telefax signal - but he will not be able to get connection. This is due to the following procedure: The Fax communications program receives 1) a RING signal from the Fax modem and lifts 2) the receiver and the modem 3) EXPECTS a FAX signal from the caller and will 4) disconnect if this is not the case. The fax log will 5) register a ”RECIEVE ERROR”. The Fax file LOG00 is accessible for making statistics related to the com lines. The File contains the following fields and can be used to "keep an eye" on uninvited guests: Fieldname LGCMTK LGSQTK LGIGTK LGEVTP Length 3 (0) 9 (0) 9 (0) 10 Description Communication line token Send/Receive Queue token Image group token Event type LGRESO LGEVOK 50 1 (0) Reason text Event completed LGEVTS LGFXNO LGUSKY LGUSDT (Z) 20 20 256 Event timestamp Fax number User key User data Value SPOOL DIAL ERROR EXPIRED SENT PRINTED VIEWED DELETED 0=No 1=Yes Agent Data can guarantee, that it is impossible to get access to an AS/400 command line via the Fax communications program. 12-16 BlueSeries eXpress’it Users Manual Security in the INACTIVE Fax communications program. If Fax is shut down for one reason or the other - then a situation will arise where the communications program is INACTIVE - but if Line, Controller and Device is in status ACTIVE - then AS/400 (IBM’s) normal procedures for security will be activated. NOTE - The modem will normally still be in the FAX mode with ”Auto Answer” set to "No". This means that the modem will not answer a call.. If you imagine the situation, where the modem is not set in Fax mode - and that the ”Auto Answer” is set to "Yes" - the modem will answer - but as there are no program connected to the Device - it will be impossible for the caller to get in direct access with the AS/400. And again - because the call is not connected to a program, it is impossible to get access via the modem due to OS/400. OS/400 is written in such a way that the connection to a program, under all circumstances must be established via the protocol that uses "User name" and "Password". In short a completely different form for communication that the one established via Fax. See also; IBM's manuals for extern communication for iSeries (AS/400). _____________________________________________________________________________ About the Integrated File System in OS/400 AS/400 enjoys an object-based architecture. There are many types of objects (files, programs, message queues, device descriptions, user profiles, etc.), each with certain unique characteristics. Although the control language commands to work with the wide variety of objects are designed to be consistent for simplicity, OS/400 treats each type of object uniquely. This fact results in AS/400 being inherently virusresistant, from the standpoint that a program cannot pretend to be a file. As with any other server, it can potentially be a carrier of viruses introduced via e-mail or connected workstations. However, you can rest assured that the operating system and the objects it controls have proven immunity to viruses. 12-17 BlueSeries eXpress’it Users Manual 12.5. Arrangement with a fax machine These scenarios can be used if you want to let your "old" fax machine share the same telephone line as BlueSeries (Fax). Scenario A) Scenario B) Scenario C) A) Fax reports busy if the fax machine is in use. The fax machine will be disconnected in both the Scenario B) and C) as soon Fax starts to fax. The fax machine will react with an error message just as if the line was disconnected. If you are trying to send a fax from your fax machine while Fax is in use, your fax machine will reject with a "Busy" message. It is your actual office interior; placing of hardware, cable lengths etc. that is the decision maker for your type of scenario. 12-18 BlueSeries eXpress’it Users Manual 12.6 Q & A Here is a selection of Question and Answers related to the use of BlueSeries. See also the Q&A on www.BlueSeries.com. Q: What type of fax modems can be connected to Fax? A: You can use both external and internal modems. More and more BlueSeries (BueFax) installations have actually changed to internal modems as they have upgraded their AS/400 to iSeries. Internal Modems The Fax module will work with all the internal modems that are supplied for the iSeries platform. That applies for: The 9771 adapter card with the integrated #2771/ #2793 / #9794 adapter internal modem that is supplied standard on the iSeries platform. The 2805 Multi Port modem. This modem has 4 lines - and multiple modems can be installed in rack on the iSeries. (Fax have also support for the internal 2761 8-line modem although this modem is discontinued by IBM) Select the “Modem Type” by pressing F4. Use a blank Modem Init string. The phone line connects direct from the socket(s) in the backside of the iSeries – to the phone net. External Modems. We where very pleased with the IBM 7852 Option modem and it is why this modem is selected as Modem Type “1” when you create the line. Use a blank Modem Init string. IBM did officially discontinue the7852 modem in March 2004. Fax will also work with external Class 2 fax modems. (Class 2 is not to be confused with class 2.0) “Modem type” for Class 2 modems is “0”. We recommend two Multitech modem modems that have successfully tested. A) "Multitech Multimodem MT5600BA and b) Multitech 5600ZDX v90 Multitech Multimodem MT5600BA This modem is an “industrial modem”, very comparable with the “old” IBM 7852 modem. Approx same price and is built to work 24-7 around the clock. Make sure that the setting is right in option 12 "Work with communications descriptions". "Modem" Type must be "Modem Init Sting" must be 0=PC modem. AT&K3 Multitech 5600ZDX v90 This modem is a “PC type modem” small and low priced. It works fine, but will in some occasions “burn out” and will need to be replaced with a new modem. "Modem" Type must be "Modem Init Sting" must be 0=PC modem. AT H0 E0 &S0 &D3 X3 12-19 BlueSeries eXpress’it Users Manual Q: How many resources (fax lines) can actually be connected to Fax? A: As many as you want – but your iSeries might have hardware limitations. Select the line in option 12 "Work with communications descriptions". Select the CMN line. Press F4 in the field “Resource Name”. The list will display the resources available on the particular iSeries in question. This iSeries has 8 lines available for faxing. 5 internal modem lines and 3 V.24 lines for external modems. CMN02 2793 Comm Port Internal modem CMN03 2793 V.24 Port V.24 line *) CMN08 2742 V.24 Port V.24 Adapter CMN09 2742 V.24 Port V.24 Adapter CMN04 -07 2805 Comm Port Internal multiple line modem *) If you have a new iSeries it will include a #9771,#9793 or #9794 adapter card with integrated 56kbps modem. This feature is a two-line WAN adapter, with one RVX port supporting multiple protocol communications. You can connect the external modem to Port 1 on the back on your server. Use the IBM cable: #0348 - V.24/EIA232 Cable. You must of course make sure, that no other jobs are using the resources. Internal modem. The standard internal modem has only one phone line, but multiple modems can be installed in rack in the iSeries. External modem. External fax modems can only be connected to V.24 lines on your iSeries or AS/400. The maximum number of V.24. adapters will vary with the iSeries or AS/400 model type. Check with your hardware supplier. If you are out of V.24 adaptors on your AS/400, an alternative solution could be, to connect via an TCP/IP connection - but note this is for out bound fax only. (Please read the description of the LDLC concept in the manual or on the BlueSeries homepage) 12-20 BlueSeries eXpress’it Users Manual 12.7 License terms The price for BlueSeries software is dependent on the combination for the various modules and add-on’s. E.g. extra fax lines, mail and xml module or the number of attached PC clients. Maintenance After buying BlueSeries it is possible to sign up for a maintenance period valid for 12 months. Maintenance covers Hot-Line support and free upgrades of BlueSeries. The yearly price for maintenance is calculated as 18 % of the current sales price - of the total BlueSeries configuration - at the time of maintenance renewal. Rights The right to use BlueSeries is handed over together with the installation of the product, including the Users Manual, but exclusive the source code for BlueSeries. The ownership of BlueSeries remains with System & Metode A/S. BlueSeries may only be used on the system described at the time of agreement. If the iSeries (AS/400) is replaced during the next year, the license can be moved to the new machine in the same i-group without expense. The user must however be able to substantiate in writing that BlueSeries has been deleted from the "old" iSeries (AS/400). After the initial 12 months, the user must be signed up for maintenance with Agent Data or an authorized dealer, before the license can be transferred. BlueSeries may not be used by, or handed over to other companies. It is the users own responsibility to ensure, that the license agreement for any connected 3rd party software is in order. 3rd party software is defined as software that is not owned of or developed by System & Metode A/S. System & Metode will have the right to refer to the customer’s company name as a reference site. Objections from the customer will however be respected. The supplier cannot be held responsible for any consequences from using the product caused by errors or shortcomings in the product delivered. The supplier cannot be held responsible for any demands of compensation of any kind. It is the supplier's responsibility to obtain a copy of the actual version of BlueSeries. The supplier has a complete pledge of secrecy regarding any conditions he may get knowledge to that requires secrecy according to circumstances or if demanded by the customer. 12-21