1
Cloud Distribution for Desktop
V1.2.1 _ Java Edition
2
Copyright © 2013 by Warework
This work is licensed under the Creative Commons Attribution-NonCommercial-NoDerivs 3.0
Unported License.
A copy of the license is available at http://creativecommons.org/licenses/by-nc-nd/3.0/
3
Contents
About this tutorial......................................................................................................... 11
Who should read this guide?.................................................................................... 11
Prerequisites............................................................................................................ 11
Typographical conventions....................................................................................... 12
About the examples.................................................................................................. 12
Further information................................................................................................... 12
Trademarks.............................................................................................................. 14
Chapter 1: Overview.................................................................................................... 15
Scopes..................................................................................................................... 16
Providers.................................................................................................................. 16
Services.................................................................................................................... 16
Components included in this Distribution.................................................................. 17
Chapter 2: Download .................................................................................................. 19
Requisites................................................................................................................. 19
License..................................................................................................................... 19
Download ................................................................................................................ 20
Maven....................................................................................................................... 20
Chapter 3: Library support........................................................................................... 21
API........................................................................................................................... 21
Change logs............................................................................................................. 21
Bug report................................................................................................................. 21
Releases.................................................................................................................. 21
Chapter 4: Quick start.................................................................................................. 22
Create a new Eclipse project.................................................................................... 22
Sample 1: Start up your application with a Template................................................ 31
4
Sample 2: Log messages......................................................................................... 31
Sample 3: Run SQL in embedded database............................................................. 32
Configure Eclipse with H2 database......................................................................... 37
Generate Java Beans from database tables with JPA.............................................. 44
Sample 4: Execute ORM operations in embedded database................................... 54
Sample 5: Send emails............................................................................................. 59
Sample 6: Configure your application from scratch.................................................. 60
PART I: BASIC CONCEPTS........................................................................................ 66
Chapter 5: Scopes....................................................................................................... 67
Configuration............................................................................................................ 67
Creating new Scopes............................................................................................... 69
Environment of a Scope........................................................................................... 72
Parent Scopes...................................................................................................... 72
Domains and the context of a Scope.................................................................... 74
Example................................................................................................................ 76
Working with Scopes................................................................................................ 78
Create, retrieve and remove Services in a Scope................................................. 78
Create and remove Providers in a Scope.............................................................. 79
Create, use and remove Objects References in a Scope...................................... 80
Get, add and remove objects in a Scope.............................................................. 81
Chapter 6: Services...................................................................................................... 83
Service life cycle....................................................................................................... 83
Configuration............................................................................................................ 84
Proxy Services ......................................................................................................... 87
Add Clients into Services...................................................................................... 88
More operations with Clients................................................................................. 89
Configuration......................................................................................................... 90
Create custom Services, Clients, Connectors and Loaders...................................... 92
Chapter 7: Providers.................................................................................................. 100
5
Provider life cycle................................................................................................... 100
Configuration.......................................................................................................... 101
Create custom Providers........................................................................................ 104
PART II: SERVICES.................................................................................................. 106
Chapter 8: Log Service.............................................................................................. 107
Create and retrieve a Log Service.......................................................................... 107
Add and connect Loggers....................................................................................... 108
Perform Log operations.......................................................................................... 109
Console Logger...................................................................................................... 111
Add a Console Logger........................................................................................ 111
Working with the Console Logger....................................................................... 111
Log4j Logger.......................................................................................................... 112
Add a Log4j Logger............................................................................................. 112
Working with the Log4j Logger............................................................................ 115
Chapter 9: Data Store Service................................................................................... 116
Create and retrieve a Data Store Service............................................................... 116
Add and connect to Data Stores............................................................................. 117
Perform Data Store operations............................................................................... 117
Common operations............................................................................................ 117
Working with Views............................................................................................. 122
Data Store Service configuration............................................................................ 126
Configuration with Proxy Service Java objects.................................................... 126
Configuration with Data Store Service Java objects............................................ 127
Configuration with a generic Proxy Service XML file........................................... 129
Configuration with a Data Store Service XML file................................................ 130
Views...................................................................................................................... 131
Key-Value View................................................................................................... 132
Relational Database Management System (RDBMS) View ............................... 134
Object Database Management System (ODBMS) View ..................................... 145
6
Object Relational Mapping (ORM) View ............................................................. 169
Create custom Views ......................................................................................... 196
Hashtable Data Store............................................................................................. 198
Add a Hashtable Data Store............................................................................... 198
Working with the Hashtable Data Store............................................................... 198
Key-Value View for Hashtable Data Stores......................................................... 200
Properties Data Store............................................................................................. 202
Add a Properties Data Store............................................................................... 202
Working with the Properties Data Store.............................................................. 203
Key-Value View for Properties Data Stores......................................................... 204
JDBC Data Store.................................................................................................... 206
Add a JDBC Data Store...................................................................................... 207
Working with the JDBC Data Store..................................................................... 209
RDBMS View for JDBC Data Stores................................................................... 215
Key-Value View for JDBC Data Stores................................................................ 228
JPA Data Store....................................................................................................... 231
Add a JPA Data Store......................................................................................... 233
Working with the JPA Data Store........................................................................ 235
ORM View for JPA Data Stores.......................................................................... 238
Chapter 10: Pool Service........................................................................................... 268
Create and retrieve a Pool Service......................................................................... 268
Add and connect Poolers........................................................................................ 269
Perform Pool operations......................................................................................... 270
c3p0 Pooler............................................................................................................ 271
Add a c3p0 Pooler.............................................................................................. 271
Working with the c3p0 Pooler.............................................................................. 272
Chapter 11: Mail Service............................................................................................ 274
Create and retrieve a Mail Service.......................................................................... 274
Add and connect Mail Clients................................................................................. 275
7
Perform Mail operations.......................................................................................... 276
JavaMail Client....................................................................................................... 278
Add a JavaMail Client......................................................................................... 278
Working with the JavaMail Client........................................................................ 280
Chapter 12: Converter Service................................................................................... 282
Create and retrieve a Converter Service................................................................ 282
Add and connect Converters.................................................................................. 283
Perform object transformations............................................................................... 284
String Formatter...................................................................................................... 285
Add a String Formatter........................................................................................ 285
Working with the String Formatter....................................................................... 286
Base64 Converter................................................................................................... 286
Add a Base64 Converter..................................................................................... 287
Working with the Base64 Converter.................................................................... 287
JavaScript Compressor.......................................................................................... 288
Add a JavaScript Compressor............................................................................. 289
Working with the JavaScript Compressor............................................................ 289
PART III: PROVIDERS.............................................................................................. 291
Chapter 13: Standard Provider................................................................................... 292
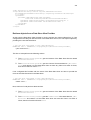
Configure and create a Standard Provider.............................................................. 292
Retrieve objects from a Standard Provider............................................................. 293
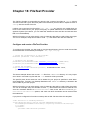
Chapter 14: Singleton Provider.................................................................................. 294
Configure and create a Singleton Provider............................................................. 294
Retrieve objects from a Singleton Provider............................................................. 294
Chapter 15: Service Provider..................................................................................... 296
Configure and create a Service Provider................................................................ 296
Retrieve objects from a Service Provider................................................................ 297
Chapter 16: Data Store View Provider....................................................................... 299
Configure and create a Data Store View Provider.................................................. 299
8
Retrieve objects from a Data Store View Provider.................................................. 300
Chapter 17: Key-Value Data Store Provider............................................................... 301
Configure and create a Key-Value Data Store Provider.......................................... 301
Retrieve objects from a Key-Value Data Store Provider......................................... 302
Chapter 18: FileText Provider.................................................................................... 303
Configure and create a FileText Provider............................................................... 303
Retrieve objects from a Key-Value Data Store Provider......................................... 304
Chapter 19: Pooled Object Provider........................................................................... 305
Configure and create a Pooled Object Provider...................................................... 305
Retrieve objects from a Pooled Object Provider..................................................... 305
Chapter 20: JNDI Provider......................................................................................... 307
Configure and create a JNDI Provider.................................................................... 307
Retrieve objects from a JNDI Provider.................................................................... 308
Chapter 21: Spring Provider....................................................................................... 309
Configure and create a Spring Provider.................................................................. 309
Retrieve objects from a Spring Provider................................................................. 310
Chapter 22: Object Query Provider............................................................................ 312
Configure and create an Object Query Provider..................................................... 312
Retrieve objects from an Object Query Provider..................................................... 313
Chapter 23: Object Deserializer Provider................................................................... 314
Configure and create an Object Deserializer Provider............................................ 314
Retrieve objects from an Object Deserializer Provider............................................ 315
Chapter 24: Properties Provider................................................................................. 317
Configure and create an Properties Provider.......................................................... 317
Retrieve objects from an Properties Provider......................................................... 318
PART IV: TEMPLATES.............................................................................................. 319
Chapter 25: FULL Template....................................................................................... 320
Quick start.............................................................................................................. 320
Start up your application with the FULL Template............................................... 320
9
Create Lists, Sets and Maps............................................................................... 321
Log messages..................................................................................................... 321
Execute SQL statements in embedded database............................................... 322
Execute ORM operations with JPA in embedded database................................ 323
Configure a remote relational database.............................................................. 325
Send emails........................................................................................................ 328
Enable Spring in your project.............................................................................. 330
Load serialized files............................................................................................ 331
Base64 encoder and decoder tool...................................................................... 332
Compress JavaScript.......................................................................................... 332
Overriding the default configuration........................................................................ 333
Customize the Log Service................................................................................. 333
Customize the Pool Service................................................................................ 334
Customize the Data Store Service...................................................................... 335
Customize the Converter Service........................................................................ 337
PART V: CONFIGURATION...................................................................................... 339
Chapter 26: XML configuration................................................................................... 340
Scopes................................................................................................................... 340
Initialization parameters.......................................................................................... 341
Providers................................................................................................................ 341
Object References.................................................................................................. 343
Services.................................................................................................................. 343
Proxy services..................................................................................................... 345
Parent Scopes........................................................................................................ 346
Domains................................................................................................................. 347
Context of a Scope................................................................................................. 348
Example................................................................................................................. 350
Custom XML Loaders for Services......................................................................... 351
Chapter 27: Serialized configuration.......................................................................... 353
10
Scope and initialization parameters........................................................................ 353
Providers and object references............................................................................. 354
Services.................................................................................................................. 354
Parents, domains and the context of a Scope........................................................ 356
11
About this tutorial
Who should read this guide?
This tutorial is intended for Java software programmers who are interested in developing applications on the Warework Framework.
Prerequisites
Before proceeding with this tutorial you should have a good knowledge of the Java progra mming language. It is also recommended that you have some knowledge about:
•
Design patterns (basic ones like Singleton, Factory and Facade; also Inversion of Control would be desirable).
•
Logging mechanisms.
•
Log4j.
•
XML.
•
How to parse XML files with SAX (optional).
•
SQL.
•
JDBC.
•
JPA.
•
Object Database Management Systems.
•
Properties files.
•
c3p0.
•
JavaMail.
•
JNDI.
•
Spring Framework.
12
Typographical conventions
The following table resumes the typographical conventions used in this tutorial:
courier new
courier new bold
Code examples, packages, class methods, constants, URLs, files, identifiers and menu options.
Emphasis and code relationship.
About the examples
In this tutorial you will find code fragments that represent short examples about a particular topic
of the Framework. In order to run those examples, you will need a Java Virtual Machine. First
check out which Java version requires this Warework Distribution and after that you should get
the Virtual Machine at:
http://www.oracle.com/technetwork/java/archive-139210.html
It is also recommended to use an IDE (Integrated Development Environment) where to create
and run the examples because they speed up the development process. Eclipse
(http://www.eclipse.org/) and NetBeans (http://netbeans.org/) are widely used
for Java software development.
Further information
For information about design patterns the best-known book is “Design Patterns: Elements of
Reusable Object-Oriented Software” (GAMMA, Erich, HELM, Richard, JOHNSON, Ralph and
VLISSIDES, John. Design Patterns: Elements of Reusable Object-Oriented Software. AddisonWesley Professional. 1994).
See the definition of “Java logging framework” for information about how log tools work at:
http://en.wikipedia.org/wiki/Java_Logging_Frameworks.
For information about the Log4j Framework please review the following link:
http://logging.apache.org/log4j/
For information about XML please review the following link:
http://en.wikipedia.org/wiki/XML
If you plan to create a custom Loader to parse an XML file, you can review the following tutorial:
http://docs.oracle.com/javase/tutorial/jaxp/sax/parsing.html
13
For information about properties file please review the java.util.Properties API:
http://docs.oracle.com/javase/1.4.2/docs/api/java/util/Properties.html
For information about SQL we recommend you to check out this great resource: “SQL Cookbook” (MOLINARO, Anthony. SQL Cookbook. O’Reilly. 2005).
For information about JDBC please review the following tutorial:
http://docs.oracle.com/javase/tutorial/jdbc/index.html
For information about the c3p0 Framework please review the following link:
http://www.mchange.com/projects/c3p0/
For information about the JavaMail API please review the following link:
http://www.oracle.com/technetwork/java/javamail/index.html
Review the definition of an Object Database Management System in the following location:
http://en.wikipedia.org/wiki/Object_database
For information about JPA please review the following tutorial:
http://docs.oracle.com/javaee/5/tutorial/doc/bnbpz.html
The following link shows how to acquire the JPA EntityManager in different contexts. It will
help you to configure the JPA Data Store with JNDI:
http://docs.oracle.com/cd/B31017_01/web.1013/b28221/usclient005.htm
The following link is about JPA and cache. Very useful to properly configure JPA:
https://blogs.oracle.com/carolmcdonald/entry/jpa_caching
For information about the Spring Framework we recommend you to check out this reference
guide:
http://static.springsource.org/spring/docs/1.2.9/reference/preface.html
14
Trademarks
•
Java and all Java-based trademarks are trademarks or registered trademarks of Oracle
Corporation and/or its affiliates.
•
Eclipse is a registered trademark of the Eclipse Foundation.
•
Netbeans is a registered trademark of Oracle Corporation and/or its affiliates.
•
Log4j is a registered trademark of the Apache Software Foundation.
•
Oracle is a registered trademark of Oracle Corporation and/or its affiliates.
•
MySQL is a registered trademark of Oracle Corporation and/or its affiliates.
•
DB2 is a registered trademark of IBM Corporation and/or its affiliates.
•
MongoDB is a registered trademark of 10gen, Inc.
•
db4o is a registered trademark of Versant Corporation.
•
WebLogic is a registered trademark of Oracle Corporation and/or its affiliates.
•
Gmail is a registered trademark of Google Corporation and/or its affiliates.
•
Apache Derby is a registered trademark of the Apache Software Foundation.
•
Android is a registered trademark of Google Corporation and/or its affiliates.
•
Spring Framework is a trademark of SpringSource, Inc.
•
Hibernate is a registered trademark of Red Hat, Inc.
15
Chapter 1: Overview
Warework Cloud Distribution for Desktop is a software development Framework for the Java
programming language that simplifies the creation of applications in desktop platforms. This
multi-purpose Framework is very useful because:
•
It provides a basic infrastructure for an application as it includes a relational database
and Services to send emails, work with data stores and perform log operations.
•
It organizes the structure of an application with pluggable components. You can expand
the functionality of the Framework whenever you want and leave the task of managing
new features to Warework.
•
It sets up the basic mechanisms to make your application run across multiple pla tforms.
Do you plan to execute your application in Android? No problem, you can reuse most of
your code by simply changing the Warework Distribution.
This software library sets the rules and basic elements to help developers in the creation of ap plications and with the usage of other Warework elements. The Java edition of Warework Cloud
Distribution for Desktop presents these characteristics:
•
Embeddable. It does not need any external library to run and it is ready to work on
Java Standard Editions, version 6 and up.
•
Simple API. Its functions are versatile and easy to understand helping developers be
productive very quickly.
•
Modular. It can be expanded with Warework components and other complex frameworks that determine the size of the application to create.
•
Pre-configured. It includes default Templates that allow you to start-up your projects in
seconds. This document includes some examples that show how to work with Templates. There we demonstrate how to log messages with one line of code and how to
connect with a relational database with just three lines of code.
•
Design patterns. It is built upon well-known design patterns like Inversion of Control
and those defined by the Gang of Four (Factory, Facade, Singleton, etc.) so it provides
a common programming style to software developers.
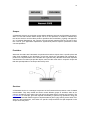
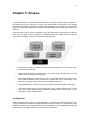
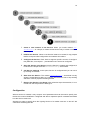
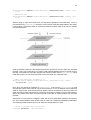
Let us see now what is inside of this software library. In Warework, you will typically deal with
three different types of components: Scopes, Services and Providers. These components are
managed by a central unit named Warework CORE and together can be seen as follows:
16
Scopes
A Warework Scope is an enclosing context where attributes, Services and Providers are associ ated. You are free to define what a Scope can be; it can represent, for instance, a Market System where Services and Providers perform operations like food delivery, lighting management,
etc. In Desktop Distributions, the concept of Scope typically matches with the concept of System. That is, your application represents a System that performs specific operations to solve
concrete problems.
Providers
Warework Providers are Framework components that retrieve objects from a specific place and
make them available for the developer. How those objects are generated and managed depends on the implementation of the Provider but in general, they all share these three important
characteristics: Providers just provide objects, each Provider must exist in a specific Scope and
their life span depends on the Scope where they exist.
Services
A Warework Service is a managed component of the Framework that presents a set of related
functionalities. They keep sorted and under control different groups of activities, allow to run
common operations at the same point and resume important facts of complex sub-systems. The
Log Service, for example, gives the required functionality to perform log operations, using just
one interface and with different types of implementations (like Log4j) working at the same time.
Services, like Providers do, must exist in a specific Scope and their life span depends on the
Scope where they exist.
17
Components included in this Distribution
Warework Cloud Distribution for Desktop includes the following software libraries by default:
•
•
Warework components
o
Warework CORE version 1.2.0
o
Warework CORE Extension Module version 1.5.0
o
Warework Data Store Extension Module version 1.1.0
o
Warework Log4j Logger version 1.0.1
o
Warework Data Store Service version 1.3.0
o
Warework Properties Data Store version 1.2.0
o
Warework JDBC Data Store version 1.3.0
o
Warework JPA Data Store version 1.2.0
o
Warework Pool Service version 1.0.2
o
Warework c3p0 Pooler version 1.0.1
o
Warework Mail Service version 1.0.2
o
Warework JavaMail Client version 1.0.1
o
Warework Converter Service version 1.0.2
o
Warework FileText Provider version 1.1.2
o
Warework JNDI Provider version 1.0.1
o
Warework Spring Provider version 1.0.1
o
Warework Object Deserializer Provider version 1.1.2
o
Warework Properties Provider version 1.0.2
Third party libraries
18
o
Log4j version 1.2.17
o
c3p0 version 0.9.1.2
o
JavaMail version 1.4.7
o
H2 Database Engine version 1.3.173
o
AOP Alliance version 1.0
o
Commons Logging version 1.1.1
o
Spring Framework version 3.2.4
o
Java Transaction API version 1.1
o
Service Data Objects version 2.1.1
o
Eclipse Persistence version 2.1.0
o
Eclipselink version 2.5.0
19
Chapter 2: Download
Requisites
In order to run the library Warework Cloud Distribution for Desktop version 1.2.1 you need to
have Java version 1.6 or later.
License
This product includes software developed by Warework and third party organizations. In consequence, it is licensed under the terms and conditions of different software licenses where
each license applies to at least one included module. The association between each module
and each license is defined in a file named NOTICE.txt that exists in the downloaded zip.
These licenses are also accessible at Warework servers in the following locations:
Warework Software Library License 1.0
http://resources.warework.com/lib/lic/wsll-1.0.txt
GNU Lesser General Public License 2.1
http://resources.warework.com/lib/lic/lgpl-2.1.txt
Eclipse Public License 1.0
http://resources.warework.com/lib/lic/epl-1.0.txt
Common Development and Distribution License 1.0
http://resources.warework.com/lib/lic/cddl-1.0.txt
Apache License Version 2.0
http://resources.warework.com/lib/lic/apache-2.0.txt
Public Domain
http://resources.warework.com/lib/lic/pub-dom.txt
Service Data Objects
http://resources.warework.com/lib/lic/sdo.txt
20
Download
If you agree with the terms specified in the license then you can download this software library
in the following direction:
http://repository.warework.com/maven/2/com/warework/distribution/warework-java-dist-cloud-desktop/1.2.1/warework-java-dist-cloud-desktop-1.2.1bundle.zip
Maven
Maven users can link to this library by adding this code in the pom.xml file of the project:
<sample-code:xml>
<dependency>
<groupId>com.warework.distribution</groupId>
<artifactId>warework-java-dist-cloud-desktop</artifactId>
<version>1.2.1</version>
</dependency>
</sample-code:end>
You also have to indicate in the pom.xml or the global settings file where is located the Maven
2 repository. Use the following code in any of those files to achieve this:
<sample-code:xml>
<repositories>
<repository>
<id>warework-repository</id>
<name>Warework Repository</name>
<url>http://repository.warework.com/maven/2</url>
<layout>default</layout>
<releases>
<enabled>true</enabled>
<updatePolicy>always</updatePolicy>
<checksumPolicy>fail</checksumPolicy>
</releases>
<snapshots>
<enabled>false</enabled>
<updatePolicy>never</updatePolicy>
<checksumPolicy>fail</checksumPolicy>
</snapshots>
</repository>
</repositories>
</sample-code:end>
21
Chapter 3: Library support
API
Java developers that are looking for technical information about the programming interface can
review the API (HTML) of this library as it is bundled in the downloaded file and is accessible via
Internet in the api.warework.com sub-domain as follows:
http://api.warework.com/java/warework-java-dist-cloud-desktop/1.2.1/index.html
Change logs
This software library registers its changes in a log that is bundled in the downloaded file and is
also accessible in the log.warework.com sub-domain as follows:
http://log.warework.com/java/warework-java-dist-cloud-desktop.txt
Bug report
We really appreciate comments about software libraries developed by Warework. Prior to reporting a failure to us, you should consider reviewing good practices about how to submit a bug
at:
http://www.warework.com/documentation.page#bug
You can report a bug to us at:
http://www.warework.com/support.page
Releases
Every time a software library is released by Warework we notify users via Twitter. Our continuous integration system automatically sends a message each time a library is packaged and
placed in the repository. To keep up to date with our libraries follow us on Twitter at:
http://twitter.com/#!/warework_info
22
Chapter 4: Quick start
Create a new Eclipse project
In this user manual we are going to use Eclipse to show how to structure the code and the resources in a project. Eclipse is not mandatory (you can use any IDE you want), we use it just to
show pictures of projects to help with the examples described in this tutorial.
Any modern version of Eclipse is fine to work with this software library. If it is your first time with
Eclipse, download and install the latest version of Eclipse IDE for Java EE Developers. If you
already have an instance of Eclipse running in your computer, just check out the JDK version
that this Distribution requires and ensure that it is available in Eclipse. It is also recommended
that your previously installed version of Eclipse has DTP Plugin to browse data in relational
databases (if your Eclipse is for Java EE Developers it should be installed by default).
Once Eclipse is running in your computer, you can create a project to work with the Warework
Distribution by following these steps:
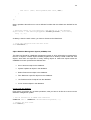
1. Create a new Java Project: Select "File" in the main menu of the Eclipse IDE, after
that "New" and finally "Java Project".
23
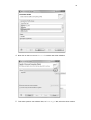
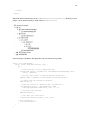
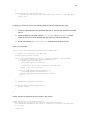
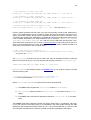
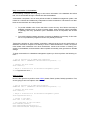
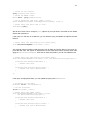
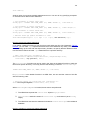
2. Set the name of the project: just fill the "Project name" box in the new window and
click "Finish" (remember to validate first that JRE version is fine to meet the Distribution requisites).
Once the new project is created, you should see something like this:
24
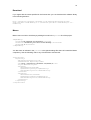
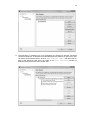
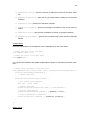
3. Configure the project: Right click on the new project and select "Properties".
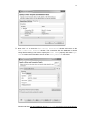
4. Go to the "Libraries" tab: in the new window, first select in the left panel the option
"Java Build Path" and after that select the "Libraries" tab. Now you should see a
window like this:
25
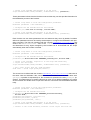
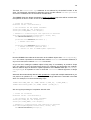
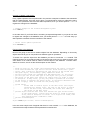
5. Include the Warework Distribution in your project: click the "Add External
JARs…" button and select the location of the software library. Once it is selected, the
Properties window will display the Warework Distribution:
Now click "OK" button and check out that the Warework Distribution exists in your project:
26
At this point, you are ready to perform operations with Warework.
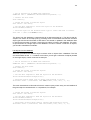
6. Link the library documentation (optional): to access the software library documentation directly in Eclipse you have to specify the location of the Javadoc JAR file. First,
right click on the name of the Warework Distribution library and select "Properties":
This action will pop up a new window. Select in this new window "Javadoc location"
in the left panel:
27
After that, select "Javadoc in archive" option in the right panel and then the
"Browse…" button that matches the "Archive path" field. Now select the Javadoc
archive for this Warework Distribution. This is what you should see after it is selected:
Click "OK" and it is done.
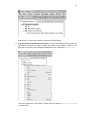
Now that we have a new Eclipse project created and the Warework library is configured, we can
create a new Java class where to write some examples. To create a new Java class, just follow
these steps:
1. Right click on the name of the project and select "New" and after that click the "Class"
menu option.
28
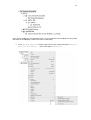
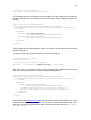
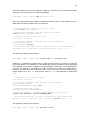
2. A new window pops up and requests some data to create the class. Fill the "Package"
box with the value "com.warework.examples" (a package is like a folder where you
place related classes together), the "Name" box with "MySampleApp" (this is the name
for the class) and select the "public static void main(String[] args)"
checkbox. Once it is done, you should see a picture like this:
Now click "Finish" and the new class is shown in the project as follows:
29
3. You will also see the code generated for this class in the Java editor. Something like
this:
<sample-code:java>
package com.warework.examples;
public class MySampleApp {
/**
* @param args
*/
public static void main(String[] args) {
// TODO Auto-generated method stub
}
}
</sample-code:end>
To test our class, we are going to write the classic "Hello World" message in the output console. To achieve this task, write this code in your class:
<sample-code:java>
package com.warework.examples;
public class MySampleApp {
/**
* @param args
*/
public static void main(String[] args) {
System.out.println("Hello World");
}
}
</sample-code:end>
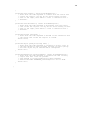
Perfect, now we can run the one million dollar app by right-clicking the class name in
the package explorer window. When the menu pops up, select: "Run As" and then
"Java Application":
30
This will run the application and the "Hello World" message will be displayed in the
Eclipse console:
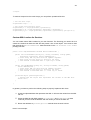
At this point, you can try out some examples to play with Warework. You can simply copy the
content of the example from here and paste it in your sample class. If you are going to copy and
paste the examples, please bear in mind these facts:
31
1. Do not delete the "package" statement from your class. For simplicity, we will show in
the examples only the content of the class (without "package" and "import" statements) so if you replace all your code with the example, remember to place the "package" statement as the first line of your code.
2. When you paste the code in your class, you will need to import the required Warework
classes to make the example work. To import the classes you have to select "Source"
from the main menu and then the "Organize Imports" option. This action will include
some "import" statements on top of your code and eliminate problems like "XYZ cannot be resolved" or "XYZ cannot be resolved to a variable".
Sample 1: Start up your application with a Template
Warework provides a Template with everything that you need to quickly start up a software a pplication with the Framework. You can perform log and database operations without installing
and configuring anything. Just place the JAR of this Distribution in your classpath and Warework
handles the rest.
In this and the following examples we will create an application named "system". Check it out
now how to start up an application using this template and this application name:
<sample-code:java>
public class MySampleApp {
public static void main(String[] args) {
try {
// Create a fully configured system.
ScopeFactory.createTemplate(MySampleApp.class, "full", "system");
} catch (Exception e) {
e.printStackTrace();
}
}
}
</sample-code:end>
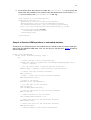
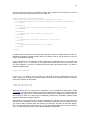
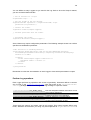
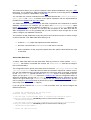
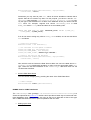
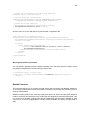
If you execute this code, the Eclipse "Console" window should display something like this:
Sample 2: Log messages
Warework includes by default Log4j, the industry-standard utility for executing log operations. It
is automatically configured so you just need to worry about writing the message and the log
level to use:
<sample-code:java>
32
public class MySampleApp {
public static void main(String[] args) {
try {
// Create and get a fully configured Scope.
ScopeFacade system = ScopeFactory.createTemplate(MySampleApp.class,
"full", "system");
// Log messages in different levels.
system.debug("Debug message");
system.info("Info message");
system.warning("Warning message");
system.log("Fatal message", LogServiceConstants.LOG_LEVEL_Fatal);
// Shut down your application.
ScopeContext.remove("system", true, true);
} catch (Exception e) {
e.printStackTrace();
}
}
}
</sample-code:end>
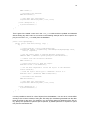
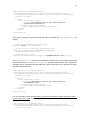
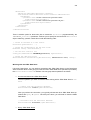
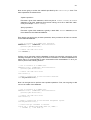
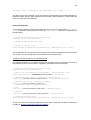
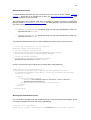
Logs are redirected by default to the console. When you execute this code, logs should appear
in the console like it is shown in the following picture:
If you plan to write logs in separate files or any other output, please review how to override the
default Log4j configuration.
Sample 3: Run SQL in embedded database
Warework includes by default (bundled within the JAR of the Warework Distribution) a relational
database. It is the H2 Database Engine and it is automatically configured so you do not have to
install, neither configure, anything in order to perform relational database operations. It is about
4 lines of code to start running SQL. Check this out with the following examples:
<sample-code:java>
public class MySampleApp {
public static void main(String[] args) {
try {
// Create and get a fully configured Scope.
ScopeFacade system = ScopeFactory.createTemplate(MySampleApp.class,
"full", "system");
// Get the object where to perform database operations.
33
RDBMSView ddbb = (RDBMSView) system.
getObject("relational-database");
// Connect with the database.
ddbb.connect();
// Create a new table in the database.
ddbb.executeUpdate("CREATE TABLE TEST1 (MESSAGE VARCHAR(99))", null);
// Begin a transaction in the database management system.
ddbb.beginTransaction();
// First SQL statement.
String sql1 = "INSERT INTO TEST1 (MESSAGE) VALUES ('ABC')";
// Second SQL statement.
String sql2 = "INSERT INTO TEST1 (MESSAGE) VALUES ('DEF')";
// Third SQL statement.
String sql3 = "INSERT INTO TEST1 (MESSAGE) VALUES ('GHI')";
// Execute three SQL update statements at once.
ddbb.executeUpdate(sql1 + ";" + sql2 + ";" + sql3,
new Character(';'));
// Commits changes in the database.
ddbb.commit();
// Disconnect the database.
ddbb.disconnect();
// Shut down your application.
ScopeContext.remove("system", true, true);
} catch (Exception e) {
e.printStackTrace();
}
}
}
</sample-code:end>
The following example shows you how to retrieve an object to process the result of a query:
<sample-code:java>
public class MySampleApp {
public static void main(String[] args) {
try {
// Create and get a fully configured Scope.
ScopeFacade system = ScopeFactory.createTemplate(MySampleApp.class,
"full", "system");
// Get the object where to perform database operations.
RDBMSView ddbb = (RDBMSView) system.
getObject("relational-database");
// Connect with the database.
ddbb.connect();
// Query the database.
ResultRows result = (ResultRows) ddbb.
executeQuery("SELECT * FROM TEST1", -1, -1);
// Iterate rows.
34
while (result.next()) {
// Get the string value of a given column name.
String message = result.getString("MESSAGE");
}
// Disconnect with the database.
ddbb.disconnect();
// Shut down your application.
ScopeContext.remove("system", true, true);
} catch (Exception e) {
e.printStackTrace();
}
}
}
</sample-code:end>
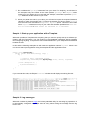
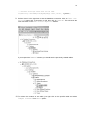
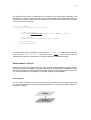
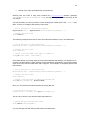
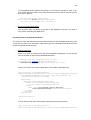
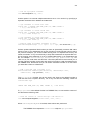
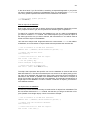
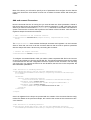
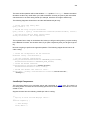
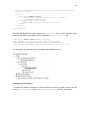
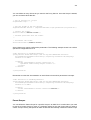
Now, we are going to create four text files, write SQL statements in them and finally execute the
content of each file in the database. First, you have to create the files in the /METAINF/<scope-name>/statement/sql directory of your project, for example:
•
/META-INF/system/statement/sql/init-ddbb.sql
This could be the content of the init-ddbb.sql file:
<sample-code:sql>
CREATE TABLE HOME_USER (
ID NUMERIC(5, 0) NOT NULL,
NAME VARCHAR(25) NOT NULL,
PRIMARY KEY (ID)
)
</sample-code:end>
•
/META-INF/system/statement/sql/create-user.sql
This could be the content of the create-user.sql file:
<sample-code:sql>
INSERT INTO HOME_USER (ID, NAME) VALUES (${USER_ID}, ${USER_NAME})
</sample-code:end>
Check out that we have defined two variables named USER_ID and USER_NAME. We
will replace these variables later on to register a specific user in the database.
•
/META-INF/system/statement/sql/list-users.sql
This could be the content of the list-users.sql file:
<sample-code:sql>
SELECT * FROM HOME_USER
</sample-code:end>
•
/META-INF/system/statement/sql/find-user.sql
This could be the content of the find-user.sql file:
35
<sample-code:sql>
SELECT * FROM HOME_USER WHERE ID=${USER_ID}
</sample-code:end>
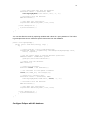
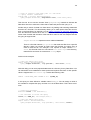
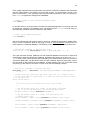
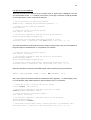
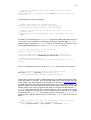
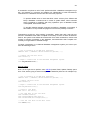
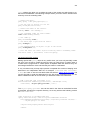
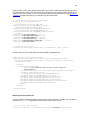
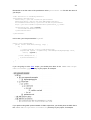
After creating these files, in Eclipse IDE you should see a picture like this:
The following example shows how to execute the init-ddbb.sql script:
<sample-code:java>
public class MySampleApp {
public static void main(String[] args) {
try {
// Create and get a fully configured Scope.
ScopeFacade system = ScopeFactory.createTemplate(MySampleApp.class,
"full", "system");
// Get the object where to perform database operations.
RDBMSView ddbb = (RDBMSView) system.
getObject("relational-database");
// Connect with the database.
ddbb.connect();
// Create the table in the database.
ddbb.executeUpdateByName("init-ddbb", null, null);
// Disconnect with the database.
ddbb.disconnect();
// Shut down your application.
ScopeContext.remove("system", true, true);
} catch (Exception e) {
e.printStackTrace();
}
}
}
</sample-code:end>
36
To register a new user in the HOME_USER table, you have to replace the variables defined in the
create-user.sql file with specific values:
<sample-code:java>
public class MySampleApp {
public static void main(String[] args) {
try {
// Create and get a fully configured Scope.
ScopeFacade system = ScopeFactory.createTemplate(MySampleApp.class,
"full", "system");
// Get the object where to perform database operations.
RDBMSView ddbb = (RDBMSView) system.
getObject("relational-database");
// Connect with the database.
ddbb.connect();
// Values for variables.
Hashtable values = new Hashtable();
// Set variables for the update statement.
values.put("USER_ID", new Integer(3));
values.put("USER_NAME", "Ian Sharpe");
// Create a new user in the database.
ddbb.executeUpdateByName("create-user", values, null);
// Commit changes.
ddbb.commit();
// Disconnect with the database.
ddbb.disconnect();
// Shut down your application.
ScopeContext.remove("system", true, true);
} catch (Exception e) {
e.printStackTrace();
}
}
}
</sample-code:end>
Once you have some data, you can list the users like this:
<sample-code:java>
public class MySampleApp {
public static void main(String[] args) {
try {
// Create and get a fully configured Scope.
ScopeFacade system = ScopeFactory.createTemplate(MySampleApp.class,
"full", "system");
// Get the object where to perform database operations.
RDBMSView ddbb = (RDBMSView) system.
getObject("relational-database");
// Connect with the database.
ddbb.connect();
37
// List every home user from the database.
ResultRows result = (ResultRows) ddbb.
executeQueryByName("list-users", null, -1, -1);
// Disconnect with the database.
ddbb.disconnect();
// Shut down your application.
ScopeContext.remove("system", true, true);
} catch (Exception e) {
e.printStackTrace();
}
}
}
</sample-code:end>
You can also filter the result by replacing variables with values in a query statement. The following example shows how to retrieve a specific home user from the database:
<sample-code:java>
public class MySampleApp {
public static void main(String[] args) {
try {
// Create and get a fully configured Scope.
ScopeFacade system = ScopeFactory.createTemplate(MySampleApp.class,
"full", "system");
// Get the object where to perform database operations.
RDBMSView ddbb = (RDBMSView) system.
getObject("relational-database");
// Connect with the database.
ddbb.connect();
// Values for variables.
Hashtable values = new Hashtable();
// Set variables for the update statement.
values.put("USER_ID", new Integer(3));
// Search for a specific user.
ResultRows result = (ResultRows) ddbb.
executeQueryByName("find-user", values, -1, -1);
// Disconnect with the database.
ddbb.disconnect();
// Shut down your application.
ScopeContext.remove("system", true, true);
} catch (Exception e) {
e.printStackTrace();
}
}
}
</sample-code:end>
Configure Eclipse with H2 database
38
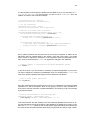
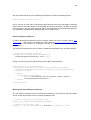
Once you executed some SQL statements, you can explore the contents of the database by
connecting Eclipse with H2. To achieve this task, perform these steps:
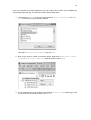
1.
Select option "Window" in the main menu and then "Open Perspective" and "Other…". This will show up the following window:
Just select "Database Development" and click "OK".
2. Now we are going to create a connection profile. Right click on "Database Connections" in "Data Source Explorer" window and then select "New":
3. A new window pops up. Now select in this window "Generic JDBC" profile type, enter
the name for the connection and then click "Next":
39
4. Now click on the icon next to "Drivers" to add a new driver definition:
5. This action opens a new window. Now, at "Name/Type" tab, select the driver version:
40
6. Now select the "JAR List" tab and browse for the Warework JAR which includes de
H2 database. In this tab, click on "Add JAR/Zip" and select the JAR:
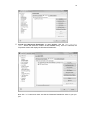
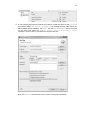
7. After that, go to the "Properties" tab and fill each field like it is shown in the following
picture:
41
8. Now click "OK" to close the "New Driver Definition" window and return to the
"New Connection Profile" window. The connection with the database is almost
ready. Before testing it, we have to specify the "User name" property with value "system". It is also recommended to check out the "Save password" check box:
Please note that user and database names ("system") must be the name of the Scope:
42
<sample-code:java>
// Database and Scope names must be the same.
ScopeFactory.createTemplate(MySampleApp.class, "full", "system");
</sample-code:end>
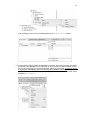
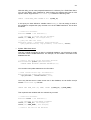
9. Perfect. Now it is the right time to test the database connection. Click on " Test Connection" button and, if connection is OK, then click on "Finish". This will show the
new connection in the "Data Source Explorer" window.
If you expand the "PUBLIC" schema you should see the previously created tables:
10. To review the contents of one table, just right click on the specific table and select
"Sample Contents" from "Data" option:
43
This will display some rows from selected table in the "SQL Results" window:
11. The last step is about closing the database connection. We have to perform this action
because the H2 database is not configured in server mode (to handle multiple connections at the same time) so, to avoid undesired problems in the future, remember always
to disconnect the database before performing other database operations (with your application or another Eclipse window). Just right click on the database connection name
and select "Disconnect":
44
Generate Java Beans from database tables with JPA
When working with databases in Java, it is very common to pair each table of the database with
one Java Bean. This approach, known as ORM, is very useful because it allows you to use
simple Java Beans to perform complex database operations. You can execute queries and insert, update and remove table rows without the need to write SQL statements, just with Java
Beans. To decrease your development time, especially when working with many tables, it is
highly recommended that you use JPA, the standard ORM tool for Java, to handle database operations with Java Beans.
About JPA you should know that it is a specification, that is, it does not provide the main functionality to perform ORM operations; it just specifies how to do it. So, in order to make JPA
work, you must use a JPA implementation. Warework includes by default EclipseLink, which is
one of the best JPA implementations in the market.
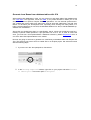
Now we are going to see how to generate one Java Bean per database table with Eclipse and
JPA. The first thing we have to do is to enable JPA in our Eclipse project. We achieve this task
with the following steps:
1. If you are not in the Java perspective, first select it:
2. In the "Package Explorer" window, right click on your project and select "Convert
to JPA Project…" from menu option "Configure":
45
3. A new window pops up. Review that JPA version is "2.0" and click "Next":
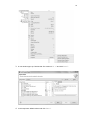
4. In this step leave default values and click "Next":
46
5. Now, select in the "Platform" drop list the EclipseLink version included with this Warework Distribution. After that, click on the "Manage libraries…" button that exists in
the JPA implementation area:
47
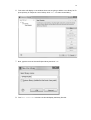
6. This action will display a new window where we are going to define a new library for Eclipse (a library in Eclipse is a set of JARs). Click "New…" to create a new library:
7. Now, type the name of the new Eclipse library and click "OK":
8. The "User Libraries" window now should display the library like this:
48
9. The new library is created but it is not configured yet. We have to add the JAR which
contains EclipseLink. As Warework includes EclipseLink by default, we just have to specify where the Warework JAR is. Click on "Add External JARs…" and select the location of the Warework JAR. Once you locate it, the "User Libraries" window updates the library and shows the included JAR:
49
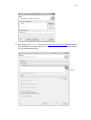
10. Click "OK" to close the "User Libraries" window and show again the "JPA Facet"
window. The new Warework library is shown in the "JPA implementation" area, just
check it out:
11. Now, select from the "Connection" drop list the database connection created before
and click on "Connect":
50
12. Finally, click "Finish" to enable JPA in your project. Now, your project may look like
this:
51
Notice that a new "persistence.xml" file is created at "META-INF" directory.
13. Because the Warework JAR is now duplicated in your project, you should remove the
JAR from "Referenced Libraries" to keep just one reference to it. Right click on
the project and select "Properties". In the new window select "Java Build Path"
on the left panel and after that the "Libraries" tab in the right panel. At this point, select the Warework JAR like it is shown in the following picture:
14. Click "Remove" and "OK" and the project is updated like this (sometimes Eclipse does
not refresh the "Package Explorer" window very well after this operation; you may
need to press F5 when the project is selected to refresh the window):
52
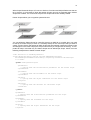
Once JPA is enabled in your Eclipse project, you can generate one Java Bean for every table
that exists in the database. Check it out how to create them:
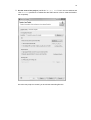
1. In the "Package Explorer" window, right click on your project and select "Generate
Entities from Tables..." from menu option "JPA Tools":
53
2. A new windows pops up. Here you have to specify the connection created before, the
"PUBLIC" schema and the tables that you want to convert into Java Beans. For our examples, we are going to select just the "HOME_USER" table:
3. In the future, you should click "Next" and configure in detail how Java Beans are created from database tables (how the sequences for primary keys are generated, target
package for the Java Beans source code, mapping data types, etc.). For our example,
we just keep default values unmodified so we are going to click on "Finish". The new
Java Bean is created in the project:
54
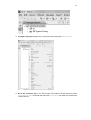
4. Job is almost done. We just have to update the "persistence.xml" file to specify the
name of the JPA persistence unit. Open this file and set the name of your Scope (" system") for the name of the "persistence-unit" XML tag:
<sample-code:xml>
<?xml version="1.0" encoding="UTF-8"?>
<persistence version="2.0"
xmlns="http://java.sun.com/xml/ns/persistence"
xmlns:xsi="http://www.w3.org/2001/XMLSchema-instance"
xsi:schemaLocation="http://java.sun.com/xml/ns/persistence
http://java.sun.com/xml/ns/persistence/persistence_2_0.xsd">
<persistence-unit name="system">
<class>model.HomeUser</class>
</persistence-unit>
</persistence>
</sample-code:end>
Sample 4: Execute ORM operations in embedded database
At this point, your Eclipse project is JPA-enabled and you should be able to perform ORM operations with the Warework ORM View. First, we are going to execute some CRUD operations
with the ORM View:
<sample-code:java>
public class MySampleApp {
public static void main(String[] args) {
try {
// Create and get a fully configured Scope.
ScopeFacade system = ScopeFactory.createTemplate(MySampleApp.class,
"full", "system");
// Get the object where to perform database operations.
ORMView ddbb = (ORMView) system.getObject("orm-database");
// Connect with the relational database.
ddbb.connect();
// Begin a transaction in the relational database.
ddbb.beginTransaction();
// Create a JPA entity.
HomeUser user = new HomeUser();
// Set some data in the Java Bean.
user.setId(1l);
user.setName("Arnold Brown");
// Save the JPA entity in the relational database.
ddbb.save(user);
// Update some data in the Java Bean.
user.setName("Arnold Brown Jr.");
// Update the object in the relational database.
ddbb.update(user);
// Delete the object in the relational database.
ddbb.delete(user);
// Commits changes in the relational database.
55
ddbb.commit();
// Disconnect the database.
ddbb.disconnect();
// Shut down your application.
ScopeContext.remove("system", true, true);
} catch (Exception e) {
e.printStackTrace();
}
}
}
</sample-code:end>
That is great. We created a new row in the HOME_USER table and then updated and deleted it
without writing any SQL code. Let us review in the following example how to find a specific ob ject (a row in the HOME_USER table) from the database:
<sample-code:java>
public class MySampleApp {
public static void main(String[] args) {
try {
// Create and get a fully configured Scope.
ScopeFacade system = ScopeFactory.createTemplate(MySampleApp.class,
"full", "system");
// Get the object where to perform database operations.
ORMView ddbb = (ORMView) system.getObject("orm-database");
// Connect with the relational database.
ddbb.connect();
// Create the filter to find the object.
HomeUser filter = new HomeUser();
// Set the data required to locate the object in the database.
filter.setId(3l);
// Find the object which type is "HomeUser" and ID is 3.
HomeUser user = (HomeUser) ddbb.find(filter);
// Disconnect the database.
ddbb.disconnect();
// Shut down your application.
ScopeContext.remove("system", true, true);
} catch (Exception e) {
e.printStackTrace();
}
}
}
</sample-code:end>
It is also possible to search for a list of objects from the database. You can do so in three different ways. One of them consists of using the JPA entity (the Java Bean generated from the data base) as a filter for the query. For example, you can set the values for attributes of the JPA en tity, specify the operation to perform (this is optional, by default performs an "equals to" operation) and sort results like this:
<sample-code:java>
56
public class MySampleApp {
public static void main(String[] args) {
try {
// Create and get a fully configured Scope.
ScopeFacade system = ScopeFactory.createTemplate(MySampleApp.class,
"full", "system");
// Get the object where to perform database operations.
ORMView ddbb = (ORMView) system.getObject("orm-database");
// Connect with the relational database.
ddbb.connect();
// Create the filter to find the objects.
HomeUser filter = new HomeUser();
// Set the data required to find the objects in the database.
filter.setId(1l);
// Define which operators to use.
Hashtable operator = new Hashtable();
// Set which operation to perform for each attribute of the filter.
operator.put("id", Operator.GREATER_THAN);
// Define the order of the results.
OrderBy order = new OrderBy();
// Set ascending order for field "ID".
order.addAscending("id");
// List Home Users which ID is greater than 1 and sorted by ID.
List<HomeUser> users = (List<HomeUser>) ddbb.list(filter,
operator, order, -1, -1);
// Disconnect the database.
ddbb.disconnect();
// Shut down your application.
ScopeContext.remove("system", true, true);
} catch (Exception e) {
e.printStackTrace();
}
}
}
</sample-code:end>
You can also create custom queries with a specific Warework Query object:
<sample-code:java>
public class MySampleApp {
public static void main(String[] args) {
try {
// Create and get a fully configured Scope.
ScopeFacade system = ScopeFactory.createTemplate(MySampleApp.class,
"full", "system");
// Get the object where to perform database operations.
ORMView ddbb = (ORMView) system.getObject("orm-database");
// Connect with the relational database.
ddbb.connect();
57
// Define the query.
Query query = new Query(getScope());
// Search for User objects.
query.setObject(HomeUser.class);
// Define the WHERE clause.
Where where = new Where(system);
// Create one OR expression.
Or or = where.createOr();
// Filter by name and password.
or.add(where.createLikeValue("name", "Ian Sharpe"));
or.add(where.createGreaterThanValue("id", 1l));
// Set the OR expression in the WHERE clause.
where.setExpression(or);
// List Home Users named 'Ian Sharpe' or ID is greater than 1.
List<HomeUser> users = (List<HomeUser>) ddbb.list(query);
// Disconnect the database.
ddbb.disconnect();
// Shut down your application.
ScopeContext.remove("system", true, true);
} catch (Exception e) {
e.printStackTrace();
}
}
}
</sample-code:end>
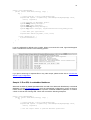
Sometimes it is much better to keep your queries in separate files. With Warework you can cre ate XML files that represent database queries like this:
<sample-code:xml>
<?xml version="1.0" encoding="UTF-8"?>
<query xmlns:xsi="http://www.w3.org/2001/XMLSchema-instance"
xsi:noNamespaceSchemaLocation="http://repository.warework.com/xsd/...
...object-query-1.0.0.xsd">
<object>model.HomeUser</object>
<where>
<or>
<expression>
<attribute>name</attribute>
<operator>LIKE</operator>
<value-operand>
<type>java.lang.String</type>
<value>Ian Sharpe</value>
</value-operand>
</expression>
<expression>
<attribute>id</attribute>
<operator>GREATER_THAN</operator>
<value-operand>
<type>java.lang.Long</type>
<value>1</value>
</value-operand>
</expression>
</or>
58
</where>
</query>
</sample-code:end>
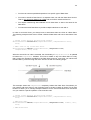
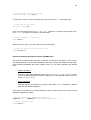
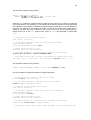
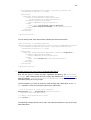
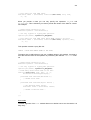
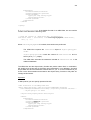
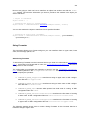
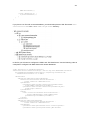
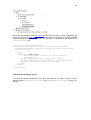
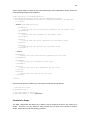
XML files like this should exist in the /META-INF/system/statement/xoq directory of your
project. Let us store this query in a file named "find-user.xml":
Once the query is located in the right place, we can execute it very easily:
<sample-code:java>
public class MySampleApp {
public static void main(String[] args) {
try {
// Create and get a fully configured Scope.
ScopeFacade system = ScopeFactory.createTemplate(MySampleApp.class,
"full", "system");
// Get the object where to perform database operations.
ORMView ddbb = (ORMView) system.getObject("orm-database");
// Connect with the relational database.
ddbb.connect();
// Read the content of 'find-user.xml' and execute it.
List<HomeUser> users = (List<HomeUser>) ddbb.
executeQueryByName("find-user", null, -1, -1);
// Disconnect the database.
ddbb.disconnect();
// Shut down your application.
ScopeContext.remove("system", true, true);
} catch (Exception e) {
e.printStackTrace();
}
}
}
</sample-code:end>
59
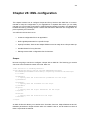
Sample 5: Send emails
You have to create an XML file named mail-service.xml in the /META-INF/<scopename> directory of your project, for example:
The following is an example for the content of the mail-service.xml file:
<sample-code:xml>
<?xml version="1.0" encoding="UTF-8"?>
<proxy-service xmlns:xsi="http://www.w3.org/2001/XMLSchema-instance"
xsi:noNamespaceSchemaLocation="http://repository.warework.com/xsd/proxyservice-1.0.0.xsd">
<clients>
<client name="default-client"
connector="com.warework.service.mail.client.connector. …
… JavaMailSenderConnector">
<parameter name="mail.host" value="smtp.host.com" />
<parameter name="mail.port" value="587" />
<parameter name="mail.transport.protocol" value="smtp" />
<parameter name="mail.user" value="[email protected]" />
<parameter name="mail.password" value="password" />
<parameter name="mail.smtp.auth" value="true" />
<parameter name="mail.smtp.starttls.enable" value="true" />
<parameter name="mail.message.charset" value="utf-8" />
<parameter name="mail.message.subtype" value="html" />
</client>
</clients>
</proxy-service>
</sample-code:end>
Once the configuration for the Mail Service is ready, you can send an email like this:
<sample-code:java>
public class MySampleApp {
public static void main(String[] args) {
try {
// Create and get a fully configured Scope.
ScopeFacade system = ScopeFactory.createTemplate(MySampleApp.class,
"full", "system");
60
// Get an instance of the Mail Service.
MailServiceFacade mailService = (MailServiceFacade) system.
getService("mail-service");
// Connect with the mail server.
mailService.connect("default-client");
// Send an email.
mailService.send("default-client", "subject",
"[email protected]", "[email protected]",
"[email protected];[email protected]", null, null, "mail message");
// Disconnect with the mail server.
mailService.disconnect("default-client");
// Shut down your application.
ScopeContext.remove("system", true, true);
} catch (Exception e) {
e.printStackTrace();
}
}
}
</sample-code:end>
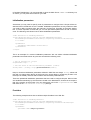
Sample 6: Configure your application from scratch
Templates are cool but most of the times you will need to create a specific configuration for your
application so you can specify in detail everything that you need.
To achieve this, first you have to create the main configuration file for your application. In this
file you will define the Services and Providers that allow you to perform operations with the
Framework. Just create an XML in the /META-INF directory of your project with any name you
want, for example:
Use the following code as a reference for the content of the /META-INF/system.xml file:
<sample-code:xml>
<?xml version="1.0" encoding="UTF-8"?>
<scope xmlns:xsi="http://www.w3.org/2001/XMLSchema-instance"
xsi:noNamespaceSchemaLocation="http://repository.warework.com/xsd/scope1.0.0.xsd">
<providers>
<provider name="sql-statement-provider"
61
class="com.warework.provider.FileTextProvider">
<parameter name="config-target"
value="/META-INF/system/statement/sql" />
<parameter name="file-extension" value="sql" />
<parameter name="remove-new-line-character" value="true" />
<parameter name="remove-tab-character" value="true" />
</provider>
<provider name="jpql-statement-provider"
class="com.warework.provider.FileTextProvider">
<parameter name="config-target"
value="/META-INF/system/statement/jpql" />
<parameter name="file-extension" value="jpql" />
<parameter name="remove-new-line-character" value="true" />
<parameter name="remove-tab-character" value="true" />
</provider>
<provider name="object-query-provider"
class="com.warework.provider.ObjectQueryProvider">
<parameter name="config-target"
value="/META-INF/system/statement/xoq" />
</provider>
<provider name="spring-provider"
class="com.warework.provider.SpringProvider">
<parameter name="config-target"
value="/META-INF/system/applicationContext.xml" />
</provider>
<provider name="datastore-view-provider"
class="com.warework.provider.DatastoreViewProvider">
<parameter name="service-name" value="datastore-service" />
</provider>
<provider name="ddbb-connection-provider"
class="com.warework.provider.PooledObjectProvider">
<parameter name="service-name" value="pool-service" />
</provider>
</providers>
<services>
<service name="log-service"
class="com.warework.service.log.LogServiceImpl">
<parameter name="config-class"
value="com.warework.core.loader.ProxyServiceSAXLoader" />
<parameter name="config-target"
value="/META-INF/system/log-service.xml" />
</service>
<service name="datastore-service"
class="com.warework.service.datastore.DatastoreServiceImpl">
<parameter name="config-class"
value="com.warework.service.datastore.DatastoreSAXLoader" />
<parameter name="config-target"
value="/META-INF/system/datastore-service.xml" />
</service>
<service name="pool-service"
class="com.warework.service.pool.PoolServiceImpl">
<parameter name="config-class"
value="com.warework.core.loader.ProxyServiceSAXLoader" />
<parameter name="config-target"
value="/META-INF/system/pool-service.xml" />
</service>
62
<service name="mail-service"
class="com.warework.service.mail.MailServiceImpl">
<parameter name="config-class"
value="com.warework.core.loader.ProxyServiceSAXLoader" />
<parameter name="config-target"
value="/META-INF/system/mail-service.xml" />
</service>
</services>
</scope>
</sample-code:end>
This XML file defines four Services, each one with a custom configuration file. Let us review the
configuration of the Log Service with the content of the /META-INF/system/log-service.xml file:
<sample-code:xml>
<?xml version="1.0" encoding="UTF-8"?>
<proxy-service xmlns:xsi="http://www.w3.org/2001/XMLSchema-instance"
xsi:noNamespaceSchemaLocation="http://repository.warework.com/xsd/proxyservice-1.0.0.xsd">
<clients>
<client name="default-client"
connector="com.warework.service.log.client.connector. …
… Log4jPropertiesConnector">
<parameter name="config-target"
value="/META-INF/system/log/log4j.properties"/>
</client>
</clients>
</proxy-service>
</sample-code:end>
This Log Service configuration file indicates that Log4j is going to be the default logging mechanism for your application and that Log4j is configured with the /META-INF/system/log/log4j.properties file. The content for this properties file could be like this:
log4j.logger.default-client=DEBUG, consoleApp
log4j.appender.consoleApp=org.apache.log4j.ConsoleAppender
log4j.appender.consoleApp.layout=org.apache.log4j.PatternLayout
log4j.appender.consoleApp.layout.ConversionPattern=[%d]-[%-5p] - %m%n
Now we are going to review the configuration of the Data Store Service with the content of the
/META-INF/system/datastore-service.xml file:
<sample-code:xml>
<?xml version="1.0" encoding="UTF-8"?>
<datastore-service xmlns:xsi="http://www.w3.org/2001/XMLSchema-instance"
xsi:noNamespaceSchemaLocation="http://repository.warework.com/ …
… xsd/datastore-service-1.1.0.xsd">
<datastores>
<datastore name="relational-database"
connector="com.warework.service.datastore. …
… client.connector.JDBCConnector">
<parameters>
<parameter name="client-connection-provider-name"
value="ddbb-connection-provider"/>
<parameter name="client-connection-provider-object"
63
value="c3p0-client"/>
</parameters>
<views>
<view class="com.warework.service.datastore. …
… client.JDBCViewImpl" name="rdbms-view"
provider="sql-statement-provider"/>
</views>
</datastore>
<datastore name="orm-database"
connector="com.warework.service.datastore. …
… client.connector.JPAConnector">
<parameters>
<parameter name="persistence-unit" value="system"/>
<parameter name="javax.persistence.jdbc.driver"
value="org.h2.Driver"/>
<parameter name="javax.persistence.jdbc.url"
value="jdbc:h2:~/system"/>
<parameter name="javax.persistence.jdbc.user"
value="system"/>
<parameter name="eclipselink.cache.shared.default"
value="false"/>
</parameters>
<views>
<view class="com.warework.service.datastore. …
… client.JPAViewImpl" name="orm-view"
provider="jpql-statement-provider"/>
</views>
</datastore>
</datastores>
</datastore-service>
</sample-code:end>
The following /META-INF/system/pool-service.xml file represents the content for the
Pool Service configuration:
<sample-code:xml>
<?xml version="1.0" encoding="UTF-8"?>
<proxy-service xmlns:xsi="http://www.w3.org/2001/XMLSchema-instance"
xsi:noNamespaceSchemaLocation="http://repository.warework.com/xsd/proxyservice-1.0.0.xsd">
<clients>
<client name="c3p0-client"
connector="com.warework.service.pool.client.connector. …
… C3P0Connector">
<parameter name="jdbc-url" value="jdbc:h2:~/system;USER=system"/>
<parameter name="driver-class" value="org.h2.Driver"/>
<parameter name="connect-on-create" value="true"/>
</client>
</clients>
</proxy-service>
</sample-code:end>
And the /META-INF/system/mail-service.xml file represents the content for the Mail
Service configuration:
<sample-code:xml>
<?xml version="1.0" encoding="UTF-8"?>
<proxy-service xmlns:xsi="http://www.w3.org/2001/XMLSchema-instance"
xsi:noNamespaceSchemaLocation="http://repository.warework.com/xsd/proxyservice-1.0.0.xsd">
<clients>
64
<client name="default-client"
connector="com.warework.service.mail.client.connector. …
… JavaMailSenderConnector">
<parameter name="mail.host" value="smtp.host.com" />
<parameter name="mail.port" value="587" />
<parameter name="mail.transport.protocol" value="smtp" />
<parameter name="mail.user" value="[email protected]" />
<parameter name="mail.password" value="password" />
<parameter name="mail.smtp.auth" value="true" />
<parameter name="mail.smtp.starttls.enable" value="true" />
<parameter name="mail.message.charset" value="utf-8" />
<parameter name="mail.message.subtype" value="html" />
</client>
</clients>
</proxy-service>
</sample-code:end>
All these resources may look like this in your project:
Now it is the time to create the application using your custom configuration:
<sample-code:java>
public class MySampleApp {
public static void main(String[] args) {
try {
// Configure the application with the 'system.xml' file.
ScopeFacade system = ScopeFactory.createFacade(MySampleApp.class,
"system", "my-app-name");
// ...perform operations here...
// Shut down your application.
ScopeContext.remove("my-app-name ", true, true);
} catch (Exception e) {
e.printStackTrace();
65
}
}
}
</sample-code:end>
66
PART I: BASIC CONCEPTS
67
Chapter 5: Scopes
A Warework Scope is a closed context where Services, Providers and other types of objects exist. Scopes can be a lot of things; it is up on you to define what you want them to be. Imagine
that we want to build an application or system that represents a fruit market; you can create a
Scope to represent the market and execute the required operations with specific Providers and
Services.
Scopes provide a set of common methods to work with Framework components and other objects. They can store any kind of objects in a shared memory and create, invoke and remove
Services and Providers. Check this out with the following image:
•
The Services Container is where the Scope stores each Service. You can create, store,
use and remove Services.
•
The Providers Container is another area of the Scope where Providers exist. You can
create, store, use and remove Providers.
•
The Objects Registry is a special area of the Scope where references to objects exist.
Each of these references links a name into an object that can be retrieved by a Pro vider. You can create, store, use and remove Objects References.
•
The Shared Memory is where you can store, retrieve and remove objects of any type.
•
The Scope Facade is the most important part for the software developer as it is the
main door to start working with every element indicated in the previous points. You interact with a Scope with its Facade.
Configuration
A very important step to perform, but not mandatory, is to define the Scope configuration, specifying the Services, Providers and Objects References that must exist in a Scope when a new
instance is created. It is recommended to keep the configuration of your applications in separate
files where you can easily manage how your Scopes must behave.
68
Now we are going to see how to configure a Scope with an XML file. The first thing you need to
check out is the format and content of this file. Here it is:
<sample-code:xml>
<?xml version="1.0" encoding="UTF-8"?>
<scope xmlns:xsi="http://www.w3.org/2001/XMLSchema-instance"
xsi:noNamespaceSchemaLocation="http://repository.warework.com/xsd/scope1.0.0.xsd">
<parameters>
// Specify here the initialization parameters for the Scope.
</parameters>
<providers>
// Specify here the Providers for the Scope.
</providers>
<objects>
// Specify here the object references for the Scope.
</objects>
<services>
// Specify here the Services for the Scope.
</services>
</scope>
</sample-code:end>
An XML file like this allows you to define which Providers, Services, Object References and initialization parameters a Scope will have when it is created. Later on, we will review how each of
these components are defined.
A very important fact is that Warework Cloud Distribution for Desktop requires you to place this
XML file in the META-INF directory of your project and that the name for it can be any name
you want. Example: if you plan to create a Scope that reads a file named “system”, you have to
create the XML like this:
/META-INF/system.xml
In the META-INF directory of your project you can store as many configuration files as you
need. It allows you to keep in the same directory XML files that represent Scopes in develop ment and production environments:
/META-INF/system-dev.xml
/META-INF/system-pro.xml
Warework gives also the opportunity to developers to use predefined configurations (called
“Templates”). For those who require Scopes fully configured and ready to run, templates are the
way to go. They allow you to create Scopes without the need to configure them; that is why the
time needed to start up a new project is drastically reduced with Templates. Please, review
chapters related with Templates later on.
Sometimes you may need to specify a set of parameters to configure how a Scope will be created and how it will behave once it is created. Initialization parameters are very useful too when
you need to define constants (they are read only) for Services, Providers or the entire application. It is also important to know that you can use pre-defined parameters as well as custom
ones. The following code shows how to define initialization parameters:
69
<sample-code:xml>
<?xml version="1.0" encoding="UTF-8"?>
<scope xmlns:xsi="http://www.w3.org/2001/XMLSchema-instance"
xsi:noNamespaceSchemaLocation="http://repository.warework.com/xsd/scope1.0.0.xsd">
<parameters>
<parameter name="name" value="John"/>
</parameters>
</scope>
</sample-code:end>
This is an example of a custom initialization parameter. We can define unlimited initialization
parameters and retrieve them any time we want with the following code:
<sample-code:java>
// Get an instance of a Scope.
ScopeFacade scope = ...;
// Get the value of the initialization parameter ("John").
String name = (String) scope.getInitParameter("name");
</sample-code:end>
Keep in mind that initialization parameters defined in XML files are always String values and
they will not change along the life of the Scope (you cannot delete or update any of them once
the Scope is started). Services and Providers can read these parameters too.
There are predefined initialization parameters that are used to configure Scopes. Most of them
are handled automatically by ScopeFactory included in this Distribution, the one responsible
of the creation of the Scopes. You can review each one in the ScopeL1Constants class that
exists in the com.warework.core.scope package.
Creating new Scopes
Regardless of whether a configuration has been specified or not, you always need to create a
new Scope before start using it. The making process of a Scope is performed with the
ScopeFactory class that exists in com.warework.core.scope package. It is fairly easy to
create a new Scope. You just need to invoke method createFacade in the factory class with
three arguments:
•
A context class: the first argument must be any class that exists in your project and it is
used to load resources from it.
•
File name: It represents the name of the XML or serialized file to load for the Scope
from the META-INF directory.
•
Scope name: It is the name that you will use to retrieve the Scope later on.
Let us say that we have a test class named Sample1, which contains the main method. We
can create a new Scope like so:
<sample-code:java>
public class Sample1 {
public static void main(String[] args) {
try {
70
ScopeFactory.createFacade(Sample1.class, "scope-config", "system");
} catch (Exception e) {
e.printStackTrace();
}
}
}
</sample-code:end>
The previous code first tries to load from /META-INF/scope-config.ser a serialized file
(Java Beans stored as binary files) with the configuration of the Scope. If this file does not exist,
then it tries with the XML version of the configuration file (/META-INF/scope-config.xml).
When any of those configuration files is found, a new Scope named "system" is created by the
Factory.
Once the Scope is created, you can get an instance of it with the ScopeContext class that exists in com.warework.core.scope package. To retrieve an instance of the Scope created in
the previous example, write this code:
<sample-code:java>
public class Sample1 {
public static void main(String[] args) {
try {
// Create the Scope.
ScopeFactory.createFacade(Sample1.class, "scope-config", "system");
// Get the Scope.
ScopeFacade system = ScopeContext.get("system");
} catch (Exception e) {
e.printStackTrace();
}
}
}
</sample-code:end>
You can also get an instance of the Scope when you create it:
<sample-code:java>
public class Sample1 {
public static void main(String[] args) {
try {
// Create and get the Scope.
ScopeFacade system = ScopeFactory.createFacade(Sample1.class,
"scope-config", "system");
} catch (Exception e) {
e.printStackTrace();
}
}
}
</sample-code:end>
Very important facts to know about this:
•
No matter how many times you invoke ScopeContext.get() method, you will always
get the same instance for the same Scope name. They will change only when the
Scope is destroyed and created again.
<sample-code:java>
71
public class Sample1 {
public static void main(String[] args) {
try {
// Create and get the Scope.
ScopeFacade system1 = ScopeFactory.createFacade(Sample1.class,
"scope-config", "system");
// system2 is the same instance as system1.
ScopeFacade system2 = ScopeFactory.createFacade(Sample1.class,
"scope-config", "system");
// Remove the Scope. Now system1 and system2 are dead.
ScopeContext.remove("system", false, false);
// system3 is a new instance.
ScopeFacade system3 = ScopeFactory.createFacade(Sample1.class,
"scope-config", "system");
// system4 is the same instance as system3.
ScopeFacade system4 = ScopeFactory.createFacade(Sample1.class,
"scope-config", "system");
} catch (Exception e) {
e.printStackTrace();
}
}
}
</sample-code:end>
•
You can create multiple instances of Scopes with the same XML/serialized configuration file. Just give a different name for the Scope for the same configuration file and you
will get a new Scope.
<sample-code:java>
public class Sample1 {
public static void main(String[] args) {
try {
// Create and get the Scope.
ScopeFacade system1 = ScopeFactory.createFacade(Sample1.class,
"scope-config", "system1");
// system2 is NOT the same instance as system1.
ScopeFacade system2 = ScopeFactory.createFacade(Sample1.class,
"scope-config", "system2");
} catch (Exception e) {
e.printStackTrace();
}
72
}
}
</sample-code:end>
The process is very similar for those who want to create a new Scope using a Template. This
time there is no need to specify the name of the XML/serialized configuration file because it is
automatically created by the Framework. Instead, you have to define the name of the Template
to use. Check out this example:
<sample-code:java>
public class Sample1 {
public static void main(String[] args) {
try {
// Create the Scope.
ScopeFactory.createTemplate(Sample1.class, "full", "system");
// Get the Scope.
ScopeFacade system = ScopeContext.get("system");
} catch (Exception e) {
e.printStackTrace();
}
}
}
</sample-code:end>
To create a Scope with a Template you also need the ScopeFactory class but now the method to invoke is createTemplate(). What does it mean "full"? It is a common name for
Templates that represent configurations for Scopes with all the capabilities enabled.
Environment of a Scope
Sometimes Scopes may need to work with other Scopes to better organize complex environments and expand the available functionality. Warework Cloud Distribution for Desktop provides
the required methods to achieve this task and help developers create bigger systems with con trol. In this Framework, the organization of complex systems is performed with:
Parent Scopes
You can create a hierarchy of Scopes by saying that one Scope extends another Scope. That
is, a Scope named B can extend another Scope named A in a way that B integrates the func tionality provided by A:
73
When Scope B extends Scope A, B can use Services, Providers and Object References that exist in Scope A. It is important to know that parent Scopes can only be assigned when children
Scopes are created. You cannot link Scope A with Scope B when B is already created.
Parent Scopes allows you to organize systems like this:
You can define the Parent Scope for a specific Scope in an XML file. It is useful when you need
to start up a Parent Scope (or reuse it, if it already exists) for the main Scope that you want to
create. A Scope factory that parses an XML file like this automatically creates the Parent Scope
and assigns it to the main Scope (the Scope instance that you will get with the factory). It is important to keep in mind that only one Parent Scope can be defined per Scope. Check out in the
following example how to define a Parent Scope:
<sample-code:xml>
<?xml version="1.0" encoding="UTF-8"?>
<scope xmlns:xsi="http://www.w3.org/2001/XMLSchema-instance"
xsi:noNamespaceSchemaLocation="http://repository.warework.com/xsd/scope1.0.0.xsd">
<parent name="parent-scope">
<parameters>
// Specify here the initialization parameters for the Parent Scope.
</parameters>
<providers>
// Specify here the Providers for the Parent Scope.
</providers>
<objects>
// Specify here the object references for the Parent Scope.
</objects>
<services>
// Specify here the Services for the Parent Scope.
</services>
</parent>
<parameters>
// Specify here the initialization parameters for the Scope.
</parameters>
<providers>
// Specify here the Providers for the Scope.
</providers>
<objects>
// Specify here the object references for the Scope.
</objects>
74
<services>
// Specify here the Services for the Scope.
</services>
</scope>
</sample-code:end>
Once the main Scope is created, you can retrieve its Parent Scope like this:
<sample-code:java>
// Get the main Scope.
ScopeFacade scope = ...;
// Get the Parent of the Scope.
ScopeFacade parent = scope.getParent();
</sample-code:end>
Domains and the context of a Scope
Warework gives the possibility to include multiple Scopes into another Scope. This level of organization let software developers create domains where Scopes exist. If we include Scope A1
and Scope A2 into Scope A, Warework assumes the following facts:
•
Scope A is the domain (named “Domain Scope”) of Scopes A1 and A2.
•
Scopes A1 and A2 exist in the context of Scope A (Scope A can retrieve Scopes A1
and A2).
•
Scopes A1 and A2 can retrieve an instance of their Domain Scope A.
•
Scopes A1 and A2 can directly use Services, Providers and Object References that exist in Scope A.
•
Scope A cannot directly use Services, Providers and Object References that exist in
Scopes A1 and A2.
You can define the Domain Scope for a specific Scope in an XML file. It is useful when you
need to create a Domain Scope (or reuse it, if it already exists) for the main Scope that you
want to create. Keep in mind that only one Domain Scope can be defined per Scope. Check out
in the following example how to define it:
<sample-code:xml>
<?xml version="1.0" encoding="UTF-8"?>
<scope xmlns:xsi="http://www.w3.org/2001/XMLSchema-instance"
xsi:noNamespaceSchemaLocation="http://repository.warework.com/xsd/scope1.0.0.xsd">
<domain name="domain-scope">
75
<parameters>
// Specify here the initialization parameters for the Domain Scope.
</parameters>
<providers>
// Specify here the Providers for the Domain Scope.
</providers>
<objects>
// Specify here the object references for the Domain Scope.
</objects>
<services>
// Specify here the Services for the Domain Scope.
</services>
</domain>
<parameters>
// Specify here the initialization parameters for the Scope.
</parameters>
<providers>
// Specify here the Providers for the Scope.
</providers>
<objects>
// Specify here the object references for the Scope.
</objects>
<services>
// Specify here the Services for the Scope.
</services>
</scope>
</sample-code:end>
Once the main Scope is created, you can retrieve its Domain Scope like this:
<sample-code:java>
// Get the main Scope.
ScopeFacade scope = ...;
// Get the Domain of the Scope.
ScopeFacade domain = scope.getDomain();
</sample-code:end>
The XML configuration file also allows you to define a set of Scopes that exist in the context of a
Scope. This time, you can define as many Scopes as you need in the context of another Scope.
Check this out with the following example:
<sample-code:xml>
<?xml version="1.0" encoding="UTF-8"?>
<scope xmlns:xsi="http://www.w3.org/2001/XMLSchema-instance"
xsi:noNamespaceSchemaLocation="http://repository.warework.com/xsd/scope1.0.0.xsd">
<parameters>
// Specify here the initialization parameters for the Scope.
</parameters>
<providers>
// Specify here the Providers for the Scope.
</providers>
76
<objects>
// Specify here the object references for the Scope.
</objects>
<services>
// Specify here the Services for the Scope.
</services>
<context>
<scope name="scope-1">
<parameters>
// Specify here the initialization parameters for the Scope.
</parameters>
<providers>
// Specify here the Providers for the Scope.
</providers>
<objects>
// Specify here the object references for the Scope.
</objects>
<services>
// Specify here the Services for the Scope.
</services>
</scope>
<scope name="scope-2">…</scope>
<scope name="scope-3">…</scope>
</context>
</scope>
</sample-code:end>
Once the main Scope is created, you can retrieve a Scope from the context of the main Scope
like this:
<sample-code:java>
// Get the main Scope.
ScopeFacade scope = ...;
// Get a Scope from the context of the main Scope.
ScopeFacade contextScope = scope.getContext().get("scope-1");
</sample-code:end>
Example
The following example shows a combination of multiple Scopes in just one XML configuration
file:
<sample-code:xml>
<?xml version="1.0" encoding="UTF-8"?>
<scope xmlns:xsi="http://www.w3.org/2001/XMLSchema-instance"
xsi:noNamespaceSchemaLocation="http://repository.warework.com/xsd/scope1.0.0.xsd">
<parent name="p1">
<parent name="p2">
77
<domain name="p2-d">…</domain>
<context>
<scope name="p2-c1">…</scope>
<scope name="p2-c2">…</scope>
</context>
</parent>
<domain name="p1-d">…</domain>
<parameters>…</parameters>
<providers>…</providers>
<objects>…</objects>
<services>…</services>
</parent>
<parameters>…</parameters>
<providers>…</providers>
<objects>…</objects>
<services>…</services>
<context>
<scope name="c1">…</scope>
<scope name="c2">…</scope>
<scope name="c3">
<parent name="c3-p">
<context>
<scope name="c3-p-c1">…</scope>
<scope name="c3-p–c2">…</scope>
</context>
</parent>
<parameters>…</parameters>
<providers>…</providers>
<objects>…</objects>
<services>…</services>
</scope>
</context>
</scope>
</sample-code:end>
To retrieve Scopes from the main Scope, you can perform operations like this:
<sample-code:java>
// Get the main Scope.
ScopeFacade scope = ...;
// Get Scopes from the main Scope.
ScopeFacade p2 = scope.getParent().getParent();
ScopeFacade p2_d = scope.getParent().getParent().getDomain();
ScopeFacade p2_c1 = scope.getParent().getParent().getContext().get("p2-c1");
</sample-code:end>
78
Working with Scopes
Software developers can interact with Scopes through the ScopeFacade interface. The Warework Scope Facade provides methods to perform operations with Services, Providers and other
objects. We can review which methods it provides and group them in the following table:
Create, retrieve and remove Services in a Scope
To create a Service in a Scope, you always need to provide a unique name for the Service and
the implementation class of the Service.
<sample-code:java>
// Create a new Service and register it in the Scope.
scope.createService("log-service", LogServiceImpl.class, null);
</sample-code:end>
Once it is created, you can retrieve it using the same name (when you retrieve an instance of a
Service, you will get an interface that represents a facade for that Service):
<sample-code:java>
// Get an instance of the Log Service.
LogServiceFacade logService = (LogServiceFacade) scope.
getService("log-service");
</sample-code:end>
You can also perform both steps in a single line of code:
<sample-code:java>
// Create a new Service, register in the Scope and return it.
LogServiceFacade logService = (LogServiceFacade) scope.
createService("log-service", LogServiceImpl.class, null);
</sample-code:end>
79
While the name of the Service can be any one you want, the implementation class must be the
one specified in the Service documentation.
You should also need to bear in mind that Services created in a Scope are not only accessible
in that Scope. Check this out with the following example:
•
Imagine that we have two Scopes named A and B:
<sample-code:java>
// Get an instance of Scope A.
ScopeFacade scopeA = …;
// Get an instance of Scope B.
ScopeFacade scopeB = …;
</sample-code:end>
•
If Scope B extends Scope A then we can access Scope A Services directly from the
Scope B facade like this:
<sample-code:java>
// Get one Service in Scope A from Scope B.
LogServiceFacade logService = (LogServiceFacade) scopeB.
getService("log-service");
</sample-code:end>
•
If Scope A is the Domain of Scope B then we can access Scope A Services directly
from the Scope B facade exactly as we saw in the previous point.
Here it is shown how to remove a Service:
<sample-code:java>
// Remove the Log Service.
scope.removeService("log-service");
</sample-code:end>
This line of code removes the Service in a specific Scope. You cannot directly remove Services
that exist in parent and domain Scopes.
Sometimes you may require a list of Services that are accessible in a Scope. The following line
of code gets the names of every Service that exists in a Scope, its parents Scopes and its domain Scope:
<sample-code:java>
// Get the name of every accessible Service.
Enumeration names = scope.getServiceNames();
</sample-code:end>
Create and remove Providers in a Scope
To create a Provider in a Scope, you always need to specify a unique name for the Provider and
the implementation class of the Provider.
<sample-code:java>
// Create a new provider and register it in the Scope. This provider
// retrieves objects that represent food.
scope.createProvider("food-provider", FoodProvider.class,
null);
80
</sample-code:end>
We cannot obtain their interfaces this time because its functionality is included in the Facade of
the Scope with the getObject methods (remember: Providers just provide objects instances).
When working with Providers, you need to know that on one side you can manage them (create
and remove each Provider) and on the other side you can manage the objects a Provider can
retrieve (create, get and remove references to them).
To remove a Provider is quite simple:
<sample-code:java>
// Remove the food Provider.
scope.removeProvider("food-provider");
</sample-code:end>
This line of code removes the Provider in a specific Scope. You cannot directly remove Providers that exist in parent and domain Scopes.
Sometimes you may require a list of Providers that are accessible in a Scope. The following line
of code gets the names of every Provider that exists in a Scope, its parents Scopes and its do main Scope:
<sample-code:java>
// Get the name of every accessible Provider.
Enumeration providerNames = scope.getProviderNames();
</sample-code:end>
To validate if a Provider exists in a Scope, its parents Scopes or its domain Scope, run this
code:
<sample-code:java>
// Validate if the 'food-provider' exists.
boolean exists = scope.existsProvider("food-provider");
</sample-code:end>
Create, use and remove Objects References in a Scope
Once you have at least one Provider in a Scope, you can create a reference to an object that
exists in that Provider. To create a reference you always need to specify a unique name for it,
the Provider where to extract the object and which object to get:
81
<sample-code:java>
// Create a reference named 'fruit' to an object named 'apple' in a
// Provider named 'food-provider'.
scope.createObject("fruit", "food-provider", "apple");
</sample-code:end>
Now that we have the reference created, we can access the object just by doing:
<sample-code:java>
// Get the 'apple' object from the 'food-provider'.
Food fruit = (Food) scope.getObject("fruit");
</sample-code:end>
You can also request an object directly, without the need to create a reference:
<sample-code:java>
// Get the 'apple' object from the 'food-provider'.
Food fruit = (Food) scope.getObject("food-provider", "apple");
</sample-code:end>
The powerful idea behind this is that you are isolating how an object is created. In our example,
as the Food Provider just knows about creating food objects like apples and kiwis, every object
that this Provider can retrieve implements the Food interface. This allows us to easily change
the food we want:
<sample-code:java>
// Gets the 'kiwi' object from the 'food-provider'.
Food fruit = (Food) scope.getObject("food-provider", "kiwi");
</sample-code:end>
Now, let’s remove an Object Reference:
<sample-code:java>
// Remove the fruit Object Reference.
scope.removeObject("fruit");
</sample-code:end>
This line of code removes the Object Reference (not the object itself in the Provider) in a specific Scope. You cannot remove references that exist in its parents Scopes or its domain Scope.
The following line of code gets the names of every Object Reference that exists in a Scope, its
parents Scopes and its domain Scope:
<sample-code:java>
// Get the name of every accessible Object Reference.
Enumeration names = scope.getObjectNames();
</sample-code:end>
Get, add and remove objects in a Scope
Scopes provide a special area where to store objects of any type. These objects can be accessed only from the Scope facade where they exist.
To store an object, you have to give the object a name (this name must be unique):
<sample-code:java>
// Save the fruit in the shared memory.
scope.setAttribute("best-market-food", fruit);
</sample-code:end>
To get the object:
82
<sample-code:java>
// Get the fruit from the shared memory.
Food food = (Food) scope.getAttribute("best-market-food");
</sample-code:end>
To remove that object:
<sample-code:java>
// Remove the fruit in the shared memory.
scope.removeAttribute("best-market-food");
</sample-code:end>
The following line of code gets the names of every object that is stored in the shared memory of
a Scope:
<sample-code:java>
// Get the name of every object stored in the Scope.
Enumeration names = scope.getAttributeNames();
</sample-code:end>
83
Chapter 6: Services
Warework Services are components of the Framework that present these features:
•
Encapsulation. They group a set of related functions of a particular topic.
•
Common life cycle. Each Service goes through a series of states before they can be
used and destroyed.
•
Centrally controlled. Services are created and stored in Scopes. You can retrieve a
Service via a Scope.
•
Configurable. Services may be configured on start-up, with different sources like plain
Java objects or XML files, or during runtime.
•
Pre-built or custom. You can use existing Warework Services or create your own
ones.
•
Extend the functionality of systems. Services are distributed as JAR files that, when
plugged in the Framework, provide extra support for your application.
Some Services may perform simple operations and may not require configuration at all. However, there will be others that perform more complex tasks and require to be fully configured.
Software developers can add into the Framework as many Services as they need. Check out
our Web site to view Services created by Warework and download every one that fits your
needs.
Service life cycle
Even that each Service defines its own behavior, they all must implement the ServiceFacade
interface (check out the com.warework.core.service package) to accomplish the default
requisites of a Service life cycle. When a class implements this interface, it is managed by the
Framework in the following way:
84
1. Create a new instance of the Service. When you invoke method createService() in a Scope, it creates a new Service only if it does not exist in
that Scope.
2. Initialize the Service. When a new Service instance is created, it may prepare
itself to accept an initial configuration and methods invocations.
3. Configure the Service. Each Service supports specific sources of configuration (XML files, Java objects ...) and decides how it has to be configured.
4. Store the Service in the Scope. Once the Service is created and configured, it
is stored in the Scope where the createService() was invoked.
5. Call Service methods. At this point, Service is configured and you can use it
by invoking its methods.
6. Shut down the Service. The method removeService() that exists in every
Scope is responsible for telling to a specific Service that it has to stop working
and that it must be prepared for being erased.
7. Remove the Service in the Scope. After a Service stops the execution, it is removed from the Scope where it belongs to.
Configuration
When a Service is created, it may accept a set of parameters that can be used to specify how
the Service must be initialized or configured and also to represent specific constants that define
how the Service must work.
Suppose we want to specify when the Lighting Service of a market must turn on and off. We
could write something like this:
<sample-code:java>
85
// Create a map where to store the configuration parameters.
Hashtable parameters = new Hashtable();
// Configure how the Service must work by specifying the hour
// when the lights turn on and off.
parameters.put("turn-on-lights", new Integer(8));
parameters.put("turn-off-lights", new Integer(19));
// Create the Service with the configuration.
LightingServiceFacade service = (LightingServiceFacade) scope.
createService("lighting-service",
LightingServiceImpl.class, parameters);
</sample-code:end>
These parameters indicate how the Service must work but they can also provide information for
the initialization process of the Service:
<sample-code:java>
// Create a map where to store the configuration parameters.
Hashtable parameters = new Hashtable();
// Configure how the Service must be initialized.
parameters.put("test-bulbs-on-startup", Boolean.TRUE);
// Create the Service with the configuration.
LightingServiceFacade service = (LightingServiceFacade) scope.
createService("lighting-service",
LightingServiceImpl.class, parameters);
</sample-code:end>
Each Service can use these parameters how and whenever they want. It is very important for
you to know that there are by default two of them that are specifically designed for the configuration process of the Service. The first one is defined with the constant PARAMETER_ConfigTarget that exists in the ServiceConstants class of the com.warework.core.service package and indicates that the Service must read the configuration from a given object.
<sample-code:java>
// Create the configuration for the Lighting Service.
LightingConfig config = new LightingConfig();
// Configure the Lighting Service.
config.setLightType("led");
config.setLightColor("white");
// Create a map where to store the configuration parameters.
Hashtable parameters = new Hashtable();
// Configure where to read the configuration for the Service.
parameters.put(ServiceConstants.PARAMETER_ConfigTarget, config);
// Create the Service with the configuration.
LightingServiceFacade service = (LightingServiceFacade) scope.
createService("lighting-service",
LightingServiceImpl.class, parameters);
</sample-code:end>
The second one is defined with the constant PARAMETER_ConfigClass that exists in the
same class and indicates that the Service must read the configuration using a given class that
decides how and where to read that configuration. The class that you pass as the value of the
parameter must implement the LoaderFacade interface that exists in the com.warework.core.loader package and is responsible for loading configurations from different sources, like
XML files:
86
Lighting Service XML configuration file:
<sample-code:xml>
<?xml version="1.0" encoding="UTF-8"?>
<lighting-service>
<light-type>led</light-type>
<light-color>white</light-color>
</lighting-service>
</sample-code:end>
Lighting Service Java code:
<sample-code:java>
// Create a map where to store the configuration parameters.
Hashtable parameters = new Hashtable();
// Configure how to read the configuration for the Service.
// NOTE: You may pass the class or a string that represents that class.
parameters.put(ServiceConstants.PARAMETER_ConfigClass,
LightingServiceConfigLoader.class);
// Create the Service with the configuration.
LightingServiceFacade service = (LightingServiceFacade) scope.
createService("lighting-service",
LightingServiceImpl.class, parameters);
</sample-code:end>
In this example, the LightingServiceConfigLoader class reads the XML file, copies the
content into Java objects and provides those objects for the configuration of the Service. Keep
in mind that every parameter specified in the configuration is not passed just to the Service, they
all are also given to the loader class.
<sample-code:java>
// Create a map where to store the configuration parameters.
Hashtable parameters = new Hashtable();
// Configure how and where to read the configuration for the Service.
parameters.put(ServiceConstants.PARAMETER_ConfigClass,
LightingServiceConfigLoader.class);
parameters.put("config-target", "/META-INF/system/lighting.xml");
// Create the Service with the configuration.
LightingServiceFacade service = (LightingServiceFacade) scope.
createService("lighting-service",
LightingServiceImpl.class, parameters);
</sample-code:end>
For Services that have to exist when a Scope is created, you need to define these Services in
an XML configuration file. The following example shows how to define multiple Services in an
XML file:
<sample-code:xml>
<?xml version="1.0" encoding="UTF-8"?>
<scope xmlns:xsi="http://www.w3.org/2001/XMLSchema-instance"
xsi:noNamespaceSchemaLocation="http://repository.warework.com/xsd/scope1.0.0.xsd">
<services>
<service name="sample1-service"
class="com.warework.service.sample1.Sample1ServiceImpl"/>
<service name="sample2-service"
class="com.warework.service.sample2.Sample2ServiceImpl"/>
…
87
</services>
</scope>
</sample-code:end>
These Services do not have parameters. That is, just with the name and the class, the Service
should be ready to run.
To retrieve a Service from a Scope we can write something like:
<sample-code:java>
// Get an instance of a Scope.
ScopeFacade scope = ...;
// Get the facade of Service "Sample1".
Sample1ServiceFacade service = (Sample1ServiceFacade) scope.
getService("sample1-service");
</sample-code:end>
Most of the times, you will need to specify a set of parameters that configure how the Service
must work. This is an example of a Service configured with parameters:
<sample-code:xml>
<?xml version="1.0" encoding="UTF-8"?>
<scope xmlns:xsi="http://www.w3.org/2001/XMLSchema-instance"
xsi:noNamespaceSchemaLocation="http://repository.warework.com/xsd/scope1.0.0.xsd">
<services>
<service name="log-service"
class="com.warework.service.log.LogServiceImpl">
<parameter name="config-class"
value="com.warework.core.loader.ProxyServiceSAXLoader" />
<parameter name="config-target"
value="/META-INF/system/log-service.xml" />
</service>
</services>
</scope>
</sample-code:end>
In this example, the Log Service accepts parameters to define where to load an XML file for the
configuration of the Service. You will need to review the parameters that a Service can accept
with the class that defines the constants of the Service (in this example, the LogServiceConstants.class).
Proxy Services
There is a special kind of Service that is prepared to handle multiple implementations for the
same Service logic. Each implementation is called “Client” and performs operations related to
the Service logic. On the other hand, the Service that bundles all the implementations is called
“Proxy Service”. This idea lets us:
•
Manage more than one implementation at the same place.
•
Simplify and centralize the use of multiple components that perform the same tasks.
•
Be prepared to changes in our software infrastructure.
88
•
Replace an existing implementation with another one that best fits our needs.
•
Make our systems more portable through different environments.
•
Set up a modular software application.
Suppose that a Market System works with two different messenger companies: one for fast
sending and the other one for normal sending. We can see how to send fast an item as follows:
If we are not worried about time, we can send the same item just by changing the name of the
Client:
Add Clients into Services
A Proxy Service can handle as many Clients as you need. To add a Client into a Service of this
kind you just need to invoke the method createClient() that exists in that Service. This
method requests a name for the new Client and a special class named "Connector" which performs the creation of the Client. So, we can say that Warework Connectors are responsible for
the creation of Clients in specific Services. Let's create one in our Market System example:
<sample-code:java>
// Create the Service in the Scope.
MessengerServiceFacade service = (MessengerServiceFacade) scope.
createService("messenger-service",
MessengerServiceImpl.class, null);
89
// Add a Client in the Service.
service.createClient("fast-messenger", FastConnector.class, null);
</sample-code:end>
In this example, the FastConnector class creates a specific Messenger Client and stores it in
the Messenger Service. Connectors are also capable of creating the connections that a Client
may require to work (like connections with databases). We start a connection with a Client by
calling the method connect() that exists in the Service:
<sample-code:java>
// Connect the Client.
service.connect("fast-messenger");
</sample-code:end>
Once it is connected, we can access the Service logic by invoking its methods:
<sample-code:java>
// Send the item.
service.send("fast-messenger", item);
</sample-code:end>
As you can see, Proxy Services always require the name of the Client when you want to perform an operation. In the following code, we are going to send the same item but this time with
the normal messenger:
<sample-code:java>
// Add a Client in the Service.
service.createClient("normal-messenger", NormalConnector.class, null);
// Connect the Client.
service.connect("normal-messenger");
// Send the item.
service.send("normal-messenger", item);
</sample-code:end>
Warework provides in the Website multiple Clients for each Proxy Service. Just check out the
extensions section of the Service. There you can see a list of Clients that are supported by the
Service.
More operations with Clients
The following table summarizes all the common operations that share these Services:
createClient(String clientName, Class
connectorType, Hashtable connectionParameters)
getClientNames()
existsClient(String clientName)
removeClient(String clientName)
removeAllClients()
getClientType(String clientName)
Creates a new Client in the Service.
Gets the names of all the Clients
bound to a Service.
Validates if a Client is bound to a
Service.
Removes a Client bound in a Service. If the Service does not have
a Client bound to the specified
name, this method does nothing. If
Client is connected, this method
disconnects it first.
Removes all the Clients bound in a
Service.
Gets the class that implements the
90
isClientType(String clientName, Class clientType)
connect(String clientName)
getConnection(String clientName)
disconnect(String clientName)
disconnectAll()
isConnected(String clientName)
Client.
Validates if a Client is the same
type of a given class.
Connects the Client.
Gets the connection of a Client.
First you will need to connect the
Client to retrieve the connection,
otherwise this method will return
null.
Closes a connection with a Client.
Closes the connection of every Client.
Validates if a Client is connected.
Configuration
Proxy Services can be configured in a common way to automatically initialize the Clients that a
Service may need. This is done with the ProxyService class that exists in com.warework.core.model package. The following example shows how to configure two Clients when a Service is created:
<sample-code:java>
// Create a configuration for the Proxy Service.
ProxyService config = new ProxyService();
// Configure two Clients for the Proxy Service.
config.setClient("fast-messenger", FastConnector.class);
config.setClient("normal-messenger", NormalConnector.class);
// Create a map where to store the configuration parameters.
Hashtable parameters = new Hashtable();
// Configure where to read the configuration for the Service.
parameters.put(ServiceConstants.PARAMETER_ConfigTarget, config);
// Create the Messenger Service.
MessengerServiceFacade messengerService = (MessengerServiceFacade) scope
.createService("messenger-service", MessengerServiceImpl.class,
parameters);
</sample-code:end>
This time, when we execute the createService method with this configuration, it creates
every Client that ProxyService contains when the Service is started up. Warework recommends configuring Proxy Services in this way when you know that a set of Clients must exist
since the beginning of the life of a Service. Particularly, you will notice that this way is much
comfortable when configuring Clients because parameters can be passed with a single line of
code:
<sample-code:java>
// Create a configuration for the Proxy Service.
ProxyService config = new ProxyService();
// Configure a Client for the Proxy Service.
config.setClient("fast-messenger", FastConnector.class);
config.setClientParameter("fast-messenger", "check-speed",
Boolean.TRUE);
</sample-code:end>
91
Every time you create a Client, you can pass a set of parameters to the Connector so it can customize the creation and behavior of the Client. The previous line of code performs this task and
it is the same as doing this:
<sample-code:java>
// Create the Service in the Scope.
MessengerServiceFacade service = (MessengerServiceFacade) scope.
createService("messenger-service",
MessengerServiceImpl.class, null);
// Create a map where to store the Connector's parameters.
Hashtable parameters = new Hashtable();
// Configure where to read the configuration for the Service.
parameters.put("check-speed", Boolean.TRUE);
// Add a Client in the Service.
service.createClient("fast-messenger", FastConnector.class, parameters);
</sample-code:end>
The way to configure a Proxy Service with XML is slightly different. You need to create a sep arate XML file for the Proxy Service and reference it from the Scope XML file. The following example shows how to define a Proxy Service and the configuration file that it requires. The first
thing you have to do is to register the Service:
<sample-code:xml>
<?xml version="1.0" encoding="UTF-8"?>
<scope xmlns:xsi="http://www.w3.org/2001/XMLSchema-instance"
xsi:noNamespaceSchemaLocation="http://repository.warework.com/xsd/scope1.0.0.xsd">
<services>
<service name="log-service"
class="com.warework.service.log.LogServiceImpl">
<parameter name="config-class"
value="com.warework.core.loader.ProxyServiceSAXLoader" />
<parameter name="config-target"
value="/META-INF/system/log-service.xml" />
</service>
</services>
</scope>
</sample-code:end>
This XML file defines a Log Service and a configuration file for it. You specify the configuration
file for the Service with two special parameters:
•
config-class: this parameter represents the class that reads the XML configuration
for the Service. The most common value for this parameter is com.warework.core.loader.ProxyServiceSAXLoader as it is a generic loader of configuration files for
Proxy Services. Anyway, some Services may use their own Loaders for XML files or
simply skip the configuration process by removing this parameter. Review the value for
this parameter in the documentation of each Service.
•
config-target: this parameter represents the location of the XML file to load. You
have to place this file at /META-INF directory of your project.
Once it is registered in the Scope we proceed with the creation of the Proxy Service configur ation file. Based on the previous example, this could be the content of the log-service.xml
file:
92
<sample-code:xml>
<?xml version="1.0" encoding="UTF-8"?>
<proxy-service xmlns:xsi="http://www.w3.org/2001/XMLSchema-instance"
xsi:noNamespaceSchemaLocation="http://repository.warework.com/xsd/proxyservice-1.0.0.xsd">
<clients>
<client name="default-client"
connector="com.warework.service.log.client.connector.ConsoleConnector"/>
</clients>
</proxy-service>
</sample-code:end>
You can define as many clients as you need for the Proxy Service. Once the Scope is started,
you can work with Clients like this:
<sample-code:java>
// Get an instance of a Scope.
ScopeFacade scope = ...;
// Get the facade of the Log Service.
LogServiceFacade service = (LogServiceFacade) scope.getService("log-service");
// Connect the Client.
service.connect("default-client");
// Perform operations with the Client here ...
// Disconnect the Client.
service.disconnect("default-client");
</sample-code:end>
Some clients may require configuration parameters. The following example shows how a Client
specifies a configuration file for it.
<sample-code:xml>
<?xml version="1.0" encoding="UTF-8"?>
<proxy-service xmlns:xsi="http://www.w3.org/2001/XMLSchema-instance"
xsi:noNamespaceSchemaLocation="http://repository.warework.com/xsd/proxyservice-1.0.0.xsd">
<clients>
<client name="default-client" connector="…">
<parameter name="config-target" value="…"/>
</client>
</clients>
</proxy-service>
</sample-code:end>
Remember to review the documentation of each Client to know which parameters it accepts.
Create custom Services, Clients, Connectors and Loaders
The creation process of a Service consists of two steps. The first one is about defining your own
Service logic in an interface that extends the ServiceFacade interface (check out this class in
the com.warework.core.service package):
93
<sample-code:java>
import com.warework.core.service.ServiceFacade;
public interface LightingServiceFacade extends ServiceFacade {
public void switchON();
public void switchOFF();
}
</sample-code:end>
The second one has to do with implementing your interface in a class that extends the AbstractService class. This abstract class provides the default functionality to make an object
behave as a Service. Just extend it, implement your interface and write the required methods:
<sample-code:java>
import com.warework.core.service.AbstractService;
import com.warework.core.service.ServiceException;
public class LightingServiceImpl extends AbstractService implements
LightingServiceFacade {
// NOTE 1: List every initialization parameter with the protected
// method "getInitParameterNames()" that exists in the
// AbstractService class.
// NOTE 2: Get the value of an initialization parameter with the
// protected method "getInitParameter(String name)" that exists
// in the AbstractService class.
// ----- AbstractService methods
public void close() throws ServiceException {
// Write here the code required to finish the execution of
// the Service.
}
protected void initialize() throws ServiceException {
// Write here the code required to initialize the execution
// of the Service.
}
protected void configure(Object config) throws ServiceException {
// Write here the code required to configure the Service.
}
// ----- LightingService methods
public void switchON() {
// Specific Service logic here.
}
public void switchOFF() {
// Specific Service logic here.
}
}
</sample-code:end>
If you plan to handle multiple Clients, you have to perform two similar steps. First create your
own Service logic in an interface that extends the ProxyServiceFacade interface (check out
this class in the com.warework.core.service package):
94
<sample-code:java>
import com.warework.core.service.ProxyServiceFacade;
public interface MessengerServiceFacade extends
ProxyServiceFacade {
public void send(String clientName, Item item);
}
</sample-code:end>
After that, implement your interface in a class that extends the AbstractProxyService class.
This abstract class provides the default functionality to make an object behave as a Proxy Ser vice. Just extend it, implement your interface and write the required methods:
<sample-code:java>
import com.warework.core.service.AbstractProxyService;
public class MessengerServiceImpl extends AbstractProxyService
implements MessengerServiceFacade {
// NOTE 1: You can override protected method 'initialize()' to
// customize your initialization process.
// NOTE 2: You can override protected method 'termiante()' to
// customize your finalization process.
// NOTE 3: You can override protected method
// 'configure(Object config)' to customize the configuration process.
// NOTE 4: You can invoke protected method 'getClient(String name)'
// to get clients instances.
public void send(String clientName, Object item) {
// Specific Service logic here.
}
}
</sample-code:end>
To create Clients for Proxy Services you also need to perform two steps. First write the specific
Client/Service logic in an interface that extends the ClientFacade interface (check out this
class in the com.warework.core.service.client package) and after that, implement this
interface in a class that extends the AbstractClient class:
Client interface
<sample-code:java>
import com.warework.core.service.client.ClientFacade;
public interface MessengerFacade extends ClientFacade {
public void send(Item item);
}
</sample-code:end>
Normal messenger implementation
<sample-code:java>
import com.warework.core.service.client.AbstractClient;
import com.warework.core.service.client.ClientException;
public class NormalMessenger extends AbstractClient implements
95
MessengerFacade {
// NOTE 1: You can override protected method 'initialize()' to
// customize the initialization process of the Client.
// NOTE 2: You can invoke protected method 'getScope()' to get
// the scope where this Client exists.
// ----- MessengerFacade methods
public void send(Item item) {
// Write here the client logic.
}
// ----- AbstractClient methods
protected void close() throws ClientException {
// Write here the code required to close the connection
// with the Client.
}
protected boolean isClosed() {
// Write here the code required to decide if the connection
// with the client is closed.
return false;
}
}
</sample-code:end>
Fast messenger implementation
<sample-code:java>
import com.warework.core.service.client.AbstractClient;
import com.warework.core.service.client.ClientException;
public class FastMessenger extends AbstractClient implements
MessengerFacade {
// NOTE 1: You can override protected method 'initialize()' to
// customize the initialization process of the Client.
// NOTE 2: You can invoke protected method 'getScope()' to get
// the scope where this Client exists.
// ----- MessengerFacade methods
public void send(Item item) {
// Write here the Client logic.
}
// ----- AbstractClient methods
protected void close() throws ClientException {
// Write here the code required to close the connection
// with the Client.
}
protected boolean isClosed() {
// Write here the code required to decide if the connection
// with the Client is closed.
return false;
}
}
96
</sample-code:end>
Every time you create a Client for a Service, you need to create at least one Connector for that
Client. Now we are going to create two Connectors: one for the Fast Messenger Client and another one for the Normal Messenger Client. This time we just need to extend the AbstractConnector class that exists in the package com.warework.core.service.client.connector:
Normal messenger Connector implementation
<sample-code:java>
import com.warework.core.service.client.connector.AbstractConnector;
import com.warework.core.service.client.connector.ConnectorException;
public class NormalMessengerConnector extends AbstractConnector {
// NOTE 1: You can override protected method 'createClient()' to
// customize the creation and initialization process of the
// Client.
// NOTE 2: You can invoke protected method 'getScope()' to get
// the scope where this Client exists.
// NOTE 3: You can invoke protected method
// 'getInitParameterNames()' to get the names of initialization
// parameters of the Connector.
// NOTE 4: You can invoke protected method
// 'getInitParameter(String name)' to get the value of an
// initialization parameters of the Connector.
public Class getClientType() {
return NormalMessenger.class;
}
public Object getClientConnection() throws ConnectorException {
// Create and return here the object that represents the
// connection with the Client. You may call
// "createConnectionSource()" method here.
return null;
}
protected Class getServiceType() {
return MessengerServiceImpl.class;
}
protected Object createConnectionSource()
throws ConnectorException {
// Create and return here the object that holds the
// information required to create/get the connection with
// the Client.
return null;
}
}
</sample-code:end>
Fast messenger Connector implementation
<sample-code:java>
import com.warework.core.service.client.connector.AbstractConnector;
import com.warework.core.service.client.connector.ConnectorException;
97
public class FastMessengerConnector extends AbstractConnector {
// NOTE 1: You can override protected method 'createClient()' to
// customize the creation and initialization process of the
// Client.
// NOTE 2: You can invoke protected method 'getScope()' to get
// the Scope where this Client exists.
// NOTE 3: You can invoke protected method
// 'getInitParameterNames()' to get the names of initialization
// parameters of the Connector.
// NOTE 4: You can invoke protected method
// 'getInitParameter(String name)' to get the value of an
// initialization parameters of the Connector.
public Class getClientType() {
return FastMessenger.class;
}
public Object getClientConnection() throws ConnectorException {
// Create and return here the object that represents the
// connection with the Client. You may call
// "createConnectionSource()" method here.
return null;
}
protected Class getServiceType() {
return MessengerServiceImpl.class;
}
protected Object createConnectionSource()
throws ConnectorException {
// Create and return here the object that holds the
// information required to create/get the connection with
// the Client.
return null;
}
}
</sample-code:end>
You can also create custom XML Loaders for your own Services. The first thing you need to do
is to create the Loader that reads the XML file and parses it into a Java object. Just create a
class that extends the AbstractSAXLoader class that exists in the com.warework.core.loader package, like this:
<sample-code:java>
public class SampleSAXLoader extends AbstractSAXLoader {
public void startElement(String uri, String localName, String qName,
Attributes attributes) throws SAXException {
// Parse every XML tag here with the "qName" argument.
// Each value for the object to return is set here.
// This method is executed when <> open tag is found.
}
public void endElement(String uri, String localName, String qName)
throws SAXException {
// Parse every XML tag here with the "qName" variable.
// Each value for the object to return is set here.
// This method is executed when </> close tag is found.
98
}
protected Object getConfiguration() {
// Return here the object that represents the content of the XML file.
return null;
}
}
</sample-code:end>
In general, you have to perform the following steps to properly implement this class:
1. Create an object/attribute that represents the XML. It will store the values from the XML
file in it.
2. Parse the XML file with SAX methods startElement and endElement. In these
methods you have to fill the attribute with the values you find in the XML file.
3. Return the attribute at getConfiguration method when the work is done.
Here it is an example:
<sample-code:java>
public class SampleSAXLoader extends AbstractSAXLoader {
// Object that represents the XML file.
private ServiceConfig config;
public void startElement(String uri, String localName, String qName,
Attributes attributes) throws SAXException {
if ((qName.equals("firstTag")) ||
(localName.equals("firstTag"))) {
// Create the object that represents the XML file.
config = new ServiceConfig();
} else if ((qName.equals("anotherTag")) ||
(localName.equals("anotherTag"))) {
config.setName(attributes.getValue("name"));
} else if (...) {
...
}
}
// "endElement" method is optional.
protected Object getConfiguration() {
return config;
}
}
</sample-code:end>
Finally, we have to reference the new Loader in the Service:
<sample-code:xml>
<?xml version="1.0" encoding="UTF-8"?>
<scope xmlns:xsi="http://www.w3.org/2001/XMLSchema-instance"
xsi:noNamespaceSchemaLocation="http://repository.warework.com/xsd/scope1.0.0.xsd">
<services>
99
<service name="sample-service"
class="com.warework.service.sample.SampleServiceImpl">
<parameter name="config-class"
value="com.warework.core.loader.SampleSAXLoader" />
<parameter name="config-target"
value="/META-INF/system/sample-service.xml" />
</service>
</services>
</scope>
</sample-code:end>
100
Chapter 7: Providers
This Framework integrates a specific type of component called “Provider” that handles how objects are created and retrieved. Some Providers may create new instances of objects while oth ers may reuse the existing ones, some may be very simple while others may delegate their operations to more powerful frameworks, some may provide objects locally while others do re motely... Each one decides how to work, but all of them behave in the same way: as objects
providers. Warework Providers present these features:
•
Encapsulation. They group a set of related functions about a particular topic.
•
Common life cycle. Each Provider goes through a series of states before they can be
used and destroyed.
•
Centrally controlled. Providers are created and stored in Scopes. You can use a Provider via a Scope.
•
Configurable. Providers may be configured on start-up with a set of parameters.
•
Pre-built or custom. You can use existing Warework Providers or create your own
ones.
•
Extend the functionality of systems. Providers are distributed as JAR files that, when
plugged in the Framework, provide extra support for your application.
Software developers can add into the Framework as many Providers as they need. Check out
the Web site (menu option: Download) to view Providers created by Warework and download
those that fit your needs.
Provider life cycle
Even that each Provider defines its own behavior, they all must extend the AbstractProvider class (check out the com.warework.core.provider package) to accomplish the default requisites of a Provider life cycle. When a class implements this interface, it is managed by
the Framework in the following way:
101
1. Create a new instance of the Provider. When you invoke method createProvider() in a Scope, it creates a new Provider only if it does not exist in
that Scope.
2. Initialize the Provider. When a new Provider instance is created, it may prepare itself before accepting objects requests.
3. Store the Provider in the Scope. Once the Provider is created and initialized,
it is stored in the Scope where the createProvider() was invoked.
4. Request objects. At this point, Provider is running and you can use it by invoking Scope methods like getObject().
5. Shut down the Provider. The method removeProvider() that exists in
every Scope is responsible for telling to a specific Provider that it has to stop
working and that it must prepare to be erased.
6. Remove the Provider in the Scope. After a Provider stops the execution, it is
removed from the Scope where it belongs to.
Configuration
When a Provider is created, it may accept a set of parameters that can be used to specify how
the Provider must be initialized and also to represent specific constants that define how the Provider must work.
Suppose we want to specify if foods that are out of date have to be available in a Market System. We could write something like this:
<sample-code:java>
// Create a map where to store the configuration parameters.
Hashtable parameters = new Hashtable();
// Configure how the Provider must work.
parameters.put("out-of-date-food", Boolean.FALSE);
102
// Create a new Provider and register it in the Scope.
scope.createProvider("food-provider", FoodProvider.class, parameters);
</sample-code:end>
These parameters indicate how the Provider must work but they can also provide information for
the initialization process of the Provider:
<sample-code:java>
// Create a map where to store the configuration parameters.
Hashtable parameters = new Hashtable();
// Configure how the Provider must be initialized.
parameters.put("test-food-on-startup", Boolean.TRUE);
// Create a new Provider and register it in the Scope.
scope.createProvider("food-provider", FoodProvider.class, parameters);
</sample-code:end>
Each Provider can use those parameters how and whenever they want. By default, Providers
define two parameters that can be used by the developer to configure the initialization and operation processes. The first one is defined with the constant PARAMETER_CreateObjects that
exists in the AbstractProvider class of the com.warework.core.provider package
and determines if every object managed by the Provider has to be bounded into the Scope
automatically when the Provider is created.
<sample-code:java>
// Create a map where to store the configuration parameters.
Hashtable parameters = new Hashtable();
// Configure how the Provider must be initialized.
parameters.put(AbstractProvider.PARAMETER_CreateObjects, Boolean.TRUE);
// Create a new Provider, register it in the Scope and bound every
// object into the Scope.
scope.createProvider("food-provider", FoodProvider.class, parameters);
// Get a fruit object from the 'food-provider'.
Food fruit = (Food) scope.getObject("fruit");
</sample-code:end>
The second one is defined with the constant PARAMETER_DisconnectOnLookup that exists in
the same class and indicates if the connection with the Provider has to be closed after each
getObject operation is requested (if so, the connection is opened on the next getObject operation). This parameter let us retrieve objects that come from a relational database very easily
as the Provider can handle when to open and close the connection with the database automatically.
<sample-code:java>
// Create a map where to store the configuration parameters.
Hashtable parameters = new Hashtable();
// Configure how the Provider must work.
parameters.put(AbstractProvider.PARAMETER_DisconnectOnLookup,
Boolean.TRUE);
parameters.put("server", "192.168.0.1");
parameters.put("user", "john");
parameters.put("password", "123");
// Create a new Provider and register it in the Scope.
scope.createProvider("food-provider", FoodProvider.class, parameters);
// Connect to the 'food' database, retrieve a fruit object and close the
103
// connection with the database.
Food fruit = (Food) scope.getObject("fruit");
</sample-code:end>
For Providers that have to exist when a Scope is created, you need to define these Providers in
an XML configuration file. The following example shows how to define multiple Providers in an
XML file:
<sample-code:xml>
<?xml version="1.0" encoding="UTF-8"?>
<scope xmlns:xsi="http://www.w3.org/2001/XMLSchema-instance"
xsi:noNamespaceSchemaLocation="http://repository.warework.com/xsd/scope1.0.0.xsd">
<providers>
<provider name="sample1-provider"
class="com.warework.provider.Sample1Provider" />
<provider name="sample2-provider"
class="com.warework.provider.Sample2Provider" />
…
</providers>
</scope>
</sample-code:end>
These Providers do not have parameters. That is, just with the name and the class, the Provider
should be ready to run.
To retrieve an object from these Providers we can write something like:
<sample-code:java>
// Get an instance of a Scope.
ScopeFacade scope = ...;
// Get an object from "Sample1" Provider.
Object obj = scope.getObject("sample1-provider", "object-name");
</sample-code:end>
Most of the times, you will need to specify a set of parameters that configure how the Provider
must work. This is an example of a Provider configured with parameters:
<sample-code:xml>
<?xml version="1.0" encoding="UTF-8"?>
<scope xmlns:xsi="http://www.w3.org/2001/XMLSchema-instance"
xsi:noNamespaceSchemaLocation="http://repository.warework.com/xsd/scope1.0.0.xsd">
<providers>
<provider name="standard-provider"
class="com.warework.provider.StandardProvider">
<parameter name="default-set" value="java.util.HashSet" />
<parameter name="default-map" value="java.util.HashMap" />
<parameter name="default-list" value="java.util.ArrayList" />
</provider>
</providers>
</scope>
</sample-code:end>
In this example, the Standard Provider accepts parameters to define which classes it can create
(review how this Provider works later on). You will need to review the parameters that a Provider can accept with the implementation class of the Provider (in this example, the StandardProvider.class).
104
Once you have defined at least one Provider, you can also define in an XML file references to
objects that exist in a Provider. Check this out with the following code:
<sample-code:xml>
<?xml version="1.0" encoding="UTF-8"?>
<scope xmlns:xsi="http://www.w3.org/2001/XMLSchema-instance"
xsi:noNamespaceSchemaLocation="http://repository.warework.com/xsd/scope1.0.0.xsd">
<providers>
<provider name="standard-provider"
class="com.warework.provider.StandardProvider">
<parameter name="load-objects" value="false"/>
<parameter name="default-set" value="java.util.HashSet"/>
<parameter name="default-map" value="java.util.HashMap"/>
<parameter name="default-list" value="java.util.ArrayList"/>
</provider>
</providers>
<objects>
<object name="map" provider="standard-provider" object="default-map"/>
</objects>
</scope>
</sample-code:end>
This time, you can retrieve new HashMap instances just by writing this:
<sample-code:java>
// Get a new Map from the Standard Provider.
HashMap map = (HashMap) scope.getObject("map");
</sample-code:end>
Every time this line of code is executed you will get a new HashMap. Review how the Provider
works because it may retrieve unique instances (singleton) or objects from remote machines.
Create custom Providers
To create a Provider you just need to extend the AbstractProvider class that exists in the
com.warework.core.provider package and implement the required methods:
<sample-code:java>
import java.util.Enumeration;
import com.warework.core.provider.AbstractProvider;
import com.warework.core.provider.ProviderException;
public class FoodProvider extends AbstractProvider {
// NOTE 1: List every initialization parameter with the protected
// method "getInitParameterNames()" that exists in the
// AbstractProvider class.
// NOTE 2: Get the value of an initialization parameter with the
// protected method "getInitParameter(String name)" that exists
// in the AbstractProvider class.
protected void initialize() throws ProviderException {
// Write here the code required to prepare the execution of
// the Provider. You may do not write nothing in here.
105
}
protected void connect() throws ProviderException {
// Write here the code required to connect with the source that
// stores the objects. You may do not write nothing in here.
// This is the right place where to start a connection with a
// database.
}
protected void disconnect() throws ProviderException {
// Write here the code required to disconnect with the source
// that stores the objects. You may do not write nothing in here.
// This is the right place where to close a connection with a
// database.
}
protected boolean isClosed() {
// Write here the code required to decide if the connection with
// the source that stores the objects is closed.
return false;
}
protected Object getObject(String name) {
// Write here the code required to retrieve an object. This is
// the main method of every Provider and here you must specify
// how each object may be created and/or configured.
return null;
}
protected Enumeration getObjectNames() throws ProviderException {
// Write here the code required to retrieve the name of every
// object that this class can provide.
// This method is called automatically when parameter
// AbstractProvider.PARAMETER_CreateObjects is set to TRUE.
return null;
}
}
</sample-code:end>
106
PART II: SERVICES
107
Chapter 8: Log Service
The Log Service is the central unit where to perform log operations in the Framework. It allows
developers to send messages at runtime, with a level of granularity and in a chosen output (for
example: consoles, files, databases, etc.).
As this Service is a Proxy Service, you can use multiple Loggers within one common interface
and interact with all of them whenever you need. This functionality helps developers to switch
between Log4j and Logback very quickly and without pain. It is also very useful for keeping the
same log messages on different platforms.
Create and retrieve a Log Service
To create the Log Service in a Scope, you always need to provide a unique name for the Se rvice and the LogServiceImpl class that exists in the com.warework.service.log package.
<sample-code:java>
// Create the Log Service and register it in a Scope.
scope.createService("log-service", LogServiceImpl.class, null);
</sample-code:end>
Once it is created, you can retrieve it using the same name (when you retrieve an instance of a
Log Service, you will get the LogServiceFacade interface):
<sample-code:java>
// Get an instance of the Log Service.
LogServiceFacade logService = (LogServiceFacade) scope.
getService("log-service");
</sample-code:end>
The following example shows how to define the Log Service in an XML file:
<sample-code:xml>
<?xml version="1.0" encoding="UTF-8"?>
<scope xmlns:xsi="http://www.w3.org/2001/XMLSchema-instance"
xsi:noNamespaceSchemaLocation="http://repository.warework.com/xsd/scope1.0.0.xsd">
<services>
<service name="log-service"
class="com.warework.service.log.LogServiceImpl"/>
</services>
</scope>
</sample-code:end>
Most of the times, you will need to specify a set of parameters that configure how the Service
must work. Review the next section to know how to define Loggers/Clients with these param eters.
108
Add and connect Loggers
Now the Log Service is running but you need at least one Logger to perform log operations. To
add a Logger into the Log Service you have to invoke method createClient() that exists in
its Facade. This method requests a name for the new Logger and a Connector which performs
the creation of the Logger. Let’s see how to register a sample Logger in this Service:
<sample-code:java>
// Add a Logger in the Log Service.
logService.createClient("sample-logger", SampleConnector.class, null);
</sample-code:end>
The SampleConnector class creates the Sample Logger and stores it in the Log Service. After
that, we have to tell the Log Service that we want to perform operations with the Sample Log ger. We do so by connecting the Logger:
<sample-code:java>
// Connect the sample Logger.
logService.connect("sample-logger");
</sample-code:end>
To configure Loggers in XML you need to create a separate XML file for the Log Service and
reference it from the Scope XML file. The following example shows how to define a Log Service
and the configuration file that it requires for the Loggers. The first thing you have to do is to register the Service as we did before, but this time with initialization parameters:
<sample-code:xml>
<?xml version="1.0" encoding="UTF-8"?>
<scope xmlns:xsi="http://www.w3.org/2001/XMLSchema-instance"
xsi:noNamespaceSchemaLocation="http://repository.warework.com/xsd/scope1.0.0.xsd">
<services>
<service name="log-service"
class="com.warework.service.log.LogServiceImpl">
<parameter name="config-class"
value="com.warework.core.loader.ProxyServiceSAXLoader" />
<parameter name="config-target"
value="/META-INF/system/log-service.xml" />
</service>
</services>
</scope>
</sample-code:end>
Once it is registered in the Scope we proceed with the creation of the Log Service configuration
file. Based on the previous example, this could be the content of the log-service.xml file:
<sample-code:xml>
<?xml version="1.0" encoding="UTF-8"?>
<proxy-service xmlns:xsi="http://www.w3.org/2001/XMLSchema-instance"
xsi:noNamespaceSchemaLocation="http://repository.warework.com/xsd/proxyservice-1.0.0.xsd">
<clients>
<client name="sample-logger"
connector="com.warework.service.log.client.connector.ConsoleConnector"/>
</clients>
</proxy-service>
</sample-code:end>
109
You can define as many Loggers as you need for the Log Service. Once the Scope is started,
you can work with Clients like this:
<sample-code:java>
// Get an instance of a Scope.
ScopeFacade scope = ...;
// Get the facade of the Log Service.
LogServiceFacade logService = (LogServiceFacade) scope.
getService("log-service");
// Connect the Client.
logService.connect("sample-logger");
// Perform operations with the Client.
…
// Disconnect the Client.
logService.disconnect("sample-logger");
</sample-code:end>
Some Clients may require configuration parameters. The following example shows how a Client
specifies one initialization parameter:
<sample-code:xml>
<?xml version="1.0" encoding="UTF-8"?>
<proxy-service xmlns:xsi="http://www.w3.org/2001/XMLSchema-instance"
xsi:noNamespaceSchemaLocation="http://repository.warework.com/xsd/proxyservice-1.0.0.xsd">
<clients>
<client name="sample-logger" connector="…">
<parameter name="…" value="…"/>
</client>
</clients>
</proxy-service>
</sample-code:end>
Remember to review the documentation of each Logger to know which parameters it accepts.
Perform Log operations
Each Logger performs log operations with a level of granularity. Warework defines a common
set of levels in the LogServiceConstants class that exists in the com.warework.service.log package and each one designates a log message in a specific context.
LogServiceConstants.LOG_LEVEL_Debug
LogServiceConstants.LOG_LEVEL_Info
LogServiceConstants.LOG_LEVEL_Warning
LogServiceConstants.LOG_LEVEL_Fatal
This level designates detailed informational events
used to debug applications.
This level designates informational messages that
highlight the progress of the application.
This level designates a potential problem.
This level designates serious failures that will presumably lead the application to abort.
These levels are generic and mostly used by all Loggers. Even when Loggers define more
levels, Warework recommends you using only those specified at LogServiceConstants to
110
keep compatibility across them. It is helpful if you plan to change the Logger in the future, use
many of them at the same time or move your application into a different environment.
To log a message with the Log Service is quite simple: just invoke the log method of the Log
Service Facade with the name of the Logger to use, the message to log and the level of the log.
<sample-code:java>
// Log a message using a standard log level.
logService.log("sample-logger", "A message from the Log Service",
LogServiceConstants.LOG_LEVEL_Info);
</sample-code:end>
You can also use each Logger levels directly with the specific constants that it defines in the Client class.
<sample-code:java>
// Log a message with a specific sample Logger level.
logService.log("sample-logger", "Another message from the Log Service",
SampleLogger.LOG_LEVEL_Trace);
</sample-code:end>
As log operations are very common, Warework includes a faster way to perform them with the
log method that exists in the Facade of each Scope. This method permits to invoke a log operation in a default Logger without the need to retrieve the Log Service.
<sample-code:java>
// Log a message from a scope.
scope.log("This is faster!", LogServiceConstants.LOG_LEVEL_Info);
</sample-code:end>
The previous line of code looks in the Scope for a Service named "log-service" that implements
the com.warework.service.log.LogServiceFacade interface and then invokes the log
operation on it with a Logger named "default-client". So, in order to make this method work, we
have to create first the Log Service and a Logger with specific names.
<sample-code:java>
// Create the Log Service.
LogServiceFacade logService = (LogServiceFacade) scope
.createService("log-service", LogServiceImpl.class, null);
// Create a Logger.
logService.createClient("default-client", SampleConnector.class,
null);
</sample-code:end>
The Facade of the Scope also provides three short methods to perform log. Check out how to
log info, debug and warning messages in both ways:
<sample-code:java>
// Both ways to log with INFO level.
scope.log("Fast INFO log", LogServiceConstants.LOG_LEVEL_Info);
scope.info("Fastest INFO log");
// Both ways to log with DEBUG level.
scope.log("Fast DEBUG log", LogServiceConstants.LOG_LEVEL_Debug);
scope.debug("Fastest DEBUG log");
// Both ways to log with WARNING level.
scope.log("Fast WARNING log", LogServiceConstants.LOG_LEVEL_Warning);
scope.warning("Fastest WARNING log");
</sample-code:end>
111
Console Logger
Warework includes by default a very simple Logger that performs log operations only with the
console. If you are looking for a Logger where to execute complex operations you should better
use the Apache Log4j Logger or similar. This Console Logger is suitable only if you plan to:
•
Create a simple application.
•
Run a quick test with the Framework.
•
Perform simple log operations on many different environments.
Add a Console Logger
To add a Console Logger into the Log Service you have to invoke method createClient()
that exists in its Facade just with a name and the ConsoleConnector class because this Logger does not accept to be configured. Let see how to register it:
<sample-code:java>
// Add a console Logger in the Log Service.
logService.createClient("console-logger", ConsoleConnector.class, null);
</sample-code:end>
Check it now how to do it with XML:
<sample-code:xml>
<?xml version="1.0" encoding="UTF-8"?>
<proxy-service xmlns:xsi="http://www.w3.org/2001/XMLSchema-instance"
xsi:noNamespaceSchemaLocation="http://repository.warework.com/xsd/proxyservice-1.0.0.xsd">
<clients>
<client name="console-logger"
connector="com.warework.service.log.client.connector.ConsoleConnector"/>
</clients>
</proxy-service>
</sample-code:end>
Working with the Console Logger
You can perform operations with the Console Logger in the Log Service Facade. You have to
invoke the log method with the name of the Console Logger to use, the message to log and the
level of the log.
The Console Logger defines four log levels that exactly match with the ones defined at LogServiceConstants:
ConsoleLogger.LOG_LEVEL_Debug
ConsoleLogger.LOG_LEVEL_Info
ConsoleLogger.LOG_LEVEL_Warning
ConsoleLogger.LOG_LEVEL_Fatal
This level designates detailed informational events used
to debug applications.
This level designates informational messages that highlight the progress of the application.
This level designates a potential problem.
This level designates serious failures that will presumably
112
lead the application to abort.
To simplify the usage of the Logger, we will use the Console Logger with the levels defined at
LogServiceConstants class:
<sample-code:java>
// Remember always to connect the Logger first.
logService.connect("console-logger");
// Log a message using the console output.
logService.log("console-logger", "Log this message in the console",
LogServiceConstants.LOG_LEVEL_Info);
</sample-code:end>
This example will show in the console output something like:
[INFO @ <scope-name>] Log this message in the console
Log4j Logger
Log4j Logger gives the possibility to perform log operations with Log4j in Warework. This is a
well-known and very stable Framework, used to log messages on multiple outputs like console,
text files and also databases. If you plan to have fine grained control of what is logged on each
output then Log4j is a very good choice.
Prior to work with this Logger, you should review the Log4j documentation, especially the section related with the configuration. There you will find how to define the target output for the logs
and how to format for them.
Add a Log4j Logger
To add a Log4j Logger into the Log Service you have to invoke method createClient() that
exists in its Facade with a name, a Log4j Connector class and a configuration for the Logger.
You can use two different kinds of Connectors. If you plan to configure Log4j with a properties
file, then you should use Log4jPropertiesConnector as follows:
<sample-code:java>
// Create the configuration for the Logger.
Hashtable config = new Hashtable();
// Set the location of the Log4j configuration file.
config.put(Log4jPropertiesConnector.PARAMETER_ConfigTarget,
"/META-INF/system/log4j.properties");
// Create the Log4j Logger.
logService.createClient("log4j-logger",
Log4jPropertiesConnector.class, config);
</sample-code:end>
The Log4jPropertiesConnector collects the configuration and sets up a Log4j Logger with
the properties file that exists where PARAMETER_ConfigTarget specifies. Please review in
the Log4j documentation how to configure Log4j with properties files. Check it now how to do it
with the Proxy Service XML configuration file:
113
<sample-code:xml>
<?xml version="1.0" encoding="UTF-8"?>
<proxy-service xmlns:xsi="http://www.w3.org/2001/XMLSchema-instance"
xsi:noNamespaceSchemaLocation="http://repository.warework.com/xsd/proxyservice-1.0.0.xsd">
<clients>
<client name="log4j-logger"
connector="com.warework.service.log.client.connector. …
… Log4jPropertiesConnector">
<parameter name="config-target"
value="/META-INF/system/log4j.properties"/>
</client>
</clients>
</proxy-service>
</sample-code:end>
If you plan to configure Log4j with an XML file, then you should use Log4jXMLConnector as
follows:
<sample-code:java>
// Create the configuration for the Logger.
Hashtable config = new Hashtable();
// Set the location of the Log4j configuration file.
config.put(Log4jXMLConnector.PARAMETER_ConfigTarget,
"/META-INF/system/log4j.xml");
// Create the Log4j Logger.
logService.createClient("log4j-logger", Log4jXMLConnector.class, config);
</sample-code:end>
The Log4jXMLConnector collects the configuration and sets up a Log4j Logger with the XML
file that exists where PARAMETER_ConfigTarget specifies. Please review in the Log4j documentation how to configure Log4j with XML files. Check it now how to do it with the Proxy Ser vice XML configuration file:
<sample-code:xml>
<?xml version="1.0" encoding="UTF-8"?>
<proxy-service xmlns:xsi="http://www.w3.org/2001/XMLSchema-instance"
xsi:noNamespaceSchemaLocation="http://repository.warework.com/xsd/proxyservice-1.0.0.xsd">
<clients>
<client name="log4j-logger"
connector="com.warework.service.log.client.connector. …
… Log4jXMLConnector">
<parameter name="config-target"
value="/META-INF/system/log4j.xml"/>
</client>
</clients>
</proxy-service>
</sample-code:end>
It is very important to know that the name you give to the Warework Logger must be the same
name as the Log4j Logger. If we define the Warework Logger like this:
<sample-code:xml>
<?xml version="1.0" encoding="UTF-8"?>
<proxy-service xmlns:xsi="http://www.w3.org/2001/XMLSchema-instance"
xsi:noNamespaceSchemaLocation="http://repository.warework.com/xsd/proxyservice-1.0.0.xsd">
114
<clients>
<client name="log4j-logger"
connector="com.warework.service.log.client.connector. …
… Log4jPropertiesConnector">
<parameter name="config-target"
value="/META-INF/system/log4j.properties"/>
</client>
</clients>
</proxy-service>
</sample-code:end>
The Log4j specific configuration file should have a Logger with that name too. In a Log4j properties configuration file it could be like this:
log4j.logger.log4j-logger=DEBUG, consoleApp
log4j.appender.consoleApp=org.apache.log4j.ConsoleAppender
log4j.appender.consoleApp.layout=org.apache.log4j.PatternLayout
log4j.appender.consoleApp.layout.ConversionPattern=[%d]-[%-5p] - %m%n
Warework gives the possibility to define variables that will be replaced in the Log4j configuration
file. Suppose that we have the following content in a Log4j properties file:
log4j.logger.log4j-logger=DEBUG, consoleApp
log4j.appender.consoleApp=org.apache.log4j.ConsoleAppender
log4j.appender.consoleApp.layout=org.apache.log4j.PatternLayout
log4j.appender.consoleApp.layout.ConversionPattern=[%d]- …
…[%-5p @ %X{variable-user-name}] - %m%n
In this code we have defined a user-name variable. To replace that variable with a value we
can configure the Log4j Logger like this:
<sample-code:xml>
<?xml version="1.0" encoding="UTF-8"?>
<proxy-service xmlns:xsi="http://www.w3.org/2001/XMLSchema-instance"
xsi:noNamespaceSchemaLocation="http://repository.warework.com/xsd/proxyservice-1.0.0.xsd">
<clients>
<client name="log4j-logger"
connector="com.warework.service.log.client.connector. …
… Log4jPropertiesConnector">
<parameter name="config-target"
value="/META-INF/system/log4j.properties"/>
<parameter name="variable-user-name" value="john"/>
</client>
</clients>
</proxy-service>
</sample-code:end>
Now, for every log operation that is executed, the value "john" will be displayed in the output.
You can define every variable you need, just remember to name these variables with the
"variable-" prefix and Warework will replace them for you.
115
Working with the Log4j Logger
As with all Loggers, you can perform operations with the Log4j Logger in the Log Service
Facade. You have to invoke the log method with the name of the Log4j Logger to use, the
message to log and the level of the log.
The Log4j Logger defines the following log levels:
Log4jLogger.LOG_LEVEL_Trace
Log4jLogger.LOG_LEVEL_Debug
Log4jLogger.LOG_LEVEL_Info
Log4jLogger.LOG_LEVEL_Warning
Log4jLogger.LOG_LEVEL_Error
Log4jLogger.LOG_LEVEL_Fatal
This level designates finer-grained informational events
than the DEBUG level.
This level designates detailed informational events used
to debug applications.
Matches LogServiceContants.LOG_LEVEL_Debug
This level designates informational messages that highlight the progress of the application.
Matches LogServiceContants.LOG_LEVEL_Info
This level designates a potential problem.
Matches
LogServiceContants.LOG_LEVEL_Warning
This level designates error events that might still allow the
application to continue running
This level designates serious failures that will presumably
lead the application to abort.
Matches LogServiceContants.LOG_LEVEL_Fatal
To simplify the usage of the Logger, we will use the Log4j Logger with the levels defined at
LogServiceConstants class:
<sample-code:java>
// Remember always to connect the Logger first.
logService.connect("log4j-logger");
// Log a message using the Log4j logger.
logService.log("log4j-logger", "Log this message with Log4j",
LogServiceConstants.LOG_LEVEL_Info);
</sample-code:end>
116
Chapter 9: Data Store Service
The Data Store Service is the central unit where to perform operations with data repositories in
this Framework. It is a Proxy Service so you can manage multiple Data Stores in the same
place like relational databases (MySQL, Oracle, DB2, etc.) or properties files for example. This
Service gives the opportunity to manage any kind of Data Store and work with them using a
common interface.
Operations like connect, disconnect, query, update and commit are supported in this Service.
Check out in the following example how simple is the process of creating a new table in a relational database:
<sample-code:java>
// Get an instance of the Data Store Service.
DatastoreServiceFacade datastoreService = (DatastoreServiceFacade) scope.
getService("datastore-service");
// Connect to the relational database.
datastoreService.connect("my-database");
// Create a new table in the database.
datastoreService.update("my-database", null,
"CREATE TABLE MESSAGES (MESSAGE VARCHAR(99))");
// Disconnect to the database.
datastoreService.disconnect("my-database");
</sample-code:end>
You can also combine the Data Store Service with Providers to load statements from text files
for Data Stores. That is, you can keep in separate files some commands that you need to execute in specific Data Stores. It lets you write, for example, SQL scripts in text files and execute
them just by providing the name of the file. If you are a business application developer, you will
love this feature.
Warework also gives the opportunity to change the way a Data Store is used. This Service is
not just an abstract layer for Data Stores; it also provides the necessary mechanisms to dynam ically update the functionality of a Data Store. This is done with Views and it is where the magic
really begins with this Service.
Create and retrieve a Data Store Service
To create the Data Store Service in a Scope, you always need to provide a unique name for the
Service and the DatastoreServiceImpl class that exists in the com.warework.service.datastore package.
<sample-code:java>
// Create the Data Store Service and register it in a Scope.
scope.createService("datastore-service", DatastoreServiceImpl.class, null);
</sample-code:end>
Once it is created, you can get an instance of it by using the same name (when you retrieve an
instance of a Data Store Service, you will get the DatastoreServiceFacade interface):
117
<sample-code:java>
// Get an instance of the Data Store Service.
DatastoreServiceFacade datastoreService = (DatastoreServiceFacade) scope.
getService("datastore-service");
</sample-code:end>
Add and connect to Data Stores
Now the Data Store Service is running but you need at least one Data Store where to perform
operations. To add a Data Store into the Service you have to invoke method createClient()
that exists in its Facade. This method requests a name for the new Data Store and a Connector
which performs the creation of the Data Store. Let’s see how to register a sample Data Store in
this Service:
<sample-code:java>
// Add a Data Store in the Data Store Service.
datastoreService.createClient("sample-datastore", SampleConnector.class,
null);
</sample-code:end>
The SampleConnector class creates the Sample Data Store and registers it in the Data Store
Service. After that, we have to tell the Data Store Service that we want to perform operations
with the Sample Data Store. We do so by connecting the Data Store:
<sample-code:java>
// Connect the Sample Data Store.
datastoreService.connect("sample- datastore");
</sample-code:end>
Perform Data Store operations
Each Data Store exposes its interface or functionality in two different places. First, you can find
basic and common operations at DatastoreServiceFacade interface. These are operations
that almost every Data Store can execute like connect, disconnect, query, update and
commit. Like every Proxy Service, you have to provide the name of the Data Store where to
perform any of these operations.
The second place where you can execute operations is in a View of a Data Store. Views are
wrappers that upgrade the functionality provided by the Data Store (or another View) and they
are organized like stacks. That is, you can add a View on top of a Data Store but you can also
add a View on top of another View. This level of organization lets you transform the way which
data is processed. Later on you will see that you can get a View of a Data Store with the DatastoreServiceFacade interface.
Example: we can have a JDBC Data Store to perform simple database operations with SQL
commands. If we want to execute more specific operations we can add a RDBMS View (specific
for relational databases) on top of the JDBC Data Store.
Common operations
Now we are going to review the basic Data Store operations provided by the DatastoreServiceFacade interface. We can group these operations as follows:
•
Connect and disconnect Data Stores
118
The first operation you have to invoke to start working with a Data Store is connect:
<sample-code:java>
// Connect the Sample Data Store.
datastoreService.connect("sample-datastore");
</sample-code:end>
If sample-datastore represents a relational database then connect will start up a
connection with the database. If it represents a properties file then it will open the file.
Each Data Store handles the connect operation in a specific way.
After you perform the connection, you typically will execute other Data Store operations
like query, update or commit. Once the job is done, you will need to close the Data
Store:
<sample-code:java>
// Disconnect the Sample Data Store.
datastoreService.disconnect("sample-datastore");
</sample-code:end>
•
Query Data Stores
There are multiple methods named query where you can retrieve information from a
Data Store. The first one allows you to directly query data with a statement that is supported by the Data Store. For example, if sample-datastore represents a relational
database then we could query the Data Store like this:
<sample-code:java>
// Query the Sample Data Store.
Object result = datastoreService.
query("sample-datastore", "SELECT * FROM HOME_USER");
</sample-code:end>
Check it out now how easy is to make the sample-datastore behave as a different
Data Store, like a properties file for example:
<sample-code:java>
// Get the value of the 'user.name' property in the Sample Data Store.
String value = (String) datastoreService.
query("sample-datastore", "user.name");
</sample-code:end>
Very important facts to consider about this method:
As always with Proxy Services, you have to indicate the name of the Client
(Data Store in this case) where to execute the query statement.
Each Data Store accepts a specific query language.
Each Data Store returns a specific type of object.
Please review the documentation associated to each Data Store to know which query
language it accepts and what sort of object is returned.
When you query a Data Store you do not perform the query directly on the Data Store,
instead you will execute the query in a View that wraps the Data Store. By default, this
query method performs the operation in the View that is on top of the stack of Views of
the Data Store (the "Current View"). But wait; did we add any View in the Data Store?
119
Well, every time you create a new Data Store, the Data Store Service creates a default
View for the Data Store, wraps the Data Store with the default View and then saves the
default View (not the Data Store, because the View contains the Data Store and not the
other way) for later use. That is why you will always perform operations with Views and
not directly with Data Stores.
To execute the query in a specific View you have to provide the class or the name of
the View. Check it out with an example: suppose we have a View that is implemented
with class SampleView1 and it is responsible for transforming to uppercase the queries
of a properties file Data Store. If we add this View in the Properties Data Store and we
query it by specifying the class of the View, then we will get results/strings in uppercase:
<sample-code:java>
// Value of property 'user.name.john' is 'John Wood'.
// 'query' returns 'JOHN WOOD'.
String name = (String) datastoreService.
query("sample-datastore", SampleView1.class, "user.name.john");
</sample-code:end>
We can also use this View by giving the name of the View:
<sample-code:java>
// Value of property 'user.name.john' is 'John Wood'.
// 'query' returns 'JOHN WOOD'.
String name = (String) datastoreService.
query("sample-datastore", "sample-view1", "user.name.john");
</sample-code:end>
The difference about providing the name or the class of the View is:
By name you retrieve exactly the View that you are looking for. This is typically
the best option in most cases.
By providing the class you retrieve the first View in the stack that matches the
given class.
If we now add SampleView2 to transform queries to lowercase then the Data Store will
have two Views (SampleView2 is on top of SampleView1 and SampleView1 is on
top of the properties Data Store):
<sample-code:java>
// Value of property 'user.name.john' is 'John Wood'.
// 'query' returns 'john wood'.
String name = (String) datastoreService.
query("sample-datastore", SampleView2.class, "user.name.john");
</sample-code:end>
With this code we get results in lowercase and, as SampleView2 is now the Current
View, we can get the same results with the following code:
<sample-code:java>
// Value of property 'user.name.john' is 'John Wood'.
// 'query' returns 'john wood'.
// We use the View on top of the stack.
String name = (String) datastoreService.
query("sample-datastore", "user.name.john");
</sample-code:end>
The powerful idea about this is that you can choose which specific View to use when
you run a query. Let us now query the Data Store to retrieve again results in uppercase:
120
<sample-code:java>
// Value of property 'user.name.john' is 'John Wood'.
// 'query' returns 'JOHN WOOD'.
String name = (String) datastoreService.
query("sample-datastore", SampleView1.class, "user.name.john");
</sample-code:end>
This time we do not use the Current View (SampleView2), instead we indicate the
Data Store Service to retrieve the View that we want and perform the query on it.
Another way to search for data in a Data Store is by loading and executing statements
that exist in a Provider. This functionality allows you to read queries from files and run
them in the Data Store, for example: you can setup a Provider to read SQL statements
from text files and execute each one in a relational database, just by specifying the
name of the Provider and the name of the text file to read. For the next sample code we
are going to suppose that:
sample-datastore represents now a relational database.
There is a Provider named sql-provider that reads text files from a specific
directory. When you request an object from this Provider, the name given is
used to read the file. For example: if we request an object named listusers, this Provider looks for a file named list-users.sql in the directory,
reads the file and return its content as a String object.
And this is the example:
<sample-code:java>
// Query the Sample Data Store.
Object result = datastoreService.
query("sample-datastore", "sql-provider", "list-users", null);
</sample-code:end>
With this utility you can save prepared statements in a directory for any Data Store. You
can also define some variables for these queries and replace them later on with specific
values. Suppose that list-users.sql contains the following code:
<sample-code:sql>
SELECT * FROM HOME_USER A WHERE A.ID = ${USER_ID}
</sample-code:end>
In this query we have defined a variable named USER_ID. We can assign a value to
this variable to complete the query and then run it in the Data Store. This is done as follows:
<sample-code:java>
// Values for variables.
Hashtable values = new Hashtable();
// Set variables to filter the query.
values.put("USER_ID", new Integer(8375));
// Query the Sample Data Store.
Object result = datastoreService.
query("sample-datastore", "sql-provider", "list-users", values);
</sample-code:end>
121
You can define as many variables as you need but only when the Data Store supports
it. Not every Data Store can replace variables with values so please review the documentation of each Data Store to know if this functionality is enabled.
query methods also allows you to define in which View execute the query that exists in
a Provider. Suppose that we have a View that is implemented with class SampleView3
and it is responsible for transforming to uppercase the queries of a relational database.
<sample-code:java>
// Get the results in uppercase.
Object result = datastoreService.
query("sample-datastore", SampleView3.class,
"sql-provider", "list-users", null);
</sample-code:end>
It works as we saw before. We specify where to execute the query, from the stack of
Views of the Data Store, to get a result in a specific way.
•
Update Data Stores
Before proceed with this section, read the previous point because update operations
are used in the same way. This time, instead querying for data in a Data Store, you will
create or modify information in a Data Store. For example, if sample-datastore represents a relational database then we could create a new table in the Data Store like
this:
<sample-code:java>
// Create a new table in the database.
datastoreService.update("sample-datastore",
"CREATE TABLE MESSAGES (MESSAGE VARCHAR(99))");
</sample-code:end>
If sample-datastore represents now a properties file then we could set a new property in the Data Store like this:
<sample-code:java>
// Set a new property in the properties file.
datastoreService.update("sample-datastore",
"user.name=John Wood");
</sample-code:end>
Each Data Store performs the update operation in a specific manner. If you require ex ecuting update in a View, you can specify it by providing the name of the View or the
implementation class of the View:
<sample-code:java>
// Save properties in uppercase.
datastoreService.update("sample-datastore", "sample-view1",
"user.name=John Wood");
// Update in the first View of the stack that matches given class.
datastoreService.update("sample-datastore", SampleView1.class,
"user.name=John Wood");
</sample-code:end>
You can also read update statements from Providers:
<sample-code:java>
// Read 'create-contact.sql' and execute it.
datastoreService.update("sample-datastore",
"sql-provider", "create-contact", null);
122
</sample-code:end>
Let us say that we want to create a new user in the database, we can define a script
named create-user.sql like this:
<sample-code:sql>
INSERT INTO HOME_USER (ID, NAME) VALUES (${USER_ID}, ${USER_NAME})
</sample-code:end>
Then replace these variables with the values that you need:
<sample-code:java>
// Values for variables.
Hashtable values = new Hashtable();
// Set variables for the update statement.
values.put("USER_ID", new Integer(3));
values.put("USER_NAME", "Ian Sharpe");
// Create a new user in the database.
datastoreService.update("sample-datastore", "sql-provider",
"create-user", values);
</sample-code:end>
•
Commit Data Stores
Some Data Stores require you to confirm that latest update operations have to be executed. That is, you may run multiple update operations in a Data Store and it will not
make these changes available until you invoke the commit method. It is like working
with a text file in a note pad application. You write some text there, but it is not written
into disk until you press the Save button. Databases, for example, typically require you
to perform commit in order to persist the data. Please review the documentation of
each Data Store to understand how it works with this operation.
You can commit changes just by providing the name of the Data Store to execute the
operation:
<sample-code:java>
// Commit changes in a Data Store.
datastoreService.commit("sample-datastore");
</sample-code:end>
If you want to commit changes on every Data Store at once, then invoke commitAll:
<sample-code:java>
// Commit changes in every Data Store.
datastoreService.commitAll();
</sample-code:end>
Working with Views
Data Stores implement the basic functionalities that allow operating with specific data reposit ories. They expose this functionality with the DatastoreServiceFacade interface, with the
methods that we reviewed in the previous section: connect, disconnect, query, update
and commit. A key fact about this is that you cannot get an instance of a Data Store.
Another way to work with Data Stores is using Views. They let you to change the interface of a
Data Store and provide a different set of methods to better adjust to your needs. Views are very
handy when:
123
•
You have to execute specialized operations in a specific type of Data Store.
•
You need to handle a Data Store in a separate class, not with the Data Store Service.
That is, you can get an instance of a View and work with it outside the Service.
•
You require transforming data obtained from a Data Store or data to be saved in the
Data Store.
•
You want the same Data Store to provide multiple interfaces to work with it.
In order to work with Views, you always have to associate at least one View to a Data Store.
The following example shows how to create a fictitious Data Store and how to associate a View
to it:
<sample-code:java>
// Create a Data Store in the Data Store Service.
datastoreService.createClient("sample-datastore", SampleConnector.class,
null);
// Add a View on top of the Data Store.
datastoreService.addView("sample-datastore", SampleView1.class,
"sample-view1", null, null);
</sample-code:end>
When the second line of code is executed, the functionality of sample-datastore is updated
to behave as SampleView1 indicates. This View is added on top of the Data Store in a way
that it wraps the operations provided by the Data Store and now, every time you interact with
the Data Store, you do it through the View. Check it out with the following image:
This example shows that SampleView1 completely isolates the Data Store. Sometimes you
may need to add more Views on top of existing ones to construct a stack of Views. This is great
because it allows you to manage multiple interfaces for the same Data Store and choose the
one you need for a specific operation. Check out this code:
<sample-code:java>
// Create a Data Store in the Data Store Service.
datastoreService.createClient("sample-datastore", SampleConnector.class,
null);
// Add first View.
datastoreService.addView("sample-datastore", SampleView1.class, "view1", null,
null);
// Add second View.
124
datastoreService.addView("sample-datastore", SampleView2.class, "view2", null,
null);
// Add third View.
datastoreService.addView("sample-datastore", SampleView3.class, "view3", null,
null);
</sample-code:end>
What is going on right now? Well, when you request an operation to the Data Store, now it is
processed first by SampleView3 because it is the Current View (the latest added in the stack).
It will produce a response based on the data provided by another View of the stack or directly
from the Data Store.
Another interesting feature is that Warework gives the opportunity to link a View with a default
Provider. This is very useful when you need to read prepared statements from a specific source,
like SQL commands from text files. Suppose we have a Provider named sql-provider which
loads SQL scripts, we can link this Provider to the View when we create the View:
<sample-code:java>
// Add a View and link a Provider to it.
datastoreService.addView("sample-datastore", SampleView1.class, "view1"
"sql-provider", null);
</sample-code:end>
Now, when we request an operation to SampleView1, it can use the sql-provider to load
and execute scripts. Each View can use its own Provider or, if it is not defined, the Provider that
exists in another View of the same stack. By default, when a View does not have a Provider, the
View uses the Provider that exists in the next View of the stack. If there are no Providers associ ated to any Views of the stack, then the View will not be able to retrieve objects from a default
Provider.
Sometimes you may need to configure a View with a set of parameters. Read the documentation of the implementation class of each View to check out if it defines initialization parameters.
The following example shows you how to setup the configuration for a View:
<sample-code:java>
// Create a configuration for the View.
Hashtable parameters = new Hashtable();
125
// Configure the View with initialization parameters.
parameters.put("sample-param-1", "sample-value-1");
// Add a View and configure it.
datastoreService.addView("sample-datastore", SampleView1.class, "view1"
null, parameters);
</sample-code:end>
Once you have at least one View associated to a Data Store, you can get an instance of a View
with the following line of code (for this example, suppose we added three Views as we did be fore):
<sample-code:java>
// Get the Current View of the Data Store.
SampleView3 view = (SampleView3) datastoreService.getView("sample-datastore");
// Perform operations with the View.
view.operation1();
view.operation2();
view.operation2();
...
</sample-code:end>
This method returns the Current View. If you need to retrieve another View from the stack of
Views of the Data Store, then you have to indicate the name or the implementation class of the
View that you want to get:
<sample-code:java>
// Get a View from the stack of Views of the Data Store.
SampleView2 view = (SampleView2) datastoreService.getView("sample-datastore",
"view2");
// Get a View from the stack of Views of the Data Store.
SampleView2 view = (SampleView2) datastoreService.getView("sample-datastore",
SampleView2.class);
</sample-code:end>
Wonderful, now we can decide which interface we want to use when working with a specific
Data Store.
What happens if you request a View when there are no Views associated to the Data Store?
This time you will get nothing:
<sample-code:java>
// We get 'null' because 'sample-datastore' does not have Views.
Object view = datastoreService.getView("sample-datastore");
</sample-code:end>
If you plan to remove Views from a Data Store, then you should consider which actions can be
performed:
•
Remove all Views at once
This is the easiest way to empty the stack of Views of a Data Store. Just invoke removeAllViews for a specific Data Store like this:
<sample-code:java>
// Remove every View associated to the Data Store.
datastoreService.removeAllViews("sample-datastore");
</sample-code:end>
126
•
Remove Current View
To remove the View that exists on top of the stack of Views, just invoke removeView
for a specific Data Store like this:
<sample-code:java>
// Remove just one View, the Current View.
datastoreService.removeView("sample-datastore");
</sample-code:end>
Finally, there is also another method that can be helpful in certain occasions. It is the isDefaultView method and it decides if a Data Store has Views associated to it.
<sample-code:java>
// Returns TRUE if there are Views in the stack and FALSE if stack is empty.
boolean empty = datastoreService.isDefaultView("sample-datastore");
</sample-code:end>
Data Store Service configuration
A Data Store Service is a special kind of Proxy Service which allows to be configured in two dif ferent ways. In the first place, as they are Proxy Services, you can configure them with the typical configuration Java objects and XML files that Proxy Services support. The second option consists of defining a specific Data Store Service configuration where you can set up Data Stores
and Views.
Configuration with Proxy Service Java objects
The following example quickly shows how to create a Data Store Service with two Data Stores
to be ready on start up:
<sample-code:java>
// Create a configuration for the Data Store Service.
ProxyService config = new ProxyService();
// Configure two Data Stores for the Data Store Service.
config.setClient("sample-datastore1", Sample1Connector.class);
config.setClient("sample-datastore2", Sample2Connector.class);
// Create a map where to store the configuration of the Service.
Hashtable parameters = new Hashtable();
// Setup the configuration of the Service.
parameters.put(ServiceConstants.PARAMETER_ConfigTarget, config);
// Create the Data Store Service.
DatastoreServiceFacade datastoreService = (DatastoreServiceFacade) scope
.createService("datastore-service", DatastoreServiceImpl.class,
parameters);
</sample-code:end>
You can also configure Data Stores with initialization parameters like this:
<sample-code:java>
// Create a map where to store configuration parameters for the Data Store.
Hashtable dsParams = new Hashtable();
127
// Configure the Data Store.
dsParams.put("sample-param-1", "sample-value-1");
dsParams.put("sample-param-2", "sample-value-2");
// Create a configuration for the Data Store Service.
ProxyService config = new ProxyService();
// Configure two Data Stores for the Data Store Service.
config.setClient("sample-datastore1", Sample1Connector.class, dsParams);
// Create a map where to store the configuration parameters.
Hashtable parameters = new Hashtable();
// Setup the configuration of the Service.
parameters.put(ServiceConstants.PARAMETER_ConfigTarget, config);
// Create the Data Store Service.
DatastoreServiceFacade datastoreService = (DatastoreServiceFacade) scope
.createService("datastore-service", DatastoreServiceImpl.class,
parameters);
</sample-code:end>
Configuration with Data Store Service Java objects
Data Store Services can be configured in a specific way to automatically initialize the Data
Stores that the Service may need. This is done with the DatastoreService class that exists
in com.warework.service.datastore.model package. The following example shows how
to configure two Data Stores when a Data Store Service is created:
<sample-code:java>
// Create a configuration for the Data Store Service.
DatastoreService config = new DatastoreService();
// Configure two Data Stores for the Service.
config.setDatastore("sample1-datastore", Sample1Connector.class, null, null);
config.setDatastore("sample2-datastore", Sample2Connector.class, null, null);
// Create a map where to store the configuration parameters.
Hashtable parameters = new Hashtable();
// Setup the configuration of the Service.
parameters.put(ServiceConstants.PARAMETER_ConfigTarget, config);
// Create the Data Store Service.
DatastoreServiceFacade datastoreService = (DatastoreServiceFacade) scope
.createService("datastore-service", DatastoreServiceImpl.class,
parameters);
</sample-code:end>
Do you need to pass some parameters to the Data Store? You can do it with a Hashtable
when the Data Store is created, like this:
<sample-code:java>
// Create a map where to store configuration parameters for the Data Store.
Hashtable dsParams = new Hashtable();
// Configure the Data Store.
dsParams.put("sample-param-1", "sample-value-1");
dsParams.put("sample-param-2", "sample-value-2");
// Create a configuration for the Data Store Service.
DatastoreService config = new DatastoreService();
128
// Create the Data Store with the configuration.
config.setDatastore("sample1-datastore", Sample1Connector.class,
dsParams, null);
// Create a map where to store the configuration parameters for the Service.
Hashtable parameters = new Hashtable();
// Setup the configuration of the Service.
parameters.put(ServiceConstants.PARAMETER_ConfigTarget, config);
// Create the Data Store Service.
DatastoreServiceFacade datastoreService = (DatastoreServiceFacade) scope
.createService("datastore-service", DatastoreServiceImpl.class,
parameters);
</sample-code:end>
You can also include initialization parameters once the Data Store is created:
<sample-code:java>
// Create a configuration for the Data Store Service.
DatastoreService config = new DatastoreService();
// Define one Data Store for the Service.
config.setDatastore("sample1-datastore", Sample1Connector.class,
null, null);
// Configure the Data Store.
config.setClientParameter("sample1-datastore", "sample-param-1",
"sample-value-1");
config.setClientParameter("sample1-datastore", "sample-param-2",
"sample-value-2");
// Create a map where to store the configuration parameters for the Service.
Hashtable parameters = new Hashtable();
// Setup the configuration of the Service.
parameters.put(ServiceConstants.PARAMETER_ConfigTarget, config);
// Create the Data Store Service.
DatastoreServiceFacade datastoreService = (DatastoreServiceFacade) scope
.createService("datastore-service", DatastoreServiceImpl.class,
parameters);
</sample-code:end>
To specify a set of Views for a Data Store, you have to invoke setView method as many times
as you need:
<sample-code:java>
// Create a configuration for the Data Store Service.
DatastoreService config = new DatastoreService();
// Configure one Data Store for the Service.
config.setDatastore("sample1-datastore", Sample1Connector.class, null, null);
// Set up a View for the Data Store.
config.setView("sample1-datastore", Sample1View.class, "view1", null, null);
</sample-code:end>
Remember that you can associate a default Provider for a View. It can be done as follows:
<sample-code:java>
129
// Create a configuration for the Data Store Service.
DatastoreService config = new DatastoreService();
// Configure one Data Store for the Service.
config.setDatastore("sample1-datastore", Sample1Connector.class, null, null);
// Configure a View for the Data Store.
config.setView("sample1-datastore", Sample1View.class, "view1",
"sql-provider", null);
</sample-code:end>
When a View requires configuration, you can specify a set of initialization parameters like this:
<sample-code:java>
// Create a configuration for the Data Store Service.
DatastoreService config = new DatastoreService();
// Configure one Data Store for the Service.
config.setDatastore("sample1-datastore", Sample1Connector.class, null, null);
// Create a configuration for the View.
Hashtable parameters = new Hashtable();
// Configure the View with initialization parameters.
parameters.put("sample-param-1", "sample-value-1");
// Configure a View for the Data Store.
config.setView("sample1-datastore", Sample1View.class, "view1",
null, parameters);
</sample-code:end>
Configuration with a generic Proxy Service XML file
Use the following templates to load a Data Store Service with Scope and Proxy Service configuration files. First, the Scope XML file:
<sample-code:xml>
<?xml version="1.0" encoding="UTF-8"?>
<scope xmlns:xsi="http://www.w3.org/2001/XMLSchema-instance"
xsi:noNamespaceSchemaLocation="http://repository.warework.com/xsd/scope1.0.0.xsd">
<services>
<service name="datastore-service"
class="com.warework.service.datastore.DatastoreServiceImpl">
<parameter name="config-class"
value="com.warework.core.loader.ProxyServiceSAXLoader" />
<parameter name="config-target"
value="/META-INF/system/datastore-service.xml" />
</service>
</services>
</scope>
</sample-code:end>
And now, the datastore-service.xml:
<sample-code:java>
<?xml version="1.0" encoding="UTF-8"?>
<proxy-service xmlns:xsi="http://www.w3.org/2001/XMLSchema-instance"
xsi:noNamespaceSchemaLocation="http://repository.warework.com/xsd/proxyservice-1.0.0.xsd">
130
<clients>
<client name="sample-datastore" connector="…">
<parameter name="sample-param-1" value="sample-value-1"/>
<parameter name="sample-param-2" value="sample-value-2"/>
…
</client>
</clients>
</proxy-service>
</sample-code:end>
Configuration with a Data Store Service XML file
Use the following templates to load a Data Store Service with Scope and Data Store Service
specific configuration files. Warework recommends you to use this type of configuration instead
of the generic Proxy Service configuration file because with a Data Store Service XML file you
can define Views. First, review how to configure this Service in the Scope XML file:
<sample-code:xml>
<?xml version="1.0" encoding="UTF-8"?>
<scope xmlns:xsi="http://www.w3.org/2001/XMLSchema-instance"
xsi:noNamespaceSchemaLocation="http://repository.warework.com/xsd/scope1.0.0.xsd">
<services>
<service name="datastore-service"
class="com.warework.service.datastore.DatastoreServiceImpl">
<parameter name="config-class"
value="com.warework.service.datastore.DatastoreSAXLoader" />
<parameter name="config-target"
value="/META-INF/system/datastore-service.xml" />
</service>
</services>
</scope>
</sample-code:end>
And now, the datastore-service.xml:
<sample-code:xml>
<?xml version="1.0" encoding="UTF-8"?>
<datastore-service xmlns:xsi="http://www.w3.org/2001/XMLSchema-instance"
xsi:noNamespaceSchemaLocation="http://repository.warework.com/xsd/datastore
-service-1.1.0.xsd">
< datastores>
<datastore name="..." connector="...">
<parameters>
<parameter name="..." value="..."/>
<parameter name="..." value="..."/>
</parameters>
<views>
<view name="..." class="..." provider="...">
<parameter name="..." value="..."/>
<parameter name="..." value="..."/>
</view>
131
<view name="..." class="..." provider="...">
<parameter name="..." value="..."/>
<parameter name="..." value="..."/>
</view>
</views>
</datastore>
<datastore name="..." connector="...">
<parameters>
<parameter name="..." value="..."/>
<parameter name="..." value="..."/>
</parameters>
<views>
<view name="..." class="..." provider="...">
<parameter name="..." value="..."/>
<parameter name="..." value="..."/>
</view>
<view name="..." class="..." provider="...">
<parameter name="..." value="..."/>
<parameter name="..." value="..."/>
</view>
</views>
</datastore>
</datastores>
</datastore-service>
</sample-code:end>
Remember that you can also provide a short class name to load the Service:
<sample-code:xml>
<?xml version="1.0" encoding="UTF-8"?>
<scope xmlns:xsi="http://www.w3.org/2001/XMLSchema-instance"
xsi:noNamespaceSchemaLocation="http://repository.warework.com/xsd/scope1.0.0.xsd">
<services>
<service name="datastore-service" class="datastore">
<parameter name="config-class"
value="com.warework.service.datastore.DatastoreSAXLoader" />
<parameter name="config-target"
value="/META-INF/system/datastore-service.xml" />
</service>
</services>
</scope>
</sample-code:end>
Views
In general, when you work with Views, you typically deal with the interface of a View instead of
the implementation class. So, we can say that Views can be split in two. By one side we have
the interface of the View and on the other side we have the class that implements this interface.
132
There is no need to perform any extra operation to work with the interface of a View. You just
have to provide the same implementation class of the View when you create it, but this time,
you have to cast the result of getView method to the interface of the View. Check this out with
the following example:
<sample-code:java>
// Create a Data Store in the Data Store Service.
datastoreService.createClient("sample-datastore", SampleConnector.class,
null);
// Always use the implementation class of the View to create it.
datastoreService.addView("sample-datastore", SampleView1Impl.class, "view1",
null, null);
// Get the View with the interface.
SampleView1 view = (SampleView1) datastoreService.getView("sample-datastore");
</sample-code:end>
This is a much better idea. Now we can use the same interface of a View for different type of
Data Stores. Of course, creating the View directly with the interface is completely forbidden:
<sample-code:java>
// Never use the interface to create a View!!!
datastoreService.addView("sample-datastore", SampleView1.class, "view1",
null, null);
</sample-code:end>
Anyway, if you have to work with the implementation class because you need all the functionality that it provides, you can do it without problems:
<sample-code:java>
// Use the implementation class of the View to create it.
datastoreService.addView("sample-datastore", SampleView1Impl.class, "view1",
null, null);
// Get the View with the interface.
SampleView1Impl view = (SampleView1Impl) datastoreService.
getView("sample-datastore");
</sample-code:end>
In this section we are going to review some common interfaces to work with Views. Please, read
the following points carefully because you will probably spend most of your time with these interfaces to interact with Data Stores.
Key-Value View
This View is an interface that represents an abstract Data Store composed of a collection of
key-value pairs, such that each possible key appears at most once in the collection. It is like a
Hashtable but this time the operations are performed in a Data Store. Operations associated
with this View allow:
•
Addition of pairs to the collection.
•
Removal of pairs from the collection.
•
Modification of the values of existing pairs.
133
•
Lookup of the value associated with a particular key.
Working with this View is fairly easy because the KeyValueView interface (package:
com.warework.service.datastore.view) only exposes a few methods and they all are
very simple.
The first operation you have to perform to start working with a Data Store is the connect operation. There is no exception with the Key-Value View:
<sample-code:java>
// Get an instance of a Key-Value interface.
KeyValueView view = (KeyValueView) datastoreService.getView(...);
// Connect the Data Store.
view.connect();
</sample-code:end>
The following example shows how to add a new value associated to a key in the Data Store:
<sample-code:java>
// Get an instance of a Key-Value View.
KeyValueView view = (KeyValueView) datastoreService.getView(...);
// Connect the Data Store.
view.connect();
// Create a new key named 'user.name' or update it.
view.put("user.name", "John Wood");
</sample-code:end>
Some Data Stores may accept other keys and values different than Strings. This limitation is im posed by the Data Store so read carefully the documentation associated to the implementation
class of the View and the Data Store that it supports. This example is completely perfect with
this interface:
<sample-code:java>
// Get an instance of a Key-Value View.
KeyValueView view = (KeyValueView) datastoreService.getView(...);
// Connect the Data Store.
view.connect();
// Create a new key-value or update an existing one.
view.put(new Integer(23), Boolean.TRUE);
</sample-code:end>
Now, you can retrieve the value associated to the key like this:
<sample-code:java>
// Get the value of key '23'.
Boolean value = (Boolean) view.get(new Integer(23));
</sample-code:end>
This is how to remove a key and the value associated to it:
<sample-code:java>
// Remove the key from the Data Store.
view.remove("user.enabled");
</sample-code:end>
You can also get a list with the keys that exist in the Data Store:
134
<sample-code:java>
// Get every key from the Data Store.
Enumeration keys = view.keys();
</sample-code:end>
To retrieve the number of key-value pairs you have to invoke the size method like this:
<sample-code:java>
// Count keys in Data Store.
int size = view.size();
</sample-code:end>
Once you have performed a set of put or remove operations, it might be a good idea to perform commit to register the changes in the Data Store:
<sample-code:java>
// Commit changes in a Data Store.
view.commit();
</sample-code:end>
When the work is done, you have to disconnect the Data Store:
<sample-code:java>
// Close the connection with the Data Store.
view.disconnect();
</sample-code:end>
Relational Database Management System (RDBMS) View
This View is an interface that represents a collection of data items organized as a set of formally-described tables. You can take advantage of this View to query and update with SQL statements relational databases like Oracle, MySQL, DB2, etc. Two basic operations are allowed
here:
•
Update operations
Executes a given SQL statement, which may be an INSERT, UPDATE, or DELETE statement or an SQL statement that returns nothing, such as an SQL DDL statement (for example: CREATE TABLE).
•
Query operations
Executes a given SQL statement, typically a static SQL SELECT statement, to retrieve
data from the relational database.
Even before you perform any of these operations, what you have to do first is to connect to the
database management system:
<sample-code:java>
// Get an instance of a RDBMS View interface.
RDBMSView view = (RDBMSView) datastoreService.getView(...);
// Connect the Data Store.
view.connect();
</sample-code:end>
135
Perfect, now a connection with the database is ready to accept SQL commands. In the following
examples we are going to save some information in a database but before that, it is recommended to begin a transaction with the database.
A transaction comprises a unit of work performed within a database management system, and
treated in a coherent and reliable way independent of other transactions. Transactions in a database environment have two main purposes:
•
To provide reliable units of work that allow correct recovery from failures and keep a
database consistent even in cases of system failure, when execution stops (completely
or partially) and many operations upon a database remain uncompleted, with unclear
status.
•
To provide isolation between programs accessing a database concurrently. If this isolation is not provided the programs outcome are possibly erroneous.
Transactions provide an "all-or-nothing" proposition, stating that each work-unit performed in a
database must either complete in its entirety or have no effect whatsoever. Further, the system
must isolate each transaction from other transactions, results must conform to existing constraints in the database, and transactions that complete successfully must get written to durable
storage.
To begin a transaction in a database management system you have to perform the following actions:
<sample-code:java>
// Get an instance of a RDBMS View interface.
RDBMSView view = (RDBMSView) datastoreService.getView(...);
// Connect the Data Store.
view.connect();
// Begin a transaction in the database management system.
view.beginTransaction();
</sample-code:end>
Now it is the right time to perform some update operations. First, we are going to add one row in
a table of the database:
<sample-code:java>
// Get an instance of a RDBMS View interface.
RDBMSView view = (RDBMSView) datastoreService.getView(...);
// Connect the Data Store.
view.connect();
// Begin a transaction in the database management system.
view.beginTransaction();
// Create the SQL statement to execute.
String sql = "INSERT INTO HOME_USER (ID, NAME) VALUES (1, 'John Wood')";
// Run the SQL update statement.
view.executeUpdate(sql, null);
</sample-code:end>
Another option is to execute multiple statements at once. You can do it by specifying a separat or character which delimits each statement:
136
<sample-code:java>
// SQL statement to create first user.
String sql1 = "INSERT INTO HOME_USER (ID, NAME) VALUES (1, 'John Wood')";
// SQL statement to create second user.
String sql2 = "INSERT INTO HOME_USER (ID, NAME) VALUES (2, 'James Sharpe')";
// SQL statement to create third user.
String sql3 = "INSERT INTO HOME_USER (ID, NAME) VALUES (3, 'Sofia Green')";
// Execute three SQL update statements at once.
view.executeUpdate(sql1 + ";" + sql2 + ";" + sql3, new Character(';'));
</sample-code:end>
Perform update operations like this when you have to dynamically construct SQL statements in
Java. If your statements are not too complex to create, like the ones we saw in the previous example, you should consider storing them on separate files as they are easier to maintain. A very
convenient way to keep SQL statements in separate files consist of keeping each statement (or
a set of related statements) in an independent text file, for example: create-user.sql, delete-user.sql, update-user.sql, etc. Later on we can read these text files with a Provider (Warework recommends you to use the FileText Provider for this task) and use this Provider to read the statements for a View. Remember that you can define a default Provider for a
View when you associate a View to a Data Store:
<sample-code:java>
// Add a View and link a Provider to it.
datastoreService.addView("sample-datastore", SampleViewImpl.class, "view1",
"sql-provider", null);
</sample-code:end>
The sql-provider Provider now can be used in the View as the default Provider to read text
files from a specific directory. Let us say we have the following content for create-user.sql:
<sample-code:sql>
INSERT INTO HOME_USER (ID, NAME) VALUES (1, 'John Wood')
</sample-code:end>
If sql-provider is the default Provider in a RDBMS View, we can read the content of this file
with the following code:
<sample-code:java>
// Read the content of 'create-user.sql' and execute it.
view.executeUpdateByName("create-user", null, null);
</sample-code:end>
When executeUpdateByName is invoked, these actions are performed:
1. The RDBMS View requests the create-user object to sql-provider.
2. sql-provider reads the content of create-user.sql and returns it (as a String
object).
3. The RDBMS View executes the statement included at create-user.sql in the Data
Store.
The RDBMS View and the FileText Provider are perfect mates. Both, in combination, will simplify a lot the process of executing scripts in your database. Just write simple text files with SQL
statements and let Warework execute them for you. It is recommended that you check out the
documentation associated to the FileText Provider to fully take advantage of this feature.
137
If we need a generic statement to create new users in the database, we can define the script
create-user.sql with some variables, like this:
<sample-code:sql>
INSERT INTO HOME_USER (ID, NAME) VALUES (${USER_ID}, ${USER_NAME})
</sample-code:end>
Then replace these variables with the values that you need:
<sample-code:java>
// Values for variables.
Hashtable values = new Hashtable();
// Set variables for the update statement.
values.put("USER_ID", new Integer(3));
values.put("USER_NAME", "Ian Sharpe");
// Create a new user in the database.
view.executeUpdateByName("create-user", values, null);
</sample-code:end>
When your script contains multiple statements, you also have to indicate the character that delimits each statement. Suppose we have the following create-user.sql script:
<sample-code:sql>
INSERT INTO HOME_USER (ID, NAME) VALUES (${USER_ID}, ${USER_NAME});
INSERT INTO ACTIVE_USERS (ID, NAME) VALUES (${USER_ID});
</sample-code:end>
Now we can replace variables in multiple statements with this code:
<sample-code:java>
// Values for variables.
Hashtable values = new Hashtable();
// Set variables for the update statement.
values.put("USER_ID", new Integer(3));
values.put("USER_NAME", "Ian Sharpe");
// Create a new user in the database.
view.executeUpdateByName("create-user", values, new Character(';'));
</sample-code:end>
We can also use a Provider that is not the default Provider of the View. In this case, we just
need to specify the Provider where to retrieve the statement to execute:
<sample-code:java>
// Values for variables.
Hashtable values = new Hashtable();
// Set variables for the update statement.
values.put("USER_ID", new Integer(3));
values.put("USER_NAME", "Ian Sharpe");
// Execute a statement from the Provider that we define.
view.executeUpdateByName("another-provider", "create-user", values,
new Character(';'));
</sample-code:end>
138
This time, the create-user.sql statement is not retrieved by the default Provider of the
View. The framework requests this statement from a Provider named "another-provider"
and once it is loaded, then it is executed in the Data Store.
The RDBMS View also allows developers to define a callback object that will be invoked when
the operation is done or it fails. Check out the following example:
<sample-code:java>
// Values for variables.
Hashtable values = new Hashtable();
// Set variables for the update statement.
values.put("USER_ID", new Integer(3));
values.put("USER_NAME", "Ian Sharpe");
// Redirect to callback object once operation is executed.
view.executeUpdateByName("create-user", values, null,
new AbstractCallback(getScope()){
protected void onFailure(Throwable t) {
// Handle error here.
}
protected void onSuccess(Object result) {
// Handle successful operation here.
// 'result' is null in RDBMS update operations.
}
});
</sample-code:end>
Now the RDBMS View redirects the execution to the callback object when executeUpdateByName is invoked. If operation is successful then method onSuccess is executed. Otherwise, if
any error is found, then method onFailure is executed.
As you can see, creating the callback object is fairly easy. It is mandatory to provide a Scope
(you can retrieve it from the Data Store Service for example) and implement two methods.
When a callback object is defined for update operations of the RDBMS View (like executeUpdateByName), it is important to bear in mind that onSuccess method argument is always
null.
Warework also automatically detects batch operations in scripts with multiple statements so you
can perform an operation at onSuccess every time a single statement is executed in the Data
Store. For example, if we have the following script:
<sample-code:sql>
INSERT INTO HOME_USER (ID, NAME) VALUES (${USER_ID}, ${USER_NAME});
INSERT INTO ACTIVE_USERS (ID, NAME) VALUES (${USER_ID});
</sample-code:end>
We can log the percentage of completion with this code:
<sample-code:java>
// Values for variables.
Hashtable values = new Hashtable();
// Set variables for the update statement.
values.put("USER_ID", new Integer(3));
values.put("USER_NAME", "Ian Sharpe");
// Redirect to callback object once operation is executed.
view.executeUpdateByName("create-user", values, null,
new AbstractCallback(getScope()){
139
protected void onFailure(Throwable t) {
// Handle error here.
}
protected void onSuccess(Object r) {
// This method is executed twice, one for every statement in the
// 'create-user' script.
System.out.println("progress: " + getBatch().progress());
}
});
</sample-code:end>
Method getBatch provides the following useful information about the batch operation in execution:
•
getBatch().count(): counts the amount of callbacks executed in the batch operation.
•
getBatch().duration(): gets how long (in milliseconds) is taking the current batch
operation.
•
getBatch().id(): gets the ID of the batch operation.
•
getBatch().progress(): gets the percentage of completion of the current batch operation.
•
getBatch().size(): gets the total of callbacks to perform in the batch operation.
•
getBatch().startTime(): gets the time (in milliseconds ) when the batch operation
started.
It is also possible to pass objects / attributes to the callback so you can use them at onSuccess
or onFailure. For this purpose, we have to use a Hashtable when the callback is created.
Check out this example:
<sample-code:java>
// Attributes for the callback.
Hashtable attributes = new Hashtable();
// Set the attributes.
attributes.put("color", "red");
attributes.put("password", new Integer(123));
// Redirect to callback with attributes.
view.executeUpdateByName("statement-name", null, null,
new AbstractCallback(getScope(), attributes){
protected void onFailure(Throwable t) {
String color = (String) getAttribute("color");
}
protected void onSuccess(Object r) {
// Retrieve every attribute name with 'getAttributeNames()'.
Integer password = (Integer) getAttribute("password");
}
});
</sample-code:end>
140
Every update operation that we performed in the previous examples is related to the transaction
that we created earlier in this section. Once the work is done, you should either commit or roll back the transaction. If the operations were executed without problems, then you should perform commit to register the changes in the database:
<sample-code:java>
// Commits changes in the Database Management System.
view.commit();
</sample-code:end>
In the other hand, if you find a failure, something unexpected happened or you just do not want
to register the changes in the database, then you should perform rollback to undo every update operation executed since the transaction was started:
<sample-code:java>
// Cancel latest update operations.
view.rollback();
</sample-code:end>
We have reviewed with this interface how to connect to a database and perform update opera tions in it with a transaction. Now we are going to focus on query operations to know how to retrieve data from a relational database. The following code is an example to perform this action:
<sample-code:java>
// Execute the statement to retrieve some data.
Object result = view.executeQuery("SELECT * FROM HOME_USER", -1, -1);
</sample-code:end>
This code executes the SQL statement into the relational database and returns an object that
represents the result provided by the database. By default, this result is in the form of a ResultRows object (check out the specific types returned by the implementation class of this View because each Data Store may provide the chance to get a different object as result) which represents the table of data returned by the database. It allows iterating each row of the table result
and picking up the values of its columns. Check it out with the following example:
<sample-code:java>
// Execute the statement to retrieve some data.
ResultRows result = (ResultRows) view.executeQuery("SELECT * FROM HOME_USER",
-1, -1);
// Iterate rows until the end of the table. First row is 1, second 2 and so
// on. You must perform 'result.next()' at least one time to point the cursor
// to the first row.
while (result.next()) {
/*
* For each row we can retrieve the value of each column.
*/
// Get the boolean value of a column. If the value is SQL NULL
// (it is null in the database), the value returned is null.
Boolean column1 = result.getBoolean("COLUMN1");
// Get the numeric value of a column. You must specify the
// numeric type to get.
Short column2A = (Short) result.getNumber("COLUMN2A", Short.class);
Integer column2B = (Integer) result.getNumber("COLUMN2B", Integer.class);
Long column2C = (Long) result.getNumber("COLUMN2C", Long.class);
Float column2D = (Float) result.getNumber("COLUMN2D", Float.class);
141
Double column2E = (Double) result.getNumber("COLUMN2E", Double.class);
BigDecimal column2F = (BigDecimal) result.getNumber("COLUMN2F",
BigDecimal.class);
// Get the string value.
String column3 = result.getString("COLUMN3");
// Get the date value.
Date column4 = result.getDate("COLUMN4");
// Get the array of bytes.
byte[] column5 = result.getBlob("COLUMN5");
}
</sample-code:end>
When you iterate result rows, you can specify the column (where to get the data) by name or by
column index:
<sample-code:java>
// Execute the statement to retrieve some data.
ResultRows result = (ResultRows) view.executeQuery("SELECT * FROM HOME_USER",
-1, -1);
// Iterate rows.
while (result.next()) {
// Get the string value of a given column name.
String column3A = result.getString("COLUMN3");
// Get the string value of a given column index.
String column3B = result.getString(3);
}
</sample-code:end>
Another option is to retrieve a whole row as a Java Bean object. To achieve this, you have to
provide to getBean a class that represents a Java Bean. A new instance of this class is created
and used to store the values of the result columns. You may also provide a mapping where to
relate result columns with bean attributes. Check it out with one example:
<sample-code:java>
// Execute the statement to retrieve some data.
ResultRows result = (ResultRows) view.executeQuery("SELECT * FROM HOME_USER",
-1, -1);
// Map table result columns with bean attributes.
Hashtable mapping = new Hashtable();
// Map result 'NAME' column with bean 'name' attribute.
mapping.put("NAME", "name");
// Map result 'DATE_OF_BIRTH' column with bean 'dateOfBirth' attribute.
mapping.put("DATE_OF_BIRTH", "dateOfBirth");
// Map result 'PASSWORD' column with bean 'password' attribute.
mapping.put("PASSWORD", "password");
// Iterate rows.
while (result.next()) {
142
// Copy the values of specified columns into the User bean.
User user = (User) result.getBean(User.class, mapping);
}
</sample-code:end>
Warework can also create this mapping automatically when the columns names and bean attributes follow a specific naming convention. Here are the rules for columns and attributes names:
•
Names of database columns are uppercase, for example: PASSWORD. Names of bean
attributes are lowercase, for example: password.
•
Spaces in columns names are specified with the underscore character:
DATE_OF_BIRTH. The attributes of the bean use the camel notation: dateOfBirth.
Check out more examples:
•
NAME1 equals to name1
•
NAME_A equals to nameA
•
A equals to a
•
AA equals to aa
•
A_B equals to aB
•
A_B_C equals to aBC
If getBean method does not receive the mapping configuration, it extracts by reflection the
name of every attribute that exist in the given bean class. Each attribute name is converted into
the corresponding column name and this column name is finally used to retrieve the value from
the database result. If an attribute of the Java Bean does not exist as a result column, then it is
discarded. The following example shows how this naming convention simplifies quite a lot the
work:
<sample-code:java>
// Execute the statement to retrieve some data.
ResultRows result = (ResultRows) view.executeQuery("SELECT * FROM HOME_USER",
-1, -1);
// Iterate rows.
while (result.next()) {
// Copy the values of columns found into the User bean.
User user = (User) result.getBean(User.class, null);
}
</sample-code:end>
You can also transform the database result into a list:
<sample-code:java>
143
// Execute the statement to retrieve some data.
ResultRows result = (ResultRows) view.executeQuery("SELECT * FROM HOME_USER",
-1, -1);
// Map table result columns with bean attributes.
Hashtable mapping = new Hashtable();
// Map result 'NAME' column with bean 'name' attribute.
mapping.put("NAME", "name");
// Map result 'DATE_OF_BIRTH' column with bean 'dateOfBirth' attribute.
mapping.put("DATE_OF_BIRTH", "dateOfBirth");
// Map result 'PASSWORD' column with bean 'password' attribute.
mapping.put("PASSWORD", "password");
// Create a list with User beans that represent each row from the database
// result.
Vector resultList = AbstractResultRows.toList(resultRows, User.class,
mapping);
</sample-code:end>
It is also possible to use auto-mapping:
<sample-code:java>
// Execute the statement to retrieve some data.
ResultRows result = (ResultRows) view.executeQuery("SELECT * FROM HOME_USER",
-1, -1);
// Create a list with User beans that represent each row from the database
// result.
Vector resultList = AbstractResultRows.toList(resultRows, User.class,
null);
</sample-code:end>
Sometimes you may need to limit the number of rows returned by a database when a query op eration is performed. Let us say that there are 26 registries or rows in the HOME_USER table and
that we just expect to retrieve the first 10 rows. We can write something like this:
<sample-code:java>
// Get the first 10 rows.
Object result = view.executeQuery("SELECT * FROM HOME_USER", 1, 10);
</sample-code:end>
What is going on right now? When you specify the number of rows that you want in the result of
a database, Warework automatically calculates the number of pages that hold this number of
rows. In the previous example we specified 10 rows per result and with this information Warework estimates that the size of each page is 10 rows and that there are three pages: page 1
with 10 rows, page 2 with 10 rows and page 3 with 6 rows. If now we need to retrieve the next
ten rows, we have to indicate that we want the second page:
<sample-code:java>
// Get rows from 11 to 20.
Object result = view.executeQuery("SELECT * FROM HOME_USER", 2, 10);
</sample-code:end>
If we request page number three, we get the last 6 registries from the database. The important
fact to keep in mind here is that the number of rows remains as 10:
<sample-code:java>
// Get rows from 21 to 26.
Object result = view.executeQuery("SELECT * FROM HOME_USER", 3, 10);
</sample-code:end>
144
With queries, you can also write SELECT statements in separate text files (this time, just one
statement per file). Suppose that the following code is the content of the list-users.sqlfile:
<sample-code:sql>
SELECT * FROM HOME_USER
</sample-code:end>
If sql-provider still is our default Provider, we can read the script like this:
<sample-code:java>
// Read the content of 'list-users.sql' and execute it in the database.
Object result = view.executeQueryByName("list-users", null, -1, -1);
</sample-code:end>
There is also the possibility to define some variables in the query:
<sample-code:sql>
SELECT * FROM HOME_USER A WHERE A.ID = ${USER_ID}
</sample-code:end>
Now we can assign a value to this variable to complete the query. This is done as follows:
<sample-code:java>
// Values for variables.
Hashtable values = new Hashtable();
// Set variables to filter the query.
values.put("USER_ID", new Integer(8375));
// Read 'list-users.sql', replace variables and execute the final statement.
Object result = view.executeQueryByName("list-users", values, -1, -1);
</sample-code:end>
The two last arguments allow you to define the page and maximum number of rows to retrieve.
The following example shows how to get the second page with a fixed size of 10 rows per page:
<sample-code:java>
// Get the second page with no more than 10 registries in it.
Object result = view.executeQueryByName("list-users", null, 2, 10);
</sample-code:end>
We can also define callbacks in query operations. This time, onSuccess provides the result of
the query:
<sample-code:java>
// Handle result with callback object.
view.executeQueryByName("list-users", null, -1, -1,
new AbstractCallback(getScope()){
protected void onFailure(Throwable t) {
// Do something.
}
protected void onSuccess(Object r) {
// Get the result form the database.
ResultRows result = (ResultRows) r;
// Iterate rows.
while (result.next()) {
// Copy the values of columns found into the User bean.
145
User user = (User) result.getBean(User.class, null);
}
}
});
</sample-code:end>
Query operations also allow us to use a different Provider than the default one defined for the
View:
<sample-code:java>
// Read the content of 'list-users.sql' and execute it in the database.
Object result = view.executeQueryByName("another-provider", "list-users",
null, -1, -1);
</sample-code:end>
As always, when the work is done, you have to disconnect the Data Store:
<sample-code:java>
// Close the connection with the Data Store.
view.disconnect();
</sample-code:end>
Object Database Management System (ODBMS) View
This View is a facade for a database management system in which information is represented in
the form of objects. It allows object-oriented programmers to develop a data model with Java
objects, store them and replicate or modify existing objects to make new objects within the
OODBMS. Six basic operations are allowed here:
•
Save: Stores an object in the database.
•
Update: Updates an object in the database.
•
Delete: Removes an object in the database.
•
Find: Retrieves a specific object from the database.
•
List: Retrieves a list of objects from the database.
•
Count: Counts objects in the database.
Connect with the database
Even before you perform any of these operations, what you have to do first is to connect to the
database management system:
<sample-code:java>
// Get an instance of an ODBMS View interface.
ODBMSView view = (ODBMSView) datastoreService.getView(...);
// Connect the Data Store.
view.connect();
</sample-code:end>
146
Begin a transaction in the database
In the following examples we are going to save some information in the database but before
that, it is recommended to begin a transaction with the database.
A transaction comprises a unit of work performed within a database management system, and
treated in a coherent and reliable way independent of other transactions. Transactions in a database environment have two main purposes:
•
To provide reliable units of work that allow correct recovery from failures and keep a
database consistent even in cases of system failure, when execution stops (completely
or partially) and many operations upon a database remain uncompleted, with unclear
status.
•
To provide isolation between programs accessing a database concurrently. If this isolation is not provided the programs outcome are possibly erroneous.
Transactions provide an "all-or-nothing" proposition, stating that each work-unit performed in a
database must either complete in its entirety or have no effect whatsoever. Further, the system
must isolate each transaction from other transactions, results must conform to existing constraints in the database, and transactions that complete successfully must get written to durable
storage.
To begin a transaction in a database management system you have to perform the following actions:
<sample-code:java>
// Get an instance of an ODBMS View interface.
ODBMSView view = (ODBMSView) datastoreService.getView(...);
// Connect the Data Store.
view.connect();
// Begin a transaction in the database management system.
view.beginTransaction();
</sample-code:end>
Save an object
Now it is the right time to perform some CRUD (Create, Read, Update, Delete) operations. First,
we are going to save one object in the database:
<sample-code:java>
// Get an instance of an ORM View interface.
ODBMSView view = (ODBMSView) datastoreService.getView(...);
// Connect the Data Store.
view.connect();
// Begin a transaction in the database management system.
view.beginTransaction();
// Create a Java Bean.
User user = new User();
// Set some data in the Java Bean.
user.setName("James");
user.setDateOfBirth(new Date());
user.setPassword(new Integer(8713));
147
// Save the Java Bean in the data store.
view.save(user);
</sample-code:end>
You can also invoke this method with a callback object. This object will be invoked when the operation is done or fails. Check out the following example
<sample-code:java>
// Connect the Data Store.
view.connect();
// Begin a transaction in the database management system.
view.beginTransaction();
// Create a Java Bean.
User user = new User();
// Set some data in the Java Bean.
user.setName("James");
user.setDateOfBirth(new Date());
user.setPassword(new Integer(8713));
// Save the Java Bean in the data store.
view.save(user, new AbstractCallback(getScope()){
protected void onFailure(Throwable t) {
// Handle error here.
}
protected void onSuccess(Object result) {
// Handle successful operation here.
// 'result' is the object just saved.
User user = (User) result;
// Display user name.
System.out.println("User name: " + user.getName());
}
});
</sample-code:end>
It is also possible to pass objects / attributes to the callback so you can use them at onSuccess
or onFailure. For this purpose, we have to use a Hashtable when the callback is created.
Check out this example:
<sample-code:java>
// Attributes for the callback.
Hashtable attributes = new Hashtable();
// Set the attributes.
attributes.put("color", "red");
attributes.put("password", new Integer(123));
// Save the Java Bean in the data store.
view.save(user, new AbstractCallback(getScope(), attributes){
protected void onFailure(Throwable t) {
String color = (String) getAttribute("color");
}
protected void onSuccess(Object result) {
// Retrieve every attribute name with 'getAttributeNames()'.
Integer password = (Integer) getAttribute("password");
}
148
});
</sample-code:end>
Now we are going to save multiple objects with just one line of code. You can save an array or a
collection of objects like this:
<sample-code:java>
// Save three Java Beans in the data store.
view.save(new User[]{user1, user2, user3});
</sample-code:end>
If the underlying Data Store can save all those objects at once, just one operation will be performed. If not, the Framework will start a batch operation automatically. Batch operations are
very useful because they allow us to track each operation executed. The following example
stores a collection of Java Beans and displays data about the batch operation:
<sample-code:java>
// We can also save collections.
List<User> users = new ArrayList<User>();
// Set some users in the collection.
users.add(user1);
users.add(user2);
users.add(user3);
// Save the collection in the data store.
view.save(users, new AbstractCallback(getScope()){
protected void onFailure(Throwable t) {
// Handle error here.
}
protected void onSuccess(Object result) {
// This callback method is invoked three times, one for.
// each object to save.
// Get current object saved.
User user = (User) result;
// Display user name.
System.out.println("Current user name: " + user.getName());
// Display items saved.
System.out.println("Total saved: " + getBatch().count());
// Display percentage of completion.
System.out.println("% saved: " + getBatch().progress());
}
});
</sample-code:end>
When Data Stores save arrays or collections at once but we want to use Warework batch operations instead (to track each object individually), in this case we have to configure the Data
Store to work as we need. This is done with PARAMETER_SkipNativeBatchSupport. Use
this constant (or value "skip-native-batch-support") in the connector of the Data Store to
force the Framework use batch operations.
Method getBatch provides the following useful information about the batch operation in execution:
149
•
getBatch().count(): counts the amount of callbacks executed in the batch operation.
•
getBatch().duration(): gets how long (in milliseconds) is taking the current batch
operation.
•
getBatch().id(): gets the ID of the batch operation.
•
getBatch().progress(): gets the percentage of completion of the current batch operation.
•
getBatch().size(): gets the total of callbacks to perform in the batch operation.
•
getBatch().startTime(): gets the time (in milliseconds ) when the batch operation
started.
Update objects
Previously stored objects in the database can be updated later on with new values:
<sample-code:java>
// Update some data in the Java Bean.
user.setName("James Jr.");
// Update the object in the data store.
view.update(user);
</sample-code:end>
You can also use callbacks and update multiple objects (arrays or collections) with batch operations:
<sample-code:java>
// Update three Java Beans in the data store.
view.update(new User[]{user1, user2, user3}, new AbstractCallback(getScope()){
protected void onFailure(Throwable t) {
// Handle error here.
}
protected void onSuccess(Object result) {
// Get current object updated.
User user = (User) result;
// Display user name.
System.out.println("Current user name: " + user.getName());
// Display items updated.
System.out.println("Total updated: " + getBatch().count());
// Display percentage of completion.
System.out.println("% updated: " + getBatch().progress());
}
});
</sample-code:end>
Delete objects
150
The following example shows how to delete one object:
<sample-code:java>
// Delete the object in the data store.
view.delete(user);
</sample-code:end>
You can also use callbacks and delete arrays or collections with batch operations:
<sample-code:java>
// Delete three Java Beans in the data store.
view.delete(new User[]{user1, user2, user3}, new AbstractCallback(getScope()){
protected void onFailure(Throwable t) {
// Handle error here.
}
protected void onSuccess(Object result) {
// Get current object deleted.
User user = (User) result;
// Display user name.
System.out.println("Current user name: " + user.getName());
// Display items deleted.
System.out.println("Total deleted: " + getBatch().count());
// Display percentage of completion.
System.out.println("% deleted: " + getBatch().progress());
}
});
</sample-code:end>
To remove every object of a specific type, we have to provide the class:
<sample-code:java>
// Delete all users in the data store.
view.delete(User.class);
</sample-code:end>
This code can be executed in two different ways by the Framework. It is very important to un derstand that delete method creates a query when a class is provided. If the Data Store that
implements this View can delete the objects from a given query then you should not worry about
running operations like this because the Data Store directly handles the operation and takes
care about everything. When Data Stores do not support deleting objects with a given query,
you need to know that, in this case, the Framework divides the operation in two different parts.
First, it runs a query to retrieve a list of objects and after that deletes each item of the list. The
problem arises when the list to delete is so big that it kills the virtual machine memory. So
please, know your Data Store first and handle this operation with care.
If the underlying Data Store supports queries to delete multiple objects then batches will perform
just one operation. When the Framework directly handles the operation because the Data Store
does not support it, then you will be able to track each object deleted.
The following example shows how to remove a set of objects specified in a query:
<sample-code:java>
// Define the query.
Query query = new Query(getScope());
151
// Search for User objects.
query.setObject(User.class);
// Define the WHERE clause.
Where where = query.getWhere(true);
// Set an expression like this: (name = 'Carl').
where.setExpression(where.createEqualToValue("name", "Carl"));
// Delete every user which name is 'Carl'.
view.delete(query);
</sample-code:end>
We will show soon how to configure Query objects. By now just bear in mind that we can delete
objects with queries too.
If the query is in the form of an XML file, you can load the query and delete the objects returned
like this:
<sample-code:java>
// Delete every user specified by "list-users" query.
view.executeDeleteByName("list-users", null);
</sample-code:end>
This method uses a Provider to load the query from an XML file. Review later on how to list ob jects with XML files. We explain in detail there how this mechanism works and the same rules
apply for executeDeleteByName. Also, like we have seen before, you can use callback here:
<sample-code:java>
// Delete every user specified by "list-users" query.
view.executeDeleteByName("list-users", null, new AbstractCallback(getScope()){
protected void onFailure(Throwable t) {
// Handle error here.
}
protected void onSuccess(Object result) {
// Handle each object deleted here.
}
});
</sample-code:end>
If the query accepts parameters, you can update the query with a Hashtable:
<sample-code:java>
// Attributes for the query.
Hashtable filter = new Hashtable();
// Set the attributes.
filter.put("name", "John");
// Delete every user named "John".
view.executeDeleteByName("list-users", filter,
new AbstractCallback(getScope()){
protected void onFailure(Throwable t) {
// Handle error here.
}
protected void onSuccess(Object result) {
// Handle each object deleted here.
}
152
});
</sample-code:end>
Commit or rollback a transaction
Every update operation that we performed in the previous examples is related to the transaction
that we created before. Once the work is done, you should either commit or rollback the trans action. If the operations were executed without problems, then you should perform commit to
register the changes in the database:
<sample-code:java>
// Commits changes in the Database Management System.
view.commit();
</sample-code:end>
In the other hand, if you find a failure, something unexpected happened or you just do not want
to register the changes in the database, then you should perform rollback to undo every update operation executed since the transaction was started:
<sample-code:java>
// Cancel latest update operations.
view.rollback();
</sample-code:end>
Find an object in the database
Now we are going to see how to retrieve objects from the database. Depending on how many
objects we want to get, we can perform two different types of operations.
To search for a specific object from the database you have to invoke the find method. This
method requires you to provide an object of the same type as the one you want to retrieve, with
some data in it so it will be used as a filter to find the object in the database. To better understand how it works, check out the API description of this method:
<sample-code:java>
/**
* Finds an object by its values. This method returns the object of the data
* store which matches the type and all non-null field values from a given
* object. This is done via reflecting the type and all of the fields from
* the given object, and building a query expression where all
* non-null-value fields are combined with AND expressions. So, the object
* you will get will be the same type as the object that you will provide.
* The result of the query must return one single object in order to avoid
* an exception. In many cases, you may only need to provide the ID fields
* of the object to retrieve one single object. In relational databases like
* Oracle or MySQL, these ID fields are the primary keys.
*
* @param filter
*
Filter used to find an object in the data store. This object
*
specifies two things: first, the type of the object to search
*
for in the data store, and second, the values that identify
*
the object in the data store.
* @return Object from the data store that matches the type and the values
*
of the given object. If more than one object is found in the data
*
store, then an exception is thrown. If no objects are found, then
*
this method returns <code>null</code>.
* @throws ClientException
*/
Object find(Object filter) throws ClientException;
</sample-code:end>
Let's see some sample code. Suppose that there is a user named Steve in the database, we
could retrieve an object instance that represents this user like this:
153
<sample-code:java>
// Get an instance of an ODBMS View interface.
ODBMSView view = (ODBMSView) datastoreService.getView(...);
// Connect the Data Store.
view.connect();
// Create the filter to find the object.
User filter = new User();
// Set the data required to locate the object in the database.
filter.setName("Steve");
// Find the object in the database which type is "User" and name is "Steve".
User user = (User) view.find(filter);
</sample-code:end>
The object from the database is returned with all its data associated to it. The idea is that developers can search for an object just by providing some of its attributes and retrieve the same
object type with the last information it had when it was stored or updated in the database. Bear
in mind that an exception is thrown if more than one object is found in the database. This meth od just searches for a single object in the database. In order to retrieve a collection of objects,
you should invoke different methods.
List objects from the database
Warework provides three different ways to retrieve a list of objects from a database. The first
one works similar as the find method, but this time you will get a collection of objects (instead
of one single object). Check it out with an example:
<sample-code:java>
// Get an instance of an ODBMS View interface.
ODBMSView view = (ODBMSView) datastoreService.getView(...);
// Connect the Data Store.
view.connect();
// Create the filter to find the objects.
User filter = new User();
// Set the data required to find the objects in the database.
filter.setPassword(new Integer(8713));
// Find the objects which type is "User" and password is "8713".
List<User> users = (List<User>) view.list(filter, null, null, -1, -1);
</sample-code:end>
The main characteristic of this method is that it creates a query where every non-null attribute of
the given object is combined with AND expressions, for example:
<sample-code:java>
// Create the filter to find the objects.
User filter = new User();
// Set the data required to find the objects in the database.
filter.setName("Steve");
filter.setPassword(new Integer(8713));
// Find "User" objects which name is "Steve" and password is "8713".
List<User> users = (List<User>) view.list(filter, null, null, -1, -1);
</sample-code:end>
154
When this operation is executed, Warework creates a query like this (it is just a representation
of the query, it is not used by the underlying database):
<sample-code:sql>
User WHERE ((name = 'Steve') AND (password = 8713))
</sample-code:end>
Also, when objects of the data model are related each other, every non-null attribute of the related objects is used to build the query. For example:
<sample-code:java>
// Create the filter to find an user by its contact.
Contact contact = new Contact();
// Set the data required to find User objects by its email.
contact.setEmail("[email protected]");
// Create the filter to find User objects.
User filter = new User();
// Set the data required to find User objects in the database.
filter.setName("Steve");
filter.setContact(contact);
// Find "User" objects which name is "Steve" and email is "[email protected]".
List<User> users = (List<User>) view.list(filter, null, null, -1, -1);
</sample-code:end>
This operation creates a query like this:
<sample-code:sql>
User WHERE ((name = 'Steve') AND (contact.email = '[email protected]'))
</sample-code:end>
While the AND expression is always used to create the query (there is no chance to modify this
type of expression in this method), you can indicate which specific operation must be performed
in the attributes of the object. By default, the equal operator is used when a non-null attribute is
found but it is possible to use different ones like: not equals to, greater than, greater than or
equals to, less than, less than or equals to, like, not like, is null or is not null. The following ex ample shows how to list User objects which name is Steve and password is greater than
1000:
<sample-code:java>
// Create the filter to find the objects.
User filter = new User();
// Set the data required to find the objects in the database.
filter.setName("Steve");
filter.setPassword(new Integer(1000));
// Define which operators to use.
Hashtable operator = new Hashtable();
// Set which operation to perform for each attribute of the filter.
operator.put("password", Operator.GREATER_THAN);
// Find "User"s which name is "Steve" and password is greater than "1000".
List<User> users = (List<User>) view.list(filter, operator, null, -1, -1);
</sample-code:end>
This operation creates a query like this:
<sample-code:sql>
User WHERE ((name = 'Steve') AND (password > 1000))
155
</sample-code:end>
It is also possible to change the operator in referenced objects:
<sample-code:java>
// Create the filter to find an user by its contact.
Contact contact = new Contact();
// Set the data required to find User objects by its email.
contact.setEmail("[email protected]");
// Create the filter to find User objects.
User filter = new User();
// Set the data required to find User objects in the database.
filter.setName("Steve");
filter.setContact(contact);
// Define which operators to use.
Hashtable operator = new Hashtable();
// Set which operation to perform for each attribute of the filter.
operator.put("contact.email", Operator.LIKE);
// Find "User" objects which name is Steve and email is like "[email protected]".
List<User> users = (List<User>) view.list(filter, operator, null, -1, -1);
</sample-code:end>
This is the generated query:
<sample-code:sql>
User WHERE ((name = 'Steve') AND (contact.email LIKE '[email protected]'))
</sample-code:end>
What if you just want to list all the objects of the same type? In this case you can provide just
the class instead of an object instance:
<sample-code:java>
// List all "User" objects.
List<User> users = (List<User>) view.list(User.class, null, null, -1, -1);
</sample-code:end>
When you provide a class you can only specify two operators: IS_NULL and IS_NOT_NULL.
This is because you cannot provide the values of the fields in a class. For example:
<sample-code:java>
// Define which operators to use.
Hashtable operator = new Hashtable();
// Set only IS_NULL or IS_NOT_NULL operators.
operator.put("name", Operator.IS_NOT_NULL);
// Find every "User" which name is not null.
List<User> users = (List<User>) view.list(User.class, operator, null, -1, -1);
</sample-code:end>
This operation creates a query like this:
<sample-code:sql>
User WHERE (name IS_NOT_NULL)
</sample-code:end>
156
The same way we did before we can use a callback object in this method. Just bear in mind that
now the result of the operation is provided by the callback onSuccess method:
<sample-code:java>
// Define which operators to use.
Hashtable operator = new Hashtable();
// Set only IS_NULL or IS_NOT_NULL operators.
operator.put("name", Operator.IS_NOT_NULL);
// Find every "User" which name is not null.
view.list(User.class, null, null, -1, -1,
new AbstractCallback(getScope()){
protected void onFailure(Throwable t) {
// Handle error here.
}
protected void onSuccess(Object result) {
// Get database query result.
List<User> users = (List<User>) result;
// Handle collection here...
}
});
</sample-code:end>
Sort results
The third argument of the list method allows us to define how to sort the results. It is fairly
easy:
<sample-code:java>
// Define the order of the results.
OrderBy order = new OrderBy();
// Set ascending order for field "name".
order.addAscending("name");
// List every "User" sorted by name.
List<User> users = (List<User>) view.list(User.class, null, order, -1, -1);
</sample-code:end>
The result of this operation will be a list of all users sorted in ascending order. The query gener ated looks like this:
<sample-code:sql>
User ORDER BY name ASC
</sample-code:end>
Pagination
Sometimes you may need to limit the number of objects returned by the database when a query
operation is performed. Let us say that there are 26 objects of USER type and that we just expect to retrieve the first 10 objects. We can write something like this:
<sample-code:java>
// Get the first 10 objects.
List<User> users = (List<User>) view.list(User.class, null, null, 1, 10);
</sample-code:end>
157
What is going on right now? When you specify the number of objects that you want in the result
of a database, Warework automatically calculates the number of pages that hold this number of
objects. In the previous example we specified 10 objects per result and with this information
Warework estimates that the size of each page is 10 objects and that there are three pages:
page 1 with 10 objects, page 2 with 10 objects and page 3 with 6 objects. If now we need to r etrieve the next ten objects, we have to indicate that we want the second page:
<sample-code:java>
// Get objects from 11 to 20.
List<User> users = (List<User>) view.list(User.class, null, null, 2, 10);
</sample-code:end>
If we request page number three, we get the last 6 objects from the database. The important
fact to keep in mind here is that the number of objects remains as 10:
<sample-code:java>
// Get objects from 21 to 26.
List<User> users = (List<User>) view.list(User.class, null, null, 3, 10);
</sample-code:end>
Creating custom queries with Query object
Warework also gives the possibility to create Query objects where to specify all the characteristics we had seen before. These Query objects allows to define AND, OR and NOT expressions
as well, so they are more useful in certain cases. The following example shows how to run a
simple query with this object:
<sample-code:java>
// Define the query.
Query query = new Query(getScope());
// Set the type of objects to look for.
query.setObject(User.class);
// List every "User" object.
List<User> users = (List<User>) view.list(query);
</sample-code:end>
This example retrieves every User object from the database. To filter the results, we have to
create a Where clause for the query. Let's see how to filter the query by specifying a value for
the name attribute of the User object:
<sample-code:java>
// Define the query.
Query query = new Query(getScope());
// Search for User objects.
query.setObject(User.class);
// Create the WHERE clause. You must provide an instance of ScopeFacade.
Where where = query.getWhere(true);
// Set an expression like: (name = 'Steve').
where.setExpression(where.createEqualToValue("name", "Steve"));
// List "User" objects which name is 'Steve'.
List<User> users = (List<User>) view.list(query);
</sample-code:end>
This operation creates a query like this:
<sample-code:sql>
User WHERE (name = 'Steve')
158
</sample-code:end>
One great feature about Query objects is that you can assign values from different sources to
the attributes of the object that define the search criteria. This is handled with Warework Providers, that is, you have to create an expression for the Where clause which gets the value from
a Provider and assigns this value to the attribute of the object. For example, suppose that we
have a Provider named "password-provider" which returns the password for a given user
name. To search for a user which matches the password given by the Provider, we can create a
query like this:
<sample-code:java>
// Define the query.
Query query = new Query(getScope());
// Search for User objects.
query.setObject(User.class);
// Define the WHERE clause.
Where where = query.getWhere(true);
// Filter by password; assign to password the value of the Provider.
where.setExpression(where.createEqualToProviderValue("password",
"password-provider", "steve"));
// List "User" objects which name is 'Steve'.
List<User> users = (List<User>) view.list(query);
</sample-code:end>
This time, the value for the attribute is not directly assigned by the developer; instead, it is assigned with the value returned by the Provider. So, if "password-provider" returns 8713 for
"steve", then the query created looks like this:
<sample-code:sql>
User WHERE (password = 8713)
</sample-code:end>
Now we are going to create one AND expression to filter the query with two attributes. Check it
out with the following example:
<sample-code:java>
// Define the query.
Query query = new Query(getScope());
// Search for User objects.
query.setObject(User.class);
// Define the WHERE clause.
Where where = query.getWhere(true);
// Create one AND expression.
And and = where.createAnd();
// Filter by name and password.
and.add(where.createLikeValue("name", "Steve"));
and.add(where.createGreaterThanValue("password", new Integer(1000)));
// Set the AND expression in the WHERE clause.
where.setExpression(and);
// List "User" which name is like 'Steve' and password is greater than 1000.
List<User> users = (List<User>) view.list(query);
</sample-code:end>
This operation creates a query like this:
159
<sample-code:sql>
User WHERE ((name LIKE 'Steve') AND (password > 1000))
</sample-code:end>
OR expressions with Query objects
With Query objects you can also specify OR expressions:
<sample-code:java>
// Define the query.
Query query = new Query(getScope());
// Search for User objects.
query.setObject(User.class);
// Define the WHERE clause.
Where where = query.getWhere(true);
// Create one OR expression.
Or or = where.createOr();
// Filter by name and password.
or.add(where.createLikeValue("name", "Steve"));
or.add(where.createGreaterThanValue("password", new Integer(1000)));
// Set the OR expression in the WHERE clause.
where.setExpression(or);
// List "User" which name is like 'Steve' or password is greater than 1000.
List<User> users = (List<User>) view.list(query);
</sample-code:end>
This operation creates this query:
<sample-code:sql>
User WHERE ((name LIKE 'Steve') OR (password > 1000))
</sample-code:end>
Of course, you can create more complex queries. The following example shows you how to mix
multiple AND, OR and NOT expressions:
<sample-code:java>
// Define the query.
Query query = new Query(getScope());
// Search for User objects.
query.setObject(User.class);
// Define the WHERE clause.
Where where = query.getWhere(true);
// Create OR expression.
Or or1 = where.createOr();
// Filter by name.
or1.add(where.createLikeValue("name", "Arnold"));
or1.add(where.createLikeValue("name", "David"));
// Create NOT expression.
Not not = where.createNot(or1);
// Create another OR expression.
Or or2 = where.createOr();
160
// Filter by password.
or2.add(where.createGreaterThanValue("password", new Integer(1000)));
or2.add(where.createLessThanValue("password", new Integer(5000)));
// Create one AND expression.
And and = where.createAnd();
// Filter by name and password.
and.add(not);
and.add(or2);
// Set the AND expression in the WHERE clause.
where.setExpression(and);
// List "User" objects.
List<User> users = (List<User>) view.list(query);
</sample-code:end>
And this is the query representation:
<sample-code:sql>
User WHERE (NOT ((name LIKE 'Arnold') OR (name LIKE 'David')) AND ((password >
1000) OR (password < 5000)))
</sample-code:end>
Order and pagination with Query objects
Query objects also allow you to define the order of the results and which page to retrieve from
the database. The following example shows you how to list the first ten users sorted by name in
ascending order:
<sample-code:java>
// Define the query.
Query query = new Query(getScope());
// Set the type of objects to look for.
query.setObject(User.class);
// Define the order of the results.
OrderBy order = new OrderBy();
// Set ascending order for field "name".
order.addAscending("name");
// Set order by.
query.setOrderBy(order);
// Set which page to get from the result.
query.setPage(1);
// Set maximum number of objects to get in the result.
query.setPageSize(10);
// List the first ten "User" objects sorted by name in ascending order.
List<User> users = (List<User>) view.list(query);
</sample-code:end>
List objects with XML queries
Making queries like this is very useful when you have to dynamically create the query (you are
free to create the query the way you need it) but, in certain cases, it is better for the progra mmer
to create queries in separate XML files because they can be managed outside the Java code
and they are easier to understand.
161
A very convenient way to keep object queries in separate files consist of keeping each statement in an independent XML file, for example: find-user.xml, list-users.xml, etc. Later
on we can read these XML files with a Provider (Warework recommends you to use the Object
Query Provider for this task) and use this Provider to read the statements for the ODBMS View.
Remember that you can define a default Provider for a View when you associate a View to a
Data Store:
<sample-code:java>
// Add a View and link a Provider to it.
datastoreService.addView("sample-datastore", SampleViewImpl.class,
"view-name", "object-query-provider", null);
</sample-code:end>
The object-query-provider now can be used in the View as the default Provider to read
XML queries from a specific directory. Let us say we have the following content for findsteve.xml:
<sample-code:xml>
<?xml version="1.0" encoding="UTF-8"?>
<query xmlns:xsi="http://www.w3.org/2001/XMLSchema-instance"
xsi:noNamespaceSchemaLocation="http://repository.warework.com/xsd/...
...object-query-1.1.0.xsd">
<object>com.mycompany.beans.User</object>
<where>
<expression>
<attribute>name</attribute>
<operator>EQUAL_TO</operator>
<value-operand>
<type>java.lang.String</type>
<value>Steve</value>
</value-operand>
</expression>
</where>
</query>
</sample-code:end>
If object-query-provider is the default Provider in an ODBMS View, we can read the content of this file with the following code:
<sample-code:java>
// Read the content of 'find-steve.xml' and execute it.
List<User> users = (List<User>) view.executeQueryByName("find-steve", null,
-1, -1);
</sample-code:end>
When executeQueryByName is invoked, these actions are performed:
4. The ODBMS View requests the find-steve object to object-query-provider.
5. object-query-provider reads the content of find-steve.xml and returns it (as
a Query object).
6. The ODBMS View executes the statement included at find-steve.xml in the Data
Store.
The ODBMS View and the Object Query Provider are perfect mates. Both, in combination, will
simplify a lot the process of executing query statements in your object database. Just write
162
simple XML files and let Warework execute them for you. It is recommended that you check out
the documentation associated to the Object Query Provider to fully take advantage of this feature.
Operators
In XML queries you can specify operators like this:
<sample-code:xml>
<?xml version="1.0" encoding="UTF-8"?>
<query xmlns:xsi="http://www.w3.org/2001/XMLSchema-instance"
xsi:noNamespaceSchemaLocation="http://repository.warework.com/xsd/...
...object-query-1.1.0.xsd">
<object>com.mycompany.beans.User</object>
<where>
<expression>
<attribute>name</attribute>
<operator>EQUAL_TO</operator>
<value-operand>
<type>java.lang.String</type>
<value>Steve</value>
</value-operand>
</expression>
</where>
</query>
</sample-code:end>
And you can also use short keywords to identify them:
<sample-code:xml>
<?xml version="1.0" encoding="UTF-8"?>
<query xmlns:xsi="http://www.w3.org/2001/XMLSchema-instance"
xsi:noNamespaceSchemaLocation="http://repository.warework.com/xsd/...
...object-query-1.1.0.xsd">
<object>com.mycompany.beans.User</object>
<where>
<expression>
<attribute>name</attribute>
<operator>EQ</operator>
<value-operand>
<type>java.lang.String</type>
<value>Steve</value>
</value-operand>
</expression>
</where>
</query>
</sample-code:end>
Previous examples perform the same operation. Check out the following table to review which
operators are supported and which short names you can use:
OPERATOR
=
!=
<
FULL NAME
EQUAL_TO
NOT_EQUAL_TO
LESS_THAN
SHORT NAME
EQ
NE
LT
163
<=
>
>=
IS NULL
IS NOT NULL
LIKE
NOT LIKE
LESS_THAN_OR_EQUAL_TO
GREATER_THAN
GREATER_THAN_OR_EQUAL_TO
IS_NULL
IS_NOT_NULL
LIKE
NOT_LIKE
LE
GT
GE
IN
NN
LK
NL
Value types
In XML queries you can specify different value types and some of them with short names. For
example, the previous query can be written as:
<sample-code:xml>
<?xml version="1.0" encoding="UTF-8"?>
<query xmlns:xsi="http://www.w3.org/2001/XMLSchema-instance"
xsi:noNamespaceSchemaLocation="http://repository.warework.com/xsd/...
...object-query-1.1.0.xsd">
<object>com.mycompany.beans.User</object>
<where>
<expression>
<attribute>name</attribute>
<operator>EQ</operator>
<value-operand>
<type>string</type>
<value>Steve</value>
</value-operand>
</expression>
</where>
</query>
</sample-code:end>
The following table summarizes which data types can be used with short names:
OBJECT TYPE
java.lang.Boolean
java.lang.Byte
java.lang.Short
java.lang.Integer
java.lang.Long
java.lang.Float
java.lang.Double
java.lang.Character
java.lang.String
java.util.Date
SHORT NAME
boolean
byte
short
int or integer
long
float
double
char or character
string
date
AND, OR and NOT expressions in XML queries
With XML Object Queries you can write the same queries as the one you will code with Query
objects. These XML queries also allow defining AND, OR and NOT expressions as well, for example:
<sample-code:xml>
<?xml version="1.0" encoding="UTF-8"?>
<query xmlns:xsi="http://www.w3.org/2001/XMLSchema-instance"
164
xsi:noNamespaceSchemaLocation="http://repository.warework.com/xsd/...
...object-query-1.1.0.xsd">
<object>com.mycompany.beans.User</object>
<where>
<and>
<expression>
<attribute>name</attribute>
<operator>LIKE</operator>
<value-operand>
<type>java.lang.String</type>
<value>Steve</value>
</value-operand>
</expression>
<expression>
<attribute>password</attribute>
<operator>GREATER_THAN</operator>
<value-operand>
<type>java.lang.Integer</type>
<value>1000</value>
</value-operand>
</expression>
</and>
</where>
</query>
</sample-code:end>
This XML query looks like this:
<sample-code:sql>
User WHERE ((name LIKE 'Steve') AND (password > 1000))
</sample-code:end>
Check it out now with an OR expression:
<sample-code:xml>
<?xml version="1.0" encoding="UTF-8"?>
<query xmlns:xsi="http://www.w3.org/2001/XMLSchema-instance"
xsi:noNamespaceSchemaLocation="http://repository.warework.com/xsd/...
...object-query-1.1.0.xsd">
<object>com.mycompany.beans.User</object>
<where>
<or>
<expression>
<attribute>name</attribute>
<operator>LIKE</operator>
<value-operand>
<type>java.lang.String</type>
<value>Steve</value>
</value-operand>
</expression>
<expression>
<attribute>password</attribute>
<operator>GREATER_THAN</operator>
<value-operand>
<type>java.lang.Integer</type>
<value>1000</value>
</value-operand>
</expression>
</or>
</where>
165
</query>
</sample-code:end>
Now, this XML query looks like this:
<sample-code:sql>
User WHERE ((name LIKE 'Steve') OR (password > 1000))
</sample-code:end>
The following example shows a more complex query with AND, OR and NOT expressions:
<sample-code:xml>
<?xml version="1.0" encoding="UTF-8"?>
<query xmlns:xsi="http://www.w3.org/2001/XMLSchema-instance"
xsi:noNamespaceSchemaLocation="http://repository.warework.com/xsd/...
...object-query-1.1.0.xsd">
<object>com.mycompany.beans.User</object>
<where>
<not>
<and>
<expression>
<attribute>name</attribute>
<operator>NOT_LIKE</operator>
<value-operand>
<type>java.lang.String</type>
<value>James</value>
</value-operand>
</expression>
<or>
<expression>
<attribute>name</attribute>
<operator>NO_LIKE</operator>
<value-operand>
<type>java.lang.String</type>
<value>Arnold</value>
</value-operand>
</expression>
<expression>
<attribute>name</attribute>
<operator>IS_NOT_NULL</operator>
</expression>
<or>
</and>
<not>
</where>
</query>
</sample-code:end>
This is the output for the query:
<sample-code:sql>
User WHERE NOT ((name NOT_LIKE 'James') AND ((name NOT_LIKE 'Arnold') OR (name
IS_NOT_NULL)))
</sample-code:end>
Setting date values in XML queries
Before we proceed with more different examples, keep in mind that it is also possible to assign
date values to the attributes:
166
<sample-code:xml>
<?xml version="1.0" encoding="UTF-8"?>
<query xmlns:xsi="http://www.w3.org/2001/XMLSchema-instance"
xsi:noNamespaceSchemaLocation="http://repository.warework.com/xsd/...
...object-query-1.1.0.xsd">
<object>com.mycompany.beans.User</object>
<where>
<expression>
<attribute>name</attribute>
<operator>EQUAL_TO</operator>
<value-operand>
<type>java.util.Date</type>
<value>1967/08/12</value>
<format>yyyy/MM/dd</format>
<locale>en_US</locale>
<time-zone>europe/london</time-zone>
</value-operand>
</expression>
</where>
</query>
</sample-code:end>
With this information, Warework will try to parse the date and assign its value to the attribute.
While locale and time-zone are not mandatory, you should always provide the format to
properly parse the date. Check out some available locale codes here:
http://docs.oracle.com/javase/1.4.2/docs/guide/intl/locale.doc.html
Review how to retrieve time-zone codes in the following location:
http://docs.oracle.com/javase/1.4.2/docs/api/java/util/TimeZone.html
In XML queries it is also possible to assign values to attributes which come from defined vari ables or Providers.
Creating variables in XML queries
First we are going to review how to define a variable for an attribute. The idea about defining
variables is simple: by one side, you have to create an expression in the XML query and define
in there a name for a variable. This variable will be replaced later on at runtime with the values
specified by the developer. The following find-user.xml query file defines a variable for the
name attribute of the User object:
<sample-code:xml>
<?xml version="1.0" encoding="UTF-8"?>
<query xmlns:xsi="http://www.w3.org/2001/XMLSchema-instance"
xsi:noNamespaceSchemaLocation="http://repository.warework.com/xsd/...
...object-query-1.1.0.xsd">
<object>com.mycompany.beans.User</object>
<where>
<expression>
<attribute>name</attribute>
<operator>LIKE</operator>
167
<variable-operand name="USER_NAME"/>
</expression>
</where>
</query>
</sample-code:end>
Now that we have defined a variable for the name attribute, we can replace this variable with a
specific value as follows:
<sample-code:java>
// Values for variables.
Hashtable values = new Hashtable();
// Set variables for the query.
values.put("USER_NAME", "Steve");
// Read 'find-user.xml', replace variables and execute it.
List<User> users = (List<User>) view.executeQueryByName("find-user", values,
-1, -1);
</sample-code:end>
Once the value is assigned to the variable, the output query looks like this:
<sample-code:sql>
User WHERE (name LIKE 'Steve')
</sample-code:end>
We can perform a similar action with a Provider. With Providers, instead of defining a variable in
the query, we specify an object from a Provider that will be used as the value for the attribute.
For example, suppose that we have a Provider named password-provider which returns
user's passwords, that is, if we request object "steve", the Provider will return something like
"3425". The following query shows how to assign the object named "steve" in Provider "password-provider" to the "password" attribute.
<sample-code:xml>
<?xml version="1.0" encoding="UTF-8"?>
<query xmlns:xsi="http://www.w3.org/2001/XMLSchema-instance"
xsi:noNamespaceSchemaLocation="http://repository.warework.com/xsd/...
...object-query-1.1.0.xsd">
<object>com.mycompany.beans.User</object>
<where>
<expression>
<attribute>password</attribute>
<operator>EQUALS_TO</operator>
<provider-operand>
<provider-name>password-provider</provider-name>
<provider-object>steve</provider-object>
</provider-operand>
</expression>
</where>
</query>
</sample-code:end>
After the value "3425" is retrieved from the Provider and it is assigned to "password", this
query is shown as follows:
<sample-code:sql>
User WHERE (password = 3425)
</sample-code:end>
168
Count database objects
To count every object of a specific type we have to invoke the following operation:
<sample-code:java>
// Count all users.
int count = view.count(User.class);
</sample-code:end>
We can also use callbacks in count operations:
<sample-code:java>
// Count users.
view.count(User.class, new AbstractCallback(getScope()){
protected void onFailure(Throwable t) {
// Handle error here.
}
protected void onSuccess(Object result) {
// Get count.
Integer count = (Integer) result;
}
});
</sample-code:end>
It is also possible to count the results of a query:
<sample-code:java>
// Define the query.
Query query = new Query(getScope());
// Search for User objects.
query.setObject(User.class);
// Define the WHERE clause.
Where where = query.getWhere(true);
// Set an expression like this: (name = 'Carl').
where.setExpression(where.createEqualToValue("name", "Carl"));
// Count users which name is 'Carl'.
int count = view.count(query);
</sample-code:end>
With executeCountByName we can count the objects that an XML query returns:
<sample-code:java>
// Count result of "list-users" query.
int count = view.executeCountByName("list-users", null);
</sample-code:end>
Close the connection with the database
As always, when the work is done, you have to disconnect the Data Store:
<sample-code:java>
// Close the connection with the Data Store.
view.disconnect();
</sample-code:end>
169
Object Relational Mapping (ORM) View
This View is an interface for a relational database management system, where developers can
perform operations in an object-oriented way (create, read, update and delete objects in the
database) and also like it is done in relational databases, with query and update oper ations in a
specific query language. This View is just a mix of the RDBMS and ODBMS Views in one single
interface.
The Object-Relational Mapping is a technique where software developers can associate objects
of the programming language (Java Beans) with tables of a relational database. Basically, it
works as follows:
•
There is a mapping configuration (typically, in the form of XML files or Java annotations)
that specifies which Java object represents a table in the relational database. This configuration also specifies how each table column is associated with each object attribute
and also the relationship of the tables/objects between each other.
•
Once there is a mapping configuration, developers can create object instances and
store them in the relational database (one object instance represents one row in a table
of the database) without the need to write SQL. It is also possible to delete, update and
search for objects very easily in the relational database.
This ORM View encapsulates an ORM engine. You can find many good Java ORM implementations out there like ORMLite, Hibernate or EclipseLink, for example. They all have their own
characteristics but, in general, behave in the same manner. In Warework, for example, you can
use for this purpose the Data Store for JPA, which uses JPA (Java Persistence API) as an ORM
engine for this View.
The main advantage of using ORMs is that there is no need to write huge amounts of SQL
code. Each ORM engine automatically creates the SQL code required to perform CRUD operations (Create, Read, Update and Delete) in a specific database. It means that an ORM engine
can create SQL code for MySQL, Oracle or any databases that it supports, just by specifying
the target database type.
This ORM View allows the following operations with objects:
•
Save: Stores an instance of an object (typically, a serializable Java Bean) in the rela tional database as a new row in one table. Each bean attribute is associated with each
column of the database. For example:
<sample-code:java>
// Create a Java Bean.
User user = new User();
// Set some data in the Java Bean.
user.setId(new Integer(8713)); // Typically, a Primary Key
user.setName("James");
user.setDateOfBirth(new Date());
// Save the Java Bean with the ORM View.
view.save(user);
</sample-code:end>
When save operation is executed, the underlying implementation of the ORM View will
create the corresponding SQL code to insert a new record in the database, something
like this:
<sample-code:sql>
170
INSERT INTO USER (ID, NAME, DATE_OF_BIRTH)
VALUES (8713, 'John Wood', '2013/03/07')
</sample-code:end>
Once the statement is created, the ORM runs it in the database and the object is stored
in the table.
•
Update: Updates one row in a table of the database with the values of a given object.
•
Delete: Removes one row in a table of the database that matches the values of a given
object.
•
Find: Retrieves an object from the database that represents a specific row of a table.
•
List: Retrieves a list of objects from the table where each object represents one row.
•
Count: Counts objects in the database.
This ORM View also allows executing query and update statements in a specific query language supported by the ORM engine. For example, JPA supports JPQL (JPA Query Language)
which allows developers to create statements like SQL but in an object-oriented way.
Connect with the database
Even before you perform any of these operations, what you have to do first is to connect to the
relational database management system:
<sample-code:java>
// Get an instance of an ORM View interface.
ORMView view = (ORMView) datastoreService.getView(...);
// Connect the Data Store.
view.connect();
</sample-code:end>
Begin a transaction in the database
In the following examples we are going to save some information in the database but before
that, it is recommended to begin a transaction with the database.
A transaction comprises a unit of work performed within a database management system, and
treated in a coherent and reliable way independent of other transactions. Transactions in a database environment have two main purposes:
•
To provide reliable units of work that allow correct recovery from failures and keep a
database consistent even in cases of system failure, when execution stops (completely
or partially) and many operations upon a database remain uncompleted, with unclear
status.
•
To provide isolation between programs accessing a database concurrently. If this isolation is not provided the programs outcome are possibly erroneous.
Transactions provide an "all-or-nothing" proposition, stating that each work-unit performed in a
database must either complete in its entirety or have no effect whatsoever. Further, the system
must isolate each transaction from other transactions, results must conform to existing con-
171
straints in the database, and transactions that complete successfully must get written to durable
storage.
To begin a transaction in a relational database management system you have to perform the
following actions:
<sample-code:java>
// Get an instance of an ORM View interface.
ORMView view = (ORMView) datastoreService.getView(...);
// Connect the Data Store.
view.connect();
// Begin a transaction in the database management system.
view.beginTransaction();
</sample-code:end>
Save an object
Now it is the right time to perform some CRUD (Create, Read, Update, Delete) operations. First,
we are going to save one object in the database (insert one or multiple row):
<sample-code:java>
// Get an instance of an ORM View interface.
ORMView view = (ORMView) datastoreService.getView(...);
// Connect the Data Store.
view.connect();
// Begin a transaction in the database management system.
view.beginTransaction();
// Create a Java Bean.
User user = new User();
// Set some data in the Java Bean.
user.setName("James");
user.setDateOfBirth(new Date());
user.setPassword(new Integer(8713));
// Save the Java Bean in the data store.
view.save(user);
</sample-code:end>
You can also invoke this method with a callback object. This object will be invoked when the operation is done or fails. Check out the following example
<sample-code:java>
// Connect the Data Store.
view.connect();
// Begin a transaction in the database management system.
view.beginTransaction();
// Create a Java Bean.
User user = new User();
// Set some data in the Java Bean.
user.setName("James");
user.setDateOfBirth(new Date());
user.setPassword(new Integer(8713));
// Save the Java Bean in the data store.
view.save(user, new AbstractCallback(getScope()){
172
protected void onFailure(Throwable t) {
// Handle error here.
}
protected void onSuccess(Object result) {
// Handle successful operation here.
// 'result' is the object just saved.
User user = (User) result;
// Display user name.
System.out.println("User name: " + user.getName());
}
});
</sample-code:end>
It is also possible to pass objects / attributes to the callback so you can use them at onSuccess
or onFailure. For this purpose, we have to use a Hashtable when the callback is created.
Check out this example:
<sample-code:java>
// Attributes for the callback.
Hashtable attributes = new Hashtable();
// Set the attributes.
attributes.put("color", "red");
attributes.put("password", new Integer(123));
// Save the Java Bean in the data store.
view.save(user, new AbstractCallback(getScope(), attributes){
protected void onFailure(Throwable t) {
String color = (String) getAttribute("color");
}
protected void onSuccess(Object result) {
// Retrieve every attribute name with 'getAttributeNames()'.
Integer password = (Integer) getAttribute("password");
}
});
</sample-code:end>
Now we are going to save multiple objects with just one line of code. You can save an array or a
collection of objects like this:
<sample-code:java>
// Save three Java Beans in the data store.
view.save(new User[]{user1, user2, user3});
</sample-code:end>
If the underlying Data Store can save all those objects at once, just one operation will be performed. If not, the Framework will start a batch operation automatically. Batch operations are
very useful because they allow us to track each operation executed. The following example
stores a collection of Java Beans and displays data about the batch operation:
<sample-code:java>
// We can also save collections.
List<User> users = new ArrayList<User>();
// Set some users in the collection.
users.add(user1);
users.add(user2);
173
users.add(user3);
// Save the collection in the data store.
view.save(users, new AbstractCallback(getScope()){
protected void onFailure(Throwable t) {
// Handle error here.
}
protected void onSuccess(Object result) {
// This callback method is invoked three times, one for.
// each object to save.
// Get current object saved.
User user = (User) result;
// Display user name.
System.out.println("Current user name: " + user.getName());
// Display items saved.
System.out.println("Total saved: " + getBatch().count());
// Display percentage of completion.
System.out.println("% saved: " + getBatch().progress());
}
});
</sample-code:end>
When Data Stores save arrays or collections at once but we want to use Warework batch operations instead (to track each object individually), in this case we have to configure the Data
Store to work as we need. This is done with PARAMETER_SkipNativeBatchSupport. Use
this constant (or value "skip-native-batch-support") in the connector of the Data Store to
force the Framework use batch operations.
Method getBatch provides the following useful information about the batch operation in execution:
•
getBatch().count(): counts the amount of callbacks executed in the batch operation.
•
getBatch().duration(): gets how long (in milliseconds) is taking the current batch
operation.
•
getBatch().id(): gets the ID of the batch operation.
•
getBatch().progress(): gets the percentage of completion of the current batch operation.
•
getBatch().size(): gets the total of callbacks to perform in the batch operation.
•
getBatch().startTime(): gets the time (in milliseconds ) when the batch operation
started.
Update objects
Previously stored objects (rows) in the database can be updated later on with new values:
174
<sample-code:java>
// Update some data in the Java Bean.
user.setName("James Jr.");
// Update the object in the data store.
view.update(user);
</sample-code:end>
You can also use callbacks and update multiple objects (arrays or collections) with batch operations:
<sample-code:java>
// Update three Java Beans in the data store.
view.update(new User[]{user1, user2, user3}, new AbstractCallback(getScope()){
protected void onFailure(Throwable t) {
// Handle error here.
}
protected void onSuccess(Object result) {
// Get current object updated.
User user = (User) result;
// Display user name.
System.out.println("Current user name: " + user.getName());
// Display items updated.
System.out.println("Total updated: " + getBatch().count());
// Display percentage of completion.
System.out.println("% updated: " + getBatch().progress());
}
});
</sample-code:end>
Delete objects
The following example shows how to delete one object (removes the row from the table):
<sample-code:java>
// Delete the object in the data store.
view.delete(user);
</sample-code:end>
You can also use callbacks and delete arrays or collections with batch operations:
<sample-code:java>
// Delete three Java Beans in the data store.
view.delete(new User[]{user1, user2, user3}, new AbstractCallback(getScope()){
protected void onFailure(Throwable t) {
// Handle error here.
}
protected void onSuccess(Object result) {
// Get current object deleted.
User user = (User) result;
// Display user name.
System.out.println("Current user name: " + user.getName());
175
// Display items deleted.
System.out.println("Total deleted: " + getBatch().count());
// Display percentage of completion.
System.out.println("% deleted: " + getBatch().progress());
}
});
</sample-code:end>
To remove every object of a specific type, we have to provide the class:
<sample-code:java>
// Delete all users in the data store.
view.delete(User.class);
</sample-code:end>
This code can be executed in two different ways by the Framework. It is very important to un derstand that delete method creates a query when a class is provided. If the Data Store that
implements this View can delete the objects from a given query then you should not worry about
running operations like this because the Data Store directly handles the operation and takes
care about everything. When Data Stores do not support deleting objects with a given query,
you need to know that, in this case, the Framework divides the operation in two different parts.
First, it runs a query to retrieve a list of objects and after that deletes each item of the list. The
problem arises when the list to delete is so big that it kills the virtual machine memory. So
please, know your Data Store first and handle this operation with care.
If the underlying Data Store supports queries to delete multiple objects then batches will perform
just one operation. When the Framework directly handles the operation because the Data Store
does not support it, then you will be able to track each object deleted.
The following example shows how to remove a set of objects specified in a query:
<sample-code:java>
// Define the query.
Query query = new Query(getScope());
// Search for User objects.
query.setObject(User.class);
// Define the WHERE clause.
Where where = query.getWhere(true);
// Set an expression like this: (name = 'Carl').
where.setExpression(where.createEqualToValue("name", "Carl"));
// Delete every user which name is 'Carl'.
view.delete(query);
</sample-code:end>
We will show soon how to configure Query objects. By now just bear in mind that we can delete
objects with queries too.
If the query is in the form of an XML file, you can load the query and delete the objects returned
like this:
<sample-code:java>
// Delete every user specified by "list-users" query.
view.executeDeleteByName("list-users", null);
</sample-code:end>
176
This method uses a Provider to load the query from an XML file. Review later on how to list ob jects with XML files. We explain in detail there how this mechanism works and the same rules
apply for executeDeleteByName. Also, like we have seen before, you can use callback here:
<sample-code:java>
// Delete every user specified by "list-users" query.
view.executeDeleteByName("list-users", null, new AbstractCallback(getScope()){
protected void onFailure(Throwable t) {
// Handle error here.
}
protected void onSuccess(Object result) {
// Handle each object deleted here.
}
});
</sample-code:end>
If the query accepts parameters, you can update the query with a Hashtable:
<sample-code:java>
// Attributes for the query.
Hashtable filter = new Hashtable();
// Set the attributes.
filter.put("name", "John");
// Delete every user named "John".
view.executeDeleteByName("list-users", filter,
new AbstractCallback(getScope()){
protected void onFailure(Throwable t) {
// Handle error here.
}
protected void onSuccess(Object result) {
// Handle each object deleted here.
}
});
</sample-code:end>
Commit or rollback a transaction
Every update operation that we performed in the previous examples is related to the transaction
that we created before. Once the work is done, you should either commit or rollback the trans action. If the operations were executed without problems, then you should perform commit to
register the changes in the database:
<sample-code:java>
// Commits changes in the Relational Database Management System.
view.commit();
</sample-code:end>
In the other hand, if you find a failure, something unexpected happened or you just do not want
to register the changes in the database, then you should perform rollback to undo every update operation executed since the transaction was started:
<sample-code:java>
// Cancel latest update operations.
view.rollback();
</sample-code:end>
177
Find an object in the database
Now we are going to see how to retrieve objects from the database. Depending on how many
objects we want to get, we can perform two different types of operations.
To search for a specific object from the database (one row in a table of the database) you have
to invoke the find method. This method requires you to provide an object of the same type as
the one you want to retrieve, with some data in it so it will be used as a filter to find the object in
the database. To better understand how it works, check out the API description of this method:
<sample-code:java>
/**
* Finds an object by its values. This method returns the object of the data
* store which matches the type and all non-null field values from a given
* object. This is done via reflecting the type and all of the fields from
* the given object, and building a query expression where all
* non-null-value fields are combined with AND expressions. So, the object
* you will get will be the same type as the object that you will provide.
* The result of the query must return one single object in order to avoid
* an exception. In many cases, you may only need to provide the ID fields
* of the object to retrieve one single object. In relational databases like
* Oracle or MySQL, these ID fields are the primary keys.
*
* @param filter
*
Filter used to find an object in the data store. This object
*
specifies two things: first, the type of the object to search
*
for in the data store, and second, the values that identify
*
the object in the data store.
* @return Object from the data store that matches the type and the values
*
of the given object. If more than one object is found in the data
*
store, then an exception is thrown. If no objects are found, then
*
this method returns <code>null</code>.
* @throws ClientException
*/
Object find(Object filter) throws ClientException;
</sample-code:end>
Let's see some sample code. Suppose that there is a user named Steve in the relational database, we could retrieve an object instance that represents this user like this:
<sample-code:java>
// Get an instance of an ORM View interface.
ORMView view = (ORMView) datastoreService.getView(...);
// Connect the Data Store.
view.connect();
// Create the filter to find the object.
User filter = new User();
// Set the primary key.
filter.setId(new Integer(652));
// Search the user by primary key.
User user = (User) view.find(filter);
</sample-code:end>
The object that represents that specific row from the database is returned with all its data associated to it. The idea is that developers can search for an object just by providing some of its attributes and retrieve the same object type with the last information it had when it was stored or
updated in the database. Bear in mind that an exception is thrown if more than one object is
found in the database. This method just searches for a single object in the database. In order to
retrieve a collection of objects, you should invoke different methods.
178
List objects from the database
Warework provides three different ways to retrieve a list of objects from a database. The first
one works similar as the find method, but this time you will get a collection of objects (instead
of one single object). Check it out with an example:
<sample-code:java>
// Get an instance of an ORM View interface.
ORMView view = (ORMView) datastoreService.getView(...);
// Connect with the relational database.
view.connect();
// Create the filter to find the objects.
User filter = new User();
// Set the data required to find the objects in the database.
filter.setPassword(new Integer(8713));
// List every row from USER table which password is "8713".
List<User> users = (List<User>) view.list(filter, null, null, -1, -1);
</sample-code:end>
The main characteristic of this method is that it creates a query where every non-null attribute of
the given object is combined with AND expressions, for example:
<sample-code:java>
// Create the filter to find the objects.
User filter = new User();
// Set the data required to find the objects in the database.
filter.setName("Steve");
filter.setPassword(new Integer(8713));
// Find "User" objects which name is "Steve" and password is "8713".
List<User> users = (List<User>) view.list(filter, null, null, -1, -1);
</sample-code:end>
When this operation is executed, the ORM engine creates a query that may look like this:
<sample-code:sql>
SELECT * FROM USER WHERE ((NAME = 'Steve') AND (PASSWORD = 8713))
</sample-code:end>
Also, when objects of the data model are related each other (typically, 1:1 relationships), every
non-null attribute of the related objects is used to build the query. For example:
<sample-code:java>
// Create the filter to find an user by its contact.
Contact contact = new Contact();
// Set the data required to find User objects by its email.
contact.setEmail("[email protected]");
// Create the filter to find User objects.
User filter = new User();
// Set the data required to find User objects in the database.
filter.setName("Steve");
filter.setContact(contact);
// Find "User" objects which name is "Steve" and email is "[email protected]".
List<User> users = (List<User>) view.list(filter, null, null, -1, -1);
</sample-code:end>
179
This operation creates a query like this:
<sample-code:sql>
SELECT * FROM USER A, CONTACT B
WHERE ((B.USER = A.ID) AND (A.NAME = 'Steve') AND
(B.EMAIL = '[email protected]'))
</sample-code:end>
While the AND expression is always used to create the query (there is no chance to modify this
type of expression in this method), you can indicate which specific operation must be performed
in the attributes of the object. By default, the equal operator is used when a non-null attribute is
found but it is possible to use different ones like: not equals to, greater than, greater than or
equals to, less than, less than or equals to, like, not like, is null or is not null. The following ex ample shows how to list User objects which name is Steve and password is greater than
1000:
<sample-code:java>
// Create the filter to find the objects.
User filter = new User();
// Set the data required to find the objects in the database.
filter.setName("Steve");
filter.setPassword(new Integer(1000));
// Define which operators to use.
Hashtable operator = new Hashtable();
// Set which operation to perform for each attribute of the filter.
operator.put("password", Operator.GREATER_THAN);
// Find "User"s which name is "Steve" and password is greater than "1000".
List<User> users = (List<User>) view.list(filter, operator, null, -1, -1);
</sample-code:end>
This operation creates a query like this:
<sample-code:sql>
SELECT * FROM USER WHERE ((NAME = 'Steve') AND (PASSWORD > 1000))
</sample-code:end>
It is also possible to change the operator in referenced objects:
<sample-code:java>
// Create the filter to find an user by its contact.
Contact contact = new Contact();
// Set the data required to find User objects by its email.
contact.setEmail("[email protected]");
// Create the filter to find User objects.
User filter = new User();
// Set the data required to find User objects in the database.
filter.setName("Steve");
filter.setContact(contact);
// Define which operators to use.
Hashtable operator = new Hashtable();
// Set which operation to perform for each attribute of the filter.
operator.put("contact.email", Operator.LIKE);
// Find "User" objects which name is Steve and email is like "[email protected]".
180
List<User> users = (List<User>) view.list(filter, operator, null, -1, -1);
</sample-code:end>
This is the generated query:
<sample-code:sql>
SELECT * FROM USER A, CONTACT B
WHERE ((B.USER = A.ID) AND (A.NAME = 'Steve') AND
(B.EMAIL LIKE '[email protected]'))
</sample-code:end>
What if you just want to list all the objects of the same type? In this case you can provide just
the class instead of an object instance:
<sample-code:java>
// List every row from USER table.
List<User> users = (List<User>) view.list(User.class, null, null, -1, -1);
</sample-code:end>
When you provide a class you can only specify two operators: IS_NULL and IS_NOT_NULL.
This is because you cannot provide the values of the fields in a class. For example:
<sample-code:java>
// Define which operators to use.
Hashtable operator = new Hashtable();
// Set only IS_NULL or IS_NOT_NULL operators.
operator.put("name", Operator.IS_NOT_NULL);
// List every row from USER table which NAME column is not null.
List<User> users = (List<User>) view.list(User.class, operator, null, -1, -1);
</sample-code:end>
This operation creates a query like this:
<sample-code:sql>
SELECT * FROM USER WHERE (NAME IS NOT NULL)
</sample-code:end>
The same way we did before we can use a callback object in this method. Just bear in mind that
now the result of the operation is provided by the callback onSuccess method:
<sample-code:java>
// Define which operators to use.
Hashtable operator = new Hashtable();
// Set only IS_NULL or IS_NOT_NULL operators.
operator.put("name", Operator.IS_NOT_NULL);
// Find every "User" which name is not null.
view.list(User.class, null, null, -1, -1,
new AbstractCallback(getScope()){
protected void onFailure(Throwable t) {
// Handle error here.
}
protected void onSuccess(Object result) {
// Get database query result.
List<User> users = (List<User>) result;
// Handle collection here...
}
181
});
</sample-code:end>
Sort results
The third argument of the list method allows us to define how to sort the results. It is fairly
easy:
<sample-code:java>
// Define the order of the results.
OrderBy order = new OrderBy();
// Set ascending order for column "NAME".
order.addAscending("name");
// List every row from USER table sorted by name.
List<User> users = (List<User>) view.list(User.class, null, order, -1, -1);
</sample-code:end>
The result of this operation will be a list of all users sorted in ascending order. The query gener ated looks like this:
<sample-code:sql>
SELECT * FROM USER ORDER BY NAME ASC
</sample-code:end>
Pagination
Sometimes you may need to limit the number of objects returned by the ORM engine when a
query operation is performed. Let us say that there are 26 rows in USER table and that we just
expect to retrieve the first 10 rows/objects. We can write something like this:
<sample-code:java>
// Get the first 10 objects.
List<User> users = (List<User>) view.list(User.class, null, null, 1, 10);
</sample-code:end>
What is going on right now? When you specify the number of objects that you want in the result
of a database, Warework automatically calculates the number of pages that hold this number of
objects. In the previous example we specified 10 objects per result and with this information
Warework estimates that the size of each page is 10 objects and that there are three pages:
page 1 with 10 objects, page 2 with 10 objects and page 3 with 6 objects. If now we need to r etrieve the next ten objects, we have to indicate that we want the second page:
<sample-code:java>
// Get objects from 11 to 20.
List<User> users = (List<User>) view.list(User.class, null, null, 2, 10);
</sample-code:end>
If we request page number three, we get the last 6 objects from the database. The important
fact to keep in mind here is that the number of objects remains as 10:
<sample-code:java>
// Get objects from 21 to 26.
List<User> users = (List<User>) view.list(User.class, null, null, 3, 10);
</sample-code:end>
Creating custom queries with Query object
Warework also gives the possibility to create Query objects where to specify all the characteristics we had seen before. These Query objects allows to define AND, OR and NOT expressions
182
as well, so they are more useful in certain cases. The following example shows how to run a
simple query with this object:
<sample-code:java>
// Define the query.
Query query = new Query(getScope());
// Set the type of objects to look for.
query.setObject(User.class);
// List every row from USER table.
List<User> users = (List<User>) view.list(query);
</sample-code:end>
This example retrieves every row from USER table of the database. To filter the results, we have
to create a Where clause for the query. Let's see how to filter the query by specifying a value for
the name attribute of the User object:
<sample-code:java>
// Define the query.
Query query = new Query(getScope());
// Search for User objects.
query.setObject(User.class);
// Define the WHERE clause.
Where where = query.getWhere(true);
// Set an expression like: (name = 'Steve').
where.setExpression(where.createEqualToValue("name", "Steve"));
// List every row from USER table which name is 'Steve'.
List<User> users = (List<User>) view.list(query);
</sample-code:end>
This operation creates a query like this:
<sample-code:sql>
SELECT * FROM USER WHERE (NAME = 'Steve')
</sample-code:end>
One great feature about Query objects is that you can assign values from different sources to
the attributes of the object that define the search criteria. This is handled with Warework Providers, that is, you have to create an expression for the Where clause which gets the value from
a Provider and assigns this value to the attribute of the object. For example, suppose that we
have a Provider named "password-provider" which returns the password for a given user
name. To search for a user which matches the password given by the Provider, we can create a
query like this:
<sample-code:java>
// Define the query.
Query query = new Query(getScope());
// Search for User objects.
query.setObject(User.class);
// Define the WHERE clause.
Where where = query.getWhere(true);
// Filter by password; assign to password the value of the Provider.
where.setExpression(where.createEqualToProviderValue("password",
"password-provider", "steve"));
// List "User" objects which name is 'Steve'.
183
List<User> users = (List<User>) view.list(query);
</sample-code:end>
This time, the value for the attribute is not directly assigned by the developer; instead, it is assigned with the value returned by the Provider. So, if "password-provider" returns 8713 for
"steve", then the query created looks like this:
<sample-code:sql>
SELECT * FROM USER WHERE (PASSWORD = 8713)
</sample-code:end>
Now we are going to create one AND expression to filter the query with two attributes. Check it
out with the following example:
<sample-code:java>
// Define the query.
Query query = new Query(getScope());
// Search for User objects.
query.setObject(User.class);
// Define the WHERE clause.
Where where = query.getWhere(true);
// Create one AND expression.
And and = where.createAnd();
// Filter by name and password.
and.add(where.createLikeValue("name", "Steve"));
and.add(where.createGreaterThanValue("password", new Integer(1000)));
// Set the AND expression in the WHERE clause.
where.setExpression(and);
// List "User" which name is like 'Steve' and password is greater than 1000.
List<User> users = (List<User>) view.list(query);
</sample-code:end>
This operation creates a query like this:
<sample-code:sql>
SELECT * FROM USER WHERE ((NAME LIKE 'Steve') AND (PASSWORD > 1000))
</sample-code:end>
OR expressions with Query objects
With Query objects you can also specify OR expressions:
<sample-code:java>
// Define the query.
Query query = new Query(getScope());
// Search for User objects.
query.setObject(User.class);
// Define the WHERE clause.
Where where = query.getWhere(true);
// Create one OR expression.
Or or = where.createOr();
// Filter by name and password.
or.add(where.createLikeValue("name", "Steve"));
or.add(where.createGreaterThanValue("password", new Integer(1000)));
184
// Set the OR expression in the WHERE clause.
where.setExpression(or);
// List "User" which name is like 'Steve' or password is greater than 1000.
List<User> users = (List<User>) view.list(query);
</sample-code:end>
This operation creates this query:
<sample-code:sql>
SELECT * FROM USER WHERE ((NAME LIKE 'Steve') OR (PASSWORD > 1000))
</sample-code:end>
Of course, you can create more complex queries. The following example shows you how to mix
multiple AND, OR and NOT expressions:
<sample-code:java>
// Define the query.
Query query = new Query(getScope());
// Search for User objects.
query.setObject(User.class);
// Define the WHERE clause.
Where where = query.getWhere(true);
// Create OR expression.
Or or1 = where.createOr();
// Filter by name.
or1.add(where.createLikeValue("name", "Arnold"));
or1.add(where.createLikeValue("name", "David"));
// Create NOT expression.
Not not = where.createNot(or1);
// Create another OR expression.
Or or2 = where.createOr();
// Filter by password.
or2.add(where.createGreaterThanValue("password", new Integer(1000)));
or2.add(where.createLessThanValue("password", new Integer(5000)));
// Create one AND expression.
And and = where.createAnd();
// Filter by name and password.
and.add(not);
and.add(or2);
// Set the AND expression in the WHERE clause.
where.setExpression(and);
// List "User" objects.
List<User> users = (List<User>) view.list(query);
</sample-code:end>
And this is the query representation:
<sample-code:sql>
SELECT * FROM USER WHERE (NOT ((NAME LIKE 'Arnold') OR (NAME LIKE 'David'))
AND ((PASSWORD > 1000) OR (PASSWORD < 5000)))
</sample-code:end>
Order and pagination with Query objects
185
Query objects also allow you to define the order of the results and which page to retrieve from
the database. The following example shows you how to list the first ten users sorted by name in
ascending order:
<sample-code:java>
// Define the query.
Query query = new Query(getScope());
// Set the type of objects to look for.
query.setObject(User.class);
// Define the order of the results.
OrderBy order = new OrderBy();
// Set ascending order for field "name".
order.addAscending("name");
// Set order by.
query.setOrderBy(order);
// Set which page to get from the result.
query.setPage(1);
// Set maximum number of objects to get in the result.
query.setPageSize(10);
// List the first ten "User" objects sorted by name in ascending order.
List<User> users = (List<User>) view.list(query);
</sample-code:end>
List objects with XML queries
Making queries Query object is very useful when you have to dynamically create the query (you
are free to create the query the way you need it) but, in certain cases, it is better for the programmer to create queries in separate XML files because they can be managed outside the
Java code and they are easier to understand.
A very convenient way to keep object queries in separate files consist of keeping each statement in an independent XML file, for example: find-user.xml, list-users.xml, etc. Later
on we can read these XML files with a Provider (Warework recommends you to use the Object
Query Provider for this task) and use this Provider to read the statements for the ORM View.
Remember that you can define a default Provider for a View when you associate a View to a
Data Store:
<sample-code:java>
// Add a View and link a Provider to it.
datastoreService.addView("sample-datastore", SampleViewImpl.class,
"view-name", "object-query-provider", null);
</sample-code:end>
The object-query-provider now can be used in the View as the default Provider to read
XML queries from a specific directory. Let us say we have the following content for findsteve.xml:
<sample-code:xml>
<?xml version="1.0" encoding="UTF-8"?>
<query xmlns:xsi="http://www.w3.org/2001/XMLSchema-instance"
xsi:noNamespaceSchemaLocation="http://repository.warework.com/xsd/...
...object-query-1.1.0.xsd">
<object>com.mycompany.beans.User</object>
186
<where>
<expression>
<attribute>name</attribute>
<operator>EQUAL_TO</operator>
<value-operand>
<type>java.lang.String</type>
<value>Steve</value>
</value-operand>
</expression>
</where>
</query>
</sample-code:end>
If object-query-provider is the default Provider in an ORM View, we can read the content
of this file with the following code:
<sample-code:java>
// Read the content of 'find-steve.xml' and execute it.
List<User> users = (List<User>) view.executeQueryByName("find-steve", null,
-1, -1);
</sample-code:end>
When executeQueryByName is invoked, these actions are performed:
1. The ORM View requests the find-steve object to object-query-provider.
2. object-query-provider reads the content of find-steve.xml and returns it (as
a Query object).
3. The ORM View executes the statement included at find-steve.xml in the relational
database.
The ORM View and the Object Query Provider are perfect mates. Both, in combination, will simplify a lot the process of executing query statements in your database. Just write simple XML
files and let Warework execute them for you. It is recommended that you check out the documentation associated to the Object Query Provider to fully take advantage of this feature.
Operators
In XML queries you can specify operators like this:
<sample-code:xml>
<?xml version="1.0" encoding="UTF-8"?>
<query xmlns:xsi="http://www.w3.org/2001/XMLSchema-instance"
xsi:noNamespaceSchemaLocation="http://repository.warework.com/xsd/...
...object-query-1.1.0.xsd">
<object>com.mycompany.beans.User</object>
<where>
<expression>
<attribute>name</attribute>
<operator>EQUAL_TO</operator>
<value-operand>
<type>java.lang.String</type>
<value>Steve</value>
</value-operand>
</expression>
</where>
187
</query>
</sample-code:end>
And you can also use short keywords to identify them:
<sample-code:xml>
<?xml version="1.0" encoding="UTF-8"?>
<query xmlns:xsi="http://www.w3.org/2001/XMLSchema-instance"
xsi:noNamespaceSchemaLocation="http://repository.warework.com/xsd/...
...object-query-1.1.0.xsd">
<object>com.mycompany.beans.User</object>
<where>
<expression>
<attribute>name</attribute>
<operator>EQ</operator>
<value-operand>
<type>java.lang.String</type>
<value>Steve</value>
</value-operand>
</expression>
</where>
</query>
</sample-code:end>
Previous examples perform the same operation. Check out the following table to review which
operators are supported and which short names you can use:
OPERATOR
=
!=
<
<=
>
>=
IS NULL
IS NOT NULL
LIKE
NOT LIKE
FULL NAME
EQUAL_TO
NOT_EQUAL_TO
LESS_THAN
LESS_THAN_OR_EQUAL_TO
GREATER_THAN
GREATER_THAN_OR_EQUAL_TO
IS_NULL
IS_NOT_NULL
LIKE
NOT_LIKE
SHORT NAME
EQ
NE
LT
LE
GT
GE
IN
NN
LK
NL
Value types
In XML queries you can specify different value types and some of them with short names. For
example, the previous query can be written as:
<sample-code:xml>
<?xml version="1.0" encoding="UTF-8"?>
<query xmlns:xsi="http://www.w3.org/2001/XMLSchema-instance"
xsi:noNamespaceSchemaLocation="http://repository.warework.com/xsd/...
...object-query-1.1.0.xsd">
<object>com.mycompany.beans.User</object>
<where>
<expression>
<attribute>name</attribute>
<operator>EQ</operator>
188
<value-operand>
<type>string</type>
<value>Steve</value>
</value-operand>
</expression>
</where>
</query>
</sample-code:end>
The following table summarizes which data types can be used with short names:
OBJECT TYPE
java.lang.Boolean
java.lang.Byte
java.lang.Short
java.lang.Integer
java.lang.Long
java.lang.Float
java.lang.Double
java.lang.Character
java.lang.String
java.util.Date
SHORT NAME
boolean
byte
short
int or integer
long
float
double
char or character
string
date
AND, OR and NOT expressions in XML queries
With XML Object Queries you can write the same queries as the one you will code with Query
objects. These XML queries also allow defining AND, OR and NOT expressions as well, for example:
<sample-code:xml>
<?xml version="1.0" encoding="UTF-8"?>
<query xmlns:xsi="http://www.w3.org/2001/XMLSchema-instance"
xsi:noNamespaceSchemaLocation="http://repository.warework.com/xsd/...
...object-query-1.1.0.xsd">
<object>com.mycompany.beans.User</object>
<where>
<and>
<expression>
<attribute>name</attribute>
<operator>LIKE</operator>
<value-operand>
<type>java.lang.String</type>
<value>Steve</value>
</value-operand>
</expression>
<expression>
<attribute>password</attribute>
<operator>GREATER_THAN</operator>
<value-operand>
<type>java.lang.Integer</type>
<value>1000</value>
</value-operand>
</expression>
</and>
</where>
</query>
</sample-code:end>
189
This XML query is converted into something like this:
<sample-code:sql>
SELECT * FROM USER WHERE ((NAME LIKE 'Steve') AND (PASSWORD > 1000))
</sample-code:end>
Check it out now with an OR expression:
<sample-code:xml>
<?xml version="1.0" encoding="UTF-8"?>
<query xmlns:xsi="http://www.w3.org/2001/XMLSchema-instance"
xsi:noNamespaceSchemaLocation="http://repository.warework.com/xsd/...
...object-query-1.1.0.xsd">
<object>com.mycompany.beans.User</object>
<where>
<or>
<expression>
<attribute>name</attribute>
<operator>LIKE</operator>
<value-operand>
<type>java.lang.String</type>
<value>Steve</value>
</value-operand>
</expression>
<expression>
<attribute>password</attribute>
<operator>GREATER_THAN</operator>
<value-operand>
<type>java.lang.Integer</type>
<value>1000</value>
</value-operand>
</expression>
</or>
</where>
</query>
</sample-code:end>
Now, this XML query looks like this:
<sample-code:sql>
SELECT * FROM USER WHERE ((NAME LIKE 'Steve') OR (PASSWORD > 1000))
</sample-code:end>
The following example shows a more complex query with AND, OR and NOT expressions:
<sample-code:xml>
<?xml version="1.0" encoding="UTF-8"?>
<query xmlns:xsi="http://www.w3.org/2001/XMLSchema-instance"
xsi:noNamespaceSchemaLocation="http://repository.warework.com/xsd/...
...object-query-1.1.0.xsd">
<object>com.mycompany.beans.User</object>
<where>
<not>
<and>
<expression>
<attribute>name</attribute>
<operator>NOT_LIKE</operator>
<value-operand>
190
<type>java.lang.String</type>
<value>James</value>
</value-operand>
</expression>
<or>
<expression>
<attribute>name</attribute>
<operator>NO_LIKE</operator>
<value-operand>
<type>java.lang.String</type>
<value>Arnold</value>
</value-operand>
</expression>
<expression>
<attribute>name</attribute>
<operator>IS_NOT_NULL</operator>
</expression>
<or>
</and>
<not>
</where>
</query>
</sample-code:end>
This is the output for the query:
<sample-code:sql>
SELECT * FROM USER WHERE NOT ((NAME NOT LIKE 'James') AND
((NAME NOT LIKE 'Arnold') OR (NAME IS NOT NULL)))
</sample-code:end>
Setting date values in XML queries
Before we proceed with more different examples, keep in mind that it is also possible to assign
date values to the attributes:
<sample-code:xml>
<?xml version="1.0" encoding="UTF-8"?>
<query xmlns:xsi="http://www.w3.org/2001/XMLSchema-instance"
xsi:noNamespaceSchemaLocation="http://repository.warework.com/xsd/...
...object-query-1.1.0.xsd">
<object>com.mycompany.beans.User</object>
<where>
<expression>
<attribute>name</attribute>
<operator>EQUAL_TO</operator>
<value-operand>
<type>java.util.Date</type>
<value>1967/08/12</value>
<format>yyyy/MM/dd</format>
<locale>en_US</locale>
<time-zone>europe/london</time-zone>
</value-operand>
</expression>
</where>
</query>
</sample-code:end>
With this information, Warework will try to parse the date and assign its value to the attribute.
While locale and time-zone are not mandatory, you should always provide the format to
properly parse the date. Check out some available locale codes here:
191
http://docs.oracle.com/javase/1.4.2/docs/guide/intl/locale.doc.html
Review how to retrieve time-zone codes in the following location:
http://docs.oracle.com/javase/1.4.2/docs/api/java/util/TimeZone.html
In XML queries it is also possible to assign values to attributes which come from defined vari ables or Providers.
Creating variables in XML queries
First we are going to review how to define a variable for an attribute. It is simple: by one side,
you have to create an expression in the XML query and define in there a name for a variable.
This variable will be replaced later on at runtime with the values specified by the developer. The
following find-user.xml query file defines a variable for the name attribute of the User object:
<sample-code:xml>
<?xml version="1.0" encoding="UTF-8"?>
<query xmlns:xsi="http://www.w3.org/2001/XMLSchema-instance"
xsi:noNamespaceSchemaLocation="http://repository.warework.com/xsd/...
...object-query-1.1.0.xsd">
<object>com.mycompany.beans.User</object>
<where>
<expression>
<attribute>name</attribute>
<operator>LIKE</operator>
<variable-operand name="USER_NAME"/>
</expression>
</where>
</query>
</sample-code:end>
Now that we have defined a variable for the name attribute, we can replace this variable with a
specific value as follows:
<sample-code:java>
// Values for variables.
Hashtable values = new Hashtable();
// Set variables for the query.
values.put("USER_NAME", "Steve");
// Read 'find-user.xml', replace variables and execute it.
List<User> users = (List<User>) view.executeQueryByName("find-user", values,
-1, -1);
</sample-code:end>
Once the value is assigned to the variable, the output query looks like this:
<sample-code:sql>
SELECT * FROM USER WHERE (NAME LIKE 'Steve')
</sample-code:end>
192
We can perform a similar action with a Provider. With Providers, instead of defining a variable in
the query, we specify an object from a Provider that will be used as the value for the attribute.
For example, suppose that we have a Provider named password-provider which returns
user's passwords, that is, if we request object "steve", the Provider will return something like
"3425". The following query shows how to assign the object named "steve" in Provider "password-provider" to the "password" attribute.
<sample-code:xml>
<?xml version="1.0" encoding="UTF-8"?>
<query xmlns:xsi="http://www.w3.org/2001/XMLSchema-instance"
xsi:noNamespaceSchemaLocation="http://repository.warework.com/xsd/...
...object-query-1.1.0.xsd">
<object>com.mycompany.beans.User</object>
<where>
<expression>
<attribute>password</attribute>
<operator>EQUALS_TO</operator>
<provider-operand>
<provider-name>password-provider</provider-name>
<provider-object>steve</provider-object>
</provider-operand>
</expression>
</where>
</query>
</sample-code:end>
After the value "3425" is retrieved from the Provider and it is assigned to "password", this
query is shown as follows:
<sample-code:sql>
SELECT * FROM USER WHERE (PASSWORD = 3425)
</sample-code:end>
Running native update statements
This ORM View also allows executing native queries supported by the ORM engine. Some engines let developers to run SQL statements while others allow the execution of statements in a
custom object-oriented query language (for example: Hibernate Query Language or JPA Query
Language). The following fragment of code shows how to execute an SQL statement in the relational database with an ORM engine that supports SQL for native queries:
<sample-code:java>
// Get an instance of a ORM View interface.
ORMView view = (ORMView) datastoreService.getView(…);
// Connect with the relational database.
view.connect();
// Begin a transaction in the relational database.
view.beginTransaction();
// Create the SQL statement to execute.
String sql = "INSERT INTO HOME_USERS (ID, NAME) VALUES (1, 'John Wood')";
// Run the SQL update statement.
view.executeUpdate(sql, null);
// Commit changes.
193
view.commit();
</sample-code:end>
Another option is to execute multiple statements at once. You can do it by specifying a separat or character which delimits each statement:
<sample-code:java>
// SQL statement to create first user.
String sql1 = "INSERT INTO HOME_USERS (ID, NAME) VALUES (1, 'John Wood')";
// SQL statement to create second user.
String sql2 = "INSERT INTO HOME_USERS (ID, NAME) VALUES (2, 'James Sharpe')";
// SQL statement to create third user.
String sql3 = "INSERT INTO HOME_USERS (ID, NAME) VALUES (3, 'Sofia Green')";
// Execute three SQL update statements at once.
view.executeUpdate(sql1 + ";" + sql2 + ";" + sql3, new Character(';'));
</sample-code:end>
Running scripts with update statements
If you define a default Provider for this View that reads plaint text files, like Warework FileText
Provider, you can read .sql scripts and execute them in the database very easily. This time, instead of setting up the View with the Object Query Provider, we specify that the default Provider
is a FileText Provider that reads .sql statements from a specific directory:
<sample-code:java>
// Add a View and link a Provider to it.
datastoreService.addView("sample-datastore", SampleViewImpl.class,
"view-name", "sql-provider", null);
</sample-code:end>
The sql-provider Provider now can be used in the View as the default Provider to read text
files from a specific directory. Let us say we have the following content for create-user.sql:
<sample-code:sql>
INSERT INTO HOME_USERS (ID, NAME) VALUES (1, 'John Wood')
</sample-code:end>
If sql-provider is the default Provider in a ORM View, we can read the content of this file
with the following code:
<sample-code:java>
// Read the content of 'create-user.sql' and execute it.
view.executeUpdateByName("create-user", null, null);
</sample-code:end>
When executeUpdateByName is invoked, these actions are performed:
1. The ORM View requests the create-user object to sql-provider.
2. sql-provider reads the content of create-user.sql and returns it (as a String
object).
3. The ORM View executes the statement included at create-user.sql in the relational
database.
Defining variables in scripts with update statements
194
If we need a generic statement to create new users in the database, we can define the script
create-user.sql with some variables, like this:
<sample-code:sql>
INSERT INTO HOME_USERS (ID, NAME) VALUES (${USER_ID}, ${USER_NAME})
</sample-code:end>
Then replace these variables with the values that you need:
<sample-code:java>
// Values for variables.
Hashtable values = new Hashtable();
// Set variables for the update statement.
values.put("USER_ID", new Integer(3));
values.put("USER_NAME", "Ian Sharpe");
// Create a new user in the relational database.
view.executeUpdateByName("create-user", values, null);
</sample-code:end>
When your script contains multiple statements, you also have to indicate the character that delimits each statement. Suppose we have the following create-user.sql script:
<sample-code:sql>
INSERT INTO HOME_USERS (ID, NAME) VALUES (${USER_ID}, ${USER_NAME});
INSERT INTO ACTIVE_USERS (ID, NAME) VALUES (${USER_ID});
</sample-code:end>
Now we can replace variables in multiple statements with this code:
<sample-code:java>
// Values for variables.
Hashtable values = new Hashtable();
// Set variables for the update statement.
values.put("USER_ID", new Integer(3));
values.put("USER_NAME", "Ian Sharpe");
// Create a new user in the database.
view.executeUpdateByName("create-user", values, new Character(';'));
</sample-code:end>
Running native queries
Now we are going to focus on native query operations to know how to retrieve data from a rela tional database. The following code is an example to perform this action:
<sample-code:java>
// Execute the statement to retrieve some data.
Object result = view.executeQuery("SELECT * FROM HOME_USERS", -1, -1);
</sample-code:end>
This code executes the SQL statement into the relational database and returns an object that
represents the result provided by the database. Remember that we are using SQL just as an example of a native query language and that it could be a complete different one like HQL or
JPQL. The type of the result returned by this method depends on the implementation of the
ORM engine, so please, check out the documentation of the Data Store that implements this
ORM View to learn about the result type for this method.
195
Pagination with native queries
It is also possible to specify the page and size for the result set. In the following example, 1 rep resents the page to retrieve and 10 is the size of the result:
<sample-code:java>
// Get the first 10 rows.
Object result = view.executeQuery("SELECT * FROM HOME_USERS", 1, 10);
</sample-code:end>
Running native queries from scripts
With queries, you can also write SELECT statements in separate text files (this time, just one
statement per file). Suppose that the following code is the content of the list-users.sqlfile:
<sample-code:sql>
SELECT * FROM HOME_USERS
</sample-code:end>
If sql-provider still is our default Provider, we can read the script like this:
<sample-code:java>
// Read the content of 'list-users.sql' and execute it in the database.
Object result = view.executeQueryByName("list-users", null, -1, -1);
</sample-code:end>
Defining variables in a query script
There is also the possibility to define some variables in the query:
<sample-code:sql>
SELECT * FROM HOME_USERS A WHERE A.ID = ${USER_ID}
</sample-code:end>
Now we can assign a value to this variable to complete the query. This is done as follows:
<sample-code:java>
// Values for variables.
Hashtable values = new Hashtable();
// Set variables to filter the query.
values.put("USER_ID", new Integer(8375));
// Read 'list-users.sql', replace variables and execute the final statement.
Object result = view.executeQueryByName("list-users", values, -1, -1);
</sample-code:end>
The two last arguments allow you to define the page and the maximum number of objects to retrieve. The following example shows how to get the second page with a fixed size of 10 objects
per page:
<sample-code:java>
// Get the second page with no more than 10 registries in it.
Object result = view.executeQueryByName("list-users", null, 2, 10);
</sample-code:end>
Count database objects
To count every object of a specific type (every row in a table) we have to invoke the following
operation:
196
<sample-code:java>
// Count all users.
int count = view.count(User.class);
</sample-code:end>
We can also use callbacks in count operations:
<sample-code:java>
// Count users.
view.count(User.class, new AbstractCallback(getScope()){
protected void onFailure(Throwable t) {
// Handle error here.
}
protected void onSuccess(Object result) {
// Get count.
Integer count = (Integer) result;
}
});
</sample-code:end>
It is also possible to count the results of a query:
<sample-code:java>
// Define the query.
Query query = new Query(getScope());
// Search for User objects.
query.setObject(User.class);
// Define the WHERE clause.
Where where = query.getWhere(true);
// Set an expression like this: (name = 'Carl').
where.setExpression(where.createEqualToValue("name", "Carl"));
// Count users which name is 'Carl'.
int count = view.count(query);
</sample-code:end>
With executeCountByName we can count the objects that an XML query returns:
<sample-code:java>
// Count result of "list-users" query.
int count = view.executeCountByName("list-users", null);
</sample-code:end>
Close the connection with the database
As always, when the work is done, you have to disconnect the Data Store:
<sample-code:java>
// Close the connection with the Data Store.
view.disconnect();
</sample-code:end>
Create custom Views
The creation process of a View consists of two steps. The first one is about defining your own
View logic in an interface that extends, at least, the DatastoreView interface. Check out this
197
class in the com.warework.service.datastore.view package; you can also extend
more interfaces of Views in this package.
<sample-code:java>
import com.warework.service.datastore.view.DatastoreView;
public interface MyView extends DatastoreView {
public void operation1();
public void operation2();
}
</sample-code:end>
The second one has to do with implementing your interface in a class that extends the AbstractDatastoreView class. This abstract class provides the default functionality to make
an object behave as a View. Just extend it, implement your interface and write the required
methods:
<sample-code:java>
import com.warework.service.datastore.AbstractDatastoreView;
public class MyViewImpl extends AbstractDatastoreView implements
MyView {
// NOTE 1: Query the Data Store with method "query()" that exists in the
// AbstractDatastoreView class.
// NOTE 2: Update the Data Store with method "update()" that exists in the
// AbstractDatastoreView class.
// NOTE 3: Commit the Data Store with method "commit()" that exists in the
// AbstractDatastoreView class.
// NOTE 4: Connect the Data Store with method "connect()" that exists in
// the AbstractDatastoreView class.
// NOTE 5: Disconnect the Data Store with method "disconnect()" that exists
// in the AbstractDatastoreView class.
// NOTE 6: Validate if connection is open with method "isConnected()" that
// exists in the AbstractDatastoreView class.
// NOTE 7: Get the main Data Store with method "getDatastore()" that
// exists in the AbstractDatastoreView class.
// NOTE 8: Get the next View in the stack of Views of the Data Store with
// method "getParentView()" that exists in the AbstractDatastoreView class.
// NOTE 9: Get a statement from the default Provider with method
// "getStatement()" that exists in the AbstractDatastoreView class.
// NOTE 10: List every initialization parameter with the protected
// method "getInitParameterNames()" that exists in the
// AbstractDatastoreView class.
// NOTE 11: Get the value of an initialization parameter with the
// protected method "getInitParameter(String name)" that exists
// in the AbstractDatastoreView class.
198
// ----- MyView methods
public void operation1() {
// Perform your Data Store operations here.
}
public void operation2() {
// Perform your Data Store operations here.
}
}
</sample-code:end>
Hashtable Data Store
This Data Store allows you to perform operations with a Hashtable, that is, a memory key-value
Data Store. You can create one instance of this map and add, query, update and remove the
values that it has by providing keys. These operations can be executed with the Data Store Service Facade, with well-known methods like: connect, disconnect, query, update and commit. You can also perform the same operations with a Key-Value View specifically designed for
a Hashtable Data Store.
Add a Hashtable Data Store
To add a Hashtable Data Store into the Data Store Service you have to invoke method createClient() that exists in its Facade with a name and the Hashtable Connector class. You
can use just one type of Connector and it does not require any configuration:
<sample-code:java>
// Create the Hashtable Data Store.
datastoreService.createClient("hashtable-datastore",
HashtableConnector.class, null);
</sample-code:end>
Check it now how to do it with the Data Store Service XML configuration file (this functionality is
provided by Warework Data Store Extension Module):
<sample-code:xml>
<?xml version="1.0" encoding="UTF-8"?>
<datastore-service xmlns:xsi="http://www.w3.org/2001/XMLSchema-instance"
xsi:noNamespaceSchemaLocation="http://repository.warework.com/xsd/datastore
-service-1.1.0.xsd">
<datastores>
<datastore name="hashtable-datastore" connector=
"com.warework.service.datastore.client.connector.HashtableConnector"/>
</datastores>
</datastore-service>
</sample-code:end>
Working with the Hashtable Data Store
Like every Data Store, you can perform operations with Hashtable Data Stores in the Data Store
Service Facade. Now we are going to review the basic Hashtable Data Store operations
199
provided by the DatastoreServiceFacade interface. We can group these operations as follows:
•
Connect and disconnect Hashtable Data Stores
The first operation you have to invoke to start working with a Hashtable Data Store is
connect:
<sample-code:java>
// Connect the Hashtable Data Store.
datastoreService.connect("hashtable-datastore");
</sample-code:end>
After you perform the connection, you typically will execute other Hashtable Data Store
operations like query. Once the job is done, you will need to close the Hashtable Data
Store:
<sample-code:java>
// Disconnect the Hashtable Data Store.
datastoreService.disconnect("hashtable-datastore");
</sample-code:end>
•
Query Hashtable Data Stores
There are two methods, both named query, where you can retrieve information from a
Hashtable Data Store. The first one (and the most useful one) allows you to directly
search for the value associated to a key:
<sample-code:java>
// Get the value of the 'user.name' key in the Data Store.
String value = (String) datastoreService.
query("hashtable-datastore", "user.name");
</sample-code:end>
You can use different types of keys too, also retrieve different types of values (remember, the underlying collection is a simple instance of a Hashtable class):
<sample-code:java>
// Get the value of the 536 key in the Data Store.
Date dateofBirth = (Date) datastoreService.
query("hashtable-datastore", new Integer(536));
</sample-code:end>
Another way to search for data in a Data Store is by loading and executing statements
that exist in a Provider. This functionality is rarely used with Hashtable Data Stores. If
you still want to read a key from a Provider, please review the Data Store Service documentation.
•
Update Hashtable Data Stores
This time, instead of querying for data in a Hashtable Data Store, you will create or
modify a key in the Data Store. For example:
<sample-code:java>
// Set a new key in the Hashtable.
datastoreService.update("hashtable-datastore", "user.name=John Wood");
</sample-code:end>
200
To store/update values different than strings, you will need to provide an array of objects, where the first position of the array represents the key and the second position
the value for that key:
<sample-code:java>
// Set key 536 with the current date.
datastoreService.update("hashtable-datastore",
new Object[]{new Integer(536), new Date()});
</sample-code:end>
•
Commit Hashtable Data Stores
This operation does not perform any action in the Hashtable so there is no need to
worry about committing this Data Store.
Key-Value View for Hashtable Data Stores
This View is a class that implements the Key-Value interface for the Hashtable Data Store. Now
we are going to see how to associate a View of this type with a Hashtable Data Store and how
to perform operations with the View.
•
Setting up the View
There is no need to configure this View with initialization parameters, so just add the
View in the stack of Views of the Hashtable Data Store:
<sample-code:java>
// Add Key-Value View for Hashtable Data Stores.
datastoreService.addView("hashtable-datastore",
HashtableViewImpl.class, "key-value-view", null, null);
</sample-code:end>
Check it now how to do it with the Data Store Service XML configuration file:
<sample-code:xml>
<?xml version="1.0" encoding="UTF-8"?>
<datastore-service xmlns:xsi="http://www.w3.org/2001/XMLSchema-instance"
xsi:noNamespaceSchemaLocation="http://repository.warework.com/ …
… xsd/datastore-service-1.1.0.xsd">
<datastores>
<datastore name="hashtable-datastore"
connector="com.warework.service.datastore. …
… client.connector.HashtableConnector">
<views>
<view class="com.warework.service.datastore. …
… client.HashtableViewImpl" name="key-value-view"/>
</views>
</datastore>
</datastores>
</datastore-service>
</sample-code:end>
You can also provide short class names to identify Connectors and Views:
<sample-code:xml>
<?xml version="1.0" encoding="UTF-8"?>
<datastore-service xmlns:xsi="http://www.w3.org/2001/XMLSchema-instance"
201
xsi:noNamespaceSchemaLocation="http://repository.warework.com/ …
… xsd/datastore-service-1.1.0.xsd">
<datastores>
<datastore name="hashtable-datastore" connector="Hashtable">
<views>
<view class="Hashtable" name="key-value-view"/>
</views>
</datastore>
</datastores>
</datastore-service>
</sample-code:end>
•
Working with the Key-Value View for Hashtable Data Stores
Now we are going to review the basic operations provided by the HashtableViewImpl class. Working with this View is fairly easy because the KeyValueView interface (package: com.warework.service.datastore.view) only
exposes a few methods and they all are very simple.
The first operation you have to perform to start working with a Data Store is the connect operation. There is no exception with the Key-Value View:
<sample-code:java>
// Get an instance of a Key-Value interface.
KeyValueView view = (KeyValueView) datastoreService.
getView("hashtable-datastore");
// Connect the Hashtable Data Store.
view.connect();
</sample-code:end>
The following example shows how to add a new value associated to a key in the Hashtable Data Store:
<sample-code:java>
// Get an instance of a Key-Value interface.
KeyValueView view = (KeyValueView) datastoreService.
getView("hashtable-datastore");
// Connect the Hashtable Data Store.
view.connect();
// Create a new key named 'user.name' or update it.
view.put("user.name", "John Wood");
</sample-code:end>
Remember, you can use values different than Strings:
<sample-code:java>
// Get an instance of a Key-Value interface.
KeyValueView view = (KeyValueView) datastoreService.
getView("hashtable-datastore");
// Connect the Hashtable Data Store.
view.connect();
// Create a new 536 key named with the current date.
view.put(new Integer(536), new Date());
</sample-code:end>
Now, you can retrieve the value associated to a key like this:
202
<sample-code:java>
// Get the value of the 536 key.
Date value = (Date) view.get(new Integer(536));
</sample-code:end>
This is how to remove a key and the value associated to it:
<sample-code:java>
// Remove the key from the Hashtable Data Store.
view.remove("user.name");
</sample-code:end>
You can also get a list with the keys that exist in the Data Store:
<sample-code:java>
// Get every key from the Hashtable Data Store.
Enumeration keys = view.keys();
</sample-code:end>
When finished, you have to disconnect the Hashtable Data Store:
<sample-code:java>
// Close the connection with the Data Store.
view.disconnect();
</sample-code:end>
Properties Data Store
This Data Store allows you to perform operations with properties files. You can load one of this
configuration files and query the properties that it has just by providing keys. There is also the
possibility to add new properties or update existing ones, and save them in the same file that
you loaded. These operations can be executed with the Data Store Service Facade, with wellknown methods like: connect, disconnect, query, update and commit. You can also perform the same operations with a Key-Value View specifically designed for a Properties Data
Store.
Add a Properties Data Store
To add a Properties Data Store into the Data Store Service you have to invoke method createClient() that exists in its Facade with a name, the Properties Connector class and a
configuration for the Data Store. You can use just one type of Connector:
<sample-code:java>
// Create the configuration for the Data Store.
Hashtable config = new Hashtable();
// Set the location of the properties file.
config.put(PropertiesConnector.PARAMETER_ConfigTarget,
"/META-INF/config.properties");
// Create the Properties Data Store.
datastoreService.createClient("properties-datastore",
PropertiesConnector.class, config);
</sample-code:end>
203
The PropertiesConnector collects the configuration and sets up a Properties Data Store
with the properties file that exists where PARAMETER_ConfigTarget specifies. Check it now
how to do it with the Data Store Service XML configuration file (this functionality is provided by
Warework Data Store Extension Module):
<sample-code:xml>
<?xml version="1.0" encoding="UTF-8"?>
<datastore-service xmlns:xsi="http://www.w3.org/2001/XMLSchema-instance"
xsi:noNamespaceSchemaLocation="http://repository.warework.com/xsd/datastore
-service-1.1.0.xsd">
<datastores>
<datastore name="properties-datastore" connector=
"com.warework.service.datastore.client.connector.PropertiesConnector">
<parameter name="config-target" value="/META-INF/config.properties"/>
</datastore>
</datastores>
</datastore-service>
</sample-code:end>
For those who need to load a properties file from a different JAR, remember that you can do so
by adding parameter PropertiesConnector.PARAMETER_ContextLoader.
Working with the Properties Data Store
Like every Data Store, you can perform operations with Properties Data Stores in the Data
Store Service Facade. Now we are going to review the basic Properties Data Store operations
provided by the DatastoreServiceFacade interface. We can group these operations as follows:
•
Connect and disconnect Properties Data Stores
The first operation you have to invoke to start working with a Properties Data Store is
connect:
<sample-code:java>
// Connect the Properties Data Store.
datastoreService.connect("properties-datastore");
</sample-code:end>
After you perform the connection, you typically will execute other Properties Data Store
operations like query, the most used one. Once the job is done, you will need to close
the Properties Data Store:
<sample-code:java>
// Disconnect the Properties Data Store.
datastoreService.disconnect("properties-datastore");
</sample-code:end>
•
Query Properties Data Stores
There are two methods, both named query, where you can retrieve information from a
Properties Data Store. The first one (and the most useful one) allows you to directly
search for the value associated to a key:
<sample-code:java>
204
// Get the value of the 'user.name' property in the Data Store.
String value = (String) datastoreService.
query("properties-datastore", "user.name");
</sample-code:end>
Another way to search for data in a Data Store is by loading and executing statements
that exist in a Provider. This functionality is rarely used with Properties Data Stores. If
you still want to read a key from a Provider, please review the Data Store Service documentation.
•
Update Properties Data Stores
This time, instead querying for data in a Properties Data Store, you will create or modify
a key in the Data Store. For example:
<sample-code:java>
// Set a new property in the properties file.
datastoreService.update("properties-datastore", "user.name=John Wood");
</sample-code:end>
•
Commit Properties Data Stores
You can commit changes just by providing the name of the Properties Data Store:
<sample-code:java>
// Update existing properties file.
datastoreService.commit("properties-datastore");
</sample-code:end>
Note that sometimes you will not be able to perform this action because you may not
have write permissions.
Key-Value View for Properties Data Stores
This View is a class that implements the Key-Value interface and it represents an abstract Data
Store composed of a collection of key-value pairs, such that each possible key appears at most
once in the collection.
Now we are going to see how to associate a View of this type with a Properties Data Store and
how to perform operations with the View.
•
Setting up the View
There is no need to configure this View with initialization parameters, so just add the
View in the stack of Views of the Properties Data Store:
<sample-code:java>
// Add Key-Value View for Properties Data Stores.
datastoreService.addView("properties-datastore",
PropertiesViewImpl.class, "keyvalue-view", null, null);
</sample-code:end>
Check it now how to do it with the Data Store Service XML configuration file:
<sample-code:xml>
<?xml version="1.0" encoding="UTF-8"?>
<datastore-service xmlns:xsi="http://www.w3.org/2001/XMLSchema-instance"
205
xsi:noNamespaceSchemaLocation="http://repository.warework.com/ …
… xsd/datastore-service-1.1.0.xsd">
<datastores>
<datastore name="properties-datastore"
connector="com.warework.service.datastore. …
… client.connector.PropertiesConnector">
<parameter name="config-target"
value="/META-INF/config.properties"/>
<views>
<view class="com.warework.service.datastore. …
… client.PropertiesViewImpl" name="keyvalue-view"/>
</views>
</datastore>
</datastores>
</datastore-service>
</sample-code:end>
You can also provide short class names to identify Connectors and Views:
<sample-code:xml>
<?xml version="1.0" encoding="UTF-8"?>
<datastore-service xmlns:xsi="http://www.w3.org/2001/XMLSchema-instance"
xsi:noNamespaceSchemaLocation="http://repository.warework.com/ …
… xsd/datastore-service-1.1.0.xsd">
<datastores>
<datastore name="properties-datastore" connector="Properties">
<parameter name="config-target"
value="/META-INF/config.properties"/>
<views>
<view class="Properties" name="keyvalue-view"/>
</views>
</datastore>
</datastores>
</datastore-service>
</sample-code:end>
•
Working with the Key-Value View for Properties Data Stores
Now we are going to review the basic operations provided by the PropertiesViewImpl class. Working with this View is fairly easy because the KeyValueView interface (package: com.warework.service.datastore.view) only exposes a few
methods and they all are very simple.
The first operation you have to perform to start working with a Data Store is the connect operation. There is no exception with the Key-Value View:
<sample-code:java>
// Get an instance of a Key-Value interface.
KeyValueView view = (KeyValueView) datastoreService.
getView("properties-datastore");
// Connect the Properties Data Store.
view.connect();
</sample-code:end>
The following example shows how to add a new value associated to a key in the Prop erties Data Store:
<sample-code:java>
206
// Get an instance of a Key-Value interface.
KeyValueView view = (KeyValueView) datastoreService.
getView("properties-datastore");
// Connect the Properties Data Store.
view.connect();
// Create a new key named 'user.name' or update it.
view.put("user.name", "John Wood");
</sample-code:end>
A very important fact to bear in mind is that this View will accept only String values, if
a different type is given, then an exception will be thrown.
Now, you can retrieve the value associated to a key like this:
<sample-code:java>
// Get the value of the 'user.name' key.
String value = (String) view.get("user.name");
</sample-code:end>
This is how to remove a key and the value associated to it:
<sample-code:java>
// Remove the key from the Properties Data Store.
view.remove("user.name");
</sample-code:end>
You can also get a list with the names of the keys that exist in the Data Store:
<sample-code:java>
// Get every key from the Properties Data Store.
Enumeration keys = view.keys();
</sample-code:end>
To retrieve the number of key-value pairs you have to invoke the size method like this:
<sample-code:java>
// Count keys in Data Store.
int size = view.size();
</sample-code:end>
Once you have performed a set of put or remove operations, it might be a good idea
to perform commit to register the changes in the Properties Data Store:
<sample-code:java>
// Commit changes in the Properties Data Store.
view.commit();
</sample-code:end>
When the work is done, you have to disconnect the Properties Data Store:
<sample-code:java>
// Close the connection with the Data Store.
view.disconnect();
</sample-code:end>
JDBC Data Store
207
This Data Store allows you to perform operations with relational databases using the JDBC
technology. It is a wrapper for JDBC that simplifies the process of connecting with a database
and the way you query or update data in it with SQL.
You can either use common methods from the Data Store Service like connect, disconnect,
query, update and commit; or perform more specific operations with the implementations
provided for the RDBMS and Key-Value Views.
The JDBC Data Store integrates perfectly with other components of the Framework to retrieve
database connections. For example: you can either use a javax.sql.DataSource object
from a JNDI Provider in a server platform or retrieve a java.sql.Connection object from the
Warework Pool Service. In general, you will setup the connection for this Data Store with an
XML configuration file; it is very probably that you will not need to write a single line of Java
code to configure your database connection.
The execution of SQL statements is very easy and most of the times one line of code is enough
to perform the task. This JDBC Data Store allows you to:
•
Create a String object that represents an SQL statement.
•
Run SQL commands like SELECT or INSERT that exist in a text file.
•
Define variables in a SQL script and replace them with specific values before the script
is executed.
Add a JDBC Data Store
To add a JDBC Data Store into the Data Store Service you have to invoke method createClient() that exists in its Facade with a name, the JDBCConnector class and a configuration for the Data Store.
This configuration has to specify a Provider where to retrieve a javax.sql.DataSource or a
java.sql.Connection object (the first one store the information required to create a connection with the database and the second represents the connection itself). A Provider configured
for the JDBCConnector typically will return a DataSource object in a server platform (for example: you can get a DataSource object from a JNDI Provider which is configured to work in a
WebLogic Application Server) and a Connection object in a standalone application (in most
cases, it is a good idea to get Connection objects with the Warework Pool Service; you can
use for example a c3p0 Pooler/Client in this Service to define and create your database connections using a pool of Connection objects).
If you can get an instance of a DataSource from a Provider, then you should configure this
Data Store like this:
<sample-code:java>
// Create the configuration for the Data Store.
Hashtable config = new Hashtable();
// Set the name of the Provider where to retrieve the DataSource object.
config.put(JDBCConnector.PARAMETER_ConnectionSourceProviderName,
"datasource-provider");
// Set the name of the object that represents the DataSource in the Provider.
config.put(JDBCConnector.PARAMETER_ConnectionSourceProviderObject,
"datasource-object-name");
// Create the JDBC Data Store.
208
datastoreService.createClient("jdbc-datastore", JDBCConnector.class, config);
</sample-code:end>
With this code we instruct the JDBC Connector to retrieve a DataSource object named datasource-object-name (if it is a JNDI name, it may look like jdbc/myApplicationDS) from
Provider datasource-provider (in a server platform, this Provider usually is a JNDI Provider).
Check it now how to do it with the Data Store Service XML configuration file (this functionality is
provided by Warework Data Store Extension Module):
<sample-code:xml>
<?xml version="1.0" encoding="UTF-8"?>
<datastore-service xmlns:xsi="http://www.w3.org/2001/XMLSchema-instance"
xsi:noNamespaceSchemaLocation="http://repository.warework.com/xsd/datastore
-service-1.1.0.xsd">
<datastores>
<datastore name="jdbc-datastore" connector=
"com.warework.service.datastore.client.connector.JDBCConnector">
<parameters>
<parameter name="connection-source-provider-name"
value="datasource-provider"/>
<parameter name="connection-source-provider-object"
value="datasource-object-name"/>
</parameters>
</datastore>
</datastores>
</datastore-service>
</sample-code:end>
If you can get an instance of a Connection object from a Provider, then you should configure
the JDBC Data Store like this:
<sample-code:java>
// Create the configuration for the Data Store.
Hashtable config = new Hashtable();
// Set the name of the Provider where to retrieve the Connection object.
config.put(JDBCConnector.PARAMETER_ClientConnectionProviderName,
"connection-provider");
// Set the name of the object that represents the Connection in the Provider.
config.put(JDBCConnector.PARAMETER_ClientConnectionProviderObject,
"connection-object-name");
// Create the JDBC Data Store.
datastoreService.createClient("jdbc-datastore", JDBCConnector.class, config);
</sample-code:end>
This time we instruct the JDBC Connector to get from Provider connection-provider (in a
stand-alone application, this Provider usually is the Pooled Object Provider which retrieves object instances from the Pool Service; this Provider is bundled within the Pool Service) a
java.sql.Connection object named connection-object-name (in a Pooled Object Provider it is the name of the Client/Pooler where to retrieve the object instance).
Check it now how to do it with the Data Store Service XML configuration file:
<sample-code:xml>
<?xml version="1.0" encoding="UTF-8"?>
<datastore-service xmlns:xsi="http://www.w3.org/2001/XMLSchema-instance"
xsi:noNamespaceSchemaLocation="http://repository.warework.com/xsd/datastore
-service-1.1.0.xsd">
209
<datastores>
<datastore name="jdbc-datastore" connector=
"com.warework.service.datastore.client.connector.JDBCConnector">
<parameters>
<parameter name="client-connection-provider-name"
value="connection-provider"/>
<parameter name="client-connection-provider-object"
value="connection-object-name"/>
</parameters>
</datastore>
</datastores>
</datastore-service>
</sample-code:end>
There is another option for those who plan to create the DataSource programmatically: the
PARAMETER_DataSource parameter. It allows you to specify for the Connector a DataSource
object created by yourself. Check this out with the following code:
<sample-code:java>
// Create an instance of a Data Source.
DataSource myDataSource = ...;
// Create the configuration for the Data Store.
Hashtable config = new Hashtable();
// Set the Data Source to use.
config.put(JDBCConnector.PARAMETER_DataSource, myDataSource);
// Create the JDBC Data Store.
datastoreService.createClient("jdbc-datastore", JDBCConnector.class, config);
</sample-code:end>
Working with the JDBC Data Store
Like every Data Store, you can perform operations with JDBC Data Stores in the Data Store
Service Facade. Now we are going to review the basic JDBC Data Store operations provided by
the DatastoreServiceFacade interface. We can group these operations as follows:
•
Connect and disconnect JDBC Data Stores
The first operation you have to invoke to start working with a JDBC Data Store is connect:
<sample-code:java>
// Connect with the relational database.
datastoreService.connect("jdbc-datastore");
</sample-code:end>
After you perform the connection, you typically will execute other JDBC Data Store operations like query or update. Once the job is done, you will need to close the JDBC
Data Store:
<sample-code:java>
// Disconnect with the relational database.
datastoreService.disconnect("jdbc-datastore");
</sample-code:end>
•
Query JDBC Data Stores
210
There are two methods, both named query, where you can retrieve information from a
relational database. The first one allows you to directly execute an SQL statement:
<sample-code:java>
// Run a SELECT statement in the relational database.
ResultRows value = (ResultRows) datastoreService.
query("jdbc-datastore", "SELECT * FROM HOME_USER");
</sample-code:end>
The JDBC Data Store returns by default a ResultRows object which provides the necessary methods to process the result (rows and columns) of the query. It allows iterating each row of the table result and picking up the values of its columns. Check it out
with the following example:
<sample-code:java>
// Execute the statement to retrieve some data.
ResultRows result = (ResultRows) datastoreService.
query("jdbc-datastore", "SELECT * FROM HOME_USER");
// Iterate rows until the end of the table. First row is 1, second 2 and
// so on. You must perform 'result.next()' at least one time to point
// the cursor to the first row.
while (result.next()) {
/*
* For each row we can retrieve the value of each column.
*/
// Get the boolean value of a column. If the value is SQL NULL
// (it is null in the database), the value returned is null.
Boolean column1 = result.getBoolean("COLUMN1");
// Get the numeric value of a column. You must specify the
// numeric type to get.
Short column2A = (Short) result.getNumber("COLUMN2A", Short.class);
Integer column2B = (Integer) result.getNumber("COLUMN2B",
Integer.class);
Long column2C = (Long) result.getNumber("COLUMN2C", Long.class);
Float column2D = (Float) result.getNumber("COLUMN2D", Float.class);
Double column2E = (Double) result.getNumber("COLUMN2E",
Double.class);
BigDecimal column2F = (BigDecimal) result.getNumber("COLUMN2F",
BigDecimal.class);
// Get the string value.
String column3 = result.getString("COLUMN3");
// Get the date value.
Date column4 = result.getDate("COLUMN4");
// Get the array of bytes.
byte[] column5 = result.getBlob("COLUMN5");
}
</sample-code:end>
211
When you iterate result rows, you can specify the column (where to get the data) by
name or by column index:
<sample-code:java>
// Execute the statement to retrieve some data.
ResultRows result = (ResultRows) datastoreService.
query("jdbc-datastore", "SELECT * FROM HOME_USER");
// Iterate rows.
while (result.next()) {
// Get the string value of a given column name.
String column3A = result.getString("COLUMN3");
// Get the string value of a given column index.
String column3B = result.getString(3);
}
</sample-code:end>
Another option is to retrieve a whole row as a Java Bean object. To achieve this, you
have to provide to getBean a class that represents a Java Bean. A new instance of this
class is created and used to store the values of the result columns. You may also
provide a mapping where to relate result columns with bean attributes. Check it out with
one example:
<sample-code:java>
// Execute the statement to retrieve some data.
ResultRows result = (ResultRows) datastoreService.
query("jdbc-datastore", null, "SELECT * FROM HOME_USER");
// Map table result columns with bean attributes.
Hashtable mapping = new Hashtable();
// Map result 'NAME' column with bean 'name' attribute.
mapping.put("NAME", "name");
// Map result 'DATE_OF_BIRTH' column with bean 'dateOfBirth' attribute.
mapping.put("DATE_OF_BIRTH", "dateOfBirth");
// Map result 'PASSWORD' column with bean 'password' attribute.
mapping.put("PASSWORD", "password");
// Iterate rows.
while (result.next()) {
// Copy the values of specified columns into the User bean.
User user = (User) result.getBean(User.class, mapping);
}
</sample-code:end>
Warework can also create this mapping automatically when the columns names and
bean attributes follow a specific naming convention. Here are the rules for columns and
attributes names:
Names of database columns are uppercase, for example: PASSWORD. Names of
bean attributes are lowercase, for example: password.
212
Spaces in columns names are specified with the underscore character:
DATE_OF_BIRTH. The attributes of the bean use the camel notation, for example: dateOfBirth.
Check out more examples:
NAME1 equals to name1
NAME_A equals to nameA
A equals to a
AA equals to aa
A_B equals to aB
A_B_C equals to aBC
If getBean method does not receive the mapping configuration, it extracts by reflection
the name of every attribute that exist in the given bean class. Each attribute name is
converted into the corresponding column name and this column name is finally used to
retrieve the value from the database result. If an attribute of the Java Bean does not ex ist as a result column, then it is discarded. The following example shows how this nam ing convention simplifies quite a lot the work:
<sample-code:java>
// Execute the statement to retrieve some data.
ResultRows result = (ResultRows) datastoreService.
query("jdbc-datastore", "SELECT * FROM HOME_USER");
// Iterate rows.
while (result.next()) {
// Copy the values of columns found into the User bean.
User user = (User) result.getBean(User.class, null);
}
</sample-code:end>
You can also transform the database result into a list:
<sample-code:java>
// Execute the statement to retrieve some data.
ResultRows resultRows = (ResultRows) datastoreService.
query("jdbc-datastore", "SELECT * FROM HOME_USER");
// Map table result columns with bean attributes.
Hashtable mapping = new Hashtable();
// Map result 'NAME' column with bean 'name' attribute.
mapping.put("NAME", "name");
// Map result 'DATE_OF_BIRTH' column with bean 'dateOfBirth' attribute.
mapping.put("DATE_OF_BIRTH", "dateOfBirth");
// Map result 'PASSWORD' column with bean 'password' attribute.
mapping.put("PASSWORD", "password");
213
// Create a list with User beans that represent each row from the
// database result.
Vector resultList = AbstractResultRows.toList(resultRows, User.class,
mapping);
</sample-code:end>
It is also possible to use auto-mapping:
<sample-code:java>
// Execute the statement to retrieve some data.
ResultRows resultRows = (ResultRows) datastoreService.
query("jdbc-datastore", "SELECT * FROM HOME_USER");
// Create a list with User beans that represent each row from the
// database result.
Vector resultList = AbstractResultRows.toList(resultRows, User.class,
null);
</sample-code:end>
By default, you will always get a ResultRows object with a JDBC Data Store when you
run a query. It is also possible to configure this Data Store to retrieve JDBC ResultSet
objects instead of Warework ResultRows objects. To achieve this, you have to configure the JDBC Data Store with PARAMETER_NativeResultSet, like this:
<sample-code:java>
// Create the configuration for the Data Store.
Hashtable config = new Hashtable();
// Retrieve JDBC's ResultSet instead of Warework's ResultRows.
config.put(JDBCConnector.PARAMETER_NativeResultSet, Boolean.TRUE);
// Create the JDBC Data Store.
datastoreService.createClient("jdbc-datastore", JDBCConnector.class,
config);
</sample-code:end>
Once it is configured like this, you will get a ResultSet object when you run a query:
<sample-code:java>
// Execute the statement and return a JDBC ResultSet object.
ResultSet result = (ResultSet) datastoreService.
query("jdbc-datastore", "SELECT * FROM HOME_USER");
</sample-code:end>
Another way to search for data in a JDBC Data Store is by loading and executing state ments that exist in a Provider. This functionality allows you to read queries from files
and run them in the JDBC Data Store, for example: you can setup a FileText Provider to
read SQL statements from text files and execute each one in a relational database, just
by specifying the name of the Provider and the name of the text file to read. For the next
sample code we are going to suppose that there is a FileText Provider named sqlprovider that reads text files from a specific directory. When you request an object
from this Provider, the name given is used to read the file. For example: if we request
an object named list-users, this Provider looks for a file named list-users.sql
in the directory, reads the file and return its content as a String object. This is the example:
<sample-code:java>
// Read a statement from a text file and execute if in the Data Store.
ResultRows result = (ResultRows) datastoreService.
query("jdbc-datastore", "sql-provider", "list-users", null);
</sample-code:end>
214
With this utility you can save prepared statements in a directory for a JDBC Data Store.
You can also define some variables for these queries and replace them later on with
specific values. Suppose that list-users.sql contains the following code:
<sample-code:sql>
SELECT * FROM HOME_USER A WHERE A.ID = ${USER_ID}
</sample-code:end>
In this query we have defined a variable named USER_ID. We can assign a value to
this variable to complete the query and then run it in the JDBC Data Store. This is done
as follows:
<sample-code:java>
// Values for variables.
Hashtable values = new Hashtable();
// Set variables to filter the SQL statement.
values.put("USER_ID", new Integer(8375));
// Query the JDBC Data Store.
ResultRows result = (ResultRows) datastoreService.
query("jdbc-datastore", "sql-provider", "list-users", values);
</sample-code:end>
•
Update JDBC Data Stores
This time, instead of querying for data in a relational database, you will create or modify
information with the JDBC Data Store. For example, we can create a new table in the
database like this:
<sample-code:java>
// Create a new table in the relational database.
datastoreService.update("jdbc-datastore",
"CREATE TABLE MESSAGES (MESSAGE VARCHAR(99))");
</sample-code:end>
You can also read update statements from Providers:
<sample-code:java>
// Read 'create-contact.sql' and execute it.
datastoreService.update("jdbc-datastore",
"sql-provider", "create-contact", null);
</sample-code:end>
Let us say that we want to create a new user in the database, we can define a script
named create-user.sql like this:
<sample-code:sql>
INSERT INTO HOME_USER (ID, NAME) VALUES (${USER_ID}, ${USER_NAME})
</sample-code:end>
Then replace these variables with the values that you need:
<sample-code:java>
// Values for variables.
Hashtable values = new Hashtable();
// Set variables for the update statement.
values.put("USER_ID", new Integer(3));
values.put("USER_NAME", "Ian Sharpe");
// Create a new user in the database.
215
datastoreService.update("jdbc-datastore", "sql-provider",
"create-user", values);
</sample-code:end>
Sometimes you may need to pass null values for these variables to indicate that a
specific field will not contain any data. For this purpose, you have to use the JDBCNullType class (package: com.warework.service.datastore.client) to specify the type of the field/column in a table of the database where you need to set the
null value. For example, suppose that column FAVOURITE_COLOR in table
HOME_USER stores String values and that it is not a mandatory field:
<sample-code:sql>
INSERT INTO HOME_USER (ID, NAME, FAVOURITE_COLOR) VALUES (${USER_ID},
${USER_NAME}, ${USER_COLOR})
</sample-code:end>
If we do not want to assign any value to USER_COLOR variable, we can set this field to
null as follows:
<sample-code:java>
// Values for variables.
Hashtable values = new Hashtable();
// Set variables for the update statement.
values.put("USER_ID", new Integer(3));
values.put("USER_NAME", "Ian Sharpe");
values.put("USER_COLOR", JDBCNullType.VARCHAR);
// Create a new user in the database.
datastoreService.update("jdbc-datastore", "sql-provider",
"create-user", values);
</sample-code:end>
Now, with this code we instruct the Data Store to add a new row in the table where FAVOURITE_COLOR is intentionally left blank. In order to use the appropriate JDBC null
type, review the API documentation of the JDBCNullType class and check out the
constants that it defines.
•
Commit JDBC Data Stores
You can commit changes just by providing the name of the JDBC Data Store:
<sample-code:java>
// Commit changes.
datastoreService.commit("jdbc-datastore");
</sample-code:end>
RDBMS View for JDBC Data Stores
The JDBCViewImpl class (package: com.warework.service.datastore.client) is a
View that implements the RDBMSView interface and it provides a better way to interact with relational databases using JDBC. Now we are going to see how to associate a View of this type
with a JDBC Data Store and how to perform operations with the View.
•
Setting up the View
216
There is no need to configure this View with initialization parameters, so just add the
View in the stack of Views of the JDBC Data Store:
<sample-code:java>
// Add the RDBMS View for JDBC Data Stores.
datastoreService.addView("jdbc-datastore",
JDBCViewImpl.class, "rdbms-view", null, null);
</sample-code:end>
Check it now how to do it with the Data Store Service XML configuration file:
<sample-code:xml>
<?xml version="1.0" encoding="UTF-8"?>
<datastore-service xmlns:xsi="http://www.w3.org/2001/XMLSchema-instance"
xsi:noNamespaceSchemaLocation="http://repository.warework.com/ …
… xsd/datastore-service-1.1.0.xsd">
<datastores>
<datastore name="jdbc-datastore"
connector="com.warework.service.datastore. …
… client.connector.JDBCConnector">
<parameters>
<parameter name="connection-source-provider-name"
value="datasource-provider"/>
<parameter name="connection-source-provider-object"
value="datasource-object-name"/>
</parameters>
<views>
<view class="com.warework.service.datastore. …
… client.JDBCViewImpl" name="rdbms-view"/>
</views>
</datastore>
</datastores>
</datastore-service>
</sample-code:end>
You can also provide short class names to identify Connectors and Views:
<sample-code:xml>
<?xml version="1.0" encoding="UTF-8"?>
<datastore-service xmlns:xsi="http://www.w3.org/2001/XMLSchema-instance"
xsi:noNamespaceSchemaLocation="http://repository.warework.com/ …
… xsd/datastore-service-1.1.0.xsd">
<datastores>
<datastore name="jdbc-datastore" connector="JDBC">
<parameters>
<parameter name="connection-source-provider-name"
value="datasource-provider"/>
<parameter name="connection-source-provider-object"
value="datasource-object-name"/>
</parameters>
<views>
<view class="JDBC" name="rdbms-view"/>
</views>
</datastore>
</datastores>
</datastore-service>
</sample-code:end>
•
Working with the RDBMS View for JDBC Data Stores
217
Now we are going to review the methods provided by the JDBCViewImpl class. Two
basic operations are allowed here:
Update operations
Executes a given SQL statement, which may be an INSERT, UPDATE, or DELETE
statement or an SQL statement that returns nothing, such as an SQL DDL state ment (for example: CREATE TABLE).
Query operations
Executes a given SQL statement, typically a static SQL SELECT statement, to retrieve data from the relational database.
Even before you perform any of these operations, what you have to do first is to connect
to the relational database:
<sample-code:java>
// Get an instance of a RDBMS View interface.
RDBMSView view = (RDBMSView) datastoreService.
getView("jdbc-datastore");
// Connect the JDBC Data Store.
view.connect();
</sample-code:end>
Perfect, now a connection with the database is ready to accept SQL commands. In the
following examples we are going to save some information in a relational database but
before that, it is recommended to begin a transaction with the database. To do it you
have to perform the following actions:
<sample-code:java>
// Get an instance of a RDBMS View.
RDBMSView view = (RDBMSView) datastoreService.
getView("jdbc-datastore");
// Connect the JDBC Data Store.
view.connect();
// Begin a transaction in the relational database.
view.beginTransaction();
</sample-code:end>
Now it is the right time to perform some update operations. First, we are going to add
one row in a table of the database:
<sample-code:java>
// Get an instance of a RDBMS View.
RDBMSView view = (RDBMSView) datastoreService.
getView("jdbc-datastore");
// Connect the JDBC Data Store.
view.connect();
// Begin a transaction in the database management system.
view.beginTransaction();
// Create the SQL statement to execute.
String sql = "INSERT INTO HOME_USER (ID, NAME) "
+ "VALUES (1, 'John Wood')";
218
// Run the SQL update statement.
view.executeUpdate(sql, null);
</sample-code:end>
Another option is to execute multiple statements at once. You can do it by specifying a
separator character which delimits each statement:
<sample-code:java>
// SQL statement to create first user.
String sql1 = "INSERT INTO HOME_USER (ID, NAME) VALUES "
+ "(1, 'John Wood')";
// SQL statement to create second user.
String sql2 = "INSERT INTO HOME_USER (ID, NAME) VALUES "
+ "(2, 'James Sharpe')";
// SQL statement to create third user.
String sql3 = "INSERT INTO HOME_USER (ID, NAME) VALUES "
+ "(3, 'Sofia Green')";
// Execute three SQL update statements at once.
view.executeUpdate(sql1 + ";" + sql2 + ";" + sql3, new Character(';'));
</sample-code:end>
Perform update operations like this when you have to dynamically construct SQL stat ements in Java. If your statements are not too complex to create, like the ones we saw in
the previous example, you should consider storing them on separate files as they are
easier to maintain. A very convenient way to keep SQL statements in separate files consist of keeping each statement (or a set of related statements) in an independent text
file, for example: create-user.sql, delete-user.sql, update-user.sql, etc.
Later on we can read these text files with a Provider (Warework recommends you to
use the FileText Provider for this task) and use this Provider to read the statements for
the RDBMS View. Remember that you can define a default Provider for a View when
you associate a View to a Data Store:
<sample-code:java>
// Add a View and link a Provider to it.
datastoreService.addView("jdbc-datastore", JDBCViewImpl.class,
"rdbms-view", "sql-provider", null);
</sample-code:end>
The sql-provider Provider now can be used in the View as the default Provider to
read text files from a specific directory. Let us say we have the following content for
create-user.sql:
<sample-code:sql>
INSERT INTO HOME_USER (ID, NAME) VALUES (1, 'John Wood')
</sample-code:end>
If sql-provider is the default Provider in a RDBMS View, we can read the content of
this file with the following code:
<sample-code:java>
// Read the content of 'create-user.sql' and execute it.
view.executeUpdateByName("create-user", null, null);
</sample-code:end>
When executeUpdateByName is invoked, these actions are performed:
The RDBMS View requests the create-user object to sql-provider.
219
sql-provider reads the content of create-user.sql and returns it (as a
String object).
The RDBMS View executes the statement included at create-user.sql in
the JDBC Data Store.
The RDBMS View and the FileText Provider are perfect mates. Both, in combination,
will simplify a lot the process of executing scripts in your database. Just write simple text
files with SQL statements and let Warework execute them for you. It is recommended
that you check out the documentation associated to the FileText Provider to fully take
advantage of this feature.
If we need a generic statement to create new users in the relational database, we can
define the script create-user.sql with some variables, like this:
<sample-code:sql>
INSERT INTO HOME_USER (ID, NAME) VALUES (${USER_ID}, ${USER_NAME})
</sample-code:end>
Then replace these variables with the values that you need:
<sample-code:java>
// Values for variables.
Hashtable values = new Hashtable();
// Set variables for the update statement.
values.put("USER_ID", new Integer(3));
values.put("USER_NAME", "Ian Sharpe");
// Create a new user in the database.
view.executeUpdateByName("create-user", values, null);
</sample-code:end>
Remember that you can also specify null values with the JDBCNullType:
<sample-code:java>
// Values for variables.
Hashtable values = new Hashtable();
// Set variables for the update statement.
values.put("USER_ID", new Integer(3));
values.put("USER_NAME", JDBCNullType.VARCHAR);
// Create a new user in the database.
view.executeUpdateByName("create-user", values, null);
</sample-code:end>
When your script contains multiple statements, you also have to indicate the character
that delimits each statement. Suppose we have the following create-user.sql
script:
<sample-code:sql>
INSERT INTO HOME_USER (ID, NAME) VALUES (${USER_ID}, ${USER_NAME});
INSERT INTO ACTIVE_USERS (ID, NAME) VALUES (${USER_ID});
</sample-code:end>
Now we can replace variables in multiple statements with this code:
<sample-code:java>
220
// Values for variables.
Hashtable values = new Hashtable();
// Set variables for the update statement.
values.put("USER_ID", new Integer(3));
values.put("USER_NAME", "Ian Sharpe");
// Create a new user in the database.
view.executeUpdateByName("create-user", values, new Character(';'));
</sample-code:end>
We can also use a Provider that is not the default Provider of the View. In this case, we
just need to specify the Provider where to retrieve the statement to execute:
<sample-code:java>
// Values for variables.
Hashtable values = new Hashtable();
// Set variables for the update statement.
values.put("USER_ID", new Integer(3));
values.put("USER_NAME", "Ian Sharpe");
// Execute a statement from the Provider that we define.
view.executeUpdateByName("another-provider", "create-user", values,
new Character(';'));
</sample-code:end>
This time, the create-user.sql statement is not retrieved by the default Provider of
the View. The Framework requests this statement from a Provider named "another-provider" and once it is loaded, then it is executed in the Data Store.
The RDBMS View also allows developers to define a callback object that will be invoked
when the operation is done or it fails. Check out the following example:
<sample-code:java>
// Values for variables.
Hashtable values = new Hashtable();
// Set variables for the update statement.
values.put("USER_ID", new Integer(3));
values.put("USER_NAME", "Ian Sharpe");
// Redirect to callback object once operation is executed.
view.executeUpdateByName("create-user", values, null,
new AbstractCallback(getScope()){
protected void onFailure(Throwable t) {
// Handle error here.
}
protected void onSuccess(Object result) {
// Handle successful operation here.
// 'result' is null in RDBMS update operations.
}
});
</sample-code:end>
Now the RDBMS View redirects the execution to the callback object when executeUpdateByName is invoked. If operation is successful then method onSuccess is executed. Otherwise, if any error is found, then method onFailure is executed.
As you can see, creating the callback object is fairly easy. It is mandatory to provide a
Scope (you can retrieve it from the Data Store Service for example) and implement two
221
methods. When a callback object is defined for update operations of the RDBMS View
(like executeUpdateByName), it is important to bear in mind that onSuccess method
argument is always null.
Warework also automatically detects batch operations in scripts with multiple statements so you can perform an operation at onSuccess every time a single statement is
executed in the Data Store. For example, if we have the following script:
<sample-code:sql>
INSERT INTO HOME_USER (ID, NAME) VALUES (${USER_ID}, ${USER_NAME});
INSERT INTO ACTIVE_USERS (ID, NAME) VALUES (${USER_ID});
</sample-code:end>
We can log the percentage of completion with this code:
<sample-code:java>
// Values for variables.
Hashtable values = new Hashtable();
// Set variables for the update statement.
values.put("USER_ID", new Integer(3));
values.put("USER_NAME", "Ian Sharpe");
// Redirect to callback object once operation is executed.
view.executeUpdateByName("create-user", values, null,
new AbstractCallback(getScope()){
protected void onFailure(Throwable t) {
// Handle error here.
}
protected void onSuccess(Object r) {
// This method is executed twice, one for every statement in the
// 'create-user' script.
System.out.println("progress: " + getBatch().progress());
}
});
</sample-code:end>
Method getBatch provides the following useful information about the batch operation
in execution:
•
getBatch().count(): counts the amount of callbacks executed in
the batch operation.
•
getBatch().duration(): gets how long (in milliseconds) is taking
the current batch operation.
•
getBatch().id(): gets the ID of the batch operation.
•
getBatch().progress(): gets the percentage of completion of the
current batch operation.
•
getBatch().size(): gets the total of callbacks to perform in the
batch operation.
•
getBatch().startTime(): gets the time (in milliseconds ) when the
batch operation started.
222
It is also possible to pass objects / attributes to the callback so you can use them at onSuccess or onFailure. For this purpose, we have to use a Hashtable when the
callback is created. Check out this example:
<sample-code:java>
// Attributes for the callback.
Hashtable attributes = new Hashtable();
// Set the attributes.
attributes.put("color", "red");
attributes.put("password", new Integer(123));
// Redirect to callback with attributes.
view.executeUpdateByName("statement-name", null, null,
new AbstractCallback(getScope(), attributes){
protected void onFailure(Throwable t) {
String color = (String) getAttribute("color");
}
protected void onSuccess(Object r) {
// Retrieve every attribute name with 'getAttributeNames()'.
Integer password = (Integer) getAttribute("password");
}
});
</sample-code:end>
Every update operation that we performed in the previous examples is related to the
transaction that we created earlier in this section. Once the work is done, you should
either commit or rollback the transaction. If the operations were executed without problems, then you should perform commit to register the changes in the database:
<sample-code:java>
// Commits changes in the Relational Database Management System.
view.commit();
</sample-code:end>
In the other hand, if you find a failure, something unexpected happened or you just do
not want to register the changes in the database, then you should perform rollback to
undo every update operation executed since the transaction was started:
<sample-code:java>
// Cancel latest update operations.
view.rollback();
</sample-code:end>
We have reviewed with this interface how to connect to a database and perform update
operations in it with a transaction. Now we are going to focus on query operations to
know how to retrieve data from a relational database. The following code is an example
to perform this action:
<sample-code:java>
// Execute the statement to retrieve some data.
ResultRows result = (ResultRows) view.
executeQuery("SELECT * FROM HOME_USER", -1, -1);
</sample-code:end>
This code executes the SQL statement into the relational database and returns an ob ject that represents the result provided by the database. By default, this result is in the
form of a ResultRows object (check out the specific types returned by the implementation class of this View because each Data Store may provide the chance to get a differ-
223
ent object as result) which represents the table of data returned by the database. It allows iterating each row of the table result and picking up the values of its columns.
Check it out with the following example:
<sample-code:java>
// Execute the statement to retrieve some data.
ResultRows result = (ResultRows) view.
executeQuery("SELECT * FROM HOME_USER", -1, -1);
// Iterate rows until the end of the table. First row is 1, second 2 and
// so on. You must perform 'result.next()' at least one time to point
// the cursor to the first row.
while (result.next()) {
/*
* For each row we can retrieve the value of each column.
*/
// Get the boolean value of a column. If the value is SQL NULL
// (it is null in the database), the value returned is null.
Boolean column1 = result.getBoolean("COLUMN1");
// Get the numeric value of a column. You must specify the
// numeric type to get.
Short column2A = (Short) result.getNumber("COLUMN2A", Short.class);
Integer column2B = (Integer) result.getNumber("COLUMN2B",
Integer.class);
Long column2C = (Long) result.getNumber("COLUMN2C", Long.class);
Float column2D = (Float) result.getNumber("COLUMN2D", Float.class);
Double column2E = (Double) result.getNumber("COLUMN2E",
Double.class);
BigDecimal column2F = (BigDecimal) result.getNumber("COLUMN2F",
BigDecimal.class);
// Get the string value.
String column3 = result.getString("COLUMN3");
// Get the date value.
Date column4 = result.getDate("COLUMN4");
// Get the array of bytes.
byte[] column5 = result.getBlob("COLUMN5");
}
</sample-code:end>
When you iterate result rows, you can specify the column (where to get the data) by
name or by column index:
<sample-code:java>
// Execute the statement to retrieve some data.
ResultRows result = (ResultRows) view.
executeQuery("SELECT * FROM HOME_USER", -1, -1);
// Iterate rows.
while (result.next()) {
224
// Get the string value of a given column name.
String column3A = result.getString("COLUMN3");
// Get the string value of a given column index.
String column3B = result.getString(3);
}
</sample-code:end>
Another option is to retrieve a whole row as a Java Bean object. To achieve this, you
have to provide to getBean a class that represents a Java Bean. A new instance of this
class is created and used to store the values of the result columns. You may also
provide a mapping where to relate result columns with bean attributes. Check it out with
one example:
<sample-code:java>
// Execute the statement to retrieve some data.
ResultRows result = (ResultRows) view.
executeQuery("SELECT * FROM HOME_USER", -1, -1);
// Map table result columns with bean attributes.
Hashtable mapping = new Hashtable();
// Map result 'NAME' column with bean 'name' attribute.
mapping.put("NAME", "name");
// Map result 'DATE_OF_BIRTH' column with bean 'dateOfBirth' attribute.
mapping.put("DATE_OF_BIRTH", "dateOfBirth");
// Map result 'PASSWORD' column with bean 'password' attribute.
mapping.put("PASSWORD", "password");
// Iterate rows.
while (result.next()) {
// Copy the values of specified columns into the User bean.
User user = (User) result.getBean(User.class, mapping);
}
</sample-code:end>
Warework can also create this mapping automatically when the columns names and
bean attributes follow a specific naming convention. Here are the rules for columns and
attributes names:
Names of database columns are uppercase, for example: PASSWORD. Names of
bean attributes are lowercase, for example: password.
Spaces in columns names are specified with the underscore character:
DATE_OF_BIRTH. The attributes of the bean use the camel notation, for example: dateOfBirth.
Check out more examples:
NAME1 equals to name1
NAME_A equals to nameA
225
A equals to a
AA equals to aa
A_B equals to aB
A_B_C equals to aBC
If getBean method does not receive the mapping configuration, it extracts by reflection
the name of every attribute that exist in the given bean class. Each attribute name is
converted into the corresponding column name and this column name is finally used to
retrieve the value from the database result. If an attribute of the Java Bean does not ex ist as a result column, then it is discarded. The following example shows how this nam ing convention simplifies quite a lot the work:
<sample-code:java>
// Execute the statement to retrieve some data.
ResultRows result = (ResultRows) view.
executeQuery("SELECT * FROM HOME_USER", -1, -1);
// Iterate rows.
while (result.next()) {
// Copy the values of columns found into the User bean.
User user = (User) result.getBean(User.class, null);
}
</sample-code:end>
You can also transform the database result into a list:
<sample-code:java>
// Execute the statement to retrieve some data.
ResultRows resultRows = (ResultRows) view.
executeQuery("SELECT * FROM HOME_USER", -1, -1);
// Map table result columns with bean attributes.
Hashtable mapping = new Hashtable();
// Map result 'NAME' column with bean 'name' attribute.
mapping.put("NAME", "name");
// Map result 'DATE_OF_BIRTH' column with bean 'dateOfBirth' attribute.
mapping.put("DATE_OF_BIRTH", "dateOfBirth");
// Map result 'PASSWORD' column with bean 'password' attribute.
mapping.put("PASSWORD", "password");
// Create a list with User beans that represent each row from the
// database result.
Vector resultList = AbstractResultRows.toList(resultRows, User.class,
mapping);
</sample-code:end>
It is also possible to use auto-mapping:
<sample-code:java>
// Execute the statement to retrieve some data.
ResultRows resultRows = (ResultRows) view.
executeQuery("SELECT * FROM HOME_USER", -1, -1);
226
// Create a list with User beans that represent each row from the
// database result.
Vector resultList = AbstractResultRows.toList(resultRows, User.class,
null);
</sample-code:end>
By default, you will always get a ResultRows object with a JDBC Data Store when you
run a query. It is also possible to configure this Data Store to retrieve JDBC ResultSet
objects instead of Warework ResultRows objects. To achieve this, you have to configure the JDBC Data Store with PARAMETER_NativeResultSet, like this:
<sample-code:java>
// Create the configuration for the Data Store.
Hashtable config = new Hashtable();
// Set the name of the Provider where to retrieve the Connection object.
config.put(JDBCConnector.PARAMETER_NativeResultSet, Boolean.TRUE);
// Create the JDBC Data Store.
datastoreService.createClient("jdbc-datastore", JDBCConnector.class,
config);
</sample-code:end>
Once it is configured like this, you will get a ResultSet object when you run a query:
<sample-code:java>
// Execute the statement and return a JDBC ResultSet object.
ResultSet result = (ResultSet) view.
executeQuery("SELECT * FROM HOME_USER", -1, -1);
</sample-code:end>
Sometimes you may need to limit the number of rows returned by a database when a
query operation is performed. Let us say that there are 26 registries or rows in the
HOME_USER table and that we just expect to retrieve the first 10 rows. We can write
something like this:
<sample-code:java>
// Get the first 10 rows.
ResultRows result = (ResultRows) view.
executeQuery("SELECT * FROM HOME_USER", 1, 10);
</sample-code:end>
What is going on right now? When you specify the number of rows that you want in the
result of a database, Warework automatically calculates the number of pages that hold
this number of rows. In the previous example we specified 10 rows per result and with
this information Warework estimates that the size of each page is 10 rows and that
there are three pages: page 1 with 10 rows, page 2 with 10 rows and page 3 with 6
rows. If now we need to retrieve the next ten rows, we have to indicate that we want the
second page:
<sample-code:java>
// Get rows from 11 to 20.
ResultRows result = (ResultRows) view.
executeQuery("SELECT * FROM HOME_USER", 2, 10);
</sample-code:end>
If we request page number three, we get the last 6 registries from the database. The important fact to keep in mind here is that the number of rows remains as 10:
<sample-code:java>
// Get rows from 21 to 26.
ResultRows result = (ResultRows) view.
executeQuery("SELECT * FROM HOME_USER", 3, 10);
227
</sample-code:end>
With queries, you can also write SELECT statements in separate text files (this time, just
one statement per file). Suppose that the following code is the content of the listusers.sqlfile:
<sample-code:sql>
SELECT * FROM HOME_USER
</sample-code:end>
If sql-provider still is our default Provider, we can read the script like this:
<sample-code:java>
// Read the content of 'list-users.sql' and execute it in the database.
ResultRows result = (ResultRows) view.
executeQueryByName("list-users", null, -1, -1);
</sample-code:end>
There is also the possibility to define some variables in the query:
<sample-code:sql>
SELECT * FROM HOME_USER A WHERE A.ID = ${USER_ID}
</sample-code:end>
Now we can assign a value to this variable to complete the query. This is done as follows:
<sample-code:java>
// Values for variables.
Hashtable values = new Hashtable();
// Set variables to filter the query.
values.put("USER_ID", new Integer(8375));
// Read 'list-users.sql', replace variables and execute the statement.
ResultRows result = (ResultRows) view.
executeQueryByName("list-users", values, -1, -1);
</sample-code:end>
The two last arguments allow you to define the page and maximum number of rows to
retrieve. The following example shows how to get the second page with a fixed size of
10 rows per page:
<sample-code:java>
// Get the second page with no more than 10 registries in it.
ResultRows result = (ResultRows) view.
executeQueryByName("list-users", null, 2, 10);
</sample-code:end>
We can also define callbacks in query operations. This time, onSuccess provides the
result of the query:
<sample-code:java>
// Handle result with callback object.
view.executeQueryByName("list-users", null, -1, -1,
new AbstractCallback(getScope()){
protected void onFailure(Throwable t) {
// Do something.
}
protected void onSuccess(Object r) {
228
// Get the result form the database.
ResultRows result = (ResultRows) r;
// Iterate rows.
while (result.next()) {
// Copy the values of columns found into the User bean.
User user = (User) result.getBean(User.class, null);
}
}
});
</sample-code:end>
Query operations also allow us to use a different Provider than the default one defined
for the View:
<sample-code:java>
// Read the content of 'list-users.sql' and execute it in the database.
Object result = view.executeQueryByName("another-provider",
"list-users", null, -1, -1);
</sample-code:end>
As always, when the work is done, you have to disconnect the Data Store:
<sample-code:java>
// Close the connection with the Data Store.
view.disconnect();
</sample-code:end>
Key-Value View for JDBC Data Stores
This View allows you to use a table from a relational database as a Key-Value Data Store. The
KeyValueJDBCViewImpl class at com.warework.service.datastore.client package implements the KeyValueView interface and it provides the necessary methods to
achieve this task. To work with it you have to specify a table from a database, which column of
this table correspond to the keys (it must be of String type) and the column that matches the
values for these keys. Now we are going to see how to associate a View of this type with a
JDBC Data Store and how to perform operations with the View.
•
Setting up the View
As stated before, in order to work with this View you always have to configure three initialization parameters: the name of a table, the name of the column in this table that
represents the keys and the name of the column that represents the values. There is
another optional parameter that allows you to define the name of the schema: PARAMETER_Schema. You may use it in some relational databases to specify the schema
where the table exists. The following example shows you how to setup the configuration
for this View:
<sample-code:java>
// Create a configuration for the View.
Hashtable parameters = new Hashtable();
// Configure the View with initialization parameters.
parameters.put(KeyValueJDBCViewImpl.PARAMETER_Schema,
"SAMPLE_SCHEMA");
229
parameters.put(KeyValueJDBCViewImpl.PARAMETER_TableName,
"SAMPLE_TABLE");
parameters.put(KeyValueJDBCViewImpl.PARAMETER_TableKeyField,
"KEY_COLUNM");
parameters.put(KeyValueJDBCViewImpl.PARAMETER_TableValueField,
"VALUE_COLUMN");
// Add the Key-Value View for the JDBC Data Store.
datastoreService.addView("jdbc-datastore",
KeyValueJDBCViewImpl.class, "keyvalue-view", null, parameters);
</sample-code:end>
Check it now how to do it with the Data Store Service XML configuration file:
<sample-code:xml>
<?xml version="1.0" encoding="UTF-8"?>
<datastore-service xmlns:xsi="http://www.w3.org/2001/XMLSchema-instance"
xsi:noNamespaceSchemaLocation="http://repository.warework.com/ …
… xsd/datastore-service-1.1.0.xsd">
<datastores>
<datastore name="jdbc-datastore"
connector="com.warework.service.datastore. …
… client.connector.JDBCConnector">
<parameters>
<parameter name="connection-source-provider-name"
value="datasource-provider"/>
<parameter name="connection-source-provider-object"
value="datasource-object-name"/>
</parameters>
<views>
<view class="com.warework.service.datastore. …
… client.KeyValueJDBCViewImpl" name="keyvalue-view">
<parameter name="schema" value="SAMPLE_SCHEMA"/>
<parameter name="table-name" value="SAMPLE_TABLE"/>
<parameter name="table-key-field" value="KEY_COLUMN"/>
<parameter name="table-value-field"
value="VALUE_COLUMN"/>
</view>
</views>
</datastore>
</datastores>
</datastore-service>
</sample-code:end>
You can also provide short class names to identify Connectors and Views:
<sample-code:xml>
<?xml version="1.0" encoding="UTF-8"?>
<datastore-service xmlns:xsi="http://www.w3.org/2001/XMLSchema-instance"
xsi:noNamespaceSchemaLocation="http://repository.warework.com/ …
… xsd/datastore-service-1.1.0.xsd">
<datastores>
<datastore name="jdbc-datastore" connector="JDBC">
<parameters>
<parameter name="connection-source-provider-name"
value="datasource-provider"/>
<parameter name="connection-source-provider-object"
value="datasource-object-name"/>
</parameters>
<views>
<view class="KeyValueJDBC" name="keyvalue-view">
<parameter name="schema" value="SAMPLE_SCHEMA"/>
<parameter name="table-name" value="SAMPLE_TABLE"/>
230
<parameter name="table-key-field" value="KEY_COLUMN"/>
<parameter name="table-value-field"
value="VALUE_COLUMN"/>
</view>
</views>
</datastore>
</datastores>
</datastore-service>
</sample-code:end>
•
Working with the Key-Value View for JDBC Data Stores
Now we are going to review the basic operations provided by the KeyValueJDBCViewImpl class. Working with this View is fairly easy because the KeyValueView interface (package: com.warework.service.datastore.view) only exposes a few
methods and they all are very simple.
The first operation you have to perform to start working with a Data Store is the connect operation. There is no exception with the Key-Value View:
<sample-code:java>
// Get an instance of a Key-Value interface.
KeyValueView view = (KeyValueView) datastoreService.
getView("jdbc-datastore");
// Connect the JDBC Data Store.
view.connect();
</sample-code:end>
The following example shows how to add a new String value associated to a key in
the JDBC Data Store:
<sample-code:java>
// Get an instance of a Key-Value interface.
KeyValueView view = (KeyValueView) datastoreService.
getView("jdbc-datastore");
// Connect the JDBC Data Store.
view.connect();
// Create a new key named 'user.name' or update it.
view.put("user.name", "John Wood");
</sample-code:end>
The value field in a JDBC Data Store can be different than String type so you can
probably store values like Integer or Date. This limitation is imposed by the underlying database; read the documentation of your database vendor and check out which
types are available. This example is completely perfect with this interface:
<sample-code:java>
// Get an instance of a Key-Value interface.
KeyValueView view = (KeyValueView) datastoreService.
getView("jdbc-datastore");
// Connect the JDBC Data Store.
view.connect();
// Create a new key-value or update an existing one.
view.put("user.age", new Integer(25));
</sample-code:end>
231
Now, you can retrieve the value associated to a key like this:
<sample-code:java>
// Get the value of the 'user.age' key.
Integer value = (Integer) view.get("user.age");
</sample-code:end>
This is how to remove a key and the value associated to it:
<sample-code:java>
// Remove a row in a table.
view.remove("user.age");
</sample-code:end>
You can also get a list with the names of the keys that exist in the Data Store:
<sample-code:java>
// Get every key from the JDBC Data Store.
Enumeration keys = view.keys();
</sample-code:end>
To retrieve the number of key-value pairs you have to invoke the size method like this:
<sample-code:java>
// Count keys in Data Store.
int size = view.size();
</sample-code:end>
Once you have performed a set of put or remove operations, it might be a good idea
to perform commit to register the changes in the JDBC Data Store:
<sample-code:java>
// Commit changes in the JDBC Data Store.
view.commit();
</sample-code:end>
When the work is done, you have to disconnect the JDBC Data Store:
<sample-code:java>
// Close the connection with the Data Store.
view.disconnect();
</sample-code:end>
JPA Data Store
This Data Store allows you to perform operations with relational databases using the Java Pe rsistence API (JPA). It is a wrapper for JPA that simplifies even more the way you query and up date data in a relational database with JPQL statements, XML queries and Java beans with JPA
annotations.
You can either use common methods from the Data Store Service like connect, disconnect,
query, update and commit; or perform more specific operations with the JPA implementation
provided for the ORM View.
This ORM View for JPA Data Stores allows invoking CRUD (Create, Read, Update and Delete)
methods with simple Java Beans. This sample code demonstrates how to perform these operations:
<sample-code:java>
232
// Create a JPA entity.
User user1 = new User();
// Set some data in the Java Bean.
user1.setName("James");
user1.setPassword(new Integer(8713));
// Save the JPA entity in the relational database.
view.save(user1);
// Update some data in the Java Bean.
user1.setName("James Jr.");
// Update the object in the relational database.
view.update(user1);
// Find the same object we just updated.
User user2 = (User) view.find(user1);
// Delete the object in the relational database.
view.delete(user1);
</sample-code:end>
With the JPA implementation of the ORM View you can list objects from the database in many
different ways, for example, with queries defined in XML files:
<sample-code:xml>
<?xml version="1.0" encoding="UTF-8"?>
<query xmlns:xsi="http://www.w3.org/2001/XMLSchema-instance"
xsi:noNamespaceSchemaLocation="http://repository.warework.com/xsd/...
...object-query-1.1.0.xsd">
<object>com.mycompany.beans.User</object>
<where>
<expression>
<attribute>name</attribute>
<operator>EQUAL_TO</operator>
<value-operand>
<type>java.lang.String</type>
<value>Steve</value>
</value-operand>
</expression>
</where>
</query>
</sample-code:end>
You can also use a Java Bean (with JPA annotations) as a filter for the query:
<sample-code:java>
// Create the filter to find the objects.
User filter = new User();
// Set the data required to find the objects in the database.
filter.setName("John");
filter.setPassword(new Integer(10));
// Define the order of the results.
OrderBy order = new OrderBy();
// Set ascending order for field "password".
order.addAscending("password");
// List users which name is "John", password is 10 and sorted by password.
233
List<User> users = (List<User>) view.list(filter, null, order, -1, -1);
</sample-code:end>
And this is just a quick example. In this user guide we demonstrate how to enable pagination in
database results, execute JPQL statements from text files, define variables in JPQL scripts and
much more with the JPA Data Store.
Add a JPA Data Store
To add a JPA Data Store into the Data Store Service you have to invoke method createClient() that exists in its Facade with a name, the JPAConnector class and a configuration for
the Data Store:
<sample-code:java>
// Create the configuration for the Data Store.
Hashtable config = new Hashtable();
// Configure here the JPA Data Store.
...
// Create the JPA Data Store.
datastoreService.createClient("jpa-datastore", JPAConnector.class, config);
</sample-code:end>
The configuration for this Connector has to specify how to retrieve database connections for the
JPA engine. You can configure the JPA Data Store in two different ways.
Configure the JPA Data Store for JSE deployments
For desktop applications, you should configure the JPA Data Store by specifying the name of
the persistence unit to use and some configuration parameters for the JPA engine:
<sample-code:java>
// Create the configuration for the Data Store.
Hashtable config = new Hashtable();
// Name of the JPA Persistence Unit defined at 'persistence.xml' file.
config.put(JPAConnector.PARAMETER_PersistenceUnit, "my-app-pu");
// JDBC driver class. This one shows the driver for MySQL.
config.put("javax.persistence.jdbc.driver", "com.mysql.jdbc.Driver");
// JDBC URL. This one is a template for MySQL.
config.put("javax.persistence.jdbc.url",
"jdbc:mysql://host:port/database-name");
// User.
config.put("javax.persistence.jdbc.user", "the-user-name");
// Password.
config.put("javax.persistence.jdbc.password", "the-password");
// Create the JPA Data Store.
datastoreService.createClient("jpa-datastore", JPAConnector.class, config);
</sample-code:end>
Check it now how to do it with the Data Store Service XML configuration file (this functionality is
provided by Warework Data Store Extension Module):
<sample-code:xml>
234
<?xml version="1.0" encoding="UTF-8"?>
<datastore-service xmlns:xsi="http://www.w3.org/2001/XMLSchema-instance"
xsi:noNamespaceSchemaLocation="http://repository.warework.com/xsd/datastore
-service-1.1.0.xsd">
<datastores>
<datastore name="jpa-datastore" connector=
"com.warework.service.datastore.client.connector.JPAConnector">
<parameters>
<parameter name="persistence-unit"
value="my-app-pu"/>
<parameter name="javax.persistence.jdbc.driver"
value="com.mysql.jdbc.Driver"/>
<parameter name="javax.persistence.jdbc.url"
value="jdbc:mysql://host:port/database-name"/>
<parameter name="javax.persistence.jdbc.user"
value="the-user-name"/>
<parameter name="javax.persistence.jdbc.password"
value="the-password"/>
</parameters>
</datastore>
</datastores>
</datastore-service>
</sample-code:end>
This example shows how to configure JPA to use the persistence unit named " my-app-pu"
from the /META-INF/persistence.xml file. Bear in mind that these parameters do not need
to be defined again in the persistence.xml file.
Configure the JPA Data Store to get database connections with JNDI
This configuration type is frequently used in application servers. The process is similar but this
time you have to specify at least two different parameters:
•
JPAConnector.PARAMETER_ClientConnectionProviderName
This parameter defines the name of a JNDI Provider that exists in a Scope. This Provider is used to retrieve the JPA database connection (an instance of EntityManager)
via JNDI so, in order to make it work; this Provider must be running before an object is
requested to it. Review the documentation of the JNDI Provider before configuring the
JPA Data Store like this.
•
JPAConnector.PARAMETER_ClientConnectionProviderObject
This parameter identifies the name of the JPA database connection in the JNDI context.
It is used by the Data Store to instruct the JNDI Provider which object to retrieve.
In Java EE environments, the JNDI name for the JPA connection can be specified in different places. For example, in Servlets you can use the @PersistenceContext annotation for this purpose:
@PersistenceContext(name = "persistence/em", unitName = "my-app-pu")
In this example, "persistence/em" represents the JNDI name and "my-app-pu"
which JPA persistence unit to use from the persistence.xml file. Review the docu-
235
mentation of your JEE application server to better understand how and where this JNDI
name can be defined.
•
JPAConnector.PARAMETER_UserTransactionProviderObject
This is an optional parameter. It identifies the name of the JTA user transaction in the
JNDI context. If this parameter is not specified, the default JNDI name used to retrieve
the transaction is "java:comp/UserTransaction". If you need to use a different
JNDI name then you can set that name with this parameter.
The following example shows how to configure the JPA Data Store to use JNDI:
<sample-code:java>
// Create the configuration for the Data Store.
Hashtable config = new Hashtable();
// Set the name of the JNDI Provider.
config.put(JPAConnector.PARAMETER_ClientConnectionProviderName,
"jndi-provider");
// Set the JNDI name of the JPA database connection.
config.put(JPAConnector.PARAMETER_ClientConnectionProviderObject,
"persistence/em");
// Create the JPA Data Store.
datastoreService.createClient("jpa-datastore", JPAConnector.class, config);
</sample-code:end>
In this example, a JNDI Provider named "jndi-provider" must exist in order to retrieve the
database connection.
Check it now how to configure it with the Data Store Service XML configuration file:
<sample-code:xml>
<?xml version="1.0" encoding="UTF-8"?>
<datastore-service xmlns:xsi="http://www.w3.org/2001/XMLSchema-instance"
xsi:noNamespaceSchemaLocation="http://repository.warework.com/xsd/datastore
-service-1.1.0.xsd">
<datastores>
<datastore name="jpa-datastore" connector=
"com.warework.service.datastore.client.connector.JPAConnector">
<parameters>
<parameter name="client-connection-provider-name"
value="jndi-provider"/>
<parameter name="client-connection-provider-object"
value="persistence/em"/>
</parameters>
</datastore>
</datastores>
</datastore-service>
</sample-code:end>
Working with the JPA Data Store
Like every Data Store, you can perform operations with JPA Data Stores in the Data Store Service Facade. Now we are going to review the basic JPA Data Store operations provided by the
DatastoreServiceFacade interface. We can group these operations as follows:
236
•
Connect and disconnect JPA Data Stores
The first operation you have to invoke to start working with a JPA Data Store is connect:
<sample-code:java>
// Connect with the relational database.
datastoreService.connect("jpa-datastore");
</sample-code:end>
After you perform the connection, you typically will execute other JPA Data Store operations like query or update. Once the job is done, you will need to close the JPA Data
Store:
<sample-code:java>
// Disconnect with the relational database.
datastoreService.disconnect("jpa-datastore");
</sample-code:end>
•
Query JPA Data Stores
There are two methods, both named query, where you can retrieve information from
the relational database. The first one allows you to directly execute a JPQL statement
(JPA Query Language):
<sample-code:java>
// Run a SELECT statement in the relational database.
List<User> result = (List<User>) datastoreService.
query("jpa-datastore", "SELECT u FROM User u");
</sample-code:end>
In this example, the JPA Data Store returns a list of User objects that represents the
result of a query. JPA runs the query in the database and maps each row of the result
into a Java Bean configured with JPA annotations.
Execute query statements from text files
Another way to search for data in a JPA Data Store is by loading and executing JPQL
statements that exist in a FileText Provider. This functionality allows you to read queries
from text files and run them in the JPA Data Store, for example: you can setup a FileText Provider to read JPQL statements from text files and execute each one in the relational database, just by specifying the name of the Provider and the name of the text file
to read.
For the next sample code we are going to suppose that there is a FileText Provider
named jpql-provider that reads text files from a specific directory. When you request an object from this Provider, the name given is used to read the file. For example:
if we request an object named list-users, this Provider looks for a file named listusers.jpql in the directory, reads the file and return its content as a String object.
After that, the String returned (which represents a JPQL statement) is used to execute
the query in the database. This is the example:
<sample-code:java>
// Read a statement from a text file and execute if in the database.
List<User> result = (List<User>) datastoreService.
query("jpa-datastore", "jpql-provider", "list-users", null);
</sample-code:end>
237
With this utility you can save prepared statements in a directory for a JPA Data Store.
You can also define some variables for these queries and replace them later on with
specific values. Suppose that list-users.jpql contains the following code:
<sample-code:sql>
SELECT u FROM User u WHERE u.id = ${USER_ID}
</sample-code:end>
In this query we have defined a variable named USER_ID. We can assign a value to
this variable to complete the query and then run it in the JPA Data Store. This is done
as follows:
<sample-code:java>
// Values for variables.
Hashtable values = new Hashtable();
// Set variables to filter the JPQL statement.
values.put("USER_ID", new Integer(8375));
// Query the JPA Data Store.
List<User> result = (List<User>) datastoreService.
query("jpa-datastore", "jpql-provider", "list-users", values);
</sample-code:end>
•
Update JPA Data Stores
The update method of the Data Store Service Facade allows you to execute UPDATE
and DELETE JPQL statements. With this method it is also possible to store and update
entities (Java Beans with JPA annotations) in the database.
A very important fact to keep in mind about the update method in the JPA Data Store
is that it automatically begins a transaction with the database if anyone exists. When a
database transaction already exists, then Warework forces JPA to join with the active
transaction.
Running UPDATE and DELETE JPQL statements
<sample-code:java>
// Update one row.
datastoreService.update("jpa-datastore", null,
"UPDATE User u SET u.name = 'George Brown' WHERE u.id = 591");
// Delete one row.
datastoreService.update("jpa-datastore", null,
"DELETE FROM User u WHERE u.id=591");
</sample-code:end>
Save or update JPA entities
<sample-code:java>
// Create a new entity.
User user = new User();
// Set user attributes.
user.setName("George Brown");
// Create or update the user in the database.
datastoreService.update("jpa-datastore", null,
user);
</sample-code:end>
238
Execute update or delete statements from text files
Let us say that we want to delete a user from the database, we can define a script
named delete-user.sql like this:
<sample-code:sql>
DELETE FROM User u WHERE u.id=${USER_ID}
</sample-code:end>
Then replace these variables with the values that you need:
<sample-code:java>
// Values for variables.
Hashtable values = new Hashtable();
// Set variables for the delete statement.
values.put("USER_ID", new Integer(3));
// Delete the user in the database.
datastoreService.update("jpa-datastore", null, "jpql-provider",
"delete-user", values);
</sample-code:end>
•
Commit JPA Data Stores
You can commit changes just by providing the name of the JPA Data Store:
<sample-code:java>
// Commit changes.
datastoreService.commit("jpa-datastore");
</sample-code:end>
ORM View for JPA Data Stores
The JPAViewImpl class (package: com.warework.service.datastore.client) is a
View that implements the ORMView interface and it provides a facade where to perform relational database operations in a object-oriented way. Now we are going to see how to associate a
View of this type with a JPA Data Store and how to perform operations with the View.
•
Setting up the View
There is no need to configure this View with initialization parameters, so just add the
View in the stack of Views of the JPA Data Store:
<sample-code:java>
// Add the ORM View for JPA Data Stores.
datastoreService.addView("jpa-datastore",
JPAViewImpl.class, "view-name", null, null);
</sample-code:end>
Check it now how to do it with the Data Store Service XML configuration file:
<sample-code:xml>
<?xml version="1.0" encoding="UTF-8"?>
<datastore-service xmlns:xsi="http://www.w3.org/2001/XMLSchema-instance"
xsi:noNamespaceSchemaLocation="http://repository.warework.com/ …
… xsd/datastore-service-1.1.0.xsd">
<datastores>
239
<datastore name="jpa-datastore"
connector="com.warework.service.datastore. …
… client.connector.JPAConnector">
<parameters>
<parameter name="persistence-unit"
value="my-app-pu"/>
<parameter name="javax.persistence.jdbc.driver"
value="com.mysql.jdbc.Driver"/>
<parameter name="javax.persistence.jdbc.url"
value="jdbc:mysql://host:port/database-name"/>
<parameter name="javax.persistence.jdbc.user"
value="the-user-name"/>
<parameter name="javax.persistence.jdbc.password"
value="the-password"/>
</parameters>
<views>
<view class="com.warework.service.datastore. ...
… client.JPAViewImpl" name="view-name"/>
</views>
</datastore>
</datastores>
</datastore-service>
</sample-code:end>
You can also provide short class names to identify Connectors and Views:
<sample-code:xml>
<?xml version="1.0" encoding="UTF-8"?>
<datastore-service xmlns:xsi="http://www.w3.org/2001/XMLSchema-instance"
xsi:noNamespaceSchemaLocation="http://repository.warework.com/ …
… xsd/datastore-service-1.1.0.xsd">
<datastores>
<datastore name="jpa-datastore" connector="JPA">
<parameters>
<parameter name="persistence-unit"
value="my-app-pu"/>
<parameter name="javax.persistence.jdbc.driver"
value="com.mysql.jdbc.Driver"/>
<parameter name="javax.persistence.jdbc.url"
value="jdbc:mysql://host:port/database-name"/>
<parameter name="javax.persistence.jdbc.user"
value="the-user-name"/>
<parameter name="javax.persistence.jdbc.password"
value="the-password"/>
</parameters>
<views>
<view class="JPA" name="view-name"/>
</views>
</datastore>
</datastores>
</datastore-service>
</sample-code:end>
•
Working with the ORM View for JPA Data Stores
Now we are going to review the methods provided by the JPAViewImpl class. This
ORM View allows the following operations with objects:
Save: Stores an instance of a JPA entity in the relational database as a new row in
one table. Each entity attribute is associated with each column of the database. For
example:
240
<sample-code:java>
// Create a JPA entity.
User user = new User();
// Set some data in the entity.
user.setId(new Integer(8713)); // This is the Primary Key
user.setName("James");
user.setDateOfBirth(new Date());
// Save the JPA entity with the ORM View.
view.save(user);
</sample-code:end>
When save operation is executed, the JPA engine will create the corresponding
SQL code to insert a new record in the database, something like this:
<sample-code:sql>
INSERT INTO USER (ID, NAME, DATE_OF_BIRTH)
VALUES (8713, 'John Wood', '2013/03/07')
</sample-code:end>
Once the statement is created, JPA runs it in the database and the object is stored
in the table.
Update: Updates one row in a table of the database with the values of a given object.
Delete: Removes one row in a table of the database that matches the values of a
given object.
Find: Retrieves an object from the database that represents a specific row of a
table.
List: Retrieves a list of objects from the table where each object represents one row.
Count: Counts objects in the database.
This ORM View also allows executing query and update statements in JPQL (JPA
Query Language) which allows developers to create statements like SQL but in an object-oriented way.
Connect with the database
Even before you perform any of these operations, what you have to do first is to connect
to the database:
<sample-code:java>
// Get an instance of an ORM View interface.
ORMView view = (ORMView) datastoreService.getView(...);
// Connect the JPA Data Store.
view.connect();
</sample-code:end>
Begin a transaction in the database
In the following examples we are going to save some information in the database but
before that, it is recommended to begin a transaction with the database.
241
A transaction comprises a unit of work performed within a database management system, and treated in a coherent and reliable way independent of other transactions.
Transactions in a database environment have two main purposes:
To provide reliable units of work that allow correct recovery from failures and
keep a database consistent even in cases of system failure, when execution
stops (completely or partially) and many operations upon a database remain
uncompleted, with unclear status.
To provide isolation between programs accessing a database concurrently. If
this isolation is not provided the programs outcome are possibly erroneous.
Transactions provide an "all-or-nothing" proposition, stating that each work-unit performed in a database must either complete in its entirety or have no effect whatsoever.
Further, the system must isolate each transaction from other transactions, results must
conform to existing constraints in the database, and transactions that complete successfully must get written to durable storage.
To begin a transaction in a relational database management system you have to perform the following actions:
<sample-code:java>
// Get an instance of an ORM View interface.
ORMView view = (ORMView) datastoreService.getView(...);
// Connect the JPA Data Store.
view.connect();
// Begin a transaction in the database management system.
view.beginTransaction();
</sample-code:end>
Save an object
Now it is the right time to perform some CRUD (Create, Read, Update, Delete) operations. First, we are going to save one object in the database (insert one or multiple row):
<sample-code:java>
// Get an instance of an ORM View interface.
ORMView view = (ORMView) datastoreService.getView(...);
// Connect the Data Store.
view.connect();
// Begin a transaction in the database management system.
view.beginTransaction();
// Create a Java Bean.
User user = new User();
// Set some data in the Java Bean.
user.setName("James");
user.setDateOfBirth(new Date());
user.setPassword(new Integer(8713));
// Save the Java Bean in the data store.
view.save(user);
</sample-code:end>
242
You can also invoke this method with a callback object. This object will be invoked when
the operation is done or fails. Check out the following example
<sample-code:java>
// Connect the Data Store.
view.connect();
// Begin a transaction in the database management system.
view.beginTransaction();
// Create a Java Bean.
User user = new User();
// Set some data in the Java Bean.
user.setName("James");
user.setDateOfBirth(new Date());
user.setPassword(new Integer(8713));
// Save the Java Bean in the data store.
view.save(user, new AbstractCallback(getScope()){
protected void onFailure(Throwable t) {
// Handle error here.
}
protected void onSuccess(Object result) {
// Handle successful operation here.
// 'result' is the object just saved.
User user = (User) result;
// Display user name.
System.out.println("User name: " + user.getName());
}
});
</sample-code:end>
It is also possible to pass objects / attributes to the callback so you can use them at onSuccess or onFailure. For this purpose, we have to use a Hashtable when the
callback is created. Check out this example:
<sample-code:java>
// Attributes for the callback.
Hashtable attributes = new Hashtable();
// Set the attributes.
attributes.put("color", "red");
attributes.put("password", new Integer(123));
// Save the Java Bean in the data store.
view.save(user, new AbstractCallback(getScope(), attributes){
protected void onFailure(Throwable t) {
String color = (String) getAttribute("color");
}
protected void onSuccess(Object result) {
// Retrieve every attribute name with 'getAttributeNames()'.
Integer password = (Integer) getAttribute("password");
}
});
</sample-code:end>
243
Now we are going to save multiple objects with just one line of code. You can save an
array or a collection of objects like this:
<sample-code:java>
// Save three Java Beans in the data store.
view.save(new User[]{user1, user2, user3});
</sample-code:end>
With the JPA Data Store, the Framework will start a batch operation automatically when
a collection or array is given. Batch operations are very useful because they allow us to
track each operation executed. The following example stores a collection of Java Beans
and displays data about the batch operation:
<sample-code:java>
// We can also save collections.
List<User> users = new ArrayList<User>();
// Set some users in the collection.
users.add(user1);
users.add(user2);
users.add(user3);
// Save the collection in the data store.
view.save(users, new AbstractCallback(getScope()){
protected void onFailure(Throwable t) {
// Handle error here.
}
protected void onSuccess(Object result) {
// This callback method is invoked three times, one for.
// each object to save.
// Get current object saved.
User user = (User) result;
// Display user name.
System.out.println("Current user name: " + user.getName());
// Display items saved.
System.out.println("Total saved: " + getBatch().count());
// Display percentage of completion.
System.out.println("% saved: " + getBatch().progress());
}
});
</sample-code:end>
Method getBatch provides the following useful information about the batch operation
in execution:
•
getBatch().count(): counts the amount of callbacks executed in
the batch operation.
•
getBatch().duration(): gets how long (in milliseconds) is taking
the current batch operation.
•
getBatch().id(): gets the ID of the batch operation.
244
•
getBatch().progress(): gets the percentage of completion of the
current batch operation.
•
getBatch().size(): gets the total of callbacks to perform in the
batch operation.
•
getBatch().startTime(): gets the time (in milliseconds ) when the
batch operation started.
Update objects
Previously stored objects (rows) in the database can be updated later on with new values:
<sample-code:java>
// Update some data in the Java Bean.
user.setName("James Jr.");
// Update the object in the data store.
view.update(user);
</sample-code:end>
You can also use callbacks and update multiple objects (arrays or collections) with
batch operations:
<sample-code:java>
// Update three Java Beans in the data store.
view.update(new User[]{user1, user2, user3},
new AbstractCallback(getScope()){
protected void onFailure(Throwable t) {
// Handle error here.
}
protected void onSuccess(Object result) {
// Get current object updated.
User user = (User) result;
// Display user name.
System.out.println("Current user name: " + user.getName());
// Display items updated.
System.out.println("Total updated: " + getBatch().count());
// Display percentage of completion.
System.out.println("% updated: " + getBatch().progress());
}
});
</sample-code:end>
Delete objects
The following example shows how to delete one object (removes the row from the
table):
<sample-code:java>
// Delete the object in the data store.
view.delete(user);
</sample-code:end>
245
You can also use callbacks and delete arrays or collections with batch operations:
<sample-code:java>
// Delete three Java Beans in the data store.
view.delete(new User[]{user1, user2, user3},
new AbstractCallback(getScope()){
protected void onFailure(Throwable t) {
// Handle error here.
}
protected void onSuccess(Object result) {
// Get current object deleted.
User user = (User) result;
// Display user name.
System.out.println("Current user name: " + user.getName());
// Display items deleted.
System.out.println("Total deleted: " + getBatch().count());
// Display percentage of completion.
System.out.println("% deleted: " + getBatch().progress());
}
});
</sample-code:end>
To remove every object of a specific type, we have to provide the class:
<sample-code:java>
// Delete all users in the data store.
view.delete(User.class);
</sample-code:end>
This will delete every row in the table (this operation is executed in just one step be cause the relational database allows it). The following example shows now how to remove a set of objects specified in a query:
<sample-code:java>
// Define the query.
Query query = new Query(getScope());
// Search for User objects.
query.setObject(User.class);
// Define the WHERE clause.
Where where = query.getWhere(true);
// Set an expression like this: (name = 'Carl').
where.setExpression(where.createEqualToValue("name", "Carl"));
// Delete every user which name is 'Carl'.
view.delete(query);
</sample-code:end>
We will show soon how to configure Query objects. By now just bear in mind that we
can delete objects with queries too.
If the query is in the form of an XML file, you can load the query and delete the objects
returned like this:
246
<sample-code:java>
// Delete every user specified by "list-users" query.
view.executeDeleteByName("list-users", null);
</sample-code:end>
This method uses a Provider to load the query from an XML file. Review later on how to
list objects with XML files. We explain in detail there how this mechanism works and the
same rules apply for executeDeleteByName. Also, like we have seen before, you can
use callback here:
<sample-code:java>
// Delete every user specified by "list-users" query.
view.executeDeleteByName("list-users", null,
new AbstractCallback(getScope()){
protected void onFailure(Throwable t) {
// Handle error here.
}
protected void onSuccess(Object result) {
// Handle each object deleted here.
}
});
</sample-code:end>
If the query accepts parameters, you can update the query with a Hashtable:
<sample-code:java>
// Attributes for the query.
Hashtable filter = new Hashtable();
// Set the attributes.
filter.put("name", "John");
// Delete every user named "John".
view.executeDeleteByName("list-users", filter,
new AbstractCallback(getScope()){
protected void onFailure(Throwable t) {
// Handle error here.
}
protected void onSuccess(Object result) {
// Handle each object deleted here.
}
});
</sample-code:end>
Commit or rollback a transaction
Every update operation that we performed in the previous examples is related to the
transaction that we created before. Once the work is done, you should either commit or
rollback the transaction. If the operations were executed without problems, then you
should perform commit to register the changes in the database:
<sample-code:java>
// Commits changes in the Relational Database Management System.
view.commit();
</sample-code:end>
247
In the other hand, if you find a failure, something unexpected happened or you just do
not want to register the changes in the database, then you should perform rollback to
undo every update operation executed since the transaction was started:
<sample-code:java>
// Cancel latest update operations.
view.rollback();
</sample-code:end>
Find an object in the database
Now we are going to see how to retrieve objects from the database. Depending on how
many objects we want to get, we can perform two different types of operations.
To search for a specific object from the database (one row in a table of the database)
you have to invoke the find method. This method requires you to provide an object of
the same type as the one you want to retrieve, with some data in it so it will be used as
a filter to find the object in the database.
Let's see some sample code. Suppose that there is a user named Steve in the relational database, we could retrieve an object instance that represents this user like this:
<sample-code:java>
// Get an instance of an ORM View interface.
ORMView view = (ORMView) datastoreService.getView(...);
// Connect the JPA Data Store.
view.connect();
// Create the filter to find the object.
User filter = new User();
// Set the primary key.
filter.setId(new Integer(652));
// Search the user by primary key.
User user = (User) view.find(filter);
</sample-code:end>
The object that represents that specific row from the database is returned with all its
data associated to it. The idea is that developers can search for an object just by providing some of its attributes and retrieve the same object type with the last information it
had when it was stored or updated in the database. Bear in mind that an exception is
thrown if more than one object is found in the database. This method just searches for a
single object in the database. In order to retrieve a collection of objects, you should invoke different methods.
List objects from the database
Warework provides three different ways to retrieve a list of objects from a database. The
first one works similar as the find method, but this time you will get a collection of objects (instead of one single object). Check it out with an example:
<sample-code:java>
// Get an instance of an ORM View interface.
ORMView view = (ORMView) datastoreService.getView(…);
// Connect with the relational database.
view.connect();
// Create the filter to find the objects.
User filter = new User();
248
// Set the data required to find the objects in the database.
filter.setPassword(new Integer(8713));
// List every row from USER table which password is "8713".
List<User> users = (List<User>) view.list(filter, null, null, -1, -1);
</sample-code:end>
The main characteristic of this method is that it creates a query where every non-null attribute of the given object is combined with AND expressions, for example:
<sample-code:java>
// Create the filter to find the objects.
User filter = new User();
// Set the data required to find the objects in the database.
filter.setName("Steve");
filter.setPassword(new Integer(8713));
// Find "User" objects which name is "Steve" and password is "8713".
List<User> users = (List<User>) view.list(filter, null, null, -1, -1);
</sample-code:end>
When this operation is executed, the JPA engine creates a query that may look like this:
<sample-code:sql>
SELECT * FROM USER WHERE ((NAME = 'Steve') AND (PASSWORD = 8713))
</sample-code:end>
Also, when objects of the data model are related each other (typically, 1:1
relationships), every non-null attribute of the related objects is used to build the query.
For example:
<sample-code:java>
// Create the filter to find an user by its contact.
Contact contact = new Contact();
// Set the data required to find User objects by its email.
contact.setEmail("[email protected]");
// Create the filter to find User objects.
User filter = new User();
// Set the data required to find User objects in the database.
filter.setName("John");
filter.setContact(contact);
// Find "User" objects which name is "John" and email is "[email protected]".
List<User> users = (List<User>) view.list(filter, null, null, -1, -1);
</sample-code:end>
This operation creates a query like this:
<sample-code:sql>
SELECT * FROM USER A, CONTACT B
WHERE ((B.USER = A.ID) AND (A.NAME = 'John') AND
(B.EMAIL = '[email protected]'))
</sample-code:end>
While the AND expression is always used to create the query (there is no chance to
modify this type of expression in this method), you can indicate which specific operation
must be performed in the attributes of the object. By default, the equal operator is used
when a non-null attribute is found but it is possible to use different ones like: not equals
to, greater than, greater than or equals to, less than, less than or equals to, like, not like,
249
is null or is not null. The following example shows how to list User objects which name
is Steve and password is greater than 100:
<sample-code:java>
// Create the filter to find the objects.
User f = new User();
// Set the data required to find the objects in the database.
f.setName("John");
f.setPassword(new Integer(100));
// Define which operators to use.
Hashtable operator = new Hashtable();
// Set which operation to perform for each attribute of the filter.
operator.put("password", Operator.GREATER_THAN);
// Find "User"s which name is "John" and password is greater than "100".
List<User> users = (List<User>) view.list(f, operator, null, -1, -1);
</sample-code:end>
This operation creates a query like this:
<sample-code:sql>
SELECT * FROM USER WHERE ((NAME = 'John') AND (PASSWORD > 100))
</sample-code:end>
It is also possible to change the operator in referenced objects:
<sample-code:java>
// Create the filter to find an user by its contact.
Contact contact = new Contact();
// Set the data required to find User objects by its email.
contact.setEmail("[email protected]");
// Create the filter to find User objects.
User f = new User();
// Set the data required to find User objects in the database.
f.setName("Steve");
f.setContact(contact);
// Define which operators to use.
Hashtable operator = new Hashtable();
// Set which operation to perform for each attribute of the filter.
operator.put("contact.email", Operator.LIKE);
// Find "User" objects which name is Steve and email is like
// "[email protected]".
List<User> users = (List<User>) view.list(f, operator, null, -1, -1);
</sample-code:end>
This is the generated query:
<sample-code:sql>
SELECT * FROM USER A, CONTACT B
WHERE ((B.USER = A.ID) AND (A.NAME = 'Steve') AND
(B.EMAIL LIKE '[email protected]'))
</sample-code:end>
What if you just want to list all the objects of the same type? In this case you can
provide just the class instead of an object instance:
250
<sample-code:java>
// List every row from USER table.
List<User> users = (List<User>) view.list(User.class, null, null,
-1, -1);
</sample-code:end>
When you provide a class you can only specify two operators: IS_NULL and
IS_NOT_NULL. This is because you cannot provide the values of the fields in a class.
For example:
<sample-code:java>
// Define which operators to use.
Hashtable operator = new Hashtable();
// Set only IS_NULL or IS_NOT_NULL operators.
operator.put("name", Operator.IS_NOT_NULL);
// List every row from USER table which NAME column is not null.
List<User> users = (List<User>) view.list(User.class, operator, null,
-1, -1);
</sample-code:end>
This operation creates a query like this:
<sample-code:sql>
SELECT * FROM USER WHERE (NAME IS NOT NULL)
</sample-code:end>
The same way we did before we can use a callback object in this method. Just bear in
mind that now the result of the operation is provided by the callback onSuccess method:
<sample-code:java>
// Define which operators to use.
Hashtable operator = new Hashtable();
// Set only IS_NULL or IS_NOT_NULL operators.
operator.put("name", Operator.IS_NOT_NULL);
// Find every "User" which name is not null.
view.list(User.class, null, null, -1, -1,
new AbstractCallback(getScope()){
protected void onFailure(Throwable t) {
// Handle error here.
}
protected void onSuccess(Object result) {
// Get database query result.
List<User> users = (List<User>) result;
// Handle collection here...
}
});
</sample-code:end>
Sort results
The third argument of the list method allows us to define how to sort the results. It is
fairly easy:
251
<sample-code:java>
// Define the order of the results.
OrderBy order = new OrderBy();
// Set ascending order for column "NAME".
order.addAscending("name");
// List every row from USER table sorted by name.
List<User> users = (List<User>) view.list(User.class, null, order,
-1, -1);
</sample-code:end>
The result of this operation will be a list of all users sorted in ascending order. The query
generated looks like this:
<sample-code:sql>
SELECT * FROM USER ORDER BY NAME ASC
</sample-code:end>
Pagination
Sometimes you may need to limit the number of objects returned by the JPA engine
when a query operation is performed. Let us say that there are 26 rows in USER table
and that we just expect to retrieve the first 10 rows/objects. We can write something like
this:
<sample-code:java>
// Get the first 10 objects.
List<User> users = (List<User>) view.list(User.class, null, null,
1, 10);
</sample-code:end>
What is going on right now? When you specify the number of objects that you want in
the result of a database, Warework automatically calculates the number of pages that
hold this number of objects. In the previous example we specified 10 objects per result
and with this information Warework estimates that the size of each page is 10 objects
and that there are three pages: page 1 with 10 objects, page 2 with 10 objects and page
3 with 6 objects. If now we need to retrieve the next ten objects, we have to indicate that
we want the second page:
<sample-code:java>
// Get objects from 11 to 20.
List<User> users = (List<User>) view.list(User.class, null, null,
2, 10);
</sample-code:end>
If we request page number three, we get the last 6 objects from the database. The important fact to keep in mind here is that the number of objects remains as 10:
<sample-code:java>
// Get objects from 21 to 26.
List<User> users = (List<User>) view.list(User.class, null, null,
3, 10);
</sample-code:end>
Creating custom queries with Query object
Warework also gives the possibility to create Query objects where to specify all the
characteristics we had seen before. These Query objects allows to define AND, OR and
NOT expressions as well, so they are more useful in certain cases. The following example shows how to run a simple query with this object:
252
<sample-code:java>
// Define the query.
Query query = new Query(getScope());
// Set the type of objects to look for.
query.setObject(User.class);
// List every row from USER table.
List<User> users = (List<User>) view.list(query);
</sample-code:end>
This example retrieves every row from USER table of the database. To filter the results,
we have to create a Where clause for the query. Let's see how to filter the query by specifying a value for the name attribute of the User object:
<sample-code:java>
// Define the query.
Query query = new Query(getScope());
// Search for User objects.
query.setObject(User.class);
// Define the WHERE clause. You must provide an instance of ScopeFacade.
Where where = query.getWhere(true);
// Set an expression like: (name = 'Steve').
where.setExpression(where.createEqualToValue("name", "Steve"));
// List every row from USER table which name is 'Steve'.
List<User> users = (List<User>) view.list(query);
</sample-code:end>
This operation creates a query like this:
<sample-code:sql>
SELECT * FROM USER WHERE (NAME = 'Steve')
</sample-code:end>
One great feature about Query objects is that you can assign values from different
sources to the attributes of the object that define the search criteria. This is handled with
Warework Providers, that is, you have to create an expression for the Where clause
which gets the value from a Provider and assigns this value to the attribute of the object.
For example, suppose that we have a Provider named "password-provider" which
returns the password for a given user name. To search for a user which matches the
password given by the Provider, we can create a query like this:
<sample-code:java>
// Define the query.
Query query = new Query(getScope());
// Search for User objects.
query.setObject(User.class);
// Define the WHERE clause.
Where where = query.getWhere(true);
// Filter by password; assign to password the value of the Provider.
where.setExpression(where.createEqualToProviderValue("password",
"password-provider", "steve"));
// List "User" objects which name is 'Steve'.
List<User> users = (List<User>) view.list(query);
</sample-code:end>
253
This time, the value for the attribute is not directly assigned by the developer; instead, it
is assigned with the value returned by the Provider. So, if "password-provider" returns 8713 for "steve", then the query created looks like this:
<sample-code:sql>
SELECT * FROM USER WHERE (PASSWORD = 8713)
</sample-code:end>
Now we are going to create one AND expression to filter the query with two attributes.
Check it out with the following example:
<sample-code:java>
// Define the query.
Query query = new Query(getScope());
// Search for User objects.
query.setObject(User.class);
// Define the WHERE clause.
Where where = query.getWhere(true);
// Create one AND expression.
And and = where.createAnd();
// Filter by name and password.
and.add(where.createLikeValue("name", "Steve"));
and.add(where.createGreaterThanValue("password", new Integer(1000)));
// Set the AND expression in the WHERE clause.
where.setExpression(and);
// List "User" which name is like 'Steve' and password is greater
// than 1000.
List<User> users = (List<User>) view.list(query);
</sample-code:end>
This operation creates a query like this:
<sample-code:sql>
SELECT * FROM USER WHERE ((NAME LIKE 'Steve') AND (PASSWORD > 1000))
</sample-code:end>
OR expressions with Query objects
With Query objects you can also specify OR expressions:
<sample-code:java>
// Define the query.
Query query = new Query(getScope());
// Search for User objects.
query.setObject(User.class);
// Define the WHERE clause.
Where where = query.getWhere(true);
// Create one OR expression.
Or or = where.createOr();
// Filter by name and password.
or.add(where.createLikeValue("name", "Steve"));
or.add(where.createGreaterThanValue("password", new Integer(1000)));
// Set the OR expression in the WHERE clause.
254
where.setExpression(or);
// List "User" which name is like 'Steve' or password is greater
// than 1000.
List<User> users = (List<User>) view.list(query);
</sample-code:end>
This operation creates this query:
<sample-code:sql>
SELECT * FROM USER WHERE ((NAME LIKE 'Steve') OR (PASSWORD > 1000))
</sample-code:end>
Of course, you can create more complex queries. The following example shows you
how to mix multiple AND, OR and NOT expressions:
<sample-code:java>
// Define the query.
Query query = new Query(getScope());
// Search for User objects.
query.setObject(User.class);
// Define the WHERE clause.
Where where = query.getWhere(true);
// Create OR expression.
Or or1 = where.createOr();
// Filter by name.
or1.add(where.createLikeValue("name", "Arnold"));
or1.add(where.createLikeValue("name", "David"));
// Create NOT expression.
Not not = where.createNot(or1);
// Create another OR expression.
Or or2 = where.createOr();
// Filter by password.
or2.add(where.createGreaterThanValue("password", new Integer(1000)));
or2.add(where.createLessThanValue("password", new Integer(5000)));
// Create one AND expression.
And and = where.createAnd();
// Filter by name and password.
and.add(not);
and.add(or2);
// Set the AND expression in the WHERE clause.
where.setExpression(and);
// List "User" objects.
List<User> users = (List<User>) view.list(query);
</sample-code:end>
And this is the query representation:
<sample-code:sql>
SELECT * FROM USER WHERE (NOT ((NAME LIKE 'Arnold') OR
(NAME LIKE 'David')) AND ((PASSWORD > 1000) OR (PASSWORD < 5000)))
</sample-code:end>
Order and pagination with Query objects
255
Query objects also allow you to define the order of the results and which page to retrieve from the database. The following example shows you how to list the first ten users
sorted by name in ascending order:
<sample-code:java>
// Define the query.
Query query = new Query(getScope());
// Set the type of objects to look for.
query.setObject(User.class);
// Define the order of the results.
OrderBy order = new OrderBy();
// Set ascending order for field "name".
order.addAscending("name");
// Set order by.
query.setOrderBy(order);
// Set which page to get from the result.
query.setPage(1);
// Set maximum number of objects to get in the result.
query.setPageSize(10);
// List the first ten "User" objects sorted by name in ascending order.
List<User> users = (List<User>) view.list(query);
</sample-code:end>
List objects with XML queries
Making queries with Query object is very useful when you have to dynamically create
the query (you are free to create the query the way you need it) but, in certain cases, it
is better for the programmer to create queries in separate XML files because they can
be managed outside the Java code and they are easier to understand.
A very convenient way to keep object queries in separate files consist of keeping each
statement in an independent XML file, for example: find-user.xml, list-users.xml, etc. Later on we can read these XML files with an Object Query Provider and
use this Provider to read the statements for the JPA engine. Remember that you can
define a default Provider for a View when you associate a View to a Data Store:
<sample-code:java>
// Add a View and link a Provider to it.
datastoreService.addView("jpa-datastore", JPAViewImpl.class,
"view-name", "object-query-provider", null);
</sample-code:end>
The object-query-provider now can be used in the View as the default Provider
to read XML queries from a specific directory. Let us say we have the following content
for find-steve.xml:
<sample-code:xml>
<?xml version="1.0" encoding="UTF-8"?>
<query xmlns:xsi="http://www.w3.org/2001/XMLSchema-instance"
xsi:noNamespaceSchemaLocation="http://repository.warework.com/xsd/...
...object-query-1.1.0.xsd">
<object>com.mycompany.beans.User</object>
<where>
256
<expression>
<attribute>name</attribute>
<operator>EQUAL_TO</operator>
<value-operand>
<type>java.lang.String</type>
<value>Steve</value>
</value-operand>
</expression>
</where>
</query>
</sample-code:end>
If object-query-provider is the default Provider in an ORM View, we can read the
content of this file with the following code:
<sample-code:java>
// Read the content of 'find-steve.xml' and execute it.
List<User> users = (List<User>) view.executeQueryByName("find-steve",
null, -1, -1);
</sample-code:end>
When executeQueryByName is invoked, these actions are performed:
The ORM View requests the find-steve object to object-query-provider.
object-query-provider reads the content of find-steve.xml and returns it (as a Query object).
The ORM View executes the statement included at find-steve.xml in the
relational database.
The ORM View and the Object Query Provider are perfect mates. Both, in combination,
will simplify a lot the process of executing query statements in your database. Just write
simple XML files and let Warework execute them for you. It is recommended that you
check out the documentation associated to the Object Query Provider to fully take advantage of this feature.
Operators
In XML queries you can specify operators like this:
<sample-code:xml>
<?xml version="1.0" encoding="UTF-8"?>
<query xmlns:xsi="http://www.w3.org/2001/XMLSchema-instance"
xsi:noNamespaceSchemaLocation="http://repository.warework.com/xsd/...
...object-query-1.1.0.xsd">
<object>com.mycompany.beans.User</object>
<where>
<expression>
<attribute>name</attribute>
<operator>EQUAL_TO</operator>
<value-operand>
<type>java.lang.String</type>
<value>Steve</value>
</value-operand>
</expression>
257
</where>
</query>
</sample-code:end>
And you can also use short keywords to identify them:
<sample-code:xml>
<?xml version="1.0" encoding="UTF-8"?>
<query xmlns:xsi="http://www.w3.org/2001/XMLSchema-instance"
xsi:noNamespaceSchemaLocation="http://repository.warework.com/xsd/...
...object-query-1.1.0.xsd">
<object>com.mycompany.beans.User</object>
<where>
<expression>
<attribute>name</attribute>
<operator>EQ</operator>
<value-operand>
<type>java.lang.String</type>
<value>Steve</value>
</value-operand>
</expression>
</where>
</query>
</sample-code:end>
Previous examples perform the same operation. Check out the following table to review
which operators are supported and which short names you can use:
OPERATOR
=
!=
<
<=
>
>=
IS NULL
IS NOT NULL
LIKE
NOT LIKE
FULL NAME
EQUAL_TO
NOT_EQUAL_TO
LESS_THAN
LESS_THAN_OR_EQUAL_TO
GREATER_THAN
GREATER_THAN_OR_EQUAL_TO
IS_NULL
IS_NOT_NULL
LIKE
NOT_LIKE
SHORT NAME
EQ
NE
LT
LE
GT
GE
IN
NN
LK
NL
Value types
In XML queries you can specify different value types and some of them with short
names. For example, the previous query can be written as:
<sample-code:xml>
<?xml version="1.0" encoding="UTF-8"?>
<query xmlns:xsi="http://www.w3.org/2001/XMLSchema-instance"
xsi:noNamespaceSchemaLocation="http://repository.warework.com/xsd/...
...object-query-1.1.0.xsd">
<object>com.mycompany.beans.User</object>
<where>
<expression>
<attribute>name</attribute>
258
<operator>EQ</operator>
<value-operand>
<type>string</type>
<value>Steve</value>
</value-operand>
</expression>
</where>
</query>
</sample-code:end>
The following table summarizes which data types can be used with short names:
OBJECT TYPE
java.lang.Boolean
java.lang.Byte
java.lang.Short
java.lang.Integer
java.lang.Long
java.lang.Float
java.lang.Double
java.lang.Character
java.lang.String
java.util.Date
SHORT NAME
boolean
byte
short
int or integer
long
float
double
char or character
string
date
AND, OR and NOT expressions in XML queries
With XML Object Queries you can write the same queries as the one you will code with
Query objects. These XML queries also allow defining AND, OR and NOT expressions as
well, for example:
<sample-code:xml>
<?xml version="1.0" encoding="UTF-8"?>
<query xmlns:xsi="http://www.w3.org/2001/XMLSchema-instance"
xsi:noNamespaceSchemaLocation="http://repository.warework.com/xsd/...
...object-query-1.1.0.xsd">
<object>com.mycompany.beans.User</object>
<where>
<and>
<expression>
<attribute>name</attribute>
<operator>LIKE</operator>
<value-operand>
<type>java.lang.String</type>
<value>Steve</value>
</value-operand>
</expression>
<expression>
<attribute>password</attribute>
<operator>GREATER_THAN</operator>
<value-operand>
<type>java.lang.Integer</type>
<value>1000</value>
</value-operand>
</expression>
</and>
</where>
</query>
</sample-code:end>
259
This XML query is converted into something like this:
<sample-code:sql>
SELECT * FROM USER WHERE ((NAME LIKE 'Steve') AND (PASSWORD > 1000))
</sample-code:end>
Check it out now with an OR expression:
<sample-code:xml>
<?xml version="1.0" encoding="UTF-8"?>
<query xmlns:xsi="http://www.w3.org/2001/XMLSchema-instance"
xsi:noNamespaceSchemaLocation="http://repository.warework.com/xsd/...
...object-query-1.1.0.xsd">
<object>com.mycompany.beans.User</object>
<where>
<or>
<expression>
<attribute>name</attribute>
<operator>LIKE</operator>
<value-operand>
<type>java.lang.String</type>
<value>Steve</value>
</value-operand>
</expression>
<expression>
<attribute>password</attribute>
<operator>GREATER_THAN</operator>
<value-operand>
<type>java.lang.Integer</type>
<value>1000</value>
</value-operand>
</expression>
</or>
</where>
</query>
</sample-code:end>
Now, this XML query looks like this:
<sample-code:sql>
SELECT * FROM USER WHERE ((NAME LIKE 'Steve') OR (PASSWORD > 1000))
</sample-code:end>
The following example shows a more complex query with AND, OR and NOT expressions:
<sample-code:xml>
<?xml version="1.0" encoding="UTF-8"?>
<query xmlns:xsi="http://www.w3.org/2001/XMLSchema-instance"
xsi:noNamespaceSchemaLocation="http://repository.warework.com/xsd/...
...object-query-1.1.0.xsd">
<object>com.mycompany.beans.User</object>
<where>
<not>
<and>
<expression>
<attribute>name</attribute>
<operator>NOT_LIKE</operator>
260
<value-operand>
<type>java.lang.String</type>
<value>James</value>
</value-operand>
</expression>
<or>
<expression>
<attribute>name</attribute>
<operator>NO_LIKE</operator>
<value-operand>
<type>java.lang.String</type>
<value>Arnold</value>
</value-operand>
</expression>
<expression>
<attribute>name</attribute>
<operator>IS_NOT_NULL</operator>
</expression>
<or>
</and>
<not>
</where>
</query>
</sample-code:end>
This is the output for the query:
<sample-code:sql>
SELECT * FROM USER WHERE NOT ((NAME NOT LIKE 'James') AND
((NAME NOT LIKE 'Arnold') OR (NAME IS NOT NULL)))
</sample-code:end>
Setting date values in XML queries
Before we proceed with more different examples, keep in mind that it is also possible to
assign date values to the attributes:
<sample-code:xml>
<?xml version="1.0" encoding="UTF-8"?>
<query xmlns:xsi="http://www.w3.org/2001/XMLSchema-instance"
xsi:noNamespaceSchemaLocation="http://repository.warework.com/xsd/...
...object-query-1.1.0.xsd">
<object>com.mycompany.beans.User</object>
<where>
<expression>
<attribute>name</attribute>
<operator>EQUAL_TO</operator>
<value-operand>
<type>java.util.Date</type>
<value>1967/08/12</value>
<format>yyyy/MM/dd</format>
<locale>en_US</locale>
<time-zone>europe/london</time-zone>
</value-operand>
</expression>
</where>
</query>
</sample-code:end>
261
With this information, Warework will try to parse the date and assign its value to the attribute. While locale and time-zone are not mandatory, you should always provide
the format to properly parse the date. Check out some available locale codes here:
http://docs.oracle.com/javase/1.4.2/docs/guide/intl/locale.doc.html
Review how to retrieve time-zone codes in the following location:
http://docs.oracle.com/javase/1.4.2/docs/api/java/util/TimeZone.html
In XML queries it is also possible to assign values to attributes which come from defined
variables or Providers.
Creating variables in XML queries
First we are going to review how to define a variable for an attribute. It is simple: by one
side, you have to create an expression in the XML query and define in there a name for
a variable. This variable will be replaced later on at runtime with the values specified by
the developer. The following find-user.xml query file defines a variable for the name
attribute of the User object:
<sample-code:xml>
<?xml version="1.0" encoding="UTF-8"?>
<query xmlns:xsi="http://www.w3.org/2001/XMLSchema-instance"
xsi:noNamespaceSchemaLocation="http://repository.warework.com/xsd/...
...object-query-1.1.0.xsd">
<object>com.mycompany.beans.User</object>
<where>
<expression>
<attribute>name</attribute>
<operator>LIKE</operator>
<variable-operand name="USER_NAME"/>
</expression>
</where>
</query>
</sample-code:end>
Now that we have defined a variable for the name attribute, we can replace this variable
with a specific value as follows:
<sample-code:java>
// Values for variables.
Hashtable values = new Hashtable();
// Set variables for the query.
values.put("USER_NAME", "Steve");
// Read 'find-user.xml', replace variables and execute it.
List<User> users = (List<User>) view.executeQueryByName("find-user",
values, -1, -1);
</sample-code:end>
Once the value is assigned to the variable, the output query looks like this:
262
<sample-code:sql>
SELECT * FROM USER WHERE (NAME LIKE 'Steve')
</sample-code:end>
We can perform a similar action with a Provider. With Providers, instead of defining a
variable in the query, we specify an object from a Provider that will be used as the value
for the attribute. For example, suppose that we have a Provider named password-provider which returns user's passwords, that is, if we request object "steve",
the Provider will return something like "3425". The following query shows how to assign
the object named "steve" in Provider "password-provider" to the "password" attribute.
<sample-code:xml>
<?xml version="1.0" encoding="UTF-8"?>
<query xmlns:xsi="http://www.w3.org/2001/XMLSchema-instance"
xsi:noNamespaceSchemaLocation="http://repository.warework.com/xsd/...
...object-query-1.1.0.xsd">
<object>com.mycompany.beans.User</object>
<where>
<expression>
<attribute>password</attribute>
<operator>EQUALS_TO</operator>
<provider-operand>
<provider-name>password-provider</provider-name>
<provider-object>steve</provider-object>
</provider-operand>
</expression>
</where>
</query>
</sample-code:end>
After the value "3425" is retrieved from the Provider and it is assigned to "password",
this query is shown as follows:
<sample-code:sql>
SELECT * FROM USER WHERE (PASSWORD = 3425)
</sample-code:end>
Running JPQL statements
This ORM View also allows executing JPQL UPDATE and DELETE statements. The following fragment of code shows how to execute a JPQL UPDATE statement in the relational database with the JPA engine:
<sample-code:java>
// Get an instance of an ORM View interface.
ORMView view = (ORMView) datastoreService.getView(...);
// Connect with the relational database.
view.connect();
// Begin a transaction in the relational database.
view.beginTransaction();
// Create the JPQL statement to execute.
String jpql = "UPDATE User u SET u.name = 'Alfred' WHERE u.id = 591";
// Run the JPQL update statement.
view.executeUpdate(jpql, null);
263
// Commit changes.
view.commit();
</sample-code:end>
Another option is to execute multiple statements at once. You can do it by specifying a
separator character which delimits each statement:
<sample-code:java>
// JPQL statement to update first user.
String jpql1 = "UPDATE User u SET u.name = 'Alfred' WHERE u.id = 591";
// JPQL statement to update second user.
String jpql2 = "UPDATE User u SET u.name = 'John' WHERE u.id = 8";
// JPQL statement to update third user.
String jpql3 = "UPDATE User u SET u.name = 'Marcus' WHERE u.id = 63";
// Execute three JPQL update statements at once.
view.executeUpdate(jpql1 + ";" + jpql2 + ";" + jpql3,
new Character(';'));
</sample-code:end>
Running JPQL scripts
If you define a default Provider for this View that reads plaint text files, like Warework
FileText Provider, you can read .jpql scripts and execute them in the database very
easily. This time, instead of setting up the View with the Object Query Provider, we specify that the default Provider is a FileText Provider that reads .jpql statements from a
specific directory:
<sample-code:java>
// Add a View and link a Provider to it.
datastoreService.addView("sample-datastore", SampleViewImpl.class,
"view-name", "jpql-provider", null);
</sample-code:end>
The jpql-provider Provider now can be used in the View as the default Provider to
read text files from a specific directory. Let us say we have the following content for update-user.jpql:
<sample-code:sql>
UPDATE User u SET u.name = 'John' WHERE u.id = 8
</sample-code:end>
If jpql-provider is the default Provider in an ORM View, we can read the content of
this file with the following code:
<sample-code:java>
// Read the content of 'update-user.jpql' and execute it.
view.executeUpdateByName("update-user", null, null);
</sample-code:end>
When executeUpdateByName is invoked, these actions are performed:
The ORM View requests the update-user object to jpql-provider.
jpql-provider reads the content of update-user.jpql and returns it (as
a String object).
264
The ORM View executes the statement included at update-user.jpql in the
relational database.
Defining variables in JPQL scripts
Now we are going to create a generic statement to delete users in the database. We
can define the script delete-user.sql with a variable like this:
<sample-code:sql>
DELETE FROM User u WHERE u.id=${USER_ID}
</sample-code:end>
Then replace this variable with the value that you want:
<sample-code:java>
// Values for variables.
Hashtable values = new Hashtable();
// Set variables for the statement.
values.put("USER_ID", new Integer(3));
// Delete a user in the relational database.
view.executeUpdateByName("delete-user", values, null);
</sample-code:end>
When your script contains multiple UPDATE and / or DELETE statements, you also have
to indicate the character that delimits each statement. Suppose we have the following
delete-user.sql script:
<sample-code:sql>
DELETE FROM User u WHERE u.id=${USER_ID};
DELETE FROM Contact c WHERE c.user=${USER_ID};
</sample-code:end>
Now we can replace variables in multiple statements with this code:
<sample-code:java>
// Values for variables.
Hashtable values = new Hashtable();
// Set variables for the statements.
values.put("USER_ID", new Integer(3));
// Delete a user in the database.
view.executeUpdateByName("delete-user", values, new Character(';'));
</sample-code:end>
Running JPQL queries
Now we are going to focus on JPQL query operations to know how to retrieve data from
the database with JPQL. The following code is an example to perform this action:
<sample-code:java>
// Execute the JPQL statement to retrieve some data.
List<User> users = (List<User>) view.
executeQuery("SELECT u FROM User u", -1, -1);
</sample-code:end>
This code executes the JPQL query statement into the relational database and returns a
list of JPA entities that represent the result of the JPA engine.
265
Pagination with JPQL queries
It is also possible to specify the page and size for the result set. In the following ex ample, 1 represents the page to retrieve and 10 is the size of the result:
<sample-code:java>
// Get the first 10 rows.
List<User> users = (List<User>) view.
executeQuery("SELECT u FROM User u", 1, 10);
</sample-code:end>
Running JPQL queries from scripts
With queries, you can also write SELECT statements in separate text files (this time, just
one statement per file). Suppose that the following code is the content of the listusers.jpqlfile:
<sample-code:sql>
SELECT u FROM User u
</sample-code:end>
If jpql-provider still is our default Provider, we can read the script like this:
<sample-code:java>
// Read the content of 'list-users.jpql' and execute it in the database.
List<User> users = (List<User>) view.
executeQueryByName("list-users", null, -1, -1);
</sample-code:end>
Defining variables in a JPQL query script
There is also the possibility to define variables in the JPQL query:
<sample-code:sql>
SELECT u FROM User u.id = ${USER_ID}
</sample-code:end>
Now we can assign a value to this variable to complete the query. This is done as follows:
<sample-code:java>
// Values for variables.
Hashtable values = new Hashtable();
// Set variables to filter the query.
values.put("USER_ID", new Integer(8375));
// Read 'list-users.jpql', replace variables and execute the statement.
List<User> users = (List<User>) view.
executeQueryByName("list-users", values, -1, -1);
</sample-code:end>
The two last arguments allow you to define the page and the maximum number of objects to retrieve. The following example shows how to get the second page with a fixed
size of 10 objects per page:
<sample-code:java>
// Get the second page with no more than 10 registries in it.
List<User> users = (List<User>) view.
266
executeQueryByName("list-users", null, 2, 10);
</sample-code:end>
Count database objects
To count every object of a specific type we have to invoke the following operation:
<sample-code:java>
// Count all users.
int count = view.count(User.class);
</sample-code:end>
We can also use callbacks in count operations:
<sample-code:java>
// Count users.
view.count(User.class, new AbstractCallback(getScope()){
protected void onFailure(Throwable t) {
// Handle error here.
}
protected void onSuccess(Object result) {
// Get count.
Integer count = (Integer) result;
}
});
</sample-code:end>
It is also possible to count the results of a query:
<sample-code:java>
// Define the query.
Query query = new Query(getScope());
// Search for User objects.
query.setObject(User.class);
// Define the WHERE clause.
Where where = query.getWhere(true);
// Set an expression like this: (name = 'Carl').
where.setExpression(where.createEqualToValue("name", "Carl"));
// Count users which name is 'Carl'.
int count = view.count(query);
</sample-code:end>
With executeCountByName we can count the objects that an XML query returns:
<sample-code:java>
// Count result of "list-users" query.
int count = view.executeCountByName("list-users", null);
</sample-code:end>
Close the connection with the database
As always, when the work is done, you have to disconnect the Data Store:
<sample-code:java>
267
// Close the connection with the Data Store.
view.disconnect();
</sample-code:end>
268
Chapter 10: Pool Service
Warework Pool Service is a manager for Clients that implement the Object Pool design pattern
and it provides the necessary methods to retrieve objects from pools in a very easy way.
An object pool is a set of initialized objects that are kept ready to use, rather than allocated and
destroyed on demand. Object pooling can offer a significant performance boost in situations
where the cost of initializing a class instance is high, the rate of instantiation of a class is high,
and the number of instances in use at any one time is low. The pooled object is obtained in pre dictable time when creation of the new objects (especially over network) may take variable time.
These benefits are mostly true for objects which are expensive with respect to time, such as
database or socket connections.
Create and retrieve a Pool Service
To create the Pool Service in a Scope, you always need to provide a unique name for the Service and the PoolServiceImpl class that exists in the com.warework.service.pool
package:
<sample-code:java>
// Create the Pool Service and register it in a Scope.
scope.createService("pool-service", PoolServiceImpl.class, null);
</sample-code:end>
Once it is created, you can get it using the same name (when you retrieve an instance of a Pool
Service, you will get the PoolServiceFacade interface):
<sample-code:java>
// Get an instance of the Pool Service.
PoolServiceFacade poolService = (PoolServiceFacade) scope.
getService("pool-service");
</sample-code:end>
The following example shows how to define the Pool Service in an XML file:
<sample-code:xml>
<?xml version="1.0" encoding="UTF-8"?>
<scope xmlns:xsi="http://www.w3.org/2001/XMLSchema-instance"
xsi:noNamespaceSchemaLocation="http://repository.warework.com/xsd/scope1.0.0.xsd">
<services>
<service name="pool-service"
class="com.warework.service.pool.PoolServiceImpl"/>
</services>
</scope>
</sample-code:end>
Most of the times, you will need to specify a set of parameters that configure how the Service
must work. Review the next section to know how to define Poolers/Clients with these parameters.
269
Add and connect Poolers
Now the Pool Service is running but you need at least one Client or Pooler where to perform operations. To add a Pooler into the Service you have to invoke method createClient() that
exists in its Facade. This method requests a name for the new Pooler and a Connector which
performs the creation of the Pooler. Let’s see how to register a sample Pooler in this Service:
<sample-code:java>
// Add a Pooler in the Pool Service.
poolService.createClient("sample-pooler", SampleConnector.class,
null);
</sample-code:end>
The SampleConnector class creates the Sample Pooler and registers it in the Pool Service.
After that, we have to tell the Pool Service that we want to perform operations with the Sample
Pooler. We do so by connecting the Pooler:
<sample-code:java>
// Connect the Sample Pooler.
poolService.connect("sample-pooler");
</sample-code:end>
To configure Poolers in XML you need to create a separate XML file for the Pool Service and
reference it from the Scope XML file. The following example shows how to define a Pool Service
and the configuration file that it requires for the Poolers. The first thing you have to do is to re gister the Service as we did before, but this time with initialization parameters:
<sample-code:xml>
<?xml version="1.0" encoding="UTF-8"?>
<scope xmlns:xsi="http://www.w3.org/2001/XMLSchema-instance"
xsi:noNamespaceSchemaLocation="http://repository.warework.com/xsd/scope1.0.0.xsd">
<services>
<service name="pool-service"
class="com.warework.service.pool.PoolServiceImpl">
<parameter name="config-class"
value="com.warework.core.loader.ProxyServiceSAXLoader" />
<parameter name="config-target"
value="/META-INF/system/pool-service.xml" />
</service>
</services>
</scope>
</sample-code:end>
Once it is registered in the Scope we proceed with the creation of the Pool Service configuration
file. Based on the previous example, this could be the content of the pool-service.xml file:
<sample-code:xml>
<?xml version="1.0" encoding="UTF-8"?>
<proxy-service xmlns:xsi="http://www.w3.org/2001/XMLSchema-instance"
xsi:noNamespaceSchemaLocation="http://repository.warework.com/xsd/proxyservice-1.0.0.xsd">
<clients>
<client name="sample-pooler"
connector="com.warework.service.pool.client.connector.SampleConnector"/>
</clients>
</proxy-service>
</sample-code:end>
270
You can define as many Poolers as you need for the Pool Service. Once the Scope is started,
you can work with Poolers like this:
<sample-code:java>
// Get an instance of a Scope.
ScopeFacade scope = ...;
// Get the facade of the Pool Service.
PoolServiceFacade poolService = (PoolServiceFacade) scope.
getService("pool-service");
// Connect the Client.
poolService.connect("sample-pooler");
// Perform operations with the Client.
…
// Disconnect the Client.
poolService.disconnect("sample-pooler");
</sample-code:end>
Some Poolers may require configuration parameters. The following example shows how a Pooler specifies one initialization parameter:
<sample-code:xml>
<?xml version="1.0" encoding="UTF-8"?>
<proxy-service xmlns:xsi="http://www.w3.org/2001/XMLSchema-instance"
xsi:noNamespaceSchemaLocation="http://repository.warework.com/xsd/proxyservice-1.0.0.xsd">
<clients>
<client name="sample-pooler" connector="…">
<parameter name="…" value="…"/>
</client>
</clients>
</proxy-service>
</sample-code:end>
Remember to review the documentation of each Pooler to know which parameters it accepts.
Perform Pool operations
Each Pooler exposes its functionality in the PoolServiceFacade interface and it is where you
can find the necessary method to retrieve objects from pools. This interface is really simple. As
it represents a Proxy Service, you can handle multiple Poolers and you have to identify each
one by name. So, if you need to retrieve an object from a pool, you just have to specify the
name of the Pooler/Client to use:
<sample-code:java>
// Get an object from the pool.
Object pooledObject = poolService.getObject("sample-pooler");
</sample-code:end>
And that's it. The previous line of code simply indicates the Pooler to use to retrieve a pooled
object. Each Pooler returns a specific type of pooled object, for example: if your Pooler represents a pool of database connections, it will provide a reusable database connection.
271
c3p0 Pooler
c3p0 is an excellent Java Framework that minimizes the time needed to retrieve connections
from relational databases by implementing the Object Pool design pattern with traditional JDBC
drivers. For enterprise level applications, c3p0 is one of the best solutions you can find in the
open source market: it is very stable in stressful situations, takes care quite well about memory
consumption and clearly improves the overall performance of a software application.
Warework Pooler for c3p0 wraps this Framework to integrate its functionality with the Pool Service. It lets you configure c3p0 with XML files and interact with other Warework Services, principally with the Data Store Service. Prior to work with this Pooler, you should review the c3p0
documentation, especially the section related with the configuration properties. There you will
find specific parameters for c3p0 to make it work as you require.
Add a c3p0 Pooler
To add a c3p0 Pooler into the Pool Service you have to invoke method createClient() that
exists in its Facade with a name, a c3p0 Connector class and a configuration for the Pooler.
This configuration has to specify two parameters, one for the JDBC URL and another for the
database driver class. Check this out with the following example:
<sample-code:java>
// Create the configuration for the Logger.
Hashtable config = new Hashtable();
// Set the driver class and JDBC URL.
config.put(C3P0Connector.PARAMETER_JDBC_URL,
"jdbc:derby:derbyDB;create=true");
config.put(C3P0Connector.PARAMETER_DriverClass,
"org.apache.derby.jdbc.EmbeddedDriver");
// Create the c3p0 Pooler.
poolService.createClient("c3p0-pooler", C3P0Connector.class, config);
</sample-code:end>
This code shows how to create a c3p0 Pooler for an Apache Derby database. You should
download a specific JDBC driver for your database and review the URL required to connect with
the database plus the class that represents the driver.
You should also consider using the PARAMETER_ConnectOnCreate parameter. It is very
handy to automatically connect this Pooler after it is created. If you plan to use this Pooler in a
Data Store, it is recommended to set the value for this parameter to TRUE:
<sample-code:java>
// Create the configuration for the Logger.
Hashtable config = new Hashtable();
// Set the driver class and JDBC URL.
config.put(C3P0Connector.PARAMETER_JDBC_URL,
"jdbc:derby:derbyDB;create=true");
config.put(C3P0Connector.PARAMETER_DriverClass,
"org.apache.derby.jdbc.EmbeddedDriver");
config.put(C3P0Connector.PARAMETER_ConnectOnCreate,
"true");
// Create the c3p0 Pooler.
poolService.createClient("c3p0-pooler", C3P0Connector.class, config);
</sample-code:end>
272
c3p0 provides a very good default configuration (just with the parameters defined in the previ ous example the Pooler works very well) but sometimes you may need to define specific para meters for the pool to make it work as you require. Review these parameters in the c3p0 documentation and define those that you need like any other parameter:
<sample-code:java>
// Create the configuration for the Logger.
Hashtable config = new Hashtable();
// Set the driver class and JDBC URL.
config.put(C3P0Connector.PARAMETER_JDBC_URL,
"jdbc:derby:derbyDB;create=true");
config.put(C3P0Connector.PARAMETER_DriverClass,
"org.apache.derby.jdbc.EmbeddedDriver");
config.put(C3P0Connector.PARAMETER_ConnectOnCreate,
"true");
config.put("acquireIncrement", "3");
config.put("acquireRetryAttempts", "30");
config.put("acquireRetryDelay", "1000");
config.put("autoCommitOnClose", "false");
config.put("breakAfterAcquireFailure", "false");
config.put("checkoutTimeout", "0");
…
// Create the c3p0 Pooler.
poolService.createClient("c3p0-pooler", C3P0Connector.class, config);
</sample-code:end>
Check it now how to do it with the Proxy Service XML configuration file:
<sample-code:xml>
<?xml version="1.0" encoding="UTF-8"?>
<proxy-service xmlns:xsi="http://www.w3.org/2001/XMLSchema-instance"
xsi:noNamespaceSchemaLocation="http://repository.warework.com/xsd/proxyservice-1.0.0.xsd">
<clients>
<client name="c3p0-pooler"
connector="com.warework.service.pool.client.connector. …
… C3P0Connector">
<parameter name="jdbc-url" value="jdbc:derby:derbyDB;create=true"/>
<parameter name="driver-class"
value="org.apache.derby.jdbc.EmbeddedDriver"/>
<parameter name="acquireIncrement" value="3"/>
<parameter name="acquireRetryAttempts" value="30"/>
<parameter name="acquireRetryDelay" value="1000"/>
<parameter name="autoCommitOnClose" value="false"/>
<parameter name="breakAfterAcquireFailure" value="false"/>
<parameter name="checkoutTimeout" value="0"/>
</client>
</clients>
</proxy-service>
</sample-code:end>
Working with the c3p0 Pooler
You can perform operations with the c3p0 Pooler in the Pool Service Facade. You just have to
invoke the getObject method with the name of the c3p0 Pooler to use:
<sample-code:java>
// Get an object from the pool.
Connection connection = (Connection) poolService.getObject("c3p0-pooler");
273
</sample-code:end>
This line of code retrieves a pooled java.sql.Connection object from c3p0. Now you can
configure the Data Store Service to use this database connection object in a JDBC Data Store.
Simply configure the Pooled Object Provider to retrieve objects from c3p0 Pooler and register
this Provider in the configuration of the JDBC Connector.
274
Chapter 11: Mail Service
Warework Mail Service is a Proxy Service responsible of email operations. You can handle different implementations of Mail Clients, like JavaMail, and perform email operations in different
platforms with them. Each Mail Client can be configured with an XML file to work with a specific
mail server, so this Service is quite handy when you have to connect to multiple mail servers.
Sending an email requires you to write just one line of code. You only have to indicate which
Mail Client to use (it holds the information required to connect with the mail server) plus the subject, the message and the recipients of the email. You can also include attachments very easily.
This Service integrates with the Framework to offer you some interesting features. For instance,
a Mail Client can retrieve connections via a JNDI Provider. This feature allows you store the
configuration for your email connections in an application server.
Create and retrieve a Mail Service
To create the Mail Service in a Scope, you always need to provide a unique name for the Se rvice and the MailServiceImpl class that exists in the com.warework.service.mail
package:
<sample-code:java>
// Create the Mail Service and register it in a Scope.
scope.createService("mail-service", MailServiceImpl.class, null);
</sample-code:end>
Once it is created, you can get it using the same name (when you retrieve an instance of a Mail
Service, you will get the MailServiceFacade interface):
<sample-code:java>
// Get an instance of the Mail Service.
MailServiceFacade mailService = (MailServiceFacade) scope.
getService("mail-service");
</sample-code:end>
The following example shows how to define the Mail Service in an XML file:
<sample-code:xml>
<?xml version="1.0" encoding="UTF-8"?>
<scope xmlns:xsi="http://www.w3.org/2001/XMLSchema-instance"
xsi:noNamespaceSchemaLocation="http://repository.warework.com/xsd/scope1.0.0.xsd">
<services>
<service name="mail-service"
class="com.warework.service.mail.MailServiceImpl"/>
</services>
</scope>
</sample-code:end>
Most of the times, you will need to specify a set of parameters that configure how the Service
must work. Review the next section to know how to define Mail Clients with these parameters.
275
Add and connect Mail Clients
Now the Mail Service is running but you need at least one Client where to perform operations.
To add a Mail Client into the Service you have to invoke method createClient() that exists
in its Facade. This method requests a name for the new Client and a Connector which performs
the creation of the Mail Client. Let’s see how to register a sample Client in this Service:
<sample-code:java>
// Add a Mail Client in the Mail Service.
mailService.createClient("sample-client", SampleConnector.class,
null);
</sample-code:end>
The SampleConnector class creates the Sample Mail Client and registers it in the Mail Service. After that, we have to tell the Mail Service that we want to perform operations with the
Sample Mail Client. We do so by connecting the Mail Client:
<sample-code:java>
// Connect the Sample Mail Client.
mailService.connect("sample-client");
</sample-code:end>
To configure Mail Clients in XML you need to create a separate XML file for the Mail Service
and reference it from the Scope XML file. The following example shows how to define a Mail
Service and the configuration file that it requires for the Mail Clients. The first thing you have to
do is to register the Service as we did before, but this time with initialization parameters:
<sample-code:xml>
<?xml version="1.0" encoding="UTF-8"?>
<scope xmlns:xsi="http://www.w3.org/2001/XMLSchema-instance"
xsi:noNamespaceSchemaLocation="http://repository.warework.com/xsd/scope1.0.0.xsd">
<services>
<service name="mail-service"
class="com.warework.service.mail.MailServiceImpl">
<parameter name="config-class"
value="com.warework.core.loader.ProxyServiceSAXLoader" />
<parameter name="config-target"
value="/META-INF/system/mail-service.xml" />
</service>
</services>
</scope>
</sample-code:end>
Once it is registered in the Scope we proceed with the creation of the Mail Service configuration
file. Based on the previous example, this could be the content of the mail-service.xml file:
<sample-code:xml>
<?xml version="1.0" encoding="UTF-8"?>
<proxy-service xmlns:xsi="http://www.w3.org/2001/XMLSchema-instance"
xsi:noNamespaceSchemaLocation="http://repository.warework.com/xsd/proxyservice-1.0.0.xsd">
<clients>
<client name="sample-client"
connector="com.warework.service.mail.client.connector.SampleConnector"/>
</clients>
276
</proxy-service>
</sample-code:end>
You can define as many Mail Clients as you need for the Mail Service. Once the Scope is star ted, you can work with Mail Clients like this:
<sample-code:java>
// Get an instance of a Scope.
ScopeFacade scope = ...;
// Get the facade of the Mail Service.
MailServiceFacade mailService = (MailServiceFacade) scope.
getService("mail-service");
// Connect the Client.
mailService.connect("sample-client");
// Perform operations with the Client.
…
// Disconnect the Client.
mailService.disconnect("sample-client");
</sample-code:end>
Some Mail Clients may require configuration parameters. The following example shows how a
Mail Client specifies one initialization parameter:
<sample-code:xml>
<?xml version="1.0" encoding="UTF-8"?>
<proxy-service xmlns:xsi="http://www.w3.org/2001/XMLSchema-instance"
xsi:noNamespaceSchemaLocation="http://repository.warework.com/xsd/proxyservice-1.0.0.xsd">
<clients>
<client name="sample-client" connector="…">
<parameter name="…" value="…"/>
</client>
</clients>
</proxy-service>
</sample-code:end>
Remember to review the documentation of each Mail Client to know which parameters it accepts.
Perform Mail operations
Each Mail Client exposes its functionality in the MailServiceFacade interface and it is where
you can find the necessary method to perform Mail operations.
Now we are going to check out how to send an email with the send method. The minimum information you have to provide to this method is shown below:
•
Mail Client name: Mail Service is a Proxy Service so you have to identify each Mail Cli ent by name.
•
Subject: A brief summary of the topic of the message.
277
•
From: The email address of the sender. In many email clients it is not changeable except through changing account settings.
•
To: List with the email addresses of the message's recipients.
•
Message: The content of the email message. This is exactly the same as the body of a
regular letter.
This is the minimum line of code required to send an email:
<sample-code:java>
// Send an email.
mailService.send("sample-client", "subject", "[email protected]", "[email protected]",
null, null, null, "mail message");
</sample-code:end>
If you require sending the message to multiple recipients, you can separate each email address
with a semicolon like this:
<sample-code:java>
// Send an email to multiple recipients.
mailService.send("sample-client", "subject", "[email protected]",
"[email protected];[email protected];[email protected]", null, null, null,
"mail message");
</sample-code:end>
You can perform the same action with an array of String objects:
<sample-code:java>
// Send an email to multiple recipients.
mailService.send("sample-client", "subject", "[email protected]",
new String[]{"[email protected]", "[email protected]", "[email protected]"},
null, null, null, "mail message");
</sample-code:end>
If you prefer a java.util.Vector instead of an array of String objects, you can use it too:
<sample-code:java>
// Create a list for the recipients of the message.
Vector to = new Vector();
// Add each recipient.
to.addElement("[email protected]");
to.addElement("[email protected]");
to.addElement("[email protected]");
// Send an email to multiple recipients.
mailService.send("sample-client", "subject", "[email protected]", to,
null, null, null, "mail message");
</sample-code:end>
You can also specify the following optional arguments in this method:
•
CC (Carbon Copy): Allows you to simultaneously send multiple copies of an email to
secondary recipients.
•
BCC (Blind Carbon Copy): Addresses added for the delivery list but not (usually) listed
in the message data, remaining invisible to other recipients.
278
•
Attachments: Email messages may have one or more files/resources associated to it.
They serve the purpose of delivering binary or text files of unspecified size.
The following example shows how to send an email with CC and BCC recipients:
<sample-code:java>
// Send an email to multiple recipients.
mailService.send("sample-client", "subject", "[email protected]",
new String[]{"[email protected]", "[email protected]", "[email protected]"},
new String[]{"[email protected]", "[email protected]", "[email protected]"},
new String[]{"[email protected]", "[email protected]", "[email protected]"},
null, "mail message");
</sample-code:end>
For attachments, you need to bear in mind that each Mail Client may accept a specific type of
object to represent the attachment. Review the documentation of the Mail Client that you require
and use any of the objects type that it supports. If our sample-client supports java.io.File objects then we can add attachments like this:
<sample-code:java>
// Create a list for the attachments.
Vector attachments = new Vector();
// Add attachments.
attachments.addElement(new File("file1.txt"));
attachments.addElement(new File("file2.jpg"));
attachments.addElement(new File("file3.zip"));
// Send an email with attachments.
mailService.send("sample-client", "subject", "[email protected]", "[email protected]",
null, null, attachments, "mail message");
</sample-code:end>
JavaMail Client
This Mail Client allows you to work with JavaMail, the standard software library used to perform
email operations in Java. Warework wraps JavaMail and simplifies its usage by providing a very
simple interface, for instance: to send an email requires you to write just one line of code.
As a Client of the Mail Service, this component perfectly integrates with the Framework to con figure your mail accounts in XML files and create the necessary connections without requiring
the intervention of the developer. It is also possible to retrieve from a JNDI Provider the information required to create a connection with a mail server, so this information can be stored in an
application server for example.
Add a JavaMail Client
To add a JavaMail Client into the Mail Service you have to invoke method createClient()
that exists in its Facade with a name, a JavaMail Connector class and a configuration for the
Client.
By now, there is only one Connector that is suitable for sending emails. It is represented with
the JavaMailSenderConnector class and you can use the following initialization parameters
to configure it:
279
•
PARAMETER_Host: server where to connect to send the email.
•
PARAMETER_Port: port of the server where to connect to send the email.
•
PARAMETER_User: user name required to create a connection with the mail server.
•
PARAMETER_Password: user password required to create a connection with the mail
server.
•
PARAMETER_TransportProtocol: protocol used to send the email, like SMTP.
These are common parameters that you may require for your mail connections. They are not
mandatory and there is also the possibility to specify more initialization parameters without the
constants of a Connector. Check this out with the following example. It shows how to setup the
Client to send emails with GMail:
<sample-code:java>
// Create the configuration for the Mail Client.
Hashtable config = new Hashtable();
// Set the mail server configuration.
config.put(JavaMailSenderConnector.PARAMETER_Host, "smtp.gmail.com");
config.put(JavaMailSenderConnector.PARAMETER_Port, "587");
config.put(JavaMailSenderConnector.PARAMETER_User, "[email protected]");
config.put(JavaMailSenderConnector.PARAMETER_Password, "123");
config.put(JavaMailSenderConnector.PARAMETER_TransportProtocol, "smtp");
config.put("mail.smtp.auth", "true");
config.put("mail.smtp.starttls.enable", "true");
// Create the JavaMail Client.
mailService.createClient("javamail-client", JavaMailSenderConnector.class,
config);
</sample-code:end>
Check it now how to do it with the Proxy Service XML configuration file:
<sample-code:xml>
<?xml version="1.0" encoding="UTF-8"?>
<proxy-service xmlns:xsi="http://www.w3.org/2001/XMLSchema-instance"
xsi:noNamespaceSchemaLocation="http://repository.warework.com/xsd/proxyservice-1.0.0.xsd">
<clients>
<client name="javamail-client"
connector="com.warework.service.mail.client.connector. …
… JavaMailSenderConnector">
<parameter name="mail.host" value="smtp.gmail.com"/>
<parameter name="mail.port" value="587"/>
<parameter name="mail.transport.protocol" value="smtp"/>
<parameter name="mail.user" value="[email protected]"/>
<parameter name="mail.password" value="123"/>
<parameter name="mail.smtp.auth" value="true"/>
<parameter name="mail.smtp.starttls.enable" value="true"/>
</client>
</clients>
</proxy-service>
</sample-code:end>
You can also configure the JavaMail Client to connect with an mail server via JNDI. In many ap plication servers you can store the information required to create connections with a mail server.
280
This information is accessible with a JNDI Provider and it can be used by Warework to connect
with the mail server. To achieve this you have to specify at least two initialization parameters:
•
PARAMETER_ConnectionSourceProviderName: name of the Provider, typically a
JNDI Provider, that retrieves the mail connection information from an application server.
•
PARAMETER_ConnectionSourceProviderObject: name used to get a javax.mail.Session object. This is the object that the application server provides and it represents the mail connection information.
The following example shows you how to use these two parameters plus another two to complement the information locally:
<sample-code:java>
// Create the configuration for the Mail Client.
Hashtable config = new Hashtable();
// Set the mail server configuration.
config.put(JavaMailSenderConnector.PARAMETER_ConnectionSourceProviderName,
"jndi-provider");
config.put(JavaMailSenderConnector.PARAMETER_ConnectionSourceProviderObject,
"mail/myApp");
config.put(JavaMailSenderConnector.PARAMETER_User, "[email protected]");
config.put(JavaMailSenderConnector.PARAMETER_Password, "123");
// Create the JavaMail Client.
mailService.createClient("javamail-client", JavaMailSenderConnector.class,
config);
</sample-code:end>
Check it now how to do it with the Proxy Service XML configuration file:
<sample-code:xml>
<?xml version="1.0" encoding="UTF-8"?>
<proxy-service xmlns:xsi="http://www.w3.org/2001/XMLSchema-instance"
xsi:noNamespaceSchemaLocation="http://repository.warework.com/xsd/proxyservice-1.0.0.xsd">
<clients>
<client name="javamail-client"
connector="com.warework.service.mail.client.connector. …
… JavaMailSenderConnector">
<parameter name="connection-source-provider-name"
value="jndi-provider"/>
<parameter name="connection-source-provider-object"
value="mail/myApp"/>
<parameter name="mail.user" value="[email protected]"/>
<parameter name="mail.password" value="123"/>
</client>
</clients>
</proxy-service>
</sample-code:end>
Working with the JavaMail Client
You can perform operations with the JavaMail Client in the Mail Service Facade. If you plan to
send an email, please review the Mail Service documentation because the arguments for this
operation are defined there in detail (all of them, except attachments, work in the same way
for every Mail Client). Check out with this example how to send a quick email with JavaMail:
281
<sample-code:java>
// Send an email.
mailService.send("javamail-client", "subject", "[email protected]", "[email protected]",
"[email protected]", "[email protected]", null, "mail message");
</sample-code:end>
For attachments, you need to bear in mind that JavaMail Client accepts a Vector with
javax.mail.BodyPart objects in it. Each BodyPart object allows you to define an attachment for the email in many different ways. For instance, the following code shows how to directly reference a local file for an attachment:
<sample-code:java>
// Create an attachment.
BodyPart bodyPart = new MimeBodyPart();
// Set the file to include in the email.
bodyPart.setDataHandler(new DataHandler(new FileDataSource("file2.jpg")));
// Set the name for the file.
bodyPart.setFileName("file2.jpg");
// Create a list for the attachments.
Vector attachments = new Vector();
// Add the attachment.
attachments.addElement(bodyPart);
// Send an email with attachments.
mailService.send("sample-client", "subject", "[email protected]", "[email protected]",
null, null, attachments, "mail message");
</sample-code:end>
282
Chapter 12: Converter Service
Warework Converter Service is an extremely powerful Service with a very simple purpose: perform object transformations. Software developers can provide object instances into this Service
to convert them. The result of the operation is a new instance of an object (or an updated one)
that represents the transformation of the source object.
The conversion of the object can be a basic operation like formatting a string or a complex one
like translating a given text to another language. As this Service is a Proxy Service, developers
are free to define what sorts of operations are supported by this Service. They just need to in clude the Client that performs the task they are looking for.
Any process that implies a conversion fits in this Service: compressors, unit conversions, translations, updaters, formatters, etc. Possibilities are unlimited. That is why Clients in this Service
have different names but in general, they all are known as "Converters".
Create and retrieve a Converter Service
To create the Converter Service in a Scope, you always need to provide a unique name for the
Service and the ConverterServiceImpl class that exists in the com.warework.service.converter package:
<sample-code:java>
// Create the Converter Service and register it in a Scope.
scope.createService("converter-service", ConverterServiceImpl.class, null);
</sample-code:end>
Once it is created, you can get it using the same name (when you retrieve an instance of a Converter Service, you will get the ConverterServiceFacade interface):
<sample-code:java>
// Get an instance of the Converter Service.
ConverterServiceFacade converterService = (ConverterServiceFacade) scope.
getService("converter-service");
</sample-code:end>
The following example shows how to define the Converter Service in an XML file:
<sample-code:xml>
<?xml version="1.0" encoding="UTF-8"?>
<scope xmlns:xsi="http://www.w3.org/2001/XMLSchema-instance"
xsi:noNamespaceSchemaLocation="http://repository.warework.com/xsd/scope1.0.0.xsd">
<services>
<service name="converter-service"
class="com.warework.service.converter.ConverterServiceImpl"/>
</services>
</scope>
</sample-code:end>
283
Most of the times, you will need to specify a set of parameters that configure how the Service
must work. Review the next section to know how to define Converter Clients with these parameters.
Add and connect Converters
Now the Converter Service is running but you need at least one Client (remember, Clients in
this Service are known as Converters) where to perform operations. To add a Converter into the
Service you have to invoke method createClient() that exists in its Facade. This method requests a name and a Connector which performs the creation of the Converter. Let’s see how to
register a sample Converter in this Service:
<sample-code:java>
// Add a Converter in the Converter Service.
converterService.createClient("sample-client", SampleConnector.class,
null);
</sample-code:end>
The SampleConnector class creates the Sample Converter and registers it in the Converter
Service. After that, we have to tell the Converter Service that we want to perform operations
with the Sample Converter. We do so by connecting the Converter:
<sample-code:java>
// Connect the Sample Converter.
converterService.connect("sample-client");
</sample-code:end>
To configure Converters/Clients in XML you need to create a separate XML file for the Converter Service and reference it from the Scope XML file. The following example shows how to define
a Converter Service and the configuration file that it requires for the Convertes. The first thing
you have to do is to register the Service as we did before, but this time in the Scope XML file
with initialization parameters:
<sample-code:xml>
<?xml version="1.0" encoding="UTF-8"?>
<scope xmlns:xsi="http://www.w3.org/2001/XMLSchema-instance"
xsi:noNamespaceSchemaLocation="http://repository.warework.com/xsd/scope1.0.0.xsd">
<services>
<service name="converter-service"
class="com.warework.service.converter.ConverterServiceImpl">
<parameter name="config-class"
value="com.warework.core.loader.ProxyServiceSAXLoader" />
<parameter name="config-target"
value="/META-INF/system/converter-service.xml" />
</service>
</services>
</scope>
</sample-code:end>
Once it is registered in the Scope we proceed with the creation of the Converter Service config uration file. Based on the previous example, this could be the content of the converter-service.xml file:
<sample-code:xml>
<?xml version="1.0" encoding="UTF-8"?>
<proxy-service xmlns:xsi="http://www.w3.org/2001/XMLSchema-instance"
xsi:noNamespaceSchemaLocation="http://repository.warework.com/xsd/proxy-
284
service-1.0.0.xsd">
<clients>
<client name="sample-client"
connector="com.warework.service.converter.client.connector.Sample...
Connector"/>
</clients>
</proxy-service>
</sample-code:end>
You can define as many Converters/Clients as you need for the Converter Service. Once the
Scope is started, you can work with Converters like this:
<sample-code:java>
// Get an instance of a Scope.
ScopeFacade scope = ...;
// Get the facade of the Converter Service.
ConverterServiceFacade converterService = (ConverterServiceFacade) scope.
getService("converter-service");
// Connect the Client.
converterService.connect("sample-client");
// Perform operations with the Client.
…
// Disconnect the Client.
converterService.disconnect("sample-client");
</sample-code:end>
Some Converters may require configuration parameters. The following example shows how a
Converter specifies one initialization parameter:
<sample-code:xml>
<?xml version="1.0" encoding="UTF-8"?>
<proxy-service xmlns:xsi="http://www.w3.org/2001/XMLSchema-instance"
xsi:noNamespaceSchemaLocation="http://repository.warework.com/xsd/proxyservice-1.0.0.xsd">
<clients>
<client name="sample-client" connector="…">
<parameter name="…" value="…"/>
</client>
</clients>
</proxy-service>
</sample-code:end>
Remember to review the documentation of each Converter to know which parameters it accepts.
Perform object transformations
Each Converter Client exposes its functionality in the ConverterServiceFacade interface
and it is where you can find the necessary methods to perform transformations with objects.
285
Now we are going to check out how to transform an object into another one with the transform method. The minimum information you have to provide to this method is the object you
want to transform:
<sample-code:java>
// Object to transform.
Object source = ...
// Transform the object to another object.
Object result = converterService.transform("sample-client", source);
</sample-code:end>
You can also retrieve the object to transform from a specified Provider:
<sample-code:java>
// Transform an object from a Provider.
Object result = converterService.transform("sample-client", "providerName",
"providerObject");
</sample-code:end>
String Formatter
This Converter allows you to format strings so you can transform them to upper case, lower
case, remove empty spaces, etc.
Add a String Formatter
To add a String Formatter into the Converter Service you have to invoke method createClient() that exists in its Facade with a name, the StringFormatterConnector class and a
configuration for the Converter.
The configuration must declare the operation to perform. Use the PARAMETER_OperationMode constant (defined in the StringFormatterConnector class) with any of the following
values to specify the operation:
•
OPERATION_MODE_ToUpperCase: transforms a string to upper case. In XML configuration files use "to-upper-case".
•
OPERATION_MODE_ToLowerCase: transforms a string to lower case. In XML configuration files use "to-lower-case".
•
OPERATION_MODE_Trim: removes white spaces from both ends of a string. In XML
configuration files use "trim".
•
OPERATION_MODE_FirstLetterToLowerCase: transforms the first letter of a string
to lower case. In XML configuration files use "first-letter-to-lower-case".
•
OPERATION_MODE_FirstLetterToUpperCase: transforms the first letter of a string
to upper case. In XML configuration files use "first-letter-to-upper-case".
The following example shows how to create a String Formatter in the Converter Service to
transform strings to upper case:
286
<sample-code:java>
// Create the configuration for the String Formatter.
Hashtable config = new Hashtable();
// Set the formatter configuration.
config.put(StringFormatterConnector.PARAMETER_OperationMode,
StringFormatterConnector.OPERATION_MODE_ToUpperCase);
// Create the String Formatter.
converterService.createClient("uppercase-formatter",
StringFormatterConnector.class, config);
</sample-code:end>
Check it now how to do it with the Proxy Service XML configuration file:
<sample-code:xml>
<?xml version="1.0" encoding="UTF-8"?>
<proxy-service xmlns:xsi="http://www.w3.org/2001/XMLSchema-instance"
xsi:noNamespaceSchemaLocation="http://repository.warework.com/xsd/proxyservice-1.0.0.xsd">
<clients>
<client name="uppercase-formatter"
connector="com.warework.service.converter.client.connector. …
… StringFormatterConnector">
<parameter name="operation-mode" value="to-upper-case"/>
</client>
</clients>
</proxy-service>
</sample-code:end>
Working with the String Formatter
You can perform operations with the String Formatter in the Converter Service Facade. Check
out with this example how to format a string to upper case:
<sample-code:java>
// Transform 'hello' to upper case.
String text = (String) converterService.transform("uppercase-formatter",
"hello");
</sample-code:end>
Base64 Converter
This Converter allows you to encode / decode strings and byte arrays with Base64. Base64 is
an encoding scheme that encodes binary data by treating it numerically and translating it into a
base 64 representation.
Base64 encoding scheme are commonly used when there is a need to encode binary data that
needs to be stored and transferred over media that are designed to deal with textual data. This
is to ensure that the data remains intact without modification during transport. Base64 is used
commonly in a number of applications including email via MIME, and storing complex data in
XML.
287
Add a Base64 Converter
To add a Base64 Converter into the Converter Service you have to invoke method createClient() that exists in its Facade with a name, the Base64ConverterConnector class
and a configuration for the Converter.
The configuration has to specify what kind of operation to perform (encode or decode with
Base64). Use the PARAMETER_OperationMode constant (defined in the Connector class) with
any of the following values to specify the operation:
•
OPERATION_MODE_Encode: encodes a string or a byte array with Base64. In XML configuration files use "encode".
•
OPERATION_MODE_Decode: decodes a string or a byte array with Base64. In XML configuration files use "decode".
The following example shows how to create a Base64 Converter in the Converter Service:
<sample-code:java>
// Create the configuration for the Converter.
Hashtable config = new Hashtable();
// Set the Converter configuration.
config.put(Base64ConverterConnector.PARAMETER_OperationMode,
Base64ConverterConnector.OPERATION_MODE_Encode);
// Create the Base64 Converter.
converterService.createClient("base64-encoder",
Base64ConverterConnector.class, config);
</sample-code:end>
Check it out now how to do it with the Proxy Service XML configuration file:
<sample-code:xml>
<?xml version="1.0" encoding="UTF-8"?>
<proxy-service xmlns:xsi="http://www.w3.org/2001/XMLSchema-instance"
xsi:noNamespaceSchemaLocation="http://repository.warework.com/xsd/proxyservice-1.0.0.xsd">
<clients>
<client name="base64-encoder"
connector="com.warework.service.converter.client.connector. …
… Base64ConverterConnector">
<parameter name="operation-mode" value="encode"/>
</client>
</clients>
</proxy-service>
</sample-code:end>
Working with the Base64 Converter
You can perform operations with the Base64 Converter in the Converter Service Facade. Check
out with this example how to encode a string with Base64:
<sample-code:java>
// Encode 'Hola' with Base64.
String text = (String) converterService.transform("base64-encoder", "Hola");
288
</sample-code:end>
The result of this operation will be that variable text equals to "SG9sYQ==". Base64 encoders /
decoders are also very useful when you need to transform an array of bytes to plain text whose
characters are in an ASCII string format (for example, transform an image to ASCII text).
The following fragment shows how to encode with Base64 a byte array:
<sample-code:java>
// Source array with binary data.
byte[] source = ...;
// Encode the array of bytes with Base64.
byte[] result = (byte[]) converterService.transform("base64-encoder", source);
// Get the binary data in ASCII string format.
String asciiSource = new String(result);
</sample-code:end>
The important fact to keep in mind about this is that you will get a string when you pass a string
to the Base64 Converter. On the other hand, if you pass a byte array then you will get a byte ar ray.
Now we are going to perform the opposite operation. The following snippet shows how to decode a string:
<sample-code:java>
// Create the configuration for the Converter.
Hashtable config = new Hashtable();
// Set the Converter configuration.
config.put(Base64ConverterConnector.PARAMETER_OperationMode,
Base64ConverterConnector.OPERATION_MODE_Decode);
// Create the Base64 Converter.
converterService.createClient("base64-decoder",
Base64ConverterConnector.class, config);
// Decode with Base64. The result is 'Hola'.
String text = (String) converterService.transform("base64-decoder",
"SG9sYQ==");
</sample-code:end>
JavaScript Compressor
This Converter allows you to minimize strings with JavaScript or JSON code. The result is a
new string where comments and unnecessary spaces and characters are removed so it is much
smaller in size.
Suppose that we have the following JavaScript code in a string:
<sample-code:javascript>
/**
* Pops up an alert box and displays 'Hello'.
*/
function sayHello() {
// Show message
alert('Hello');
289
}
</sample-code:end>
We can provide this string to the JavaScript Compressor to retrieve something like this:
<sample-code:javascript>
function sayHello(){alert('Hello');}
</sample-code:end>
As you can see, it is the same code (works exactly the same way) but unnecessary characters
were removed. The main benefit of compressing JavaScript code is that it speeds up network
communications; it is very useful when you plan to send requests to end points (APIs) that sup port JavaScript / JSON because messages are much smaller in size.
Add a JavaScript Compressor
To add a JavaScript Compressor into the Converter Service you have to invoke method createClient() that exists in its Facade with a name and the JavaScriptCompressorConnector class. This Converter is so simple to use that no configuration is needed in order to
make it work.
The following example shows how to create a JavaScript Compressor in the Converter Service:
<sample-code:java>
// Create the JavaScript Compressor.
converterService.createClient("js-compressor",
JavaScriptCompressorConnector.class, null);
</sample-code:end>
Check it out now how to do it with the Proxy Service XML configuration file:
<sample-code:xml>
<?xml version="1.0" encoding="UTF-8"?>
<proxy-service xmlns:xsi="http://www.w3.org/2001/XMLSchema-instance"
xsi:noNamespaceSchemaLocation="http://repository.warework.com/xsd/proxyservice-1.0.0.xsd">
<clients>
<client name="js-compressor"
connector="com.warework.service.converter.client.connector. …
… JavaScriptCompressorConnector"/>
</clients>
</proxy-service>
</sample-code:end>
Working with the JavaScript Compressor
You can perform operations with the JavaScript Compressor in the Converter Service Facade.
Check out with this example how to compress JavaScript code:
<sample-code:java>
// Create a string with the JavaScript code.
String code = "WRITE YOUR JAVASCRIPT CODE HERE";
// Compress the JavaScript code.
String js = (String) converterService.transform("js-compressor", code);
</sample-code:end>
290
291
PART III: PROVIDERS
292
Chapter 13: Standard Provider
Warework Standard Provider is responsible for creating objects instances from a predefined list
of classes. Each of those classes is assigned a name at configuration time and, later on, new instances of those classes can be retrieved by name. Objects instances are not singleton so you
will get a new one every time you request an object.
Configure and create a Standard Provider
To configure this Provider you just need to give a name to each class in a
java.util.Hashtable collection.
<sample-code:java>
// Create the configuration of the provider.
Hashtable parameters = new Hashtable();
// Configure the Provider.
parameters.put("map", Hashtable.class);
parameters.put("list", Vector.class);
</sample-code:end>
It is very important to know that every indicated class must have a default constructor (without
parameters). Also that you can specify each class with a string that represents the name of the
class.
<sample-code:java>
// Configure the Provider.
parameters.put("map", "java.util.Hashtable");
parameters.put("list", "java.util.Vector");
</sample-code:end>
Once it is configured, you can create and register the Standard Provider in a Scope as follows:
<sample-code:java>
// Create the Provider.
scope.createProvider("standard-provider", StandardProvider.class,
parameters);
</sample-code:end>
If you plan to configure this Provider on startup with an XML file then follow this template:
<sample-code:xml>
<?xml version="1.0" encoding="UTF-8"?>
<scope xmlns:xsi="http://www.w3.org/2001/XMLSchema-instance"
xsi:noNamespaceSchemaLocation="http://repository.warework.com/xsd/scope1.0.0.xsd">
<providers>
<provider name="standard-provider"
class="com.warework.provider.StandardProvider">
<parameter name="map" value="java.util.Hashtable" />
<parameter name="list" value="java.util.Vector" />
</provider>
</providers>
</scope>
</sample-code:end>
293
Retrieve objects from a Standard Provider
At this point the Standard Provider is running and we can request objects from it. To do so, we
just need to use any given name at configuration time.
<sample-code:java>
// Create a new list.
Vector list = (Vector) scope.getObject("standard-provider", "list");
</sample-code:end>
This line of code creates a new java.util.Vector every time it is invoked. Based on the
previous example, to get a new java.util.Hashtable simply change the name of the object
to create:
<sample-code:java>
// Create a new map.
Hashtable map = (Hashtable) scope.getObject("standard-provider", "map");
</sample-code:end>
294
Chapter 14: Singleton Provider
Warework Singleton Provider implements a factory that creates unique instances of objects in a
specific scope. The first time you request an object for a specific class, a new instance is created, stored (inside the Provider) and returned to the user. If you request the same object later
on, it will return the stored instance, so, that is why every object of the same class will be the
same.
Configure and create a Singleton Provider
This Provider does not require to be configured, so we just need to create and register it in a
scope as follows:
<sample-code:java>
// Create the Provider.
scope.createProvider("singleton-provider", SingletonProvider.class,
null);
</sample-code:end>
If you plan to configure this Provider on startup with an XML file then follow this template:
<sample-code:xml>
<?xml version="1.0" encoding="UTF-8"?>
<scope xmlns:xsi="http://www.w3.org/2001/XMLSchema-instance"
xsi:noNamespaceSchemaLocation="http://repository.warework.com/xsd/scope1.0.0.xsd">
<providers>
<provider name="singleton-provider"
class="com.warework.provider.SingletonProvider"/>
</providers>
</scope>
</sample-code:end>
Retrieve objects from a Singleton Provider
At this point the Singleton Provider is running and we can request objects from it. To do so, we
just need to use the name of a class to retrieve its instance:
<sample-code:java>
// Get an instance of a map.
Hashtable map1 = (Hashtable) scope.getObject("singleton-provider",
"java.util.Hashtable");
</sample-code:end>
This line of code creates a new java.util.Hashtable the first time it is invoked. It is very
important to know that every indicated class must have a default constructor (without parameters). If we invoke it again, we will get the same instance:
<sample-code:java>
295
// Get the same instance as map1.
Hashtable map2 = (Hashtable) scope.getObject("singleton-provider",
"java.util.Hashtable");
</sample-code:end>
296
Chapter 15: Service Provider
This Provider retrieves objects instances from Services and it is useful when you want a Provider to invoke a method in a Service that returns something. The way it works is simple; just
specify which Service to use and which method of the Service to call, then the Provider ex ecutes this method and the object that it returns is the object that you will get from the Provider.
Configure and create a Service Provider
To configure this Provider you need to set at least two parameters, both of them located in the
ServiceProvider class, at com.warework.provider package:
•
PARAMETER_ServiceName: Specifies the name of the Service where to retrieve the
objects instances.
•
PARAMETER_GetInstanceMethod: Specifies the name of the method that retrieves
one instance of an object in the Service. The method to invoke in the Service must accept one String argument.
If we want to retrieve objects from a Service named "sample-service", we can write something
like this:
<sample-code:java>
// Create the configuration of the provider.
Hashtable parameters = new Hashtable();
// Configure the Provider.
parameters.put(ServiceProvider.PARAMETER_ServiceName, "sample-service");
parameters.put(ServiceProvider.PARAMETER_GetInstanceMethod, "get");
</sample-code:end>
This Provider will look for a Service named sample-service and then invoke method
get(String) on it. The value for the String argument is the name you give to retrieve the
object in the Provider. This is reviewed in the next section.
Once it is configured, you can create and register the Service Provider in a Scope as follows:
<sample-code:java>
// Create the Provider.
scope.createProvider("service-provider", ServiceProvider.class, parameters);
</sample-code:end>
If you plan to configure this Provider on startup with an XML file then follow this template:
<sample-code:xml>
<?xml version="1.0" encoding="UTF-8"?>
<scope xmlns:xsi="http://www.w3.org/2001/XMLSchema-instance"
xsi:noNamespaceSchemaLocation="http://repository.warework.com/xsd/scope1.0.0.xsd">
<providers>
297
<provider name="service-provider"
class="com.warework.provider.ServiceProvider">
<parameter name="service-name" value="sample-service" />
<parameter name="get-instance-method" value="get" />
</provider>
</providers>
</scope>
</sample-code:end>
There is a third parameter defined with the constant ServiceProvider.PARAMETER_ListNameMethod. It references a method in the Service that retrieves the names of the objects
managed by the Service. This parameter is optional but if you want to load all objects from the
Provider (with PARAMETER_CreateObjects) on startup then you have to define it. The method in the Service referenced with this parameter must be without arguments and it have to re turn an Enumeration of String values (the name of each object to retrieve). Check this out
with the following example:
<sample-code:java>
// Create the configuration of the provider.
Hashtable parameters = new Hashtable();
// Configure the Provider.
parameters.put(ServiceProvider.PARAMETER_ServiceName, "sample-service");
parameters.put(ServiceProvider.PARAMETER_GetInstanceMethod, "get");
parameters.put(ServiceProvider.PARAMETER_ListNameMethod, "list");
parameters.put(ServiceProvider.PARAMETER_CreateObjects, Boolean.TRUE);
// Create the Provider.
scope.createProvider("service-provider", ServiceProvider.class, parameters);
</sample-code:end>
When the Provider is created, it gets the Sample Service and executes the list() method to
list the names. Each of these names is used to register an Object Reference in the Scope so
every object that the Service can retrieve is accessible with the scope.getObject(String)
method.
This is the XML version of the previous example:
<sample-code:xml>
<?xml version="1.0" encoding="UTF-8"?>
<scope xmlns:xsi="http://www.w3.org/2001/XMLSchema-instance"
xsi:noNamespaceSchemaLocation="http://repository.warework.com/xsd/scope1.0.0.xsd">
<providers>
<provider name="service-provider"
class="com.warework.provider.ServiceProvider">
<parameter name="service-name" value="sample-service" />
<parameter name="get-instance-method" value="get" />
<parameter name="list-names-method" value="list" />
<parameter name="create-objects" value="true" />
</provider>
</providers>
</scope>
</sample-code:end>
Retrieve objects from a Service Provider
At this point the Service Provider is running and we can request objects from it. To do so, we
just need to use any object name registered by the Service:
298
<sample-code:java>
// Get an instance of an object that exist in the Sample Service.
Object object = scope.getObject("service-provider", "service-object");
</sample-code:end>
This line of code performs the following actions:
1. The Provider retrieves the Sample Service because the value of PARAMETER_ServiceName is sample-service.
2. The Provider executes the get method in the Sample Service with the value "service-object" for the String argument; something like:
<sample-code:java>
service.get("service-object")
</sample-code:end>
3. The Provider returns the object from the get method of the Sample Service.
If you defined PARAMETER_ListNameMethod and PARAMETER_CreateObjects in the configuration of the Provider then this object can be retrieved like this:
<sample-code:java>
// Get an instance of an object that exist in the Sample Service.
Object object = scope.getObject("service-object");
</sample-code:end>
299
Chapter 16: Data Store View Provider
Warework Data Store View Provider is responsible of retrieving Views from a Data Store Service. The way it works is quite simple: you provide the name of a Data Store that exists in the
Data Store Service and this Provider will return a View associated to this Data Store (if there is
any).
Configure and create a Data Store View Provider
You can configure this Provider in two different ways. First, you can give just the name of the
Data Store Service where to retrieve the default View from Data Stores:
<sample-code:java>
// Create the configuration of the Provider.
Hashtable parameters = new Hashtable();
// Configure the Provider.
parameters.put(DatastoreViewProvider.PARAMETER_ServiceName,
"datastore-service");
// Create the Provider.
scope.createProvider("datastore-view-provider", DatastoreViewProvider.class,
parameters);
</sample-code:end>
When this Provider is configured like this, you will retrieve Views by specifying the name of the
Data Store. That is, you provide the name of the Data Store and it will return the default View of
the Data Store. This configuration is better when you need only one View from multiple Data
Stores.
Another way to configure this Provider is by specifying also the name of the Data Store:
<sample-code:java>
// Create the configuration of the Provider.
Hashtable parameters = new Hashtable();
// Configure the Provider.
parameters.put(DatastoreViewProvider.PARAMETER_ServiceName,
"datastore-service");
parameters.put(DatastoreViewProvider.PARAMETER_DatastoreName,
"my-data-store");
// Create the Provider.
scope.createProvider("datastore-view-provider", DatastoreViewProvider.class,
parameters);
</sample-code:end>
If the name of the Data Store is given then you will retrieve Views by name (every object that
you request to the Provider will be a View that exists in a specific Data Store). This configuration
is better when you need to work with different Views from just one Data Store.
If you plan to configure this Provider on startup with an XML file then follow this template:
<sample-code:java>
300
<?xml version="1.0" encoding="UTF-8"?>
<scope xmlns:xsi="http://www.w3.org/2001/XMLSchema-instance"
xsi:noNamespaceSchemaLocation="http://repository.warework.com/xsd/scope1.0.0.xsd">
<providers>
<provider name="datastore-view-provider"
class="com.warework.provider.DatastoreViewProvider">
<parameter name="service-name" value="datastore-service" />
<parameter name="view-name" value="datastore-view" />
</provider>
</providers>
</scope>
</sample-code:end>
Retrieve objects from a Data Store View Provider
At this point the Data Store View Provider is running and we can request objects from it. If we
configured the Provider just with the name of the Data Store Service, we can request objects by
providing the name the Data Store:
<sample-code:java>
// Get the View associated to the 'jdbc-datastore'.
RDBMSView view = (RDBMSView) scope.getObject("datastore-view-provider",
"jdbc-datastore");
</sample-code:end>
This line of code performs the following actions:
1. The datastore-view-provider gets an instance of the Data Store Service named
datastore-service.
2. The datastore-view-provider gets the Current View associated to jdbc-datastore and returns it. If this Data Store does not have any View in its stack of Views,
then this Provider will return null.
If we configured this Provider with the name of the Data Store then we have to provide the
name of the View that exists in the Data Store:
<sample-code:java>
// Get the View associated to the 'jdbc-datastore'.
RDBMSView view = (RDBMSView) scope.getObject("datastore-view-provider",
"rdbms-view");
</sample-code:end>
Now, this line of code performs these actions:
1. The datastore-view-provider gets an instance of the Data Store Service named
datastore-service.
2. The datastore-view-provider gets the "rdbms-view" View associated to jdbcdatastore and returns it. If this Data Store does not have this View in its stack of
Views, then this Provider will return null.
301
Chapter 17: Key-Value Data Store Provider
Warework Key-Value Data Store Provider allows you to retrieve values associated to keys that
exist in a Data Store. Every Data Store which has a Key-Value View can be used by this Provider, so you can get values associated to keys that exist in relational databases or properties
files, for example.
Configure and create a Key-Value Data Store Provider
To configure this Provider you have to indicate the following parameters:
•
Service name: this parameter represents the name of the Data Store Service where to
perform the operations.
•
Data Store name: this one is to identify the target Data Store that exists in the Data
Store Service.
•
Data Store View implementation : this parameter must be the name of the class that implements the com.warework.service.datastore.view.KeyValueView interface.
Suppose that we have a JDBC Data Store in the Service and a View on top of it that is an instance of the KeyValueJDBCViewImpl class (this class is provided with the Warework JDBC
Data Store). We can configure this provider like this:
<sample-code:java>
// Create the configuration of the provider.
Hashtable parameters = new Hashtable();
// Configure the Provider.
parameters.put(KeyValueDatastoreProvider.PARAMETER_ServiceName,
"datastore-service");
parameters.put(KeyValueDatastoreProvider.PARAMETER_DatastoreName,
"jdbc-datastore");
parameters.put(KeyValueDatastoreProvider.
PARAMETER_DatastoreViewImplementation, KeyValueJDBCViewImpl.class);
// Create the Provider.
scope.createProvider("key-value-datastore-provider",
KeyValueDatastoreProvider.class, parameters);
</sample-code:end>
Optionally, you can also enable cache so when a key is requested more than one time, instead
of retrieving it from the Data Store, you will get a copy that resides on your local machine /
memory. You can achieve this task by specifying the enable-cache parameter:
<sample-code:java>
// Create the configuration of the provider.
Hashtable parameters = new Hashtable();
// Configure the Provider.
302
parameters.put(KeyValueDatastoreProvider.PARAMETER_ServiceName,
"datastore-service");
parameters.put(KeyValueDatastoreProvider.PARAMETER_DatastoreName,
"jdbc-datastore");
parameters.put(KeyValueDatastoreProvider.
PARAMETER_DatastoreViewImplementation, KeyValueJDBCViewImpl.class);
parameters.put(KeyValueDatastoreProvider.PARAMETER_EnableCache,
Boolean.TRUE);
// Create the Provider.
scope.createProvider("key-value-datastore-provider",
KeyValueDatastoreProvider.class, parameters);
</sample-code:end>
If you plan to configure this Provider on startup with an XML file then follow this template:
<sample-code:xml>
<?xml version="1.0" encoding="UTF-8"?>
<scope xmlns:xsi="http://www.w3.org/2001/XMLSchema-instance"
xsi:noNamespaceSchemaLocation="http://repository.warework.com/xsd/scope1.0.0.xsd">
<providers>
<provider name="key-value-datastore-provider"
class="com.warework.provider.KeyValueDatastoreProvider">
<parameter name="service-name" value="datastore-service" />
<parameter name="datastore-name" value="jdbc-datastore" />
<parameter name="datastore-view-impl"
value="com.warework.service.datastore.client.KeyValueJDBCViewImpl"/>
<parameter name="enable-cache" value="false" />
</provider>
</providers>
</scope>
</sample-code:end>
Retrieve objects from a Key-Value Data Store Provider
At this point the Key-Value Data Store Provider is running and we can request objects from it.
To do so, we just need to provide a key that exists in the Data Store to retrieve the value ass ociated to it:
<sample-code:java>
// Get the value of a property from the database.
String userName = (String) scope.getObject("key-value-datastore-provider",
"user.name");
</sample-code:end>
This line of code searches for the value of user.name in the JDBC Data Store using the specified View. Remember that Key-Value Views can return other types of result different than
Strings:
<sample-code:java>
// Get the value associated to a key from the database.
Date dateOfBirth = (Date) scope.getObject("key-value-datastore-provider",
"user.dateOfBirth");
</sample-code:end>
303
Chapter 18: FileText Provider
The FileText Provider is responsible for returning the content of text files as String objects.
The idea is that with a given file name (without the extension) this Provider is capable to return a
String with the content of the file.
It allows you to read any kind of text file (.txt, .sql, .csv, etc.) and it is very useful when you
have to load resources for your project, like query or update statements for a Database Management System (for instance, you can read SQL statements from text files and execute them
later on in the database) .
With this Provider you can also specify a set of characters that will be used to filter the output.
You can for example, setup this Provider to read .sql files without the new line character.
Configure and create a FileText Provider
To configure this Provider you just need to give the base directory where to read the text files
and the extension for these files (for example: .txt, .sql, .csv, ...):
<sample-code:java>
// Create the configuration of the provider.
Hashtable parameters = new Hashtable();
// Configure the Provider.
parameters.put(FileTextProvider.PARAMETER_ConfigTarget, "/META-INF");
parameters.put(FileTextProvider.PARAMETER_FileExtension, "txt");
// Create the Provider.
scope.createProvider("filetext-provider", FileTextProvider.class,
parameters);
</sample-code:end>
The above example shows how to read .txt files from /META-INF directory. It is very important to bear in mind that only files with the .txt extension will be processed.
The specific place where resources can be loaded for your project is specified in each Warework Distribution. Typically, in a Desktop Distribution the /META-INF directory is located in the
source folder of your own project.
With this Provider you can also specify a set of characters that will be used to filter the output.
You can for example, setup this Provider to read .sql files without the new line character. Review the constants defined at FileTextProvider class, those with the PARAMETER_Remove<character>Character pattern, and check out which characters can be removed from
the loaded text.
If you plan to configure this Provider on startup with an XML file then follow this template:
<sample-code:xml>
<?xml version="1.0" encoding="UTF-8"?>
<scope xmlns:xsi="http://www.w3.org/2001/XMLSchema-instance"
xsi:noNamespaceSchemaLocation="http://repository.warework.com/xsd/scope1.0.0.xsd">
<providers>
<provider name="filetext-provider"
304
class="com.warework.provider.FileTextProvider">
<parameter name="config-target" value="/META-INF" />
<parameter name="file-extension" value="txt" />
</provider>
</providers>
</scope>
</sample-code:end>
Retrieve objects from a Key-Value Data Store Provider
At this point the FileText Provider is running and we can request objects from it. To do so, we
just need to provide the name of a text file that exists in the directory and with the extension
specified in the configuration.
<sample-code:java>
// Get a String with the content of 'notice.txt'.
String notice = (String) scope.getObject("filetext-provider", "notice");
</sample-code:end>
When this line of code is executed, the filetext-provider performs the following actions:
1. Looks for a file named /META-INF/notice.txt.
2. Reads the content of the file and places it in a String object.
3. Filters unwanted characters (if it is specified in the configuration).
4. Returns a String with the content of the file filtered.
305
Chapter 19: Pooled Object Provider
Warework Pooled Object Provider is responsible for retrieving pooled objects from the Pool Service. The way it works is very simple: you have to specify the name of a Pooler/Client that exists
in the Pool Service and this Provider will return the pooled objects that this Pooler can provide.
Configure and create a Pooled Object Provider
To configure this Provider you just need to give the name of the Pool Service where to retrieve
pooled objects from Poolers:
<sample-code:java>
// Create the configuration of the Provider.
Hashtable parameters = new Hashtable();
// Configure the Provider.
parameters.put(PooledObjectProvider.PARAMETER_ServiceName, "pool-service");
// Create the Provider.
scope.createProvider("pooled-object-provider", PooledObjectProvider.class,
parameters);
</sample-code:end>
If you plan to configure this Provider on startup with an XML file then follow this template:
<sample-code:xml>
<?xml version="1.0" encoding="UTF-8"?>
<scope xmlns:xsi="http://www.w3.org/2001/XMLSchema-instance"
xsi:noNamespaceSchemaLocation="http://repository.warework.com/xsd/scope1.0.0.xsd">
<providers>
<provider name="pooled-object-provider"
class="com.warework.provider.PooledObjectProvider">
<parameter name="service-name" value="pool-service" />
</provider>
</providers>
</scope>
</sample-code:end>
Retrieve objects from a Pooled Object Provider
At this point the Pooled Object Provider is running and we can request objects from it. To do so,
we just need to provide the name of a Pooler that exists in the Pool Service.
<sample-code:java>
// Get a pooled object from 'sample-pooler'.
Object pooledObject = scope.getObject("pooled-object-provider",
"sample-pooler");
</sample-code:end>
This line of code performs the following actions:
306
1. The pooled-object-provider gets an instance of the Pool Service named poolservice.
2. The pooled-object-provider gets a pooled object from sample-pooler and returns it.
307
Chapter 20: JNDI Provider
The JNDI Provider is responsible for locating objects from naming services. A naming service
maintains a set of bindings, which relate names to objects and provide the ability to look up objects by name.
JNDI allows the components in distributed applications to locate each other. For instance: a client can retrieve from an application server a Data Source object via JNDI to connect with a
database. Warework JNDI Provider wraps the JNDI API to provide these features and integrate
them into the Framework.
Configure and create a JNDI Provider
The configuration of this Provider is optional. Typically, in Server platforms you will not configure
JNDI to locate data sources, EJBs, JMS, Mail Sessions, and so on in the network (by default,
the JNDI context is connected to the local naming service). So, to start working with this Provider is fairly simple:
<sample-code:java>
// Create the Provider.
scope.createProvider("jndi-provider", JNDIProvider.class, null);
</sample-code:end>
If you are not working in a Server platform or, for example, you have to connect with a remote
naming service, you can then specify some initialization parameters for the configuration of the
JNDI Provider. The following example shows how to connect with a remote LDAP server:
<sample-code:java>
// Create the configuration of the provider.
Hashtable parameters = new Hashtable();
// Configure the Provider.
parameters.put(Context.INITIAL_CONTEXT_FACTORY,
"com.sun.jndi.ldap.LdapCtxFactory");
parameters.put(Context.PROVIDER_URL, "ldap://ldap.test.com:389");
parameters.put(Context.SECURITY_PRINCIPAL, "james wood");
parameters.put(Context.SECURITY_CREDENTIALS, "password");
// Create the Provider.
scope.createProvider("jndi-provider", JNDIProvider.class, parameters);
</sample-code:end>
If you plan to configure this Provider on startup with an XML file then follow this template:
<sample-code:xml>
<?xml version="1.0" encoding="UTF-8"?>
<scope xmlns:xsi="http://www.w3.org/2001/XMLSchema-instance"
xsi:noNamespaceSchemaLocation="http://repository.warework.com/xsd/scope1.0.0.xsd">
<providers>
<provider name="jndi-provider"
class="com.warework.provider.JNDIProvider">
<parameter name="java.naming.factory.initial"
value="com.sun.jndi.ldap.LdapCtxFactory" />
308
<parameter name="java.naming.provider.url"
value="ldap://ldap.test.com:389" />
<parameter name="java.naming.security.principal"
value="james wood" />
<parameter name="java.naming.security.credentials"
value="password" />
</provider>
</providers>
</scope>
</sample-code:end>
Retrieve objects from a JNDI Provider
At this point the JNDI Provider is running and we can request objects from it. To do so, we just
need to provide the name of an existing object in the naming service. For example, suppose
that your program is running on an application server and that you want to retrieve a Data
Source from it, you would write code that looks as follows:
<sample-code:java>
// Get a Data Source to connect with a database.
DataSource ds = (DataSource) scope.getObject("jndi-provider", "jdbc/MyApp");
</sample-code:end>
309
Chapter 21: Spring Provider
This Provider uses the core functionality of the Spring Framework to create instances of Java
beans which are defined in XML files. Spring provides an advanced configuration mechanism
capable of managing beans (objects) of any nature. It is very useful because it allows you to:
•
Define in an XML file how an object must be created.
•
Initialize the values of a Java bean when it is created.
•
Manage multiple object instances, each one associated with an ID.
•
Replace the implementation class of an interface very easily.
The Spring Provider grants to you access to the most complete Inversion of Control container
that exists for Java and integrates it with the Warework Framework. Before you proceed with
this Provider, you should review the Spring Framework documentation to understand how objects are defined in XML files.
Configure and create a Spring Provider
To configure this Provider you just need to give the location of the bean definitions file:
<sample-code:java>
// Create the configuration of the provider.
Hashtable parameters = new Hashtable();
// Configure the Provider.
parameters.put(SpringProvider.PARAMETER_ConfigTarget,
"/META-INF/beans.xml");
// Create the Provider.
scope.createProvider("spring-provider", SpringProvider.class,
parameters);
</sample-code:end>
You can also specify multiple files (separate each one with a semi-colon):
<sample-code:java>
// Create the configuration of the provider.
Hashtable parameters = new Hashtable();
// Configure the Provider.
parameters.put(SpringProvider.PARAMETER_ConfigTarget,
"/META-INF/beans1.xml;/META-INF/beans2.xml;/META-INF/beans3.xml;");
// Create the Provider.
scope.createProvider("spring-provider", SpringProvider.class,
parameters);
</sample-code:end>
310
URL, URL[], File and File[] objects are supported as well:
<sample-code:java>
// Create the configuration of the provider.
Hashtable parameters = new Hashtable();
// Configure the Provider.
parameters.put(SpringProvider.PARAMETER_ConfigTarget,
new File[]{new File("beans1.xml"), new File("beans2.xml")});
// Create the Provider.
scope.createProvider("spring-provider", SpringProvider.class,
parameters);
</sample-code:end>
The specific place where resources can be loaded for your project is specified in each Warework Distribution. Typically, in a Desktop Distribution the /META-INF directory is located in the
source folder of your own project.
If you plan to configure this Provider on startup with an XML file then follow this template:
<sample-code:xml>
<?xml version="1.0" encoding="UTF-8"?>
<scope xmlns:xsi="http://www.w3.org/2001/XMLSchema-instance"
xsi:noNamespaceSchemaLocation="http://repository.warework.com/xsd/scope1.0.0.xsd">
<providers>
<provider name="spring-provider"
class="com.warework.provider.SpringProvider">
<parameter name="config-target" value="/META-INF/beans.xml" />
</provider>
</providers>
</scope>
</sample-code:end>
Retrieve objects from a Spring Provider
At this point the Spring Provider is running and we can request objects from it. To do so, we just
need to provide the ID of a bean specified in the bean definitions file. For example, su ppose that
your beans.xml file looks like this:
<sample-code:xml>
<?xml version="1.0" encoding="UTF-8"?>
<beans xmlns="http://www.springframework.org/schema/beans"
xmlns:xsi="http://www.w3.org/2001/XMLSchema-instance"
xmlns:p="http://www.springframework.org/schema/p"
xsi:schemaLocation="http://www.springframework.org/schema/beans
http://www.springframework.org/schema/beans/spring-beans-2.5.xsd">
<bean id="user-bean" class="com.mycompany.beans.UserBean">
<property name="name" value="John" />
</bean>
</beans>
</sample-code:end>
To retrieve an instance of UserBean, you should write something like this:
<sample-code:java>
// Get a new instance of UserBean class.
UserBean user = (UserBean) scope.getObject("spring-provider", "user-bean");
311
</sample-code:end>
312
Chapter 22: Object Query Provider
The Object Query Provider is responsible for returning as Query objects the content of XML
files that represent queries for Object Data Stores. That is, this Provider allows you to:
•
Create queries for Data Stores with XML files like this one:
<sample-code:xml>
<?xml version="1.0" encoding="UTF-8"?>
<query xmlns:xsi="http://www.w3.org/2001/XMLSchema-instance"
xsi:noNamespaceSchemaLocation="http://repository.warework.com/xsd/...
...object-query-1.0.0.xsd">
<object>com.mycompany.beans.User</object>
<where>
<and>
<expression>
<attribute>name</attribute>
<operator>LIKE</operator>
<value-operand>
<type>java.lang.String</type>
<value>Steve</value>
</value-operand>
</expression>
<expression>
<attribute>password</attribute>
<operator>GREATER_THAN</operator>
<value-operand>
<type>java.lang.Integer</type>
<value>1000</value>
</value-operand>
</expression>
</and>
</where>
</query>
</sample-code:end>
•
Read these XML files and transform them into Java Query objects.
•
Execute each query defined in the XML files in the target Data Store.
You can review how to create object queries with XML files in the ODBMS View and ORM View
documentation.
This Provider is typically used with the Data Store Service. You have to define in a View of a
Data Store that the Object Query Provider is the one who will read the statements for the View.
But before that, you must configure this Provider in a Scope.
Configure and create an Object Query Provider
313
To configure this Provider you just need to give the base directory where to read the XML files:
<sample-code:java>
// Create the configuration of the Provider.
Hashtable parameters = new Hashtable();
// Configure the Provider.
parameters.put(ObjectQueryProvider.PARAMETER_ConfigTarget,
"/META-INF/statement/xoq");
// Create the Provider.
scope.createProvider("object-query-provider", ObjectQueryProvider.class,
parameters);
</sample-code:end>
If you plan to configure this Provider on startup with an XML file then follow this template:
<sample-code:xml>
<?xml version="1.0" encoding="UTF-8"?>
<scope xmlns:xsi="http://www.w3.org/2001/XMLSchema-instance"
xsi:noNamespaceSchemaLocation="http://repository.warework.com/xsd/scope1.0.0.xsd">
<providers>
<provider name="object-query-provider"
class="com.warework.provider.ObjectQueryProvider">
<parameter name="config-target" value="/META-INF/statement/xoq" />
</provider>
</providers>
</scope>
</sample-code:end>
Retrieve objects from an Object Query Provider
At this point the Object Query Provider is running and we can request Query objects from it. To
do so, we just need to provide the name of an XML file that exists in the target path specified
with PARAMETER_ConfigTarget. Keep in mind that you do not need to give the .xml file extension, just provide the name of the file. For example, suppose that we have a file named
find-steve.xml, we can parse the XML and get its contents like this:
<sample-code:java>
// Read '/META-INF/statement/xoq/find-steve.xml' and get the Query object.
Query query = (Query) scope.getObject("object-query-provider",
"find-steve");
</sample-code:end>
Once we have a Query object, we can use it to query the Data Store.
314
Chapter 23: Object Deserializer Provider
The Object Deserializer Provider is responsible of deserializing an object stored in a file and returning it.
Serialization is the process of converting an instance of a Java object into a format that can be
stored (for example, in a file) and recovered later in the same or another computer environment.
In the other hand, deserialization is the process of recovering the object that was serialized.
In Java, to make an object serializable, the object must implement the java.io.Serializable interface. This is a very important step you must take in order to serialize Java objects. If
the object to serialize does not implement this interface, it won't be possible to serialize the ob ject.
Suppose that you have a bean named UserInfo and that you set the name and address
fields in it. You can save this object instance into a file with the following code:
<sample-code:java>
// Create the user bean. It must implement 'java.io.Serializable'.
UserInfo user = new UserInfo();
// Fill the bean with some data.
user.setName("Arnold");
user.setAddress("Green Lane St.");
// Setup the target file where to store the bean.
ObjectOutput out = new ObjectOutputStream(new FileOutputStream("arnold.ser"));
// Serialize the object (save the content in a file).
out.writeObject(user);
// Close the serialization process.
out.close();
</sample-code:end>
This code stores the UserInfo bean in a file named "arnold.ser". When you have one or
multiple serialized files in a directory, you can use Warework Object Deserializer to read and
deserialize each file. This Provider is very useful for deserialization because it allows you to:
•
Define a repository where to store serialized files, for example, a directory in your file
system or a package in your project.
•
Access each serialized object with a key, where the key is the name of the file without
the extension (for example: arnold).
•
Deserialize an object by just providing a key.
Configure and create an Object Deserializer Provider
To configure this Provider you just need to give the base directory where to read the serialized
files:
315
<sample-code:java>
// Create the configuration of the provider.
Hashtable parameters = new Hashtable();
// Configure the Provider.
parameters.put(ObjectDeserializerProvider.PARAMETER_ConfigTarget,
"/META-INF/system/data/ser");
// Create the Provider.
scope.createProvider("object-deserializer-provider",
ObjectDeserializerProvider.class, parameters);
</sample-code:end>
By default, this Provider looks for ".ser" files in the specified directory. You can specify a differ ent file extension, like ".dat" for example, in the configuration as follows:
<sample-code:java>
// Create the configuration of the provider.
Hashtable parameters = new Hashtable();
// Configure the Provider.
parameters.put(ObjectDeserializerProvider.PARAMETER_ConfigTarget,
"/META-INF/system/data/ser");
parameters.put(ObjectDeserializerProvider.PARAMETER_FileExtension, "dat");
// Create the Provider.
scope.createProvider("object-deserializer-provider",
ObjectDeserializerProvider.class, parameters);
</sample-code:end>
With this configuration, the Provider will search only for ".dat" files in the " /METAINF/system/data/ser" directory.
If you plan to configure this Provider on startup with an XML file then follow this template:
<sample-code:xml>
<?xml version="1.0" encoding="UTF-8"?>
<scope xmlns:xsi="http://www.w3.org/2001/XMLSchema-instance"
xsi:noNamespaceSchemaLocation="http://repository.warework.com/xsd/scope1.0.0.xsd">
<providers>
<provider name="object-deserializer-provider"
class="com.warework.provider.ObjectDeserializerProvider">
<parameter name="config-target" value="/META-INF/system/data/ser" />
<parameter name="file-extension" value="dat" />
</provider>
</providers>
</scope>
</sample-code:end>
Retrieve objects from an Object Deserializer Provider
At this point the Object Deserializer Provider is running and we can request objects from it. To
do so, we just need to provide the name of an existing file that exists in the specified directory.
For example, suppose that there is a serialized object in a file named "my-object.ser" at directory "/META-INF/system/data/ser"; to deserialize and return this object you would write
something like this:
<sample-code:java>
316
// Get an object from a serialized file at '/META-INF/system/data/ser'.
MyObject mo = (MyObject) scope.getObject("object-deserializer-provider",
"my-object");
</sample-code:end>
317
Chapter 24: Properties Provider
The Properties Provider is responsible for returning properties from a properties file. Properties
files are mainly used in Java related technologies to store the configurable parameters of an application. A properties file is a simple text file that may contain multiple key-value pairs (pro perties) like this:
# This is a comment
app.cache.enable=true
app.cache.refresh=6000
app.url.help=/help/index.html
To retrieve with this Provider the value of a property that exists in the file you have to use the
key that is associated to the value. For example, to get /help/index.html you will need to
provide the key app.url.help. If you are new with properties files, please keep in mind that:
•
Keys should be unique in the same properties file.
•
Keys and values are String objects so this Provider always returns strings.
Configure and create an Properties Provider
To configure this Provider you just need to give the location of a properties file:
<sample-code:java>
// Create the configuration of the Provider.
Hashtable parameters = new Hashtable();
// Configure the Provider.
parameters.put(PropertiesProvider.PARAMETER_ConfigTarget,
"/META-INF/system/data/properties/config.properties");
// Create the Provider.
scope.createProvider("properties-provider", PropertiesProvider.class,
parameters);
</sample-code:end>
The above example shows how to read the config.properties file from /META-INF/system/data/properties directory.
The specific place where resources can be loaded for your project is specified in each Warework Distribution. Typically, in a Desktop Distribution the /META-INF directory is located in the
source folder of your own project. Other types of Distributions may read your resources from
/WEB-INF for example, so please review the documentation associated to your Distribution to
know where your resources context is.
If you plan to configure this Provider on startup with an XML file then follow this template:
<sample-code:xml>
318
<?xml version="1.0" encoding="UTF-8"?>
<scope xmlns:xsi="http://www.w3.org/2001/XMLSchema-instance"
xsi:noNamespaceSchemaLocation="http://repository.warework.com/xsd/scope1.0.0.xsd">
<providers>
<provider name="properties-provider"
class="com.warework.provider.PropertiesProvider">
<parameter name="config-target"
value="/META-INF/system/data/properties/config.properties" />
</provider>
</providers>
</scope>
</sample-code:end>
Retrieve objects from an Properties Provider
At this point the Properties Provider is running and we can request string values from it. To do
so, we just need to provide the key of a property that exists in the properties file:
<sample-code:java>
// Get the string value of a key defined in the properties file.
String cache = (String) scope.getObject("properties-provider",
"app.cache.enable");
</sample-code:end>
319
PART IV: TEMPLATES
320
Chapter 25: FULL Template
This Template provides everything that you need to quickly start up a software application with
the Framework.
It is fully configured to provide you an environment where to perform operations with a relational
database, that is, you do not have to install any database neither configure the connection with
it (user, password, JDBC Driver and so on); you just have to focus on writing and executing
SQL statements.
Additionally, this Template also sets up a default logging mechanism with the well-known Log4j
Framework. It is completely configured to perform log operations in the console so you do not
have to worry about how to format the output with the Log4j configuration file.
If you have to send emails, you can do it too with the Framework but this time you have to indic ate in an XML file the configuration required to connect with a mail server. It is very simple, just
place an XML file in a specific directory and define in it a few parameters like host, user and
password.
The FULL Template is a good base for many different types of software applications. There is
also the possibility to override the default configuration by creating custom XML files or serialized configuration Java Beans for the Services provided by the Framework (Log, Pool and Data
Store Services). This is a better option when you need to perform log operations in a specific
way (for example: write the log in text files) or connect with remote relational databases.
Quick start
Start up your application with the FULL Template
To create a new Scope based in a FULL Template, you have to invoke method createTemplate() in the ScopeFactory class (package: com.warework.core.scope) with a context
class (any class that exists in your project), the FULL Template name and a name for the Scope
(the name that you will use to retrieve the Scope later on):
<sample-code:java>
public class MySampleApp {
public static void main(String[] args) {
try {
// Create a fully configured Scope.
ScopeFactory.createTemplate(MySampleApp.class, "full", "system");
} catch (Exception e) {
e.printStackTrace();
}
}
}
</sample-code:end>
321
Create Lists, Sets and Maps
Almost every Warework Distribution include by default a convenient way to retrieve new instances of Collections. It is useful when you have to create Lists, Sets and Maps without worry ing about the underlying implementation of the Collection:
<sample-code:java>
public class MySampleApp {
public static void main(String[] args) {
try {
// Create a fully configured Scope.
ScopeFactory.createTemplate(MySampleApp.class, "full", "system");
// Get the Scope.
ScopeFacade system = ScopeContext.get("system");
// Create a new ArrayList.
List list = (List) system.getObject("list");
// Create a new HashSet.
Set set = (Set) system.getObject("set");
// Create a new HashMap.
Map map = (Map) system.getObject("map");
} catch (Exception e) {
e.printStackTrace();
}
}
}
</sample-code:end>
Log messages
To perform log operations with Log4j, just invoke method log() in the Scope Facade with the
level of the log and the message to display (logs will be displayed in the console by default):
<sample-code:java>
public class MySampleApp {
public static void main(String[] args) {
try {
// Create and get a fully configured Scope.
ScopeFacade system = ScopeFactory.createTemplate(MySampleApp.class,
"full", "system");
// Log messages in different levels.
system.debug("Debug message");
system.info("Info message");
system.warning("Warning message");
system.log("Fatal message", LogServiceConstants.LOG_LEVEL_Fatal);
} catch (Exception e) {
e.printStackTrace();
}
}
}
</sample-code:end>
322
If you want to use your own Log4j configuration file, you can place it in the /METAINF/<scope-name>/log directory. The following picture shows the directory structure in Eclipse IDE:
The most important fact to bear in mind about this file is that it should have a Logger named
default-client (configure the rest of the file as you need):
log4j.logger.default-client=DEBUG, consoleApp
log4j.appender.consoleApp=org.apache.log4j.ConsoleAppender
log4j.appender.consoleApp.layout=org.apache.log4j.PatternLayout
log4j.appender.consoleApp.layout.ConversionPattern=[%d]-[%-5p] - %m%n
If you prefer to configure Log4j with an XML file instead of a properties file, you can also place a
Log4j XML configuration file in the same directory:
Review the documentation of Log4j to better understand how to configure this Logging Framework with properties or XML files.
Execute SQL statements in embedded database
Warework includes by default the H2 Database Engine in this Distribution. The FULL template
automatically configures this relational database so you do not have to install the database, the
drivers or configure anything to start working with it in your local machine.
323
When you startup the database for the first time in a specific Scope, H2 creates a new file for
the data with the name of the Scope (in the previous example, it should be /system.h2.db)
and places it in the user home directory. If you require customizing the configuration of the database, please review the documentation of the H2 database and configure the Pool and Data
Store Services with the parameters that you need.
If you are going to write SQL scripts, you should place them in the /META-INF/<scopename>/statement/sql directory of your project, for example:
Review the Quick examples of database operations with the FULL Template at the beginning of
this tutorial and the documentation of the Data Store Service and the JDBC Data Store for further details.
Execute ORM operations with JPA in embedded database
EclipseLink, one of the best JPA implementations, is configured by default with the FULL template, so you do not have to install additional libraries or configure anything to start working with
it. The only requisite to activate JPA in Warework is to include the persistence.xml file in the
/META-INF directory of your project:
324
Remember to set the name of the persistence unit at persistence.xml file with the name of
your Scope:
<sample-code:xml>
<?xml version="1.0" encoding="UTF-8"?>
<persistence version="2.0"
xmlns="http://java.sun.com/xml/ns/persistence"
xmlns:xsi="http://www.w3.org/2001/XMLSchema-instance"
xsi:schemaLocation="http://java.sun.com/xml/ns/persistence
http://java.sun.com/xml/ns/persistence/persistence_2_0.xsd">
<persistence-unit name="system">
<class>model.HomeUser</class>
</persistence-unit>
</persistence>
</sample-code:end>
In this case, your Scope should be "system":
<sample-code:java>
public class MySampleApp {
public static void main(String[] args) {
try {
// Create and get a fully configured Scope.
ScopeFacade system = ScopeFactory.createTemplate(MySampleApp.class,
"full", "system");
} catch (Exception e) {
e.printStackTrace();
}
}
}
</sample-code:end>
If you are going to write JPQL scripts, you should place them in the /META-INF/<scopename>/statement/jpql directory of your project, for example:
If you prefer writing XML queries instead of JPQL scripts then you should place the XML files in
the /META-INF/<scope-name>/statement/xoq directory of your project, for example:
325
Review examples of JPA operations with the FULL Template and the documentation of the Data
Store Service and the JPA Data Store for further details.
Configure a remote relational database
The FULL template automatically configures the Framework to perform operations with one relational database. If you do not provide any configuration about the database, the FULL template will setup by default the embedded H2 database (as seen before). Otherwise, if a configuration is provided, the FULL template will setup the Data Stores specified in the configuration file.
You can configure a default remote database that you want just by placing an XML file named
pool-service.xml in the /META-INF/<scope-name> directory, for example:
The file named pool-service.xml holds all the information required to connect with the database. It defines parameters like user name, password, host, port and database type. For example, suppose that we want to connect with MySQL; the content for pool-service.xml
should be something like this:
<sample-code:xml>
<?xml version="1.0" encoding="UTF-8"?>
<proxy-service xmlns:xsi="http://www.w3.org/2001/XMLSchema-instance"
326
xsi:noNamespaceSchemaLocation="http://repository.warework.com/xsd/proxyservice-1.0.0.xsd">
<clients>
<client name="c3p0-client"
connector="com.warework.service.pool.client.connector. …
… C3P0Connector">
<parameter name="driver-class" value="com.mysql.jdbc.Driver"/>
<parameter name="jdbc-url" value="jdbc:mysql://host:port/ddbb-name"/>
<parameter name="user" value="the-user-name"/>
<parameter name="password" value="the-password"/>
<parameter name="connect-on-create" value="true"/>
</client>
</clients>
</proxy-service>
</sample-code:end>
In this configuration file just place the values required to connect with your database (to avoid
problems, keep connect-on-create equal to "true" and the name of client always to
"c3p0-client"). Also, you will need to download and install the database driver in your
classpath. As we are using MySQL in our example, we need to install Connector/J, the Java
database driver for MySQL:
After that, you can have a connection with MySQL the same way as we did before:
<sample-code:java>
public class MySampleApp {
public static void main(String[] args) {
try {
// Create and get a fully configured Scope.
ScopeFacade system = ScopeFactory.createTemplate(MySampleApp.class,
"full", "system");
// Get the object where to perform database operations.
RDBMSView ddbb = (RDBMSView) system.
getObject("relational-database");
// Connect with the database.
ddbb.connect();
// Perform database operations with MySQL.
...;
// Disconnect with the database.
327
ddbb.disconnect();
} catch (Exception e) {
e.printStackTrace();
}
}
}
</sample-code:end>
If you plan to use JPA with a remote database, you should also place an XML file named datastore-service.xml in the /META-INF/<scope-name> directory:
In this file you will need to configure the JDBC and JPA Data Stores. Use the following code as
a template to configure both Data Stores with remote databases:
<sample-code:xml>
<?xml version="1.0" encoding="UTF-8"?>
<datastore-service xmlns:xsi="http://www.w3.org/2001/XMLSchema-instance"
xsi:noNamespaceSchemaLocation="http://repository.warework.com/ …
… xsd/datastore-service-1.1.0.xsd">
<datastores>
<datastore name="relational-database"
connector="com.warework.service.datastore. …
… client.connector.JDBCConnector">
<parameters>
<parameter name="client-connection-provider-name"
value="ddbb-connection-provider"/>
<parameter name="client-connection-provider-object"
value="c3p0-client"/>
</parameters>
<views>
<view class="com.warework.service.datastore. …
… client.JDBCViewImpl" name="rdbms-view"
provider="sql-statement-provider"/>
</views>
</datastore>
<datastore name="orm-database"
connector="com.warework.service.datastore. …
… client.connector.JPAConnector">
<parameters>
<parameter name="persistence-unit" value="system"/>
<parameter name="javax.persistence.jdbc.driver"
328
value="com.mysql.jdbc.Driver"/>
<parameter name="javax.persistence.jdbc.url"
value="jdbc:mysql://host:port/ddbb-name"/>
<parameter name="javax.persistence.jdbc.user"
value="the-user-name"/>
<parameter name="javax.persistence.jdbc.password"
value="the-password"/>
<parameter name="eclipselink.cache.shared.default"
value="false"/>
</parameters>
<views>
<view class="com.warework.service.datastore. …
… client.JPAViewImpl" name="orm-view"
provider="object-query-provider"/>
</views>
</datastore>
</datastores>
</datastore-service>
</sample-code:end>
Bear in mind that you do not have to include any configuration parameter at persistence.xml file. Once both Data Sources are configured, you can retrieve them as always:
<sample-code:java>
public class MySampleApp {
public static void main(String[] args) {
try {
// Create and get a fully configured Scope.
ScopeFacade system = ScopeFactory.createTemplate(MySampleApp.class,
"full", "system");
// Get the Relational Database View.
RDBMSView ddbb1 = (RDBMSView) system.
getObject("relational-database");
// Get the Object-Relational Mapping View.
ORMView ddbb2 = (ORMView) system.getObject("orm-database");
} catch (Exception e) {
e.printStackTrace();
}
}
}
</sample-code:end>
Send emails
To send emails you have to create a configuration file for the Mail Service first. Place an XML
file named mail-service.xml in the /META-INF/<scope-name> directory like this:
329
Review the documentation of the Mail Service to know how to define a custom configuration file
and how to specify the JavaMail Client in it. The following is an example for the content of the
mail-service.xml file:
<sample-code:xml>
<?xml version="1.0" encoding="UTF-8"?>
<proxy-service xmlns:xsi="http://www.w3.org/2001/XMLSchema-instance"
xsi:noNamespaceSchemaLocation="http://repository.warework.com/xsd/proxyservice-1.0.0.xsd">
<clients>
<client name="java-mail"
connector="com.warework.service.mail.client.connector. …
… JavaMailSenderConnector">
<parameter name="mail.host" value="smtp.host.com" />
<parameter name="mail.port" value="587" />
<parameter name="mail.transport.protocol" value="smtp" />
<parameter name="mail.user" value="[email protected]" />
<parameter name="mail.password" value="password" />
<parameter name="mail.smtp.auth" value="true" />
<parameter name="mail.smtp.starttls.enable" value="true" />
<parameter name="mail.message.charset" value="utf-8" />
<parameter name="mail.message.subtype" value="html" />
</client>
</clients>
</proxy-service>
</sample-code:end>
Once the Mail Service is configured, you can send an email with the following code:
<sample-code:java>
public class MySampleApp {
public static void main(String[] args) {
try {
// Create and get a fully configured Scope.
ScopeFacade system = ScopeFactory.createTemplate(MySampleApp.class,
"full", "system");
// Get the Mail Service.
MailServiceFacade service = (MailServiceFacade) system.
getObject("mail-service");
// Connect client to send the email .
service.connect("java-mail");
// Send an email to multiple recipients.
330
service.send("java-mail", "subject", "[email protected]",
"[email protected];[email protected];[email protected]", null, null, null,
"mail message");
// Disconnect client.
service.disconnect("java-mail");
} catch (Exception e) {
e.printStackTrace();
}
}
}
</sample-code:end>
Enable Spring in your project
Using Spring with the FULL template is fairly simple. You just have to create a file named applicationContext.xml in the /META-INF/<scope-name> directory and define in there
every Java Bean that Spring should manage, for example:
<sample-code:xml>
<?xml version="1.0" encoding="UTF-8"?>
<beans xmlns="http://www.springframework.org/schema/beans"
xmlns:xsi="http://www.w3.org/2001/XMLSchema-instance"
xmlns:p="http://www.springframework.org/schema/p"
xsi:schemaLocation="http://www.springframework.org/schema/beans
http://www.springframework.org/schema/beans/spring-beans-2.5.xsd">
<bean id="user-bean" class="com.warework.beans.UserBean">
<property name="name" value="John" />
</bean>
</beans>
</sample-code:end>
Once you create this file and define the beans that you require, you should see a picture like
this in your project:
Warework will automatically detect this file and it will set up everything for you, so you will be
able to start using it with just two lines of code:
331
<sample-code:java>
public class MySampleApp {
public static void main(String[] args) {
try {
// Create and get a fully configured Scope.
ScopeFacade system = ScopeFactory.createTemplate(MySampleApp.class,
"full", "system");
// Get a new instance of UserBean class.
UserBean user = (UserBean) system.getObject("spring-provider",
"user-bean");
} catch (Exception e) {
e.printStackTrace();
}
}
}
</sample-code:end>
Review the documentation of the Spring Provider for further details.
Load serialized files
Deserializing objects in Warework is really simple. Just place your serialized files in the /METAINF/<scope-name>/data/ser directory, for example:
Now you can deserialize objects from this directory by providing the names of the files that you
want to load (just the name, without the file extension) and the name of the Provider in charge of
this task (object-deserializer-provider):
<sample-code:java>
public class MySampleApp {
public static void main(String[] args) {
try {
// Create and get a fully configured Scope.
ScopeFacade system = ScopeFactory.createTemplate(MySampleApp.class,
"full", "system");
// Deserialize user data.
UserBean john = (UserBean) system.
332
getObject("object-deserializer-provider", "john-brown");
} catch (Exception e) {
e.printStackTrace();
}
}
}
</sample-code:end>
Base64 encoder and decoder tool
To perform Base64 operations you need to retrieve first the Converter Service. The FULL template automatically configures this Service to encode and decode with Base64. Check out the
following example:
<sample-code:java>
public class MySampleApp {
public static void main(String[] args) {
try {
// Create and get a fully configured Scope.
ScopeFacade system = ScopeFactory.createTemplate(MySampleApp.class,
"full", "system");
// Get the Converter Service.
ConverterServiceFacade converter = (ConverterServiceFacade) system.
getService("converter-service");
// Encode some text.
String encoded = (String) converter.
transform("base64-encoder", "text to encode");
// Decode some text.
String decoded = (String) converter.
transform("base64-decoder", "aGVsbG8=");
} catch (Exception e) {
e.printStackTrace();
}
}
}
</sample-code:end>
Compress JavaScript
You can also compress JavaScript code with the Converter Service. Most of the code remains
the same:
<sample-code:java>
public class MySampleApp {
public static void main(String[] args) {
try {
// Create and get a fully configured Scope.
ScopeFacade system = ScopeFactory.createTemplate(MySampleApp.class,
"full", "system");
// Get the Converter Service.
ConverterServiceFacade converter = (ConverterServiceFacade) system.
333
getService("converter-service");
// JavaScript code to compress.
String uncompressed = "function sayHello() {" +
"// Show message" +
"alert('Hello');" +
"}";
// Compress JavaScript code.
String compressed = (String) converter.
transform("js-compressor", uncompressed);
} catch (Exception e) {
e.printStackTrace();
}
}
}
</sample-code:end>
Overriding the default configuration
For illustration purposes, we are going to show in the following sections how to override the default configuration of the FULL template with XML files. Keep in mind that you can perform the
same action with serialized files, that is, the Framework can load the configuration for each service from a serialized file the same way it is done with an XML file. For example: if you want to
override the configuration of the log service, you can create the log-service.xml file or the
log-service.ser file. The Framework will try to load the serialized file first and after that, if it
does not exist, it will try to load the XML file. If you plan to use serialized files for the configura tion of the Framework, review the Configuration chapter for further details.
Customize the Log Service
To override the default configuration of the Log Service you have to create a custom XML file
named log-service.xml in the /META-INF/<scope-name> directory, for example:
Review the documentation of the Log Service to know how to define a custom configuration file
and how to specify the Log4j Logger in it. The following is an example for the content of the
log-service.xml file:
<sample-code:xml>
<?xml version="1.0" encoding="UTF-8"?>
<proxy-service xmlns:xsi="http://www.w3.org/2001/XMLSchema-instance"
334
xsi:noNamespaceSchemaLocation="http://repository.warework.com/xsd/proxyservice-1.0.0.xsd">
<clients>
<client name="default-client"
connector="com.warework.service.log.client.connector. …
… Log4jPropertiesConnector">
<parameter name="config-target"
value="/META-INF/system/log/log4j.properties"/>
</client>
</clients>
</proxy-service>
</sample-code:end>
This XML file registers the Log4j Logger and a .properties file for it that configures Log4j.
Check out this code as an example for the content of the log4j.properties file:
log4j.logger.default-client=DEBUG, consoleApp
log4j.appender.consoleApp=org.apache.log4j.ConsoleAppender
log4j.appender.consoleApp.layout=org.apache.log4j.PatternLayout
log4j.appender.consoleApp.layout.ConversionPattern=[%d]-[%-5p] - %m%n
The final picture for your resources in an Eclipse IDE should be like this:
Customize the Pool Service
To override the default configuration of the Pool Service you have to create a custom XML file
named pool-service.xml in the /META-INF/<scope-name> directory, for example:
335
Review the documentation of the Pool Service to know how to define a custom configuration file
and how to specify the c3p0 Pooler in it. The c3p0 Pooler is responsible of creating database
connections that are used by Data Stores. The following is an example for the content of the
pool-service.xml file:
<sample-code:xml>
<?xml version="1.0" encoding="UTF-8"?>
<proxy-service xmlns:xsi="http://www.w3.org/2001/XMLSchema-instance"
xsi:noNamespaceSchemaLocation="http://repository.warework.com/xsd/proxyservice-1.0.0.xsd">
<clients>
<client name="c3p0-client"
connector="com.warework.service.pool.client.connector. …
… C3P0Connector">
<parameter name="driver-class" value="org.h2.Driver"/>
<parameter name="jdbc-url" value="jdbc:h2:~/system;USER=system"/>
<parameter name="connect-on-create" value="true"/>
</client>
</clients>
</proxy-service>
</sample-code:end>
Customize the Data Store Service
To override the default configuration of the Data Store Service you have to create a custom
XML file named datastore-service.xml in the /META-INF/<scope-name> directory, for
example:
336
Review the documentation of the Data Store Service to know how to define a custom configuration file and how to specify Data Stores in it. The following is an example for the content of the
datastore-service.xml file:
<sample-code:xml>
<?xml version="1.0" encoding="UTF-8"?>
<datastore-service xmlns:xsi="http://www.w3.org/2001/XMLSchema-instance"
xsi:noNamespaceSchemaLocation="http://repository.warework.com/ …
… xsd/datastore-service-1.1.0.xsd">
<datastores>
<datastore name="relational-database"
connector="com.warework.service.datastore. …
… client.connector.JDBCConnector">
<parameters>
<parameter name="client-connection-provider-name"
value="ddbb-connection-provider"/>
<parameter name="client-connection-provider-object"
value="c3p0-client"/>
</parameters>
<views>
<view class="com.warework.service.datastore. …
… client.JDBCViewImpl" name="rdbms-view"
provider="sql-statement-provider"/>
</views>
</datastore>
<datastore name="orm-database"
connector="com.warework.service.datastore. …
… client.connector.JPAConnector">
<parameters>
<parameter name="persistence-unit" value="system"/>
<parameter name="javax.persistence.jdbc.driver"
value="org.h2.Driver"/>
<parameter name="javax.persistence.jdbc.url"
value="jdbc:h2:~/system"/>
<parameter name="javax.persistence.jdbc.user"
value="system"/>
<parameter name="eclipselink.cache.shared.default"
value="false"/>
</parameters>
<views>
<view class="com.warework.service.datastore. …
… client.JPAViewImpl" name="orm-view"
provider="object-query-provider"/>
</views>
</datastore>
</datastores>
337
</datastore-service>
</sample-code:end>
Customize the Converter Service
To override the default configuration of the Converter Service you have to create a custom XML
file named converter-service.xml in the /META-INF/<scope-name> directory, for example:
Review the documentation of the Converter Service to know how to specify Converters in it. The
following is an example for the content of the converter-service.xml file:
<sample-code:xml>
<?xml version="1.0" encoding="UTF-8"?>
<proxy-service xmlns:xsi="http://www.w3.org/2001/XMLSchema-instance"
xsi:noNamespaceSchemaLocation="http://repository.warework.com/xsd/proxyservice-1.0.0.xsd">
<clients>
<client name="base64-encoder"
connector="com.warework.service.converter.client.connector. …
… StringFormatterConnector">
<parameter name="operation-mode" value="encode"/>
<parameter name="connect-on-create" value="true"/>
</client>
<client name="base64-decoder"
connector="com.warework.service.converter.client.connector. …
… StringFormatterConnector">
<parameter name="operation-mode" value="decode"/>
<parameter name="connect-on-create" value="true"/>
</client>
<client name="js-compressor"
connector="com.warework.service.converter.client.connector. …
… JavaScriptCompressorConnector"/>
<parameter name="connect-on-create" value="true"/>
</client>
</clients>
</proxy-service>
</sample-code:end>
338
339
PART V: CONFIGURATION
340
Chapter 26: XML configuration
This chapter is about how to configure Scopes and Proxy Services with XML files. It is recom mended to keep the configuration of your applications in separate files where you can easily
manage how your Scopes must behave. CORE Extension Module (included in this Distribution)
handles this task by providing specific Loaders that transforms XML files into configuration ob jects required by the Framework.
You will find in this section how to:
•
Create a configuration file for an application.
•
Define global parameters for a specific Scope.
•
Specify Providers, Services and Object References to be ready when a Scope starts up.
•
Handle Clients for Proxy Services.
•
Manage custom XML configuration files for Services.
Scopes
Now we are going to see how to configure a Scope with an XML file. The first thing you need to
check out is the format and content of this file. Here it is:
<sample-code:xml>
<?xml version="1.0" encoding="UTF-8"?>
<scope xmlns:xsi="http://www.w3.org/2001/XMLSchema-instance"
xsi:noNamespaceSchemaLocation="http://repository.warework.com/xsd/scope1.0.0.xsd">
<parameters>
// Specify here the initialization parameters for the Scope.
</parameters>
<providers>
// Specify here the Providers for the Scope.
</providers>
<objects>
// Specify here the object references for the Scope.
</objects>
<services>
// Specify here the Services for the Scope.
</services>
</scope>
</sample-code:end>
An XML file like this allows you to define which Providers, Services, Object References and initialization parameters a Scope will have when it is created. Later on, we will review how each of
these components are defined.
341
In Desktop Distributions, it is recommended to place the XML files at /META-INF directory but,
of course, you can place them wherever you need.
Initialization parameters
Sometimes you may need to specify a set of parameters to configure how a Scope will be created and how it will behave once it is created. Initialization parameters are very useful too when
you need to define constants (they are read only) for Services, Providers or the entire application. It is also important to know that you can use pre-defined parameters as well as custom
ones. The following code shows how to define initialization parameters:
<sample-code:xml>
<?xml version="1.0" encoding="UTF-8"?>
<scope xmlns:xsi="http://www.w3.org/2001/XMLSchema-instance"
xsi:noNamespaceSchemaLocation="http://repository.warework.com/xsd/scope1.0.0.xsd">
<parameters>
<parameter name="name" value="John"/>
</parameters>
</scope>
</sample-code:end>
This is an example of a custom initialization parameter. We can define unlimited initialization
parameters and retrieve them any time we want with the following code:
<sample-code:java>
// Get an instance of a Scope.
ScopeFacade scope = ...;
// Get the value of the initialization parameter ("John").
String name = (String) scope.getInitParameter("name");
</sample-code:end>
Keep in mind that initialization parameters defined in XML files are always String values and
they will not change along the life of the Scope (you cannot delete or update any of them once
the Scope is started). Services and Providers can read these parameters too.
There are predefined initialization parameters that are used to configure Scopes. Most of them
are handled automatically by the factories included in the Distributions, those that are responsible of the creation of the Scopes. You can review each one in the ScopeL1Constants class
that exists in the com.warework.core.scope package.
Providers
The following example shows how to define multiple Providers in an XML file:
<sample-code:xml>
<?xml version="1.0" encoding="UTF-8"?>
<scope xmlns:xsi="http://www.w3.org/2001/XMLSchema-instance"
xsi:noNamespaceSchemaLocation="http://repository.warework.com/xsd/scope1.0.0.xsd">
<providers>
<provider name="sample1-provider"
342
class="com.warework.provider.Sample1Provider" />
<provider name="sample2-provider"
class="com.warework.provider.Sample2Provider" />
…
</providers>
</scope>
</sample-code:end>
These Providers do not have parameters. That is, just with the name and the class, the Provider
should be ready to run.
To retrieve an object from these Providers we can write something like:
<sample-code:java>
// Get an instance of a Scope.
ScopeFacade scope = ...;
// Get an object from "Sample1" Provider.
Object obj = scope.getObject("sample1-provider", "object-name");
</sample-code:end>
Most of the times, you will need to specify a set of parameters that configure how the Provider
must work. This is an example of a Provider configured with parameters:
<sample-code:xml>
<?xml version="1.0" encoding="UTF-8"?>
<scope xmlns:xsi="http://www.w3.org/2001/XMLSchema-instance"
xsi:noNamespaceSchemaLocation="http://repository.warework.com/xsd/scope1.0.0.xsd">
<providers>
<provider name="standard-provider"
class="com.warework.provider.StandardProvider">
<parameter name="default-set" value="java.util.HashSet" />
<parameter name="default-map" value="java.util.HashMap" />
<parameter name="default-list" value="java.util.ArrayList" />
</provider>
</providers>
</scope>
</sample-code:end>
In this example, the Standard Provider accepts parameters to define which classes it can cre ate. You will need to review the parameters that a Provider can accept with the implementation
class of the Provider (in this example, the StandardProvider.class).
Classes inside com.warework.provider package ending with Provider keyword can also
be specified with short names. The following XML configures the Standard Provider exactly as
we saw in the previous example:
<sample-code:xml>
<?xml version="1.0" encoding="UTF-8"?>
<scope xmlns:xsi="http://www.w3.org/2001/XMLSchema-instance"
xsi:noNamespaceSchemaLocation="http://repository.warework.com/xsd/scope1.0.0.xsd">
<providers>
<provider name="standard-provider" class="Standard">
<parameter name="default-set" value="java.util.HashSet" />
<parameter name="default-map" value="java.util.HashMap" />
<parameter name="default-list" value="java.util.ArrayList" />
</provider>
</providers>
343
</scope>
</sample-code:end>
Object References
Once you have defined at least one Provider, you can also define in an XML file references to
objects that exist in a Provider. Check this out with the following code:
<sample-code:xml>
<?xml version="1.0" encoding="UTF-8"?>
<scope xmlns:xsi="http://www.w3.org/2001/XMLSchema-instance"
xsi:noNamespaceSchemaLocation="http://repository.warework.com/xsd/scope1.0.0.xsd">
<providers>
<provider name="standard-provider"
class="com.warework.provider.StandardProvider">
<parameter name="load-objects" value="false"/>
<parameter name="default-set" value="java.util.HashSet"/>
<parameter name="default-map" value="java.util.HashMap"/>
<parameter name="default-list" value="java.util.ArrayList"/>
</provider>
</providers>
<objects>
<object name="map" provider="standard-provider" object="default-map"/>
</objects>
</scope>
</sample-code:end>
This time, you can retrieve new HashMap instances just by writing this:
<sample-code:java>
// Get a new Map from the Standard Provider.
HashMap map = (HashMap) scope.getObject("map");
</sample-code:end>
Every time this line of code is executed you will get a new HashMap. Review how the Provider
works because it may retrieve unique instances (singleton) or objects from remote machines.
Services
The following example shows how to define multiple Services in an XML file:
<sample-code:xml>
<?xml version="1.0" encoding="UTF-8"?>
<scope xmlns:xsi="http://www.w3.org/2001/XMLSchema-instance"
xsi:noNamespaceSchemaLocation="http://repository.warework.com/xsd/scope1.0.0.xsd">
<services>
<service name="sample1-service"
class="com.warework.service.sample1.Sample1ServiceImpl"/>
<service name="sample2-service"
class="com.warework.service.sample2.Sample2ServiceImpl"/>
…
</services>
344
</scope>
</sample-code:end>
These Services do not have parameters. That is, just with the name and the class, the Service
should be ready to run.
To retrieve a Service from a Scope we can write something like:
<sample-code:java>
// Get an instance of a Scope.
ScopeFacade scope = ...;
// Get the facade of Service "Sample1".
Sample1ServiceFacade service = (Sample1ServiceFacade) scope.
getService("sample1-service");
</sample-code:end>
Most of the times, you will need to specify a set of parameters that configure how the Service
must work. This is an example of a Service configured with parameters:
<sample-code:xml>
<?xml version="1.0" encoding="UTF-8"?>
<scope xmlns:xsi="http://www.w3.org/2001/XMLSchema-instance"
xsi:noNamespaceSchemaLocation="http://repository.warework.com/xsd/scope1.0.0.xsd">
<services>
<service name="log-service"
class="com.warework.service.log.LogServiceImpl">
<parameter name="config-class"
value="com.warework.core.loader.ProxyServiceSAXLoader" />
<parameter name="config-target"
value="/META-INF/system/log-service.xml" />
</service>
</services>
</scope>
</sample-code:end>
In this example, the Log Service accepts parameters to define where to load an XML file for the
configuration of the Service. You will need to review the parameters that a Service can accept
with the class that defines the constants of the Service (in this example, the LogServiceConstants.class).
Classes inside com.warework.service.<service-name> package with <servicename>ServiceImpl class name can also be specified with a short name. The following XML
configures the Log Service exactly as we saw in the previous example:
<sample-code:xml>
<?xml version="1.0" encoding="UTF-8"?>
<scope xmlns:xsi="http://www.w3.org/2001/XMLSchema-instance"
xsi:noNamespaceSchemaLocation="http://repository.warework.com/xsd/scope1.0.0.xsd">
<services>
<service name="log-service" class="log">
<parameter name="config-class"
value="com.warework.core.loader.ProxyServiceSAXLoader" />
<parameter name="config-target"
value="/META-INF/system/log-service.xml" />
</service>
</services>
345
</scope>
</sample-code:end>
Proxy services
The way to configure a Proxy Service is slightly different. You need to create a separate XML
file for the Proxy Service and reference it from the Scope XML file. The following example
shows how to define a Proxy Service and the configuration file that it requires. The first thing
you have to do is to register the Service:
<sample-code:xml>
<?xml version="1.0" encoding="UTF-8"?>
<scope xmlns:xsi="http://www.w3.org/2001/XMLSchema-instance"
xsi:noNamespaceSchemaLocation="http://repository.warework.com/xsd/scope1.0.0.xsd">
<services>
<service name="log-service"
class="com.warework.service.log.LogServiceImpl">
<parameter name="config-class"
value="com.warework.core.loader.ProxyServiceSAXLoader" />
<parameter name="config-target"
value="/META-INF/system/log-service.xml" />
</service>
</services>
</scope>
</sample-code:end>
This XML file defines a Log Service and a configuration file for it. You specify the configuration
file for the Service with two special parameters:
•
config-class: this parameter represents the class that reads the XML configuration
for the Service. The most common value for this parameter is com.warework.core.loader.ProxyServiceSAXLoader as it is a generic loader of configuration files for
Proxy Services. Anyway, some Services may use their own Loaders for XML files or
simply skip the configuration process by removing this parameter. Review the value for
this parameter in the documentation of each Service.
•
config-target: this parameter represents the location of the XML file to load. You
should place this file under /META-INF directory.
Once it is registered in the Scope we proceed with the creation of the Proxy Service configuration file. Based on the previous example, this could be the content of the log-service.xml
file:
<sample-code:xml>
<?xml version="1.0" encoding="UTF-8"?>
<proxy-service xmlns:xsi="http://www.w3.org/2001/XMLSchema-instance"
xsi:noNamespaceSchemaLocation="http://repository.warework.com/xsd/proxyservice-1.0.0.xsd">
<clients>
<client name="default-client"
connector="com.warework.service.log.client.connector.ConsoleConnector"/>
</clients>
</proxy-service>
346
</sample-code:end>
You can define as many Clients as you need for the Proxy Service. Once the Scope is started,
you can work with clients like this:
<sample-code:java>
// Get an instance of a Scope.
ScopeFacade scope = ...;
// Get the facade of the Log Service.
LogServiceFacade service = (LogServiceFacade) scope.getService("log-service");
// Connect the Client.
service.connect("default-client");
// Perform operations with the Client.
...
// Disconnect the Client.
service.disconnect("default-client");
</sample-code:end>
Some Clients may require configuration parameters. The following example shows how a Client
specifies a configuration file for it.
<sample-code:xml>
<?xml version="1.0" encoding="UTF-8"?>
<proxy-service xmlns:xsi="http://www.w3.org/2001/XMLSchema-instance"
xsi:noNamespaceSchemaLocation="http://repository.warework.com/xsd/proxyservice-1.0.0.xsd">
<clients>
<client name="default-client" connector="…">
<parameter name="config-target" value="…"/>
</client>
</clients>
</proxy-service>
</sample-code:end>
Remember to review the documentation of each Client to know which parameters it accepts.
<sample-code:xml>
<?xml version="1.0" encoding="UTF-8"?>
<proxy-service xmlns:xsi="http://www.w3.org/2001/XMLSchema-instance"
xsi:noNamespaceSchemaLocation="http://repository.warework.com/xsd/proxyservice-1.0.0.xsd">
<clients>
<client name="default-client" connector="Console"/>
</clients>
</proxy-service>
</sample-code:end>
Parent Scopes
You can define the Parent Scope for a specific Scope in an XML file. It is useful when you need
to start up a Parent Scope (or reuse it, if it already exists) for the main Scope that you want to
create. A Scope factory that parses an XML file like this automatically creates the Parent Scope
347
and assigns it to the main Scope (the Scope instance that you will get with the factory). It is important to keep in mind that only one Parent Scope can be defined per Scope. Check out in the
following example how to define a Parent Scope:
<sample-code:xml>
<?xml version="1.0" encoding="UTF-8"?>
<scope xmlns:xsi="http://www.w3.org/2001/XMLSchema-instance"
xsi:noNamespaceSchemaLocation="http://repository.warework.com/xsd/scope1.0.0.xsd">
<parent name="parent-scope">
<parameters>
// Specify here the initialization parameters for the Parent Scope.
</parameters>
<providers>
// Specify here the Providers for the Parent Scope.
</providers>
<objects>
// Specify here the object references for the Parent Scope.
</objects>
<services>
// Specify here the Services for the Parent Scope.
</services>
</parent>
<parameters>
// Specify here the initialization parameters for the Scope.
</parameters>
<providers>
// Specify here the Providers for the Scope.
</providers>
<objects>
// Specify here the object references for the Scope.
</objects>
<services>
// Specify here the Services for the Scope.
</services>
</scope>
</sample-code:end>
Once the main Scope is created, you can retrieve its Parent Scope like this:
<sample-code:java>
// Get the main Scope.
ScopeFacade scope = ...;
// Get the Parent of the Scope.
ScopeFacade parent = scope.getParent();
</sample-code:end>
Domains
You can also define the Domain Scope for a specific Scope in an XML file. It is useful when you
need to create a Domain Scope (or reuse it, if it already exists) for the main Scope that you
348
want to create. Keep in mind that only one Domain Scope can be defined per Scope. Check out
in the following example how to define it:
<sample-code:xml>
<?xml version="1.0" encoding="UTF-8"?>
<scope xmlns:xsi="http://www.w3.org/2001/XMLSchema-instance"
xsi:noNamespaceSchemaLocation="http://repository.warework.com/xsd/scope1.0.0.xsd">
<domain name="domain-scope">
<parameters>
// Specify here the initialization parameters for the Domain Scope.
</parameters>
<providers>
// Specify here the Providers for the Domain Scope.
</providers>
<objects>
// Specify here the object references for the Domain Scope.
</objects>
<services>
// Specify here the Services for the Domain Scope.
</services>
</domain>
<parameters>
// Specify here the initialization parameters for the Scope.
</parameters>
<providers>
// Specify here the Providers for the Scope.
</providers>
<objects>
// Specify here the object references for the Scope.
</objects>
<services>
// Specify here the Services for the Scope.
</services>
</scope>
</sample-code:end>
Once the main Scope is created, you can retrieve its Domain Scope like this:
<sample-code:java>
// Get the main Scope.
ScopeFacade scope = ...;
// Get the Domain of the Scope.
ScopeFacade domain = scope.getDomain();
</sample-code:end>
Context of a Scope
The XML configuration file allows you to define a set of Scopes that exist in the context of a
Scope. This time, you can define as many Scopes as you need in the context of another
Scope. Check this out with the following example:
349
<sample-code:xml>
<?xml version="1.0" encoding="UTF-8"?>
<scope xmlns:xsi="http://www.w3.org/2001/XMLSchema-instance"
xsi:noNamespaceSchemaLocation="http://repository.warework.com/xsd/scope1.0.0.xsd">
<parameters>
// Specify here the initialization parameters for the Scope.
</parameters>
<providers>
// Specify here the Providers for the Scope.
</providers>
<objects>
// Specify here the object references for the Scope.
</objects>
<services>
// Specify here the Services for the Scope.
</services>
<context>
<scope name="scope-1">
<parameters>
// Specify here the initialization parameters for the Scope.
</parameters>
<providers>
// Specify here the Providers for the Scope.
</providers>
<objects>
// Specify here the object references for the Scope.
</objects>
<services>
// Specify here the Services for the Scope.
</services>
</scope>
<scope name="scope-2">…</scope>
<scope name="scope-3">…</scope>
</context>
</scope>
</sample-code:end>
Once the main Scope is created, you can retrieve a Scope from the context of the main Scope
like this:
<sample-code:java>
// Get the main Scope.
ScopeFacade scope = ...;
// Get a Scope from the context of the main Scope.
ScopeFacade contextScope = scope.getContext().get("scope-1");
</sample-code:end>
350
Example
The following example shows a combination of multiple Scopes in just one XML configuration
file:
<sample-code:xml>
<?xml version="1.0" encoding="UTF-8"?>
<scope xmlns:xsi="http://www.w3.org/2001/XMLSchema-instance"
xsi:noNamespaceSchemaLocation="http://repository.warework.com/xsd/scope1.0.0.xsd">
<parent name="p1">
<parent name="p2">
<domain name="p2-d">…</domain>
<context>
<scope name="p2-c1">…</scope>
<scope name="p2-c2">…</scope>
</context>
</parent>
<domain name="p1-d">…</domain>
<parameters>…</parameters>
<providers>…</providers>
<objects>…</objects>
<services>…</services>
</parent>
<parameters>…</parameters>
<providers>…</providers>
<objects>…</objects>
<services>…</services>
<context>
<scope name="c1">…</scope>
<scope name="c2">…</scope>
<scope name="c3">
<parent name="c3-p">
<context>
<scope name="c3-p-c1">…</scope>
<scope name="c3-p–c2">…</scope>
</context>
</parent>
<parameters>…</parameters>
<providers>…</providers>
<objects>…</objects>
<services>…</services>
</scope>
</context>
351
</scope>
</sample-code:end>
To retrieve Scopes from the main Scope, you can perform operations like this:
<sample-code:java>
// Get the main Scope.
ScopeFacade scope = ...;
// Get Scopes from the main Scope.
ScopeFacade p2 = scope.getParent().getParent();
ScopeFacade p2_d = scope.getParent().getParent().getDomain();
ScopeFacade p2_c1 = scope.getParent().getParent().getContext().get("p2-c1");
</sample-code:end>
Custom XML Loaders for Services
You can create custom XML Loaders for your own Services. The first thing you need to do is to
create the Loader that reads the XML file and parses it into a Java object. Just create a class
that extends the AbstractSAXLoader class that exists in the com.warework.core.loader
package, like this:
<sample-code:java>
public class SampleSAXLoader extends AbstractSAXLoader {
public void startElement(String uri, String localName, String qName,
Attributes attributes) throws SAXException {
// Parse every XML tag here with the "qName" argument.
// Each value for the object to return is set here.
// This method is executed when <> open tag is found.
}
public void endElement(String uri, String localName, String qName)
throws SAXException {
// Parse every XML tag here with the "qName" variable.
// Each value for the object to return is set here.
// This method is executed when </> close tag is found.
}
protected Object getConfiguration() {
// Return here the object that represents the content of the XML file.
return null;
}
}
</sample-code:end>
In general, you have to perform the following steps to properly implement this class:
4. Create an object/attribute that represents the XML. It will store the values from the XML
file in it.
5. Parse the XML file with SAX methods startElement and endElement. In these
methods you have to fill the attribute with the values you find in the XML file.
6. Return the attribute at getConfiguration method when the work is done.
Here it is an example:
352
<sample-code:java>
public class SampleSAXLoader extends AbstractSAXLoader {
// Object that represents the XML file.
private ServiceConfig config;
public void startElement(String uri, String localName, String qName,
Attributes attributes) throws SAXException {
if ((qName.equals("firstTag")) ||
(localName.equals("firstTag"))) {
// Create the object that represents the XML file.
config = new ServiceConfig();
} else if ((qName.equals("anotherTag")) ||
(localName.equals("anotherTag"))) {
config.setName(attributes.getValue("name"));
} else if (...) {
...
}
}
// "endElement" method is optional.
protected Object getConfiguration() {
return config;
}
}
</sample-code:end>
Finally, we have to reference the new Loader in the Service:
<sample-code:xml>
<?xml version="1.0" encoding="UTF-8"?>
<scope xmlns:xsi="http://www.w3.org/2001/XMLSchema-instance"
xsi:noNamespaceSchemaLocation="http://repository.warework.com/xsd/scope1.0.0.xsd">
<services>
<service name="sample-service"
class="com.warework.service.sample.SampleServiceImpl">
<parameter name="config-class"
value="com.warework.core.loader.SampleSAXLoader" />
<parameter name="config-target"
value="/META-INF/system/sample-service.xml" />
</service>
</services>
</scope>
</sample-code:end>
353
Chapter 27: Serialized configuration
Warework allows you to configure the Framework with serialized objects. The idea is simple.
First, you create the objects required to configure the Framework and after that, you serialize
these objects into files. Once the configuration is stored in files, the Framework can boot up by
loading these files.
In this chapter we are going to show you how to create and fill the Framework configuration objects. It is very important to you to know that you must use only those objects that exist in the
"com.warework.core.model.ser" package; otherwise, they cannot be serialized.
Review the following code to save into files the objects that represent the configuration of the
Framework:
<sample-code:java>
// Create the configuration.
Scope scope = new Scope();
// Configure your application.
…
// Setup the target file where to store the configuration.
ObjectOutput out = new ObjectOutputStream(new FileOutputStream("system.ser"));
// Serialize the object (save the content in the file).
out.writeObject(scope);
// Close the serialization process.
out.close();
</sample-code:end>
One of the main advantages of using serialized files is that you can store all the configuration of
the Framework in just one single file (Scope and Services configuration is stored together in the
same file). This is really useful when you need to share the configuration of your application with
someone else. Anyway, it is also possible to store the configuration in multiple serialized files
like it is done with XML files.
Scope and initialization parameters
The following code shows how to create a Scope and how to set the name for it:
<sample-code:java>
// Create a Scope named "system".
Scope scope = new Scope("system");
</sample-code:end>
Once the Scope is created, we can add some initialization parameters:
<sample-code:java>
scope.setInitParameter("app-desc", "This is a demo app");
</sample-code:end>
Remember that you can store initialization parameters of any type:
354
<sample-code:java>
scope.setInitParameter("color-enabled", Boolean.TRUE);
</sample-code:end>
Providers and object references
Now we are going to register a Provider in the Scope. To do so, we have to set the name and
the class of the Provider:
<sample-code:java>
// Register a Provider in the configuration of the Scope.
scope.setProvider("my-provider", SampleProvider.class, null);
</sample-code:end>
Once the Provider exists in the Scope, we can configure the Provider if it is required:
<sample-code:java>
// Configure the Provider.
scope.setProviderParameter("my-provider", "param1", "text value");
scope.setProviderParameter("my-provider", "param2", Boolean.TRUE);
scope.setProviderParameter("my-provider", "param3", new Date());
</sample-code:end>
To create an object reference we need to specify the name of the reference, the name of the
Provider and the name of the object in the Provider:
<sample-code:java>
// Create an object reference.
scope.setObjectReference("my-object", "my-provider", "object-name");
</sample-code:end>
Services
To create a Service we have to set the name and the implementation class of the Service:
<sample-code:java>
// Register a Service in the configuration of the Scope.
scope.setService("my-service", SampleServiceImpl.class, null, null);
</sample-code:end>
Once the Service exists in the Scope, we can configure the Service like this:
<sample-code:java>
// Configure the Service.
scope.setServiceParameter("my-service", "param1", "text value");
scope.setServiceParameter("my-service", "param2", Boolean.TRUE);
scope.setServiceParameter("my-service", "param3", new Date());
</sample-code:end>
For Proxy Services you can create Clients directly with the Scope object. You have to provide
the name of the Service, the name of the Client to create in the Service and the Connector of
the Client:
<sample-code:java>
// Create a Client for the Service.
scope.setClient("my-service", "my-client", SampleConnector.class, null);
</sample-code:end>
355
Now that one Client exists in the Service, you can configure the Client with initialization parameters like this:
<sample-code:java>
// Configure the Client (parameters for the Connector).
scope.setClientParameter("my-service", "my-client", "param1", "value1");
scope.setClientParameter("my-service", "my-client", "param2", Boolean.TRUE);
scope.setClientParameter("my-service", "my-client", "param3", new Date());
</sample-code:end>
This is useful if you want to store the configuration of Services and Clients together with the
configuration of the Scope (one main object, the Scope object, holds everything). If you prefer
to configure the Service in a separate file, you need to set two parameters in the configuration of
the Service: one to define which class loads the external configuration and another one to spe cify where is the configuration. The following code shows how to configure the Log Service to
load an external XML file:
<sample-code:java>
// Register a Service in the configuration of the Scope.
scope.setService("log-service", LogServiceImpl.class, null, null);
// Configure the Service.
scope.setServiceParameter("log-service", "config-class",
ProxyServiceSAXLoader.class);
scope.setServiceParameter("log-service", "config-target",
"/META-INF/system/log-service.xml");
</sample-code:end>
You can also perform the same action like this:
<sample-code:java>
// Register the Service and specify the class that loads the configuration.
scope.setService("log-service", LogServiceImpl.class, null,
ProxyServiceSAXLoader.class);
// Set the location of the configuration file.
scope.setServiceParameter("log-service", "config-target",
"/META-INF/system/log-service.xml");
</sample-code:end>
If you plan to load the configuration from a serialized file, you have to set a different loader:
<sample-code:java>
scope.setService("log-service", LogServiceImpl.class, null,
ObjectDeserializerLoader.class);
scope.setServiceParameter("log-service", "config-target",
"/META-INF/system/log-service.ser");
</sample-code:end>
Another way to store the configuration of Services and Clients together with the configuration of
the Scope consists of creating and configuring a ProxyService object. We can configure the
Clients of the Service in a separate object and after that we can bind this object into the Service.
Check out the following code:
<sample-code:java>
// Create the object to configure the Proxy Service.
ProxyService service = new ProxyService();
// Create a Client for the Service.
service.setClient("my-client", SampleConnector.class, null);
// Configure the Client (parameters for the Connector).
service.setClientParameter("my-client", "param1", "value1");
356
service.setClientParameter("my-client", "param1", Boolean.TRUE);
service.setClientParameter("my-client", "param1", new Date());
// Set the configuration for the Service.
scope.setServiceParameter("my-service", "config-target", service);
</sample-code:end>
You can also configure Services like this with different configuration objects. The Data Store
Service is a good example:
<sample-code:java>
// Create the configuration for the Data Store Service.
DatastoreService service = new DatastoreService();
// Configure the Data Store Service.
…
// Set the configuration for the Service.
scope.setServiceParameter("datastore-service", "config-target", service);
</sample-code:end>
Parents, domains and the context of a Scope
Like in XML files, you can also define the Parent Scope for a specific Scope in a configuration
object. Check it out:
<sample-code:java>
// Create Parent Scope.
Scope parent = new Scope("parent-system");
// Configure Parent.
…
// Create Main Scope.
Scope system = new Scope("main-system");
// Set Parent Scope.
system.setParent(parent);
</sample-code:end>
You can also define the Domain Scope for a specific:
<sample-code:java>
// Create Domain Scope.
Scope domain = new Scope("domain-system");
// Configure Domain.
…
// Create Main Scope.
Scope system = new Scope("main-system");
// Set Domain Scope.
system.setDomain(domain);
</sample-code:end>
To include Scopes in the context of a Scope follow this code:
<sample-code:java>
// Create two Scopes.
Scope scope1 = new Scope("sub-system1");
Scope scope2 = new Scope("sub-system2");
357
// Create Main Scope.
Scope system = new Scope("main-system");
// Set Scopes in the context of the Main Scope.
system.setContextScope(scope1);
system.setContextScope(scope2);
</sample-code:end>