1
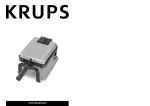
How to Make Cinnamon Roll Waffles YOUR BREAKFAST WILL NEVER BE THE SAME AGAIN B Y: R O N A L D M . S H E R G A , J R . LT E C 4 1 6 0 . 0 2 1 Navigating This Slideshow Every slide will contain three different single-click buttons for navigating: •Previous slide – •Restart show – •Next slide – Why Make Cinnamon Roll Waffles? Whether entertaining a guest, making food for your kids, or just trying to be adventurous, this simple twist on a breakfast favorite is sure to please! Although the first time you make them takes some trial and error, it is well worth it in the end. finished.jpg © Ronald M. Sherga, Jr. Used with permission. What You Will Need 1. Waffle Iron (non-stick), with user’s manual I use a Krups Type 654. This tutorial is written with the assumption that you are also using one. If you use a different model for this process, please refer to your device’s manual for operating instructions. closed.jpg © Ronald M. Sherga, Jr. Used with permission. open.jpg © Ronald M. Sherga, Jr. Used with permission. What You Will Need (cont.) 2. A tube of your favorite cinnamon rolls (For testing purposes, I recommend having a backup tube as well) I use Pillsbury brand cinnamon rolls. I prefer to use regular size versus Pillsbury’s larger “Grands!” cinnamon rolls. This package comes with eight rolls, which is plenty for two people to share. rollstube.jpg © Ronald M. Sherga, Jr. Used with permission. What You Will Need (cont.) 3. Spoon, knife, two forks, and two plates tools.jpg © Ronald M. Sherga, Jr. Used with permission. What You Will Need (cont.) 4. Paper towels and kitchen towel The towel will come in handy when dealing with the hot waffle iron, and the paper towels are for prep and cleaning purposes. towels.jpg © Ronald M. Sherga, Jr. Used with permission. What You Will Need (cont.) 5. A plastic or wooden kitchen utensil that will not cause damage to the waffle maker’s nonstick coating. I prefer to use tongs because I like the ability to grip hot food. tongs.jpg © Ronald M. Sherga, Jr. Used with permission. What You Will Need (cont.) 6. A timer! Not all waffle irons and cinnamon rolls are created equal. So it is important to figure out how long is perfect for your appliance and the type of cinnamon rolls you are using. I use my phone’s built-in timer function. timer.jpg © Ronald M. Sherga, Jr. Used with permission. What You Will Need (cont.) 7. A sponge and some detergent cleaners.jpg © Ronald M. Sherga, Jr. Used with permission. What You Will Need (cont.) 8. Patience! The first time you attempt to make these, there will be trial and error. Once you figure out the exact time that works for your appliance and cinnamon roll choice, this will be a much simpler process each time after. Stopwatch. By Paul Sherman. Used under Public Domain. http://www.wpclipart.com/time/stopwatch/stopwatch.png.html Let’s Begin! If this is your first time using the waffle iron, you will need to clean the plates before you cook anything on it. Fold up a paper towel sheet to give it a firm corner, and get it damp (not dripping wet!). Use that to wipe down the waffle iron’s top and bottom plates. Make sure you also run it along the grooves in the waffle iron plates, as pictured in the next slide. You will go through multiple sheets of paper towel for this step. Damp Dry dry.jpg © Ronald M. Sherga, Jr. Used with permission. damp.jpg © Ronald M. Sherga, Jr. Used with permission. Cleaning the Waffle Iron wipeleftright.jpg © Ronald M. Sherga, Jr. Used with permission. wipeupdown.jpg © Ronald M. Sherga, Jr. Used with permission. Preheating the Waffle Iron The Krups Type 654 does not have adjustable heat, so simply plug the waffle iron into a free wall outlet in the kitchen. There are two lights on the top of the appliance. The red one (left) lights up to indicate that the device is connected to power. The green one (right) will be lit while the device heats. Once it reaches the appropriate temperature for cooking, the green light will turn off. While you wait for the appliance to heat, proceed to the next step, “Preparing the Cinnamon Rolls.” plugin.jpg © Ronald M. Sherga, Jr. Used with permission. lights.jpg © Ronald M. Sherga, Jr. Used with permission. Preparing the Cinnamon Rolls Remove the tube of cinnamon rolls from the refrigerator. At one end of the tube, there is a place to lift up the paper and start peeling it. Continue peeling the paper until it comes off at the other end of the tube. 2. 3. 1. tube2.jpg © Ronald M. Sherga, Jr. Used with permission. tube1.jpg © Ronald M. Sherga, Jr. Used with permission. tube3.jpg © Ronald M. Sherga, Jr. Used with permission. Preparing the Cinnamon Rolls (cont.) If the can has not popped open, use the spoon to press against a seam until the tube opens up. tube4.jpg © Ronald M. Sherga, Jr. Used with permission. tube5.jpg © Ronald M. Sherga, Jr. Used with permission. Preparing the Cinnamon Rolls (cont.) Remove the cinnamon rolls and the icing canister, and set on a paper towel for the next step. rawtowel.jpg © Ronald M. Sherga, Jr. Used with permission. Testing the Waffle Maker As I stated earlier, depending on the waffle maker and the type of cinnamon rolls you use, cooking time may vary. Let’s test one! You will need your timer for this step. 1. Place a single cinnamon roll in one quadrant of the preheated waffle iron (the Krups can make 4 at a time). Oil or grease is not necessary for these cinnamon rolls. test.jpg © Ronald M. Sherga, Jr. Used with permission. Testing the Waffle Maker (cont.) 2. Close the lid and squeeze it until it is closed all the way, but do not close the latch. side.jpg © Ronald M. Sherga, Jr. Used with permission. openclamp.jpg © Ronald M. Sherga, Jr. Used with permission. Testing the Waffle Maker (cont.) 3. Start the timer as soon as you squeeze the appliance closed. Based on your manual, the cinnamon rolls should take somewhere around half the time it takes to cook waffles from batter. Since my waffle maker recommends at least four minutes, I set my timer to two minutes. screenshot.jpg © Ronald M. Sherga, Jr. Used with permission. Note: I found using my exact model of waffle maker with the regular size Pillsbury cinnamon rolls, it takes exactly one minute and forty-five seconds to cook them. Testing the Waffler Maker (cont.) 4. At the end of the timer, open the waffle maker. You can use the kitchen towel to open the iron, as it may help prevent you from burning yourself on the metal. Use the plastic or wooden utensil to gently loosen the cinnamon roll waffle from the appliance, and transfer it to a plate. Be careful, everything is hot! lift1.jpg © Ronald M. Sherga, Jr. Used with permission. lift2.jpg © Ronald M. Sherga, Jr. Used with permission. Testing the Waffle Maker (cont.) 5. Wait about one minute for the waffle to cool down. You need to check and see if the time you had set was too long or too short. See photos on the following slide for comparison. Too short: the waffle will be very soft, and may even be difficult to remove from the iron without tearing it. Too long: the waffle may be burnt crispy on the outside. It will taste like it has been charred, and will be difficult to break apart. Just right: the waffle will be like a firm sponge. The exterior will either be crisp or chewy, and the inside will be fluffy, but not wet or gooey. Testing the Waffle Maker (cont.) Undercooked under.jpg © Ronald M. Sherga, Jr. Used with permission. Perfect perfect.jpg © Ronald M. Sherga, Jr. Used with permission. Overcooked over.jpg © Ronald M. Sherga, Jr. Used with permission. Testing the Waffle Maker (cont.) 6. Depending on the result of your test run, you may need to test again and adjust the time. If the cinnamon roll was overdone, try shortening the timer by 15 seconds. If underdone, add 15 seconds. Repeat until you find the appropriate time for your waffle iron. Making the Waffles Once you have determined the perfect cook time for your waffle iron and cinnamon roll pairing, you can go ahead and make them without any worries. The Krups Type 654 allows you to make four waffles at once, so you can make a whole tube of cinnamon rolls in two quick batches. fullraw.jpg © Ronald M. Sherga, Jr. Used with permission. Making the Waffles (cont.) As each batch is finished, use your plastic or wooden utensil to remove them and place on plates. Close the waffle iron and wait for the green light to turn off before adding the next batch. fulldone.jpg © Ronald M. Sherga, Jr. Used with permission. Making the Waffles (cont.) As you remove each batch of cinnamon roll waffles, use your knife to spread icing onto them. The icing should end up melting from the heat of the waffles. cold.jpg © Ronald M. Sherga, Jr. Used with permission. melted.jpg © Ronald M. Sherga, Jr. Used with permission. Making the Waffles (cont.) IMPORTANT: As soon as you finish using the waffle iron, unplug it! This is the only way to turn it off, so you need to make sure you don’t leave it on while you eat. unplug.jpg © Ronald M. Sherga, Jr. Used with permission. Cleaning Up the Waffle Iron Now that you have enjoyed the fruits of your labor, it is time to clean the waffle iron. The initial cleaning had you use a damp paper towel to wipe the plates. However, since we just cooked food in the appliance, we need to be more thorough. Wait for the waffle iron to be cool to the touch. WARNING Do NOT submerge the waffle iron for any reason. Do NOT attempt to clean while still on or hot. Do NOT use a metal brush to clean the iron. Cleaning Up the Waffle Iron (cont.) Wet your sponge and ring it out a bit, so it is just damp (not dripping wet!). ringring.jpg © Ronald M. Sherga, Jr. Used with permission. tube1.jpg © Ronald M. Sherga, Jr. Used with permission. dampsponge.jpg © Ronald M. Sherga, Jr. Used with permission. Cleaning Up the Waffle Iron (cont.) Add a drop of detergent and work it into the sponge by squeezing and rubbing it in. detergent.jpg © Ronald M. Sherga, Jr. Used with permission. rubitin.jpg © Ronald M. Sherga, Jr. Used with permission. Cleaning Up the Waffle Iron (cont.) Just like you did with the paper towel earlier, you’re going to use the sponge to wipe all over the waffle iron, making sure you get into the grooves. Spongegroove.jpg © Ronald M. Sherga, Jr. Used with permission. Cleaning Up the Waffle Iron (cont.) Now take a damp paper towel and wipe up any of the detergent that may be left on the waffle iron. Then go over it again with a dry paper towel to make sure there is no moisture left in the waffle iron. wipeleftright.jpg © Ronald M. Sherga, Jr. Used with permission. wipeupdown.jpg © Ronald M. Sherga, Jr. Used with permission. Cleaning Up the Waffle Iron (cont.) Close the lid of the waffle iron and use the clamp to keep it shut. *Click* theclamp.jpg © Ronald M. Sherga, Jr. Used with permission. closedclamp.jpg © Ronald M. Sherga, Jr. Used with permission. Cleaning Up the Waffle Iron (cont.) Wrap the cord around the base of the waffle iron, and store upright in a dry location (like your pantry or cabinets). 3. 1. cord.jpg © Ronald M. Sherga, Jr. Used with permission. 2. wrapitup.jpg © Ronald M. Sherga, Jr. Used with permission. stored.jpg © Ronald M. Sherga, Jr. Used with permission. You’re Done! Now you know a unique take on an old classic. I hope you enjoyed the fun, new way of having cinnamon rolls. Bon appétit!