Download USER MANUAL - Sky Elevator
Transcript
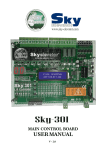
MAIN CONTROL BOARD USER MANUAL V - 2.0 SKY 401 USER MANUAL THIS DOCUMENT IS A SAMPLE FOR APPLICATION. ALL INFORMATIONS CONTAINED IN THIS DOCUMENT ARE SUBJECT TO CHANGE BY SKY ELEVATOR WITHOUT NOTICE. SKY ELEVATOR ASSUMES NO RESPONSIBILITY FOR ANY DAMAGE, LIABILITY OR OTHER LOSS ARISING FROM THESE INACCURACIES OR ERRORS. OPERATION TEMPERATURE 0°C -- 60 °C PROTECTION CLASS IP20 MOISTURE <%95 3 x 220/380V, 50/60 Hz, N SYSTEM INPUT CONTROL SUPPLY VOLTAGE 24 ± 5V DC MAX. 300 mA 8W, 24V DC POWER CONSUMPTION SECURITY CIRCUIT VOLTAGE MAX. 230V AC CONTROL SIGNAL INPUT 24 ± 5V DC CONTROL SIGNAL INPUT WITH SHORT CIRCUIT PROTECTION 24 ± 5V DC MANUFACTURER Sky Elevator ISTANBUL T e l: + 90 212 444 1988 www.sky-elevator.com 2 CONTENTS SKY 401 USER MANAUAL………………………………………………………………… 2 SKY 401 SPECIFICATIONS…………………………………………………………..…... 4 EXPLANATION OF TERMINALS……………………………….................................. 5 SKY 401 PARAMETER SETTINGS………………………………………….………..….. 6 AUXILIARY INPUT AND OUTPUT SETTINGS……………………………..…..…….. 7 SKY 401 PARAMETER LIST……………………………………………………..…....….. 8 CAUTIONS FOR PREMONTAGE………………………………………………………… 10 CAUTIONS FOR MONTAGE………………………..…………………………………….. 11 CAUTIONS FOR INSTALLATION OF CONTROL PANEL…………………………... 12 CONTROL AND CLEANING………………………………………………………………. 13 RISK ANALIZE…………………………………………………………………………….…. 14 3 SKY 401 SPECIFICATIONS - Simple and mixed collection - Adjustable stop numbers - Parameters can easily adjust with program buttons and LCD screen - Overload function - Full load function - Minimum load function - Heading towards to first predetermined floor in fire case - Adjustable parking station and travelling time - Full short circuit protected log (call) inputs (overheating, overcurrent, overvoltage protected) - To all log (call) outputs 1A lamp can be directly connected - Adjustable display output according to the intended code for each stop - When the doors open for a long time, giving ‘out of service’ signal to outside buttons - Choosing open/close waiting position of all or each floor for full automatic doors (According to EN 81-1/2 standard, ’closed waiting’ must be chosen.) - Adjustable ‘waiting on the floor’, ‘lock waiting’, ‘busy time’; ‘automatic door on/off’ positions, ‘max. high speed’, ‘max. low speed’ times - Automatic door card is placed on the main board; no need to use another board - Operating in revision mode chosen by program buttons - Adjustable time-delay relay for speed controlled lift - Programmable auxiliary relay - Programmable auxiliary input - Programmable position reset - When one of the log (call) buttons hang up, the car waits for 1 min. on this floor, then cancels this floor and continue its normal operation until the short circuit will be eliminated. Meanwhile a warning will be displayed on the LCD screen. - Overheating, overcurrent, overvoltage protected display and log (call) outputs 4 EXPLANATION OF TERMINALS System Main Phases Neutral Fast Motor Outputs Slow Motor Outputs Security Circuit Neutral )Security Circuit 140 Turning (Contactor Coil Voltage Security Circuit Supply Security Circuit Stop Turns Security Circuit Door Turns Security Circuit Lock Turns )Phase (direct connected to the one of the system main phases )Car Socket Voltage (220V AC )Car Lamp (220V AC Pump Brake )Car Call Button Inputs and Lamps (common 100 )For Two Speed Systems – Level Stopper Magnet (common 100 )Lower-Level Stopper Magnet (common 100 )Top-Level Stopper Magnet (common 100 )Min load Contact (common 100 )Overload Contact (common 100 )Full load Contact (common 100 )Contactor Feedback (common 100 )Revision Switch Input (common 100 )Revision Down Input (common 100 )Revision Up Input (common 100 )Magnet Switch for Floor Selection (common 100 )Automatic Door Open Button (common 100 )Automatic Door Close Button (common 100 )Overload Indicator (common 100 )Out of Service Indicator (common SCOM connector )Busy Indicator (common SCOM connector )Down Indicator (common SCOM connector )Up Indicator (common SCOM connector )Digital Display Outputs 24V DC ( common100 )Auxiliary Input (common100 Digital Common (+) 24V DC (–) 24V DC Simple Control Common )Automated Door Close Signal (common K15 )Automated Door Open Signal (common K15 K3 - K5 Common Input Auxiliary Relay Contact Auxiliary Relay Contact 5 ــــــــــــــــــــــــــــــــ ــــــــــــــــــــــــــــــــ ــــــــــــــــــــــــــــــــ ــــــــــــــــــــــــــــــــ ــــــــــــــــــــــــــــــــ ــــــــــــــــــــــــــــــــ ــــــــــــــــــــــــــــــــ ــــــــــــــــــــــــــــــــ ــــــــــــــــــــــــــــــــ ــــــــــــــــــــــــــــــــ ــــــــــــــــــــــــــــــــ ــــــــــــــــــــــــــــــــ ــــــــــــــــــــــــــــــــ ــــــــــــــــــــــــــــــــ ــــــــــــــــــــــــــــــــ ــــــــــــــــــــــــــــــــ ــــــــــــــــــــــــــــــــ ــــــــــــــــــــــــــــــــ ــــــــــــــــــــــــــــــــ ــــــــــــــــــــــــــــــــ ــــــــــــــــــــــــــــــــ ــــــــــــــــــــــــــــــــ ــــــــــــــــــــــــــــــــ ــــــــــــــــــــــــــــــــ ــــــــــــــــــــــــــــــــ ــــــــــــــــــــــــــــــــ ــــــــــــــــــــــــــــــــ ــــــــــــــــــــــــــــــــ ــــــــــــــــــــــــــــــــ ــــــــــــــــــــــــــــــــ ــــــــــــــــــــــــــــــــ ــــــــــــــــــــــــــــــــ ــــــــــــــــــــــــــــــــ ــــــــــــــــــــــــــــــــ ــــــــــــــــــــــــــــــــ ــــــــــــــــــــــــــــــــ ــــــــــــــــــــــــــــــــ ــــــــــــــــــــــــــــــــ ــــــــــــــــــــــــــــــــ ــــــــــــــــــــــــــــــــ ــــــــــــــــــــــــــــــــ ــــــــــــــــــــــــــــــــ ــــــــــــــــــــــــــــــــ ــــــــــــــــــــــــــــــــ ــــــــــــــــــــــــــــــــ R, S, T )MP (N U, V, W U1, V1, W1 10A 11A 110 120 130 140 1F 1 2 810 & 2001 840 & 2000 401 – 416 142 817 818 803 804 805 KK 869 500 501 M1 K20 DTS 1 2 12 31 32 a.b.c.d.e.f.g.2g GP1 24 100 1000 190 K3 K5 K15 YED YED SKY 401 PARAMETER SETTINGS 1. Press the ‘enter’ button to enter the parameter settings menu, 2. Press ‘up’ or ‘down’ buttons in order to find the desired setting, 3. Press ‘enter’ button to change the value of the desired parameter, the chosen parameter is going to be blink, set the parameter to desired value by using ‘up’ and ‘down’ buttons (if you don’t want to store the value in memory press ‘escape’ button), 4. After setting the parameter value, press ‘enter’ button to memorize it, then it passes the next parameter. 5. Press ‘escape’ button to exit from parameter settings menu. EXAMPLE: Setting the stop number - Press ‘enter’ button to enter the parameter setting menu, Press ‘up’ button until find ‘stop’ parameter Press ‘enter’ button again, stop number will blink, Choose the stop number using the ‘up’ and ‘down’ buttons Press ‘enter’ button to memorize the value and pass the next parameter setting. 6 AUXILIARY INPUT AND OUTPUT SETTINGS There are; o 1 auxiliary input o 1 auxiliary output (relay), existing on the board for general purpose. Auxiliary Input (GP1): If there occurs a problem in one of the inputs on the card (T2, 142, 817, 818, M1, KG, 869, 500, 501, 803, 804, 805, K20, DTS) as a result of any reason such as short circuiting or wrong wiring… change the parameter input with the auxiliary input (GP1) without moving the card out of the panel. After this change the card will continue its normal operation. EXAMPLE: If the ‘142’ input failed: o Put off the wire of the ‘142’ connector on the card and put the same wire on ‘GP1’ connector. o Enter the parameter settings menu and come to the ‘aux. input sel’ parameter, o Press ‘enter’ button, set the ‘aux. input’ value as ‘142’ by using the ‘up’ button. Press ‘enter’ button to store last change in the memory. After this setting the ‘GP1’ input will operate as ‘142’ input. o This process can be applied to the all inputs on the card Auxiliary Output (YED): If there occurs a problem with one of the relays on the card (RU1, RU2, RH, RF, LIR, KLR, AUTO, 031, 032, 01, 02, 12) this auxiliary input can be used instead of the broken relay. EXAMPLE: If ‘LIR’ relay is failed; o Change the wire of ‘P1’ connector with the one of the ‘YED’ connector, and the wire of ‘P2’ connector to the other ‘YED’ connector, o In the parameter settings mode, find the ‘aux. output sel.’ parameter and press ‘enter’ button, o Choose ‘auxiliary output’ as ‘LIR’ by using ‘up’ button and memorize it by pressing ‘enter’ button, o This process can be applied to the all relay outputs on the card. 7 SKY 401 PARAMETER LIST PARAMETER PANEL GET INSPECTION STOP NUMBERS SETTING LIMITS FACTORY VALUE Oca.16 - simple collection 16 simple control COLLECTION TYPE EXPLANATION Be operated at inspection mode on card Adjustable stop number - - mixed collection DOOR TYPE -manual -half automatic -full automatic manual - OPERATION TYPE -one speed -two speed -speed control Vvvf speed - M1 counter - MAGNET STRING -M1 counter -encoder Choose ‘9’ to cancel fire stop FIRE STOP PARK STOP CHOOSE INSPECTION SWITCH POSITION RESET WAITING TIME ON THE FLOOR FAST TIME SLOW TIME BUSY TIME CLOSE DOOR TIME OPEN DOOR TIME 1 -- 16 1 -- 16 17 17 -directly stop -go to the floor directly stop -no resetting -resetting 2 - 15 s 5 – 99 s 5 – 40 s 2 – 40 s 2 – 15 s 2 – 15 s 8 Choose ‘9’ to cancel park stop no resetting Reset operation after power cut 3s Time to go to the next floor after stopping on a floor 10 s Max. motion time between two floors at fast speed 10 s Max. motion time between two floors at low speed 10 s Car lamp and turning on time of ‘12’ 3s Set the value according to the door width for automatic doors 3s Set the value according to the door width for automatic doors SETTING LIMITS FACTORY VALUE EXAMPLE PARK TIME 3 – 99 s 10 s Time to go to the park floor after turn off the busy indicator LOCK TIME 5 – 15 s 8s After pump pull, lock will wait up to the chosen value PARAMETER DISPLAY SETTINGS FLOOR DOOR SETTINGS FACTORY SETTINGS 00,01,02,03,04,05,06,07,0 00,01,02,03,04,05, Floor information shown on 8,a,b,c, d, l,-1,-2,-3 06,07,08 the display this parameter must be chosen ‘wait closed’ for capability to the ‘EN 811/2 standard’ -time settings -display settings -floor door settings -general settings -all settings AUXILIARY INPUT SETTINGS (BOS, T2, 142, 817,818, M1, KG, 869500, 5001 DTS, K20) AUXILIARY OUTPUT SETTINGS (BOS, RU1, RU2, RH, RF, LIR, KLR, OTO 031, 032, 12, 02) Chosen open/close state for automatic doors (must be set separately at thefloors) Used to return to the factory v all/desired parameters If there occurs a problem in any inputs on the card due to any reason; the ‘GP1’ connector can be set in the place of failed input and after doing the necessary settings in the parameters menu, card will continue its normal operation if there occurs a problem in any relays on the card due to any reason; the ‘YED1 and ‘YED2’ connectors can be set in the place of failed relay and after doing the necessary settings in the parameters menu, card will continue its normal operation 9 CAUTIONS FOR PREMONTAGE In order to be exact convenience of the lift system to the EN 81-1/2 standards as electrically, the control card, control panel, security circuit and electrical connections must be convenient to concerned standards. The producers whom willing to build panel with SKY 401 must have enough level of information and experience about EN 81-1/2 standard and other standards, regulations, and instructions. SKY ELEVATOR assumes no responsibility for panels not build towards the given directions. SKY ELEVATOR guarantees that SKY 401 is convenience to the EN 81-1/2 but inside and outside connections of the control panel and other electrical connections are under responsibility of mounter. There must be 10mm distance between the SKY 401 control card and the panel. The SKY 401 control card must be fixed from 4 holes at the edges. After the puncturing to place SKY 401 card and other components in the panel, the panel must be cleaned very carefully from iron pieces and conductor wires otherwise these pieces can be cause damage while transferring the panel from somewhere to another. The contactors that are used for the AC motor lifts must be chosen according to the EN60947 AC3 class and must be enduring for the motor power. The connection must be done according to the directions shown in the SKY 401 schema. The cooperative motor placed on the main contactors must be chosen according to the EN60947 and must be controlled that contactors are active/inactive in the same time with power contacts. The bridge diode connections of the brake and pump must be done according to the schema and must be used isolated lugs. Panel manufacturer must control all the connections and do the required tests after finishing the panel. 10 CAUTIONS FOR MONTAGE The connections between the control panel and motor; car and lift shaft must be done carefully according to the SKY 401 schema. The 3-phase supply voltage must be connected to the R, S, T connectors on the panel with suitable fuse (chose due to motor power) and network neutral must be connected to the MP connector. Grounding cables and neutral must be separately connected and the panel body must be perfectly grounded. All stopper linkages specified in EN 81-1/2 standards must be placed in lift and the connections of these linkages must be done to the control panel according to the SKY 401 schema. All the used contactors must be convenient to the EN 60947 standards. 11 CAUTIONS FOR INSTALLATION OF CONTROL PANEL Be sure that the connections between the control panel and lift system are done according to the SKY 401 schema. Control if there is any short circuit in the connections with a suitable measuring device. Take the ‘control panel revision switch’ to ‘ON’ position. Take the ‘motor protection circuit stopper’ to ‘ON’ position and turn on the panel electric. Control that the led of ‘02’ on the board and ‘out of service’ lamp on the floor buttons are light up. Control that the voltage between the 100 – 1000 connectors is 20-26V DC. Be sure that all security contacts are connected according to the schema and operates correctly. Control the security inputs activity from 120, 130, 140 leds. The revision switch on the control panel is in ON position so the car will operate only at low speed. Control that the low speed coil is correctly coiled by routing the car with the up and down buttons placed on the control panel. If the car goes to wrong direction change place of any two ends (U2, V2, W2) of low speed coil on the control panel. Measure the voltage between 2001 – 810 and 2000 – 840 connectors while car is in motion. The value must be in 180 – 240V DC interval. Place the car on one of the middle floors and take the ‘car top revisions switch’ to ‘OFF’ position. The ‘Out of Service’ indicators will turn off on the floor buttons Be sure that the lift going the true direction by giving log (call)s if it operated wrong change place of any two connections (U2, V2, W2). 12 CAUTION! WHEN THE LFIT OPERATES NORMALLY, 817 AND 818 BISTABIL SWITCHES MUST NOT BE SHORTED WITH THE ‘100’ CONNECTOR. CAUTION! THE SECURITY PARAMETERS (120 STOP - 130 DOOR – 140 LOCK) MUST NOT BE SHORTENED. CAUTION! BE SURE THAT ALL SECURITY CONTACTS OPERATE PROPERLY BEFORE PERFORM NORMAL OPERATION MODE. CONTROL AND CLEANING Does not require periodic control. In case of a problem sent the card to the producer firm for control and fix. Do not connect to the liquid materials If needed, clean with pressured air. 13 RISK ANALIZE The contactor connector (11A) on the SKY 401 card must be connected to the security system turning. Panel direction and motion connectors do not be closed by hand. In such case security circuits can not block motion of the lift. The 24V AC fuse on the card must not be shunted. If the fuse blows constantly look for a short circuit at the shaft system and inside the panel. Car lamp supply voltage (1F) must be connected to the one of the main phases before thermic relay. When motor calefacted, the motor thermistor ends must be connected to the ‘T2’ connector to avoid the car stay between the floors. Door frames must be connected to the grounding bar. If grounding is not proper, security circuits have a risk of shunted through door chassis. After long time operations, dust, dirt, oil can be affect the performance of the security system. Please do not ignore plug and lock functions in periodic controls. 14 Ikitelli OSB. Metal İş Sanayi Sitesi 19. Blok No:1 Başakşehir İstanbul / Turkey Tel: +90 212 444 19 88 Tel: +90 212 549 11 21 GSM: +90 533 293 96 56 [email protected]