1
Illuminator User Guide
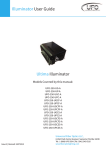
Compact 250W DMX+ Illuminator
Models Covered by this manual:
UFO 250 CDMX+G-A
UFO 250 CDMX+P-A
Universal Fiber Optics LLC,
Issue 2 | Revised: 24072013
6119A Clark Center Avenue | Sarasota | Florida 34238
Tel : 1 (800) UFO 5554 | Tel : (941) 343 8115
www.fiberopticlighting.com
INTRODUCTION
Thank you for purchasing this UFO illuminator.
Please read these instructions fully before connecting your unit to the electrical
supply, and keep them for future reference.
A high performance 250W metal halide illuminator for ultimate brightness which can
be fitted with three wheels for decorative lighting effects.
IMPORTANT
THIS PRODUCT MUST BE INSTALLED IN ACCORDANCE WITH THE
APPLICABLE
INSTALLATION CODE BY A PERSON FAMILIAR WITH THE CONSTRUCTION AND
OPERATION OF THE PRODUCT AND THE
HAZARDS INVOLVED
Do not operate without complete lamp enclosure in place or if lens is damaged.
KEEP HARNESS IN PLACE WHEN IN OPERATION.
CAUTION: Hot surface. Keep away from curtains and other combustible
materials.
WARNING: RISK OF FIRE/INJURY TO PERSONS. Keep away from combustibles.
Unplug to change lamp. Do not touch lamp.
WARNING: RISK OF FIRE. Do not place lamp where the overhead surface is closer
than 0.3m to the illuminator.
1
IMPORTANT SAFETY INFORMATION
INSTRUCTIONS PERTAINING TO A RISK OF FIRE, ELECTRIC SHOCK OR INJURY TO
PERSONS
IMPORTANT SAFETY INSTRUCTIONS
Lighted Lamp is HOT:
WARNING – To reduce the risk of FIRE, ELECTRIC SHOCK OR INJURY TO PERSONS:
1. Unplug and allow to cool before replacing lamp.
2. Lamp gets HOT quickly! Only contact plug when turning on.
3. Do not touch hot lens, guard, or enclosure.
4. Do not remain in light if skin feels warm.
5. Do not look directly at lighted lamp.
6. Keep lamp away from materials that may burn.
7. Use only with an approved 250W lamp.
8. Do not touch the lamp at any time. Use a soft cloth. Oil from skin may damage
lamp.
9. Do not operate product with missing or damaged guard, lamp containment
barrier, lens or fiber optic harness.
SAVE THESE INSTRUCTIONS
• Always disconnect the unit from the power supply before opening or attempting to
perform any work on it.
• UNIT MAY GET HOT - always allow unit to cool down before handling or moving it.
• Do not touch or attempt to remove the lamp while it is hot.
• Ensure that the power supply is correct for the unit before powering it up.
• Always ensure that the unit is properly EARTHED.
• Do not expose the unit to rain or moisture.
• Keep away from all combustible materials.
• Never attempt to tamper with the wiring or other internal components.
• Keep the unit away from gas, oil and any other flammable or explosive materials.
2
ILLUMINATOR LAYOUT
Item
Description
1
DMX connection Sockets
2
LED display and control buttons
3
Mains power input
4
Power LED
5
Cooling fan
6
Cooling fan
7
Motor Covers
8
Fiber port
9
4 x Access screws
10
3
4 x Mounting holes
INSTALLATION GUIDE
In order for the DMX+ illuminator to function safely and efficiently it must be
installed according to this user manual. Please read all sections thoroughly before
switching on the illuminator.
POWER SUPPLY REQUIREMENTS
Before plugging in the unit, please make sure that the supply is correct. Failure to do
so could cause the unit to malfunction. The unit requires a 120VAC 60Hz supply and
it MUST BE EARTHED. The illuminator units are provided with a cordset fitted with a
standard plug. UNIT MUST NOT BE DIMMED.
POSITIONING THE UNIT
The illuminator can be mounted horizontally, vertically or upside-down on any flat
surface. Keyhole slots are provided on the base of the unit to allow for securing to a
surface. The illuminator is only suitable for use in a dry area.
If the unit is being mounted at a higher than the ground level, block access below
the work area before installing.
Verify that any screws or bolts can safely bear the weight of the illuminator.
4
INSTALLATION GUIDE (Continued)
Verify that the supporting structure can safely bear the weight of all installed units,
cables and any other equipment.
For horizontal mounting, it is recommended that the illuminator is secured to a solid
surface using 4 x M4 or M5 screws or bolts and the keyhole slots. This is particularly
important if the illuminator location is not at ground floor level.
To mount the illuminator vertically, first securely install 4 x M4 or M5 screws or bolts
at the required distances so that they will line up with the keyhole slots. The
illuminator can then be mounted onto them and slid into position. The bolts or
screws MUST then be fully tightened.
To mount the illuminator under a surface, first securely install 4 x M4 or M5 screws or
bolts at the required distances so that they will line up with the keyhole slots. The
illuminator can then be mounted onto them and slid into position. The bolts or
screws MUST then be fully tightened.
CLEARANCE / VENTILATION
It is recommended that a gap of 300mm or more is left around the unit. This is to
allow air to circulate and prevent overheating. The location must have free
ventilation.
5
INSTALLATION GUIDE (Continued)
CONNECTION
There are 2 main connections required - the fiber port and the mains power supply.
Connect and secure the fiber optic connector to the fiber port before connecting the
electrical supply. Never run the illuminator with the fiber connector unplugged. For
separate feed units, there will be additional power connections required.
OPERATION
After installing and connecting the illuminator as described above, all you have to
do is turn the power on. The lamp will take 3-4 minutes to reach full brightness. This
is normal for this type of illuminator.
If no light is produced, please consult the TROUBLESHOOTING section in this
manual
6
OPERATION (Continued)
REAR PANEL CONTROLS
Button Functions
Menu
Enter
Up
Down
MENU FUNCTIONS
Repeatedly pressing the MENU button cycles through the following modes:
Mode
Address
Display
ADDR
Mode
MODE
Program
PROG
Time
TIME
Dimmer
DIM
Reset
RST
Description
Manually select the DMX address using up & down
buttons. Press enter when selected
Select either DMX or MASTER using up & down buttons.
Press enter when selected. In MASTER the unit will control
another unit set to DMX
Manually select from a range of standalone programs.
Press enter when selected.
Select the length of time between color changes. Press
enter when selected.
Manually control the dimmer from fully open to fully
closed. Press enter when selected.
Forces the unit into an initialise or reset condition. Press
enter when selected.
Notes:
1. The left hand display module shows a rotating ‘X’ when DMX data is present.
2. The microphone (under the display) for sound to light applications is a fully functional
device, but is not implemented in the software. This application is a special feature on
request.
7
OPERATION (Continued)
REAR PANEL CONNECTIONS
1. DMX OUT - standard 3-pin DMX output connector
2. DMX IN - standard 3-pin DMX input connector
3. AC IN - standard fused IEC power connector
4. DATA OUT - RJ45 connection to UFO RIU (remote indicator unit)
The DMX wiring connections are detailed below:
Like all data networks the DMX cable should be terminated on the DMX out of the last
illuminator using a terminator plug.
8
OPERATION (Continued)
The DMX+ illuminator has two modes of operation.
STANDALONE MODE
In standalone mode, the Compact DMX+ can be used in two ways - either as a single
independent illuminator or in master/slave configuration with several illuminators
connected together using DMX cables.
In master/slave configuration all addresses are set the same and whatever program is
selected on the master unit will also be executed on the slave units.
DMX MODE
Illuminators set in DMX mode can either be controlled by another Compact DMX+ in master
mode, or by a standalone DMX controller.
PROGRAMMING THE DMX+
The DMX+ can be programmed for various functions and modes from the rear panel controls
as shown on the following pages.
9
OPERATION (Continued)
PROGRAMMING THE DMX+
10
OPERATION (Continued)
PROGRAMMING THE DMX+
11
OPERATION (Continued)
DMX CHANNEL INFORMATION
Channel
Function
Fun no.
Value
Effect
01
Dimmer wheel control
01
0-255
0=fully closed / 255=fully open
02
Color wheel variable 0-90
01
0
Clear/white
02
Color wheel variable 0-90
02
10
Color 1 (blue)
02
Color wheel variable 0-90
03
20
Color 2 (green)
02
Color wheel variable 0-90
04
30
Color 3 (yellow)
02
Color wheel variable 0-90
05
40
Color 4 (red)
02
Color wheel variable 0-90
06
50
Color 5 (pink)
02
Color wheel variable 0-90
07
60
Color 6 (orange)
02
Color wheel variable 0-90
08
70
Color 7 (violet)
02
Color wheel variable 0-90
09
80
Color 8 (magenta)
02
Color wheel variable 0-90
10
90
Color 9 (apricot)
02
Color wheel snap 91-170
11
91-98
Color 9
02
Color wheel snap 91-170
12
99-106
Color 8
02
Color wheel control snap to color 91-170
13
107-114
Color 7
02
Color wheel control snap to color 91-170
14
115-122
Color 6
02
Color wheel control snap to color 91-170
15
123-130
Color 5
02
Color wheel control snap to color 91-170
16
131-138
Color 4
02
Color wheel control snap to color 91-170
17
139-146
Color 3
02
Color wheel control snap to color 91-170
18
147-154
Color 2
02
Color wheel control snap to color 91-170
19
155-162
Color 1
02
Color wheel control snap to color 91-170
20
163-170
Clear/white
02
Color wheel speed clockwise
21
171-212
Fast to slow
02
Color wheel speed counter-clockwise
22
213-255
Slow to fast
03
Twinkle wheel control
01
0-15
Stop/open
03
Twinkle wheel control clockwise
02
16-127
Slow to fast
03
Twinkle wheel control
03
128-143
Stop/open
03
Twinkle wheel control counter-clockwise
04
144-255
Fast to slow
04
Color wheel display duration
01
0-255
Short to long duration
05
Reset and lamp/fans power
01
0-127
Normal and lamp on
05
Reset and lamp/fans power
02
128-191
Reset if held for 5 seconds
05
Reset and lamp/fans power
03
192-250
Normal and lamp on
05
Reset and lamp/fans power
04
251-255
Lamp off if held for 10 seconds
12
OPERATION (Continued)
STANDALONE/MASTER PROGRAMMABLE FUNCTIONS
13
Prog
Function
Prog
Function
PA01
Color 9, no twinkle
PC01
Snap color change 0-9, no twinkle
PA02
Color 8, no twinkle
PC02
Snap color change 1-9, no twinkle
PA03
Color 7, no twinkle
PC03
Snap color change 2-9, no twinkle
PA04
Color 6, no twinkle
PC04
Snap color change 3-9, no twinkle
PA05
Color 5, no twinkle
PC05
Snap color change 4-9, no twinkle
PA06
Color 4, no twinkle
PC06
Snap color change 5-9, no twinkle
PA07
Color 3, no twinkle
PC07
Snap color change 6-9, no twinkle
PA08
Color 2, no twinkle
PC08
Snap color change 7-9, no twinkle
PA09
Color 1, no twinkle
PC09
Snap color change 8-9, no twinkle
PA10
Color 0, no twinkle
PC10
Snap color change 2-6, no twinkle
SA01
Color 9, twinkle
SC01
Snap color change 0-9, slow twinkle
SA02
Color 8, twinkle
SC02
Snap color change 1-9, slow twinkle
SA03
Color 7, twinkle
SC03
Snap color change 2-9, faster twinkle
SA04
Color 6, twinkle
SC04
Snap color change 3-9, faster twinkle
SA05
Color 5, twinkle
SC05
Snap color change 4-9, fastest twinkle
SA06
Color 4, twinkle
SC06
Snap color change 5-9, fastest twinkle
SA07
Color 3, twinkle
SC07
Snap color change 6-9, faster twinkle
SA08
Color 2, twinkle
SC08
Snap color change 7-9, slower twinkle
SA09
Color 1, twinkle
SC09
Snap color change 8-9, slower twinkle
SA10
Color 0, twinkle
SC10
Snap color change 2-6, slowest twinkle
PB01
Color change 0-9, no twinkle
PD01
Color rotate twinkle 1
PB02
Color change 1-9, no twinkle
PD02
Color rotate twinkle 2
PB03
Color change 2-9, no twinkle
PD03
Color rotate twinkle 3
PB04
Color change 3-9, no twinkle
PD04
Color rotate twinkle 4
PB05
Color change 4-9, no twinkle
PD05
Color rotate twinkle 5
PB06
Color change 5-9, no twinkle
PD06
Color rotate twinkle 6
PB07
Color change 6-9, no twinkle
PD07
Color rotate twinkle 7
PB08
Color change 7-9, no twinkle
PD08
Color rotate twinkle 8
PB09
Color change 8-9, no twinkle
PD09
Color rotate twinkle 9
PB10
Color change 2-6, no twinkle
PD10
Color rotate twinkle 10
SB01
Color change 0-9, slow twinkle
SD01
Color rotate twinkle speed 1 ccw
SB02
Color change 1-9, slow twinkle
SD02
Color rotate twinkle speed 2 ccw
SB03
Color change 2-9, faster twinkle
SD03
Color rotate twinkle speed 3 ccw
SB04
Color change 3-9 ,faster twinkle
SD04
Color rotate twinkle speed 4 ccw
SB05
Color change 4-9, fastest twinkle
SD05
Color rotate twinkle speed 5 ccw
SB06
Color change 5-9, fastest twinkle
SD06
Color rotate twinkle speed 5 cw
SB07
Color change 6-9, fastest twinkle
SD07
Color rotate twinkle speed 4 cw
SB08
Color change 7-9, slower twinkle
SD08
Color rotate twinkle speed 3 cw
SB09
Color change 8-9 ,slower twinkle
SD09
Color rotate twinkle speed 2 cw
SB10
Color change 2-6, slowest twinkle
SD10
Color rotate twinkle speed 5 cw
MAINTENANCE
CLEANING THE UNIT
Disconnect unit from power supply and allow to cool before attempting any
cleaning of the unit.
The body of the unit can be cleaned with a soft, damp cloth - do not use any
abrasives on the unit.
The fans and vents should be kept clear by periodically blowing them out with
compressed air.
Non-abrasive glass cleaner can be used to clean the glass lens inside the unit.
Please note that a record of all maintenance MUST be kept in the table below,
indicating what maintenance was undertaken and when.
Date
Maintenance Undertaken
14
MAINTENANCE
LAMP REPLACEMENT
1) Disconnect the illuminator from the power
supply and allow to cool for 10 to 15 minutes.
2) Remove the cover from the illuminator.
MSD LAMPS ONLY (GLASS HARNESS)
3) The lamp is located near the rear of the
illuminator. To free the lamp from its holder,
gently pull the lamp forwards (B). DO NOT
unscrew the brass holder (C) as this will impair
the light output.
4) Dispose of the old lamp carefully.
5) Fit the new lamp (D). DO NOT touch the lamp
glass as this may cause it to EXPLODE. If you
do, carefully clean it with a lint-free cloth and
alcohol.
6) Replace the lid, and reconnect to the power
supply.
MHR LAMPS ONLY (PMMA HARNESS)
3) Disconnect the lamp connector (1)
4) Pull the lamp free from its holder (2)
5) Insert new lamp into holder, plug into
connector
6) Replace the lid, and reconnect to the power
supply.
15
MAINTENANCE (continued)
FUSE REPLACEMENT
1) Unplug unit from electrical supply and allow to
cool.
2) The fuse is located in a drawer under the mains
input connector.
3) Open the fuse drawer.
4) Withdraw fuse from its holder
5) Replace with identically specified fuse - see
specification table in this manual.
6) Close the fuse drawer and power up the
illuminator.
16
TROUBLESHOOTING
Problem
Probable cause(s)
Main fuse blown
Unit is completely dead - Lamp
and LED power indicator are not
No power to unit
illuminated
Lamp going on & off randomly
Unit resets correctly but does
not respond to controller
Check that power is switched on and power
supply is plugged in.
Lamp blown
Replace lamp
Thermal switch activated
Allow unit to cool for 5 to 10 minutes and
investigate reason for overheating
Lamp wires are not
connected
Check plug connection - ensure lamp is
properly seated in its holder and the pins are
fully mated
Lamp needs replacing
Replace lamp
Unit needs cleaning
Clean reflector and glass lens
Incorrect power supply
Ensure power supply is 120VAC 60Hz
Fiber port connector not
plugged in correctly
Ensure fiber port connector is plugged in
correctly, and that the screw is tightened up
properly
Unit is overheating
Allow unit to cool for 5 to 10 minutes and
investigate reason for overheating
LED power indicator & fan are
on, but no light is output
Poor light output
Remedy
Check and replace fuse.
The controller is not connected
Connect the controller
Reversed data signal polarity
Install a phase reversing cable between the
unit and the controller
Bad data link connection
Check cables and connections. Repair or
replace damaged cables.
Data link not terminated
Insert termination plug into output of the last
unit in the link
Incorrect address setting
Check address setting
One of the units is transmitting
as a master or is faulty
Bypass one fixture at a time until normal
operation is regained
Unit does not reset correctly
An effect requires mechanical
adjustment
Contact UFO for assistance
No light output
Lamp too hot to strike
Allow lamp to cool
Faulty lamp
Check and replace lamp
Unit is too hot
Allow unit to cool
Faulty fan
Contact UFO for assistance
Lamp cuts out intermittently or
burns out too quickly
Note:
The DMX+ display will also show ‘lamp error’ and ‘temperature error’ messages which can be
used to assist in fault diagnosis.
17
TECHNICAL SPECIFICATIONS
Description
Compact 250W DMX+
Port connector size
30mm diameter
Fiber type
Glass & PMMA
Supply voltage
120VAC 60Hz
Lamp power
250W
Input power
360VA @ 120VAC
Start up current
11A @ 120VAC
Running current
5A @ 120VAC
Min. ambient temp.
-20°C
Max. ambient temp.
40°C
Thermal protection
Self reset thermal switch
Ballast type
Magnetic
Fan type
Sunon SP101A & Papst 8800N
Power cord
IEC mains cable
Main fuse
6.3 Amp
Lamp type
Metal halide
Lamp model
Philips MSD250/2 (Glass) BLV MHR 250N (PMMA)
Lamp life
c. 3000h (Glass) c. 4000h (PMMA)
Lamp colour temp.
8500K (Glass) 4200K (PMMA)
Lamp CRI
Color wheel
70 (Glass) 72 (PMMA)
9 colours plus white
Standard wheel colors
Blue, green, yellow, red, pink, orange, violet, magenta , apricot
Acoustic rating
47.5dB(A)
Operating environment
Indoor / dry
Protection rating
IP20
Material
Sheet steel
Color
Black powder coated
Size
L 15.3” (390mm) x W 14.2” (360mm) x H 7.9” (200mm)
Weight
36.77lb (16.68kg)
18
Universal Fiber Optics LLC,
6119A Clark Center Avenue | Sarasota | Florida 34238
Tel : 1 (800) UFO 5554 | Tel : (941) 343 8115
www.fiberopticlighting.com