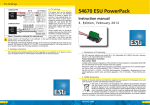
1
L.Net converter Instruction Manual 1. Edition, May 2013 50097 L.Net converter P/N 03813-13493 Content 1. EG - Declaration of conformity................................ 2 1. EG - Declaration of conformity 2. WEEE-Declaration..................................................... 2 We, ESU electronic solutions ulm GmbH & Co. KG, Edisonallee 29, D-89231 Neu-Ulm, Germany, declare in sole responsibility that the product Product description: L.Net converter Part number: 50097 complies with all relevant regulations of the Directive for Electromagnetic Compatibility (2004/108/EG). The following harmonised standards have been applied: EN 55014-1:2006 + A1:2009: Electromagnetic Compatibility requirements for household appliances, electric tools, and similar apparatus - Part 1: Emission - Product EN 55014-2:1997 + A1:2001 + A2:2008: Electromagnetic Compatibility - Requirements for household appliances, electric tools, and similar apparatus - Part 2: Immunity - Product family standard. 3. Properties of the L.Net converter............................ 3 3.1. Handheld throttles.........................................................3 3.2. Turnouts........................................................................3 3.3.Feedback modules..........................................................3 3.4. Communication.............................................................3 4. Wiring the devices.................................................... 4 4.1. Handheld throttles.........................................................4 4.2. Accessory modules........................................................4 4.3. Feedback modules.........................................................4 4.4. Booster..........................................................................4 5. Wiring to the digital command station.................. 5 6. Configuration with the command station.............. 5 6.1. Basic settings.................................................................6 6.2. Finding an L.Net converter.............................................6 6.3. Sniffer addresses............................................................6 6.3.1. Assigning sniffer addresses in the ECoS......................6 6.4. LocoNet™ Programming...............................................7 6.5. Configuration of feedback modules...............................8 6.5.1. Addresses of feedback modules..................................8 6.5.2. Administering several ECoSDetectors..........................9 6. Utilising feedback information................................ 9 6.1. Triggering routes............................................................9 7. Dispatching with the FRED® handheld throttle.. 10 8. Support and Assistance.......................................... 10 9. Warranty Certificate............................................... 11 2 2. WEEE-Declaration Disposal of obsolete electrical and electronic equipment (as practised in the European Union and other European countries with dedicated collection systems). This mark on the product, the packaging or the relevant documentation indicates that this product must not be treated like household waste. Instead this product should be disposed of at a suitable collection point for recycling of electrical and electronic appliances. Thus you contribute to avoid negative impact on the environment and people’s health that could be caused by inappropriate disposal. Recycling of materials contributes to preserve our natural resources. For more information regarding recycling of this product, please contact your local authority, your waste collection service or the dealer / shop where you purchased this product. Important hints 3. Properties of the L.Net converter The L.Net converter enables the owner of an ESU ECoS command station or the Märklin® Central Station 1 „Reloaded“ to connect LocoNet™ devices and to continue to using them. For this purpose the L.Net converter must be wired to the ECoSlink Bus of the command stations and is automatically detected and configured. It represents a gateway between the functions of the ECoSlink and the LocoNet™. It works bi-directionally and not only provides information for the command station but also assures that the throttles connected always display the current status. For the operation of the L.Net converter you must have installed firmware 3.7.0. or higher on your command station! Otherwise the module cannot be detected. The L.Net converter behaves towards the LocoNet™ devices like a command station (a so called LocoNet™ Master) and implements the functions necessary for proper operation of handheld throttles, accessory decoders or feedback modules. One can also configure Uhlenbrock® devices. The power supply can be facilitated directly by the L.Net converter delivering 250mA. In order to prevent any electrical problems on your layout when operating both systems the L.Net converter is galvanically separated from the LocoNet™. Please bear in mind that despite the use of the L.Net converter connected to the ECoS command station the ECoS cannot become a fully fledged LocoNet™ command station in all instances; the principal architecture of a LocoNet™ system and an ECoSlink based command station is quite different. The L.Net converter was developed in order to be able to continue using your peripheral devices you have become accustomed to, when you add an ESU command station. 3.1. Handheld throttles They are perfectly linked to the ECoS! If you use LocoNet™ compatible handheld throttles you can directly call up all locomotives registered in the ECoS. The display on the throttle is always synchronised with the ECoS. There are no limitations regarding the data format. You may run locomotives with DCC, Motorola®, Selectrix® or M4® data format even if the throttles could not do that on their own! Suitable throttles are the in Germany popular Daisy® or ProfiBoss® throttles as well as, for instance, the DT400 or UT2 by Digitrax®. You may also comfortably assign the desired locomotive to the FRED® throttle developed by FREMO on the ECoS (Dispatcher function). 3.2. Turnouts In order to assure that all LocoNet™ accessory modules function as desired the commands for accessories will be transmitted in parallel to both systems: In future it makes no difference to the ECoS if a turnout or signal is controlled by a conventional decoder or is connected to the LocoNet™. 3.3.Feedback modules In future LocoNet™ feedback modules reporting track occupancy can also be used. The track contacts can trigger the appropriate commands for setting routes or controlling push-pull services. Address feedback modules (e.g. Uhlenbrock Marco® or Lissy®) are currently not fully supported: While the commands for locomotives and turnouts will be implemented by the ECoS the address feedback cannot be detected by the ECoS. Due to the design of the hardware we do not recommend to use these devices. 3.4. Communication PC supported layouts often are controlled with self developed software designed for use with the LocoNet™. Locomotive and turnout commands are now issued by the ECoS via the LocoNet™. Feedback information of devices connected to the ECoS are, however, not transmitted to the LocoNet™. 3 Wiring the devices 4. Wiring the devices The wiring of your LocoNet™ devices to the L.Net converter is quite easy: Connect them to one of the two L.Net “T” sockets. As soon as you have started up the ECoS the devices will be supplied with power. You may connect up to 48 devices. In case you wish to connect more than 48 you must install a second L.Net converter. If required you may use all known distribution sockets. The L.Net converter delivers 250mA for the devices connected to it. If there are many devices it may happen that the maximum load is exceeded. In that case you must install an additional commercially available (by third party suppliers) LocoNet™ power supply. Figure 1: Basic connection of Loconet™ devices 4.1. Handheld throttles All known handheld throttles can be operated with the L.Net converter. Typical examples are the Uhlenbrock® Daisy®, IB Control®, Fleischmann® ProfiBoss®, Digitrax® DT400 or UT2. You can also use an Intellibox® as a throttle provided you have set it to the so called slave mode. You may call up and control your locomotives as usual. All available functions can be switched. You may determine yourself if you only wish to call up locomotives already registered in the ECoS or if so far unknown locomotives should be automatically detected and registered. The data format for running the locomotives is ultimately set in the ECoS and can be either DCC, Motorola®, Selectrix® or M4. Please also refer to chapters 6.1. and 6.3. for more details. 4 4.2. Accessory modules All commands for accessories are now transmitted twice with the L.Net converter: Once as usual as DCC or Motorola® command via the tracks for conventional accessory or turnout decoders and then via the L.Net converter for the modules connected to it. You may choose freely which type of module you want to use for controlling your turnouts and signals. No configuration of the turnout objects is required on the ECoS. Of course, you must assure that the devices connected to the LocoNet™ are programmed to the correct addresses. The configuration of Uhlenbrock® modules can be done directly with the ECoS as explained in chapter 6.4. 4.3. Feedback modules You may continue to use existing LocoNet™ feedback modules. The feedback information are treated by the ECoS in the same manner as if it was provided by s88/ECoSDetector feedback modules. For this purpose the ECoS simply superimposes all feedback modules connected to the L.Net converter into the address space for ECoSDetectors. You must establish a common (ground) connection between the L.net converter and the tracks as described in chapter 5. The configuration of the feedback device is described in chapter 6.5. Many feedback modules designed for the LocoNet™ do not function properly anymore when RailCom® is activated: the necessary blanking period in the track signal confuses these devices and leads to incorrect feedback. In that case you must make a decision: either you replace the feedback modules (and use for instance ESU ECoSDetectors) or you switch off RailCom®. 4.4. Booster Due to the fact that the L.Net converter LocoNet™ “T” sockets are implemented without booster signal connections no boosters may remain on the LocoNet™. Wire all boosters directly to the DCC booster interface of the ECoS (the so called CDE connection). Boosters without this option are usually pretty simple devices and often have problems with the RailCom® blanking period. They should not be used with an ECoS command station. Wiring to & configuration with the digital command station 5. Wiring to the digital command station a) ECoSlink socket b) b) Status LED c) Pushbutton d) L.Net Power LED e) L.Net Activity f) L.Net “T” sockets g) Common (ground) connect. d) c) e) 6. Configuration with the command station a) f) After connecting the L.Net converter to the command station the module will be automatically detected and linked. When the status LED blinks then the command station did not recognise the device. For trouble free operation the command station must have at least ECoS firmware 3.7.0. or higher. The configuration is done in the set-up menu of the command station. Each L.Net converter is displayed in the list “Devices connected to ECoSlink” twice since it fulfils two functions. g) Figure 2: L.Net converter overview The L.Net converter is wired directly to one of the three ECoSlink sockets of the command station with the supplied ECoSlink cable. Please observe the correct polarity of the cable! Do not force the plug into the socket! If you wish to connect more than three L.Net converters or if the supplied bus cable is too short you must extend the ECoSlink bus with the aid of the ECoSLink terminal (part number 50093). Should you use LocoNet™ feedback decoders by Uhlenbrock®, a connection between the common (ground) socket g) of the L.Net converter to the common of the track power (ECoS track output “0” (compare chapters 8.3.1./8.3.2 in the ECoS manual). Once you have connected the L.Net converter to the ECoS the status LED b) will light up continuously. As soon as the L.Net converter is ready for operation the power supply of the connected devices will be turned on and the L.Net Power LED d) lights up. Whenever there is a data exchange between the connected devices and the L.Net converter the LED e) lights up briefly. Figure 3: Devices on ECoSlink •L.Net Config: This leads to the actual function of the device: namely controlling locomotives and turnouts and programming LocoNet™ devices. •L.Net Detector: Here the feedback modules detected at the L.Net converter are configured and tested. We recommend changing these default names once you use two or more L.Net converters. 5 Configuration with the digital command station In case you use several L.Net converters it is advisable to connect one after the other. This helps to avoid confusing the different modules during configuration. 6.1. Basic settings First select “L.Net Config” from the list shown in Fig. 3 and press “Edit”. Then the configuration dialogue window opens for this L.Net converter: 6.3. Sniffer addresses Since it is possible to control M4 locomotives with a real address the ECoS saves all locomotive data sets internally in the locomotive lists with names in plain text. Since the LocoNet™ only handles addresses in the form of numbers it is necessary to link the locomotive addresses in the LocoNet™ with the actual locomotive listed in the locomotive list of the command station. Therefore it is possible to establish locomotives in the ECoS the real address of the locomotive decoder and the so called sniffer address. This sniffer address is independent from the real address and serves exclusively for the link between the external handheld throttles (transmitting a Loco.Net address) and the locomotive list of the ECoS. 6.3.1. Assigning sniffer addresses in the ECoS Figure 4: L.Net configuration Sniffer addresses are stored as additional property to each locomotive. They are entered in the locomotive menu: •Name of the controller: Assign an unmistakable name to each L.Net converter. •Permit establishing an object: If you press this option then you may be able to establish new locomotive objects with your handheld throttles: whenever you call up a locomotive whose address is not yet known to the ECoS this locomotive object is implicitly established in the ECoS. Should this behaviour be undesirable to you, the handheld throttle will respond with an error message whenever you call up an unknown locomotive. 6.2. Finding an L.Net converter After pressing the “Blinking” button in the configuration dialogue (refer to Fig. 4) the status LED of the L.Net converter will blink rhythmically. This makes finding the module much easier. Alternately you may press the button on the device at any time. Then the configuration dialogue will open immediately. Figure 5: ECoS sniffer addresses Also pay attention to chapter 19 of your ECoS handbook in order to learn more about the Sniffer addresses. 6 Configuration with the digital command station If you leave “0” as sniffer address then the actual locomotive address will be used (if available). Should you not have worked with sniffer addresses in past it may be possible that the Sniffer address has been set incorrectly in the past. Therefore it is recommended to check the locomotive roster. 6.4. LocoNet™ Programming You can configure your Uhlenbrock® devices directly on the touch panel of your ECoS and program so called LocoNet™ CVs (LNCV’s) with the aid of the L.Net converter. The relevant menu is found in the sub menu of the L.Net configuration under the “Programming” tab. Proceed during programming as always: Figure 7: LocoNet™ programming – Loconet™ CV Figure 6: LocoNet™ programming •First select the (Uhlenbrock®) part number of the device you wish to program •Then enter the number of the LocoNet™ module The L.Net converter will then attempt to find the module and to switch it into the programming mode. If you do not know the module number you may alternatively use the “general address” 65535. AS the name indicates you can call up all modules with this general address with the same part number. Since the general address is not a distinct address with which you can identify LocoNet™ modules you should only use this address for calling up modules whose indvidual address is not known. In this process only the respective module may be connected to the LocoNet and no other device with the same part number. Once you have called up the module you can read out the address form the LNCV 0. •Now enter the desired address in the L.Net CV. •By pressing the “Read” button you can read the value of the CV. •Now enter the desired new value in the CV and press the “Write” button in order to transfer the value to the device. 7 Configuration with the digital command station s88 modules. That way the individual modules can easily be kept apart. This number may be any number between 1 and 1000. When using more than one L.Net converter or in combined operation with ECoSDetectors it is not necessary to assign consecutive numbers. There may well be gaps in the sequence of numbers. •Status: Here you can read the status of the feedback modules directly and to configure them. A marked square indicates that the feedback module is active. Figure 8: Write LNet CV Please make sure that you observe the manual of the device in order to find out the numbers and the range of values of the LocoNet™ CVs. The ECoS does not know the structure and meaning of the programmed devices. Incorrectly configured modules will not work properly. 6.5. Configuration of feedback modules All feedback modules connected to the L.Net converter are internally dealt with like ECoSDetectors by the ECoS. The ECoS combines 16 feedback inputs into one virtual ECoSDetector (see Fig. 9): a) “Add” button b) “Delete” button •ECoSDetector Name: Here you can edit the names of the feedback modules connected to this L.Net converter that will be displayed in the ECoS. •ECoSDetector Nummer: In order to assure that feedback modules connected to the L.Net converter can function parallel to the s88 feedback decoders und also parallel to “real” ECoSDetectors each module must have a “number” similar to those of the 8 b) a) Figure 9: L.Net feedback configuration 6.5.1. Addresses of feedback modules LocoNet™ feedback information uses addresses ranging from 1 to 2048 (not to be confused with the address of the feedback module). Some types of feedback modules allow you to freely assign addresses respectively to configure every feedback port. Gaps are also permitted. You can display the feedback modules on the ECoS starting with number 1 in groups of 16 in the area of the ECoSDetectors. You can select how many groups of 16 should be displayed by pressing the buttons a) (Add feedback module) respectively b) (Delete feed- Utilising feedback information back module). The feedback addresses 1 – 16 will be displayed on the first virtual ECoSDetector, the feedback addresses 17 – 32 on the second one, and so forth. 6.5.2. Administering several ECoSDetectors When you layout is expanding and you wish to operate several L.Net converters in mixed mode with ESU ECoSDetectors it may become necessary to change the sequence of the reference number at a later stage. •Simply press the tab “Admin” in the configuration menu. A window similar to Fig. 10 will open. 6. Utilising feedback information You may use feedback information supplied by the L.Net converter in the same manner as is described in the ECoS handbook, chapter 15. Of course, now there are not only s88 modules available but you may also select ECoSDetectors and virtual ECoSDetectors (say: L.Net converters). 6.1. Triggering routes If you wish to trigger a route you can now also select feedback modules from the list, which are connected to the L.Net converters. This list is sorted by increasing reference numbers. Figure 10: Administering several ECoSDetector devices In this list all detected ECoSDetector modules and L.Net converters will be displayed with their name and their reference number. The list is sorted by the reference number. If you now wish to assign a new reference number to an ECoSDetector respectively an L.Net converter you simply mark the respective module and press the button “N+” in order to increase the number or the button “N-“ in order to decrease the number. Figure 11: Routes - select module Fig. 11 shows two virtual feedback modules (“L.Net Detector [1]” and “L.Net Detector [2]”) besides the “real” ECoSDetectors. The number in the squared bracket corresponds with the virtual feedback modules (in this example for instance the LocoNet™ feedback module 1- 16 as well as 17 – 32). Always bear in mind that you may select in “Port” any number from 1 – 16 in the choice list. Port number 1 of the “L.Net Detector [2]” therefore corresponds with the LocoNet™ feedback number 17. 9 Dispatching with the FRED® handheld throttle & Support 7. Dispatching with the FRED® handheld throttle The FRED® handheld throttle, which is particularly popular in the FREMO group, requires a slightly different procedure. Here the desired address must be assigned from the command station: due to its simple construction a locomotive can be directly selected. Use the so called “Dispatching” feature: the locomotive to be controlled with a FRED® throttle must first be assigned by the command station to the “Dispatch Slot”. The FRED® throttle then will take over this locomotive if so desired. Dispatching is quite easy with the ECoS: •First select the locomotive to be assigned to a FRED® throttle with one of the two throttles of the ECoS. •Now release this locomotive on the ECoS by selecting “Release Throttle” in the context menu (also refer to Fig. 12). Figure 12: Release controller •The locomotive that has been released last is now saved in the “Dispatch Slot”. •Now take over the locomotive with the FRED® throttle as described in the FRED® manual. If more “fully-fledged” throttles are connected to the L.Net converter you may also use these throttles for “Dispatching”. 10 8. Support and Assistance Your model train dealer or hobby shop is your competent partner for all questions regarding your LokPilot decoder. Otherwise please use either email, fax (please provide your fax-no./email address) or go to www.esu.eu/en/forum and we will reply within a few days. USA & Canada (English support), please contact: Phone: +1 (570) 649-5048 Tuesday & Thursday 9:00am - 3:00pm (CT) Fax: +1 (866) 591-6440 Email: [email protected] Mail: ESU LLC 477 Knopp Drive US-PA-17756 Muncy Germany and all other countries, please contact: Fax: ++49 (0) 731 - 1 84 78 - 299 Email: www.esu.eu/en/forum Mail: ESU GmbH & Co. KG Edisonallee 29 D-89231 Neu-Ulm www.esu.eu Copyright 1998 - 2012 by ESU electronic solutions ulm GmbH & Co KG. Mistakes, changes resulting in technical advancement, availability and all other rights reserved. Electrical and mechanical characteristics, dimensions and sketches are subject to change without prior notice. ESU may not be held responsible for any damage or consequential loss or damage caused by inappropriate use of the product, abnormal operating conditions, unauthorised modifications to the product, etc. Not suitable for children under 14 years of age. Inappropriate use may result in injury due to sharp points and edges. Märklin® is a registered trademark of Gebr. Märklin® und Cie. GmbH, Göppingen, Germany. RailCom® is a registered trademark of Lenz Elektronik GmbH, Giessen. RailComPlus® is a registered trademark of Lenz Elektronik GmbH, Giessen. All other trademarks are the property of their respective legal owners. According to its policy ESU electronic solutions ulm GmbH & Co KG continues to develop its products. Therefore ESU reserves the right to implement changes and improvements to any of the products listed in the ESU documentation. Duplication and preproduction of this documentation in any shape or form requires prior written consent from ESU. Warranty Certificate 9. Warranty Certificate 24 Months warranty form date of purchase Dear customer, Congratulations on purchasing this ESU product. This quality product was manufactured applying the most advanced production methods and processes and was subject to stringent quality checks and tests. Therefore ESU electronic solutions ulm GmbH & Co. KG grants you a warranty for the purchase of ESU products that far exceeds the national warranty as governed by legislation in your country and beyond the warranty from your authorised ESU dealer. ESU grants an extended manufacturer’s warranty of 24 months from date of purchase. Warranty conditions: •This warranty is valid for all ESU products that have been purchased from an authorised ESU dealer. •Any service, repair or replacement under this warranty requires proof of purchase. The filled in warranty certificate together with the receipt from your ESU dealer serves as proof of purchase. We recommend keeping the warranty certificate together with the receipt. •In case of a claim please fill in the enclosed failure report card as detailed and precise as possible and return it with your faulty product. •Please use the appropriate postage when shipping to ESU. Extent of warranty / exclusions: This warranty covers the repair or replacement free of charge at the discretion of ESU electronic solutions ulm GmbH & Co. KG of any faulty parts that are caused by design faults or faults in production, material or transport. Any further claims are explicitly excluded. The warranty expires: 1. In case of wear and tear due to normal use. 2. In case of conversions of ESU – products with parts not approved by the manufacturer. 3. In case of modification of parts. 4. In case of inappropriate use (different to the intended use as specified by the manufacturer). 5. If the instructions as laid down in the user manual by ESU electronic solutions ulm GmbH & Co. KG were not adhered to. There is no extension of the warranty period due to any repairs carried out by ESU or re-placements. You may submit your warranty claim either with your dealer or by shipping the product in question with the warranty certificate, the receipt of purchase and the fault description directly to ESU electronic solutions ulm GmbH & Co. KG at: ESU GmbH & Co. KG - Service department Edisonallee 29 D-89231 Neu-Ulm GERMANY 11 Trouble shooting sheet 1. Customer data (Please write in block letters) Name:.................... Street:.................... ZIP/City:................. | | | | | | Country:................ Email:..................... Phone:................... Date:...................... Signature:.............. 2. Error class Is not detected by the command station No function (error cannot be exactly determined) Outputs defect 3. Error description (use extra page, if needed) 4. Receipt / Proof of purchase Please enclose your receipt / invoice. Otherwise no warranty possible! 6. Your retailer: Retailer´s stamp or address 12 5. Additional information: