1
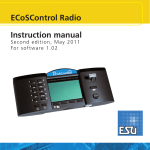
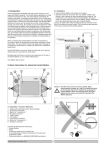
ECoSControl Radio Instruction manual First edition, November 2009 1 Contents 1. Declaration of conformity......................................3 2. WEEE-Declaration..................................................3 3. Important Note – Please read this first...................4 4. Content of package..............................................4 5. Introduction – Features of the ECoSControl Radio.4 5.1. Wireless operation.................................................4 5.2. ECoSlot..................................................................5 5.3. Handheld throttle...................................................5 5.4. Locos ....................................................................5 5.5. Accessory decoders and routes...............................5 5.6. Batteries and battery charger.................................5 6. Unpacking & Connecting......................................5 6.1. Batteries.................................................................5 6.2. Battery charger......................................................6 6.3. Pre-conditions for operation...................................6 6.3.1. Installing the receiver module in the ECoS...........6 6.3.2. Installation of the receiver module in the Central Station Reloaded................................................ 7 7. Control elements...................................................8 8. Settings at the command station...........................9 8.1. Assigning locos to the throttle................................9 8.2. Assign turnout panel to throttle...........................10 8.3. Radio channel of the base station.........................10 8.4. Changes during operation....................................10 8.5. Saving operating data..........................................10 9. Switching on ECoSControl Radio.........................10 10. Running locos and consists................................11 10.1. Selecting a loco..................................................11 10.1.1. Loco selection menu.......................................11 10.1.2. Sorting locos...................................................11 10.1.3. Filtering locos..................................................11 10.2. Quick selection mode.........................................12 10.2.1. Assigning a loco to a quick selection button....12 10.2.2. Deleting a quick selection button....................12 10.3. Running locos....................................................12 10.4. Loco is blocked..................................................13 11. Switching accessories & Routes.........................13 11.1. Interlocking panel window.................................13 11.2. Switching accessories.........................................13 11.3. Select an interlocking panel................................13 12. Emergency stop.................................................14 13. Battery life on one charge.................................14 14. Configuration menu..........................................14 14.1. Language...........................................................14 14.2. Contrast.............................................................14 14.3. Radio channel....................................................14 14.4. Handheld ID (HID)..............................................15 2 14.5. Info....................................................................15 14.6. Backlight duration..............................................15 14.7. Backlight brightness...........................................15 14.8. Joystick..............................................................15 14.9. Resetting the speed............................................15 14.10. Sequence for keyboard entries.........................15 14.11. Signal power....................................................15 15. ESU Support & Registration...............................16 15.1. Registration........................................................16 15.2. Forum................................................................16 15.3. Technical hotline................................................16 16. Appendix..........................................................17 16.1. Technical data....................................................17 17. Warranty Certificate..........................................19 17.1. Warranty conditions...........................................19 17.2. Extent of warranty / exclusions...........................19 1. Declaration of conformity We, ESU electronic solutions ulm GmbH & Co KG, Industriestrasse 5, D-89081 Ulm, declare in sole responsibility that the product 50111 ESU ECoSControl Radio is in compliance with the following standards: EN 71 1-3 : 1988 / 6 : 1994 – EN 50088 : 1996 – EN 55014, Teil 1 + part 2 : 1993 EN 61000-3-2 : 1995 – EN 60742 : 1995 – EN 61558-2-7 : 1998 according to the directive 88 / 378 / EWG – 89 / 336 / EWG – 73 / 23 / EWG ETSI EN300 328:2007-04 The ECoSControl Radio bears the CE mark. 2. WEEE-Declaration Disposal of obsolete electrical and electronic equipment (as practised in the European Union and other European countries with dedicated collection systems). This mark on the product, the packaging or the relevant documentation indicates that this product must not be treated like household waste. Instead this product should be disposed of at a suitable collection point for recycling of electrical and electronic appliances. Thus you contribute to avoid negative impact on the environment and people’s health that could be caused by inappropriate disposal. Recycling of materials contributes to preserve our natural resources. For more information regarding recycling of this product, please contact your local authority, your waste collection service or the dealer / shop where you purchased this product. Batteries do not belong in household waste! Please do not dispose of discharged batteries in your household waste: take them to a collection point at your local recycling centre or dealer. Therefore you assure an environmentally friendly way of disposal. Copyright 1998 - 2009 by ESU electronic solutions ulm GmbH & Co KG. Mistakes, changes resulting in technical advancement, availability and all other rights reserved. Electrical and mechanical characteristics, dimensions and sketches are subject to change without prior notice. ESU may not be held responsible for any damage or consequential loss or damage caused by inappropriate use of the product, abnormal operating conditions, unauthorised modifications to the product, etc. Not suitable for children under 14 years of age. Inappropriate use may result in injury due to sharp points and edges. Märklin® is a registered trademark of Gebr. Märklin® und Cie. GmbH, Göppingen, Germany. RailCom is a registered trademark of Lenz Elektronik GmbH, Giessen. All other trademarks are the property of their respective legal owners. According to its policy ESU electronic solutions ulm GmbH & Co KG continues to develop its products. Therefore ESU reserves the right to implement changes and improvements to any of the products listed in the ESU documentation. Duplication and preproduction of this documentation in any shape or form requires prior written consent from ESU. 3 Introduction - Features of the ECoSControl Radio 3. Important Note – Please read this first Congratulations on your purchase of an ECoSControl Radio. The ECoSControl Radio offers you the opportunity to run your locos remotely (wireless) in conjunction with the ECoS ESU command station as well as the Märklin ® central station Reloaded (with ESU update 3.0.0 and higher). Together with the easy and intuitive handling the ergonomic design of the throttle will open up possibilities never dreamed off before This manual offers you a step-by-step insight into the available options. Therefore we kindly ask you to work through this manual carefully before operating your ECoSControl Radio. Even though your ECoSControl Radio is of robust construction, incorrect wiring could lead to damage of the device. If in doubt do not undertake any potentially costly experiments! •ECoSControl Radio is designed solely for the use with model trains. Never leave the ECoSControl Radio in conjunction with the ECoS operating without supervision and never use it for controlling devices that transport people. • The ECoSControl Radio may only be operated with the devices described in this manual. Any other use than described in this manual is not permitted. • ECoSControl Radio works with the 2.4 GHz frequency band that does not require registration or is subject to any fees. Since this frequency range is freely available for anybody some impairment of the functionality may be caused – at least in theory - by other wireless devices such as WLAN, Bluetooth or a wireless computer mouse. Due to modern transmission processes the ECoSControl Radio is capable of compensatingfor such distortions however, operating other devices in the 2.4 GHz range may reduce the speed of transmission and the range of the ECoSControl Radio. • Do not drop, sit, shake, or expose the ECoSControl Radio to mechanical impact, as such rough handling may cause damage to the components of the device. •Do not expose the components of the ECoSControl Radio to humidity or direct sunlight. •Do not apply any caustic chemicals, cleaning detergents or similar for cleaning your ECoSControl Radio. •Do not attempt to open the housing of the ECoSControl Radio. Inappropriate handling may cause damage to your ECoSControl Radio. 4. Content of package Please check that all items are contained in the package immediately after opening it. The following components should be in the package: • ECoSControl Radio Receiver module • ECoSControl Radio Base Station • 4 NiMH rechargeable batteries Micro (size AAA) • Battery charger + power supply unit • Lanyard (carrying strap) • (This) manual Figure 1: Content of packaging 5. Introduction – Features of the ECoSControl Radio With the ECoSControl Radio you have acquired a system that can accomplish much more than “just run locos“ in wireless mode. In this chapter we introduce you to the features of the ECoSControl Radio. 5.1. Wireless operation Wireless operation is a very desirable feature, you send all commands by wireless transmission to the receiver module integrated in your ECoS. Wireless transmission is bi-directional, which means that any commands or inputs on the ECoS will also be transmitted to the ECoSControl Radio – and vice versa. All data such as speed of locos or status of turnouts are always synchronised between the ECoSControl Radio and the ECoS. Due to this matching there is no need to enter locos or accessories in the ECoSControl Radio. All changes can be handled comfortably on the command station. 4 Unpacking & Connecting The ECoSControl Radio transmitter is very powerful. In an open area you may move up to 100m away from the command station. The actual range depends largely on the surroundings and may well be much less than 100m. Reflective or absorbing metal parts such as fences as well as other devices operating in the 2.4 GHz range may have an impact on the operation of the system. Both the transmission and the receiver antennas are located inside the housing of the base station. Normally the ECoSControl Radio is not affected by the simultaneous operation of wireless networks (WLAN). Since the frequency range of 2.4 GHz is freely available to everybody other types of remote control (e.g.: 2.4 GHz remote control of model helicopters) may have some influence on the functionality of the system. 5.2. ECoSlot The receiver module is to be inserted into the (available) ECoSlot compartment of your ECoS command station or Central Station Reloaded. It co-ordinates the communication between the ECoS and the ECoSControl Radio throttles. The receiver module supports up to six throttles. For each throttle you can assign up to 100 locos and four interlocking panels. The receiver module can be operated on four different channels (channel 1 to channel 4). In order to permit the operation of several ECoSControl systems within the same room. This is particularly important at fairs and exhibitions. If you want to operate your command station with ECoSControl Radio in an exhibition hall, please obtain information regarding the channels used by your neighbours PRIOR to turning on your command station. 5.3. Handheld throttle The throttle of the ECoSControl is shaped according to ergonomic aspects and rests comfortably in your hand. Important functions such as running your loco can be dealt with singlehandedly. The ECoSControl Radio is equipped with a graphic, backlit LC (liquid crystal) display. Thus you can read any information in plain text. The background illumination of the display enables you to read text and numbers even under difficult lighting conditions. In order to save battery power the illumination is turned off after a pre-set (adjustable) time. Like the receiver module each throttle can be set to the desired radio channel (channel 1 to channel 4). A radio link is only established provided the same frequency has been selected. Should you desire to connect more than one throttle to a receiver module (and thus to a command station) each throttle has to be assigned a handheld ID (HID). The command station differentiates between the individual throttles via this number (from 1 to 6). It is not possible to connect two throttles with the same HID to a command station. Ex works all throttles are set to HID 1. If you purchase an additional throttle (ESU part number 50112) it must be set to a new HID prior to use. How to accomplish this is explained in chapter 14.4. 5.4. Locos In the loco mode the most important parameters such as the name and symbol of the loco, speed and status of function buttons are displayed for easy handling. You can then change the speed using the joystick. Subject to the digital protocol in use you may activate up to 20 functions per loco in addition to the headlights (function 0). You can assign up to 100 locos to each throttle. There are several methods of sorting your loco list as well as the quick selection of your ten favourite locos and also the text search by name. 5.5. Accessory decoders and routes Switching accessory decoders and routes does not present any problem to the ECoSControl Radio. You can assign and switch up to 4 interlocking panels with a total of 64 addresses. The ECoS displays the current status of the accessories. Switching the accessories is accomplished simply by pushing a button or in case of accessories with more than two aspects by a comfortable choice menu. 5.6. Batteries and battery charger In order to preserve the environment ESU recommends the use of rechargeable batteries. They are supplied with the ECoSControl Radio including the battery charger. 6. Unpacking & Connecting 6.1. Batteries You will need four rechargeable batteries (supplied with the ECoSControl Radio) or size “AAA” batteries (also called “Micro”). Both NiCad or NiMH batteries as well as alkaline batteries can be used. The rechargeable batteries must be charged prior to first use. One set of batteries will last about 8 hours (subject to user profile). The batteries must be inserted into the ECoSControl Radio prior to use as follows: a) Hold the ECoSControl Radio with the back facing upwards and press the tab at the top end of the cover of the battery compartment (as shown in Fig. 2). Figure 2 5 Pre-conditions for operation b) Remove the cover by first tilting it and then pulling it upwards. Figure 5: Assembling of the battery charger •To fully charge the batteries supplied takes about 10-12 hours. The LEDs on the charger indicate the time elapsed since the start of the process. If you interrupt the charge then the batteries may be fully charged before the green LED lights up. In that case you must remove the batteries from the charger. • Do not leave fully charged batteries in the charger. This could lead to damage of the batteries. • Do not store your batteries in the battery charger even when it is switched off since this causes the batteries to be discharged. Figure 3 c) Now insert the batteries. Please observe the correct polarity of the batteries as shown in the battery compartment. The “+” pole of the batteries is always the end with the “head”. Fig. 4a) left side Fig. 4b) right side d) Replace the cover, making sure it is locked in place. 6.2. Battery charger Prior to using the battery charger you must attach the Euro-plug adapter. Place the fold-away mains plug top upwards and slide the adapter into the guide rail until it is locked into place (see Fig. 5). The battery charger supplied with the ECoSControl Radio is solely for charging the supplied NiMH batteries. Two LEDs indicate the time elapsed since starting the charge process. The batteries are charging as long as the red LED lights up, while the green LED indicates that charging has been completed. Please take note of the following remarks regarding charging batteries with the supplied battery charger: •Only charge the batteries once the ECoSControl Radio indicates empty batteries or the radio link between the throttle and the base station is interrupted. 6 6.3. Pre-conditions for operation In order to be able to successfully operate your ECoSControl Radio with your ECoS or Central Station Reloaded, the firmware of the ECoS or Central Station must be version 3.0.0 or higher. Therefore it may be necessary to update the firmware of your command station first. Please refer to the manual of your command station where you will find detailed information on how to accomplish this update. Should the firmware be less than 3.0.0 then the command station cannot detect the receiver module despite an otherwise correct installation. 6.3.1. Installing the receiver module in the ECoS The receiver module must be installed in a free ECoSlot plug-in position of the ECoS. Even though the installation is quite simple you should adhere to the following steps in order to avoid possible damage to either the ECoS or the receiver module. Make sure that the command station is switched off before installing the receiver module. Also remove the batteries from their compartment! a) Turn the command station upside down. Use a foam pad or a soft cloth to avoid scratches on the display. Remove the cover of the left ECoSSlot (see the illustration with the red circle) by pressing the retaining clip (serrated surface) and moving the cover upwards (see Fig. 6). Installation of the receiver module d) Place the cover over the module and push the serrated surface downwards in order to fix it in place (Fig. 9). Figure 6 b) Remove the retaining clips in the extension module by snipping them with side cutters (see Fig. 7). Figure 9 6.3.2. Installation of the receiver module in the Central Station Reloaded The receiver module must be inserted into a free plug-in position of the Central Station Reloaded. Even though the installation is quite simple you should adhere to the following steps in order to avoid possible damage to either the Central Station or the receiver module. Make sure that the command station is switched off before installing the receiver module. Also remove the batteries from their compartment! a) Turn the command station upside down. Use a foam pad or a soft cloth to avoid scratches on the display. Remove the cover of the left extension slot by pressing the left side of the housing. Figure 7 c) Insert the receiver module into the plug-in position and tilt it slightly as shown in Fig. 8. Figure 8 Figure 10 7 Control elements b) Insert the receiver module into the plug-in position until it is locked into place (Fig. 11). 7. Control elements Your ECoSControl Radio has the following control elements (Fig.13): a) LCD display: The fully graphic LCD display shows all relevant information for the current operating mode as well as menu entries. The display is equipped with white backlighting. This is automatically turned off after a pre-set (adjustable) time. b) Joystick: The Joystick has a two axes movement: vertical () as well as horizontal (). • Loco mode: With the key the speed of the loco can be increased or reduced in loco mode. selects either the next or the previous loco from the (sorted) loco list. • Menus: In menus you can select the menu entry with , selects the current menu entry (same effect as pushing the “OK“ button), exits the menu (same effect as pushing the „CANCEL“ button). • Turnout mode: In the turnout mode you can navigate in the interlocking panel. • Configuration settings: In the configuration menus you can select the configuration value with . selects the current menu entry from (same effect as pushing the “OK“ button), exits the configuration menu (same effect as pushing the „CANCEL“ button). c) Menu buttons: The function of the menu buttons depend on the displayed symbol above the corresponding button. The left menu button switches between the turnout mode and the loco mode. d) Change of direction: In the loco mode this button changes the direction of travel of the selected loco. e) Stop: This button activates the emergency stop. This function is independent of the current operating mode. f) Function buttons: In loco mode these buttons serve to switch the loco functions 1-10 (resp. 11-20 when “Shift” is activated). In the loco list you can activate a filter according to a character string. Here the letters below the corresponding buttons are selected. g) Light button: In loco mode this button switches the headlights (function 0) of the selected loco on or off. h) Shift button: In loco mode this button switches the function buttons from function 1-10 to function 11-20. i) Power switch: With the power switch the ECoSControl Radio is turned on. In the ON position the slide switch points towards the centre of the ECoSControl Radio. Figure 11 c) RE-insert the module back into the extension slot as shown in figure 12. Figure 12 8 Settings at the command station a) f) b) g) d) c) h) e) i) Figure 13 8. Settings at the command station 8.1. Assigning locos to the throttle Before you can control locos and accessories with the ECoSControl Radio you must set a few parameters on your command station. First of all you must assign the desired locos and accessories to the ECoSControl Radio. • Select the set-up symbol from the upper tool bar. Then a menu dialog opens. You can see several pictograms at the left side. Each ECoSControl throttle can control up to 100 locos. Each throttle can control different locos. Thus each engineer can run his own locos. Mark the desired ECoSControl Radio in the list “Devices on ECoSLink“ and call up the editing function. f) • Select the third pictogram from the top. It opens the dialog window “Devices in the system“. a) c) d) b) e) Figure 15 a) List with all locos b) List of locos assigned to this ECoSControl Radio a) b) c) d) e) Figure 14 One ECoSControl Radio base station and six ECoSControl Radio throttles will be displayed. They correspond with the six possible users. If “Receiver module” is not displayed in the list it is either not plugged in correctly or your command station has a firmware lower than 3.0.0. Check the firmware version respectively the installation of the receiver module. c) Adds one loco to the ECoSControl Radio d) Deletes one loco from the ECoSControl Radio e) Move the loco marked on the right upwards or downwards f) Extended settings •Select the desired loco from the left list and add it by pushing onto the symbol c). •Select locos not required any longer in the list on the right and push onto the symbol d). 9 Switching on ECoSControl Radio •Use the same procedure for the other locos you want to add to the ECoSControl Radio. Depending on the number of ECoSControl Radio throttles this assignment must be carried out for each throttle. 8.2. Assign turnout panel to throttle You can assign up to four of the 74 interlocking panels to each ECoSControl Radio throttle. Thus you can control up to 64 accessories (4 panels with 16 addresses each). Click onto “Extended” in the loco assignment menu. You can select the panels in the open window. 9. Switching on ECoSControl Radio As soon as the command station is turned on and ready for operation and provided you have assigned locos and accessories to the ECoSControl Radio you may switch on the ECoSControl Radio. After the ECoSControl Radio has been switched on it searches for a receiver module on the assigned radio channel. Ex works radio channel 1 is active. If you have set a different channel at the ECoS then you have to set the appropriate channel by pushing the corresponding channel selection button. After the ECoSControl Radio has detected a receiver it will attempt to log on. If this is successful then the handheld ID (HID) will be shown on the display for a short time. This tells you which loco and turnout list will be used for this mobile throttle. For the handheld ID 1 the list ECoSControl Radio 1 will be used, for ID 2 the list ECoSControl Radio 2 and so forth. Figure 16 8.3. Radio channel of the base station There is a choice of 4 radio channels supported by the base station. The base station and the throttles must be set to the same radio channel. Thus up to four separate ECoSControl radio systems can be operated within the same radio range. Select “ECoSControl Base“ in the list “Devices on ECoSLink“. Then you can set the radio channel in the open menu. Figure 18 Figure 17 8.4. Changes during operation Of course you can change the assigned locos or accessories in the above mentioned menus at any time. There is no need to switch off the ECoSControl Radio for these changes. The changes will be detected and transmitted to the ECoSControl Radio and will be available at the ECoSControl Radio within a short period of time. The same is true for changing parameters of locos such as their names, maximum speed, etc. 8.5. Saving operating data All assigned locos and accessories are stored in the ECoSControl Radio in such a way that they will not be lost when the device is turned off. All data is saved automatically. Whenever the device is turned on again data synchronization takes place automatically. In order to speed up this process, only actual changes will be transmitted that were entered on the ECOS while the ECoSControl Radio was switched off. 10 If another ECoSControl Radio with the same handheld ID is already operating with the ECoS then this fact will be displayed. Simply set another handheld ID for the second ECoSControl Radio since it is not possible to operate two ECoSControl Radio throttles with the same ID and the same ECoS simultaneously. The ECoSControl Radio will now transmit all data for the locos and accessories assigned to this throttle (this handheld ID). This process may take a few moments. ECoSControl Radio informs you about the progress. Once data transmission is completed the ECoSControl Radio will either display the most recently controlled loco or changes over to the loco selection menu. Running locos and consists 10. Running locos and consists 10.1.2. Sorting locos ECoSControl Radio always starts in the loco control mode with the most recently active loco. Should this loco not be available any longer or if no loco has ever been selected then the ECoSControl Radio starts up with the loco selection menu. Here you can change the sequence of locos in the loco selection list. 10.1. Selecting a loco 10.1.1. Loco selection menu a) b) c) Figure 20 f) g) d) c) e) b) a) Figure 19 After pushing the loco selection button the loco selection menu will be displayed. You can page through the loco list with . a) List of all locos assigned to this ECoSControl Radio throttle. b) Confirm choice of loco. The loco will be called up. Alternatively this can also be accomplished with “–“. c) Change the sorting of the loco list: more details in chapter 10.1.2. d) Accessory mode: Here you can switch over to controlling accessories. e) Configuration menu: Here you can adjust settings of the ECoSControl Radio throttle. f) Number block: You can filter the loco list in the loco selection window, similar to the contact list in a mobile phone. You can enter the filter word above the number block for this purpose. More details in chapter 10.1.3. g) Shift button: Switching the quick selection mode on and off. More details in chapter 10.2. a) Alphabetical sorting b) Sorting according to the ECoS loco lists (1-3) c) Sorting as per the ten locos controlled most recently. The alphabetic sequence is set as the default sequence. The sequence is saved and remains in the memory even after turning the unit off and on again. Depending on which mode of sorting is active the following symbols appear in the loco selection list: The digit describes the loco list to which the loco is assigned. 10.1.3. Filtering locos For a quicker selection of locos you can filter the list with the aid of the number buttons. a) b) Figure 21 Example: Button “3” is also reserved for the letters d, e and f. Push button “3” one time. After a short while the cursor jumps to the next letter. Push button “4” three times in quick succession then the letter “i” will be added to the filter. a) The filter mode is cancelled b) Deletes the last letter of the filter word When the filter is active the filter word appears in inverted type font at the top edge of the display and all locos that have the filter word somewhere in their name will be shown. 11 Operate locos 10.2. Quick selection mode With the aid of the quick selection mode you can assign the 10 number buttons to one loco each and thus call up these locos very quickly. You enter the quick selection mode by pushing the shift button while in the loco selection menu. Then you push one of the numbers from 0-9 in order to directly call up the linked loco. j) i) a) c) b) o) Figure 22 Entf. a) Currently linked quick selection button b) Deletes the link between loco and quick selection button c) Exits the quick selection mode 10.2.1. Assigning a loco to a quick selection button In order to link a loco to a quick selection button you first have to select this loco. Then push and hold (!) the desired number button for about 3 seconds. A number next to the loco name indicates the new quick selection button. Entf. 10.2.2. Deleting a quick selection button Select the desired loco for which you want to delete the quick selection button and push that button. 10.3. Running locos In the window for operating locos the ECoSControl Radio displays the most important information for the currently selected loco: a) Plain text name of the loco: The name that you have given that loco in the ECoS. If the name is longer that the space available in the display then the name will be scrolled. b) Symbol: The symbol assigned to that loco. Not all symbols are available on the ECoS. c) Speed steps / maximum speed: The maximum number of speed steps of the loco (subject to the data format and the protocol). d) Speed mode: If a maximum speed has been defined for that particular loco in the ECoS then the speed will be displayed in „km/h“, otherwise “FS“ for speed steps. e) Currently set speed step / speed of the loco: Either the current speed step or the speed in km/h will be displayed. f) Current direction of travel. g) Shift: Switches on and off the “Shift” mode. Normally the functions 1-11 are displayed and in “Shift” mode the functions 11-20 can be seen. 12 a) g) h) m) b) f) d) e) l) c) k) p) n) Figure 23 h) Status of the functions of the currently controlled loco: The current status (on or off) of each button (headlights, F1 to F10, resp. F11 to F20) is indicated by a square. A small square means the function is turned off while a larger one means the function is on. The squares are arranged like the buttons of the number keypad in order to assure a quick relationship between the squares and the function buttons. Please note that the number of the displayed squares depends on the setting of the loco in the ECoS: Only the functions assigned in the ECoS will be displayed. i) Number block (Fig. 22): Here you can switch the functions 1-10 resp. 11-20 (when “Shift” mode is active). Subject to the settings of the function buttons on the ECoS they are either programmed to act as momentary action buttons (function is only active as long as the button is pressed) or as continuous switches (function changes its status every time the button is pressed). j) Lighting button (Fig. 22): Switches the function 0 (headlights) of the loco. This button is not influenced by the “Shift” mode. k) Configuration menu: Here you can change the settings of the ECoSControl Radio. l) Loco selection: Here you open the loco selection window. m)Accessory window: Here you can switch over to the control panel for accessories. n) Most recent loco: Here you can call up the most recently controlled loco (e.g.: change of speed or activating a function). o) Changing direction of travel (Fig. 22): By pressing the changeof-direction-button you will change the direction of travel. In the configuration menu you can set if the speed should go to 0 (with the programmed deceleration) before changing direction. p) Display of reception Switching accessories You can adjust the speed of the selected loco by pressing (—˜). The further you push the joystick outwards the faster the loco will change its speed. With (•–) you can page forwards and backwards in the loco list. The sequence corresponds with the sorting criteria selected in the loco list. ECoSControl Radio takes over all settings regarding function buttons, km/h display, loco name, symbol etc. from the ECoS. These settings can only be adjusted on the ECoS. 10.4. Loco is blocked If you want to call up a loco that is already being controlled from the ECoS or another throttle then you cannot operate this loco with the ECoSControl Radio. This status is indicated by the blinking speed indicator. In that case you must call up another loco on the ECoS or on another handheld throttle. If you then adjust the speed setting of that loco on your ECoSControl Radio or if you activate a function then you can take over control of that loco with your ECoSControl Radio. You can block this behaviour by activating the option “Take over loco from another controller” on the command station (also refer to the ECoS manual, chapter 21.2.1.). e) Opening the loco menu: If a loco has been controlled previously then this loco will be displayed, otherwise the loco list appears. f) Change to another interlocking panel: Selects one of the other three linked panels. g) Configuration menu: Here you can adjust certain settings of the ECoSControl Radio. h) Switch accessories 11.2. Switching accessories If you push the button h) or the change-of-direction button while an interlocking panel is open then accessories with two aspects (e.g.: lights on/off or signals Hp0/Hp1) will change immediately to the other aspect. Depending on the settings on the ECoS the function will act as a momentary action (function is only active as long as the button is pressed, e.g.: uncoupling ramp) or as continuous output (function changes to the other aspect whenever this function button is pressed, e.g.: turnouts and signals). If the accessory has more than two aspects (e.g.: three-way turnout) then a pop-up window with a choice list will appear. 11. Switching accessories & Routes ECoSControl Radio enables you to display and switch the accessory decoders linked to 4 of the 74 interlocking panels of the command station. Since each panel may contain up to 16 accessories you can switch a total of 64 accessories resp. routes with your ECoSControl Radio. 11.1. Interlocking panel window If the button “Accessories” is pressed on any other window then the ECoSControl Radio initially always displays the interlocking panel that was established first. You can select the desired accessories by moving to () and () with the joystick. Figure 25 You can choose the desired aspect with (). You switch the accessory with the “OK“ button or exit the window by pressing the “CANCEL” button. 11.3. Select an interlocking panel When pressing button f) (Fig. 24) on the main interlocking window the list of linked interlocking panels will appear. The currently selected interlocking panel is marked with a star. You can select the desired entry with () and confirm it with the „OK“ button, or exit by pressing the "CANCEL" button and return to the main interlocking window. a) b) e) f) d) g) h) c) Figure 24 a) Name and number of the currently displayed interlocking panel b) Occupied fields in the panel are indicated by squares. The selected position is highlighted. c) Detailed representation of the selected accessory. d) Name of the selected accessory. Figure 26 13 Emergency stop & Configuration menu 12. Emergency stop 14. Configuration menu In case of danger you can trigger an emergency stop at any time. The emergency stop turns off the track power. You can readjust speed settings and other functions as usual during the emergency stop. These changes will be transmitted to the loco only once the emergency stop has been cancelled and track power is turned on again. Some settings can be made directly on the ECoSControl Radio. Simply open the configuration menu that can be accessed from any window as described above. You can open the configuration menu from various windows by pressing the button . Figure 28 Figure 27 In order to activate the emergency stop briefly press the STOP button. The text “STOP” will appear at the top of the display. The emergency stop will be taken over by the ECoS and any devices connected to it and can be cancelled by pressing the STOP button once again. 13. Battery life on one charge With fully charged batteries you can operate the ECoSControl Radio for up to 8 hours. The actual time until you need to recharge the batteries depends greatly on the radio environment and on how intensive your train operations are. Empty batteries are indicated by the ECoSControl Radio with the battery symbol on the display. It may be impossible to switch on the ECoSControl Radio once the batteries are completely empty. Perhaps the background lighting may come on for a moment. In this case simply recharge the batteries. The desired appearance can be activated with (). You can open the settings for the option with the “OK“ button or exit with the “CANCEL” button in order to return to the previously displayed window. 14.1. Language The software is available in German and English. You can select the desired language with (). 14.2. Contrast Here you can adjust the contrast of the LCD display. With () you can set the contrast to the desired level. The contrast also depends on the visual conditions of the surroundings such as incidence of light but also the temperature. 14.3. Radio channel Here you select the desired radio channel. The currently active radio channel is marked with a star. The radio channel setting must correspond with the setting of the radio channel of the ECoS. If you change the channel, the ECoSControl starts up again and logs onto the new channel. Figure 29 14 Joystick 14.4. Handheld ID (HID) Here you assign the handheld ID to the throttle. You can simultaneously operate up to 6 ECoSControl Radio throttles with one receiver module. 14.8. Joystick In this menu you may choose between several options regarding the joystick: Figure 32 Figure 30 Each ECoSControl Radio has its own independent list of assigned locos and interlocking panels. The handheld ID determines which loco list and which interlocking panels will be transmitted to the ECoSControl Radio. How these lists are assigned is explained in the chapter “Settings on the ECoS”. After changing the handheld ID the ECoSControl Radio starts up again and logs on with its new HID. 14.5. Info In this menu you can read out information about your ECoSControl Radio. This info is important in case you want to direct any questions to the ESU support department. •Joystick repetition rate: If the joystick is activated in the loco window, the speed will change. Here you can set the rate of repetition of this change. Lower values bring about faster repetition; the maximum speed will be reached faster. •Joystick delay: When activating the joystick the time between the initial change and the following changes will vary. This difference can be adapted to the optimal value of your choice. Here lower values mean a shorter waiting time. •Joystick test: Here you can test the settings. There is a speed bar for testing the values for delay and repetition. The speed of the currently controlled loco is not changed in the test window. You can also check the joystick function with the crosshairs. Due to manufacturing tolerances it is not always possible to reach each end point of the crosshairs. 14.9. Resetting the speed Here you can program if you want to decelerate to zero when changing direction. 14.10. Sequence for keyboard entries Here you can predetermine if when pressing a key with a letter you want to start with this letter or rather with the number. The best option depends on whether you want to predominantly enter letters or numbers. Please also refer to chapter 10.1.3. Figure 31 UID: Serial number of your ECoSControl Radio HID: Handheld ID. This number (values from 1 to 6) is assigned when registering. SW Ver: Software version of the mobile part of the ECoSControl Radio. 14.11. Signal power In this menu the quality of the radio transmissions is stated. 14.6. Backlight duration In order to prolong the operating time of the ECoSControl Radio the background lighting is turned off after a period of inactivity (no buttons pressed, no movement of the joystick). Here you can set the time after which the background lighting extinguishes. 14.7. Backlight brightness In this menu you can adapt the brightness of the background lighting to the surroundings. 15 ESU Support & Registration 15. ESU Support & Registration Should you have any special questions regarding your ECoSControl Radio or your ECoS command station you are welcome to enter them in our online forum. All you have to do is register before entering your comments. 15.3. 15.3. Technical hotline Your model train or hobby shop is your competent partner for all your questions regarding ECoSControl Radio as well as model trains in general. You may also post your questions regarding ESU products in the Support Forum on our homepage under 15.1. Registration We want to support you in the best possible way. Therefore we kindly ask you to establish an “access account” on our website at http://www.esu.eu/register. What advantages does registration offer? When registering you enter the serial number of your ECoS. Thus your ECoS is automatically registered with ESU. Should there be any software or other problems we can then inform you directly. The most efficient way is doing this via the internet. In addition after registering you will get access to the latest software versions. Registered users (!) can download such updates free of charge at any time. All following software updates for the ECoS are free of charge. Guaranteed, you can rely on it. Of course, you can also participate in the ESU support forum. 15.2. Forum Since its introduction in autumn 2006 the ESU support forum has grown to be one of the most successful internet platforms. In this forum you may ask any questions about ESU products. Our support team will endeavour to resolve all problems together with you. That way everyone benefits from the common knowledge, since other users can also provide answers. There is a special section of the forum reserved solely for the owners and users of an ESU ECoS resp. ECoS with update 3.0.0. This „exclusivity“ assures that only customers who really own an ECoS can take part in the discussions. The quality of the answers in this forum is accordingly high. Figure 33 16 www.esu.eu The support forum is the preferred method for getting quick and competent answers. In the “Support” area on our homepage you will also find many hints regarding FAQ and even feedback from other users. Of course you can also reach us using the more classical ways. For enquiries please use either email or fax and we will reply within a few days. Please do not forget to mention a return fax number or email address. Please call our hotline only in case of complex enquiries that can’t be dealt with by email or fax. The hotline is often very busy and you may encounter delays. We are here to assist you. By phone: By fax : By email: By post: ++49 (0)700 – LOKSOUND ++49 (0)700 – 56576863 Tuesday & Wednesday from 10.00 am to12.00 am ++49 (0)700 - 37872538 [email protected] ESU GmbH & Co. KG - technischer Support Industriestrasse 5 D-89081 Ulm Germany www.esu.eu Radio system: 2.4GHz band FHSS, integral areal 4 independent frequency tables (channels) Bi-directional transmission, 576kBit Range: Up to 100 m Up to 6 ECoSControl handheld throttles per receiver module ECoSControl Radio: Storage capacity for 100 locos Storage capacity for 64 accessories Operation with rechargeable batteries or AAA batteries Full graphic FSTN LCD display with 128x64 pixels Receiver module: Compatible with ESU ECoS Power supply from ESU ECoS ________________________________________________________ 16.1. Technical data 16. Appendix Return note 1. Customer data (please write in block letters) Name: .......... Surname: ..... Street: .......... ZIP code/City: Country: ...... Email: .......... Phone: ......... Date: ........... Signature: û 2. Serial number of your ECoSControl Radio ID-Code: ..... 0x 3. Class of failure display error mechanical damage software radio problems control dial No picture (no reaction) joystick/key pad ________________________ 4. Failure description (if necessary please use a supplemental sheet) 5. Sales receipt / Proof of purchase Please add it to your reclamation! No warranty without receipt! 6. Address of your retailer Retailer´s stamp or address 17 18 Warranty Certificate 17. Warranty Certificate 24 Months warranty form date of purchase Dear customer, Congratulations on purchasing this ESU ECoSControl Radio. This quality product was manufactured applying the most advanced production methods and processes and was subject to stringent quality checks and tests. Therefore ESU electronic solutions ulm GmbH & Co. KG grants you a warranty for the purchase of ESU products that far exceeds the national warranty as governed by legislation in your country and beyond the warranty from your authorised ESU dealer. ESU grants an extended manufacturer’s warranty of 24 months from date of purchase. 17.1. Warranty conditions This warranty is valid for all ESU products that have been purchased from an authorised ESU dealer. Any service, repair or replacement under this warranty requires proof of purchase. The filled in warranty certificate together with the receipt from your ESU dealer serves as proof of purchase. We recommend keeping the warranty certificate together with the receipt. In case of a claim please fill in the enclosed failure report card as detailed and precise as possible and return it with your faulty product. Please use the appropriate postage when shipping to ESU. 17.2. Extent of warranty / exclusions This warranty covers the repair or replacement free of charge at the discretion of ESU electronic solutions ulm GmbH & Co. KG of any faulty parts that are caused by design faults or faults in production, material or transport. Any further claims are explicitly excluded. The warranty expires: 1. In case of wear and tear due to normal use. 2. In case of conversions of ESU – products with parts not approved by the manufacturer. 3. In case of modification of parts. 4. In case of inappropriate use (different to the intended use as specified by the manufacturer). 5. If the instructions as laid down in the user manual by ESU electronic solutions ulm GmbH & Co. KG were not adhered to. There is no extension of the warranty period due to any repairs carried out by ESU or re-placements. You may submit your warranty claim either with your dealer or by shipping the product in question with the warranty certificate, the receipt of purchase and the fault description directly to ESU electronic solutions ulm GmbH & Co. KG at: Electronic solutions ulm GmbH & Co. KG - Garantieabteilung Industriestrasse 5 D-89081 Ulm 19 ECoSControl Radio ESU P/N 04909-08369 20