Download Arduino MP3 Shield User Guide
Transcript
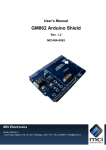
www.elechouse.com le ch ou se .c om Arduino MP3 Shield User Guide w w w .e Instruction Arduino MP3 Shield is a high quality MP3 module, supporting standard MP3 and WAV format audio files. It also supports three kinds of storage devices, including an onboard SPI-Flash, external SD Card and U-Disk. ou se .c om www.elechouse.com The Arduino MP3 Shield has an onboard 3W Class-D stereo audio amplifier which could drive 4ohm load such as loudspeaker. le ch The Arduino MP3 Shield has seven buttons and a UART interface, that is to say user has two ways to control the module flexibly. The UART interface is connected to the Arduino hardware UART by default. Since most Arduino boards have only one UART interface, this module’s UART interface can be redefined to Arduino D7 (TX) and D8 (RX) through the jumpers on board. With SoftSerial lib, Arduino could also send data to this module. .e We tested with 8G SDHC card and 16G U-disk. It works in perfect compatibility. We haven’t tested larger SD and U-disk yet. w Feature Plug in and play for Arduino Control by Serial UART interface or keys onboard. Directly drive 32ohm headset. On-board Audio Amplifier to drive 3W/4Ω external loudspeaker. 32 levels adjustable volume. Support FAT16/FAT32 file system. Support up to SD/SDHC card and U-Disk. On board 64MBit SPI-FLASH. Support copying audio files from SD card or U-Disk to SPI-FLASH. Supporting Sleep Mode. Support 16K~320Kbps MP3 files and 8K~44.1KHz sampling rate WAV files (SPI-FLASH only supports MP3 format) w w Parameter Power Supply: 4.5V~5.5V, typically 5V. Interface: UART (5V TTL) and 7 buttons. Size: 47mm x 53mm. www.elechouse.com LED There are 2 LEDs on the board. Power indicating: the LED is always on when power is supplied. State indicating: LED is on when playing music, blinking when copying files to onboard SPI-FLASH. Function Description .e le ch ou se .c om On board Audio Amplifier could drive up to 3W/4Ω external loudspeaker. Infact, we test it with 5W/8Ω loudspeker, and it works well. 1 w w w U VCC5V G N 1 SCL 2 SDA 3 A R E F 4 G 1 9 2 0 2 1 2 2 2 3 N 5 N C 4 2 5 2 6 3 1 2 7 RESET ~ 1 1 3V3 ~ 1 0 8 9 5 2 1 6 IOREF D D V ~ G N D G N D 2 8 2 9 0 SOFT_SERIAL_TX 1 1 SOFT_SERIAL_RX 1 2 1 3 1 4 1 5 SOFT_SERIAL_TX 1 6 MP3_RXD 1 7 T X 1 8 R X 7 ~ 7 1 8 VIN 2 AMP_EN_CRL 9 A 0 A 1 A 2 6 ~ 5 4 J 3 ~ 3 1 3 2 A 3 A 4 1/TX A 5 0/RX 2 3 0 2 J 1 JUMPER MP3_TXD SOFT_SERIAL_RX JUMPER Arduino ou se .c om www.elechouse.com By default, the RX Jumper and TX Jumper are connected to hardware UART pins on Arduino. You could change it with soldering to ol. If you bridge the lower two pads, Arduino D7 and D8 need to serve as RX and TX. You could find more information in latter description. le ch The amplifier could be controlled by Arduino. By default, it is enabled and not controlled by Arduino. If you need, please bright the Amplifier Control pads. More information will be explained later. CONFIGURATION DESCRIPTION Details: w w spxx// clxx// cfxx xx xx xx// w .e Arduino MP3 Shield configuration is stored in a file named “iSound.mp3” (Note that in fact it is not an audio file but a txt file. You could open it with software such as Notepad). The format of the “iSound.mp3” is as bellows: spxx// Play settings when powered on. sp must be lower case letters, xx must be 00 or 01. 00 means “Do not play automatically when powered on”. 01 means “Play automatically when power on”. clxx// Play Mode Settings. cl must be lower case letters, xx must be 00, 01, 02 or 03. 00 means Play single music, 01 means Repeat track, 02 means Repeat all, and 03 means Play randomly. cfxx xx xx xx// User-defined data. User can read these four bytes data through UART interface. Refer to Get user-defined data. “iSound.mp3” is a file where you could configure the Arduino MP3 Shield. Follow the steps below to configure it: Create a text file named “iSound.mp3” on your PC. Usually open the Notepad in Windows (on Mac or Linux, see the note), create a new file, enter the data in the rule above, and save as mp3 file. www.elechouse.com Copy the “iSound.mp3” to U-Disk or SD card. Make sure that iSound.mp3 is the last file copied to U-Disk or SD card. This could ensure that at next step, iSound.mp3 file is the last file which is written to the flash. Use COPY function to download music files and the “iSound.mp3”configuration file to the flash. All configuration information is saved in the SPI-FLASH. See COPY MUSIC FROM SD-CARD/ U-DISK TO SPI-FLASH “iSound.mp3” Example: We need configure our Arduino MP3 Shield to let it “Play automatically when powered on” and “Repeat all music” and save our user-defined 0x12 0x34 0x56 0x78. We need edit iSound.mp3 like this: sp01// om cl00// cf12 34 56 78// Note: for MAC or Linux users, there will be a problem. EOL (End of line) symbol on Windows OS is “\r\n”. But on MAC or Linux, it is ou se .c “\n”. The following is an example showing the difference. We make the newline EOL visible in Notepad++ On Windows OS: le ch On MAC/Linux: w w w .e The iSound.mp3 should end with a Windows EOL symbol. That is“\r\n”. We recommend Notepad++. You could change the EOL symbol. www.elechouse.com COPY MUSIC FROM SD-CARD/ U-DISK TO SPI-FLASH The Arduino MP3 Shield support 3 kinds of storage media, SD card, U-Disk and SPI FLASH. The three kinds of memory have the following priority (High first): SPI-FLASH, SD card and U-Disk. There are two methods to copy music from SD-CARD/U-DISK: through COPY button, or UART interface. Copy Music through COPY button Follow the following 5 steps: Create the “iSound.mp3” configuration file, copy music files to SD card/ U-DISK, then copy ” iSound.mp3” to SD card/ U-DISK(this can make sure the “iSound.mp3” is the last file in SD card/U-DISK). 2. 3. 4. Power off Arduino MP3 Shield. Press COPY button and hold. Power on Arduino MP3 Shield, and hold COPY button for about five seconds until the state indicating LED starts blinking. 5. Release the Copy key and wait state indicating LED turns off. om 1. Copy Music through UART command ou se .c In fact, the configuration file could be stored in SPI-FLASH until you download another “iSound.mp3” file to it. That means, you only have to download the configuration file once. However, each time you download music files to SPI-FLASH, old music files in the SPI will be erased. You could also copy files to SPI-FLASH by sending command via UART Interface le ch See Copy File from SD card to SPI FLASH and Copy File from U-Disk to SPI FLASH. NOTE The music files copied to the SPI-FLASH has the same order with those in the SD card/U-Disk. The SPI-FLASH only has 8MB space. Each time you copy files to SPI-FLASH, the first file will be copied anyway, even it is larger than 8MB, of course resulting in bad file in the SPI-FLASH. However, if there is not enough space for the second file, it will not .e 1. 2. Music Order w w w be copied into SPI-FLASH. For example, we have many music files in the SD card, more than 8MB, the first file size is 3MB, and the second is 4MB, and the third one is 2MB. When we do copy operation, only the first two file can be copied to the flash. You can send command to check the file numbers in the SPI-Flash. See Check Total Number of SPI FLASH Files . All the music files must be stored in the root directory of SD or U-disk. Any file name is not restricted as long as it obeys FAT file system. FAT32 file system has a rule. File order is decided by the file address. File which is created or copied into file system earlier has a higher priority. The Arduino MP3 Shield plays music in that order. To control the music order in which Arduino MP3 Shield plays, we need to control the order in which the music files are saved in SD or U-disk. For example, you could save music one by one to SD card. You save B.mp3 first and then save A.mp3. By default, it will play B.mp3 fore A.mp3 file. There is a simple way to save music as desired in bulk: Create a folder on PC and copy all music files to the folder. Add prefix 0000~9999 to the file names like 0000-God is a girl.mp3, 0001Baby.mp3, 0002-Set Fire To the Rain.mp3 and so on. Then reorder the music by name. Select all files (CTRL+A may help), then copy (CTRL+C may help), and paste these file to the SD card/U-disk. In this way, the music files will be stored in the desired order. www.elechouse.com KEY Standard Key OPERATION FUNCTION SHORT LONG SHORT LONG SHORT LONG SHORT LONG SHORT LONG PLAY PREV NEXT VOLVOL+ Play/Pause music Stop playing Previous music Fast forward (when playing music) Next music Fast backward(when plying music) Volume Volume- fast Volume + Volume + fast COPY and SLEEP ou se .c The two bronze head button on the upper left corner are COPY and SLEEP button. om KEY COPY Button The basis function of COPY button is copy music files to SPI-FLASH. For more information, please refer to Copy Music through COPY button. Another function of this COPY button is to play next. It functions while this module is the stage of playing music. le ch SLEEP Arduino MP3 Shield can sleep or wake up by SLEEP button. .e SLEEP: Press SLEEP button and hold 2 more seconds. WAKE UP: Press SLEEP button to generate a high level pulse to wakeup Arduino MP3 Shield. w JUMPERS w w On the bottom of the Arduino MP3 Shield, there are three jumpers, TX Jumper, RX Jumper, and Amplifier Control Jumper. They are used to select alternate function of Arduino MP3 Shield. TX and RX Jumper www.elechouse.com By default, the Arduino MP3 Shield connects Arduino board with hardware UART through the jumper. To change the connection, disbridge upper two pads and bridge the two below. Then on this module, D7 becomes TX, D8 becomes RX. While programming with SoftSerial library on Arduino, Arduino D7 should serve as RX and Arduino D8 as TX. Amplifier Control Amplifier Control pin is used to enable or disable the on board amplifier. By default, the amplifier is enabled, and the control pin is disconnected. To control the amplifier, bridge the two pads of the Amplifier Control Jumper in the picture above. Then the control pin is connected to Arduino D9. Set D9 high to enable the on board amplifier, low to shutdown the amplifier. Command Description om Through UART interface, user can send command to select music, select storage, set play mode, inter-cut music, music combination play and so on. UART Configuration Baud Rate: 9600bps Parity bit: None Start bit: 1 Data bit: 8 Stop bit: 1 ou se .c UART setting: le ch Command Format END 0x7E .e START LENGTH COMMAND PARAMETER 0x7E NOTE: LENGTH value is the total count of areas including LENGTH, COMMAND and PARAMETER. w Writing Command w w Writing command means commands which tell Arduino MP3 Shield to do something. After each command executed correctly, the command code will be returned. Play SD Card File Run this command to play selected SD card file. START LENGTH COMMAND TRACKS HIGH TRACKS LOW END BYTE BYTE 0x7E 0x04 0xA0 XX XX 0x7E TRACKS HIGH BYTE and TRACKS LOW BYTE are HEX numbers. They refer to the music file which you want to reply. This is not the file name, but the file’s order number. We have explained the file order above. For example, if you want to play the second music, TRACKS HIGH BYTE is 00, and TRACKS LOW BYTE is 02. Play SPI FLASH File Run this command to play selected SPI FLASH file. START LENGTH COMMAND 0x7E 0x04 0xA1 TRACKS HIGH BYTE XX TRACKS LOW BYTE XX END 0x7E www.elechouse.com TRACKS HIGH BYTE and TRACKS LOW BYTE are the same with 0xA0 command. Play U-Disk File Run this command to play selected U-Disk file. START LENGTH COMMAND TRACKS HIGH BYTE 0x7E 0x04 0xA2 XX TRACKS HIGH BYTE and TRACKS LOW BYTE are the same with 0xA0 command. TRACKS LOW BYTE XX END 0x7E Pause OR Play Run this command to switch between pause and play. Stop Playing Run this command to stop playing. START 0x7E LENGTH 0x02 le ch Next Music Run this command to play next music. LENGTH 0x02 END 0x7E COMMAND 0xA4 END 0x7E COMMAND 0xA5 END 0x7E COMMAND 0xA6 END 0x7E w .e START 0x7E Previous Music COMMAND 0xA3 om LENGTH 0x02 ou se .c START 0x7E w w Run this command to play previous music. START 0x7E LENGTH 0x02 Set Volume Run this command to set volume. START LENGTH 0x7E 0x02 The volume value is between 0x00~0x1f. COMMAND 0xA7 VOLUME LEVEL 0x00~0x1F END 0x7E Set Play Mode Run this command to set play mode. START 0x7E LENGTH 0x02 COMMAND 0xA9 PARAMETER 0x00 Single Play END 0x7E www.elechouse.com 0x01 Repeat single music 0x02 Repeat all 0x03 Play random Parameter: 0x00: Play one music and stop 0x01: Repeat playing one music 0x02: Repeat playing all music 0x03: Play music randomly We have introduced the iSound.mp3 file to configure the module. What is the difference? Well, configuration in iSound.mp3 file will be loaded each time while this module is powered on. It means that configuration in iSound.mp3 will be saved after powered of f. But the setting by 0xA9 command will not be kept while powered off. Copy File from SD card to SPI FLASH om Run this command to copy file from SD card to SPI Flash. PARAMETER 0x00 END 0x7E ou se .c START LENGTH COMMAND 0x7E 0x03 0xAA This command will try to copy all the files in SD card to SPI FLASH. The Arduino MP3 Shield will return 0xAA immediately after receiving this command correctly. At the same time the BUSY LED blinks. If copy successfully, it returns 0xAA 0x00. If failed then return 0xAA 0x01. After copy finished, BUSY LED turn off. That is to say, in a successful copy operation, you should receive 0xAA 0xAA 0x00. Copy File from U-Disk to SPI FLASH le ch Run this command to copy file from SD card to SPI Flash. START LENGTH COMMAND 0x7E 0x03 0xAB This command will try to copy all the files in U-disk to SPI FLASH. PARAMETER 0x00 END 0x7E w w Reading Command w .e The Arduino MP3 Shield will return 0xAB immediately after receiving this command correctly. At the same time the BUSY LED blinks. If copy successfully, it returns 0xAB 0x00. If failed, it returns 0xAB 0x01. After copy finished, BUSY LED turn off. That is to say, in a successful copy operation, you should receive 0xAB 0xAB 0x00. Reading command means commands which check the state of Arduino MP3 Shield. Check Volume START 0x7E LENGTH 0x02 COMMAND 0xC1 END 0x7E Return: COMMAND 0xC1 VOLUME 0x00~0x1F Check Work State START 0x7E Return value: LENGTH 0x02 COMMAND 0xC2 END 0x7E www.elechouse.com COMMAND 0xC2 RETURN VALUE 0x01 Playing 0x02 Stop 0x03 Pause Check Total Number of SPI FLASH Files START 0x7E Return value: LENGTH 0x02 COMMAND 0xC3 RETURN VALUE File numbers(2Bytes) om COMMAND 0xC3 START 0x7E Return value: LENGTH 0x02 END 0x7E RETURN VALUE File numbers(2Bytes) Check Total Number of U-Disk Files LENGTH 0x02 w w w .e START 0x7E Return value: le ch COMMAND 0xC4 COMMAND 0xC4 ou se .c Check Total Number of SD Card Files COMMAND 0xC5 END 0x7E COMMAND 0xC5 END 0x7E RETURN VALUE File numbers(2Bytes) Check Current Playing File START 0x7E Return value: LENGTH 0x02 COMMAND 0xC6 END 0x7E COMMAND TRACKS HIGH BYTE TRACKS LOW BYTE 0xC3 XX XX TRACKS HIGH BYTE and TRACKS LOW BYTE are the same with 0xA0 command. Please refer to Command 0xA0 Get user-defined data START 0x7E Return value: LENGTH 0x02 COMMAND 0xC7 COMMAND 0xC7 RETURN VALUE XX XX XX XX (4 bytes) END 0x7E www.elechouse.com NOTE: Return value is always 5 bytes, one byte COMMAND, and 4 bytes data. If the iSound.mp3 “cf “ string don’t specify 4 bytes data, then the return value will be 0xFF. Reference CONFIGURATION DESCRIPTION. .e le ch ou se .c om Physical Dimension Code w w w Download the library: MP3_shield_library.zip Disclaimer and Revisions The information in this document may change without notice. Please visit www.elechouse.com for new information. Revision History Rev. Date Author Description A B C July 3 , 2012 August 23, 2012 th Oct. 28 , 2012 Lich Wilson Wilson Initial version Add the mapping pin Add note for the iSound file rd


