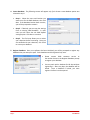
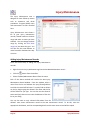
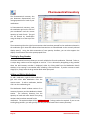
1
User Manual Version 8.0 Copyright Copyright © 2006-2014 FlanTech Inc. All rights reserved. Trademarks SIMS is a trademark of FlanTech Inc. Microsoft Windows and Windows NT are registered trademarks of Microsoft Corporation. Other brand and product names are registered trademarks or trademarks of their respective holders. Disclaimer and limitation of liability FlanTech Computer Services assumes no responsibility for any damage or loss resulting from the use of this manual. FlanTech Computer Services assumes no responsibility for any loss or claims by third parties which may arise through the use of this software. Be sure to make backup copies of all important data on other media to protect against data loss. Important: Please read the SIMS End User Software License Agreement before using the accompanying software program(s). Using any part of the software indicates that you accept the terms of the SIMS End User Software License Agreement. Software download available The latest version of SIMS is available for download from our website at http://www.flantech.net/sims_download.html . A password is required in order to install the download; please contact technical support for more information. Page ii Copyright Introduction The field of sports medicine has been expanding in its ability to provide quality care for both the athletic and non-athletic populations. Professionals from several different medical and paramedical disciplines have come to the forefront as leaders in the early recognition and care of athletic injuries. As a result of the close cooperation among these various professions, recovery from athletic injuries is now handled by the Injury Prevention Team. This team consists of the team physician, athletic trainer, physical therapist, coaches, and athletes. Their primary function is to use their respective skills to supervise the health and welfare of the athlete. The key factor in the success of this team is ongoing and reliable communication. Not only do the physicians and athletic trainers coordinating health supervision need to communicate, but also, the coaches and athletes need to be kept informed. Since the physician cannot be in all areas associated with the injury care, they must rely and supervise the professionals who manage the day-to-day sports medicine programs. Most commonly, this manager is the Certified Athletic Trainer. The strong professional interaction of these specific disciplines means there must be close cooperation in all aspects of the programs. It is important for the physician to be aware of and concur with the daily injury care programs being managed by the athletic trainer. At the same time, the athletic trainer must understand and follow the programs prescribed by the physician. To maintain this communication link, we have designed a software program to provide for the documentation of events surrounding injury--the Sports Injury Monitoring System (SIMS). SIMS is the most complete and comprehensive injury tracking software on the market. No other program will give you the flexibility and versatility that SIMS can offer. SIMS can be used as a medical record database or as a research tool for individual, conference or league data collection. The software provides a complete record of the circumstances surrounding the athletic injury, i.e. clinical impression, initial management, player position, player activity and playing conditions. SIMS adds to the injury record the ability to periodically monitor basic aspects of the athlete’s recovery and return to participation. In addition to the injury record, SIMS provides for the recording of the daily progress of an athlete’s range of motion, strength, pain, swelling and instability. It also allows for the documentation of treatment protocols as they are implemented and modified to suit the athlete’s overall recovery. The software includes areas for daily progress notes as part of the overall permanent record for an athletic injury. As an aspect of good communication, the software will track the pattern of the athlete’s compliance with prescribed programs, the results of clinical and laboratory evaluations, clinic visits and the special features associated with specific medical and surgical routines. These records are made by both physicians and athletic trainers, and can be stored electronically for an indefinite period of time. Within the athlete’s record is an area for demographic information on his her addresses (permanent and current), personal physicians and any specific medical alerts that may be present. The system has an optional Insurance Tracking Program that manages the information relevant to the athlete’s insurance and the costs associated with the care of injuries. An important aspect of the program is that all reports are printed with the current time and date and become a permanent part of the patient’s record. This provides an accurate chronology of the events affecting the athlete’s participation. To gain maximum utility from the documented data, SIMS provides a series of consistent reports, i.e. Coaches Reports, Active Injured Lists and Supervisor Reports that stem from the daily progress reports. The data files may be generated and used in statistical packages for analysis of various aspects of the local data. Simple graphs and charts can be developed to meet the needs of the individual institution. Page iii Introduction Contents Installation ........................................................................................................................................1 Hardware and Software Requirements .................................................................................................... 1 Installing SIMS ........................................................................................................................................... 1 Sharing Your Data on a Network............................................................................................................... 4 SIMS Basics ........................................................................................................................................6 The SIMS Menu ......................................................................................................................................... 6 The SIMS Toolbar ...................................................................................................................................... 9 The Navigation Bar .................................................................................................................................... 9 Working with Grids ................................................................................................................................. 10 Edit Window Buttons .............................................................................................................................. 10 Common Features................................................................................................................................... 10 Getting Started ................................................................................................................................ 12 Team Setup ............................................................................................................................................. 12 Physicians and Athletic Trainers ............................................................................................................. 12 Importing Athlete Data ........................................................................................................................... 13 Configuring Security ................................................................................................................................ 13 Athletes ........................................................................................................................................... 15 Grid Display Options ............................................................................................................................... 15 Adding Athletes....................................................................................................................................... 15 The Edit Window ..................................................................................................................................... 16 Injuries and Illnesses ........................................................................................................................ 19 Cases vs. Problems .................................................................................................................................. 19 Visual Cues .............................................................................................................................................. 19 Adding New Injuries ................................................................................................................................ 20 The Edit Window – Injury/Illness ............................................................................................................ 20 The Edit Window – Problem ................................................................................................................... 24 Injury Maintenance .......................................................................................................................... 25 Adding Injury Maintenance Records....................................................................................................... 25 The Edit Window ..................................................................................................................................... 26 Page iv Contents Physician Visits ................................................................................................................................ 28 Adding New Physician Visits ................................................................................................................... 28 The Edit Window ..................................................................................................................................... 29 Activity Calendar.............................................................................................................................. 30 Display Options ....................................................................................................................................... 30 Adding New Activities ............................................................................................................................. 31 The Edit Window ..................................................................................................................................... 32 Pharmaceutical Inventory ................................................................................................................ 33 Tracking by Drug Number ....................................................................................................................... 33 Adding and Editing Medications ............................................................................................................. 33 Recording Transactions ........................................................................................................................... 34 Correcting Transactions .......................................................................................................................... 35 Modification History ............................................................................................................................... 35 Insurance Billing .............................................................................................................................. 36 Adding New Insurance Bills..................................................................................................................... 36 The Edit Window ..................................................................................................................................... 37 Reports............................................................................................................................................ 38 Configuring Report Options .................................................................................................................... 38 Generating Report Output ...................................................................................................................... 41 Available Reports .................................................................................................................................... 42 Appendix A: External Documents ..................................................................................................... 46 Appendix B: Importing an Excel Worksheet ...................................................................................... 50 Appendix C: AthleteConnection Services........................................................................................... 53 Appendix D: Concussion Assessments............................................................................................... 59 Documentation for web-based access to SIMS data, via SIMSAnywhere, is available on our website at: http://www.flantech.net/sims_download.html#SIMSAnywhere Page v Contents Installation This chapter describes the hardware and software requirements and provides the instructions for installing the SIMS software to your PC. Hardware and Software Requirements To use the SIMS software you will need a personal computer that meets the requirements listed below. System requirements: Microsoft Windows® XP/Vista/7/8 400 MHz Pentium processor or equivalent (minimum); 1GHz Pentium processor or equivalent (recommended) 96 MB of RAM required, 256 MB of RAM recommended Hard-disk requirements will vary based on the number of athletes and the degree of detail you are recording. For most users, 1 MB per 100 athletes, per year, will suffice. The software itself requires 50 MB hard-disk space. Microsoft .NET Framework 3.5 system requirements: The SIMS installer will automatically download and install .NET Framework 3.5 if it is not detected on your system. If .NET Framework 3.5 is not already installed on your system, up to 500 MB additional hard disk space may be required. If you will be installing to multiple workstations, it is recommended that you download the full .NET Framework 3.5 package, and install to each workstation prior to installing SIMS. This will avoid the installer having to download the framework from each workstation. The full .NET Framework 3.5 package can be downloaded from: http://download.microsoft.com/download/2/0/e/20e90413712f-438c-988e-fdaa79a8ac3d/dotnetfx35.exe For help determining the versions of .NET installed on your workstation, please follow this link: http://msdn.microsoft.com/en-us/kb/kb00318785.aspx Installing SIMS 1. Close SIMS on all workstations. This step does not apply if you are installing SIMS for the first time. After updating your installation, SIMS will attempt to update your database. If the database is open on any workstation, SIMS will be unable to update the database. Also note that once the SIMS database has been updated it will be inaccessible from other workstations until those, too, have been updated. Page 1 Installation 2. Install SIMS. Download the SIMS installation file using the link provided in your email. Run the installation file and insert the password (also provided in your email) when prompted. Local Installation Required The installer will attempt to install SIMS to a local drive by default, but during installation you do have the option to change the installation location. If you choose to change the location, be sure to select a local drive. It’s ok if your database resides on a network drive, but installation of the software to a network drive is not supported, and will result in errors when SIMS is run. 3. Initialize. This step is only necessary if you are installing SIMS for the first time on a workstation. If you have not yet purchased SIMS, you may select Evaluate SIMS from the prompt that appears when you start SIMS. If you have purchased SIMS, you were sent an email with a link to your initialization file. Click the link to download and open the file, and enter your password when prompted. The password for your initialization file was included in your purchase email. In most cases, the password is the email address of the primary recipient of the purchase email. Click Initialize to initialize your workstation for use with SIMS. Note: If your initialization file was issued with SIMS 5.1 or earlier, it will not work with versions 5.2 and later. Please contact [email protected] for an updated initialization file. Start SIMS using the shortcut on your desktop. If you have not previously established a database, you will be prompted to open or create one. If you have an existing database, select Open an existing database and click Continue. Select your database when prompted. If you do not have an existing database, select Create a new database and click Continue. Page 2 Installation 4. Create Database. The following screens will appear only if the Create a new database option was selected in step 3. Step 1. Select the name and location you want to use for the SIMS database, then click Next. If the database location does not exist, you will be prompted to create it. Step 2. If desired, you can copy the settings from an existing SIMS database. In most cases you will select Use the SIMS default settings option. Click Next to continue. Step 3. The final step allows you to review your selections before continuing. Once you are satisfied with your selections, click Finish to create your database. 5. Register Database. Once your software has been initialized, you will be prompted to register any database that you attempt to open. Each database need be registered only once. Page 3 Please contact SIMS customer service at the number shown in the Register Database prompt to register your database. You may work with a database for 60 days without registering it. After sixty days, the database will be locked. Once a database is locked, you must register it before it can be opened. Installation Sharing Your Data on a Network Your SIMS database can be shared to allow multiple workstations to work with it simultaneously. Please follow these steps to share your SIMS database. 1. Install SIMS. If you have not done so already, install SIMS and initialize according to the directions above. 2. Check File Locations. From the SIMS menu, choose Tools/Options and click the File Locations button on the Workstation tab. Note the paths of the System folder and Default database. 3. Move Shared Folders to Server. Quit SIMS and move the System and Data folders (see Step 2) to the desired location on your server. Make sure that all SIMS users have full permissions/rights to the two folders. Networking on Windows Server 2008 and Windows Server 2008 R2 with SMB2 Microsoft has acknowledged that the Server Message Block version 2 (SMB2) protocol may cause stability problems with applications such as SIMS that require real-time file information on files accessed over a network. These problems typically reveal themselves in SIMS as errors resulting from corrupted index files. Microsoft has released two hotfixes, linked below, to resolve this issue. Note that the hotfixes may be required on both the server and the SIMS workstations. http://support.microsoft.com/kb/2028965 http://support.microsoft.com/kb/2618096 Also, please ensure the latest Windows service packs have been installed to both the server and the SIMS workstations. Networking on NetWare Servers Novell NetWare users may need to turn off file caching and opportunistic locking (OPLOCK) settings on the client workstations. Please consult your NetWare documentation and the link below for more details. http://www.novell.com/support/php/search.do?cmd=displayKC&externalId=10091561 4. Reconfigure SIMS. Restart SIMS. a. If you have moved the System folder as described in Step 3 (as opposed to having copied it): Page 4 You will receive an Invalid System Folder message; click OK if you receive this message. Installation A Select Directory window will appear. Browse to the System folder that now exists on your server. Highlight it and click Select. b. If you have moved the Data folder as described in Step 3 (as opposed to having copied it): You will receive an Initialization Error message stating that your database could not be found; click OK if you receive this message. A prompt will appear giving you the option to Open an existing database or Create a new database; cancel from this window using the or button. c. From the SIMS menu, choose Tools/Options and click the File Locations button on the Workstation tab. Use the browse button located next to the System folder input box to select the System folder that resides on your server. Then, use the browse button located next to the Default database input box to select the database contained in the Data folder that now resides on your server. Click OK to save your changes, and exit SIMS. d. Restart SIMS. Your database should open automatically. If it does not, repeat step 4c. 5. Configure Subsequent Workstations. On each remaining workstation, install and initialize SIMS as described in the previous section. Once initialized, follow the instructions in Step 4 above. Page 5 Installation SIMS Basics The SIMS Menu File Menu Items New Allows you to add new Athlete, Injury/Illness, Injury Maintenance, Physician Visit or Activity Calendar records. Open… Lets you open an alternate database. Close Close the database you currently have open. Import Invokes the Import Wizard, which allows you to import data files created by the SIMS Export Wizard, or Microsoft Excel worksheets. See Appendix B for information on importing Excel worksheets. Export… Invokes the Export Wizard, which allows you to selectively export your SIMS data to a file. Backup/Restore Various options for backing up and restoring your SIMS data. Exit Closes the application. Edit Menu Items The edit menu items are typically available only when working with text fields. Page 6 Undo/Redo Lets you undo and redo changes you have made to a text field. Cut Deletes the selected text and copies it to the clipboard. Copy Copies the selected text to the clipboard. Paste Inserts text that has been copied to the clipboard. Clear Deletes the selected text. Select All Selects all text in the current text field. SIMS Basics View Menu Items The view menu lets you navigate the main areas of SIMS. The items on this menu are the same as those available from the navigation bar described later in this section. Tools Menu Items Wizards The Wizards submenu is described below. Lookup Lists The Lookup Lists submenu is described below. Drug Testing History… Lets you create a record of athletes that have been tested. Deletion Recovery Allows you to recover certain types of records that have been deleted. File Maintenance… Tools Security The Security submenu is described below. Options… Options for configuring SIMS. Archive A tool for archiving your SIMS data. Mail Merge… A tool for outputting SIMS contacts to a Microsoft Word mail merge document. Random List Generator… Typically used for drug test selection, this wizard lets you generate a randomized list of athletes. for maintaining your database. Tools Menu Items - Wizards Team Setup… Lets you add and remove teams to/from the database. Year Incrementer… An end-of-season tool for updating the eligibility status of your athletes. Page 7 SIMS Basics Tools Menu Items – Lookup Lists Activity Locations For each activity location, lets you set the default opponent, playing surface and surface condition. Categories and Subcategories Lets you manage the drop-list items available throughout SIMS. Physicians and Athletic Trainers Allows you to store contact information for your physicians and athletic trainers. Team Information An area for managing your teams and related information. Change Password Allows a user to update their password. Settings Used to configure the security settings and user accounts for the database. Current Users Lets you see a list of users currently logged into SIMS. Command Window A tool you may be asked to use during a technical support call. Tools Menu Items – Security Window Menu Items In addition to the Command Window option, the Window menu will also display a list of any open SIMS windows. Help Menu Items SIMS User Manual Opens the SIMS user manual. Technical Support Displays contact information obtaining technical support. Wish List… Lets you automatically submit your suggestions to our servers. for Check for MTC Update Lets you download the latest version of Updates… the SIMS medical terminology codes (clinical impressions). About SIMS… Page 8 Gives details about the version of SIMS you are using, and related information. SIMS Basics The SIMS Toolbar The SIMS toolbar is used primarily for adding new records to the database. You can see the function of each button by hovering the mouse cursor over it. Add new athlete Add new physician visit Add new injury/illness or problem Add new activity record Add new maintenance record Add new insurance bill Opens the AthleteConnection Management Console. AthleteConnection services. See Appendix C for information on The Navigation Bar The SIMS navigation bar is displayed along the left side of the main SIMS canvas. It gives you an easy way of moving between the different areas of the program. Cool Tip You can switch between small and large buttons by right-clicking on a blank area of the navigation bar. Page 9 SIMS Basics Working with Grids Use the following tips when working with grids on the main SIMS canvas. Editing To edit an existing record, double-click the athlete’s name on the record you want to edit. In grids that are not athlete specific, you’ll normally double-click the first cell in the record to edit. You can also right-click the record and choose Edit from the context menu. Sorting Many of the grid columns can be sorted by double-clicking the column heading. You can toggle between ascending and descending order by double-clicking the column heading again. Context Menus Most records give you additional options when you right-click on the athlete’s name (or the first cell) in the record. A small “context” menu will appear with any choices that are available for the selected record type. In some grids, column-specific context menus are also available by right-clicking a column heading. Edit Window Buttons The buttons below are available from many of the SIMS edit windows. Print Print preview Update participation status Update team status Update coach’s report comments Set the linked team Save record Save record Open the Concussion Assessments window. (See Appendix D for details.) Open the External Documents window. (See Appendix A for details.) Common Features The following features and input controls are used throughout SIMS and have been designed to maximize the efficiency of your data input. Incremental Text Drop-Lists Many of the drop-lists in SIMS will allow you to manually enter text as an alternative to selecting an option from the list. As you type, the “best guess” will be filled in automatically. Page 10 SIMS Basics You can also add new items to these lists on the fly simply by typing them in. Once you “leave” the list (by pressing the Tab key or clicking on another control), you will be prompted to add the new item to the list. Once added, the new item will be permanently available from the drop-list. Category/Subcategory Drop-Lists When you select certain input fields, they will split into two drop-lists. The drop-list on the left will contain a list of categories. Once a category is selected, the drop-list on the right will be updated with a list of subcategories based on the category that was selected. Date and Time fields You can right-click on date and time fields to bring up date picker and time picker windows, respectively. These windows allow you to quickly select the date or time using your mouse. Sorting Most grids can be sorted in ascending or descending order. To sort by column, double-click the column heading to sort in ascending order. To sort in descending order, double-click the heading again. Find name Most of the main grids allow you to quickly locate a specific athlete by filtering the names on the list. To use this feature, begin typing in the Find name field below the grid. As you type, only those last names on the list that begin with the text you’ve entered will be displayed. Spell Checker Page 11 Most of the free-text input fields in SIMS can be checked for spelling errors by rightclicking the input area and choosing Check Spelling from the context menu. A number of spell checker configuration options are available by selecting Tools/Options from the menu and then the Spelling tab. SIMS Basics Getting Started Team Setup When you start SIMS for the first time, only one team—usually football— will be enabled. To enable your other teams, select Tools/Wizards/Team Setup from the SIMS menu. Follow the prompts to select the teams you want to track in your database. Once you’ve set up your teams, you can use the link at the top of the main view to display a different, or even multiple, teams. Physicians and Athletic Trainers Many of the SIMS record types will prompt you to select from a list of athletic trainers, physicians, or both. For this reason, it’s a good idea to set up these lists before you begin entering your athletes and injuries. Select Tools/Lookup Lists/ Physicians and Athletic Trainers from the menu. From this window, use the Add button to add your physicians and athletic trainers to the list. When applicable, be sure to mark the checkboxes for Include in physician lookups and/or Include in athletic trainer lookups. These checkboxes will determine whether the person you enter will appear in the associated drop-lists. Page 12 Getting Started Importing Athlete Data If you have a list of athletes in Excel format, you can import those athletes into SIMS using the Import Wizard. Please see Appendix B for instructions on using the Import wizard. Configuring Security To configure the security settings for your database, select Tools/Security/Settings from the menu. Security Options The most important security setting is the Require user name and password to access database setting. This setting is available by selecting the Policies/Security Options folder, and determines whether users will be presented with a logon window when opening the database. If this setting is not enabled, none of the other security settings will have meaning to the current database. To enable or disable this feature, right-click the setting and select Properties from the context menu. Also available are the Track logon history and Track failed logons settings. These settings allow you to keep a history of successful and/or failed database logon attempts. You can view the history by selecting View/Logon History from the Security window menu. Account Lockout and Password Policies The account lockout and password settings are designed to protect your database by minimizing the threat of brute force guessing of account passwords. The following settings are available: Account lockout threshold. This setting determines the number of consecutive failed logon attempts that causes a user account to be locked out. A locked-out account cannot be used until it is reset by an administrator or until the lockout duration for the account has expired. Account lockout duration. This setting determines the number of minutes a locked-out account remains locked out before automatically becoming unlocked. Maximum password age. This setting determines the period of time that a password can be used before the user is required to change it. Minimum password length. This setting determines the least number of characters that a password for a user account may contain. Passwords must meet complexity requirements. This setting determines whether passwords must meet complexity requirements. If this setting is enabled, passwords must meet the following minimum requirements: o Be at least six characters in length o Contain characters from three of the following four categories: Page 13 Getting Started English uppercase characters (A through Z) English lowercase characters (a through z) Base 10 digits (0 through 9) Non-alphabetic characters (for example, !, $, #, %) User Accounts Select the Users/Users folder to view the list of user accounts for the database. To add a new user, select Action/New User from the Security window menu. To edit an existing user, double click the user’s name, or highlight it and select Action/Properties from the menu. o The General tab of the user account properties window lets you set the user name, password, and related password settings for the account. o The Team Access tab lets you define the teams the user will have access to in the database. o The Feature Access tab lets you grant administrator access, or limit which features the user will have access to in the database. o The SIMSAnywhere tab lets you designate the level of access the user will have when accessing your data online via SIMSAnywhere. The settings on this tab have meaning only if a SIMSAnywhere subscription has been activated for your database. To change a user’s password, highlight the user’s name and select Action/Set Password from the menu. To change a user’s user name, highlight the user’s name and select Action/Rename from the menu. To delete a user account, highlight the user’s name and select Action/Delete from the menu. Page 14 Getting Started Athletes The Athletes view shows a list of your athletes, filtered based on the team or teams you have selected. You can also choose to show just the current roster or all roster members (past and present) using the checkbox. Grid Display Options A number of options are available to help you customize the data displayed in the grid. Several columns—such as the ID fields, DOB, height and weight—can be added to the grid by right-clicking the heading of the Last or First name columns. You can also make some columns editable directly from the grid by right-clicking the column heading and choosing Allow edits to this column. To update an athlete’s participation status, double-click the existing value in the grid. Adding Athletes There are several ways of adding a new Athlete record: The quickest way of adding an athlete is to type their name in the “Add” box just above the Athletes grid. This method is most effective when you have only a single team selected, since this will automatically add the athlete to the current roster of the team. Right-click on the Athletes grid and select New Athlete…. Click the Select File/New/Athlete from the menu. Page 15 button from the toolbar. /Athletes The Edit Window The Athlete edit window will appear whenever you add a new record or edit an existing record by double-clicking the athlete’s name. General tab The General tab holds the basic demographic information for the athlete, like name, DOB, gender, etc. At the bottom of the tab, the Add… and Remove buttons are used to indicate the teams of which the athlete is or was a member. Note that an athlete should not be removed from this list when they are no longer on the team. Rather, the checkbox to the left of the team should be cleared to indicate they are not currently on the team, but were at one time. Several fields—like height and weight—have labels that appear in blue. These labels are hyperlinks that will open another window that allows you to record a history of changes for the associated field. A default athlete image is displayed based on the selected gender. You can double-click the image to select a custom image for the athlete. Cool Tip Two alternate ID fields are provided to record identification numbers such as student IDs, hospital IDs, etc. To give your alternate IDs a more meaningful name, right-click the Alternate ID# label and select Change field labels and masks from the context menu. From the window that appears, you can define not only the label names but also an input mask for each ID field. Teams tab The Teams tab lets you record information specific to each roster of which the athlete is, or has been, a member. If you’re planning to use the Participation Wizard (see the Activity Calendar section) to record exposure-related data, be sure to use the joined team and left team fields on this tab to record the dates the athlete was a member of each roster. This will ensure that the athlete is only listed in the Participation Wizard for dates when the athlete was actually on the roster. Page 16 /Athletes Contacts tab The Contacts tab allows you to enter an unlimited number of contact records related to the athlete. These might include the athlete’s current and permanent addresses, as well as emergency contacts, physicians, etc. For each contact you enter, be sure to select a contact type. This will allow you to choose which contact types are included or excluded on applicable reports, such as the Athlete Contacts report. Insurance tab The Insurance tab lets you record any insurance policies applicable to the athlete. Use the This is the athlete’s primary policy checkbox to differentiate between primary and secondary policies. Mark the This athlete is uninsured checkbox to indicate that an athlete does not have insurance. You can also scan or select an image of an athlete’s insurance card using the button. Cool Tip Right-click the input area of the Insurance Provider field and choose Select a Provider or Add/Edit Default Providers to build and select from a default list of providers. Notes tab The Notes tab is used to store a Medical History, Medic Alert information, and any general Notes on the athlete. Cool Tip Right-click the input area of the Medic Alert field and choose Quick Picks to build and select from a list of commonly used Medic Alert items. Page 17 /Athletes Forms tab The Forms tab is an optional tab that allows you to record if and when the forms you track were received. For example, you might want to track whether a medical consent form has been received. To enable the Forms tab and define the forms you want to track, choose Tools/Options from the menu, select the Database tab and click Athlete Settings. Injuries, Maintenance, Physician Visits and Referrals tabs These tabs show a history of all injury, injury maintenance, physician visit, and referral records that have been entered for the athlete. You can also add new records for the athlete from these tabs. Page 18 /Athletes Injuries and Illnesses Injuries and Illnesses view shows a list of your injuries, illnesses and problems, filtered based on the team or teams you have selected. You can also click the blue link just above the grid to set additional filtering options. Cases vs. Problems Two types of injury/illness records are available: Cases provide a more comprehensive documentation of an injury or illness. Cases are typically used when an injury/illness requires time loss or when a specific diagnosis or clinical impression can be assigned. Problems are condensed versions of case records. They can be used to record any incident of injury that did not result in time loss, or even a non-injury for which you have given treatment. For example, an athlete might request a hot pack for a stiff back over the course of several days. Problem records can be converted to cases if necessary. Visual Cues Injuries and illnesses are displayed differently in the main grid depending on their type, status and certain other conditions as described below. open problems Open problems are displayed in green italics closed problems Closed problems that have been assigned a discharge date are displayed in grey italics closed problems Closed problems that have not been assigned a discharge date are displayed in red italics open cases Open cases that have not been assigned a return date are displayed in black Page 19 Injuries and Illnesses open cases Open cases that have been assigned a return date are displayed in dark blue closed cases Closed cases that have been assigned a return date are displayed in grey closed cases Closed cases that have not been assigned a return date are displayed in red Last Maint. Record If the most recent injury maintenance record linked to an injury occurred between 8 and 14 days ago, its date will appear highlighted in green Last Maint. Record If the most recent injury maintenance record linked to an injury occurred between 15 and 21 days ago, its date will appear highlighted in yellow Last Maint. Record If the most recent injury maintenance record linked to an injury occurred more than 21 days ago, its date will appear highlighted in red Last Maint. Record If the most recent injury maintenance record linked to an injury was entered via the SIMS Training Room Companion (sold separately), and has not been reviewed, its date will appear highlighted in pink Adding New Injuries There are several ways of adding new Injury/Illness and Problem records: Right-click on the Injuries and Illnesses grid and select New Injury/Illness or Problem…. Click the Select File/New/Injury/Illness from the menu. button from the toolbar. Each of the above methods will invoke the New Injury/Illness Record window. From this window, select a name from the list and indicate whether you want to create an Injury/Illness or a Problem record. To quickly find an athlete on the list, begin typing the athlete’s last name and the list will be filtered as you type. You can also use the Show all teams and Only show current roster checkboxes to filter the list to your liking. The Edit Window – Injury/Illness The Injury/Illness edit window will appear whenever you choose Injury/Illness when adding a new record, or when you edit an existing injury/illness record by double-clicking the athlete’s name. Page 20 Injuries and Illnesses General tab The General tab holds the essential details of the injury, such as the clinical impressions, side, onset and return dates, and description of onset. Clinical impressions are used to describe the type of injury/illness incurred. Once your clinical impressions have been confirmed by a physician, they can be designated as Physician diagnoses. The clinical impression selection process is described in more detail below. In addition to the Onset and Return date fields, other meaningful dates can be entered by clicking the More injury dates link. The Change time loss values link allows you to override the time loss values calculated by SIMS. Several checkboxes are available from the General Tab. If the injury is a recurrence of a previous injury, mark the Reinjury checkbox. Use the Case is closed checkbox to indicate that the injury/illness is no longer being treated or monitored. The Flag for review checkbox is typically used when you do not have all the details of the injury/illness and need to come back later to update the record. A red flag is displayed on the main grid next to any record that is flagged for review. The Paper copy filed checkbox can be used if you need to track that a printed copy of the injury/illness has been filed. Selecting Clinical Impressions SIMS has more than 4,000 clinical impressions from which to select. To select a clinical impression, click the Clinical impressions link, or choose Add/Remove clinical impressions… from the drop-list. When entering new injuries, the default list will show your “frequently used” clinical impressions. Any clinical impression can be designated as “frequently used” by right-clicking the item and selecting Frequently Used. From the Select Clinical Impressions window, two methods are available for locating clinical impressions: Search The Search method allows you to filter the clinical impression list by entering a single word, multiple words, or even parts of words to match. For example, you might type in ant cruc to show any anterior cruciate injuries. As you type, the clinical impression list will automatically adjust to show only those items that match your search expression. Page 21 Injuries and Illnesses Filter The Filter method lets you filter the clinical impression list by selecting a condition, body group and body part. To apply a filter, right click the clinical impression list and select Set Filter. Once your list is filtered, double-click the applicable clinical impressions to select them from the list. Selected clinical impressions will appear in the list box in the upper right part of the window. If multiple items are selected, the mover boxes at the left of each item can be used to order the items by significance. The most significant item should be positioned at the top of the list. If your clinical impressions have been confirmed by a physician diagnosis, mark the checkbox in the Physician Diagnosis area of the window. You will be prompted to enter a diagnosis date, physician and any related notes. You can also assign and ICD-9 code to any clinical impression by right-clicking it and selecting Assign ICD9 Code. Onset Details tab The Onset Details tab allows you to record specific details regarding the onset of the injury. This tab is available only if the injury has been designated as team-related on the General tab—meaning it occurred as a result of a team-related activity. The Team Activity field is used to indicate the activity during which the injury occurred, and links the injury to an Activity Calendar record. Any activities already entered for the team selected on the General tab, and that occurred on the selected onset date, will be available from the Team Activity drop-list. You may also add new activity calendar records by selecting Add new activity from the drop-list. New games and practices can also be quickly added using the FastAdd options on the drop-list, as they do not invoke an activity edit window. Please see the Activity Calendar section for more details on activities and the activity edit window. The Game Information section of the tab is available whenever a game/competition has been selected as the Team Activity. This section lets you record information penalty and scoring information regarding the selected activity. Page 22 Injuries and Illnesses The Equipment section lets you record the applicable equipment worn by the athlete at the time of the injury. Initial Response tab The Initial Response tab is used to document the specific injury management procedures that were used at the time of injury. Customizing Checklists The Tests and Management checklists can be modified by right-clicking the tab and choosing Edit checklist… from the context menu. Initial Assessment tab The Initial Assessment tab lets you record your assessment of the affected body part at the time the injury occurred. The Strength and Range of motion fields p rovide an additional level of detail when the Abnormal option is selected. When selected, the option will become a blue hyperlink that, when clicked, allows you to record specific details regarding the strength and range of motion of the affected area. The Functional level slider bar lets you indicate the level of function of the injured area relative to the level before the injury occurred. The Notes/Plan field is of particular importance, as it is designed to hold the initial progress—also known as SOAP—note for the injury. All subsequent progress notes are entered via Injury Maintenance records, described in the following section. Maintenance, Physician Visits and Referrals tabs The Maintenance, Physician Visits and Referrals tabs list any Injury Maintenance, Physician Visits, and Referral records that have been entered for the injury. New records can be added by clicking the click here link just above each grid. Existing records can be opened by double-clicking the desired record. Page 23 Injuries and Illnesses Please see the next section for more information on Injury Maintenance records. The Edit Window – Problem The Problem edit window will appear whenever you choose Problem when adding a new record, or when you edit an existing problem record by double-clicking the athlete’s name. Rather than selecting a clinical impression, in problem records you select a body part and condition. The discharged on date is the date the problem is closed, meaning it will no longer be tracked. The show times link allows you to record both a date and a time for each of the date fields. The Problem occurred on this team field is available only when the This problem occurred as a result of a team related activity checkbox is checked. You may convert the problem to an injury/illness record by clicking the Convert to Injury link. The Injury Maintenance tab lists any Injury Maintenance records associated with the problem. Page 24 Injuries and Illnesses Injury Maintenance The Injury Maintenance area is designed to store follow-up events such as treatment and rehab procedures. Progress (SOAP) notes and assessments are also recorded here. Injury Maintenance view shows a list of your injury maintenance records, filtered based on the date range and team or teams you have selected. You can change the date range by clicking the blue date range link just above the grid. You can also use the arrow buttons to move forward or backward one day at a time. Adding Injury Maintenance Records There are several ways of adding new Injury Maintenance records: Right-click on the Injury Maintenance grid and select New Maintenance record …. Click the Select File/New/Maintenance Record from the menu. button from the toolbar. Each of the above methods will invoke the New Injury Maintenance Record window. From this window, select a name from the list and indicate the injury/illness/problem to which the record will be linked. To quickly find an athlete on the list, begin typing the athlete’s last name and the list will be filtered as you type. You can also use the Show all teams and Only show current roster checkboxes to filter the list to your liking. You can also elect to copy selected information from the athlete’s most recent maintenance record to the new maintenance record. To do this, mark the appropriate checkboxes, and the corresponding data from the most recent record will be copied. Page 25 /Injury Maintenance Cool Tip If today’s treatments are the same or similar to those already entered for another day, click the Copy from a previous day… link to copy all or selected injury maintenance records from the previous day. The Edit Window The Injury Maintenance edit window will appear whenever you add a new record, or when you edit an existing injury maintenance record by double-clicking the athlete’s name. General tab The General tab holds details of the follow-up, including the date and time, the related injury, who saw the athlete and where they were seen. Four checklist tabs are also provided for recording the related procedures: Modalities, Rehab, Tests and Other. Selecting Checklist Items Checklist items are selected simply by marking the appropriate box by clicking on it. Checklists can be filtered using the Search input box located at the top of each checklist. Checklist items will appear on reports in the same order they are selected from the edit window. If desired, you may also enter additional details to the right of each selected item. For example, you might want to enter the number of sets and reps for a rehab checklist item. Click the show details or hide details link to enable or disable this feature. Customizing the Checklists You can customize each of the checklists by right-clicking its tab and selecting Edit checklist… from the context menu. The following actions are available from the Edit Checklists window: Adding Items You can add new items to a checklist by entering the item name in the Add: input box and then clicking the Add >> button. You can also add an item by right-clicking the checklist and selecting Add from the context menu. Deleting Items You can remove a checklist item by right-clicking the item and selecting Delete from the context menu. Moving Items To move an item from one checklist to another, right-click the item and select the appropriate Move to option from the context menu. Page 26 /Injury Maintenance Editing Items Double-click the item you want to edit. From the Item Details window that appears, you can modify the item name, enter the default details to be displayed for the item, and assign a CPT code or UCR cost. Ordering Checklists You can order your checklists in one of two ways: use the Alphabetize button to order the list alphabetically, or you can drag the mover bars that appear to the left of each checklist item to move an item to the desired position on the list. Assessment tab The Assessment tab lets you record your assessment of the affected body part at the time of the followup. This tab is similar to the Initial Assessment tab of the Injury edit window. With the exception of the Assessment Notes (SOAP) field, fields on this tab are disabled if Other/Not injury related has been selected as the Injury/Problem from the General tab. The Strength and Range of motion fields provide an additional level of detail when the Abnormal option is selected. When selected, the option will become a blue hyperlink that, when clicked, allows you to record specific details regarding the strength and range of motion of the affected area. The Resolution of injury slider bar lets you indicate the estimated recovery progress of the injury. The resolution at the time of injury is 0%, and the resolution once the injury is fully healed is 100%. The Functional level of injured area slider bar lets you indicate the level of function of the injured area relative to the level before the injury occurred. The Compliance field allows you to describe the athlete’s compliance with coming in for treatments/rehab. The Assessment Notes (SOAP) field is a free-text area for recording progress (SOAP) notes. The History link allows you to view a history of SOAP notes that have been entered for the injury selected on the General tab. Medications tab The Medications tab lets you record any medications given at the time of the follow-up. Click the Add Medication button to open the New Pharmaceutical Transaction wizard. See the Pharmaceutical Inventory section of this manual for more information on the New Pharmaceutical Transaction wizard. Page 27 /Injury Maintenance Physician Visits Physician Visits view shows a list of your scheduled and/or attended physician visits, filtered based on the team or teams you have selected. You can also click the blue link just above the grid to set additional filtering options. Adding New Physician Visits There are several methods of adding new Physician Visit records: Right-click on the Physician Visits grid and select New Visit…. Click the Select File/New/Physician Visit from the menu. button from the toolbar. Each of the above methods will invoke the New Physician Visit Record window. From this window, select a name from the list and indicate the injury/illness/problem to which the record will be linked. To quickly find an athlete on the list, begin typing the athlete’s last name and the list will be filtered as you type. You can also use the Show all teams and Only show current roster checkboxes to filter the list to your liking. Page 28 /Physician Visits The Edit Window The Physician Visit edit window will appear whenever you add a new record, or when you edit an existing visit record by double-clicking the athlete’s name. General tab The General tab holds basic details of the visit, including the visit date and time, type of visit, the related injury, scheduled/attended status, the physician who saw the athlete and where they were seen, and general notes regarding the visit. Procedures tab The Procedures tab allows you to document the tests and procedures carried out during the visit. The appearance of the tab will differ depending on whether you have selected Surgery as the visit type. When a non-surgical visit type has been selected, the Procedures tab will contain a checklist of diagnostic procedures. To the right of the checklist, a text area is available where you can record the results of each procedure you have selected. To customize the checklist, right-click it and choose Edit checklist… from the context menu. Results tab – non-surgical visit When a surgery visit type has been selected, the Procedures tab will show the surgical procedures you have selected. Selecting Surgical Procedures To select the surgical procedures performed during the visit, click the Select Procedures link. In the Select Surgical Procedures window that appears, place a checkmark next to each applicable surgical procedure. If you need to add a procedure that is not on the list, click the blue hyperlink above the checklist. Results tab – surgical visit Referrals tab The Referrals tabs lists any Referral records that have been linked to the visit. New records can be added by clicking the click here link just above the grid. Existing records can be opened by doubleclicking the desired record. Page 29 /Physician Visits Activity Calendar The Activity Calendar allows you to record the daily activities of your teams, such as games, practices and conditioning sessions. SIMS also references the Activity Calendar in a number of injury-related reports to determine the number of games and practices missed. Display Options Activity records can be displayed in two different ways. The most common, calendar view, is selected by clicking the view. button at the top of the display grid. Click the button to change the display to list Calendar view displays a single month’s activities in a standard calendar layout. The current month’s activities will be displayed by default, but can be changed using the navigation bar at the top of the calendar grid. The double-arrows of the navigation bar will move the month forward or backward a year at a time, while the single-arrows will move forward or backward by a single month. The button that displays the month and year , when clicked, will display a date picker that allows you to select the month to display. List view displays your activities in a grid format similar to those found in other areas of SIMS. List view is helpful when you want to view more than one month at a time, or when you are viewing multiple teams and have numerous activities on a given day (or days). A blue hyperlink is available from above the list view grid that allows you to filter by date the activities that are displayed. Activity Calendar - Calendar View Page 30 Activity Calendar - List View /Activity Calendar Adding New Activities There are several methods of adding new Activity Calendar records: From calendar view, right-click inside the box of the day the activity occurred and select New Activity…. From calendar view, double-click inside the box of the day the activity occurred. From list view, right-click the grid and select New Activity…. Click the Select File/New/Activity from the menu. button from the toolbar. Each of the above methods will invoke the New Activity window. FastAdding Games and Practices If you are not interested in recording a detailed activity record, but want to indicate that a game or practice occurred on a particular date, the FastAdd feature provides a quick and easy way of adding game and practice records. FastAdd is only available from calendar view. To use it, right-click inside the box of the day the activity occurred and select FastAdd: New game or FastAdd: New practice. A new record will be automatically entered and saved for the selected date. This feature is particularly geared toward users who will be generating reports that calculate games and practices missed by injury, but who don’t want to record a detailed activity record. Note: FastAdd is not available when more than one team is selected in the team display filter. Copying and Pasting Activity Records For many teams, one day’s activity details might be identical or almost identical to the next. In these instances, you may want to copy a previously entered activity from one day to another. To do this in calendar view, right-click the activity you want to copy and select Copy. Then, right-click inside the box of the day you want to copy to and select Paste. The new record will be an exact copy of the original activity, but the date will be modified based on the box you pasted to. You can also copy and paste in list view, but any records pasted in list view will retain the original date. Page 31 /Activity Calendar The Edit Window The Activity edit window will appear whenever you add a new record, or when you edit an existing activity record by clicking an activity from calendar view, or double-clicking a record from list view. Activity Details This section of the edit window holds basic details of the activity, including the team, activity type, location, opponent, start date/time and end date/time. Environment This section lets you record surface information and weather conditions at the time of the activity. Fields include surface, condition, temperature, humidity, peak heat index, wind and lighting. Participation This section lets you record the number of participants and number of exposures for the activity. Reports like the Injury Summary Table use this information to generate statistics such as average participant count and injuries per 1,000 exposures. The number of participants can be entered as a simple number, or you can click the blue participants hyperlink to invoke the Participation Wizard. The Participation Wizard will walk you through a series of prompts that let you indicate which athletes participated in the activity and—for those who didn’t—the reason why. Based on your responses, the wizard will calculate the number of participants and total exposures to injury. The total exposures to injury can also be entered as a simple number, or you can click the blue exposures hyperlink to invoke the Exposure Calculator. Typically, the number of exposures will equal the number of participants, but in some cases the numbers could be different. For example, in baseball you might want to count exposures by inning rather than by game, in which case an athlete who played the entire game would have 9 exposures. The Exposure Calculator allows you to designate the method for calculating exposures. What is an exposure, anyway? An exposure, most simply defined, is an “opportunity to be injured”. For example, a given athlete at a practice could be injured during that practice. Therefore, he has one exposure or “opportunity to be injured”. If the player dresses for a game but does not play, he was not exposed because he did not have an “opportunity to be injured” during the game. Other This section is for recording the general type of equipment worn (e.g., “full gear” vs. “no pads”) and any general comments pertaining to the activity. Page 32 /Activity Calendar Pharmaceutical Inventory The Pharmaceutical Inventory lets you document dispensations and manage quantities on hand of your medications. In Pharmaceutical Inventory view, the medication grid on the left lists your medications and the current quantity on hand of each. The grid can be filtered by classification using the drop-list at the top of the grid. The transaction grid on the right lists transactions that have been entered for the medication selected in the medication grid. Note that athlete-related transactions are filtered based on the currently selected display team(s). Using the Hide transactions of zero quantity checkbox, you can also suppress the display of transactions where the quantity equals zero. Tracking by Drug Number The Pharmaceutical Inventory allows you to track multiple lots for each medication, if desired. To do so, a unique drug number must be assigned to each lot. This is achieved by designating a drug number when the Add Inventory window is displayed, either by clicking Add from the Medication Details window, or by entering a new number while recording a new transaction. If you do not want to track drugs by lot, simply leave the drug number blank when prompted. Adding and Editing Medications To add a medication, right-click the medication grid and select New Medication from the context menu. To edit a medication, doubleclick it on the medication grid. The Medication Details window consists of an Inventory Summary and the Medication Details section. The Inventory Summary lists the quantity on hand and other details of any drug numbers that have been entered for the medication. The expiration date will be highlighted in red if a drug number has expired. If you are not tracking drug numbers, you will typically have only one item listed in the Inventory Summary. Page 33 /Pharmaceutical Inventory The Medication Details section provides several fields to describe the medication. Several of these fields—default prescriber, default distribution units and distribution instructions—are used as default values when entering athlete-related transactions. Another important field is the restock point, which will cause the medication to be highlighted in yellow on the medication grid when its quantity on hand falls below the designated value. Recording Transactions To record a distribution or a change in quantity, click the New Transaction button below the transaction grid. The New Pharmaceutical Transaction window will walk you through the process of recording your transaction. The first step is to select the medication, drug number and transaction type. You can select an existing drug number from the drop-list, or enter a new drug number. If you enter a drug number that does not already exist, you will be prompted to add it. If you choose to do so, the Add Inventory window will appear, where you can enter the initial quantity, expiration date and other information related to the drug number. (This is the same Add Inventory window that is displayed when the Add button is clicked from the Medication Details window described previously.) After selecting the medication and drug number, you can select from one of the four transaction types: I want to record a distribution to an athlete Use this option to record a medication that was given to an athlete. When you click Next after selecting this transaction type, you will be prompted to select the athlete name. Click Next again, and you’ll be prompted for the details of the transaction. Note that the quantity dispensed field will be highlighted in yellow if the resulting quantity on hand will be below the restock quantity. It will be highlighted in red if the resulting drug number quantity will be negative. Page 34 /Pharmaceutical Inventory I want to record an increase in quantity Use this option to record an increase in quantity, such as when you are restocking a medication. In general, you should not use this option when working with drug numbers—use the Add Inventory feature instead. When you click Next after selecting this transaction type, you will be prompted to enter the increase amount, date and any comments. I want to record a decrease in quantity Use this option to record a decrease in quantity, such as when a medication has been disposed of or has missing units. When you click Next after selecting this transaction type, you will be prompted to enter the decrease amount, date and any comments. I want to record a return to pharmacy This option is for users who receive medications from a pharmacy, and then return medications to the pharmacy when they have expired. When you click Next after selecting this transaction type, you will be prompted to enter the quantity returned, date and any comments. Correcting Transactions Transaction records can be edited by double-clicking the record from the transaction grid, or by rightclicking the record and selecting Edit…. Fields other than name, medication and drug number can be modified. Due to the sensitive nature of pharmaceutical recordkeeping, deleting pharmaceutical transactions is not allowed. In the event of a recording error, you can work around these limitations by creating one or more new transactions that negate the incorrect transaction. For example, let’s say you record a distribution of 12 aspirin to an athlete, but select the wrong athlete while entering the transaction. To correct, you would create a new distribution transaction for the wrong athlete, entering negative 12 as the quantity, when prompted. You should also clearly state the reason for the correction in the comments field of the transaction. Once you’ve negated the original transaction, you can go ahead and record a new distribution to the correct athlete. Modification History Due to the sensitive nature of pharmaceutical recordkeeping, SIMS maintains a history of any changes made to pharmaceutical transaction records. Records that have been modified will have a blue Modification History link in the bottom-left corner of the transaction edit window. Click this link to see a history of what changes were made, when they were made, and the user that made them. Page 35 /Pharmaceutical Inventory Insurance Billing The Insurance Billing view shows a list of your athletes’ insurance bills, filtered based on the team or teams you have selected. You can click the blue link just above the grid to set additional filtering options. Adding New Insurance Bills The following methods are available for adding new Insurance Billing records: Right-click on the Insurance Billing grid and select New Bill…. Click the button from the toolbar. Each of the above methods will invoke the New Insurance Bill window. From this window, select a name from the list and indicate the injury/illness/problem to which the record will be linked. To quickly find an athlete on the list, begin typing the athlete’s last name and the list will be filtered as you type. You can also use the Show all teams and Only show current roster checkboxes to filter the list to your liking. Page 36 /Insurance Billing The Edit Window The Insurance Billing edit window will appear whenever you add a new record, or when you edit an existing visit record by double-clicking the athlete’s name. General tab The General tab stores basic details of the bill, including the bill date, payee, the related injury, accountable team, reference number and comme nts. The rightmost section of the tab summarizes the bill totals, and provides links for accessing the athlete and injury/illness records associated with the bill. The accountable team field is used by the Insurance Billing reports that group bills by team. If the associated team can be determined from the selected injury/problem, it will be automatically selected. Teams on which the athlete is designated as a scholarship athlete will display a [S] after the team name. Bill Items and Payments tab The Bill Items and Payments tab is for documenting the specific servi ces, pharmaceuticals and other items appearing on the bill, as well as any payments that have been made toward the bill. Fields include service, date (of service), amount charged, comments and reference number. Any bill items and payments already recorded will appear in the grids on this tab. To add, edit or remove a bill item or payment, use the links to the left of the grid. When an item is selected from the bill items grid, any payments that have been made on that item will be highlighted in the payments grid. Similarly, when a payment is selected from the payments grid, the item paid will be highlighted in the bill items grid. Page 37 /Insurance Billing Reports The majority of SIMS reports are available from Reports view. Reports are grouped into several different categories, including Daily, Summary, Athletes, Activity Calendar, Pharmaceutical Inventory and Insurance Billing. You can change the report category using the buttons along the left side of the view. The box to the right of the buttons will show a list of reports in the selected category. You can also use the All button to display all available reports. Configuring Report Options Once you’ve located the report you want to print, double-click the report name from the list. A Customize Report window will appear that allows you to configure how the report is displayed. Configuration options will vary depending on the report, but each of the tabs described below is common to all reports. Report Title The report title can be modified from the top of the Customize Report window. Layout tab The Layout tab—more than any of the other tabs—will vary from report to report. Typically, this tab will offer options for sorting and grouping the report output. One option that is often available from this tab is the Group by team option. When multiple teams have been selected from the Teams tab, this checkbox determines whether the output is separated by team, or if it is all displayed as one continuous group. Dates tab The Dates tab is primarily used for filtering report output by date. The date filters available will be different depending on the report. For example, injury related reports will normally allow you to designate a range of onset dates that you want to include on the report. In this example, only the injuries that occurred within the date range you specify would be displayed. Page 38 //Reports A few reports, such as the Coach’s Report, let you specify a Print report as of date and time at the top of the tab. This option allows you to output the data as it would have appeared on the selected date and time. For example, in the case of the Coach’s Report, you typically want to display those injuries that are currently open and being treated. If you need to see which athletes had open injuries a few weeks ago, you can change the Print report as of date and time to get this information, even though some of those injuries may have been closed and would not appear on a report printed as of today. Teams tab The Teams tab lets you select which teams will be included on the report. In applicable reports, you can also elect to include athletes that are not on the roster of any team by marking the Also include nonroster athletes checkbox. The Used linked team values when available option, available on most injury related reports, determines how data are grouped into teams. When this box is checked, the report will use any teams that have been selected using the Linked Team feature to determine the team that records are grouped into. If the box is not checked, SIMS will place any records where the related team cannot be determined into a No Team Specified, or similar, group. Athletes tab The Athletes tab lets you determine which athletes will be included on the report. Selecting All will include any athlete who is, or was at one time, on the roster of the teams you selected on the Teams tab. Select Current roster(s) to only include those athletes currently on the roster of the teams you’ve selected. If you want to manually select the athletes to appear on the report, click the Selected option and select the desired athletes from the Select Athletes window that appears. Injuries tab The Injuries tab lets you determine which injuries, illnesses and problems will be included on the report. The Injuries and Illnesses section contains options specific to injury/illness records. Open, and not cleared for participation will include those records that have not been closed, and where a date has not been entered for the return, cleared for limited participation, or cleared for full participation fields of the injury/illness record. Page 39 //Reports Open, but cleared for limited participation will include those records that have not been closed, and where a date has been entered for the cleared for limited participation field, but one has not been entered for the return or cleared for full participation field of the injury/illness record. Open, but cleared for full participation will include those records that have not been closed, and where a date has been entered for the return or cleared for full participation field of the injury/illness record. The Closed checkbox will include injury/illness records that have been closed. Some reports also have a No injury selected option, which determines whether records are displayed that have not been linked to an injury/illness record. The Problems section of the tab determines whether Open and Discharged problems are included in the output. If the target audience of your report is not likely to understand the detailed clinical impressions used in SIMS, you may want to mark the Use simplified injury descriptions checkbox. This will convert clinical impressions like “Foot Fracture/Metatarsal/Base/Stress” into a simplified description like “Foot fracture”. In some reports, you may want to only include records that have been designated as team related, using the This injury occurred as a result of a team related activity checkbox. Mark the Only show team related injuries/problems checkbox if you only want to include these records. Finally, the Only print selected injuries/problems checkbox will open a Select Cases window that allows you to manually select the injuries, illnesses and problems that are included on the report. This option supersedes all other options available on the tab. Injury Types tab The Injury Types tab lets you determine the Body Parts and Conditions that are included on the report. Only injuries with the types you select are included on the report. You can also use the Only show injury descriptions containing this text input box to provide a word or phrase that determines which records are included on the report. For example, if you enter anterior, any clinical impression containing that word will be included in the output. Summary tab The Summary tab provides a free text area for any comments you want to appear at the end of the report. The Reset link and report troubleshooting Page 40 //Reports At the bottom left of the Customize Report window is a Reset link. Clicking this link will return the report options to their default settings. On occasion, after configuring report options, you may receive unexpected output (or no output) when you generate the report. This is most often caused by changing the options of the report such that some or all of the data are excluded. The best approach to troubleshooting situations like this is to use the Reset link to return the report options to their default settings. Then, re-apply your settings, one by one. After each change to a setting, preview the report to see if the change has had the effect you expected. This method will help you determine which setting or settings are limiting the output. Generating Report Output Printing Click the button to generate the report and send to the printer. The Windows Print window will appear that allows you to select the printer, page range, number of copies and other related options. Previewing Click the button to preview the report on your monitor, without sending it to the printer. At the top of the preview window is a toolbar with a number of options, described below. You can hover the mouse cursor over any of the toolbar objects to see what it means or does. Prints the report directly from the preview window. Refreshes the report data. Toggles group tree display, if supported by report. Allows you to navigate forward, backward, to the beginning or to the end of the report. Lets you jump to a page number that you specify. Closes a subview. Allows you to search for text within the report. Sets the zoom level of the preview. Lets you export your report in several different formats, such as PDF, Excel or Word. Page 41 //Reports Sending Output to Excel In selected reports, a button is available that will send the report output directly to Excel. The Excel output may ignore some of the report options you have set, and will often include additional fields not found on the printed report. You must have Excel installed in order to use this feature. Available Reports Daily Reports Reports typically used for daily injury reporting. Coach’s Report Daily Injury Maintenance Injury Maintenance Checklist Management Report Supervisors Report Normally used to list participation statuses of athletes with open injuries, illnesses and problems. By default, shows athlete name, participation status, injury side/description and coach’s comments. A Show extended details option allows you to also show onset and return dates, days missed, days returned and injury progress. A list of injury maintenance records for a given day. Default fields include athlete name, time seen, modalities/rehab/etc., who seen by, location and injury side/description. Checklist details and SOAP notes can also be displayed. A checklist for selecting modalities/rehab/tests/other items, for use in the training room. The list can be printed with names, names and injuries, or just a blank list. Similar to the Coach’s Report, lists participation statuses of athletes with open injuries, illnesses and problems. Shows athlete name, participation status, injury side/description and initial assessment notes/plan. Another report typically used to list participation statuses of athletes with open injuries, illnesses and problems. By default, shows athlete name, injury side/description, participation status and team. Several other fields can be optionally included, such as time loss dates, time loss counts, description of onset, initial assessment notes/plan, most recent injury maintenance note, most recent injury maintenance assessment details and last physician visit and surgery details. Summary Reports Used for end-of-season and end-of-year reporting. Breakdown by Body Part Case and Problem Breakdown Page 42 This report comes in two flavors: Breakdown and Summary. The Breakdown option lists injuries, illnesses and problems grouped by body part. Fields include athlete name, injury side/description, onset and return dates, days missed, games missed and practices missed. The Summary option, for each body part, lists the total number of injuries, number of injuries by severity (minor/moderate/severe), total time loss (days/games/practices missed), and average time loss by injury. The summary report also displays a colored bar chart of injury counts on the final page. Lists the status and origin of your injuries, illnesses and problems. Records are grouped as Open Problems, Discharged Problems, Cases that originated as Problems and were converted, and Cases that did not originate as Problems. Fields include athlete name, injury side/description, onset date and status //Reports Clinical Impression Summary Injuries and Illnesses Injury Activity Summary Injury Maintenance Summary Injury Summary Table Physician Visit Summary (open/closed). The final page of this report includes several pie charts that break down the origin and statuses of your injuries, illnesses and problems. Lists injury counts by clinical impression. Fields include clinical impression and injury count. Lists injuries and illnesses. Fields include athlete name, injury side/description, onset and return dates, and time loss counts (days/games/practices missed). A summary is included on the final page of this report, which includes several pie charts and a time loss summary. Lists the number of injuries and average time loss for each activity type. Lists counts of each injury maintenance checklist item (modalities/rehab/tests/other). The default view of this report displays each item name, along with a count, UCR and total cost for the item. If you elect to Subtotal by: Months, the report will show a chart of monthly totals for each item. Summarizes activity calendar, injury counts and exposure rates. Activity calendar summary shows number of games, practices, etc., and gives the average number of particpants and exposures for each. Injury summary shows the number of incidents incurred during each activity type, broken down by the severity of the injury. Also provides rate of cases per 100 athletes and rate of cases per 1000 exposures. Lists counts of physician visit diagnostic tests and surgical procedure items. Athletes Reports Output in these reports is specific to the selected athletes. Athlete Contacts Athlete Forms Athlete Insurance Cards Detailed Injury Report Injury Maintenance Physician Visits Team Roster Page 43 Shows contact and insurance information for each athlete. Lists when and if each form (recorded on the Forms tab of the Athlete record) was received. Fields include athlete name, form name, whether received and date received on. This report is available only if the Forms feature has been enabled. Lists insurance card images for each athlete. Identification numbers and date of birth can be optionally included. Lists details from General, Onset Details, Initial Response and Initial Assessment tabs of selected injury records. This is the same report that is available from within the edit window of individual injury/illness records. For each injury, illness and problem, lists all related modalities, rehab, tests and other items, maintenance notes and assessment information. Fields include athlete name, injury side/description, onset and return dates, date and time seen, maintenance item details, who seen by, location, participation status, strength, range of motion, stability, progress, swelling, pain, resolution and functional level. Other optional fields include description of onset, medications and extended assessment details. Lists physician visits records. Summary report fields include athlete name, visit date and time, visit type, physician and injury side/description. Detailed report option also includes location, tests or surgical procedures, and comments. A simple list of athletes. Default fields include athlete name, identification numbers, birth date, height and weight. You can also choose one of the following fields to include on the report: body fat, eligibility status, medic alert, physical, position and sickle cell trait. //Reports Activity Calendar Reports Reports that summarize activity and exposure data. Activity Calendar Activity Exposure Summary Shows activities in list or calendar layouts. The Group by: Month option displays activities in a calendar grid, one month per page. The other Group by options show a simple list of activities, with fields including activity start date and time, finish time, activity type, location and opponent, and team if more than one team is selected for output. Lists activity count, total exposures, average participants, injury counts and injury severity counts for each activity type, classification or surface. Pharmaceutical Inventory Reports Show pharmaceutical transaction details and quantities-on-hand. These reports are available only when the Pharmaceutical Inventory feature is enabled. Distribution History Expiration Summary Pharmacy Returns Quantity-on-Hand Reconciliation Report Lists pharmaceutical transactions. Default fields include transaction date, athlete name, medication, unit dose, quantity, who prescribed by, who dispensed by, and comments. Lists drug numbers that will, or did, expire in a given date range. Fields include medication, drug number, quantity-on-hand and expiration date. Lists medications returned to pharmacy. Fields include transaction date, medication, drug number, expiration date, quantity used and quantity returned. Displays the quantity-on-hand for each medication, with option to include transaction history by medication. Default fields include medication, dose usage, unit dose and quantity-on-hand. In a given date range, for each medication shows the number of units at the start, added during, used during and the amount remaining at the end of the period. Insurance Billing Reports Reports that summarize insurance billing information. These reports are available only when the Insurance Billing feature is enabled. Insurance Bills Insurance Payee Summary Insurance Payor Summary Insurance Service Summary Page 44 Lists insurance bills, with option to show only bills that have not been paid in full. Default fields include athlete name, identification number, bill date, billed by, reference #, bill total, amount paid, amount due, last payment and injury side/description. Optionally, all details of each bill can be displayed, including bill comments, service items and payment items. Lists amounts billed by each payee. Default fields include billed by (payee), total billed, total paid, total due and bill count. In addition, you can elect to display the injury side/description or the total amount paid by a single payor. A bill summary option is also available, which lists the bills associated with each payee. Lists amounts paid by each payor. Fields include payor, bill count and total paid. Lists amounts billed by service item. Default fields include service, item count and total billed. In addition, you can elect to display the total amount paid by a single payor. //Reports All Reports Lists all available reports. Page 45 //Reports Appendix A: External Documents Most SIMS records allow you to attach a document using the External Documents feature. For example, you might want to attach an x-ray image to an injury record, or a dictation file to a physician visit record. You can attach files that already exist on your hard drive, or use your scanner to scan a new file. You can even store your attached documents in the cloud, so they are kept in a secure storage area. Attachments aren't really attachments... Throughout this appendix we occasionally refer to documents selected using the External Documents feature as attachments, because this is a concept most people are familiar with. However, the documents you select are not truly attached because they are not stored in your database. Rather, what is stored in SIMS is merely a shortcut to the document, i.e., the file name and location--not the file itself. Accessing the External Documents Feature The External Documents feature is available from the edit window of Athlete, Injury/Illness, Injury Maintenance, Physician Visit, and Insurance Bill records. To access the feature, click the found at the bottom of the edit window. button Attaching Documents Documents can be attached using any the following methods: Using the Using the Action menu. By right-clicking the file listing area. By dragging and dropping files on the file listing area. Page 46 , and buttons from the toolbar. Appendix A: External Documents After you've attached a document, its file name will be used as the file description, by default. If you'd like to assign a more meaningful description to the document, simply replace the highlighted text with the desired description. Shortcuts vs Cloud Storage Shortcuts are links to files that exist on your local hard drive or internal network. When you attach a file using a shortcut, SIMS stores the file name and location (not the contents) of the file. The benefit of using a shortcut is that no uploading or downloading is required when attaching or opening an attached file. A downside of using a shortcut is that the stored location must be consistent across all SIMS workstations that might need to access the file. For example, if you use Computer A to add a shortcut to file C:\Documents\TestResults.pdf, you're, in effect, telling SIMS to store a link to a file named TestResults.pdf that exists in the C:\Documents folder. This means you'll likely have no problems accessing the file with your shortcut when you're on Computer A, but if you try to access the file from Computer B, SIMS will look for the file in the C:\Documents folder of Computer B and won't be able to find the file. The trick to using shortcuts in a shared workstation environment is to store your documents in a shared folder location that will be named consistently across all workstations (e.g., something like \\MyServer\SIMS\ExternalDocuments). As an alternative to shortcuts, SIMS offers cloud based storage for your documents. This allows you to store your documents--in encrypted format--in a secure hosting facility that meets or exceeds all HIPAA requirements. Using cloud storage offers the following benefits: No need to maintain a shared document folder on your network or local drive that may not meet HIPAA security requirements. No broken links. The link you establish when you create a shortcut is easily broken if the file is ever moved from its original location. With cloud storage, it doesn't matter where the original file was stored. By storing your documents in the cloud, you'll free up disk space on your local and/or network drives that would otherwise be occupied by external document files. Your backup files will likely be smaller as well. Cloud storage plans, including pricing, can be found on our website at: http://www.flantech.net/Products/SADS Technical details and frequently asked questions about cloud storage can be found on our website at: http://www.flantech.net/Products/SADS/TechSpecs Page 47 Appendix A: External Documents Scanning Documents You can create new documents from scanned images if you have a TWAIN compliant scanner attached to your computer. TWAIN-Compliant Devices In order to work with SIMS, your scanner must be TWAIN-compliant. TWAIN is a software protocol and interface that handles the communication between software applications and imaging devices such as scanners and digital cameras. In most cases, your scanner will come packaged with a software disk containing the required TWAIN device drivers. You can usually tell if these drivers have been installed by looking in your Windows Control Panel under Scanners and Cameras (Windows XP/Vista) or Devices and Printers (Windows 7). If you see your scanner listed, you can open it and attempt to scan a document. If you are successful, you can assume the appropriate TWAIN drivers have been installed. Almost all scanners and digital cameras are TWAIN-compliant. However, the level of control that SIMS has can vary from device-to-device. For example, SIMS will attempt to suppress the scanner’s default user interface (UI) prompts while scanning, but not all device drivers allow this. A prominent example of this can be seen with some HP scanners, which do not allow suppression of the UI, and will require you to respond to additional prompts when scanning a document. With that said, you can count on almost all desktop scanners, departmental scanners, and high-volume scanners to scan well without showing their UI. Scanning a Document To scan a document, click the button from the toolbar. (If you receive a message that no TWAIN devices were found, you will need to locate and install the TWAIN drivers for your device before you can use this feature.) From the Acquire Image window, select your scanner from the Acquire using drop-list. The available Image type and Resolution options will vary based on the device you have selected. If your scanner has a document feeder, the Use Auto Document Feeder option is available. Once you have configured your settings, click the Acquire Image button to scan your document. Use the Add Another Image button to add additional pages, as needed. Cropping and Zooming To crop a scanned image, hold down the Ctrl key on your keyboard while you drag a box around the region of the image you want to keep. The image will be cropped when you release the mouse button. Unwanted changes can be reversed by typing Ctrl+Z. Page 48 Appendix A: External Documents You can zoom in and out of images using your mouse wheel. Saving Your Scanned Document When you're ready to save your scanned image(s), click the Save to File button to save the scanned images to a local drive, or the Save to Cloud button for cloud storage. If you use the Save to File button, you will be prompted to select a file name and folder, as well as the format of the output file. If you use the Save to Cloud button, you will be prompted to enter a file description and the format of the output file. Files can be saved in PDF format, or in a number of different image formats. Working With Attached Documents Options for working with attached documents are displayed by right-clicking a file or by selecting Action from the menu. The following actions are available for your documents: Open Opens the document using the default application for the selected file type, as determined by the Windows operating system. Save As Lets you save a local copy of your document. This option is available for cloud documents only. Change Description Allows you to change the description of your attachment. Move to Cloud Moves an attached local document (shortcut) to cloud storage. Print Prints the document to your default printer using the default application for the selected file type. This option is not available for cloud documents, and is enabled only if Windows has been configured with a Print option for the file type. Delete Deletes a shortcut, or permanently deletes a document from cloud storage. Page 49 Appendix A: External Documents Appendix B: Importing an Excel Worksheet If one is available to you, a list of athletes in Excel format can save a lot of data entry time if you import it using the Import Wizard. The Import Wizard will import athlete names, identification numbers, addresses, and more. The most important things to understand about using the Import wizard are: The layout of the Excel worksheet must follow the guidelines of the SIMS Excel Import Guidelines document. The document is available from the Windows Start menu under the SIMS folder, or by clicking the blue link from the first step of the Import Wizard. It explains in detail which data must appear in each column. For example, the athlete’s last name and first name must appear in columns A and B, respectively. Only the first worksheet of an Excel workbook file will be imported. To import an Excel worksheet, choose File/Import/Excel Worksheet from the SIMS menu. Step 1: Select a file Once you’ve made sure your Excel worksheet is in the required format, use the browse button to select the file to import. Remember that only the first worksheet of an Excel workbook file can be imported. Step 2: Preview the data to be imported This step allows you to view the worksheet data before it is actually imported. Here are some helpful hints for working with the worksheet preview: If there are any cells that do not meet the requirements described in the SIMS Excel Import Guidelines, they will be highlighted in yellow. Hover the mouse cursor over any highlighted cell for an explanation of why the cell cannot be imported as shown. You can make modifications directly to any cell, but if you have a large number changes to make you might find it easier to open the file in Excel, make the changes there, and begin your import again. You can eliminate any rows that should not be imported by highlighting the row and pressing the delete key. The Import Wizard window is resizable, so you can increase the size of the window (or maximize it) to see more columns and rows, if desired. Step 3: Review invalid rows and verify matches Note: You might not see this step. This step appears only if you have one or more rows that cannot be imported, or if one or more athlete matches need to be verified. Page 50 Appendix B: Importing an Excel Worksheet Based on the name, DOB, and identification number provided on the Excel worksheet, the Import Wizard will attempt to determine whether that athlete already exists in the SIMS database. If an athlete record already exists with values that are similar—but not exactly the same—they will be listed here for your verification. Import information is shown in the columns with a white background, and the proposed match in the SIMS database is shown in the columns with a yellow background. For each athlete listed, indicate in the Match Status column whether the import and existing data both refer to the Same athlete or if they are Not the same athlete. During the import, the Import Wizard will use the value you select to determine whether the import record should be added as a new athlete, or update an existing athlete. In this step, you will also see any import rows that cannot be imported. An explanation will appear in the Match Status column. Step 4: Options for updating existing athlete records Note: You might not see this step. This step appears only if one or more import records matches an existing athlete record in the SIMS database. If you do not want to update your existing athlete records, and only want to import athletes that don’t already exist, mark the Only import new athletes that do not already exist in the database checkbox. If you elect to let the Import Wizard update your existing athlete records, the Athlete Update Options settings will determine how notes, medic alert, contacts, and insurance information are imported. For notes and medic alert text, indicate whether you want to Append import file [notes/medic alert] to the existing [notes/medic alert] or Replace existing [notes/medic alert] with import file [notes/medic alert]. The Append option will keep your existing information, and add the new information at the end. The Replace option will overwrite the existing information with the new information. If any contact or primary insurance information has been detected in your import file, the associated contact types will be listed under When importing athlete contacts and primary insurance provider. For each type listed, indicate whether you want to Keep any items of this type that already exist or Remove existing items of this type before importing. When the Keep option is selected, import data of that contact type will be added to any contacts that already exist. The Remove option is handled as follows: Page 51 For each existing athlete, the Import Wizard checks to see if any records already exist for each contact type (or primary insurance). If there is import data for the contact type, any existing records for that contact type are removed before importing the contact. For example, if the contact type is Emergency contact (primary), the Import Wizard will first look to see if the athlete’s import record includes information for this contact type. If it does, any existing Emergency contact (primary) records for the athlete will be deleted—even if there are more than one—and the new information is Appendix B: Importing an Excel Worksheet then imported. If the import record does not include information for the contact type, existing records of that contact type are not removed from the athlete record. Step 5: General import options and beginning the import If you are like most users, you only keep track of one school or club in your database. For users who keep track of multiple institutions, use the Import to this institution setting to indicate the institution to which imported records will be assigned. Note that this setting only has meaning when a valid sport has been provided as part of an athlete’s import record. If a sport is not provided, that athlete will be added as a non-roster athlete, and will not be associated with any institution or roster. The second option on this screen lets you choose how an athlete’s academic year is handled during the import. SIMS will attempt to store the academic year in the Eligibility Status field of the athlete’s roster record. If your import file does not include the sport information for your athletes, the Import Wizard will not have a roster record in which to store the athlete’s Eligibility Status. When this situation occurs, you have the option to Append the academic year to the athlete notes field or Do not import the academic year. The Append option will add the academic year to the end of the athlete’s Notes field. The Do not import option will ignore the academic year altogether. To reiterate, the Append/Do not import options only have meaning when an athlete’s sport has not been provided in the import file. Now that all your options have been set, it’s time to begin the import. Just click Finish to process the import file. Page 52 Appendix B: Importing an Excel Worksheet Appendix C: AthleteConnection Services AthleteConnection Services allow you to download and import information entered online by your athletes. Here’s how it works, in a nutshell: From within SIMS, you select the type of information you want your athletes to enter online (e.g., emergency contacts, physicians, insurance policies, etc.). You can also provide links to forms or other web based content for your athletes’ reference. Next, provide your athletes with a link to the athleteconnection.net website, along with two codes that identify your school or organization. The athletes can be existing SIMS athletes, or new athletes not already in the database. Each athlete creates an account on the website and records his or her information. Completed forms can also be uploaded by the athlete. Finally, from within SIMS you review and import (or reject) the athlete entries from the website. Follow the steps below to begin using AthleteConnection Services. Step 1: Configuring AthleteConnection Services Configuration of AthleteConnection Services is done through the AthleteConnection Management Console (ACMS). To access ACMS, click the button on the SIMS toolbar. Before the ACMS window is displayed, a Subscription Status window will appear that will show your expiration date and the number of athlete accounts currently in use. (If you do not currently subscribe to AthleteConnection Services, you can activate a free trial subscription by clicking the Free Trial Subscription link in the bottom left corner of the window.) Click OK to continue. From the ACMS, click the Services. button on the toolbar to configure the settings for AthleteConnection Website Input Settings From this tab you’ll establish which information the athlete is prompted for when they are completing their profile online. The Basic Input Options section lets you choose which identification number fields are available to the athlete, and whether they are able to specify their primary team. The Additional Input Options checklist lets you choose which types of input the athlete will be prompted for online. Each of the items on this list, if selected, will appear as a separate tab on the athlete’s profile. Any selections made here will appear in addition to the My Contact Information and Notes tabs, which are always included and cannot be disabled. Page 53 Appendix C: AthleteConnection Services Teams This tab lets you control which of your SIMS teams are available for selection by the athlete. This feature is only available when Allow athletes to specify their primary team has been selected from the Website Input Settings tab. Import Options This tab determines how data are handled after you’ve downloaded and accepted an athlete’s profile information. The Overwrite Options setting lets you indicate whether the ID and date of birth values stored in an athlete’s SIMS record should be updated with values entered by the athlete online. The Athlete Contact Type setting determines whether the athlete’s personal contact information is imported to SIMS with the current address or permanent address designation. Links This tab allows you to provide any web links (URLs) you want your athlete to have access to. You might use this to specify a link to an external website, or to a document hosted on your organization’s website. If you define one or more links on this tab, the links will be displayed on a Links tab on each athlete’s profile page. A website address and description must be provided for each link. The description is the text the athlete will see as a clickable link from the Links tab of their profile page, and the website address is where they will be directed to when they click the link. Take care to ensure you’ve entered only valid URLs in the website address column. You can use the Validate Links link to make sure the addresses you’ve entered are valid. Uploads From this tab you can specify whether athletes are able to upload documents to be saved with their profile. Custom upload instructions that will appear on the website can also be provided here. The Uploads feature is designed to work in combination with the Links feature, which you can use to provide links to your blank forms (e.g., pre-participation forms and compliance documents). Once the athlete has downloaded a form from the Links section of their profile, they can complete the form and upload it to their profile using the My Uploads section of their profile. Any uploaded files can be viewed from SIMS by previewing the athlete's account profile, as described below. Uploaded files are also available from the External Documents feature for any athlete records that have been matched to an AthleteConnection account. Page 54 Appendix C: AthleteConnection Services Step 2: Notify Your Athletes Once your settings have been configured, it’s time to begin collecting data. Since you’re going to let the athletes input the data, you’ll need to provide them with: 1) The AthleteConnection website address: https://www.athleteconnection.net 2) The account group and account code that together will identify the athlete’s account as belonging to your school or organization. You can find these values at the top right of the ACMC window. 3) A brief set of instructions. You can use these as a starting point: a. Visit this website in your browser: https://www.athleteconnection.net b. Click the Register link to create a new account, using the account group and account code provided. c. Once your account has been created, you will be taken to your profile page. Please complete the information on this page and click the Save Changes button when you’re finished. d. You can update your profile at any time by logging on to your account at https://www.athleteconnection.net How you notify your athletes is up to you. The information can be sent by email, or you might prefer to have the athletes access the website with your supervision from a training room computer. Step 3: Download Athlete Data Once your athletes have entered their information online, you can pull it into SIMS using ACMC. Each time you start ACMC, it will check for any athlete account changes. You can also check for updates while you have ACMC open by clicking the refresh button on the toolbar. The ACMC is split into two panes. The top pane lists the athletes you already have in SIMS. The bottom pane lists any athlete accounts that have been added or updated, and is from where you’ll import the changes to SIMS. If there are no account changes, the bottom pane will be collapsed when you open ACMC. Account changes will typically be listed with a status of Match, New or Updated. Page 55 Appendix C: AthleteConnection Services Previewing Account Data You can view the data an athlete has entered (including any files uploaded) by clicking View from the bottom pane. For athletes listed in the top pane, right click the athlete record and choose View account details. Matching Account Records If you have existing athletes in your SIMS database, you might need to match the incoming account records to your existing athlete records. ACMC attempts to match each new athlete account with an existing SIMS athlete record based on the first and last name, and the identification numbers provided. When you select an account with Match status from the bottom pane, the athlete record it is matched to will become selected in the upper pane. If an account record has been erroneously matched to the wrong athlete record, you can unmatch the two by clicking the Change button and selecting Unmatch. If an account record has a status of New but should be matched to an existing athlete record, select the athlete record from the top pane. Then, match the two by clicking the Change button and selecting Match to Selected Athlete. New Account Records Account records with a status of New will result in the creation of a new athlete record in SIMS. You can automatically assign new athletes to a roster by selecting an Add new to roster value before clicking Accept. If this value is left as the default—“(none)”—the athlete will be created as a non-roster athlete. Updated Account Records Account records with a status of Updated are records that were previously matched (and accepted) to a SIMS athlete record, and have since been updated online by the athlete. In the event you don’t want to accept the changes made by an athlete, click the Change button and select Reject Update. Accepting Downloaded Account Changes Matching and unmatching a record has no effect in SIMS until you accept the changed account record. Click the Accept button to import the athlete information to SIMS. You can use the Accept All button to import all account records at once. Step 4: Reviewing Imported Data in SIMS Once the account changes have been accepted, you can view the imported data of each affected athlete by opening their athlete record. (You will need to close ACMC to do this.) A deliberate effort has been made to keep information entered by the athlete separate from information entered by the AT. If you look at the Contacts or Insurance tabs of the athlete record, you will notice that athlete-entered items are listed in bold type while AT-entered items are listed in regular Page 56 Appendix C: AthleteConnection Services type. You will also notice that athlete-entered items cannot be modified, with the exception of the notes and comments fields. Modifying Athlete-Entered Contact and Insurance Information Athlete-entered contact and insurance information cannot be modified in SIMS, but you can make a copy of a contact or insurance policy, and edit the copy. To do this, right-click the entry you want to copy from the list box on the left of the Contacts or Insurance tab, and then choose Duplicate from the context menu. An exact copy of the athlete-entered record will be added, which you can edit. Medical History, Medic Alert and Notes fields are handled differently, as the athlete-entered data are actually merged with the existing text of the field. To differentiate, each line of athlete-entered text is prefaced with a “|”. You are free to modify the athlete-entered text, but be aware that if you do, it will be re-inserted if the athlete updates his/her information and you accept the changes. Managing Athlete Accounts Occasionally, you may encounter an athlete who has forgotten their logon name, password, or has been locked out of their account. Forgotten User Names and Passwords Athletes can recover user names and passwords via the website as long as they know the e-mail address that was used to create their account. From the logon page of the website, they can simply click the Forgot your Password? link and enter their e-mail address, and they will be sent an e-mail containing the user name and password. The user name and e-mail associated with an athlete’s account is also available when viewing the athlete profile from ACMC. (See the Previewing Account Data topic in Step 3 for instructions on viewing profile data.) You can also reset an athlete’s password manually using the Reset Password link from the Athlete Profile window. Locked User Accounts If an athlete (or malicious user) attempts to log on multiple, sequential, times using the wrong password, their account will become locked. To unlock an account, click the Unlock Account link from the Athlete Profile window. Page 57 Appendix C: AthleteConnection Services Deleting Accounts Athlete accounts can be deleted by clicking the Delete Account link from the Athlete Profile window. Note that deleting an account will only remove the athlete’s data from the AthleteConnection website, and has no effect on data already entered or imported into SIMS. Page 58 Appendix C: AthleteConnection Services Appendix D: Concussion Assessments The Concussion Assessments feature allows you to track various measurements commonly used as part of a concussion management routine. The modules available from the Concussion Assessments window include: Symptoms. Allows you to monitor 22 common concussion related symptoms, each graded on a scale of 0 to 6. ImPACT. Lets you record the 6 composite scores generated as part of an ImPACT exam. SAC. Lets you record the 4 scores calculated as part of a Standard Assessment of Concussion (SAC) exam. BESS. Allows you to record the 6 scores generated as part of a Balance Error Scoring System (BESS) assessment. Accessing the Concussion Assessments Feature To access the Concussion Assessments feature, click the button that appears at the bottom of the Athlete, Injury and Injury Maintenance edit windows. Note that the button will be disabled in the Injury and Injury Maintenance edit windows if a concussion has not been designated as the injury. Adding Concussion Assessments Assessments are added by clicking the New Entry link at the top of the Entry Dates list, or by rightclicking the Entry Dates list and choosing New from the context menu. Baseline vs. Follow-up Assessments When an assessment is entered from the Athlete edit window, it will be designated as a baseline entry by default, while assessments entered from the Injury or Injury Maintenance edit window will be designated as a follow-up to the selected injury, by default. To change the designation of an entry, right-click the entry from the Entry Dates list and either check or uncheck Baseline from the context menu. Note that you must be in an Injury or Injury Maintenance edit window in order to change the designation of and entry from baseline to follow-up. Page 59 Appendix D: Concussion Assessments Editing and Deleting Concussion Assessments Once an assessment entry has been saved, it will be displayed as read-only the next time you open the Concussion Assessment window. To make an entry editable, right-click it from the Entry Dates list and choose Edit from the context menu. To delete an entry, right-click it from the Entry Dates list and choose Delete from the context menu. Page 60 Appendix D: Concussion Assessments