1
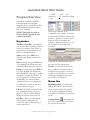
AveraSell Quick Start Guide
Program Overview
^ = CTRL * = ALT [F] =
function key U = Underscored letter
= ALT
Welcome to AveraSell! AveraSell is a
feature-rich point-of-sale program
designed to be easy to learn and use. This
guide contains basic information about
how to use AveraSell.
NOTE: This guide may refer to
features that are optional in your
version of AveraSell.
Keystrokes
Tab Key = Enter Key - In AveraSell
you use the Enter key just like a Tab key
to move from field to field. This is an
option which you may disable, but we
think it is a natural keystroke.
Click or type a number or key
combination. For example, ^1 means to
hold down the CTRL key and press the
number 1. Likewise, *1 means to hold
down the ALT key and press the
number 1. Brackets prompt you to use
the function keys at the top of the
keyboard.
Add new entry (press INSert key) Select the Add button and follow the
prompts.
Edit an existing entry (press Enter key)
- First highlight the desired entry, then
select Edit. Make changes as necessary.
Delete an existing entry (press DELete
key)- First, highlight the desired entry,
then select Delete. Generally you will be
prompted to confirm the deletion. If
not, be prepared to re-enter the item.
WARNING: You cannot undelete.
AveraSell will ask you to confirm that
you really want to delete an item, but
once it is deleted, it is gone.
A tab with an underlined letter means to
press the ALT key and the letter.
Locked - If a record is locked it will
have a padlock icon beside it and you
will get the message that it is in use by
another user. If it really is not in use by
another user, highlight the item and
press CRTL-U to unlock it.
Mouse Use
F10 key is the Finish command. When
you are finished creating an invoice,
press F10. When you have finished
editing an inventory item, press F10.
RightMouseClick - The right hand
button on the mouse opens common
shortcut menus for the task at hand.
You should try RightMouseClicking
everywhere in AveraSell to see what you
can do.
Hot Keys - Menus are often labeled
with keystroke combinations for
selection the option without having to
reach for the mouse.
Lookup Button Often appears at
the end of a field to allow you to select
the desired item from a list.
POSitive Software Company – www.gopositive.com
1
AveraSell Quick Start Guide
Instructions
See Help
Go To:
In the User Manual you will often see
references to the Help files of AveraSell.
Throughout this manual we will try to
guide you to a specific area of AveraSell.
For example, if you read "Go To
Accounting: Reports: Sales Reports:
Inventory" you should click on the pull
down menu named Accounting, then
select Reports, then select Sales Reports,
and finally select Inventory.
For example, when you read in this
manual "See Help: Price/Weight
Embedded In SKU" this means that you
should open the help files and find the
topic.
1) Go To Help: Search For Help On
2) Select the Find tab.
To standardize directions, you will most
frequently be directed to the pull down
menus at the top of the window which
are always available. However, you will
quickly discover that there are faster
ways to accomplish the same thing. For
example, on the Manager Console
screen you can simply press Report
Center (CTRL-R) and choose the same
report.
3) Start typing a keyword, like
"embedded"
Step By Step
This is an informative and handy feature
of the AveraSell's Help program to
gradually initiate you to features and
procedures of AveraSell. You will be
given a tip which might otherwise be
overlooked.
Learning to do something for the first
time sometimes requires step by step
instructions.
1) Where it is considered appropriate
you will be asked to follow numbered
steps of instructions.
4) In the bottom half, you will see the
topic and you can choose to open it.
If you would like more help with this,
Go to Help: How To Use Help.
Tip Of The Day
2) These step by step instructions will
stand out with this formatting design.
3) Remember that this may not be the
only way of accomplishing the task.
4) As you become more familiar with
AveraSell, you may find equally
appropriate and perhaps easier ways of
doing the same thing.
You can open the Tip Of The Day at
any time by selecting it under Help.
Or you may set AveraSell to open it
each time you start AveraSell. This
POSitive Software Company – www.gopositive.com
2
AveraSell Quick Start Guide
option is a part of the POSitive Setup
Form which is accessed by selecting File:
System: System Setup: Defaults Tab.
Registration
If you register your copy of AveraSell,
you will receive unlock codes that will
activate two additional features,
Inventory Matrix and Customer Orders.
Registration is only done via the internet
at www.averasell.com
Technical Support
Fee based technical support for
AveraSell is available from POSitive
Software Company. Visit
www.gopositive.com, or call our support
department at 866-368-2266 for current
pricing.
Free technical support is available as
described below:
the AveraSell Help pull-down menu.
Please include the 'version' and 'build'
numbers in your problem report.
4) If a window with an error message
was displayed, please include the full text
of the dialog box, including the text in
the title bar.
5) If the problem involves a setting or
option on a dialog box, please report the
text in the title bar and the text of the
setting or option with an explanation of
what you have observed.
Note: You can press F1 at any time
while AveraSell is active for context
sensitive help.
If you have any comments or
suggestions about AveraSell, we would
like to hear from you. Send an e-mail to
[email protected] or call us,
at 800-735-6860.
Answers to many common questions
can be found in the Support Knowledge
Base at www.gopositive.com
You can also send e-mail to
[email protected].
Send postal mail to:
POSitive Software Company
2290 Robertson Drive
Richland, WA 99354
When reporting problems, please
include the following information:
1) Is the problem reproducible? If so,
how?
2) What version of Windows are you
running? For example, Windows 98,
Windows NT 4.0, XP, etc.
3) What version of AveraSell are you
running? Select About AveraSell from
POSitive Software Company – www.gopositive.com
3
AveraSell Quick Start Guide
A Brief
Orientation
This section gives an overview of some
of the major functions of AveraSell,
including:
•
•
•
•
•
•
The AveraSell Main Screen
Inventory Tracking
Customer Tracking
Invoicing
System Setup
Reports
You can begin exploring AveraSell
immediately by running the program,
and choosing the demo company
“Blink’s Video Game Emporium.” We
have included sample data for you to
play with, using a fictitious store.
The default ID and password for
logging in to Blink’s is POS and POS.
Once you have logged in, you can begin
to explore the program. Sample
inventory, customers, and invoices have
already been entered for you.
POSitive Software Company – www.gopositive.com
4
AveraSell 4.3 Quick Start Guide
AveraSell Main Screen
When you first run POSitive, you will see a
screen similar to the one below. POSitive's
main screen consists of four elements:
•
•
•
•
Main Menus
The Tool Bar
Manager Console Window
The Signature Bar
Main Menus
Standard pull down menus access
AveraSell's functions.
•
•
•
•
•
•
•
•
•
•
File - Access to AveraSell system
preferences and setup screens.
Edit - (not applicable)
Register - Access to invoicing and
cash register functions.
Inventory - Access to inventory and
purchase order functions.
Management - Access to employee
and managerial functions.
Marketing - Access to e-mail
broadcasts, mailing lists and customer
exports
Accounting - Access to GL setups and
reporting functions.
Utilities - Access to customer, vendor,
and tax rate setups.
Window - Access to open windows.
Help - Access to program registration,
on-line help, and toolbar.
The Tool Bar (optional)
The Tool Bar displays shortcut icons and
hotkeys for typical AveraSell functions. This
is turned on or off from the Help menu. If
it is turned off, the icons are not visible, but
the hotkeys will still function. The Toolbar
should be turned off if you want more
screen area for invoicing and other AveraSell
activities.
•
•
•
•
•
•
New Invoice - Create a new invoice.
Pending - Access pending orders,
layaways, and quotes.
Inventory - List of your inventory.
Customers - List your customers.
Calendar - View a calendar.
Calculator - Use a popup calculator
with printing tape.
POSitive Software Company – www.gopositive.com
5
AveraSell 4.3 Quick Start Guide
•
•
•
•
•
•
•
Open Cash Drawer – this will open
up your cash drawer, if one is
attached.
Internal E-Mail - Send messages to
other employees.
Time Clock - Employee time clock
punch in or out.
Price Check - Lookup the price of an
item by scanning its barcode.
Login - Change employee operating
work station.
E-mail – send or receive e-mail.
Retrieve Internet Orders – if you are
using our e-commerce solution, this
will retrieve internet orders directly
into POSitive.
Manager Console Window
(optional)
The Manager Console provides a tabbed
and hot keyed listing of many AveraSell
functions. You may use the mouse or the
keyboard for quick access.
number 1. Likewise, *1 means to hold
down the ALT key and press the number 1.
Setup: Station Detail allows you to designate
if Manger Console will open and which
Main Group will be activated upon startup.
The Signature Bar
At the bottom of the screen the gray bar
displays the following information
•
•
•
Registration Status - Demo Mode if
the program is unregistered, and Basic
Edition, Advanced Edition, Single
User, or Multi-User if registered.
The currently active Sales ID on this
workstation.
Program version - More specific
version information is available on the
Help: About POSitive screen from the
Help menu.
Date and Time - This should be checked
frequently for accuracy and corrected at the
individual computer.
Press the Function Key to activate an
appropriate Main Group button:
•
•
•
•
•
•
Register [F2]
Management [F3]
Inventory [F4]
Purchase [F5]
RMA [F6]
E-Commerce [F7]
Then Click or type a number or key
combination. For example, ^1 means to
hold down the CTRL key and press the
POSitive Software Company – www.gopositive.com
6
AveraSell 4.3 Quick Start Guide
Inventory Tracking
AveraSell offers you a wide range of
inventory options for selling everything from
pencils to personal computers.
All the information you need to manage
your inventory is presented on the inventory
screen.
•
•
- Stock counts are up to the
minute, backorders are flagged and
filled automatically, and substitution
items can replace items on pending
orders. Settings for minimum and
maximum stock levels help you make
timely reorders.
Types Of Inventory - From simple to
sophisticated. Consumables, bulk
inventory, color - size matrix, kits,
consignments, trade-ins, serialized,
templates, assemblies, labor and
services, freight, and gift certificates.
Each supports multiple SKUs,
pictures, and taxation options. Each
inventory item is assigned to a
•
Stock
•
•
category which can govern its
characteristics.
Purchases - Multiple vendors,
automated RMAs, complete purchase
order history, 'hot' items list, and
more. Save money by consolidating
purchase orders, pick and choose
from the best vendors, RMA
inventory quickly.
Pricing - AveraSell gives you 6 pricing
levels for everything you sell. Prices
can be automatically updated with cost
changes. Promo pricing can be in
effect for any time period, for just an
hour to infinity. Selected customers
can get permanent price discounts,
contract pricing, and other benefits.
E-Commerce - Any inventory item
can be automatically displayed on your
POSitive Software Company – www.gopositive.com
7
AveraSell 4.3 Quick Start Guide
web page for sale whenever you want.
One of the unique features of POSitive is
the ability for you to rapidly enter inventory
by selecting category defaults. Inventory is
grouped into Departments and Categories.
Categories can have defaults set, such as
minimum stock, default vendors, price
markups, etc. When you enter a new
inventory item, POSitive will fill out 90% of
the information required by using the
Category defaults. POSitive can even autogenerate SKUs for you, based on rules you
provide. So, entering an inventory item can
be as simple as:
•
•
•
Type in a description
Type in a cost
Press F10 to complete
POSitive will generate a SKU, calculate
pricing, and fill in all other details
automatically.
POSitive Software Company – www.gopositive.com
8
AveraSell 4.3 Quick Start Guide
Customer Tracking
AveraSell lets you easily track your
customers at the point of sale. Once you
know who your customers are, and their
buying habits, you can customize your
marketing efforts through direct-mail or email. You can keep extensive notes and
classify your customers as needed for
enhanced marketing.
•
•
See at a glance what the customer has
purchased.
Offer incentives to come back by
setting automatic discounts, frequent
buyer rewards, and by mailing or emailing special offers.
POSitive Software Company – www.gopositive.com
9
AveraSell 4.3 Quick Start Guide
Invoices
•
AveraSell makes quick and simple sales
invoices and receipts.
•
•
•
)
Unlike a cash register, you are making
a record of the sale which you can
review and reprint at any time, even
years from now.
You are updating your inventory and
triggering mechanisms to order more
inventory.
You are creating a history of your
customer’s purchases, providing you
with additional marketing
opportunities.
POSitive can track your customer’s email address. Opt-in e-mail lists are a
powerful and inexpensive way to
market to your customers. Use
POSitive to gather e-mail information
at the point-of-sale, and then to send
out bulk e-mail messages.
•
•
•
•
•
•
•
Invoicing Features
•
While creating an invoice, there are many
features and processes to handle most every
business need.
•
•
•
•
•
•
•
•
Barcode Scanning - accepts input of
common barcode scanners
Line Editing of quantity, price,
discount.- change as needed
FastAdd Inventory - add a new
inventory item on the fly
Fractional and Multiple Quantities
– use up to 4 decimal places for
Quantities; rapid entry of multiple
Quantities
Annotations - make paragraph style
notes about line items and general
notes for the invoice
Serial Number Assignments display serial numbers on invoice
Packaging - offer listed inventory at
a package price with individual items
not priced
Line Positioning - reposition items
on invoice for readability or packaging
purposes
Full and Contracted Views of
Invoice - temporarily hide or reveal
customer information
Customer Purchase History - view
complete history of customer
purchases and returns
Return Processing - record, verify
authenticity, and accept return
inventory for refund or replacement
Inclusion of Special Notices - print
extensive policy statements and special
notification on every invoice
Switch printers on the fly - route the
invoice to other designated printers
Backorder Releases - fill invoice
backorders by 'borrowing' items from
another customer's pending order
Invoice Suspension - temporarily
hold or permanently convert an
invoice to an order or layaway
Coupon and Gift Certificate
Redemption - accept coupon values
and honor gift certificates
Global and Line Item Discounting
- offer percent off and/or dollar
discounts, tax Exemption – Nullify
The Invoice Interface
Ringing up sales with AveraSell is quick.
Use a barcode scanner to scan an item, press
F10 to take payment, and you are ready for
the next customer.
The REGISTER SCREEN is designed for
fast data entry. It contains the minimum
amount of information you need to process
a sale. This screen is suitable for gift stores,
pet stores, and any type of store where your
primary operation is cash & carry.
POSitive Software Company – www.gopositive.com
10
AveraSell 4.3 Quick Start Guide
can be edited to make your invoicing
process easier.
Tendering The Invoice
The last step of a customer sale is to tender
the invoice.
•
Entering Sales
An invoice consists of 3 main areas.
Customer Information (top area) - The
customer's name, address, phone and
shipping information are displayed so you
will be reminded to keep it updated.
)
Offer your customers the benefits of
split tender, gift certificates, coupons,
discounts, store accounts, credit card
payment, and even accept foreign
currency at the current exchange rate.
Just press F10 to select the method of
payment. You will be prompted to give
change and the receipt will be printed.
Note: This is not visible on Cash Sale
invoices because there is no customer
information to display.
Purchase List (white area) - items listed
here are being sold to the customer.
Add items being purchased. Items can be
added by using a barcode scanner, typing the
SKUs, or selecting from an inventory
lookup table.
Edit items being purchased. Highlight the
item and press Enter. Change the quantity,
selling price, discount percentage.
Delete an item from the list. Highlight the
item and press the DELete key on the
keyboard.
)
To add a NOTE to the invoice press
CTRL-N. Type your message and press
F10 when done. To edit the note,
highlight a portion of it and press
Enter.
Invoicing Controls (gray area) - Click on
any button or use the Function keys
associated with the item. These button bars
POSitive Software Company – www.gopositive.com
11
AveraSell 4.3 Quick Start Guide
Invoice History
•
Once the invoice has been completed, you
may review and reprint invoices.
•
•
•
•
•
Control employee access to functions
and features of AveraSell
Establish invoicing, inventory and
customer options
Reprint a receipt whenever needed.
Review details of a sale, especially
when a customer is returning
merchandise.
Focus on just the invoices for a
specific customer
Find invoices which contain or meet
specific criteria which you need.
System Setup
AveraSell lets you choose from dozens of
customization settings to reflect your
business style.
•
Standardize sales processes so that
everyone knows and follows the
correct procedures
POSitive Software Company – www.gopositive.com
12
AveraSell 4.3 Quick Start Guide
Reports
You can get information rich reports to help
you make business decisions.
POSitive Software Company – www.gopositive.com
13
AveraSell 4.3 Quick Start Guide
What You Should Do
Now?
AveraSell has sample data which already has
inventory, customers, vendors and other
basic elements in place for you to
experiment with.
1) Run AveraSell
2) At the Choose Company screen,
highlight Blink's Video and press Enter
Enter your cost of the item
Adjust the selling price(s)
)
If you want to know more about all the
options and settings available when
creating an inventory item, press F1 for
Help.
Press F10 to save it.
Choose Exit.
Create A Customer
3) Enter the sales ID and password which
are POS and POS
Open the Customer List (Click on the
People icon on the toolbar)
Poke around and do whatever you want to
do. Here are some suggested activities:
Press INSert (or choose the Add button)
Create An Invoice
Click on the first icon on the toolbar. This
creates a new transaction. Press Enter and
this opens an invoice.
Fill in the fields and press Enter to get to the
next field
)
TIP: When you get to the Zip Code
field, type 99352 and press Enter. Note
that by entering a zip code AveraSell
automatically adds the city and state.
Press Enter again. This opens the inventory
list.
Finally, press F10 to save your work.
Highlight an item (use the down arrow key)
and press Enter.
Create A Layaway
Now press F10 and take payment by Cash
(Just press Enter and then F10.)
Click on the New Transaction icon.
)
Repeat the process as often as you want,
trying something a little different each
time.
Create An Inventory Item
Click on the Bicycle icon on the toolbar.
Press the INSert (or choose the Add button)
Select Normal
On the Departments List highlight and
select Wintendo Games
Type in a Description of something you sell
and press Enter.
Type in a SKU (any letter/number
combination)
Highlight Layaway and press Enter.
This opens the customer list. Highlight your
newly added customer and press Enter.
Add an inventory item or two to the
Layaway. Include the item you created
earlier.
)
Note that the item you created is
backordered. There is a value of 1.00
in the B'Order column. We will take
care of this when you create a purchase
order.
Press F10.
Highlight a date when the Layaway will be
picked up
POSitive Software Company – www.gopositive.com
14
AveraSell 4.3 Quick Start Guide
When prompted to Apply Payment, type Y
for yes.
Press Enter. This opens the Vendor
Inventory List.
Enter an amount of 20.00.
Choose to print or not print the layaway.
Create And Receive A PO
Go to Inventory: Purchase Orders: Receive
W/O Purchase Order
)
This means, click on the word Inventory
at the top of the screen. This opens a
pull down menu. Select Purchase
Orders, and then select Receive W/O
Purchase Order.
Press F3 to open the list of vendors.
Select Glub Video Distributors.
Use the down arrow key to highlight an item
and then press Enter.
Enter a quantity being purchased and press
Enter.
Press F10 for Next.
Press Enter again to confirm that you are
receiving that quantity.
Press F10 Next, again.
Press Enter (or change the cost if you wish).
Enter a number (In reality this will be the
number on your vendors invoice or packing
slip.)
This brings you to a blank line.
)
Repeat the steps and add another item to
the purchase order.
Enter 10.00 for Freight charges.
)
Now you will add the new inventory item
which you created to this vendor list.
Press F10 Finish
Your newly created purchase order probably
looks like this.
On a blank line of the purchase order, press
Enter to open the Vendor Inventory List.
Press INSert or choose the Add button.
)
You have just completed a PO Wizard
which takes you step by step for filling
in the top half of a purchase order.
Next, you will learn how to select items
from a Vendor Inventory List, and how to
add a new item to the vendor's inventory list.
Press F2 to open the list of AveraSell
inventory. Highlight your newly added item
and press Enter.
Press Enter, Enter and then select OK
[F10].
POSitive Software Company – www.gopositive.com
15
AveraSell 4.3 Quick Start Guide
Now that your item is on the Vendor
Inventory List, you can select it for the
purchase order. As before, enter a quantity
and press Enter until you are on a blank line
again.
The purchase order is now complete. Press
F10 to Post the PO.
Choose Receive Now.
)
The PO Receive Summary screen
displays the name of the customer for
whom you created a layaway and
hence notifies you that the backordered
item is now being filled on that
layaway.
Balance The Cash Drawer
At the end of the day you should balance
your cash drawer. Go to Register: Daily
Balance.
)
This means click on the Register pull
down menu at the top of the screen and
select Daily Balance.
Enter a Sales ID and a Password (POS and
POS)
Select OK on the Choose Station prompt.
The coin counter helps you count down
your drawer. (Normally you would enter the
number of each denomination of bills and
coins, but we will skip this.) Press F10.
When balancing a cash drawer, you want
your count to equal the system count so that
the difference is 0.00
Ch
oose Close.
Open The Cash Drawer
From time to time, you may need to open
the cash drawer without ringing up a sale.
Click on the cash register icon in the toolbar.
Enter your Sales ID and Password
Select an option to take cash out, put cash
in, or to cash a check
Press F10 to Post
Answer Yes to post the information to
history files.
On the Final Balance screen, designate how
much cash will be placed in the register for
making change the next day.
Type a reason and then fill in the dollar
amount.
Press F10. This activity is logged and will
be a part of balancing the cash drawer at the
end of the day.
The Your Cash Deposit shows how much
cash you should remove from the drawer
POSitive Software Company – www.gopositive.com
16
AveraSell 4.3 Quick Start Guide
leaving the rest to make change. Of course,
you will also remove checks and credit card
slips.
Choose OK
Choose Yes to print the Register Balance
Report.
Then choose OK.
Print Reports
Bulk Inventory - AveraSell will track stock
counts of inventory purchased in bulk form
and then re-packaged or sold in smaller
units.
Copy Record - This feature allows you to
With the Manager Console screen open,
either click on the Report Center button or
press CTRL-R
Numerous reports are available for
reviewing profits, inventory status, and
purchase order history.
Highlight a report type on the left.
Highlight a specific report in the middle
column.
Press F7 to run the report.
)
you wish, AveraSell can generate a SKU for
an inventory item as it is being added to
AveraSell. The generated SKU can contain
codes to indicate the category and/or
vendor of the item.
Note: the Add, Edit, and Remove buttons
are for managing "custom made"
reports, using the Clarion Report
Writer (separate product).
If you are prompted for a date range, click
on one of the buttons or fill in start and end
dates. Then choose F10.
Daily Sales Summary
A useful report is the Daily Sales Summary
screen which is a snapshot of a given day's
activity.
Go to Management: Daily Sales Summary.
Advanced Features
There are many advanced features are built
into AveraSell. Some of these features will
need to be activated while others are always
working for you.
Auto SKU - An SKU, or stock keeping unit,
is a unique identifier of inventory items. If
clone an inventory item to make another
item similar to it. All fields will be copied
except for the SKU field which must be
unique. Make any changes to description,
pricing, cost, or any other data field before
saving.
Customer Categories - The Customer
Category is designed to minimize the
number of keystrokes and amount of time
needed to add a new customer to the
customer list. In advance, you define any
combination of tax rates, area codes, zip
codes, pricing levels, store credits, and more
as a customer category. When a new
customer is added to AveraSell, selecting the
category will fill in the defaults and then you
have to fill in only a few details.
Invoice Tender - When accepting payment
on an invoice, only payment options
appropriate to the type of sale will be visible.
For example, you may have chosen not to
accept credit cards on a cash sale so that
option will not be listed.
Mail Groups - This feature exists to facilitate
internal e-mail and reporting of activities. A
group is a collection of employees with
similar jobs. The purpose of mail groups is
to reduce the number of internal mail
messages having to be written and to
broadcast one message to more than one
individual at a time. A secondary purpose is
to be able to generate reports, such as a
profit report, based upon the activities of the
members of a group.
POSitive Software Company – www.gopositive.com
17
AveraSell 4.3 Quick Start Guide
Purchase Order Number - Your purchase
order numbers can be generated with a code
which is easily interpreted so you will know
who placed the PO and when.
Quantity Alert - If you attempt to add an
item to the Order List which is already on
the list, you will be prompted to confirm the
adjustment. This feature helps you minimize
mistakes in ordering too many of an item.
Smart Links - Several shortcuts are
embedded into AveraSell screens to quickly
display more information. For example, if
you click on what appears to be a plain
information box about stock status, you are
immediately presented with data justifying
the counts.
Windowed Envelopes - Many forms,
receipts and some reports are formatted so
that the address will align with a windowed
envelope. This saves time and effort
required to hand address envelopes for
mailings of Receipts, and some Reports.
POSitive Software Company – www.gopositive.com
18
AveraSell 4.3 Quick Start Guide
Setting Up Your
Company
Now that you have installed AveraSell and
have had a chance to play around with the
sample company, Blink's Video Emporium,
you are ready to create your own company
data.
You will be walked through each phase of
the company setup. You should enter your
company information as accurately as
possible; however entries can be changed at
a later time if necessary.
Your Company - Choose a business type
similar to yours. Make any other changes
needed. Again, you can change settings
selected here at a later time.
Run AveraSell and stop at the Choose
Company screen.
Click on the Create New Company button.
You are prompted to enter a data password.
This password should be a simple word
which you can easily remember.
)
Important: Do not forget this password.
There may come a time when you will
need this password to access your data
files.
Station Info - Select appropriate options.
The New Company Wizard
The New Company Wizard will take you
step-by-step through creating your own
company. Please read the information on
the screens and fill in the information as
accurately as possible. You may select the
Back [F9] or the Next [F10] buttons
whenever you need to.
Company Info - Enter your company name
and address exactly as you want it to appear
on your invoices.
Create Tax Rates - Most businesses only
need to use Tax Description 1 and Tax Rate
1. Be sure to change the tax rate from 0.00
to your local tax rate.
Refer to User Manual for
instructions on setting up more
complex tax rates.
POSitive Software Company – www.gopositive.com
19
AveraSell 4.3 Quick Start Guide
You can change the time to something more
practical. Next, choose OK. You will be
told that the directory doesn't exist and you
should answer Yes to create it.
Because backups are so important, AveraSell
will periodically give you reminders to
backup the data. Don't ignore them.
Choose Invoice Style - If you are in doubt,
select Register Style. This can be changed at
a later time. Be sure to review the Help File
later.
Remember: Leave AveraSell running during
the backup time period.
Add/Edit Employees
The Employee List will already have one
entry: POS Manager.
Finish F10 - When you see the Finish
button, click on it. Choose Yes to proceed
with making default data. Please wait a few
minutes as AveraSell creates the data. Click
on the "Done" button to continue to the
next phase.
Sales ID - You are asked to enter your Sales
ID and Password. For now, you can use
POS as Sales ID and POS as the Password.
In the next steps, you will be guided to
create a sales id and password for yourself
and your employees.
Backups - You are immediately prompted
to select backup options.
Choose appropriate Days and Time.
AveraSell sets the time of the backup to 1:00
AM by default. You can change this to fit
your schedule.
IMPORTANT: for the backup to be
performed, your computer must be left on
and AveraSell needs to be running at that
hour.
It is wise, initially, to leave this default
employee unchanged as you are getting used
to AveraSell. Later, you should edit this
entry to change the password.
You should add yourself as an employee. A
New Employee Wizard will take you
through each step. If you have questions,
press F1 for help.
Later, when you decide to add your
employees, you should learn more about
Security Settings and Security Groups. You
can get help on this topic by pressing F1 and
looking for topics: Security Groups,
AveraSell Security Options.
This has been an overview of the basic
company set-up procedure for AveraSell.
Please refer to the User Guide for more
detailed information.
POSitive Software Company – www.gopositive.com
20
AVERASELL SYSTEM REQUIREMENTS
AveraSell does run under Windows Vista, but we recommend Windows XP for the greatest stability and
reliability. Our POS software does NOT run on Macintosh computers.
Workstations
•
•
•
•
•
•
•
Pentium Class 800 or faster
256 MB RAM*
Windows 2000, 2003, XP, Vista
CD-ROM
200 MB free hard drive space
100 MBit Network Cards
Microsoft Internet Explorer 6.0 or later**
Stand Alone Systems also Require:
•
•
Uninterrupted Power Supply
Data Backup Device
The following options will enhance the point of sale software
•
•
•
•
•
•
•
•
Faster Processors
More memory
Credit Card Reader
Cash Drawer
Barcode Scanner
Laser Printer
Receipt Printer
Barcode Printer
Dedicated Servers
•
•
•
•
•
•
•
•
Pentium Class 800 or faster
512 MB RAM*
Windows 2000, 2003, XP, Vista
CD ROM
100 MBit Ethernet Hub
Data Backup Device
Uninterruptable Power Supply (UPS)
Microsoft Internet Explorer 6.0 or later**
We know that there are some users that run successfully on Novell however our testing and support is
only for Windows.
Peer to Peer Servers
•
•
•
•
•
•
•
•
Pentium Class 800 or faster
256 MB RAM*
Windows 2000, 2003, XP, Vista
CD ROM
100 MBit Ethernet Hub
Data Backup Devise
Uninterrupted Power Supply
Microsoft Internet Explorer 4.0 or later**
All Network Servers
Network system support requires 1 workstation set up with Net Meeting and an Internet connection.
The following options will enhance the retail software:
•
•
•
Faster Processors
512 MB RAM or more*
Network Switches
* The amount of memory used should be determined by the requirements of your operating system and
the level of performance you wish to have.
** MS Internet Explorer 6 or later contains a number of Internet components used in POSitive Software.
The software WILL NOT run if you don't have this installed. If you don't have this software already, you
can download it for free from www.microsoft.com.
Hardware
Most standard point of sale equipment can be used with AveraSell, however
some interfaces or models may not be compatible.
•
•
•
•
•
•
•
•
•
•
•
•
•
•
•
Barcode Scanner
Magnetic Stripe Reader
Integrated Keyboard
Scale
Portable Data Collector
Laser/Inkjet Printer
Receipt Printer
Label Printer
Check Validation Printer
Cash Drawer
Pole Display
Multiple Monitor
Touchscreen Monitor
Capture Picture Using TWAIN Source Device
Debit PINpad
Barcode Scanner
Supported Devices:
AveraSell only supports Keyboard and USB Interface barcode scanners.
Metrologic, Symbol, Unitech, Welch Allyn (brand)
Setup:
No special settings are needed to setup this device.
To test this device:
If a barcode is scanned in notepad and it’s SKU appears then it will work in AveraSell.
Magnetic Stripe Reader
Supported Devices:
Cherry, IDTech, Logic Controls, Partner Tech, Unitech, Magtech
Setup:
1) Click on the Register menu item and then click on Register Center. If your Manager
Console was already open then click on the “Register(F2)” button.
2) Click on the Station Settings button. This will open the Station Detail window.
3) Click on the Credit Card Processing tab.
4) Place a check next to “Use Mag Stripe Reader”
5) Click OK to save changes.
To test this device:
1) Click on the Register menu item and then click on Register Center. If your Manager
Console was already open then click on the “Register(F2)” button.
2) Click on the Station Settings button. This will open the Station Detail window.
3) Click on the Credit Card Processing tab.
4) In the “My Card Reader” section of this window click on the Test button.
Integrated Keyboard
Supported Devices:
Cherry, IDTech, Logic Controls, Partner Tech, Unitech
Setup:
The keyboard will automatically be setup by windows drivers. Click here for directions
on setting up the Mag Stripe Reader.
To test this device:
If you can type characters and they appear then the keyboard is working. Click here for
directions for testing the Mag Stripe Reader.
Scale
Supported Devices:
NCI WeighTronix, and others. MUST be compatible with POSH MR4-KB decoder or
Plexis xWedge software decoder.
Setup for one inventory item:
1) Open your inventory list.
2) Edit an item on this list and click on the Options(F8) tab.
3) Place a check next to “Prompt to Read Scale”.
4) Click OK to save changes
Setup for a category:
1) Click on Utilities and then Categories.
2) Highlight the category and then click Defaults(F5).
3) Place a check on “Prompt to Read Scale” and click Reset Inventory(F5).
4) Place a check next to “Prompt to Read Scale” and click Process(F10).
5) Click Done and then OK to save the changes.
To test this device:
1) Create a new invoice.
2) Add an item that has the “Prompt to use Scale” enabled.
3) It should prompt for the item’s weight.
Portable Data Collector
Supported Devices:
Unitech, Metrologic Scanpal 2, PSC Falcon PT40
Setup:
1) Click on the Register menu item and then click on Register Center. If your Manager
Console was already open then click on the “Register(F2)” button.
2) Click on the Station Settings button. This will open the Station Detail window.
3) Click on the Portable Scanner tab.
4) Select the com port that the Portable Scanner is connected to.
5) Select the type of Scanner.
6) Click OK to save the changes.
To test this device:
1) Click on Inventory, Physical Inventory, and then Reconcile from File.
2) Click on the Add button.
3) Type in the name of your scanner where it stays Import Description.
4) Choose “Portable Scanner” and click Finish.
5) Make the name of your scanner is highlighted and click Import Highlighted.
6) A “Reading Scanner…” window will appear that will allow you to scan in your
inventory into AveraSell. When you are done click on OK to save the changes.
Laser/Inkjet Printer
Supported devices:
(almost all)
Setup:
1) Click on the Register menu item and then click on Register Center. If your Manager
Console was already open then click on the “Register(F2)” button.
2) Click on the Station Settings button. This will open the Station Detail window.
3) Under Printers/E-Mail click on the transaction type you would like to use this printer
for. (You can repeat steps 4-7 if you want to setup this printer for multiple types of
transactions)
4) Click on Laser/Ink Jet Printer for Printer Type.
5) To the right of where it says Windows Printer Driver click on the “…” button.
6) Select your laser/inkjet printer and click OK to save the changes.
7) To the right of where is says Windows Form type in Standard.
8) Click OK to save the changes.
To test this device:
1) Open your windows Control Panel.
2) Double click on Printers and Faxes.
3) Right click on your printer and click Properties.
4) Click on Print Test Page.
Receipt Printer
Supported Devices:
Epson, Samsung, Star, Ithaca
Setup:
1) Click on the Register menu item and then click on Register Center. If your Manager
Console was already open then click on the “Register(F2)” button.
2) Click on the Station Settings button. This will open the Station Detail window.
3) Under Printers/E-Mail click on the transaction type you would like to use this printer
for. (You can repeat steps 4-8 if you want to setup this printer for multiple types of
transactions)
4) Click on Receipt/Dot Matrix for Printer Type.
5) To the right of where it says Windows Printer Driver click on the “…” button.
6) Select your Receipt/Dot Matrix printer and click OK to save the changes.
7) To the right of where is says Windows Form type in Generic Receipt Printer.
8) To the right of where is says Form type the form number. (If you click on the “…”
button you can see the list of available form numbers)
9) Click OK to save the changes.
To test this device:
1) Open your windows Control Panel.
2) Double click on Printers and Faxes.
3) Right click on your printer and click Properties.
4) Click on Print Test Page.
Label Printer
Supported Devices:
Datamax, Eltron/Zebra
Setup:
1) Click on File, Editors, and then Inventory Labels Editor.
2) Highlight the label that you most commonly use and click edit. (If you get a warning
message just press OK)
3) Click on Project and then Page Setup.
4) Click on the Printer Selection tab and press Select.
5) Select your label printer, press OK, and press OK again to save the changes.
To test this device:
1) Click on File, Editors, and then Inventory Labels Editor.
2) Highlight the label that you most commonly use and click edit. (If you get a warning
message just press OK)
3) Click on File, Print Sample, and then Print Sample with Frames.
Check Validation Printer
Supported Devices:
Epson TM-U325PD
Setup:
1) Click on File, System, and then System Setup.
2) Click on Invoice Setup.
3) Click on the Printing tab.
Customer Checks can be validated by printing your bank name and account number on
the back of the check for deposit. You can print up to 6 lines of information. Each line
will print whatever is typed plus insert data within the brackets
[Date] = Date of the invoice will be printed
[Time] = Time when the invoice was created will be printed
[Invoice] = Invoice number will be printed
[Station] = The register number
[Method] = The method or type of payment
[ID] = the sales ID of the employee
4) Enter desired text to be printed on the back of the check.
For example
Line 1----For Deposit Only
Line 2----Bank Name
Line 3----Account Number
Line 4----[Date] [Time]
Line 5----[Invoice] Reg [Station] [ID]
Line 6 ---[Method]
IMPORTANT: To complete the setup, you must also configure the printer definition.
5) Click OK to save the changes.
6) Go to File: System: Printers
7) Edit "Generic Receipt Printer"
8) Select tab "Receipt Printer Setup" and enter the appropriate values as per manufacturer
instructions.
These are codes for the Epson TM-U325PD
--- This is a Receipt Printer --- CHECKMARK this
--- Reset Printer --- 27,64
--- Tear Off Code --- 29,86,65,0
--- Validate Checks --- CHECKMARK this
--- Validate Accounts Receivable --- (OPTIONAL)
--- Validate On --- 27,99,48,8
--- Validate Off --- 27,99,48,1
--- Print Validation Text Upside Down --- (OPTIONAL)
--- Upside Down On --- 27,123,1--- Upside Down Off --- 27,123,0
Cash Drawer
Supported Devices:
(Any receipt printer interface drawer)
Setup:
1) Click on the Register menu item and then click on Register Center. If your Manager
Console was already open then click on the “Register(F2)” button.
2) Click on the Station Settings button. This will open the Station Detail window.
3) Click on the Cash Drawer tab.
4) Place a check next to “Use Cash Drawer”.
5) Enter in the correct control codes.
Epson and Samsung control codes:
Cash drawer trigger: 27,112,0,48
Partial cut (option): 27,105
Epson alternate cash drawer trigger: 27,112,0,64,240 (generates longer pulse)
Star control codes:
Cash drawer trigger: 7
Partial cut (option): 27,100,48 or 27,100,49
Citizen control codes:
Cash drawer trigger: 7
Partial cut (option): 27,80,00 or 27,80,01
(Some Citizen printers also use Epson control codes)
Ithaca POSjet control codes:
Cash drawer trigger: 27,120,1
Auto-cut (option): 27,118
Run Macro (for logo printing) <27><31><114>macro name<0> (Use only with POSjet
driver)
Note: If you have trouble printing, or can't make your cash drawer open, make sure your
printer port is set to EPP or Standard and not ECP. Many new computers, especially
Dell's, come from the factory with the printer ports set to ECP. This setting is not
compatible with most receipt printers. Contact your computer's manufacturer for
instructions on how to check the setting of your printer port.
6) Select the port that this printer is connected through.
7) To the right of where it says Cash Drawer Printer click on the “…” button.
8) Select the printer that the cash drawer is connected through and click OK. (If you do
not have this cash drawer connected through a printer then you will need to add a
generic/text only printer that uses the same port the cash drawer is connected through)
9) Click OK to save the changes.
To test this device:
1) Click on the Register menu item and then click on Register Center. If your Manager
Console was already open then click on the “Register(F2)” button.
2) Click on the Station Settings button. This will open the Station Detail window.
3) Click on the Cash Drawer tab.
4) Press the test button and the cash drawer should open.
Pole Display
Supported Devices:
Logic Controls, Partner Tech, or any brand that emulates the latter.
Setup:
1) Click on the Register menu item and then click on Register Center. If your Manager
Console was already open then click on the “Register(F2)” button.
2) Click on the Station Settings button. This will open the Station Detail window.
3) Click on Pole Display.
4) Place a check next to Use Pole Display.
5) To the right of where it says Pole ID click on the “…” button.
6) If you are using Partner Tech CD-5220 or CD-7220 then highlight 200 and press OK.
(Skip to step 11)
7) If you are using something else then highlight 251 and press edit.
8) Enter the name of the Pole Display as the description.
9) Enter control codes 1 and 2. (See your manufacturer’s instruction manual for details on
this).
10) Enter in the number of characters per line that will display on the pole display, click
OK, and click OK again to save changes.
11) Select the correct port that this devices uses.
12) Enter a “welcome to our store” message where it says Pole Line1 and Pole Line2.
13) To the right of where it says Pole Printer click on the “…” button.
14) Select the printer that the pole display is connected through and click OK. (If you do
not have this pole display connected through a printer then you will need to add a
generic/text only printer that uses the same port the pole display is connected through)
15) Click OK to save the changes.
To test this device:
1) Click on the Register menu item and then click on Register Center. If your Manager
Console was already open then click on the “Register(F2)” button.
2) Click on the Station Settings button. This will open the Station Detail window.
3) Click on Pole Display.
4) Click on the Test button and it should display the message from Pole Line1 and Pole
Line2 on your pole display.
Multiple Monitor
Supported Devices:
(almost all)
Setup:
1) Click on the Register menu item and then click on Register Center. If your Manager
Console was already open then click on the “Register(F2)” button.
2) Click on the Station Settings button. This will open the Station Detail window.
3) Click on the Multi-Monitor Support tab.
4) Place a check next to Activate Multi-Monitor Mode.
5) Click OK to save the changes.
To test this device:
1) Create a new invoice.
2) The second monitor that is connected to the computer should show the information
that the customer needs to see.
Touchscreen Monitor
Supported Devices:
(almost all)
Setup:
1) Click on the Register menu item and then click on Register Center. If your Manager
Console was already open then click on the “Register(F2)” button.
2) Click on the Station Settings button. This will open the Station Detail window.
3) Click on Invoice/Misc.
4) Under Invoice Style select Touchscreen.
5) Click OK to save the changes.
To test this device:
1) Create a new invoice.
2) You should be able to press the buttons on your Touchscreen monitor.
Capture Picture Using TWAIN Source
To associate pictures with your inventory:
1) Open your inventory list.
2) Highlight the inventory item you would like a picture to be associated with.
3) Click on the “Pic” tab on the right side.
4) Click on the icon to the left of the “+” icon.
5) Click on Select Source(F8).
6) Highlight the correct picture capturing device and click OK.
7) Click Capture.
Debit PINpad
Supported Devices:
VeriFone PINpad 1000SE
Setup:
1) Setup your com port that this device is connected to with the following settings:
Bits per second (Baud): 1200
Data bits: 7
Parity: Even
Stop bits: 1
Flow control: None
2) Click on File, Definitions, and then Tender Definitions.
3) Click Add.
4) Enter the following settings for the debit card tender definition:
Tender Code: DBT
Description: Debit Card
Receipt Description: Debit Card
Type: Debit Card
Use Electronic Debit Card Verification: checked
5) Click OK to save the changes.
To test this device:
1) Create a new invoice.
2) Add line item(s) to the invoice.
3) Click Tender(F10)
4) Choose the debit card tender type. The PINpad should prompt for a PIN number.