1
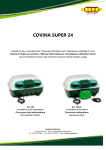
 COVINA SUPER 49
Use and maintenance manual / User information manual for artificial incubation of eggs
Art. 549
Art. 549/A
Semi-automatic incubator
Automatic incubator
RIVER SYSTEMS SRL
Via Marco Polo, 33 - 35011 Campodarsego (Padova) Italy
Tel. +39-049-9202464 - Fax: +39-049-9216057 - e-mail: [email protected] 1
INDEX
1
2
3
4
5
6
7
8
9
10
11
12
-
INTRODUCTION..............................................................................................................................................................................5
TECHNICAL SPECIFICATIONS AND DATA ............................................................................................................................5
EGG SELECTION AND STORAGE FOR INCUBATION ........................................................................................................5
PREPARATION AND START-UP OF THE INCUBATOR......................................................................................................6
4A TEMPERATURE SETTING AND ADJUSTMENT ............................................................................................................8
4B INCUBATION OF PALMIPEDS-EGGS (GOOSE, DUCK, ETC.) .................................................................................9
4C INFORMATION FOR A CORRECT INCUBATION .......................................................................................................9
PERIODIC CHECK OF EGGS DURING INCUBATION (CANDLING) ............................................................................ 10
HATCHING AND BIRTH OF THE CHICK .............................................................................................................................. 11
FIRST DAYS OF LIFE .................................................................................................................................................................... 12
7A BENEFITS OF THE INFRARED HEAT LAMP ............................................................................................................... 12
7B NUTRITION .......................................................................................................................................................................... 12
PROBLEMS THAT MAY ARISE DURING INCUBATION ................................................................................................... 13
MAINTNANCE AND STORAGE OF THE INCUBATOR AT THE END OF THE CYCLE............................................ 14
WARNINGS / ADVICES .............................................................................................................................................................. 14
CONFORMITY OF THE APPLIANCE ....................................................................................................................................... 14
GUARANTEE .................................................................................................................................................................................. 14
SPARE PARTS ......................................................................................................................................................................... 15-16
THE EGGS ....................................................................................................................................................................................... 17
EGG SELECTION ........................................................................................................................................................................... 18
Version 1.2 – 01.07.2012
2
Art. 549
2
1
3
2
4
7
5/b
5/a
1
2
3
4
5/a
5/b
6
7
8
9
6
Lid
Inspection window
Control panel (see detail)
Egg tilting handle
Opening for filling of water basin to be used during incubation
Opening for filling of water basin to be used during the last three days
Incubator electric cord
Base
Egg turning motor electric cord
Egg turning motor
Art. 549/A 2
1
3
2
5/b
7
8
9
5/a
6
3
11
12
13
17
18
14
15
16
11
12
13
14
15
16
17
18
19
20
21
22
23
24
19
20
Motor support
Motor
Resistance support
Resistance
Temperature probe
Turbine
Digital display
LED “resistance on”
Temperature setting button (+)
Temperature setting button (-)
Swinging egg tray with cradles
Element of egg tray
Element joining bar
Plastic floor (for hatching)
23
22
21
24
22
23
4
1 – INTRODUCTION
The COVINA SUPER 49 is designed to hatch hen-eggs as well as pheasant, guinea fowl, quail, partridge, grey partridge,
rock partridge, turkey, palmipeds (goose, mallard, all breeds of duck, etc.), peacock, pigeon, exotic birds and birds of
prey.
Art. 549 is supplied with a semi-automatic egg turning system, manually operated from the outside by means of a
small handle connected to the swinging egg tray in the machine. It is possible to retrofit the egg turning motor (art.
556M-1) to automatically tilt the egg tray. Assembly instructions supplied with the motor.
Art. 549/A is complete with the motor for the automatic tilting of the swinging egg tray.
A high-quality steel electric resistor produces the heat necessary for incubation. It is controlled by a reliable electronic
precision thermostat that allows setting the temperature inside the incubator (from 30°C to 40°C) and keeping it
constant and accurate. The temperature is set by pressing the (+) and (-) buttons on the control panel.
A turbine fan uniformly distributes the warm and humid air inside the incubator.
The natural “surface-type” humidification is achieved by the molded water basins at the base of the incubator. The two
openings at the front allow for filling the basins from the outside, without opening the incubator, thus preventing any
heat and humidity loss.
2 – TECHNICAL SPECIFICATIONS AND DATA
Incubator model
Type of eggs to incubate
Rated voltage
Rated frequency
Maximum power
Average daily consumption
Display
Ventilation
Thermostat
Electrical resistor
Humidity in the incubator
Number of egg turnings in 24h
Incubator capacity
Dimensions
Weight
Covina Super 49 (art. 549) – semi-automatic
Covina Super 49 (art. 549/A) – automatic
Hen, pheasant, guinea fowl, quail, partridge, grey partridge, rock partridge,
turkey, palmipeds (goose, mallard, all breeds of duck, etc.), peacock, pigeon,
exotic birds and birds of prey
Single phase, 230 Volt CE
50/60 Hz CE
150 W
Max. 2 kW/24h
Digital temperature setting with decimal point
Turbine-type
Electronic precision thermostat +/-0,1°C
150W
45-55% with water in one basin
60-65% with water in both basins
Art. 549: with eggs placed in the egg tray: minimum 4 times
Art. 549/A: one inclination every two hours
49 eggs of medium/large size or 196 small eggs (e.g. quail) placed in the egg
tray
Art. 549: 580x520x250 mm
Art. 549/A: 580x570x250 mm
Art. 549: 5,0 Kg
Art. 549/A: 5,5 Kg
3 – EGG SELECTION AND STORAGE FOR INCUBATION
It is advisable to incubate eggs coming from one’s own stock, as eggs that have travelled will have hatching rates
below 50% due to stress, vibrations, sudden changes in temperature and asphyxiated embryos (where packaging fails
to let the eggs breathe). Anyway, if you use eggs that have travelled, let them rest into an egg tray for at least 24 hours,
their point downwards, before incubating them.
Choose eggs from parent stock that are well developed, well fed and healthy.
Parent stock mustn’t be blood-related (males must come from a different source), interbreeding can produce eggs with
weak embryos, with a high mortality rate (a weak chick develops but without the strength required to hatch).
Ensure all birds are sexually mature and that the correct ratios between males and females are observed.
5
Please refer to the following table:
Bird
Hen
Pheasant
Duck
Goose
Guinea fowl
Partridge
Quail
Turkey
PROPORTION BETWEEN
Male
and
Female
1
6
1
4
1
4
1
4
1
2
1
1
1
3
1
8
SEXUAL MATURITY
Male
Female
6/8 months
6/8 months
6/7 months
6/7 months
8 months
4 months
8 months
7 months
8/10 months 8/10 months
10/12 months 10/12 months
60 days
50 days
7 months
7 months
Please remember that parent stock older than 3 years lose fertility.
The embryo starts developing before incubation and therefore needs to be appropriately cared for. The hatching rate
will decrease if incorrect procedure is followed. Here below are some rules that will help you to obtain healthier eggs:
1. Collect the eggs at least 3-4 times a day. In summer collect them at least 5 times a day. Never incubate eggs that
have been kept at a temperature above +26°C or below +5°C; beyond these temperatures the embryo dies. Never
store the eggs in the refrigerator.
2. Do not incubate dirty eggs: incubation temperatures and humidity will increase bacterial infection caused by
organic material (manure, blood, soil, etc.) contaminating the embryo and causing fatalities.
Never wash the eggs. If dirty, gently brush them with a dry abrasive sponge to clean.
3. Keep the eggs in a cool room with temperature between +14°C and +18°C and humidity of about 65-75%.
Keep the eggs in the egg trays with the point downwards.
4. Eggs are good for incubation from 2nd to 6th/7th day from laying. Incubating eggs older than 8 days considerably
reduces the hatching rate, which will be close to zero in case of eggs kept for more than 15 days.
5. Choose eggs with normal shape (they should not be oblong, spherical, corrugated or misshapen in any way).
6. The egg shell must not be cracked, thin, broken, soft, tapered or blue spotted (old eggs).
7. Allow the cold eggs (from storage temperature) to warm to room temperature gradually before putting them into
the incubator. A sudden heating from +12°C to +38°C would cause moisture on the egg shell leading to
decreased hatching rates.
8. Avoid incubating eggs from different species. Do not add eggs after having started incubation.
4 – PREPARATION AND START-UP OF THE INCUBATOR
To obtain a successful hatching it is important to choose an appropriate location for the incubator. The temperature in
the room where the machine is housed must be between +20°C and +25°C, it should be comfortable, clean and well
aired but devoid of air draughts (e.g. not a stable or a garage). Make sure that the machine is not exposed to direct sun
light or placed next to heat sources such as radiators, stoves, etc. The relative humidity should be between 50% and
75%.
DO NOT USE THE INCUBATOR IN ROOMS WHERE THE TEMPERATURE IS BELOW +20°C OR ABOVE +25°C. We
suggest you keep it at home.
Do not use or store the incubator in a room where there are chemicals, poisonous, toxic or flammable substances, even
in small concentrations, as they will negatively affect the development of embryos.
Do not use the incubator where there is the risk of contact with water or other liquids.
Proceed as follows:
A)
B)
Place the incubator on a flat wooden table. The base must rest directly on the table in order to prevent any
obstruction of the ventilation holes.
Remove the lid and place it beside the machine, keeping the grill downwards.
6
C)
Remove the plastic floor from the base of the incubator, as it is
necessary only for hatching (last 3 days). DO NOT LEAVE IT INSIDE THE
MACHINE DURING INCUBATION!
NB: store the plastic floor on a flat surface so that it won’t deform.
D)
Ensure that the egg tray is in the correct position (on its supports) and that the cradle rows tilt freely in the two
directions.
E)
Fill basin 5/a with lukewarm water. Pour the water into the
corresponding opening at the front left hand side of the incubator. Do
this slowly, taking care not to allow the water to overflow from the basin:
too much liquid would increase in the humidity rate lowering the
hatching percentage. The second basin (5/b) will be used only for the
hatching phase.
F)
Replace the lid. Ensure that the edge of the lower box locates perfectly
with the slot in the lid.
7
G)
Plug the machine into a socket. The fan will start immediately, followed
by the display that shows the temperature inside the incubator. The
yellow LED indicates that the resistor is working. It will remain
illuminated for 20-40 minutes, until the set temperature is reached; it
will then flash intermittently at 2-3 seconds intervals.
The machine is pre-set at a temperature of 37,7°C, ideal for all species of birds. It is recommended you reset the
temperature following the instructions here below.
4A – TEMPERATURE SETTING AND ADJUSTMENT
To set and adjust the temperature press the (+) and (-) buttons on the control panel. Press one of the two buttons to
enter the Programme Mode (the display shows a “P” beside the temperature). Press and release (+) or (-) to set the
desired temperature. This will be memorized after a few seconds (the display will show the present internal
temperature and the letter “C”).
Display with present internal temperature
(temperature followed by “C”)
Display with temperature in Programme Mode
(temperature followed by “P”)
Once the new temperature is set, allow the machine to stabilize and check optimum temperature is attained. If you
increase it, the resistor will activate (the LED will be on) heating the air until the temperature is reached. If you decrease
it, the resistor will remain inactive (the led will be off) to allow the air inside the incubator to cool.
H) Run the machine empty (without eggs) for at least 2-3 hours in order to stabilize temperature and humidity.
I)
After ensuring that the machine functions correctly remove the lid and
place it beside the incubator. Gently place the eggs into the tray cradles,
their point downwards. Replace the lid.
Only for art. 549/A: start the egg turning motor by plugging it in. The motor will start working. The egg tray executes
one tilting every two hours. Note: its movement is scarcely noticeable as it is very slow.
One hour after starting the motor
Two hours later
8
Do not cover the incubator or keep it in a box whilst in use. This would
prevent the air exchange in the incubator, necessary for the embryo
development, that takes place through the ventilation holes present in the
base of the incubator and through the two inspection windows.
The incubation cycle starts now. Mark the date on a calendar and follow the instructions shown on table 4C
“Information For A Correct Incubation”.
Only for art. 549: change the inclination of the eggs at least 4 times a day by tilting the handle placed in the front
of the incubator. The handle must rest alternately at the 10 o’clock position to the left or the 2 o’clock position to
the right. NEVER LEAVE THE HANDLE (AND THEREFORE THE EGGS) IN A VERTICAL POSITION (h. 12.00). Move the
handle gently in order to avoid shocks to the eggs.
When used with the egg turning motor (art. 556M-1), ensure that the cradles of the egg tray make a complete
inclination every two hours.
Inclination rightwards
Inclination leftwards
Handle rotation
Monitor the water level in the basin by looking into the opening every 24 hours (the level you can see inside the
opening corresponds to the one in the basin). Fill up with clean and warm water (+35/40°C).
Please beware that it is the water surface and not its quantity that generates the humidity, therefore the quantity of
water in the basin will not affect the humidity rate. The punctual and constant check for the presence of water will
provide the necessary humidity, preventing the basin from running out of water.
In case of power failure, surround the four sides of the incubator with bottles containing hot water and cover
everything with a blanket. This allows the temperature within the incubator to be retained. Once the power is restored,
immediately remove all of these items. Do not keep the incubator covered for long periods: low oxygen levels inside
the incubator will drastically reduce the hatching rate.
It is possible that during the first incubation cycles the self lubricating turbine brasses may drip some oil onto the
central part of the protection grill. This oil is not harmful to the eggs or to the chicks. Remove it with a cloth moistened
with alcohol during the cleaning operations at the end of the cycle.
4B – INCUBATION OF PALMIPEDS-EGGS (GOOSE, DUCK, ETC.)
From day 10 of incubation to three days prior the foreseen hatching date, open the incubator and let the eggs cool for
15 minutes each day. Before putting the lid back on, spray a misting of water on the eggs. During this operation you
may unplug the machine.
4C – INFORMATION FOR A CORRECT INCUBATION
Suggested temperature at the beginning of incubation: 37,7°C
Suggested temperature during the last 3 days before hatching: 37,2°C.
9
Please make reference to the following chart in order to have a successful hatching:
Species
Incubation
time
Hen
Pheasant
Quail
Guinea fowl
Turkey
Partridge
Peacock
Goose
Duck / Mallard
Muscovy duck
21 days
23-25 days
16-17 days
26-28 days
28 days
23-24 days
28 days
29-31 days
27-28 days
33-35 days
For a correct humidity
at the beginning of
incubation
Fill up 1 water basin
Fill up 1 water basin
Fill up 1 water basin
Fill up 1 water basin
Fill up 1 water basin
Fill up 1 water basin
Fill up 1 water basin
Fill up 1 water basin
Fill up 1 water basin
Fill up 1 water basin
Do not turn
the eggs after
For a correct humidity during
the last 3 days before hatching
Day 18
Day 20
Day 14
Day 23
Day 25
Day 20
Day 25
Day 27
Day 24
Day 30
Fill up the 2 water basins
Fill up the 2 water basins
Fill up the 2 water basins
Fill up the 2 water basins
Fill up the 2 water basins
Fill up the 2 water basins
Fill up the 2 water basins
Fill up the 2 water basins
Fill up the 2 water basins
Fill up the 2 water basins
5 – PERIODIC CHECK OF EGGS DURING INCUBATION (CANDLING)
The candling is a delicate and complex operation that can lead to eliminating fertilized eggs by mistake. Since it is
facultative, if you are not experienced we recommend proceeding directly with the incubation.
You can periodically check the incubated eggs by candling them. This operation should be carried out in a dark room,
using a strong beam (e.g. the River Systems’ egg tester art. 164), as per the following chart:
Species
Hen
Pheasant
Guinea fowl
Turkey
Partridge
Peacock
Goose
Duck / Mallard
Muscovy duck
1st check
at 8 days
at 8 days
at 8 days
at 8 days
at 8 days
at 9 days
at 9 days
at 9 days
at 10 days
2nd check
at 11 days
at 12 days
at 13 days
at 13 days
at 12 days
at 14 days
at 15 days
at 13 days
at 15 days
3rd check
at 18 days
at 19 days
at 24 days
at 24 days
at 19 days
at 24 days
at 24 days
at 24 days
at 25 days
Take the eggs individually from the incubator and check them immediately. The egg can stay out of the incubator for
maximum 2 minutes. With a little experience, and if you use the egg tester, you can candle the eggs without lifting
them. In this case, open the incubator and lay the egg tester on each egg. The beam allows you to see the embryo.
Never shake or turn violently the egg as this can break the blood vessels and therefore cause the death of the embryo.
1st check: beginning of incubation
Normally it is difficult to see the embryo, as it is incorporated in the yolk: next to the air cell and at its point you shall
see blood vessels. If the egg is not fertilized its inside is uniform, doesn’t show blood vessels and the yolk is right in the
middle. Discard these eggs.
It is possible that eggs with a thick shell or brown ones don’t allow a clear view of their interior at this stage: leave them
to the second check.
2nd check: development of the embryo
You will normally see a network of blood vessels at the point of the egg and the embryo will look like a dark spot. If the
blood vessels are not present, it means that the embryo is lost.
3rd check: verification of the embryo
Normally the embryo occupies the entire egg, therefore the blood vessels shall be no longer visible. The air cell is big.
If the embryo doesn’t fill the whole egg, blood vessels are still visible, the air cell is small and the albumen has not been
used up, it means that the embryo is underdeveloped and the egg should be discarded.
10
6 – HATCHING AND BIRTH OF THE CHICK
The following operation is very delicate and should be executed quickly to prevent the eggs from cooling. We suggest
that two people perform it in order to reduce the time as much as possible.
Three days before the expected hatching date:
Only for art. 549/A: stop the egg turning motor by unplugging it when the eggs are in a vertical position: this will
facilitate the removal of the egg tray after the eggs have been taken out.
A) Remove the eggs from the swinging tray and place them gently on a blanket.
B)
Only for art. 549: remove the metal handle from the front of the
incubator.
C)
Remove the egg tray.
Only for art. 549/A: to remove the egg tray, simply lift it, pulling it out
from the steel tongue of the motor (be careful to reinsert it correctly
when you relocate the egg tray).
If after several incubation cycles you notice that the slit where the motor
steel tongue is inserted is too large, swap the row with another of the
tray.
D)
Put the supplied plastic grill floor (removed at the beginning of the incubation) into the base of the incubator,
ensuring that the two plastic tongues cover the internal side of the water openings, so that the chicks will not fall
into them and drown.
E)
Distribute the eggs on the grill and close the lid.
F)
G)
Fill both basins (5/a and 5/b) with lukewarm water.
Set the temperature to 37,2°C (see instructions on page 28)
IMPORTANT - during the last 3 days:
Do not turn the eggs
Do not open the incubator unnecessarily as the humidity and the heat necessary for the hatching would escape,
causing the loss of the chick inside the shell. Open the incubator A MAXIMUM OF ONCE A DAY to extract the dried
off chicks.
11
Keep the newborn chicks in the incubator for about 12 hours. They can stay in the incubator for 3 days without drinking
or eating without damage.
7 – FIRST DAYS OF LIFE
Put the chicks in a draught-free room provided with the necessary heat and light where they can be fed and watered.
TIPS: you can use a 50x50 carton box. Cover the bottom with newspaper sheets that will require daily renewal. You can
also create a small pen using the plastic panels art. 4510-09 (size of each panel: cm 800x400).
For heating, you can hang a reflector with an infrared heat lamp (see list below) at approximately 20-25 cm from the
floor. The temperature can be adjusted by changing the height of the lamp. The box or the pen should be big enough
to contain a drinker and a feeder.
7A – BENEFITS OF THE INFRARED HEAT LAMP
The infrared heat lamps do not only heat the chick; they also act deeply, on the tissues and muscles, fixing the calcium
in the bones and helping the expansion of the blood and lymph vessels, thus improving the blood circulation and,
consequently, the nutrition of the cells. This assists the healthy growth of the chick that will also be more resistant to
diseases.
The reflector (of aluminium or polycarbonate) increases the concentration of the infrared rays coming from the bulb.
- art. 701: aluminium reflector Ø 21 cm, complete with hanging chain L=2m and protection grill
- art. 702: reflector in clear polycarbonate Ø 27 cm (hanging chain L=2m and protection grill are optional)
- art. 750/100: infrared bulb Philips IR100R, heavy
- art. 750/150: infrared bulb Philips 150W, light
7B – NUTRITION
Normally the chicks start eating and drinking from their second/third day of life. Put a drinker and a feeder for fine
fodder in the box/pen. We suggest the following products:
Drinkers:
- art. 137: siphon drinker - capacity 1,5 litres in polypropylene (suitable for all chicks, even small sized ones)
- art. 138: siphon drinker - capacity 3 litres in polypropylene (suitable for bigger sized chicks – not quail or pheasant)
- art. 137/A: Bottle-holder drinker for chicks (suitable for bigger sized chicks – not quail or pheasant).
If you use other drinkers, make sure that the basin is not higher than 3-4 cm, otherwise the chicks may get wet or
drown. To prevent this, we suggest you put some pebbles inside that will attract them towards the drinking water.
Feeders:
- art. 296: polypropylene tray Ø 24 cm
- art. 120: galvanized feed trough with grill L=0,3 m – or L=0,5 m (art. 121)
- art. 120/A/R: plastic feed trough with grill L=0,5 m
We suggest you sprinkle some fodder on the newspaper sheets too.
12
8 – PROBLEMS THAT MAY ARISE DURING INCUBATION
Problem
Possible cause
Clear eggs. No blood vessels are
visible during candling
Blood rings are visible while
candling
Suggestion
Eggs not fertilized due to too
many, too few, too old or infertile
cocks
Eggs stored for too long before
incubation
Too high or too low temperature
during storage
Inadequate care of the eggs
before incubation
Eggs not collected frequently
enough
Blood-related parent stock
Old eggs
Old parent stock
Only for art. 549: eggs not
sufficiently
turned
during
incubation
Bacterial contamination
Many dead embryos /
Chicks die before piercing the
shell
Nutritional deficiencies
Eggs have traveled for long
distances
Wrong
humidity
during
incubation
The incubator deployed in too hot
an environment
The incubator has been opened
too often during hatching
Other causes
The eggs fracture
Chicks
limbs
with
malformed
Dirty eggs
lower
Incorrect
incubation
humidity
during
The incubator worked in a room
below +20°C
Blood-related parent stock
Use only young and vigorous cocks,
never consanguineous ones
Do not store the eggs for more than 7
days
Ensure that the room temperature is
between +14°C and +18°C
Check the correct storing of the eggs
Collect the eggs more frequently
during the day
The parent stock must not be siblings
Store the eggs for max. 7 days
Parent stock shall not be older than 3
years
Turn the eggs at least 4 times a day
Ensure that the eggs are clean
Feed the parent stock with specific
fodder
Incubate local eggs only
Comply with the information given
about the filling up of water basins
Make sure that the room temperature
is NOT above +26°C
Open the incubator max. once a day to
remove the dried off chicks
Follow the instructions on chapters 3
and 4
Incubate clean eggs
Comply with the instructions on the
quantity of water necessary.
Do not pour water outside the basins
when not required
Make sure the temperature of the
room is of at least +20°C
The parent stock shall not be siblings
9 – MAINTENANCE AND STORAGE OF THE INCUBATOR AT THE END OF THE CYCLE
At the end of the cycle, thoroughly clean the lower part of the incubator with neutral detergent first, then disinfect it
with a chlorine-based disinfectant or some household bleach.
Thoroughly clean the lid exterior with a soft cloth, dampened with clean water and squeezed out.
The external part of the protection grill of the lid should be cleaned with a soft cloth moistened with alcohol. Blow the
internal part with compressed air to remove any feathers dropped by the chicks.
DURING THIS OPERATION THE MACHINE SHALL BE UNPLUGGED.
Do not use solvents, diluents and toxic chemicals.
Allow all parts to dry thoroughly. Place the incubator in a dry place, safe from shocks and changes in temperature. Do
not put any other object on top of it.
13
10 – WARNINGS / ADVICES
Do not leave the appliance within children’s reach;
Do not use or store the appliance in rooms with corrosive, flammable or explosive substances;
Do not use the appliance if the electric cord, the electronic circuit or the protection grill are damaged;
Keep the incubator safe from shocks;
Do not open the cover of the electronic circuit or remove the fan guard (protection grill);
Clean the machine after the incubation process is finished. The incubator must be unplugged.
WARNING: the guarantee lapses if the machine is modified, tampered with or misused.
11 – CONFORMITY OF THE APPLIANCE
This appliance complies with the EC European Directives.
SR-1 EN 60335, EN 55014-1, 2006/95/EC, 2004/108/EC EMC, ROHS 2002/95/EC, 60730-2-1/A11 IEC EN, 60730-2-9 IEC
EN, 61032 IEC, UNI EN ISO 13732, UNI EN ISO 13857, IEC 48-8.
12 – GUARANTEE
The machine is granted a 1 year guarantee, commencing on the date of purchase.
Within the guarantee period we will eliminate, free of charge, any defect in the machine, resulting from faults in
materials or workmanship, either by repairing or replacing the complete appliance as we may choose.
This guarantee extends to every country where this appliance is supplied by River Systems srl or its appointed
distributor.
The guarantee does not cover: damage due to improper use, normal wear or use as well as defects that have a
negligible effect on the value or operation of the machine. The guarantee becomes void if repairs are undertaken by
unauthorized persons and if original parts are not used.
To obtain service within the guarantee period, hand in or send the complete machine with your sales receipt to your
retailer.
DISPOSAL OF WASTE ELECTRICAL AND ELECTRONIC EQUIPMENT
According to 2002/95/CE, 2002/96/CE and 2003/108/CE Standards concerning the reduction of the use
of dangerous substances in the electrical and electronic devices, as well as the disposal of waste
electrical and electronic equipment, the symbol of the crossed refuse bin shown hereinafter indicates
that the product, at the end of its working life, should be disposed of correctly at your local recycling
centre and should not be disposed of with general household waste. Please contact your local authority
for further information. The observation of the procedures helps the recycling of the waste generated by
the electric or electronic devices and therefore the preservation of the environment.
14
SPARE PARTS
3
3
1
2
4
5
6
7
8
15
SPARE PARTS
Pos.
Code
1
2
3
4
5
6
7
8
549-01
556M-1
549-03
549-04
549-05
549-06
549-07
549-08
Description
Egg tilting handle
Egg turning motor
Electronic card with display
Resistance
Motor with turbine
Kit egg tray (2 joining bars + 7 cradle elements)
Plastic floor (for hatching)
Upper protection grill
16
THE EGGS
Hen
Duck
Guinea fowl
Goose
Pigeon
Quail
17
Pheasant
Partridge
Turkey
EGG SELECTION
EGGS SUITABLE FOR INCUBATION
Good quality eggs
EGGS WITH LOW HATCHING RATE
Scabrous shell
White (not
genetically)
and fragile shell
Small egg
Slightly dirty egg
Oblong egg
EGGS TO BE DISCARDED
Soil dirty egg
Blood on the shell
Manure on the
shell
Yolk on the shell
Slight crack
Broken
Perforated
Misshapen
Thin shell
Wrinkled shell
Very dirty
18
Product: ________________________
Delivery date: ________________________
Date, stamp and signature of the retailer:
19