1
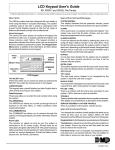
MCM Electronics MCM Electronics
MCM Electronics
The Icon Series
Installation
and
Programming
Information
Icon 8
Version 5.0
TABLE OF CONTENTS
1.
Panel Hardware
Page 2
1
Page 5
2
Physical Layout.
Inputs.
Outputs.
Indicators on PCB.
Initialization.
On Power up.
Dialling Sequence.
2.
Program Information
Program readback.
Entering program mode.
3.
Function Summary
Page 7
3
4.
Control Panel Functions.
Page 8
4
Functions 00 to 55
5.
Communications Functions. Page 11
5
Functions 60 to 76
6.
Special Functions.
Page 16
6
Page 21
7
Page 23
8
Functions 89 to 99
7.
Reporting Codes
ADEMCO high speed.
ADEMCO Contact I.D.
8.
Warning:
Other Features
This equipment must only be installed and serviced
by suitably qualified personnel
Installation and programming manual
CD
1
+
Page 3
Installation and programming manual
INPUTS:
Inputs 1 to 8
16 VAC
Are 10K monitored inputs, with a response time of around 300 ms.
Alarm triggers siren,strobe and dialler (depending on setup).
Are armed in the on or partial mode (depending on partial setup).
May be programmed to have exit / entry, exit / handover
delays or may be programmed for 24 hour
hou operation.
For the connection of a 16 vac 1.5 amp plug pack.
OUTPUTS:
Aux 12V
Batt
Int sir **
Int bell
or bell1
Ext stb
Ext sir
Int bell2 ***
This 12v dc is for detectors, etc. The output is via the INTERNAL fuse.
Between 200 and 500mA can be delivered to load depending on
other loads, eg. siren, strobe. The onboard regulator is rated at 1.0
amp and of this, the battery can take up to 200mA depending on
the state of charge.
One strobe requires 250mA and each speaker 200mA.
The panel itself, in alarm with one arming station connected, draws
150mA approx.
This output is connected to the on-board regulator via a resistor
which limits the charge current. Charging voltage is 13.7v.
Timed output to drive 2 x 8 ohm speaker rated at 10 watts, fused
via the INTERNAL fuse.This may be replaced by the Bell 2 output on later
models.
Output (timed) to DC screamers, fused via INTERNAL fuse. May
also be programmed (via opt 91) as armed, 24 hr alarm, bell or to
power to smoke detectors which latch and can be reset by test 6.
12v dc output to drive 12v dc strobe, fused via EXTERNAL fuse.
Timed 0utput to drive 1 x 8 ohm speaker rated at 10 watts, fused
via EXTERNAL fuse.
Output (timed) to drive DC screamers, fused via INTERNAL fuse.
This bell2 output is not programmable, it is fixed as a bell output.
*** Note this output will be only available on future models.
Telecom
Line socket
This is connected to the Exchange line, via the Telecom lead
which is supplied with the unit. The Telecom lead uses pins 2 & 6
of the Telecom socket for the incoming line and pins 1 & 5 connect
to the telephone in a MODE 3 arrangement.
AUSTEL Permit No. A89-12-0083.
High
Integrity
Comms
Earth
This terminal connects to a dual GAS ARRESTOR. This device is
the same as used by Telecom in exchanges and main frames to
protect against lightning induced voltages. If this terminal is
connected, it must be hard wired otherwise Austel Permit will be
rendered Void.
Remote
Command
These 4 terminals connect to the REMOTE KEYPADS.
The terminal marked
+ connects to the + terminal on the keypad
The terminal marked C connects to the C on the keypads
The terminal marked D connects to the D on the keypads
The terminal marked
- connects to the
- on the keypads
Page 4
1
Installation and programming manual
Indicators on the PCB
Scan
This LED indicates that the micro-processor is operating and must always be
flickering.
Dial
This LED, located adjacent to the dial relays, will light when the
dialler is in its reporting sequence and will extinguish when reporting
is completed.
Initialization
To initialize the panel to factory defaults enter program mode and use
Function 90 or power the panel up with any button pressed on the keyboard for 3
seconds.
On power up
On power up the unit performs an internal self test of its EEPROM and then boots with
this program. If the EEPROM is found to have been corrupted in some way then the
factory defaults will be reloaded indicated by 5 beeps from the keypad.
If the EEPROM is correct then the panel will power up in the mode determined by
Function 98 (Status on power up).
If Function 98 is 0 (Do not retain the On /Off status) the unit starts off in OFF mode and
the sirens may operate for half a second.
If Function 98 is 1 (Retain On/Off status) and the unit was armed when power was
interrupted, then when power is restored, the unit will allow a settling time of 60 secs
and attempt to re-arm. Sectors unsealed after the settling time will be automatically
isolated and will be reported as such. After the 60 seconds
settling time the unit will dial through a mains fail restore, a low battery restore and the
current status of the panel with user code 31.
31
Dialling sequence
The dialling sequence from start to finish consists of 6 dialling attempts.
The first 3 dialling attempts to the first phone number (with a 20 second pause between
attempts to wait for handshake).
If after the 3 attempts no handshake is received then the dialler will release the line for
5 minutes.
The dialler will then make 3 attempts to the second phone number (if no second
number has been programmed then the first number will be tried again).
If after these 3 attempts handshake is still not received the dialler will hang up until
another condition causes it to dial, at which time the previous condition will also be
Page 5
1
Installation and programming manual
PROGRAM READBACK
With the full range of panels there are basically two methods of reading back information that has previously been programmed. The first method allows information that is
serial in format to be read sequentially ie. phone numbers, while the second method
allows all selections to be seen at once ie. sectors assigned as E/E. These are explained below.
SEQUENTIAL READBACK
Whilst in PROGRAM mode, if an option is entered followed by the TEST key then that
options setting will be read back using the LEDs on the programmer as follows :
" LED "
" INDICATES DIGIT "
1
2
3
4
5
6
7
8
Partial
On
Auxiliary
1
2
3
4
5
6
7
8
9
0
Pause
Example
For this example Function 60 is already programmed as 0199
If you wish to check Function 60
Enter the function number 6 0 followed by the TEST key.
( whilst in program mode )
ON LED will light accompanied by a beep
(digit 0)
Then number 1 LED accompanied by a beep
(digit 1)
Then PARTIAL LED accompanied by a beep
(digit 9)
Then another beep with PARTIAL LED still lit
(digit 9)
Then beep beep and the PROGRAM LED flashing again
(test completed ready for next function).
PARALLEL READBACK
For Functions 31 - 36, 49, 50, 51, 52, 55, 56, 61, 76.
When the function number is entered the previously selected sections will
flash. If at this point the On button is depressed no changes will be made and
the program LED will be flashing again.
To de-select a section re-enter that section number and the section LED will
extinguish.
Page 6
2
Installation and programming manual
ENTERING PROGRAM MODE
There are two codes that will allow access to the product range of panels for
programming. The technician code that will allow access to all programmable
functions and the master user code which allows access only to user code
programming. Either code can only be used in the OFF mode and since the
operation of both codes is similar, only the technician code will be discussed.
DEFAULTING THE PANEL
If the technician and master codes are not known the only way to enter program mode is
to default the panel so the factory preset codes may be used. This is accomplished by
removing power from the panel and then reapplying power with ANY key on the keypad
pressed for three seconds. This will restore the factory technician and master codes which
are 2 1 8 0 6 7 and 2 1 8 5 7 2 respectively and will be indicated by five beeps from
the Keypad.
NOTE : Defaulting the panel will reset ALL functions to the factory presets.
ENTERING PROGRAM MODE
To enter the program mode the following sequence is entered :
2 1 8 0 6 7 - On
(Enter technician code and press the On key)
At this point the program LED will begin flashing to indicate that you are in program
mode and the required function number may be entered. If an error was made in entering the code or an incorrect code used, the keypad will give a long error beep after
which you may try again. Assuming we are in program mode the following examples will
show how functions are programmed or changed.
Example 1
To program or change the primary phone number (Function 64) to 02 - pause 1234567. With the program LED flashing enter the following :
6 4
(Select Function 64. Program LED will light steady.)
0 2
(First two digits of phone number.)
partial
(Pressing partial key = 1 second pause.)
1 2 3 4 5 6 7 (Remainder of phone number.)
On
(Stores phone number. Program LED will flash.)
At this point the installer can either program further options or leave the program mode
by pressing the 'off
off' key.
Example 2
Program sectors 1 and 8 to be entry/exit sectors (Function 49). With the programming
LED again flashing enter the following :
4 9
0 1 0 8
On
Off
(Select Function 49. Program LED will light steady.)
(Enter sectors 1 (01) and 8 (08) LEDS will flash.)
(store information and exit function 49.)
(Exit program mode. Program LED will extinguish.)
Page 7
2
Installation and programming manual
Control Panel Functions
Function
Number
00
01
02-30
40
41
42
43
47
49
50
51
52
54
55
Function
Master Code
User code 1
User code 2 to User code 30
Exit time
Entry time
Siren time
Partial Mode isolates
Keypad Panic audible
Exit and Entry sections
Exit and Handover sections
Partial Exit / Handover sections
24 hour inputs
Disable sirens on first keypress
Silent sections
Defaults
218572
1111
Nil
60 secs
30 secs
10 min
Nil
Audible
Sections 1 + 2
Nil
Nil
Nil
Enabled
Nil
Page No.
20
20
20
8
8
8
9
9
9
10
10
10
10
11
3
Communications Functions
60
62
63
64
65
66
67
68
69
70
71
73
74
75
76
89
Account number
Down - Load phone number
Open / Close reports
Phone number one
Phone number two
Dial method
Reporting format
Report restorals
No. days between test reports
Checksum reporting
Report isolates
Delay till first test report
Keypad Duress On / Off
Auto - Isolation
Multi - break sectors
Single digit arming
Nil
Nil
Enabled
Nil
Nil
DTMF (tone)
Contact I.D.
Enabled
Nil
Enabled
Enabled
12 Hours
Disabled
Disabled
Nil
Disabled
11
11
12
12
12
12
13
13
13
14
14
14
15
15
15
16
N/A
Bell
Control dialler
Disabled
Medium
Disabled
Master/Tech Code
Disabled
218067
16
16
17
17
17
18
18
19
19
Special Functions
90
91
92
93
94
95
96
98
99
Default to factory
Bell output type
Slave dialler
Keyswitch option
Siren speed
Arming lockout
Download configuration
Rearm enable
Technician code
Page 8
Installation and programming manual
Function 40 - Exit Time
Description :
This function sets the time that sectors
allocated as entry/exit (Function 49),
exit handover (Function 50) or partial
exit/entry (Function 51) will allow for
exit.
Default -
60 seconds
Options - (Single digit entry required)
0 - 0 seconds
5 - 50 seconds
1 - 10 seconds
6 - 60 seconds
2 - 20 seconds
7 - 70 seconds
3 - 30 seconds
8 - 80 seconds
4 - 40 seconds
9 - 90 seconds
Example : While in program mode (Program LED flashing)
Key Sequence
Operation
40
Enter Function No.
5
Enter Option ( 5 = 50 seconds)
on
Store Entry
Installer may now exit program mode by pressing the OFF button or continue
programming by entering a new function number
Function 41 - Entry Time
Description :
This function sets the time that sectors
allocated as entry/exit (Function 49),
exit handover (Function 50) or partial
exit/entry (Function 51) will allow for
entry.
Notes :
Handover sectors will only have entry
time if an exit/entry sector has been
triggered first
Default - 30 seconds
Options - (Single digit entry required)
0 - 0 seconds
5 - 50 seconds
1 - 10 seconds
6 - 60 seconds
2 - 20 seconds
7 - 70 seconds
3 - 30 seconds
8 - 80 seconds
4 - 40 seconds
9 - 90 seconds
Example : While in program mode (Program LED flashing)
Key Sequence
Operation
41
Enter Function No.
3
Enter Option (3 = 30 seconds)
on
Store Entry
Installer may now exit program mode by pressing the OFF button or continue programming.
Function 42 - Siren Time
Default - 10 minutes
Options - (Single digit entry required)
0 - 0 seconds
5 - 2 min 40 sec
1 - 10 seconds
6 - 5 min
2 - 20 seconds
7 - 10 min
3 - 40 seconds
8 - 21 min
4 - 80 seconds
9 - 42 min
Description :
This function sets the maximum time
for which the internal, external and
satellite sirens and bell output will
operate.
Notes:
Australian Standards AS 2201 limit the sirens to be triggered only once per section unless
manually re-armed. Noise pollution regulations in most states limit siren time to 10 minutes.
Example : While in program mode (Program LED flashing)
Key Sequence
Operation
42
Enter Function No.
6
Enter Option (6 = 5 minutes)
on
Store Entry
Installer may now exit program mode by pressing the OFF button or continue programming
Page 9
4
Installation and programming manual
Function 43 - Partial Mode
Description :
Partial mode sets up a preprogrammed list of sections which are
automatically isolated when the unit
is turned on using the partial key.
Default - No sections programmed.
Options : (Two digit entry required per sector)
Any sector or combination of sectors from 1 to 8
Example : While in program mode (Program LED flashing)
Key Sequence
Operation
51
Enter Function No.
050708
Enter Options (Sectors 5, 7 & 8 will be isolated)
On
Store Entry
Installer may now exit program mode by pressing the OFF button or continue programming by
entering a new function number
Function 47 - Keypad Panic Audible
Description :
This function determines whether the
keypad panic activation (holding the
ON and the OFF keys depressed at
the same time for 3 seconds) will
cause the sirens to sound in addition
to reporting to the monitoring
company or only report.
Default - audible
Options : (Single digit entry required)
0 = Silent Keypad Panic (report only)
1 = Sirens and report.
4
Example : While in program mode (Program LED flashing)
Key Sequence
Operation
47
Enter Function No.
0
Enter Option (Keypad Panic now silent)
On
Store Entry
Installer may now exit program mode by pressing the OFF button or continue programming
by entering a new function number
Function 49 - Exit/Entry Sections in ON Mode
Description :
This function allows the display and or
changing of those sections which will
have the exit/entry delays defined in
Functions 40 and 41.
Default - Sectors 1 & 2
Options : (Two digit entry required per sector)
Any sector or combination of sectors from 1 to 8
Example : While in program mode (Program LED flashing)
Key Sequence
Operation
49
Enter Function No.
0208 Enter Option (Sector 2 is removed and section 8 is added)
On
Store Entry
Installer may now exit program mode by pressing the OFF button or continue programming
by entering a new function number.
Page 10
Installation and programming manual
Function 50 - Exit and Handover Sections in ON Mode
Default - none
Options : (Two digit entry required per sector)
Description :
Any sector or combination of sectors from 1 to 8
Display and / or change which sections
will have exit / handover delay.
Notes : Sectors selected will only have entry time if an exit/entry sector is triggered first.
Example : While in program mode (Program LED flashing)
Key Sequence
Operation
50
Enter Function No.
02
Enter Option (Sector 2 becomes handover)
On
Store Entry
Installer may now exit program mode by pressing the OFF button or continue
programming by entering a new function number.
Function 51 -
Exit / Entry Sections in
Description :
Display and change which sections will
have exit / entry delay in Partial mode.
Partial mode
Default none
Options : (Two digit entry required per sector)
Any sector or combination of sectors from 1 to 8
Notes : Sectors programmed in this function are independent of sectors programmed as
ON mode exit / entry sectors and only have exit / entry times assigned to them when the
panel is turned ON using the Partial key.
Example : While in program mode (Program LED flashing)
Key Sequence
Operation
51
Enter Function No.
03
Enter Option (Sector 3 is now Partial Exit/Entry sector)
On
Store Entry
Installer may now exit program mode by pressing the OFF button or continue programming
by entering a new function number.
Function 52 - Sections to operate in 24 Hour mode
Description :
Display and change which sections will
operate as 24 hour inputs.
Default - none
Option : (Two digit entry required per sector)
Any sector or combination of sectors from 1 to 8
Example : While in program mode (Program LED flashing)
Key Sequence
Operation
52
Enter Function No.
07
Enter Options (Sector 7 is now active 24hrs)
On
Store Entry
Installer may now exit program mode by pressing the OFF button or continue
programming by entering a new function number.
Function 54 - Disable Sirens On First Keypress
Description :
This function determines whether the
sirens will be silenced for 10 seconds on
the first key press. This allows the audible feedback from the keypad to be
heard without the sirens interfering.
(Does not work on keypad panic)
Default - Disabled (1)
Options : (Single digit entry required)
0 = Sirens are not disabled on first keypress.
1 = Sirens are silenced for 10 secs on the first
keypress.
Example : While in program mode (Program LED flashing)
Key Sequence
Operation
42
Enter Function No.
0
Enter Option (0 = Sirens are not silenced)
On
Store Entry
Installer may now exit program mode by pressing the OFF button or continue
programming by entering a new function number.
Page 11
4
Installation and programming manual
Function 55 - Silent Sections
10.4
Description :
Display and change which sections
will operate as Silent Sections ie. they
will report to the monitoring company
but will not activate the sirens.
Default - None
Options : (Two digit entry required per sector)
Any sector or combination of sectors from 1 to 8
Example : While in program mode (Program LED flashing)
Key Sequence
Operation
55
Enter Function No.
05
Enter Option (Sector 5 is now silent)
06
Enter Option (Sector 6 is now silent)
07
Enter Option (Sector 7 is now silent)
On
Store Entry
Installer may now exit program mode by pressing the OFF button or continue
programming by entering a new function number.
Function 60 - Account number
Description :
This function is used to enter the
account number for transmission to
the Central Station.
Default - None
Options : (Four digit entry required)
Any 4 Digits Limits 0000 - 9999
Notes: The dialler will not dial if the account number (Function 60) or phone number 1
(Function 64) is not programmed or the account number is set to 0000. Entering the
function number and then pressing the isol + code key will clear entries for Functions 60,
62, 64 and 65.
Example : While in program mode (Program LED flashing)
Key Sequence
Operation
60
Enter Function No.
1234
Enter Option (Account Number is now 1234)
On
Store Entry
Installer may now exit program mode by pressing the OFF button or continue programming by entering
a new function number.
Function 62 - Download Phone Number
Description :
This phone number is used by the
panel when downloading is initiated
by the MCM Connect downloading
software.
Default - None
Options : (Max of 15 digits)
The phone number may be up to 15 digits long
including pauses. Pauses (1 second) may be
entered anywhere by pressing the Partial key.
Example : While in program mode (Program LED flashing)
Key Sequence
Operation
62
Enter Function No.
02
Enter Area Code
part
Enter a 1 second Pause
218067
Enter Phone number (047p2180676)
On
Store Entry
Installer may now exit program mode by pressing the OFF button or continue programming by entering a new function number.
Page 12
5
Installation and programming manual
Function 63 -
Open/Close reports - Yes / No.
Default -Send open /close
Options : (Single digit entry required)
Description :
1
0
Selects whether open / close reports
are sent or not.
10.8
Open / Close sent
No Open / Close sent.
Example : While in programmode (Program LED flashing)
Key Sequence
Operation
63
Enter Function No.
0
Enter Option (0 = no report )
On
Store Entry
Installer may now exit program mode by pressing the OFF button or
continue programming by entering a new function number.
Function 64 - Phone number 1
Description :
Default - None
Options : (Maximum of 15 digits)
This phone number is the first number
used by the panel when reporting to
the monitoring company.
The phone number may be up to 15 digits long
including pauses. Pauses
(1 second) may be entered anywhere by
pressing the Partial key.
Example : While in program mode (Program LED flashing)
Key Sequence
Operation
64
Enter Function No.
218572
Enter Option (Phone number 1 is 218572)
On
Store Entry
Installer may now exit program mode by pressing the OFF button or continue programming by entering a
new function number.
Function
65 - Phone number 2
Description :
This phone number is the alternative
number used by the panel when reporting to the monitoring company and is
only used if the panel fails to report to
Phone #1
Default - None
Options : (Maximum of 15 digits)
The phone number may be up to 15 digits
long including pauses. Pauses (1 second)
may be entered anywhere by pressing the
Partial key.
Example : While in program mode (Program LED flashing)
Key Sequence
Operation
65
Enter Function No.
218067
Enter Option (Phone number 2 is 218067)
On
Store Entry
Installer may now exit program mode by pressing the OFF button or continue programming
by entering a new function number.
Function
66 - Dialling method
Description :
Default - DTMF (tone)
Options : (Single digit entry required)
0
Dial in
1
Dial in
2
Dial in
Example : While in program mode (Program LED flashing)
Key Sequence
Operation
66
Enter Function No.
1
Enter Option (1 = Dial
On
Store Entry
Installer may now exit program mode by pressing the OFF
by entering a new function number.
Selects to dial in DTMF or Decadic
Page 13
Decadic, (pulse)
DTMF, (tone)
New Zealand Decadic
in DTMF)
button or continue programming
5
Installation and programming manual
Function 67 - Reporting format
Description :
This function determines the format the
dialler will report in.
Default - Contact I.D. (4)
Option
0
1
4
: (Single digit entry required)
Normal Reporting (ADEMCO high speed)
Tape Dial (No handshake to start Tx.)
Contact I.D. single account number.
Notes:
When selected Tape Dial mode causes the dialler not to listen for acknowledge tone and
starts sending alarm message continuously until 30 second timeout or until a kissoff tone. (In
this mode a kissoff tone can be a whistle.) If the whistle is received on the first call it will not
continue to dial. In this mode no open/closing report, restores, isolate/de-isolates, mains fail,
low battery or 24 hour test messages are sent.
Example : While in program mode (Program LED flashing)
Key Sequence
Operation
67
Enter Function No.
0
Enter Option (0 = ADEMCO high speed)
On
Store Entry
Installer may now exit program mode by pressing the OFF button or continue programming by entering a new function number.
Function 68 - Report restorals
Description :
The dialler will normally report when an
input is restored to a non alarm
condition.
Default - Report
restorals
Options : (Single digit entry required)
1
Report restorals
0
Do not report restorals
5
Example : While in program mode (Program LED flashing)
Key Sequence
Operation
68
Enter Function No.
1
Enter Option (1 = Report Restorals)
On
Store Entry
Installer may now exit program mode by pressing the OFF button or continue programming by entering a new function number.
Function 69 - Test reports
Default - No test reports
Description :
This function programs the number of
24hr periods between test reports,
programming a 0 gives no test reports.
Options : (Single digit entry required)
0 to 9 = period in days
Example : While in program mode (Program LED flashing)
Key Sequence
Operation
69
Enter Function No.
7
Enter Option (7 = 7 days)
On
Store Entry
Installer may now exit program mode by pressing the OFF button or continue
programming by entering a new function number.
Page 14
Installation and programming manual
Function 70 - Report Using Checksum
Description :
The dialler defaults to use the single
round with checksum.
If a 0 is programmed the dialler will
report in dual round without
checksum.
Default - Using checksum
Options : (Single digit entry required)
1
Report using checksum
0
Do not use checksum in reporting
Note:
Not all base stations can handle reporting with checksum.
This function is applicable to ADEMCO high speed reporting only and not CONTACT ID.
Example : While in program mode (Program LED flashing)
Key Sequence
Operation
70
Enter Function No.
0
Enter Option (0 = no checksum)
On
Store Entry
Installer may now exit program mode by pressing the OFF button or continue programming
by entering a new function number.
Function 71 - Report Isolated Sections
Description :
If enabled the control panel will
report isolated sections at the end of
exit time.
Default - Report isolates
Options : (Single digit entry required)
1
Report isolated sections
0
Do not report isolated sections
Example : While in program mode (Program LED flashing)
Key Sequence
Operation
71
Enter Function No.
1
Enter Option (1 = report isolated sectors)
On
Store Entry
Installer may now exit program mode by pressing the OFF button or continue programming by entering a new function number.
Function 73 - Delay till First test report
Description :
This sets the delay from when program is exited till the dialler sends its
first test report, in multiples of 4 hours.
Default - 12 hours
Options : (Single digit entry required)
0 to 9 = number of 4 hr periods before the first test
report.
Example : While in program mode (Program LED flashing)
Key Sequence
Operation
73
Enter Function No.
3
Enter Option (3 = 12hrs)
On
Store Entry
Installer may now exit program mode by pressing the OFF button or continue
programming by entering a new function number.
Page 15
5
Installation and programming manual
Function 74 - Keyboard Duress On / Off
Description :
Keyboard duress may be disabled to
prevent accidental duress alarms
from private residences.
Default - Duress disabled
Options : (Single digit entry required)
1
Duress reports enabled
0
Duress reports disabled
Note:
Duress is achieved by adding 1 to the last digit of the user code eg. 1234 becomes 1235, 6789
becomes 6780.
Example : While in program mode (Program LED flashing)
Key Sequence
Operation
74
Enter Function No.
1
Enter Option (1 = reports enabled)
On
Store Entry
Installer may now exit program mode by pressing the OFF button or continue
programming by entering a new function number.
Function 75 - Auto-Isolate On/Off
Description :
Normally if an attempt to arm the
panel with a faulted section (other
than an exit/entry section) is made
the panel will give an error beep. If
this option is enabled then faulted
sections will be automatically isolated
and will be reported as such.
Default - Auto-Isolate disabled
Options : (Single digit entry required)
1
Auto - isolation enabled
0
Auto - isolation disabled
Example : While in program mode (Program LED flashing)
Key Sequence
Operation
75
Enter Function No.
1
Enter Option (1 = auto-isolation enabled)
On
Store Entry
Installer may now exit program mode by pressing the OFF button or continue programming
by entering a new function number.
Function 76 - Multi-Report (Multi-Break)
Default - None
Description :
Options : (Two digit entry required per sector)
Display and change which sections
Any sector or combination of sectors from 1 to 8
will report input condition changes
when armed.
Note:
This option will not give multi triggering of sirens to a section but will give multi reporting. The
section LED will latch on the first alarm for that section.
Example : While in program mode (Program LED flashing)
Key Sequence
Operation
76
Enter Function No.
01
Enter Option (01 = sector 1)
02
Enter Option (02 = sector 2)
On
Store Entries
Installer may now exit program mode by pressing the OFF button or continue
programming by entering a new function number.
Page 16
5
Installation and programming manual
Function 89 - Single Digit Arming
Description :
This function, when enabled, will allow
the panel to be turned on by pressing
the 0 key and either the 'ON
ON' key for full
arming or 'PARTIAL
PARTIAL' key for partial
arming.
Default - disabled
Options : (Single digit entry required)
0 = Single digit arming is disabled
1 = Single digit arming is enabled
NOTE: If opening / closing reporting is enabled, the unit will report an opening or
closing with user 31 in CONTACT ID format or user 15 with ADEMCO high speed format.
Example : While in program mode (Program LED flashing)
Key Sequence
Operation
89
Enter Function No.
1
Enter Option (1 = single digit arming enabled)
On
Store Entry
Installer may now exit program mode by pressing the OFF button or continue programming
by entering a new function number.
Function 90 - Default System Parameters
Description :
This option is used to default all system
setup values and user numbers etc,
back to known values.
Options :
None
Example : While in program mode (Program LED flashing)
Key Sequence
Operation
90
Enter Function No.
On
Panel will default to Factory defaults
Installer will automatically be exited from program mode when this function is invoked and
will have to re-enter program mode using the default Technician code (218067)
Function 91 -
Bell Output Type
Description :
This function determines what events
will trigger the bell 1 output
Default - Normal Bell Output
Options : (Single digit entry required)
0 Normal Bell Output
1 Normal Bell Output Plus Pulse Output
For Keyswitch Option
2 Panel Secure
3 24 Hour input in Alarm
4 Smoke Detector Power
Notes :
1.
When used for Smoke Detector Power (option 4), the Bell Output is used as the
negative supply to the Detectors. The Smoke Detector power may be turned off for 5
seconds when the panel is not armed by entering a user code and then TEST 6.
6
2.
When option 1 is selected and the keyswitch function (Function 93) has been
enabled, the bell output will give :1 beep on disarm, 2 beeps on arming and 5 beeps if arming was unsuccessful
Example : While in program mode (Program LED flashing)
Key Sequence
Operation
91
Enter Function No.
2
Enter Option (2 = panel secure o/p)
On
Store Entry
Installer may now exit program mode by pressing the OFF button or continue programming
by entering a new function number.
Page 17
Installation and programming manual
Function 92 - Slave Dialler Option
Description :
If this option is enabled, the panel
will, to all intents and purposes act as
a slave dialler.
Note:
Default - Control Dialler
Options : (Single digit entry required)
0 Control Dialler
1 Slave Dialler
When the Slave Dialler option is selected, inputs are 10k end of line
Example : While in program mode (Program LED flashing)
Key Sequence
Operation
92
Enter Function No.
0
Enter Option (0 = Control Dialler)
On
Store Entry
Installer may now exit program mode by pressing the OFF button or continue
programming by entering a new function number.
Function 93 - Keyswitch Option
Description :
This function, if enabled, will allow
sectors 7 and 8 to be used as
keyswitch inputs.
The Keyswitch is fitted to inputs 7 and
8. These inputs are disabled as alarm
inputs. To arm panel into Partial
mode seal input 7 (with 10K resistor).
To arm panel into Secure mode seal
input 8 (with 10K resistor).
To disarm panel unseal inputs 7 or 8.
Default - No Keyswitch
Options : (Single digit entry required)
0 - No Keyswitch fitted
1 - Latched Keyswitch (input 7 = partial,
input 8 = full arm)
2 - Momentary Keyswitch, intended for
radio control. Includes a Panic
Feature if input faulted for longer
then 2 secs. As per option 1, input 7
is partial arm and input 8 is full arm.
3 - Momentary Keyswitch as per option
2 but with only input 8 used (Full arm only)
4 - Momentary Keyswitch as per option
2 but with only input 7 used (Partial
arm only)
Example : While in program mode (Program LED flashing)
Key Sequence
Operation
93
Enter Function No.
3
Enter Option (Sector 8 becomes a keyswitch input)
On
Store Entry
Installer may now exit program mode by pressing the OFF button or
continue programming by entering a new function number.
Function 94 -
Siren Speed
Description :
This function may be used to vary the
speed of the siren outputs.
Default - medium(6)
Options : (Single digit entry required)
9 (slow) to 1 (fast)
Example : While in program mode (Program LED flashing)
Key Sequence
Operation
94
Enter Function No.
3
Enter Option (3 = Faster than default)
On
Store Entry
Installer may now exit program mode by pressing the OFF button or continue programming by entering a new function number.
Page 18
6
Installation and programming manual
Function 95 - Arming Lockout
Default - Arming enabled
Options :
0 = Arming can be performed.
1 = Arming is disabled.
Description :
This function may be used to prevent
the user from being able to arm the
panel
Example : While in program mode (Program LED flashing)
Key Sequence
Operation
95
Enter Function No.
1
Enter Option (1 = Panel cannot be armed by
user code)
On
Store Entry
Installer may now exit program mode by pressing the OFF button or continue programming by entering a new function number.
Function 96 - Download Configuration
Description :
This function determines how a
download / upload session is initiated.
Default - 5
Options : (Single digit entry required)
0 = Download disabled
1 = Ring detect only
2 = Ring detect or Tech code only
3 = Ring detect, Master code or Tech code
4 = Tech code only
5 = Master or Tech code only
Notes :
Downloading can be initiated by one of the three methods listed below :
1.
Ring Detect - The panel will dial back using the download phone number
(Function 62) if it receives three calls, of six rings duration (4-8), within a 90 second period.
2.
Master code initiated - Entering the User Master Code + test 8 will cause the
panel to dial as if it had detected the correct ring sequence.
3.
Tech code initiated - Tech code + test 80 will cause the panel to dial as if it had detected
the correct ring sequence.
Example : While in program mode (Program LED flashing)
Key Sequence
Operation
96
Enter Function No.
1
Enter Option (1 = ring detect only)
On
Store Entry
Installer may now exit program mode by pressing the OFF button or continue programming
by entering a new function number.
Page 19
6
Installation and programming manual
Function
unction 98 - Status on power up
Default
- Do not retain status
Options :
0 = Do not retain status.
1 = Retain status.
Description :
If this option is enabled, the panel will
attempt to power up in its previous
state when power is restorede.(e.g.Armed). If it
was previously armed it will ignore the sector
inputs for a settling period of 90 seconds and
then re-arm. Any sectors unsealed after this
settling period will be automatically isolated.
If this option is disabled then the panel will
power up in the OFF mode regardless of its
previous state.
NOTE: Pressing the OFF key during the 90 sec settling period will abort
will stay in the OFF mode.
the rearm and panel
Example : While in program mode (Program LED flashing)
Key Sequence
Operation
98
Enter Function No.
1
Enter Option (1 = Retain status)
On
Store Entry
Installer may now exit program mode by pressing the OFF button or continue
programming by entering a new function number.
Function 99 - Technician Code
Description :
The Technician code is used to set up
all functions of the system. Tech code
can only be used when the system is
in the OFF mode.
Default - 218067 ( six digits )
Options : (6 digit entry required)
Any 6 Digits
Example : While in program mode (Program LED flashing)
Key Sequence
Operation
99
Enter Function No.
218067
Enter Option (Tech code = 218067)
On
Store Entry
Installer may now exit program mode by pressing the OFF button or continue
programming by entering a new function number.
Page 20
6
Installation and programming manual
Function 00 - Master Code
Description :
The Master code is used to enter and
change the user codes only
(no system setups may be changed).
The Master code may be changed by either
the Technician or by the holder of the existing
Master code.
Default - 218572 ( six digits)
Options : (6 digit entry required)
Any 6 Digits
Notes: Ensure the Master code is different to the Technicians code. If the Master code is the
same as the Technician code then the technician will not be able to gain access to program
the system functions
Example : While in program mode (Program LED flashing)
Key Sequence
Operation
00
Enter Function No.
218572
Enter Option (Master code = 218572)
On
Store Entry
Installer may now exit program mode by pressing the OFF button or continue programming
by entering a new function number.
Function 01 - User Code 1
Description :
Function 01 allows the programming of
user code 1. This User code is the only
one with a default value but in all other
respects is the same as User codes
02 to 30
Default - 1111 ( four digits only )
Options : (Four digit entry required)
Any 4 Digits (see notes)
Notes:
30 User codes may be programmed into the panel, These user codes are
programmed using function numbers 01 to 30,
30 all are programmed in exactly the
same manner.
No two User Codes may be the same and if Keyboard Duress has been enabled by
Function 74 then no two codes can be within 2 digits of each other. eg. if one code is
1234 then the closest a code can be to it is 1236 or 1232,
1232 or else an error beep will be
heard.
The User codes are used to Arm, Disarm, Isolate Sections and Test the system only.
The User codes may be changed by either the Technician or by the holder of the
existing Master code.
The User codes may be deleted by using the Isolate key in place of the 4 digits in the
user code ( the Isolate key needs to be used only once to delete all four digits of the
user code).
Example : While in program mode (Program LED flashing)
Key Sequence
Operation
01
Select User No. 01
2222
Enter Option (User code 1 = 2222)
On
Store Entry
02
Select Function No. 02
Isolate
Delete User Code 2
On
Store Entry
Installer or Master code holder may now exit program mode by pressing the OFF button or
continue programming by entering a new function number.
Page 21
6
Installation and programming manual
REPORTING CODES
Ademco High Speed
Function
67=0
EXPAN D ED H IG H SPEED REPO RT C O D ES
The high speed ADEMCO reports are 13 digits long with the first four digits being
allocated to be the client's account number, the next 8 digits allocated to be event
reporting channels with the last digit being the channel status code.
Valid codes for the 8 event reporting channel codes with their meanings are as follows :
Code
Meaning
1
New event
2
New opening
3
New restore
4
New closing
5
Normal
6
Previously reported event still in effect
Valid codes for the channel status code with their meaning are as follows:Code
Meaning
1
Duress report in previous 8 channels (alarm in channel 1)
e.g. accnt #. channels. code.
1234
1555 5555
1
2
Opening report in previous 8 channels (user id in channel 1)
e.g. accnt #. channels. code.
1234
7222 2222
2 - user 7 disarmed the system
3
Zone bypass status report in previous 8 channels
e.g. accnt #. channels. code.
1234
5515 5555
3 - zone 3 newly isolated
1234
1565 5555
3 - zone 1 newly isolated,
zone 3 previously isolated
1234
3535 5555
3 - zones 1 and 3 isolate restoral
4
Closing report in previous 8 channels
e.g. accnt #. channels. code.
1234
8444 4444
4 - user 8 armed the system
1234
F444 4444
4 - user 15 armed the system
5
Zone trouble report in previous 8 channels (not used)
6
System trouble report in the previous 8 channels (not used)
7
Zone alarm status report
e.g. accnt #. channels. code.
1234
5515 5555
7 - zone 3 newly alarmed
1234
1565 5555
7 - zone 1 newly alarmed,
zone 3 previously alarm
1234
3535 5555
7 - zones 1 and 3 restoral
8
New low battery alarm
e.g. accnt #. channels. code.
1234
5555 5555
8 - low battery alarm
9
Test report. Alarm status is reported in the previous 8 channels
e.g. accnt #. channels. code.
1234
5555 5655
9 - test report, prev. zone 6 alarm.
Page 22
7
Installation and programming manual
REPORTING CODES
15.2
Contact
ID
Contact ID
Function 67=4
Format
SSSS 18
E TTT PP NNN
Where
SSSS =
Four Digit Account Number
18
=
Unique Format Identifier
(Not Displayed or Printed)
E
=
Event
1 = New Event or Opening
3 = New Restore or Closing
TTT =
Event Code
120 = Panic Alarm
121 = Duress Alarm
130 = Burglar Alarm
301 = AC Power Loss
302 = Low Battery
401 = Open/Close by User
570 = Zone Bypass
602 = Periodic Test Report
PP
= Area or Partition Number
NNN = Section Number or User Number
Examples of Reporting
1234
1234
1234
1234
1234
1234
1234
1234
18
18
18
18
18
18
18
18
1
1
1
1
3
1
1
1
120
121
130
130
301
302
401
602
00
00
01
01
00
00
00
00
Note: Checksum is omitted for clarity
000
005
001
002
000
000
001
000
Page 23
Panic Alarm
Duress Alarm by user 5
Section 1 alarm in area 1
Section 2 alarm in area 1
AC Fail restore
Low battery alarm
Open message with user code 1
Test Report
7
Installation and programming manual
Other Features
- KEYBOARD
Panic
Keyboard Panic is achieved by pressing and holding both the OFF and
ON keys together and holding for 2 secs. This is a local as well as a back
to base alarm.Keyboard Panic may be triggered and reported more
than once, but only one restoral will be sent when a valid user code is
next entered.
- KEYBOARD
Duress
Keyboard Duress is sent by entering your normal 4 digit code but with the
last digit incremented by 1.
If your code is " 1234 " then enter "1235
1235 ", a duress is sent
with no local alarm. A duress restore is sent when the next valid code is entered. If the last
digit of your code is " 0 " then enter a " 1 ". Or if a " 9 " enter a " 0 "..
- 24 HOUR
Inputs which are configured for 24 hour operation, when alarmed,
will send a restoral when that input is resealed and a valid user code
entered.
- MAINS FAIL
Mains fail is automatically detected and reported by the control dialler.
When mains fail is detected the power LED on the Command Centre will
start giving a single flash and will be beeping. The beeper will stop when
any button
is depressed. After mains has been off for more than 60
minutes the dialler will send a mains fail alarm.
When mains is restored the LED will go steady again and after 30
seconds the dialler will trip and send a mains restoral.
- LOW BATT
Low battery is automatically detected and reported by the control
dialler. When low battery is detected the power LED on the Command
Centre will start giving a double flash. After the battery voltage has been
low for 30 seconds thedialler will send a low battery report. When the
battery voltage is restored to normal the LED will go steady a g a i n
and after 30 seconds the dialler will send a low battery restoral.
If low battery occurs during the 60 minute mains fail time, then it takes
precedence over the mains fail and both events will be reported.
- TEST DIAL
To test the reporting ability of the dialler a test dial may be initiated by
entering a User code and then TEST 9. When the dialler receives the
handshake tones
from the monitoring station the dialler will give 3
beeps. When Tape Dial (option 67)
67 is enabled the dialler will give 3
beeps after dialling is completed for the test call.
NOTE: This test dial will reset the time to the next test dial if test reports
are enabled.
- TECH TEST
In addition to the normal test functions, the technicians code also allows
FUNCTIONS the initiation of automatic upload or download sessions when using the
MCM Connect 2000 software package. The sequence is :
Tech Code + TEST 80
NOTE:
In all instances when mentioned in this manual, Download refers to information being sent
from the PC to the remote Panel and Upload refers to information being sent from the remote
Panel to the PC.
Page 24
8