1
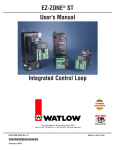
EZ-ZONE™ ST
User’s Manual
Integrated Control Loop
TOTAL
CUST
CUS
TOMER
SATISF
TISFA
ACTI
CTIO
ON
3 Year Warranty
ISO 9001
Registered Company
Winona, Minnesota USA
1241 Bundy Boulevard., Winona, Minnesota USA 55987
Phone: +1 (507) 454-5300, Fax: +1 (507) 452-4507 http://www.watlow.com
0600-0052-0000 Rev. E
October 2007
Made in the U.S.A.
$15.00
Safety Information
Warranty
We use note, caution and warning symbols throughout
this book to draw your attention to important operational and safety information.
The EZ-ZONE™ ST is manufactured by ISO 9001registered processes and is backed by a three-year
warranty to the first purchaser for use, providing that
the units have not been misapplied. Since Watlow has
no control over their use, and sometimes misuse, we
cannot guarantee against failure. Watlow's obligations
hereunder, at Watlow's option, are limited to replacement, repair or refund of purchase price, and parts
which upon examination prove to be defective within
the warranty period specified. This warranty does not
apply to damage resulting from transportation, alteration, misuse or abuse.
A “NOTE” marks a short message to alert you to an
important detail.
A “CAUTION” safety alert appears with information
that is important for protecting your equipment and
performance. Be especially careful to read and follow all
cautions that apply to your application.
A “WARNING” safety alert appears with information
that is important for protecting you, others and equipment from damage. Pay very close attention to all warnings that apply to your application.
The safety alert symbol, ç (an exclamation point in
a triangle) precedes a general CAUTION or WARNING
statement.
The electrical hazard symbol, Ó (a lightning bolt in a
triangle) precedes an electric shock hazard CAUTION or
WARNING safety statement.
ç
Ó
CAUTION or WARNING
Electrical Shock Hazard
CAUTION or WARNING
Warranty
The EZ-ZONE™ ST is manufactured by ISO 9001-registered processes and is backed by a three-year warranty
to the first purchaser for use, providing that the units
have not been misapplied. Since Watlow has no control
over their use, and sometimes misuse, we cannot guarantee against failure. Watlow’s obligations hereunder,
at Watlow’s option, are limited to replacement, repair or
refund of purchase price, and parts which upon examination prove to be defective within the warranty period
specified. This warranty does not apply to damage resulting from transportation, alteration, misuse or abuse. The
purchaser must use Watlow parts to maintain all listed
ratings.
Technical Assistance
If you encounter a problem with your Watlow controller, review your configuration information to verify
that your selections are consistent with your application: inputs, outputs, alarms, limits, etc. If the problem persists, you can get technical assistance from
your local Watlow representative (see back cover), by
e-mailing your questions to wintechsupport@watlow.
com or by dialing +1 (507) 494-5656 between 7 a.m.
and 5 p.m., Central Standard Time (CST). Ask for for
an Applications Engineer. Please have the following
information available when calling:
• Complete model number
• All configuration information
• User’s Manual
• Factory Page
Return Material Authorization (RMA)
1. Call Watlow Customer Service, (507) 454-5300,
for a Return Material Authorization (RMA) number
before returning any item for repair. If you do not
know why the product failed, contact an Application
Engineer or Product Manager. All RMA’s require:
• Ship-to address
• Bill-to address
• Contact name
• Phone number
• Method of return shipment
• Your P.O. number
• Detailed description of the problem
• Any special instructions
• Name and phone number of person returning the
product.
2. Prior approval and an RMA number from the
Customer Service Department is required when
returning any product for credit, repair or evaluation. Make sure the RMA number is on the outside of
the carton and on all paperwork returned. Ship on a
Freight Prepaid basis.
3. After we receive your return, we will examine it and
try to verify the reason for returning it.
4. In cases of manufacturing defect, we will enter
a repair order, replacement order or issue credit for
material returned. In cases of customer mis-use, we
will provide repair costs and request a purchase order
to proceed with the repair work.
5. To return products that are not defective, goods
must be be in new condition, in the original boxes and
they must be returned within 120 days of receipt. A 20
percent restocking charge is applied for all returned
stock controls and accessories.
6. If the unit is unrepairable, you will receive a letter of explanation. and be given the option to have the
unit returned to you at your expense or to have us
scrap the unit.
7. Watlow reserves the right to charge for no trouble
found (NTF) returns.
The EZ-ZONE™ ST User’s Manual is copyrighted by
Watlow Winona, Inc., © October 2007 with all rights
reserved.
EZ-ZONE™ ST is covered by U.S. Patent No. 6,005,577
and Patents Pending
TC
Table of Contents
Chapter 1: Overview . . . . . . . . . . . . . . . . . . . . . . . . . . . . . . . . . . . . .2
The EZ-ZONE™ ST Provides Total Thermal System Control . . . . . . . . . . 2
Features and Benefits . . . . . . . . . . . . . . . . . . . . . . . . . . . . . . . . . . . . . . . 2
A Conceptual View of the ST . . . . . . . . . . . . . . . . . . . . . . . . . . . . . . . . . 3
Chapter 2: Install, Wire and Set Address . . . . . . . . . . . . . . . . . . . . . . .5
Wiring . . . . . . . . . . . . . . . . . . . . . . . . . . . . . . . . . . . . . . . . . . . . . . . . . . . 6
Installation . . . . . . . . . . . . . . . . . . . . . . . . . . . . . . . . . . . . . . . . . . . . . . 11
Replacing the Solid-State Relay . . . . . . . . . . . . . . . . . . . . . . . . . . . . . . 12
Setting the Address . . . . . . . . . . . . . . . . . . . . . . . . . . . . . . . . . . . . . . . 21
Chapter 3: Using the Interfaces . . . . . . . . . . . . . . . . . . . . . . . . . . . . . 23
Chapter 4: Home Page . . . . . . . . . . . . . . . . . . . . . . . . . . . . . . . . . . . 28
Chapter 5: Operations Page . . . . . . . . . . . . . . . . . . . . . . . . . . . . . . . 30
Navigating the Operations Page . . . . . . . . . . . . . . . . . . . . . . . . . . . . . . 30
Chapter 6: Setup Page . . . . . . . . . . . . . . . . . . . . . . . . . . . . . . . . . . . 37
Navigating the Setup Page . . . . . . . . . . . . . . . . . . . . . . . . . . . . . . . . . . 37
Chapter 7: Profiling Page . . . . . . . . . . . . . . . . . . . . . . . . . . . . . . . . . 46
Navigating the Profiling Page . . . . . . . . . . . . . . . . . . . . . . . . . . . . . . . . 46
Chapter 8: Factory Page . . . . . . . . . . . . . . . . . . . . . . . . . . . . . . . . . . 53
Navigating the Factory Page . . . . . . . . . . . . . . . . . . . . . . . . . . . . . . . . . 53
Chapter 9: Features . . . . . . . . . . . . . . . . . . . . . . . . . . . . . . . . . . . . . 56
Chapter 10: Appendix . . . . . . . . . . . . . . . . . . . . . . . . . . . . . . . . . . . 68
Troubleshooting . . . . . . . . . . . . . . . . . . . . . . . . . . . . . . . . . . . . . . . . . . 68
Modbus Registers For All Parameters . . . . . . . . . . . . . . . . . . . . . . . . . 71
Specifications . . . . . . . . . . . . . . . . . . . . . . . . . . . . . . . . . . . . . . . . . . . . 86
Ordering Information . . . . . . . . . . . . . . . . . . . . . . . . . . . . . . . . . . . . . . 87
Index . . . . . . . . . . . . . . . . . . . . . . . . . . . . . . . . . . . . . . . . . . . . . . . . . . . 90
Declaration of Conformity . . . . . . . . . . . . . . . . . . . . . . . . . . . . . . . . . . . 94
Watlow EZ-ZONE™ ST
•
1 •
Table of Contents
1
Chapter 1: Overview
The EZ-ZONE™ ST Provides Total
Thermal System Control
PID temperature control
• Provides accurate temperature control
• Provides a single input and dual outputs
Watlow’s new EZ-ZONE™ ST solid-state controller
offers complete thermal system control in a single
package. You get a PID temperature controller already connected to a high-amperage, solid-state relay
with the option of adding a properly sized heat sink,
an over-under temperature limit, a shut-down power
contactor, digital communications and a remote user
interface in one package.
• Provides standard or advanced PID tuning algorithms.
Optional 485 Modbus™ communication
• Provides connectivity to PC or PLC networks
Optional temperature limit
• Increases safety during under- and over-temperature conditions
You can stack the EZ-ZONE™ ST into multiple configurations to solve a wide range of application needs.
Optional mechanical contactor
• Enables circuit safety shutdown driven by a limit
controller or a PID alarm output signal
Features and Benefits
Back panel or DIN rail mount
• Provides several mounting options
Optional current monitoring feature
• Detects a shorted or half-waving solid-state relay;
an open heater circuit; or a failed heater
Compact package
• Reduces panel size
Optional remote user interface (RUI)
• Uses one RUI for multiple zones
Touch-safe package
• IP2X-Touch safe with back of hand
• Shallow panel depth allows it to fit in small spaces
• Increases safety for installers and operators
• Eliminates the costs and complexity of having to
bring all controller related wires to the front
panel
±0.1 percent temperature accuracy
• Provides efficient and accurate temperature control
• Enables the use of multiple RUIs to improve the
system’s usability and flexibility
Agency approvals:
(with factory-installed
heatsink);
(without factory-installed heatsink); CE; RoHS; W.E.E.E.; CSA; NEMA 4 (RUI)
• Limit version features FM approval
Optional Solid-state Relay heat sink
• Sized and engineered for specific applications
• Provides third-party recognition
• Factory assembled heat sink required for UL listing
Three-year warranty
• Provides Watlow reliability and product support
System diagnostics
• Provides continuous self-monitoring alerts of system trouble, to reduce maintenance and service
costs
Off-the-shelf designed system solution
• Improves system reliability and reduces wiring
Advanced controllability algorithms
• TRU-TUNE+™ meets demanding controllability
requirements.
• Reduces installation cost
• Eliminates compatibility headaches often encountered when using many different components and
brands
PC Software: EZ-ZONE™ ST Configurator
• Wizard-style configuration of controller settings
Solid-state relay output
• Provides faster cycling, more precise control, increased heater life and energy efficiency
• Online or offline recipe editing
UL® is a registered trademark of Underwriter’s Laboratories Inc.
Modbus™ is a trademark of Schneider Automation Incorporated.
Watlow EZ-ZONE™ ST
•
2
•
Chapter 1 Over view
A Conceptual View of the ST
side of the controller. To have any effect outside of the
controller, an output must be configured to respond to
a function.
The flexibility of the controller’s software and hardware allows a large range of configurations. Acquiring
a better understanding of the controller’s overall functionality and capabilities while at the same time planning out how the controller can be used will deliver
maximum effectiveness in your application.
It is useful to think of the controller in three parts:
inputs; procedures; and outputs. Information flows
from an input to a procedure to an output when the
controller is properly configured. A single ST controller can carry out several procedures at the same time,
for instance closed-loop control, monitoring for several
different alarm situations and operating switched devices, such as lights and motors. Each process needs
to be thought out carefully and the controller’s inputs,
procedures and outputs set up properly.
Outputs
Outputs can perform various functions or actions in
response to information provided by a function, such
as operating a heater; turning a light on or off; unlocking a door; or turning on a buzzer.
Assign an output to a Function in the Output
Menu or Digital Input/Output Menu. Then select
which instance of that function will drive the selected
output. For example, you might assign an output to
respond to alarm 2 (instance 2).
You can assign more than one output to respond to
a single instance of a function. For example, alarm 2
could be used to trigger a light connected to output 1
and a siren connected to digital output 5.
Inputs
Input Events and Output Events
The inputs provide the information that any given
programmed procedure can act upon. In a simple form,
this information may come from an operator pushing
a button or as part of a more complex procedure it
may represent a remote set point being received from
another controller.
Each analog input typically uses a thermocouple
or RTD to read the temperature of something. It can
also read volts, current or resistance, allowing it to
use various devices to read humidity, air pressure,
operator inputs and others values. The settings in the
Analog Input Menu (Setup Page) for each analog input
must be configured to match the device connected to
that input.
Each digital input reads whether a device is active or inactive. A controller with digital input-output
hardware includes two sets of terminals each of which
can be used as either an input or an output. Each pair
of terminals must be configured to function as either
an input or output with the Direction parameter in
the Digital Input/Output Menu (Setup Page).
The Function, or EZ, Key on the front panel also
operates as a digital input by toggling the function assigned to it in the Digital Input Function parameter in
the Function Key Menu (Setup Page).
Input events are internal states that are set by the
digital inputs. Digital input 5 provides the state of
input event 1, and digital input 6 provides the state
of input event 2. Wait for Event steps in profiles are
triggered by these events. The setting of Digital Input
Function (Setup Page, Digital Input/Output Menu)
does not change the relationship between the input
and the event, so take care not to configure the function in a way that would conflict with a profile that
uses an input event. An input will still control the
input event state, even if Digital Input Function is set
to None.
Output events are internal states that can only be
set by profile steps. Outputs 1 through 4 can be configured to respond to output events.
Functions
Functions use input signals to calculate a value. A
function may be as simple as reading a digital input to
set a state to true or false, or reading a temperature to
set an alarm state to on or off. Or, it could compare the
temperature of a process to the set point and calculate
the optimal power for a heater.
To set up a function, it’s important to tell it what
source, or instance, to use. For example, an alarm may
be set to respond to either analog input 1 or 2 (instance 1 or 2, respectively).
Keep in mind that a function is a user-programmed
internal process that does not execute any action out-
Watlow EZ-ZONE™ ST
•
3
•
Chapter 1 Over view
EZ-ZONE™ ST
Output 1
switched dc
Analog Input 1
thermocouple, RTD, process (V or mA)
Solid-state Relay
PID
Controller
Output 2 form A relay
(0.5 A solid-state or 5 A mechanical)
EIA-485 Communications
Remote User Interface (RUI)
or Modbus
ST(P, E, J, C)_-____-____
Supervisory
&
Power
Board
Digital Input (or Output) 6
switch or volts dc
Digital Output (or Input) 5
alarm or event
Digital Output (or Input) 6
alarm or event
Output 3
form C relay (5 A mechanical)
Analog Input 2
thermocouple, RTD, process (V or mA)
heat, cool, alarm
or event
Current Sensor
optional
ST__-__A_-____
ST__-__M_-____
Digital Input (or Output) 5
switch or volts dc
heat, cool or alarm
heat, cool, alarm,
event or limit
Limit
Controller
optional
ST_L_-____-____
Output 4 form A relay
(2 A mechanical)
Contactor
optional
ST__- (B or F)___-____
High
Current
Power
EZ-ZONE™ ST inputs and outputs.
Ó
WARNING: When the controller is powered up, the outputs
may turn on.
NOTE: A current error can be sent to the RUI (Remote User Interface) soft error display by enabling Current Reading [`CU;r] in
the Setup Page.
Watlow EZ-ZONE™ ST
•
4
•
Chapter 1 Over view
Chapter 2:
Install, Wire and Set Address
2
EZ-ZONE™ ST with contactor
156 mm
(6.14 in)
25 A heatsink (shown)
This dimension same for 40 A heatsink.
36.2 mm
(1.43 in)
Front View
41.9 mm
(1.65 in)
4
1
35 mm
(1.38 in)
EZ-ZONE™ ST
Patent Pending
Integrated
Control Loop
177.8 mm
(7.00 in)
2
5
4
1
EZ-ZONE™ ST
Patent Pending
Integrated
Control Loop
188.6 mm
(7.43 in)
2
5
WARNING: The heat sink
can become hot during operation.
3
CAUTION: The EZ-ZONE™
ST must be mounted vertically (as shown) to meet the
ampere/ambient-temperature performance curve.
6
3
126.1 mm
(4.97 in)
63.5 mm
(2.5 in)
25 A (shown)
Side View
98.6 mm
(3.88 in)
40 A
EZ-ZONE™ ST without contactor
51.6 mm
(2.03 in)
36.2 mm
(1.43 in)
RUI Panel Cutout Dimensions
52.07 mm
(2.05 in)
156 mm
(6.14 in)
25 A heatsink (shown)
This dimension the same for 40 A heatsink.
#8 mounting
screw
2
1
EZ-ZONE™ ST
Integrated Control Loop
Patent Pending
45.21 mm
(1.78 in)
(1.77 to 1.79 in)
Panel Cutout
41.9 mm
(1.65 in)
177.8 mm
(7.00 in)
6
29.5 mm
(1.16 in)
52.07 mm
(2.05 in)
45.21 mm
(1.78 in)
(1.77 to 1.79 in)
your panel thickness
1.5 to 9.7 mm
(0.06 to 0.38 in)
35 mm
(1.38 in)
188.6 mm
(7.43 in)
9.65 mm
(0.38 in)
minimum
87 mm
(3.43 in)
17.4 mm
(0.68 in)
126.1 mm
(4.97 in)
63.5 mm
(2.5 in)
25 A (shown)
Front View
WARNING: The heat
sink can become hot
during operation.
76.25 mm
(3.00 in)
Side View
98.6 mm
(3.88 in)
40 A
#8 mounting
screw
CAUTION: The EZZONE™ ST must be
mounted vertically
(as shown) to meet
the ampere/ambienttemperature performance curve.
Watlow EZ-ZONE™ ST
Front View
21.59 mm
(0.85 in)
29.5 mm
(1.16 in)
1.40 mm
(0.06 in)
2
1
15.75 mm
(6.20 in)
44.70 mm
(1.76 in)
EZ-ZONE™ ST
Integrated Control Loop
Patent Pending
Back View
Side View
10.16 mm
(4.00 in)
30.73 mm
(1.21 in)
•
5
•
Chapter 2 Install and Wire
Ó
Wiring
with a contactor (ST _ _ - (B or F) _ _ _ - _ _ _ _)
WARNING: Use National Electric
(NEC) or other country-specific
standard wiring and safety practices when wiring and connecting
this controller to a power source
and to electrical sensors or peripheral devices. Failure to do so
may result in damage to equipment and property, and/or injury
or loss of life.
A1
A2
L3
K3
J3
A1
L4
T2
L4
A1
J3
K3
L3
T2
L4
A1
J3
K3
L3
Patent Pending
L3
K3
J3
A1
L4
T2
S2
Integrated
Control Loop
ST_ L - _ _ _ _ - _ _ _ _ (with limit)
N.O. (Output 4)
contactor (Coil 1)
N.C. (Output 3)
common (Output 3)
N.O. (Output 3)
OUT 3
SSR
ON
1234
SSR
STATUS
OUT 2
ON
1234
98
99
CF
T+/R+ (RUI)
T-/R- (RUI)
common (RUI)
6
fuse
Output 1 (SSR)
Power Supply
ST_ _ - _ _ A _ - _ _ _ _
Remote User Interface (RUI)
earth
ground
load
98
99
CC
CA
CB
B5
CAUTION: Always mount the controller
as shown, with the heat-sink fins aligned
vertically.
T-/R- (Modbus RTU)
common (Modbus RTU)
T+/R+ (Modbus RTU)
- common (Digital I/O)
fuse
Power Supply
NOTE: The control common terminal and
the digital common terminal are referenced to different voltages and must remain isolated.
ST_ _ - _ _ M _ - _ _ _ _
Modbus RTU on EIA-485
No flashing indicates that the controller
is not functioning.
Watlow EZ-ZONE™ ST
3
STATUS
CD
- common (Digital I/O)
+ Digital Input 5 or Output 5
Flashing red indicates an input error.
+ Digital Input 6 or Output 6
Flashing green indicates the controller is
running with no input errors.
D6
STATUS Indicator Light
D5
NOTE: Use the contactor with a minimum load
of 100 watts.
+ Digital Input 6 or Output 6
NOTE: Terminals L4 and A1 on the limit connector are jumpered at the factory to complete
the contactor circuit. Additional switches may
be wired in series to the terminals.
+ Digital Input 5 or Output 5
WARNING: If high voltage is applied to a lowvoltage controller, irreversible damage will
occur.
LIMIT
CE
ç
OUT 2
L2
B5
OUT 3
A1
T1
K2
D6
Address
Selection
5
LIMIT
L4
D5
Controller
2
L3
T2
S1
K3
S2
J3
–
R1
L2
S1
K2
R1
+
R2
L2
K2
Limit
EZ-ZONE™ ST
S2
common
(Output 2) N.O.
(Output 2)
T1
–
T1
S1
R1
+
S2
S3
4
1
S3
Thermocouple
(Input 2)
S2
Thermocouple
(Input 1)
S1
R2
L2
K2
T1
S1
R1
S1
+
S2
L2
K2
T1
S1
R1
3-wire
RTD
(Input 2)
S3
fuse
S3
S1
R2
+
–
T2
–
R2
L2
2-wire
RTD
(Input 2)
hot
neutral
+
S2
Process
0 to 10VÎ (dc)
0 to 50mVÎ (dc)
(Input 2)
K2
T1
S1
R1
2-wire
RTD S1
(Input 1)
hot
fuse
fuse
Process
0 to 20 mA
(Input 2)
–
Contactor
Coil 1
hot
–
Process
0 to 20 mA
(Input 1)
3-wire
RTD
(Input 1)
Contactor
Coil 2
R2
Process
0 to 10VÎ (dc)
0 to 50mVÎ (dc)
+
(Input 1)
NOTE: A2 is connected internally to terminal 98. A1 is connected internally to
the contactor coil. The other side of the
coil is connected to terminal 99.
ST_ B - _ _ _ _ - _ _ _ _ (no limit)
•
6
•
Chapter 2 Install and Wire
Wiring
without a contactor (ST _ _ - A _ _ _ _ - _ _ _ _ )
hot
hot
fuse
fuse
Ó
load
WARNING: Use National Electric (NEC) or other country-specific standard wiring and safety practices when wiring and connecting this controller to a power source and to electrical sensors or peripheral devices. Failure to do so may result in damage to equipment and property, and/or injury or loss of life.
Output 1 (SSR)
neutral
hot
fuse
load
ç
Output 1 (SSR)
WARNING: If high voltage is applied to a low-voltage controller, irreversible damage will occur.
1
2
CAUTION: Always mount the controller as shown, with the
heat-sink fins aligned vertically.
EZ-ZONE™ ST
Integrated Control Loop
Patent Pending
SSR
LIMIT
STATUS
K3
CF
contactor (Coil 1)
A1
L2
CD
N.O. (Output 4)
L4
K2
CE
T2
T1
B5
S2
-
S2
S1
D6
R2
+
R2
R1
D5
J3
A1
A1
A1
A1
+ T2
- S2
T2
- S2
+ R2
R2
Process
Process
0 to 10VÎ (dc) 0 to 20 mA
0 to 50mVÎ (dc) (Input 2)
(Input 2)
S3
L4
S2
S2
S1
R2
2-wire
T2
S3
S1
99
Control
J3
T2
K3
98
J3
J3
L4
Address
Selection
N.C. (Output 3)
J3
L4
L3
common (Output 3)
1234
K3
L4
N.O. (Output 3)
L3
OUT 2
ON
L3
K3
K3
Limit
ST_ L - _ _ _ _ - _ _ _ _
all
L3
L3
OUT 3
3-wire
Thermocouple
(Input 2)
RTD
(Input 2)
Controller
L2
+
L2
K2
K2
T1
+ T1
-
S1
R1
L2
K2
T1
S1
S3
R1
S1
Process
Process
0 to 10VÎ (dc) 0 to 20 mA
0 to 50mVÎ (dc) (Input 1)
(Input 1)
Watlow EZ-ZONE™ ST
L2
2-wire
•
S1
R1
K2
S2
S3
S1
3-wire
RTD
(Input 1)
7
•
T1
S1
R1
N.O. (Output 2)
common (Output 2)
L2
K2
T1
-
S1
+
R1
Thermocouple
(Input 1)
Chapter 2 Install and Wire
c
T
hot
hot
fuse
fuse
load
Output 1 (SSR)
neutral
hot
Ground Connection
Connect the ground to the heat sink.
fuse
load
There is no ground connection on models without a heat sink.
Output 1 (SSR)
1
2
EZ-ZONE™ ST
Integrated Control Loop
Patent Pending
Indicator
Lights
SSR
LIMIT
STATUS
OUT 3
K3
Address
Selection
1234
)
ON
L3
OUT 2
98
99
Power
98
Power
Power
99
Power
common (RUI)
CC
common (Modbus RTU)
CA
T-/R- (Modbus RTU)
CB
T+/R+ (Modbus RTU)
J3
Control
CF
A1
L2
CD
T-/R- (RUI)
L4
K2
CE
T+/R+ (RUI)
T2
T1
B5
- common (Digital I/O)
B5
- common (Digital I/O)
S2
S1
D6
+ Digital Input 6 or Output 6
D6
+ Digital Input 6 or Output 6
R2
R1
D5
+ Digital Input 5 or Output 5
D5
+ Digital Input 5 or Output 5
ST_ _ - _ _ A _ - _ _ _ _
Remote User Interface
(RUI)
ST_ _ - _ _ M _ - _ _ _ _
Modbus RTU on EIA-485
NOTE: The control common terminal and
the digital common terminal are referenced to different voltages and must
remain isolated.
Watlow EZ-ZONE™ ST
•
8
•
Chapter 2 Install and Wire
1
Internal wiring in an ST
with a single-pole contactor
without a limit (ST _ B - B _
_ _ - _ _ _ _).
4
Use single-pole contactors
for hot-to-neutral loads.
NEC does not permit neutral to be switched.
contactor
contact
2
SSR
4
contactor
contacts
Use double-pole contactors
for hot-to-hot loads. Both
hot legs must be opened together on limit conditions to
remove power from circuit.
5
current
sensor
1
2
5
current
sensor
SSR
to pin 3 to pin 6
below
below
to pin 3 to pin 6
below below
Limit
A1
A2
Limit
A1
A2
contactor
coil
contactor
coil
3
6
user-supplied
safety switch
Power
Watlow EZ-ZONE™ ST
contactor
coil
98
99
(Dotted lines represent internal wiring.)
3
3
Limit
L2
K2
98
99
Power
output 4
internal relay
normally open
6
A1
A2
Limit
A1
L4
contactor
coil
You may remove
the factory-installed
jumper between A1
and L4 to install a
safety switch for the
limit relay (ST _ L - _
_ _ _ - _ _ _ _).
Power
98
99
Power
98
99
3
Internal wiring in an ST
with a double-pole contactor
without a limit (ST _ B - F _
_ _ - _ _ _ _).
You can use output 2
(L2 and K2) to deactivate the contactor coil
on an ST without a
limit (ST _ B - _ _ _ _
- _ _ _ _).
(Dotted lines represent internal wiring.)
6
6
•
9
•
Chapter 2 Install and Wire
1
hot
2
120VÅ (ac)
EZ-ZONE™ ST
Integrated Control Loop
neutral
Patent Pending
fuse
Do not switch or
fuse neutral wire!
fuse
SSR
LIMIT
STATUS
OUT 3
K3
1234
ON
L3
98
99
J3
N.O. (Output 4)
Power
Power
fuse
CF
A1
L2
CD
L4
K2
CE
T1
B5
S2
S1
D6
R2
R1
D5
T2
4
1
OUT 2
limit relay
contactor
coil
customer supplied
limit contactor
EZ-ZONE™ ST
Patent Pending
Integrated
Control Loop
20 A
maximum
2
2
L3
K3
J3
A1
L4
S2
1
T2
–
R2
EZ-ZONE™ ST
Integrated Control Loop
+
-
Patent Pending
OUT 3
L2
K2
T1
S1
R1
Address
Selection
J3
1234
K3
ON
1234
6
OUT 2
ON
L3
98
3
STATUS
SSR
OUT 2
99
CF
B5
CD
D6
CE
D5
System using the auxiliary terminals
(20 A maximum) to operate a secondary
load.
SSR
LIMIT
OUT 3
STATUS
+
-
LIMIT
System with a limit using an external
contactor (ST _ L - A _ _ _ - _ _ _ _).
+
5
98
99
CF
A1
L2
CD
L4
K2
CE
T2
T1
B5
S2
S1
D6
R2
R1
D5
earth
ground
zone 1
Sub-assembly Labels
Top Level
ST??-????-????
Module
??? V~50/60 Hz 140VA MAX
SEE MANUAL 0600-0052-0000
(CONTROL)STRC-0???-????
SN:??????
DC:????
PATENT PENDING
The model number at the top of each
label identifies the controller configuration.
See Ordering Information and Model
Numbers in the Appendix for more detailed information.
ST _ _ - _ L _ _ - _ _ _ _ 24 to 28V
ST _ _ - _ H _ _ - _ _ _ _ 100 to 240V
ST _ _ - _ 1 _ _ - _ _ _ _ 24VÅ (ac)
ST _ _ - _ 2 _ _ - _ _ _ _ 120V
ST _ _ - _ 3 _ _ - _ _ _ _ 208 to 240V
Controller label.
ST??-????-????
SEE MANUAL 0600-0052-0000
(H/S)STRT-HS??-000?
DC:????
SN:??????
PATENT PENDING
Heat sink label.
ST??-????-????
SEE MANUAL 0600-0052-0000
T
(BASE) STRC-BASE-????
DC:????
SN:??????
PATENT PENDING
Base label.
Watlow EZ-ZONE™ ST
•
10
•
Chapter 2 Install and Wire
Installation
Mounting and Unmounting the Controller from a DIN Rail
To mount the controller on a DIN rail, first
hook the top flange on the back of the heat
sink on to the top of the DIN rail. Then
rotate the controller to an upright position
until the lower flange snaps into place.
To unmount the controller, first use a
screwdriver to pull down the small lever on the bottom of the heat sink and
rotate the bottom of the controller forward. Then lift the the controller off of
the rail.
NOTE: Typically, the DIN rail is mounted
before components are mounted on it.
Mounting the Remote User Interface (RUI)
2. While pressing the case assembly firmly against the panel,
slide the mounting collar over the back of the RUI.
If the installation does not require an IP65/NEMA 4X seal,
slide the mounting collar up to the back of the panel tight
enough to eliminate the spacing between the gasket and the
panel.
1. Make the panel cutout using the mounting template dimensions in this chapter.
Insert the case assembly into the panel cutout.
3. For an IP65/NEMA 4X seal, place the blade of a screwdriver in the notch of the mounting collar assembly and push
toward the panel while applying pressure to the face of the
RUI. Don't be afraid to apply enough pressure to properly
install the RUI. If you can move the case assembly back and
forth in the cutout, you do not have a proper seal.
The tabs on each side of the bracket have teeth that latch
into the ridges. Each tooth is staggered at a different depth
from the front so that only one of the tabs one each side is
locked onto the ridges at a time.
The seal is good if the distance from the panel and the top
half of the assembly is 16 mm (0.630 in.) or less, and the distance bottom half and the panel is 13.3 mm (0.525 in.) or less.
Watlow EZ-ZONE™ ST
•
11
•
Chapter 2 Install and Wire
Replacing the Solid-State Relay
on a Controller without a Contactor (ST _ _-A _ _ _-_ _ _ _)
1. Pinch the release levers on the top and
bottom of the control module and lift the
bottom edge forward to detach the unit.
2. With a Phillips screwdriver, remove
the four nearest screws that were under the module.
3. Lift the controller body, exposing
the solid-state relay.
Replacing the Solid-state Relay
1. Using a Phillips screwdriver, replace
the two screws connecting the solidstate relay to the heat sink.
2. Place the controller body over the
solid-state relay and, using a Phillips
screwdriver, replace the four screws
securing it.
3. Snap the control module in place,
bottom edge first.
NOTE: For controller models without a contactor (ST _ _-A _ _
_-_ _ _ _), the solid-state relay must be mounted with the larger
power terminals on the top and the smaller control terminals on
the bottom.
4. Using a Phillips screwdriver, remove the
two screws connecting the solid-state relay
to the heat sink.
Watlow EZ-ZONE™ ST
•
12
•
Chapter 2 Install and Wire
Replacing the Solid-State Relay
on a Controller with a Contactor (ST _ _ - (B or F) _ _ _ - _ _ _ _)
1. Pinch the release levers on the top and
bottom of the control module and lift the
right edge forward to detach the unit.
3. With a Phillips screwdriver, remove
the two screws at the top corners of the
controller.
2. With a Phillips screwdriver, remove
the four nearest screws that were under
the module.
4. Lift the controller body, exposing
the solid-state relay.
5. Using a Phillips screwdriver, remove
the two screws connecting the solidstate relay to the heat sink.
Replacing the Solid-state Relay
1. Using a Phillips screwdriver, replace
the two screws connecting the solidstate relay to the heat sink. Check that
the bottom of the solid-state relay is on
the left.
2. Place the controller body over the
solid-state relay and, using a Phillips
screwdriver, replace the six screw securing it.
NOTE: For controller models with a contactor (ST _ _-A _ _ _-_ _
_ _), the solid-state relay must be mounted with the larger power
terminals on the right and the smaller control terminals on the
left.
3. Snap the control module in place,
left edge first.
Watlow EZ-ZONE™ ST
•
13
•
Chapter 2 Install and Wire
Ó
Power
Slot C
98
Warning:
Use National Electric (NEC)
or other country-specific
standard wiring and safety
practices when wiring and
connecting this controller to
a power source and to electrical sensors or peripheral
devices. Failure to do so may
result in damage to equipment and property, and/or
injury or loss of life.
99
power
power
fuse
CF
CD
CE
B5
D6
D5
Digital Input or Output 5
Digital Input
• update rate 10 Hz
• dry contact or dc voltage
Slot C
98
NOTE: To prevent ground
loops, isolation needs to be
maintained from input to output when using switched DC
or analog process outputs.
99
DC voltage
• maximum input 36V at 3 mA
• minimum high state 3V @ 0.25 mA
• maximum low state 2V
CF
CD
CE
Dry contact
• minimum open resistance 500 Ω
• maximum closed resistance 100 Ω
D6
input or output + • maximum short circuit 13 mA
B5
common -
Digital Output
• update rate 10 Hz
• output voltage 24V
• current limit, Output 5, 24 mA
maximum
• capable of driving a 3-pole
DIN-A-MITE
• open-circuit voltage 22 to
32VÎ (dc)
ST (B, C, D or E) _ - _ _ _ _-_ _ _ _
D5
CAUTION: Always mount the
controller with the heat-sink
fins aligned vertically.
Digital Input or Output 6
Digital Input
• update rate 10 Hz
• dry contact or dc voltage
Slot C
NOTE: Terminals L4 and
A1 on the limit connector
are jumpered at the factory
to complete the contactor
circuit. Additional switches
may be wired in series to the
terminals.
Ó
98
99
DC voltage
• maximum input 36V at 3 mA
• minimum high state 3V @ 0.25 mA
• maximum low state 2V
CF
CD
CE
Dry contact
•
minimum open resistance 500 Ω
input or output +
D6
• maximum closed resistance 100 Ω
• maximum short circuit 13 mA
D5
B5
common -
Digital Output
• update rate 10 Hz
• output voltage 24V
• current limit, Output 6, 10 mA
maximum
• capable of driving a single-pole
DIN-A-MITE
• open-circuit voltage 22 to
32VÎ (dc)
ST (B, C, D or E) _ - _ _ _ _-_ _ _ _
WARNING: If high voltage is
applied to a low-voltage controller, irreversible damage
will occur.
Watlow EZ-ZONE™ ST
•
14
•
Chapter 2 Install and Wire
Ó
Warning:
Use National Electric (NEC)
or other country-specific
standard wiring and safety
practices when wiring and
connecting this controller to
a power source and to electrical sensors or peripheral
devices. Failure to do so may
result in damage to equipment and property, and/or
injury or loss of life.
Input 1 Thermocouple
Slot B
•
•
•
•
20 Ω maximum source resistance
>20 MΩ input impedance
3 microampere open-sensor detection
Thermocouples are polarity sensitive. The negative lead (usually
red) must be connected to S1.
• To reduce errors, the extension wire for thermocouples must be
of the same alloy as the thermocouple.
ST _ _ - _ _ _ _ - _ _ _ _ (all)
L2
K2
T1
-
S1
+
R1
Input 1 RTD
Slot B
NOTE: To prevent ground
loops, isolation needs to be
maintained from input to output when using switched DC
or analog process outputs.
Slot B
L2
L2
K2
S3
S1
K2
T1
S2
T1
S1
S3
S1
R1
S1
R1
2-wire
CAUTION: Always mount the
controller with the heat-sink
fins aligned vertically.
NOTE: Terminals L4 and
A1 on the limit connector
are jumpered at the factory
to complete the contactor
circuit. Additional switches
may be wired in series to the
terminals.
•
•
•
•
platinum, 100 and 1,000 Ω @ 0°C
calibration to DIN curve (0.00385 Ω/Ω/°C)
20 Ω total lead resistance
RTD excitation current of 0.09 mA typical. Each
ohm of lead resistance may affect the reading by
0.03°C.
• For 3-wire RTDs, the S1 lead (usually white) must
be connected to R1.
• For best accuracy use a 3-wire RTD to compensate
for lead-length resistance. All three lead wires must
have the same resistance.
ST _ _ - _ _ _ _ - _ _ _ _ (all)
3-wire
Input 1 Process
Slot B
Slot B
L2
L2
K2
K2
T1
+ T1
-
- S1
S1
+ R1
R1
• 0 to 20 mA @ 100 Ω input impedance
• 0 to 10VÎ (dc) @ 20 kΩ input impedance
• 0 to 50 mVÎ (dc) @ 20 kΩ input impedance
• scalable
ST _ _ - _ _ _ _ - _ _ _ _ (all)
amperes
volts
Ó
WARNING: If high voltage is
applied to a low-voltage controller, irreversible damage
will occur.
Watlow EZ-ZONE™ ST
•
15
•
Chapter 2 Install and Wire
Ó
Input 2 Thermocouple
Slot A
L3
Warning:
Use National Electric (NEC)
or other country-specific
standard wiring and safety
practices when wiring and
connecting this controller to
a power source and to electrical sensors or peripheral
devices. Failure to do so may
result in damage to equipment and property, and/or
injury or loss of life.
K3
•
•
•
•
20 Ω maximum source resistance
>20 MΩ input impedance
3 microampere open-sensor detection
Thermocouples are polarity sensitive. The negative lead (usually
red) must be connected to S2.
• To reduce errors, the extension wire for thermocouples must be
of the same alloy as the thermocouple.
ST _ L - _ _ _ _ - _ _ _ _ (limit)
J3
A1
L4
T2
-
S2
+
R2
Input 2 RTD
Slot A
Slot A
NOTE: To prevent ground
loops, isolation needs to be
maintained from input to output when using switched DC
or analog process outputs.
K3
K3
J3
J3
A1
A1
L4
L4
S3
S1
CAUTION: Always mount the
controller with the heat-sink
fins aligned vertically.
L3
L3
T2
S2
T2
S2
S3
S2
R2
S1
R2
3-wire
2-wire
•
•
•
•
platinum, 100 and 1,000 Ω @ 0°C
calibration to DIN curve (0.00385 Ω/Ω/°C)
20 Ω total lead resistance
RTD excitation current of 0.09 mA typical. Each
ohm of lead resistance may affect the reading by
0.03°C.
• For 3-wire RTDs, the S1 lead (usually white) must
be connected to R2.
• For best accuracy use a 3-wire RTD to compensate
for lead-length resistance. All three lead wires must
have the same resistance.
ST _ L - _ _ _ _ - _ _ _ _ (limit)
Input 2 Process
NOTE: Terminals L4 and
A1 on the limit connector
are jumpered at the factory
to complete the contactor
circuit. Additional switches
may be wired in series to the
terminals.
Ó
Slot A
Slot A
L3
L3
K3
K3
J3
J3
A1
A1
L4
L4
T2
+ T2
-
- S2
+ R2
• 0 to 20 mA @ 100 Ω input impedance
• 0 to 10VÎ (dc) @ 20 kΩ input impedance
• 0 to 50 mVÎ (dc) @ 20 kΩ input impedance
• scalable
ST _ L - _ _ _ _ - _ _ _ _ (limit)
S2
R2
amperes
volts
WARNING: If high voltage is
applied to a low-voltage controller, irreversible damage
will occur.
Quencharc Note:
Switching pilot duty inductive
loads (relay coils, solenoids,
etc.) with the mechanical
relay, solid state relay or
open collector output options
requires use of an R.C. suppressor.
Watlow EZ-ZONE™ ST
•
16
•
Chapter 2 Install and Wire
Ó
Warning:
Use National Electric (NEC)
or other country-specific
standard wiring and safety
practices when wiring and
connecting this controller to
a power source and to electrical sensors or peripheral
devices. Failure to do so may
result in damage to equipment and property, and/or
injury or loss of life.
Output 1 Solid-state Relay with a Contactor
3
6
earth
ground
load
Output 1 Solid-state Relay without a Contactor
hot
hot
fuse
fuse
NOTE: To prevent ground
loops, isolation needs to be
maintained from input to output when using switched DC
or analog process outputs.
See Quencharc note.
ST _ _ - B _ _ _ - _ _ _ _ (contactor)
Output 1 (SSR)
load
Output 1 (SSR)
neutral
hot
See Quencharc note.
ST _ _ - A _ _ _ - _ _ _ _ (no contactor)
fuse
load
Output 1 (SSR)
1
2
EZ-ZONE™ ST
Integrated Control Loop
CAUTION: Always mount the
controller with the heat-sink
fins aligned vertically.
Patent Pending
Output 2 Mechanical Relay, Form A
NOTE: Terminals L4 and
A1 on the limit connector
are jumpered at the factory
to complete the contactor
circuit. Additional switches
may be wired in series to the
terminals.
Ó
WARNING: If high voltage is
applied to a low-voltage controller, irreversible damage
will occur.
Slot B
normally open
common
K2
S1
R1
Mechanical
Relay
L2
normally
open
K2 common
Internal
Circuitry
Output 2 Solid-state Relay, Form A
• 0.5 A at 20 to 264VÅ (ac) maximum resistive load
• 20 VA 120/240VÅ (ac) pilot duty
• opto-isolated, without contact
suppression
• maximum off state leakage of
105 microamperes
• Output does not supply power.
• Do not use on dc loads.
See Quencharc note.
ST (K, B, P, E) _ - _ _ _ _ - _ _ _ _
Slot B
common
Watlow EZ-ZONE™ ST
L2
T1
normally open
Quencharc Note:
Switching pilot duty inductive
loads (relay coils, solenoids,
etc.) with the mechanical
relay, solid state relay or
open collector output options
requires use of an R.C. suppressor.
• 5 A at 240VÅ (ac) or 30VÎ (dc)
maximum resistive load
• 20 mV at 24V minimum load
• 125 VA pilot duty @ 120/240VÅ
(ac), 25 VA at 24VÅ (ac)
• 100,000 cycles at rated load
• Output does not supply power.
• for use with ac or dc
See Quencharc note.
ST (H, D, J, C) _ - _ _ _ _ - _ _ _ _
L2
K2
T1
S1
R1
•
17
•
Solid-state Relay
L2
normally
open
K2 common
Internal Circuitry
Chapter 2 Install and Wire
Ó
Warning:
Use National Electric (NEC)
or other country-specific
standard wiring and safety
practices when wiring and
connecting this controller to
a power source and to electrical sensors or peripheral
devices. Failure to do so may
result in damage to equipment and property, and/or
injury or loss of life.
Output 3 Mechanical Relay, Form C
Slot A
normally open
common
normally closed
L3
K3
J3
A1
A4
T2
S2
R2
• 5 A at 240VÅ (ac) or 30VÎ (dc)
maximum resistive load
• 20 mA at 24V minimum load
• 125 VA pilot duty at 120/240VÅ
(ac), 25 VA at 24VÅ (ac)
• 100,000 cycles at rated load
• Output does not supply power.
• for use with ac or dc
See Quencharc note.
ST _ L - _ _ _ _ - _ _ _ _ (limit)
Mechanical
Relay
L3
normally
open
K3 common
J3
normally
closed
Internal
Circuitry
Output 4 Mechanical Relay, Form A
Slot A
L3
NOTE: To prevent ground
loops, isolation needs to be
maintained from input to output when using switched DC
or analog process outputs.
K3
J3
common
normally open
A1
L4
T2
S2
CAUTION: Always mount the
controller with the heat-sink
fins aligned vertically.
R2
• 2 A at 240VÅ (ac) or 30VÎ (dc)
maximum resistive load
• 20 mV at 24V minimum load
• 125 VA pilot duty at 120/240VÅ
(ac), 25 VA at 24VÅ (ac)
• 100,000 cycles at rated load
• Output does not supply power.
• for use with ac or dc
See Quencharc note.
ST _ L - _ _ _ _ - _ _ _ _ (limit)
Mechanical
Relay
A1 common
normally
L4
open
Internal
Circuitry
NOTE: Terminals L4 and
A1 on the limit connector
are jumpered at the factory
to complete the contactor
circuit. Additional switches
may be wired in series to the
terminals.
Ó
WARNING: If high voltage is
applied to a low-voltage controller, irreversible damage
will occur.
Quencharc Note:
Switching pilot duty inductive
loads (relay coils, solenoids,
etc.) with the mechanical
relay, solid state relay or
open collector output options
requires use of an R.C. suppressor.
Watlow EZ-ZONE™ ST
•
18
•
Chapter 2 Install and Wire
Ó
Warning:
Use National Electric (NEC)
or other country-specific
standard wiring and safety
practices when wiring and
connecting this controller to
a power source and to electrical sensors or peripheral
devices. Failure to do so may
result in damage to equipment and property, and/or
injury or loss of life.
Standard Bus EIA-485 Communications
• Wire T-/R- to the A terminal of
the EIA-485 port.
• Wire T+/R+ to the B terminal of
the EIA-485 port.
• Wire common to the common
terminal of the EIA-485 port.
• Do not route network wires
with power wires. Connect network wires in daisy-chain fashion when connecting multiple
devices in a network.
Slot C
98
99
CF common
CD
CE
T-/RT+/R+
B5
D6
D5
Modbus RTU or Standard Bus EIA-485 Communications
Slot C
NOTE: To prevent ground
loops, isolation needs to be
maintained from input to output when using switched DC
or analog process outputs.
98
99
CC common
CA
CB
T-/RT+/R+
B5
D6
CAUTION: Always mount the
controller with the heat-sink
fins aligned vertically.
NOTE: Terminals L4 and
A1 on the limit connector
are jumpered at the factory
to complete the contactor
circuit. Additional switches
may be wired in series to the
terminals.
• Do not connect more than 16
controllers on a network.
• maximum network length:
1,200 meters (4,000 feet)
• 1/8th unit load on EIA-485 bus
ST _ _ - _ _ A _ - _ _ _ _ (RUI)
D5
• Wire T-/R- to the A terminal of
the EIA-485 port.
• Wire T+/R+ to the B terminal of
the EIA-485 port.
• Wire common to the common
terminal of the EIA-485 port.
• Do not route network wires
with power wires. Connect network wires in daisy-chain fashion when connecting multiple
devices in a network.
• A termination resistor may be
required. Place a 120 Ω resistor
across T+/R+ and T-/R- of last
controller on network.
• Only one protocol per port is
available at a time: either Modbus RTU or Standard Bus.
• Do not connect more than 16
controllers on a Standard Bus
network.
• Do not connect more than 247
controllers on a Modbus RTU
network.
• maximum network length:
1,200 meters (4,000 feet)
• 1/8th unit load on EIA-485 bus.
ST _ _ - _ _ M _ - _ _ _ _ (Modbus
RTU or EIA-485)
Modbus-IDA
Terminal
EIA/TIA-485
Name
Watlow Terminal Label
Function
DO
A
CA or CD
T-/R-
D1
B
CB or CE
T+/R+
common
common
CC or CF
common
Ó
WARNING: If high voltage is
applied to a low-voltage controller, irreversible damage
will occur.
Note: Excessive writes to
EEPROM over Modbus can
cause premature EEPROM
failure. The EEPROM is rated
for 1,000,000 writes. See "Saving Settings to Nonvolatile
Memory" in Chapter 2, Install
and Wire.
Watlow EZ-ZONE™ ST
•
19
•
Chapter 2 Install and Wire
Ó
Warning:
Use National Electric (NEC)
or other country-specific
standard wiring and safety
practices when wiring and
connecting this controller to
a power source and to electrical sensors or peripheral
devices. Failure to do so may
result in damage to equipment and property, and/or
injury or loss of life.
Wiring a Serial EIA-485 Network
Do not route network wires with power wires. Connect network wires in
daisy-chain fashion when connecting
multiple devices in a network.
A termination resistor may be required. Place a 120 Ω resistor across
T+/R+ and T-/R- of the last controller
on a network.
Note: The RUI (remote user interface) can
communicate using Watlow's Standard Bus
only.
Note: Do not route network wires with power
wires.
EZ-ZONE ST
ST_ _ - (B or F) _ M _ -_ _ _ _
EZ-ZONE ST
ST_ _ - (B or F) _ A _ -_ _ _ _
power
98
99
T-/R-
99
CC
T+/R+
98
CA
B5
CB
EZ-ZONE ST
ST_ _ - A _ A _ -_ _ _ _
power
power
common
EZ-ZONE ST
ST_ _ - A _ M _ -_ _ _ _
power
98
power
99
power
power
CC
com
CD
T-/R-
CA
T-/R-
CE
T+/R+
CB T+/R+
CF
CAUTION: Always mount the
controller with the heat-sink
fins aligned vertically.
D6
T-/R-
T+/R+
power
power
common
D5
power
98
99
CF
CD
B5
CE
D6
D5
NOTE: To prevent ground
loops, isolation needs to be
maintained from input to output when using switched DC
or analog process outputs.
Only one protocol per port is available at a time: either Modbus RTU or
Standard Bus.
com
B5
B5
D6
D6
D5
D5
PLC
NOTE: Terminals L4 and
A1 on the limit connector
are jumpered at the factory
to complete the contactor
circuit. Additional switches
may be wired in series to the
terminals.
RUI
(remote user interface)
98
99
CF
power
power
common
power
power
common
CD
T-/R-
T-/R-
CE
T+/R+
T+/R+
Wiring a network of controllers using
Watlow's Standard bus and an RUI (remote user interface).
Wiring a network of controllers using
Modbus.
Ó
WARNING: If high voltage is
applied to a low-voltage controller, irreversible damage
will occur.
Note: Excessive writes to
EEPROM over Modbus can
cause premature EEPROM
failure. The EEPROM is rated
for 1,000,000 writes. See "Saving Settings to Nonvolatile
Memory" in Chapter 2, Install
and Wire.
Watlow EZ-ZONE™ ST
•
20
•
Chapter 2 Install and Wire
Setting the Address
Communications
Parameter Name
Modbus Controller Address
The address of an EZ-ZONE™ ST controller with the
Modbus option (ST _ _-_ _ M _-_ _ _ _) can be set to
ranges from 1 to 8 using the DIP switch and ranges
1 to 247 using software.
Set switch 4 to on to use Modbus communications.
Modbus™ RTU addresses from 1 to 247 can be programmed into the controller using Standard bus
communications. Only one controller can be connected to the network while changing the address
using communications. After the Modbus address is
changed, all four DIP switches must be turned on
(set to 8) and the controller restarted for the new address be become available on the Modbus network.
The Modbus addresses set by software will override
only address 8, but lower addresses set on the DIP
switch will override the software-assigned addresses.
1
2
3
**4
off
off
on
2
on
off
off
on
3
off
on
off
on
4
on
on
off
on
5
off
off
on
on
6
on
off
on
on
7
off
on
on
on
**8
on
on
on
on
**1 to 247
on
on
on
on
1 to 247
313 (unsigned) rw
Baud
9,600 (188)
19,200 (189)
38,400 (190)
314 (unsigned) rw
Parity
Even (191)
Odd (192)
None (61)
315 (unsigned) rw
Non-Volatile Save
(ST Firmware 2 and higher)
Yes (106)
No (59)
317 (unsigned) rw
Saving Settings to Nonvolatile Memory
When controller settings are entered from a remote
user interface (RUI), changes are always saved to
nonvolatile memory (an EEPROM). If the controller
loses power or is switched off, its settings will be restored when it starts again.
The EEPROM will wear out after about 1,000,000
writes, which should not be a problem with changes
made from the RUI. However if the controller is
receiving instructions from a PLC or a computer
through a network connection, the EEPROM could,
over time, wear out. The Nonvolatile Memory Save
parameter allows the user to save settings made
over the network to either volatile or nonvolatile
memory.
By default, settings made through the network
are not saved to nonvolatile memory. However, every
time a setting is changed through an RUI, all of the
controller settings are saved to nonvolatile memory,
regardless of the setting of Nonvolatile Memory
Save. This parameter can only be changed via the
network and will always be saved to nonvolatile
memory. (See table above.)
DIP Switch
off
Address (when all four DIP
switches are set to on)
unsigned: 16-bit unsigned integer
signed: 16-bit signed integer
float: 32-bit IEEE floating point value
long: 32-bit unsigned integer
The Standard bus address of an EZ-ZONE™ ST controller with the Modbus™ RTU option (ST _ _-_ _ M
_-_ _ _ _) ranges from 1 to 8, because DIP switch 4 is
reserved for switching Modbus on or off.
1
Modbus
(less 40,001 offset)
The following data type conventions are used for
Modbus registers:
As many as 32 controllers can be connected to a network.
Zone
Range
** Set switch 4 to on to use Modbus communications. Modbus
addresses from 1 to 247 can be programmed into the controller
using Standard bus communications. After the Modbus address is changed, all four DIP switches must be turned on (set
to 8) for the new address be become available on the Modbus
network.
Watlow Standard Bus Controller Address
CAUTION: Changes set by Modbus are immediate. Users
will not be able to communicate with the controller after its
address, parity or baud rate has been changed. The master
device will need to be configured to the new settings.
The address of an EZ-ZONE™ ST controller with the
Watlow Standard bus option (ST _ _-_ _ A _-_ _ _ _)
ranges from 1 to 16, where up to 16 controllers can
be connected on the network. A RUI (remote user
interface) will only recognize addresses 1 through
4, where the relationship between the RUI and the
controller it is connected to is selected on the RUI.
The Modbus communications parameters are in the
Communications Menu of the Configurator setup
software.
As many as eight RUIs can be connected to a network and assigned addresses 1 to 8.
As many as four personal computers can beconnected to a network and assigned addresses 1 to 4.
The Standard bus address of an EZ-ZONE™ ST controller with the Modbus™ RTU option (ST _ _-_ _ M
Watlow EZ-ZONE™ ST
•
21
•
Chapter 2 Install and Wire
_-_ _ _ _) ranges from 1 to 8, because DIP switch 4 is
reserved for switching Modbus on or off.
DIP Switch
Zone
1
2
3
*4
1
off
off
off
off
2
on
off
off
off
3
off
on
off
off
4
on
on
off
off
5
off
off
on
off
6
on
off
on
off
7
off
on
on
off
8
on
on
on
off
*9
off
off
off
on
*10
on
off
off
on
*11
off
on
off
on
*12
on
on
off
on
*13
off
off
on
on
*14
on
off
on
on
*15
off
on
on
on
*16
on
on
on
on
* The Standard bus address of an EZ-ZONE™ ST controller with
the Modbus RTU option (ST _ _-_ _ M _-_ _ _ _) ranges from 1
to 8, because DIP switch 4 is reserved for switching Modbus on
or off.
Note: Excessive writes to EEPROM over Modbus can cause
premature EEPROM failure. The EEPROM is rated for 1,000,000
writes. See "Saving Settings to Nonvolatile Memory" in Chapter
2, Install and Wire.
Watlow EZ-ZONE™ ST
•
22
•
Chapter 2 Install and Wire
Chapter 3: Using the Interfaces
3
Remote User Interface (RUI) Keys and Displays
Upper Display:
In the Home Page, displays the
process value, otherwise displays the value of the parameter in the lower display.
Temperature Units Indicator Lights:
Indicates whether the temperature is displayed in Fahrenheit or Celsius.
Zone Display:
Indicates the controller zone
that the remote user interface
(RUI) is currently communicating with.
Output Activity:
Number lights indicate output
activity.
1 to 9 = zones 1 to 9
A = zone 10
b = zone 11
C = zone 12
d = zone 13
Percent Units Indicator
E = zone 14
F = zone 15
H = zone 16
Lights when the controller is
displaying values as a percentage.
Lower Display:
Profile Activity;
Indicates the set point or output power value during operation, or the parameter whose
value appears in the upper
display.
Lights when a profile is running. Flashes when a profile is
paused.
Communications Activity
EZ Key:
Infinity Key ˆ
Advance Key ‰
This key can be programmed
to do various tasks, such as
starting a profile.
In the Home Page, press
to scroll through the network zones.
Advances through parameter prompts.
In other prompts, press
to back up one level, or
press and hold for three
seconds to return to the
Home Page.
Flashes when the RUI is communicating with a controller.
Up and Down Keys ¿ ¯
In the Home Page, adjusts the
set point in the lower display.
In other pages, changes the upper display to a higher or lower
value, or changes a parameter
selection.
To Clear an Alarm
[LiM] Limit
If the alarm condition has ended, from the Home Page,
press the Advance Key ‰. If there are any active messages, [ignr] will appear in the upper display and
the alarm instance will appear in the lower display.
[tUnE] Tuning
Use the Down Arrow Key ¯ to scroll through the messages and the Up Arrow Key ¿ to clear the alarm.
[`C;Er] Current Error
Error and Alarm Messages
No Device Connected
[Attn] will appear in the lower display with the error
message in the upper display.
If no device is connected to the RUI or the controller
on the selected zone is disconnected, [``no] will appear in the upper display and [`deu] will appear in
the lower display. Press the Infinity Key ˆ to move to
the next zone.
[``rP] Ramping
[d;Err] Device Error
[`h;Er] Heater Error
[Er;i1] Error Input 1
[Er;i2] Error Input 2
[AL`1] Alarm 1
(For alarm details, query the
[AL`2] Alarm 2
process value and alarm settings.)
Watlow EZ-ZONE™ ST
If a zone disappears, check network wiring.
•
23
•
Chapter 3 Remote User Inter face (RUI)
• Press the Advance Key ‰ to move through the parameters of the menu.
• Press the Up ¿ or Down ¯ key to move through
the parameter values.
• Press the Infinity Key ˆ to move backwards
through the levels: parameter to menu; menu to
Home Page.
• Press and hold the Infinity Key ˆ for two seconds
to return to the Home Page.
The RUI Page
To go to the RUI Page from the Home Page, press both
the Down ¯ and Advance ‰ keys for three seconds. L
(local) will appear in the Zone Display, [`bUs] will appear in the upper display and [`rUi] will appear in
the lower display.
• Press the Up ¿ or Down ¯ key to move through
the menus.
• Press the Advance Key ‰ to select a menu.
Display
Parameter name
Description
Settings
Range
Default
Appears
If
[`bUS]
Communications Menu
[`Ad;s]
[ Ad.S]
RUI Address
Set the address of this RUI. Each RUI on the network must have a unique address.
1 to 8
1
always
[St;2n]
[St.Zn]
Start Zone
Set the lowest address that this RUI will communicate with.
Narrowing the range of addresses will speed up
some operations.
1 to 16
1
always
[nU;2n]
[nU.Zn]
Number of Zones
Set the number of contiguous addresses that this
RUI will communicate with.
Narrowing the range of addresses will speed up
some operations.
1 to 16
8
always
[`LoC]
Lockout Menu
* The positions of the Operations Page and Profiling Page in the ranges
below can be changed in the Lock Menu (Factory Page). See the examples at the end of this chapter.
[rLoC]
[rLoC]
Read Lock
Set the read-only security clearance level. The user
can access the selected level and all lower levels.
If the Set Lock level is higher than the Read Lock,
the Read Lock level takes priority.
1
2
3
4
5
Home Page
Operations Page*
Profiling Page*
Setup Page & Diagnostics Menu
Lock, Calibration & Custom menus
5
always
[SLoC]
[SLoC]
Set Lock
Set the read-write security clearance level. The user can access the selected level and all lower levels.
If the Set Lock level is higher than the Read Lock,
the Read Lock level takes priority.
0
1
2
3
4
5
No changes allowed
Home Page
Operations Page*
Profiling Page*
Setup Page & Diagnostics Menu
Lock, Calibration & Custom menus
5
always
[diAg]
Diagnostics Menu
[`S;id]
[ S.id]
Software ID
View the software ID.
always
[`S;rL]
[ S.rL]
Software Release
View the software release number.
always
[`S;Pr]
[ S.Pr]
Software Prototype
View the software minor version number.
always
[S;bLd]
[ S.bLd]
Software Build
View the software build number.
always
[``Sn]
[ Sn]
Serial Number
View the controller serial number.
always
[dAtE]
[dAtE]
Date of Manufacture
View the controller manufacture date.
always
[USr;r]
[USr.r]
User Restore Set
Restore the factory default RUI Page settings or
load a saved configuration.
Watlow EZ-ZONE™ ST
[nonE]
[FCty]
[SEt1]
[SEt2]
•
24
•
Don't change settings
Factory settings
User Set 1
User Set 2
Don't
change
always
Chapter 3 Remote User Inter face (RUI)
Display
Parameter name
Description
Settings
Range
[USr;S]
[USr.S]
User Save Set
Save the RUI Page settings.
[nonE] Don't change settings
[SEt1] User Set 1
[SEt2] User Set 2
[C;LEd]
[C.LEd]
Communications LED Assignment
Set the activity that the communications indicator
light will monitor.
[Con1]
[Con2]
[both]
[`off]
Watlow EZ-ZONE™ ST
•
25
•
Comms Port 1
Comms Port 2
Comms Ports 1 & 2
no monitoring
Default
Appears
If
Don't
change
always
always
Chapter 3 Remote User Inter face (RUI)
Changing the Position of the Operations
Page or Profiling Page in the Lockout Menu
Programming the EZ Key
You can program the Remote User Interface (RUI) EZ
Key either in the Setup Menu using the RUI or with
configuration software, such as EZ-ZONE Configurator, using a personal computer.
To change the position of the Operations Page or Profiling Page in the Lockout Menu, you must go to the
Lock Operations Page parameter [LoC;O] or Lock Profiling Page parameter [LoC;P] in the Lockout Menu in
the Factory Page.
The following examples show how to program the EZ
Key to start and stop a profile.
• To go to the Factory Page from the Home Page,
press both the Advance ‰ and Infinity ˆ keys
for six seconds. [CUSt] will appear in the Upper
Display and [FCty] will appear in the Lower
Display.
• Press the Up ¿ or Down ¯ key to move to the
Lockout Menu [`LoC].
• Press the Advance Key ‰ to select a parameter.
• Press the Up ¿ or Down ¯ key to change the
parameter value. The value you select (1, 2 or
3) will determine the position of the Operations
Page or Profiling Pages in the Lockout Menu in
the RUI Page.
• Press the Infinity Key ˆ to move backwards
through the levels: parameter to menu; menu to
Home Page.
• Press and hold the Infinity Key ˆ for two seconds
to return to the Home Page.
Using the RUI
1. To go to the Setup Page from the Home Page, press
both the Up ¿ and Down ¯ keys for six seconds.
[``Ai] will appear in the upper display and [`Set]
will appear in the lower display.
2. Press the Up Key ¿ twice. [`FUn] will appear in
the upper display and [`SEt] will appear in the lower
display.
3. Press the Advance Key ‰ once. [ProF] will appear
in the upper display and [`d;Fn] (Digital Input Function) will appear in the lower display.
3. Press the Up ¿ or Down ¯ key to scroll through
the functions that can be assigned to the EZ Key.
When [P;StS] (Profile Start/Stop) appears in the upper
display and [`d;Fn] appears in the lower display, press
the Infinity Key once to select that function and move
to the [`F;iS] (Function Instance) parameter.
4. Press the Up ¿ or Down ¯ key to scroll to the profile that you want the EZ Key to control.
Example 1
The operator wants to read all the menus and not allow any parameters to be changed.
5. Press the Advance Key ‰ to make your selection
and move back to the Digital Input Function parameter. Or press the Infinity Key ˆ once to return to the
submenu, twice to return to the main menu or three
times to return to the Home Page.
In the RUI Page, Lockout Menu, set Read Lock
[rLoC] to 5 and Set Lock [SLoC] to 0.
Example 2
The operator wants to read and write to the Home
Page and Profiling Page, and lock all other pages and
menus.
Using EZ-Zone Configurator Software
1. Set the communications protocol to Standard Bus.
Make the necessary physical connections between the
personal computer and the EZ-ZONE™ ST via the
EIA485 port. Run the software and allow it to connect
to the controller by directing it or allowing it to find
the appropriate communications port.
In the RUI Page, Lockout Menu, set Read Lock
[rLoC] to 2 and Set Lock [SLoC] to 2.
In the Factory Page, Lockout Menu, set Lock Operations Page [LoC;O] to 3 and Lock Profiling Page
[LoC;P] to 2.
2. After the software connects to the controller, look
on the left side of your screen under the Parameters
Menus for Function Key under Setup. Click on the
plus sign to reveal the Function Key 1 submenu.
Example 3
The operator wants to read the Operations Page,
Setup Page. Profiling Page, Diagnostics Menu, Lock
Menu, Calibration Menu and Custom Menus. The operator also wants to read and write to the Home Page.
3. Click on Function Key 1, then select a Digital Input
Function and a Function Instance.
If you want to start and stop a profile with the EZ
Key, select Profile Start/Stop and the number of the
profile that you want the EZ Key to control.
In the RUI Page, Lockout Menu, set Read Lock
[rLoC] to 1 and Set Lock [SLoC] to 5.
In the Factory Page, Lockout Menu, set Lock Operations Page [LoC;O] to 2 and Lock Profiling Page
[LoC;P] to 3.
Watlow EZ-ZONE™ ST
•
26
•
Chapter 3 Remote User Inter face (RUI)
Indicator Lights on the Controller Case
1
2
Solid-state Relay:
EZ-ZONE™ ST
Integrated Control Loop
Indicates that the solid-state
relay is in an on state.
Patent Pending
Limit:
OUT 3
Flashing green indicates the
controller is running with no
input errors.
OUT 2
Address
Selection
1234
ON
L3
K3
Watlow EZ-ZONE™ ST
Status:
STATUS
Output 3:
Indicates that output 3 is in
an on state.
SSR
LIMIT
Indicates that the controller is
in a limit state.
98
99
J3
Control
CF
A1
L2
CD
L4
K2
CE
T2
T1
B5
S2
S1
D6
R2
R1
D5
•
27
•
Flashing red indicates an input
error.
No flashing indicates that the
controller is not functioning.
Output 2:
Indicates that output 2 is in an
on state.
Chapter 3 Remote User Inter face (RUI)
4
Chapter 4: Home Page
Default Home Page Parameters
Use the Advance Key ‰ to step through the other
parameters. The parameter prompt will appear in the
lower display, and the parameter value will appear in
the upper display. You can use the Up ¿ and Down
¯ keys to change the value of read-write parameters,
just as you would in any other menu.
The Home Page is a customized list of as many as 20
parameters that can be configured and changed in the
Custom Menu [CUSt] (Factory Page). The default list
of 10 parameters below includes the Active Process
Value (value in upper display) and Active Set Point
(value in lower display). The Action parameter only
appears if there is an active message. (See "To Clear
an Alarm" in the RUI Keys and Displays chapter.)
Default Home Page (Default parameters appear only on models that support those options.)
*
Custom Menu
Number
Home
Page
Display
(defaults)
Parameter Name
1 Upper Display
(value only)
Active Process Value
Settings
Custom
Menu
Display
(defaults)
[AC;Pu]
Parameter Page and Menu
Operations Page, Analog Iput Menu
2 Lower Display
(value only)
*Active Set Point
[AC;SP]
Operations Page, Profile Status Menu
3
[Attn]
Message Action
[ACtn]
Home Page only (See RUI Chapter.)
4
[C;MI]
Control Mode
[`C;M]
Operations Page, Loop Menu
5
[h;Pr1]
Heat Power
[`h;Pr]
Operations Page, Monitor Menu
6
[C;Pr1]
Cool Power
[`C;Pr]
Operations Page, Monitor Menu
7
[AUt1]
Autotune
[`AUt]
Operations Page, Loop Menu
8
[id;s1]
Idle Set Point
[idLE]
Operations Page, Loop Menu
9
[P;ST1]
Profile Start
[P;Str]
Home Page only (See Profile Page Chapter.)
10
[P;AC1]
Profile Action Request
[P;ACr]
Home Page only (See Profile Page Chapter.)
11 to 20
(skipped)
None
[nonE]
(Add parameters to the Home Page in the
Custom Menu, Factory Page.)
If Control Mode is set to Auto, the process value
is in the upper display and the Closed Loop Set
Point (read-write) is in the lower display.
If a profile is running, the process value is in the
upper display and the Target Set Point (read only)
is in the lower display.
If Control Mode is set to Manual, the process
value is in the upper display and the output power
level (read-write) is in the lower display.
If Control Mode is set to Off, the process value is
in the upper display and [`oFF] (read only) is in
the lower display.
If a sensor failure has occurred, [----] is in the
upper display and the output power level (readwrite) is in the lower display.
Watlow EZ-ZONE ™ ST
•
28
•
Chapter 4 Home Page
Parameters that Appear Only in the Home Page
Display
Parameter Name
Description
Setting
Range
Default
Modbus
Appears If
(less 40,001 offset)
read/write
[Attn]
Message Action
View (Down Key) and clear (Up
Key) active alarm and error messages.
[Er;i1] Error Input 1
[Er;i2] Error Input 2
[AL`1] Alarm 1
[AL`2] Alarm 2
[LiM] Limit
[tUnE] Tuning
[``rP] Ramping
[d;Err] Device Error
[`C;Er] Current Error
[`h;Er] Heater Error
[P;St1]
Profile Start
Select a profile or step number
that will be affected by Profile
Action.
0 to 40
[P;AC1]
Profile Action Request
Select the action to apply to the
profile (1 to 4) or step selected in
Profile Start.
[nonE]
[ProF}
[StEP]
[PAUS]
[rESU]
[`End]
No Action (61)
Start a Profile (77)
Start a Step (89)
Pause (146)
Resume (147)
End (148)
an alarm or
error message is active.
0
292
rw
the controller includes
profiling
(ST_ _-_ _ _
_-P _ _ _).
No Action
306
rw
the controller includes
profiling
(ST_ _-_ _ _
_-P _ _ _).
Navigating the Pages and Menus
Home Page
Process Value [1234]ň
Set Point [1234]<‰Æ
Communications Menu
[~bUS]
[~rUi]
Hold both keys
for 3 seconds.
RUI Page
Home Page
Analog Input Menu
Process Value [1234]ň
Set Point [1234]<>Æ
Hold both keys
for 3 seconds.
Home Page
Process Value [1234]ň
Set Point [1234]<>Æ
[``Ai]
[oPEr]
Operations Page
Analog Input Menu
[~`Ai]
[~set]
Hold both keys
for 6 seconds.
Setup Page
Home Page
Profile 1
Process Value [1234]ň
Set Point [1234]‰Æ
[~~p1]
[ProF]
Hold key for 3
seconds.
Profile Page
Home Page
Custom Menu
Process Value [1234]ň
Set Point [1234]‰ˆÆ
Hold both keys
for 6 seconds.
Watlow EZ-ZONE ™ ST
[CUST]
[Fcty]
Factory Page
•
29
•
Chapter 4 Home Page
5
Chapter 5: Operations Page
• Press the Advance Key ‰ to move through the parameters of the submenu.
• Press the Infinity Key ˆ to move backwards
through the levels: parameter to submenu; submenu to menu; menu to Home Page.
• Press and hold the Infinity Key ˆ for two seconds
to return to the Home Page.
To go to the Operations Page from the Home Page, press
both the Up ¿ and Down ¯ keys for three seconds.
[``Ai] will appear in the upper display and [oPEr]
will appear in the lower display.
• Press the Up ¿ or Down ¯ key to move through
the menus.
• Press the Advance Key ‰ to move to a submenu.
• Press the Up ¿ or Down ¯ key to move through
the submenus.
Home Page Operations Page
Parameters
[~~p~]ˆ [``Ai]ˆ [~~~I]ˆ
[~~Sp]<> [oPEr]‰ [``Ai]‰[``Pu]‰[`i;Er]‰[`i;Ca]‰
Hold both keys
for 3 seconds.
Input 1
Submenu
<
>
Analog
Input Menu
<
>
ˆ
Process
Value
Input Error
Navigating the Operations Page
Calibration
Offset
Input 2 Same as above.
Submenu
NOTE Some of these menus and parameters may not appear, depending on the controller's options. See model
number information in the Appendix for more information.
ˆ[`dio]ˆ [~~~5]ˆ
[oPEr]‰ [`dio]‰[`do;S]‰[`Ei;S]‰
Digital I/O 5 Output State Event Status
Digital
Input/Output Submenu
Menu
<
>
<
>
ˆ Digital I/O 6 Same as above.
Submenu
ˆ[LiM]ˆ
[oPEr]‰ [`LL;S]‰[`Lh;S]‰
Limit Menu Limit Low
Set Point
<
>
Limit High
Set Point
ˆ[Mon]ˆ
[oPEr]‰ [C;MA]‰ [`h;Pr]‰[`C;Pr]‰[`C;SP]‰[`Pu;A]‰
Control
Heat Power
Mode Active
Monitor
Menu
Cool Power
Closed Loop Process
Set Point
Value Active
<
>
ˆ[LooP]ˆ
[oPEr]‰ [`C;M]‰ [A;tSP]‰[`AUt]‰[`C;SP]‰[`id;S]‰[`h;Pb]‰[`h;hY]‰[`C;Pb]‰[`C;hy]‰[``ti]‰[``td]‰[``db]‰[`o;SP]‰
Loop Menu Control
Mode
<
>
Autotune
Set Point
Autotune
Request
Closed Loop Idle Set
Set Point
Point
Heat Propor- Heat Hyster- Cool Propor- Cool Hyster- Time Integral Time Deriva- Dead Band
tional Band esis
tional Band esis
tive
Open Loop
Set Point
ˆ[ALM]ˆ [~~~I]ˆ
[oPEr]‰ [ALM]‰ [`A;Lo]‰[`A;hi]‰
Alarm 1
Submenu
<
>
Alarm Menu
<
>
ˆ
Alarm Low
Set Point
Alarm High
Set Point
Alarm 2 Same as above.
Submenu
ˆ[CUrr]ˆ
[oPEr]‰ [`C;hi]‰[`C;Lo]‰[`CU;r]‰[`C;Er]‰[`h;er]‰
Current
Menu
Active High
Set Point
Active Low
Set Point
Current Read Current Error Heater Error
<
>
ˆ[P;StA]ˆ
[oPEr]‰ [p;Str]‰[P;ACr]‰[`StP]‰[S;tyP]‰[tg;SP]‰[AC;SP]‰[`S;ti]‰[Ent1]‰[``JC]‰
Profile Sta- Profile Start Profile
Action
tus Menu
<
>
Watlow EZ-ZONE ™ ST
Active Step
Step Type
Target Set
Point
Active Set
Point
Step Time
Remaining
Event Output Jump Count
(1 or 2)
Remaining
Request
•
30
•
Chapter 5 Operations Page
Display
Settings
Parameter name
Description
[``Ai]
[oPEr]
Analog Input Menu
[```1]
[``Ai]
Analog Input 1
Range
Default
Modbus*
Appears If
(less 40,001 offset)
read/write
[```2]
[``Ai]
Analog Input 2
(Analog input 2 appears it ST_L-_ _ _ _ -_ _ _ _ )
[``Pu]
[ Pv]
Analog Input (1 or 2)
Process Value
View the process value.
-1,999.000 to 9,999.000°F
or units
-1,128.000 to 5,537.000°C
19 [1 float]
25 [2 float]
read only
always
[`i;Er]
[ i.Er]
Analog Input (1 or 2)
Error Status
View the cause of the most recent error.
[nonE] None (61)
[oPEn] Open (65)
[Shrt] Shorted (127)
[Er;Ab] Ambient Error (9)
[E;;Rtd] RTD Lead Resistance Error (141)
41 [1 unsigned]
69 [2 unsigned]
read only
always
[`i;Ca]
[ i.CA]
Analog Input (1 or 2)
Calibration Offset
Offset the input reading to compensate
for lead wire resistance or other factors that cause the input reading to
vary from the actual process value.
-1,999.000 to 9,999.000°F
or units
-1,110.555 to 5,555.000°C
51 [1 float]
79 [2 float]
rw
always
[`dio]
[oPEr]
Digital Input/
Output Menu
[```5]
[`dio]
Digital Input
Output 5
0.0
[```6]
[`dio]
Digital Input
Output 6
[`do;S]
[ do.S]
Digital Output (5 or 6)
Output State
View the state of this output.
[``on] On (63)
[`off] Off (62)
175 [5 unsigned] always
188 [6 unsigned]
read only
[`Ei;S]
[ Ei.S]
Digital Input (5 or 6)
Event Status
View this event input state.
[iACt] Inactive (41)
[`ACt] Active (5)
32 [1 unsigned]
33 [2 unsigned]
read only
always
[LiM]
[oPEr]
Limit Menu
[`LL;S]
[ LL.S]
Limit
Low Set Point
Set the low process value that will
trigger the limit.
-1,999.000 to 9,999.000°F
or units
-1,128.000 to 5,537.000°C
0.0°F or
-18.0°C
275 [float]
rw
Limit Sides (Setup
Page) is not set to
High.
[`Lh;S]
[ Lh.S]
Limit
High Set Point
Set the high process value that will
trigger the limit.
-1,999.000 to 9,999.000°F
or units
-1,128.000 to 5,537.000°C
0.0°F or
-18.0°C
277 [float]
rw
Limit Sides (Setup
Page) is not set to
Low.
Limit
Clear Request
Write to this regieter to clear a limit
state.
0
272 [unsigned]
write only
Modbus only
Limit
State
View the limit state.
Off (62)
None (61)
High (51)
Low (52)
Error (28)
280 [unsigned]
read only
Modbus only
[`off] Off (62)
[Auto] Auto (10)
[MAn] Manual (54)
222 [unsigned]
read only
always
[Mon]
[oPEr]
Monitor Menu
[C;MA]
[C.MA]
Monitor
Control Mode Active
View the current control mode.
Note: Some values will be rounded off to fit in the four-character display. Full values can be read with Modbus.
All temperature parameters through Modbus are in °F.
* Low register numbers contain the two lower bytes; high register numbers contain the two higher bytes of the four-byte floating-point value.
Watlow EZ-ZONE ™ ST
•
31
•
Chapter 5 Operations Page
Display
Parameter name
Description
Settings
Range
Default
Modbus*
Appears If
(less 40,001 offset)
read/write
[`h;Pr]
[ h.Pr]
Monitor
Heat Power
View the current heat output level.
0.0 to 100.0%
236 [float]
read only
always
[`C;Pr]
[ C.Pr]
Monitor
Cool Power
View the current cool output level.
-100.0 to 0.0%
242 [float]
read only
always
[`C;SP]
[ C.SP]
Monitor
Closed Loop Set Point
View the set point currently in effect.
-1,999.000 to 9,999.000°F
or units
-1,128.000 to 5,537.000°C
75°F or units
24°C
always
[`Pu;A]
[ Pv.A]
Monitor
Process Value Active
View the current filtered process value
using the control input.
-1,999.000 to 9,999.000F
or units
-1,128.000 to 5,537.000°C
19 [float]
read only
always
Monitor
Alarm 1 State
View the state of alarm 1.
Startup (88)
None (61)
Blocked (12)
Alarm Low (8)
Alarm High (7)
Error (28)
29 [1 unsigned]
read only
Modbus only
Monitor
Alarm 2 State
View the state of alarm 2.
Startup (88)
None (61)
Blocked (12)
Alarm Low (8)
Alarm High (7)
Error (28)
30 [2 unsigned]
read only
Modbus only
Monitor
Ambient Temperature
View the ambient temperature.
-1,999.000 to 9,999.000
34 [float]
read only
Modbus only
Monitor
Bumpless Set Point
View the set point that will take effect
if a bumpless transfer occurs.
-1,999.000 to 9,999.000
209 [float]
read only
Modbus only
Monitor
Control Loop Output Power
View the output power.
-1,999.000 to 9,999.000
27 [float]
read only
Modbus only
Monitor
Event 1 Status
View the status of event 1.
Inactive (41)
Active (5)
32 [unsigned]
read only
Modbus only
Monitor
Event 2 Status
View the status of event 2.
Inactive (41)
Active (5)
33 [unsigned]
read only
Modbus only
Monitor
Limit State
View the limit state.
Off (62)
None (61)
Limit High (51)
Limit Low (52)
Error (28)
31 [unsigned]
read only
Modbus only
Monitor
Ramp Set Point
View the current ramp set point.
-1,999.000 to 9,999.000
217 [float]
read only
Modbus only
Note: Some values will be rounded off to fit in the four-character display. Full values can be read with Modbus.
All temperature parameters through Modbus are in °F.
* Low register numbers contain the two lower bytes; high register numbers contain the two higher bytes of the four-byte floating-point value.
Watlow EZ-ZONE ™ ST
•
32
•
Chapter 5 Operations Page
Display
Parameter name
Description
Monitor
Tune Status
View which step the tuning process
is in.
Settings
Range
Default
Modbus*
Appears If
(less 40,001 offset)
read/write
Off (62)
Waiting for Cross 1 Pos (119)
Waiting for Cross 1 Neg (120)
Waiting for Cross 2 Pos (121)
Waiting for Cross 2 Neg (122)
Waiting for Cross 3 Pos (113)
Waiting for Cross 3 Neg (150)
Measuring Max Peak (151)
Measuring Min Peak (152)
Calculating (153)
Complete (18)
Timeout (118)
263 [unsigned]
read only
Modbus only
[Loop]
[oPEr]
Loop Menu
[`C;M]
[ C.M]
Loop
Control Mode
Select the method that the controller
will use to control.
[`off] Off (62)
[Auto] Auto (10)
[MAn] Manual (54)
Auto
221 [unsigned]
rw
always
[A;tSP]
[A.tSP}
Loop
Autotune Set Point
Set the set point that the autotune
will use as a percentage of the current set point.
50.0 to 200.0%
90.0
260 [float]
rw
Heat Algorithm
or Cool Algorithm
(Setup Page) is set
to PID.
[`AUt]
[ AUt]
Loop
Autotune Request
Start an autotune. While autotune
is active, the Home Page will display
[Attn] [tUn1]. When the autotune
is complete, the message will clear
automatically.
[``no] No (59)
[`YES] Yes (106)
No
262 [unsigned]
rw
Heat Algorithm
or Cool Algorithm
(Setup Page) is set
to PID.
[`C;SP]
[ C.SP]
Loop
Closed Loop Set Point
Set the set point that the controller
will automatically control to.
Low Set Point to High
Set Point (Setup Page)
75°F or
units
24.0°C
21 [float]
rw
always
[`id;S]
[ id.S]
Loop
Idle Set Point
Set a set point that can be triggered
by an event state.
Low Set Point to High
Set Point (Setup Page)
75°F or
units
24.0°C
207 [float]
rw
always
[`h;Pb]
[ h.Pb]
Loop
Heat Proportional Band
Set the proportional band for the heat
outputs.
0.001 to 9,999.000°F or
units
0.001 to 5,555.000°C
25.0°F or
units
14.0°C
232 [float]
rw
Heat Algorithm
(Setup Page) is set
to PID.
[`h;hy]
[ h.hy]
Loop
Heat Hysteresis
Set the control switching hysteresis
for on-off control. This determines
how far into the “on” region the process value needs to move before the
output turns on.
0.001 to 9,999.000°F or
units
0.001 to 5,555.000°C
3.0°F or
units
2.0°C
234 [float]
rw
Heat Algorithm
(Setup Page) is set
to On-Off.
[`C;Pb]
[ C.Pb]
Loop
Cool Proportional Band
Set the proportional band for the cool
outputs.
0.001 to 9,999.000°F or
units
0.001 to 5,555.000°C
25.0°F or
units
14.0°C
238 [float]
rw
Cool Algorithm
(Setup Page) is set
to PID.
Note: Some values will be rounded off to fit in the four-character display. Full values can be read with Modbus.
All temperature parameters through Modbus are in °F.
* Low register numbers contain the two lower bytes; high register numbers contain the two higher bytes of the four-byte floating-point value.
Watlow EZ-ZONE ™ ST
•
33
•
Chapter 5 Operations Page
Display
Settings
Parameter name
Description
Range
Default
Modbus*
Appears If
(less 40,001 offset)
read/write
[`C;hy]
[ C.hy]
Loop
Cool Hysteresis
Set the control switching hysteresis
for on-off control. This determines
how far into the “on” region the process value needs to move before the
output turns on.
0.001 to 9,999.000°F or
units
0.001 to 5,555.000°C
3.0°F or
units
2.0°C
240 [float]
rw
Cool Algorithm
(Setup Page) is set
to On Off.
[``ti]
[ ti]
Loop
Time Integral
Set the PID integral for the outputs.
0.0 to 9,999.000 seconds
per repeat
180.0 seconds per
repeat
226 [float]
rw
Heat Algorithm
or Cool Algorithm
(Setup Page) is set
to PID.
[``td]
[ td]
Loop
Time Derivative
Set the PID derivative time for the
heat outputs.
0.0 to 9,999.000 seconds
0.0
seconds
228 [float]
rw
Heat Algorithm
or Cool Algorithm
(Setup Page) is set
to PID.
[``dB]
[ db]
Loop
Dead Band
Set the offset to the proportional
band. With a negative value, both
heating and cooling outputs are active
when the process value is near the
set point. A positive value keeps heating and cooling outputs from fighting
each other.
-1,000.0 to 1,000.0°F or
units
-555.0 to 555.5°C
0.0
230 [float]
rw
Heat Algorithm
and Cool Algorithm (Setup Page)
is set to PID or
On-Off.
[`o;SP]
[ o.SP]
Loop
Open Loop Set Point
Set a fixed level of output power
when in manual (open-loop) mode.
-100 to 100% (heat and
cool)
0 to 100% (heat only)
-100 to 0% (cool only)
23
rw
always
32.0°F or
units
0.0°C
99 [1 float]
115 [2 float]
rw
Alarm Sides (Setup Page) is not set
to High.
300.0°F or
units
148.9°C
97 [1 float]
113 [2 float]
rw
Alarm Sides (Setup Page) is not set
to Low.
[ALM]
[oPEr]
Alarm Menu
[`A;Lo]
[ A.Lo]
[`A;hi]
[ A.hi]
[```1]
[ALM]
Alarm 1
[```2]
[ALM]
Alarm 2
Alarm (1 or 2)
Low Set Point
If Alarm Type (Setup Page, Alarm
Menu) is set to:
process - set the process value that
will trigger a low alarm.
deviation - set the span of units below the set point that will trigger a
low alarm.
Process: -1,999.000 to
9,999.000°F or units
1,128.33 to 5,537.22°C
Alarm (1 or 2)
High Set Point
If Alarm Type (Setup Page, Alarm
Menu) is set to:
process - set the process value that
will trigger a high alarm.
deviation - set the span of units
above the set point that will trigger
a high alarm.
Process: -1,999.000 to
9,999.000°F or units
1,128.33 to 5,537.22°C
Alarm (1 or 2)
Clear Request
Write to this register to clear an
alarm state.
0
108 [1 unsigned]
124 [2 unsigned]
write only
Modbus only
Alarm (1 or 2)
Silence Request
Write to this register to clear an
alarm state.
0
109 [1 unsigned]
125 [2 unsigned]
write only
Modbus only
Deviation: -1,999.000 to
9,999.000°F or units
1,110.56 to 5,555.56°C
Deviation: -1,999.000 to
9,999.000°F or units
1,110.56 to 5,555.56°C
Note: Some values will be rounded off to fit in the four-character display. Full values can be read with Modbus.
All temperature parameters through Modbus are in °F.
* Low register numbers contain the two lower bytes; high register numbers contain the two higher bytes of the four-byte floating-point value.
Watlow EZ-ZONE ™ ST
•
34
•
Chapter 5 Operations Page
Display
Settings
Parameter name
Description
[CUrr]
[oPEr]
Current Menu
Range
Default
Modbus*
Appears If
(less 40,001 offset)
read/write
NOTE: To use the current sensing feature, Time Base (Setup Page, Output Menu)
must be set to 0.7 seconds or more.
[`C;hi]
[ C.hi]
Current
High Set Point
Set the current value that will trigger
a high Heater Error state.
-1,999.000 to 9,999.000
[`C;Lo]
[ C.Lo]
Current
Low Set Point
Set the current value that will trigger
a low Heater Error state.
[`CU;r]
[ CU.r]
286 [float]
rw
Current Sides
(Setup Page) is set
to High or Both.
-1,999.000 to 9,999.000
288 [float]
rw
Current Sides
(Setup Page) is set
to Low or Both.
Current
Read
View the most recent current value
monitored by the current transformer.
-1,999.000 to 9,999.000
38 [float]
read only
always
[`C;Er]
[ C.Er]
Current
Error
View the cause of the most recent
load fault.
[nonE] None (61)
[Shrt] Shorted (127)
[open] Open (65)
40 [unsigned]
read only
always
[`h;Er]
[ h.Er]
Current
Heater Error
View the cause of the most recent
load fault monitored by the current
transformer.
[nonE] None (61)
[high] High (37)
[Low] Low (53)
282 [unsigned]
read only
always
[P;Sta]
[oPEr]
Profile
Status
Menu
50.0
* Some parameters in the Profile Status Menu can be
changed for the currently running profile, but should
only be changed by knowledgeable personnel and
with caution. Changing parameters via the Profile
Status Menu will not change the stored profile but will
have an immediate impact on the profile that is running.
(menu appears if ST_ _ - _ _ _ _ - _ P _ _)
Changes made to profile parameters in the Profiling
Pages will be saved and will also have an immediate
impact on the running profile.
[P;Str]
{P.Str]
Profile Status
Profile Start
Select a step or profile to load.
0 to 40
(0: no profile is running)
0 (none)
292 [unsigned]
rw
always
[P;ACr]
{P.ACr]
Profile Status
Profile Action Request
Select what action to apply to the currently loaded profile.
[nonE]
[ProF}
(77)
[StEP]
[PAUS]
[rESU]
[`End]
None
306 [unsigned]
rw
always
[`StP]
[ StP]
Profile Status
Active Step
View the currently running step.
1 to 40
296 [unsigned]
read only
always.
[S;typ]
[S.typ]
Profile Status
Step Type
View the currently running step type.
[UStP] Unused Step
[``ti] Time
[rAtE] Rate
[SoAH] Soak
[`W;E] Wait Event
[W;Pr] Wait For Process
[W;bo] Wait For Both
[``JL] Jump Loop
[`End] End
No Action (61)
Start a Profile
Start a Step (89)
Pause (146)
Resume (147)
End (148)
Unused
Step
a file is running.
Note: Some values will be rounded off to fit in the four-character display. Full values can be read with Modbus.
All temperature parameters through Modbus are in °F.
* Low register numbers contain the two lower bytes; high register numbers contain the two higher bytes of the four-byte floating-point value.
Watlow EZ-ZONE ™ ST
•
35
•
Chapter 5 Operations Page
Display
Parameter name
Description
Settings
Range
Default
Modbus*
Appears If
(less 40,001 offset)
read/write
[tg;SP]
[tg.SP]
Profile Status
Target Set Point
View the target set point of the current step.
-1,999.000 to 9,999.000°F
or units
-1,128.000 to 5,537.000°C
[AC;SP]
[AC.SP]
Profile Status
Active Set Point
Display the current set point, even if
the profile is ramping.
-1,999.000 to 9,999.000°F
or units
-1,128.000 to 5,537.000°C
297 [float]
read only
always
[`S;ti]
[ S.ti]
Profile Status
Step Time Remaining
View the time remaining for the current step.
Step is displayed in seconds. If the
time exceeds 9,999 seconds, the
display will show 9,999 and remain
there while the control continues
to decrement internally. Once the
remaining time is equal to or less
than 9,999 the display will represent the actual seconds remaining.
As an example, if a three-hour soak
time is currently being monitored,
the first value displayed will be
9,999, and the display will remain
at 9,999 until the remaining time
is approximately equal to 2 hours
and 46 minutes. At this point the
display will track the actual seconds
remaining.
0 to 9,999.000 seconds
303 [float]
read only
always
[Ent1]
[Ent1]
[Ent2]
[Ent2]
Profile Status
Event Output (1 or 2)
View the event output states of the
current step.
[`off] Off (62)
[``on] On (63)
32 [1 unsigned]
33 [2 unsigned]
read only
a file is running.
[``JC]
[ JC]
Profile Status
Jump Count Remaining
View the jump counts remaining for
the current loop. In a profile with
nested loops, this may not indicate
the actual jump counts remaining.
0 to 9,999
305 [unsigned]
read only
always
a file is running.
Off
Note: Some values will be rounded off to fit in the four-character display. Full values can be read with Modbus.
All temperature parameters through Modbus are in °F.
* Low register numbers contain the two lower bytes; high register numbers contain the two higher bytes of the four-byte floating-point value.
Watlow EZ-ZONE ™ ST
•
36
•
Chapter 5 Operations Page
6
Chapter 6: Setup Page
To go to the Setup Page from the Home Page, press
both the Up ¿ and Down ¯ keys for six seconds.
[``Ai] will appear in the upper display and [`Set]
will appear in the lower display.
the submenus.
• Press the Advance Key ‰ to move through the parameters of the submenu.
• Press the Infinity Key ˆ to move backwards
through the levels: parameter to submenu; submenu to menu; menu to Home Page.
• Press and hold the Infinity Key ˆ for two seconds
to return to the Home Page.
• Press the Up ¿ or Down ¯ key to move through
the menus.
• Press the Advance Key ‰ to move to a submenu.
• Press the Up ¿ or Down ¯ key to move through
Home Page Setup Page
Parameters
[~~p~]ˆ [~`A1]ˆ [~~~1]ˆ
[~~Sp]<> [~set]‰ [~~AI]‰ [~sen]‰[~lin]‰[`Rt;l]‰[`s;lo]‰[`s;hi]‰[`r;lo]‰[`r;hi]‰[`FiL]‰[`i;Er]‰[`dEC]‰[`S;bA]‰
Input 1
Submenu
<
>
Hold both keys Analog Input
for 6 seconds.
Menu
<
>
ˆ
Input 2
Submenu
Sensor Type Linearization RTD Leads
In/Out 5
Submenu
<
>
<
>
ˆ
In/Out 6
Submenu
Scale High
Range Low
Range High
Filter
Input Error
Decimal
Sensor
Backup
Enable
Same as above without sensor backup enable.
ˆ[~dio]ˆ [~~~5]ˆ
[~set]‰ [~dio]‰ [`dir]‰[`o;Fn]‰[`o;Fi]‰
Digital
Input/Output
Menu
Scale Low
Direction
Output
Function
Output
Function
Instance
Navigating the Setup Page
[`di;L]‰[`d;Fn]‰[`F;is]‰
Digital Input Digital Input Input
Level
Function
Function
Instance
Same as above.
ˆ[Lim]ˆ
[~set]‰ [`L;Sd]‰ [`L;hy]‰[`L;it]‰
Limit Menu Limit Sides
<
>
Limit
Hysteresis
Limit
Integrate
ˆ[loop]ˆ
[~set]‰ [`h;Ag]‰ [`C;Ag]‰[t;tUn]‰[t;bnd]‰[`t;gn]‰[t;Agr]‰[FAiL]‰[MAn]‰ [``RP]‰[`R;SC]‰[`R;rt]‰[`l;sp]‰[`h;SP]‰
Loop Menu Heat
Algorithm
<
>
Cool
Algorithm
TRUTUNE+™
Enable
TRUTUNE+™
Band
TRUTUNE+™
Gain
Autotune
Aggressiveness
Input Error
Failure
Manual
Power
Ramp Action Ramp Scale
Ramp Rate
[sp;Lo]‰ [SP;hi]‰
Closed Loop Closed Loop Open Loop
Low Set
High Set
Low Set
Point
Point
Point
Open Loop
High Set
Point
ˆ[otPt]ˆ [~~~1]ˆ
[~set]‰ [otPt]‰ [~o;Fn]‰[~o;Fi]‰[`o;Ct]‰[`o;tb]‰[`o;Lo]‰[`o;hi]‰
Output Menu
<
>
Output 1
Submenu
<
>
Output
Function
Output
Function
Instance
Output
Control
Output Time Output Low Output High
Base
Power Scale Power Scale
Output 2 & 3
ˆ Submenus Same as above.
ˆ[ALM]ˆ [~~~1]ˆ
[~set]‰
[ALM]‰ [`A;ty]‰[`A;Sr]‰[`A;iS]‰[`A;hy]‰[`A;Lg]‰[`A;Sd]‰[`A;La]‰[~A;bL]‰[`A;Si]‰[A;dsp]‰
Alarm Menu
<
>
ˆ
Alarm 1
Submenu
<
>
Alarm 2
Submenu
Alarm Type
Alarm
Source
Alarm
Instance
Source
Alarm
Hysteresis
Alarm Logic
Alarm Sides
Alarm
Latching
Alarm
Blocking
Alarm
Silencing
Alarm
Display
Same as above.
ˆ[CUrr]ˆ
[~SEt]‰ [`C;Sd]‰ [`CU;r]‰[`C;LE]‰[`C;dt]‰[C;oFS]‰
Current
Menu
<
>
Surrent Sides Current
Reading
Enable
Current Limit Current
Enable
Detect
Threshold
Current
Offset
NOTE: Some of these menus and parameters may not appear, depending
on the controller's options. See model
number information in the Appendix for
more information.
ˆ[`FUn]ˆ
[~SEt]‰ [`d;Fn]‰ [`F;iS]‰
Function Key Digital Input
Function
Menu
Function
Instance
<
>
ˆ[glbl]ˆ
[~SEt]‰ [`C_F]‰ [AC;LF]‰[p;typ]‰[`gse]‰[~gsd]‰
Global Menu Display Units AC Line
<
>
Frequency
Watlow EZ-ZONE ™ ST
Profile Type
Guaranteed Guaranteed
Soak Enable Soak Deviation
•
37
•
Chapter 6 Setup Page
Display
Parameter Name
Description
[``Ai]
[`Set]
Analog Input Menu
[`Sen]
[ SEn]
[```1]
[``Ai]
Analog Input 1
Input (1 or 2)
Sensor Type
Set the analog sensor type to match
the device wired to this input.
NOTE: There is no open-sensor detection
for process inputs.
Settings
Range
Default
[```2]
[``Ai]
Analog Input 2
Modbus*
Appears If
(less 40,001 offset)
read/write
(Integer values for Modbus in
parenthesis.)
(Analog input 2 appears it ST_L-_ _ _ _ -_ _ _ _ )
[`oFF] Off (62)
[``tC] Thermocouple (95)
[`mu] Millivolts (56)
[uolT] Volts dc (104)
[`MA] Milliamps dc (112)
[r0;1H] RTD 100 Ω (113)
[r1;0H] RTD 1,000 Ω (114)
thermocouple
42 [1 unsigned]
70 [2 unsigned]
rw
always
J
43 [1 unsigned]
71 [2 unsigned]
rw
Sensor Type is
set to Thermocouple.
[`Lin]
[ Lin]
Input (1 or 2)
Linearization
Set the linearization to match the
thermocouple wired to this input.
[```b] B (11)
[```C] C (15)
[```d] D (23)
[```E] E (26)
[```F] F (30)
[```J] J (46)
[`Rt;L]
[ rt.L]
Input (1 or 2)
RTD Leads
Set to match the number of leads on
the RTD wired to this input.
[```2] 2 (1)
[```3] 3 (2)
2
44 [1 unsigned]
72 [2 unsigned]
rw
Sensor Type is
set to RTD 100 Ω
or RTD 1,000 Ω.
[`S;Lo]
[ S.Lo]
Input (1 or 2)
Scale Low
Set the low scale for process inputs.
This value, in millivolts, volts or milliamps will correspond to the Range
Low value displayed by the controller.
-100.0 to 100.0
0.0
57 [1 float]
85 [2 float]
rw
Sensor Type
is set to
Millivolts,Volts
or Milliamps.
[`S;hi]
[ S.hi]
Input (1 or 2)
Scale High
Set the high scale for process inputs.
This value, in millivolts, volts or milliamps will correspond to the Range
High value displayed by the controller.
-100.0 to 100.0
20
59 [1 float]
87 [2 float]
rw
Sensor Type
is set to
Millivolts,Volts
or Milliamps.
[`r;Lo]
[ r.Lo]
Input (1 or 2)
Range Low
Set the low range for the displayed
process input units.
-1,999.000 to 9,999.000
0
61 [1 float]
89 [2 float]
rw
Sensor Type
is set to
Millivolts,Volts
or Milliamps.
[`r;hi]
[ r.hi]
Input (1 or 2)
Range High
Set the high range for the displayed
process input units.
-1,999.000 to 9,999.000
9,999.0
63 [1 float]
91 [2 float]
rw
Sensor Type
is set to
Millivolts,Volts
or Milliamps.
[`FiL]
[ FiL]
Input (1 or 2)
Filter Time
Filtering smooths out the process signal to both the display and the input.
Increase the time to increase filtering.
0.0 to 60.0 seconds
0.5
55 [1 float]
83 [2 float]
rw
always
[`i;Er]
[ i.Er]
Input (1 or 2)
Error Latching
Turn input error latching on or off. If
latching is on errors must be manually cleared.
[`off] Off (62)
[``on] On (63)
Off
67 [1 unsigned]
95 [2 unsigned]
rw
always
69 [unsigned]
Modbus only
Input (1 or 2)
Decimal
Set the precision of the displayed
value.
[```0] Whole
[``0;0] Tenths
[`0;00] Hundreths
[0;000] Thousandths
[`dEC]
[ dEC]
[```H] K (48)
[```n] N (58)
[```r] R (80)
[```S] S (84)
[```t] T (93)
Whole
always
Note: Some values will be rounded off to fit in the four-character display. Full values can be read with Modbus.
All temperature parameters through Modbus are in °F.
* Low register numbers contain the two lower bytes; high register numbers contain the two higher bytes of the four-byte floating-point value.
Watlow EZ-ZONE ™ ST
•
38
•
Chapter 6 Setup Page
Display
[`S;bA]
[ S.bA]
Parameter Name
Description
Settings
Range
Default
Input 1
Sensor Backup Enable
If the input 1 sensor fails, the controller will use the input 2 sensor.
[`oFF] Off (62)
[``on] On (63)
Input (1 or 2)
Error Reset
Write to this register to clear an error
state.
0
Modbus*
Appears If
(less 40,001 offset)
read/write
(Integer values for Modbus in
parenthesis.)
Off
65 [1 unsigned]
rw
the controller
includes a limit
(ST_L-_ _ _ _-_ _ _ _).
68 [1 unsigned]
96 [2 unsigned]
write only
Modbus only
Ó
[`dio]
[```5]
[```6]
[`Set]
[`dio]
[`dio]
Digital Input/
Digital Input
Digital Input
Output Menu
Output 5
Output 6
(menu appears if ST (B, E, D or C)_ -_ _ _ _ - _ _ _ _ )
WARNING: When the controller is powered up,
the outputs may turn on.
[`dir]
[ dir]
Digital Input/Output (5 or 6)
Direction
Set the function to an input or output.
[OtPt] Output (68)
[``in] Input Voltage (193)
[iCon] Input Dry Contact
(44)
Output
169 [5 unsigned]
182 [6 unsigned]
rw
always
[`o;Fn]
[ o.Fn]
Digital Output (5 or 6)
Function
Select what function will drive this
output.
[`oFF] Off (62)
[ALM] Alarm (6)
[`Ent] Event (29)
Off
173 [5 unsigned]
186 [6 unsigned]
rw
Direction is set
to Output.
[`o;Fi]
[ o.Fi]
Digital Output (5 or 6)
Function Instance
Select which source instance will
drive the output.
1 or 2
(5) 1
(6) 2
174 [5 unsigned]
187 [6 unsigned]
rw
Direction is set
to Output.
[`di;L]
[ di.L]
Digital Input (5 or 6)
Level
Select what action will be interpreted
as a true state.
[high] High (37)
[Low] Low (53)
High
264 [1 unsigned]
268 [2 unsigned]
rw
Direction is set
to Input Voltage
or Input Dry
Contact.
[`d;Fn]
[ d.Fn]
Digital Input (5 or 6)
Function
Select the function that will be triggered by a true state.
Functions respond to a level state
change or an edge level change.
None
[none] None (61)
[idLE] Idle Set Point Enable [level] (107)
[tUnE] Tune [edge] (98)
[ALM] Alarm Reset [edge]
(6)
[`SiL] Silence Alarms
[edge] (108)
[MAn] Manual/Auto Mode
[level] (54)
[`oFF] Control Outputs Off
[level] (90)
[P;diS] Profile Disable
[level] (206)
[P;hoL] Profile Hold/Resume
[level] (207)
[ProF] Profile Start Number [edge] (79)
[P;StS] Profile Start/Stop
[level] (208)
[LMr] Limit Reset [edge]
(82)
266 [1 unsigned]
270 [2 unsigned]
rw
Direction is set
to Input Voltage
or Input Dry
Contact.
Note: Some values will be rounded off to fit in the four-character display. Full values can be read with Modbus.
All temperature parameters through Modbus are in °F.
* Low register numbers contain the two lower bytes; high register numbers contain the two higher bytes of the four-byte floating-point value.
Watlow EZ-ZONE ™ ST
•
39
•
Chapter 6 Setup Page
Display
[`F;iS]
[ F.iS]
Parameter Name
Description
Digital Input (5 or 6)
Function Instance
Select which instance of the Event
Function will be triggered by a true
state.
[LIm]
[`Set]
Limit Menu
Settings
Range
Default
Modbus*
Appears If
(less 40,001 offset)
read/write
(Integer values for Modbus in
parenthesis.)
0 All Instances (except pro- 1
files)
(For example, if Digital
Function is set to Silence
Alarms and Function Instance is set to 0, then this
digital input will silence
both alarms.)
1 to 4
267 [1 unsigned]
271 [2 unsigned]
rw
Direction is set
to Input Voltage
or Input Dry
Contact.
(menu appears if (ST_L-_ _ _ _-_ _ _ _).
[`L;Sd]
[ L.Sd]
Limit
Sides
Select which side or sides of the process value will be monitored.
[both] Both (13)
[high] High (37)
[LoW] Low (53)
Both
279 [unsigned]
rw
always
[`L;hy]
[ L.hy]
Limit
Hysteresis
Set the hysteresis for the limit function. This determines how far into
the safe range the process value must
move before the limit turns the output back on.
0.001 to 9,999.000°F or
units
0.001 to 5,555.000°C
1.0
273 [float]
rw
always
[`L;it]
[ L.it]
Limit
Integrate
In a limit state the controller will
turn off the outputs, terminate an active profile and freeze PID and TRUTUNE+™ calculations.
[``no] No (59)
[`YES] Yes (106)
No
316 [unsigned]
rw
always
[Loop]
[`Set]
Loop Menu
[`h;Ag]
[ h.Ag]
Loop
Heat Algorithm
Set the heat control method.
[`oFF] Off (62)
[`Pid] PID (71)
[on;of] On-Off (64)
PID
223 [unsigned]
rw
always
[`C;Ag]
[ C.Ag]
Loop
Cool Algorithm
Set the cool control method.
[`oFF] Off (62)
[`Pid] PID (71)
[on;of] On-Off (64)
Off
224 [unsigned]
rw
always
[t;tUn]
[t.tun]
Loop
TRU-TUNE+™ Enable
Enable or disable the TRU-TUNE+™
adaptive tuning feature.
[``no] No (59)
[`YES} Yes (106)
No
257 [unsigned]
rw
Cool Algorithm
or Heat Algorithm is set to
PID.
[t;bnd]
[t.bnd]
Loop
TRU-TUNE+™ Band
Set the range, centered on the set
point, within which TRU-TUNE+™
will be in effect. Use this function
only if the controller is unable to
adaptive tune automatically.
0 Auto
1 to 100
0
307 [unsigned]
rw
Cool Algorithm
or Heat Algorithm is set to
PID and TRUTUNE+™ Enable is set to Yes.
[`t;gn]
[ t.gn]
Loop
TRU-TUNE+™ Gain
Select the responsiveness of the
TRU-TUNE+™ adaptive tuning calculations. More responsiveness may
increase overshoot.
1 to 6 Most to least responsive
3
308 [unsigned]
rw
Cool Algorithm
or Heat Algorithm is set to
PID and TRUTUNE+™ Enable is set to Yes.
Note: Some values will be rounded off to fit in the four-character display. Full values can be read with Modbus.
All temperature parameters through Modbus are in °F.
* Low register numbers contain the two lower bytes; high register numbers contain the two higher bytes of the four-byte floating-point value.
Watlow EZ-ZONE ™ ST
•
40
•
Chapter 6 Setup Page
Display
Parameter Name
Description
Settings
Range
Default
[t;Agr]
[t.Agr]
Loop
Autotune Aggressiveness
Select the aggressiveness of the autotuning calculations.
[Undr] Under (99)
[Crit] Critical (21)
[OuEr] Over (69)
[FAiL]
[FAiL]
Loop
Input Error Failure
Select what the controller will do
when an error is detected and control
changes to manual mode.
[MAn]
[MAn]
Modbus*
Appears If
(less 40,001 offset)
read/write
(Integer values for Modbus in
parenthesis.)
259 [unsigned]
rw
Cool Algorithm
or Heat Algorithm is set to
PID.
User
[`oFF] Off, sets output
power to 0% (62)
[bPLS] Bumpless, maintains same output power,
if it was less than 75% and
stable, otherwise 0% (14)
[MAn] Manual Fixed, sets
output power to Manual
Power setting (54)
[USEr] User, sets output
power to last open-loop
set point the user entered
(100)
214 [unsigned]
rw
always
Loop
Manual Power
Set the manual output power level
that will take effect if an input error
failure occurs.
Set Point Open Loop Limit
Low to Set Point Open
Loop Limit High
0.0
211 [float]
rw
Input Error
Failure is set to
Fixed.
[``rP]
[ rP]
Loop
Ramp Action
Select when the controller's set point
will ramp to the defined end set point.
[`oFF]
[`Str]
[StPt]
[both]
Off
215 [unsigned]
rw
always
[`r;SC]
[ r.SC]
Loop
Ramp Scale
Select the scale of the ramp rate.
[hour] Hours (39)
[Min] Minutes (57)
Minutes
216 [unsigned]
rw
Ramp Action is
set to Startup,
Set Point or both.
[`r;rt]
[ r.rt]
Loop
Ramp Rate
Set the rate for the set point ramp.
Set the time units for the rate with
the Ramp Scale parameter.
0.001 to 9,999.000°F or
units
0.001 to 5,555.000°C
1.0
219 [float]
rw
Ramp Action is
set to Startup,
Set Point or both.
[`L;SP]
[ L.SP]
Loop
Closed Loop Low Set Point
Set the minimum value of the closedloop set point range..
-1,999.000 to 9,999.000°F
or units
-1,128.000 to 5,537.000°C
-1,999.000
195 [float]
rw
always
[`h;SP]
[ h.SP]
Loop
Closed Loop High Set Point
Set the maximum value of the closedloop set point range.
-1,999.000 to 9,999.000°F
or units
-1,128.000 to 5,537.000°C
9,999.000
197 [float]
rw
always
Loop
Closed Loop Active Set Point
-1,999 to 9,999
203 [float]
read only
Modbus only
[SP;hi]
[SP.hi]
Loop
Open Loop High Set Point
Set the maximum value of the openloop set point range.
-1,999 to 9,999
201 [float]
read only
Modbus only
[SP;Lo]
[SP.Lo]
Loop
Open Loop Low Set Point
Set the minimum value of the openloop set point range.
-1,999 to 9,999
199 [float]
read only
Modbus only
Off (62)
Startup (88)
Set Point (85)
Both (13)
Critical
Note: Some values will be rounded off to fit in the four-character display. Full values can be read with Modbus.
All temperature parameters through Modbus are in °F.
* Low register numbers contain the two lower bytes; high register numbers contain the two higher bytes of the four-byte floating-point value.
Watlow EZ-ZONE ™ ST
•
41
•
Chapter 6 Setup Page
Display
Parameter Name
Description
Settings
Loop
User Action Failure
[otpt]
[`Set]
Output Menu
[```1]
[otpt]
Output 1
Range
Default
-1,999 to 9,999
[```2]
[otPt]
Output 2
Modbus*
203 [unsigned]
read only
[```3]
[otpt]
Output 3
Appears If
(less 40,001 offset)
read/write
(Integer values for Modbus in
parenthesis.)
Modbus only
Ó
WARNING: When the controller is powered up,
the outputs may turn on.
[`o;Fn]
[ o.Fn]
Output (1 to 3)
Function
Select what the output will control.
[`oFF] Off (62)
[hEAt] Heat (36)
[CooL] Cool (20)
[ALM] Alarm (6)
[`Ent] Event (29) (2 & 3
only)
[LiM] Limit (126) (3 only)
Heat (1)
Alarm (2)
Off (3 to 6)
134 [1 unsigned]
147 [2 unsigned]
160 [3 unsigned]
rw
1 and 2 always, 3
if the controller
includes a limit
(ST_L-_ _ _ _-_
_ _ _).
[`o;Fi]
[ o.Fi]
Output (1 to 3)
Function Instance
Select which instance will be associated with this output.
1 or 3
1
135 [1 unsigned]
148 [2 unsigned]
161 [3 unsigned]
rw
1 and 2 always, 3
if the controller
includes a limit
(ST_L-_ _ _ _-_
_ _ _).
[`o;Ct]
[ o.Ct]
Output (1 to 3)
Control
Set the output control type. This parameter is only used with PID control,
but can be set anytime.
[`Ftb] Fixed Time Base
(34)
[`utb] Variable Time Base
(103)
Fixed Time
Base
131 [1 unsigned]
144 [2 unsigned]
157 [3 unsigned]
rw
1 and 2 always, 3
if the controller
includes a limit
(ST_L-_ _ _ _-_
_ _ _).
[`o;tb]
[ o.tb]
Output (1 to 3)
Time Base
Set the time base for fixed-time-base
control.
0.1 to 60.0 seconds
0.1 sec.
[SSR]
5.0 sec.
[relay]
132 [1 float]
145 [2 float]
158 [3 float]
rw
1 and 2 always, 3
if the controller
includes a limit
(ST_L-_ _ _ _-_
_ _ _) and Time
Base is set to
Fixed Time Base.
[`o;Lo]
[ o.Lo]
Output (1 to 3)
Low Power Scale
The power output will never be less
than the value specified and will
represent the value at which output
scaling begins.
0.0 to 100.0%
0.0%
139 [1 float]
152 [2 float]
165 [3 float]
rw
1 and 2 always, 3
if the controller
includes a limit
(ST_L-_ _ _ _-_ _
_ _) and if Source
is set to Heat or
Cool.
[`o;hi]
[ o.hi]
Output (1 to 3)
High Power Scale
The power output will never be greater than the value specified and will
represent the value at which output
scaling stops.
0.0 to 100.0%
100.0%
141 [1 float]
154 [2 float]
167 [3 float]
rw
1 and 2 always, 3
if the controller
includes a limit
(ST_L-_ _ _ _-_ _
_ _) and if Source
is set to Heat or
Cool.
[Alm]
[`Set]
Alarm Menu
[```1]
[Alm]
Alarm 1
[```2]
[Alm]
Alarm 2
[`A;ty]
[ A.ty]
Alarm (1 or 2)
Type
Select how the alarm will or will not
track the set point.
Process
[`oFF] Off (62)
Alarm
[PR;AL] Process Alarm (76)
[dE;AL] Deviation Alarm (24)
110 [1 unsigned]
126 [2 unsigned]
rw
always
[`A;Sr]
[ A.Sr]
Alarm (1 or 2)
Source
Select what will trigger this alarm.
[``Ai] Analog Input (142)
[PWr] Power (73) (process
only)
[CUrr] Current (22) (process only)
111 [1 unsigned]
127 [2 unsigned]
rw
always
Analog Input
Note: Some values will be rounded off to fit in the four-character display. Full values can be read with Modbus.
All temperature parameters through Modbus are in °F.
* Low register numbers contain the two lower bytes; high register numbers contain the two higher bytes of the four-byte floating-point value.
Watlow EZ-ZONE ™ ST
•
42
•
Chapter 6 Setup Page
Display
Parameter Name
Description
Settings
Range
Default
Modbus*
Appears If
(less 40,001 offset)
read/write
(Integer values for Modbus in
parenthesis.)
[`A;is]
[ A.iS]
Alarm (1 or 2)
Source Instance
If Alarm Source is set to input, select
which input to use.
1 or 2
1
112 [1 unsigned]
128 [2 unsigned]
rw
always
[`A;hy]
[ A.hy]
Alarm (1 or 2)
Hysteresis
Set the hysteresis for an alarm. This
determines how far into the safe region the process value needs to move
before the alarm can be cleared.
0.001 to 9,999.000°F or
units
0.001 to 5,555.000°C
1.0
101 [1 float]
117 [2 float]
rw
always
[`A;Lg]
[ A.Lg]
Alarm (1 or 2)
Logic
Select what the output condition will
be during in the alarm state.
[`AL;C] Close On Alarm (17) Close On
[`AL;o] Open On Alarm (66) Alarm
104 [1 unsigned]
120 [2 unsigned]
rw
always
[`A;Sd]
[ A.Sd]
Alarm (1 or 2)
Sides
Select which side or sides will trigger
this alarm.
[both] Both (13)
[high] High (37)
[LoW] Low (53)
Both
103 [1 unsigned]
119 [2 unsigned]
rw
always
[`A;LA]
[ A.LA]
Alarm (1 or 2)
Latching
Turn alarm latching on or off. A
latched alarm has to be turned off by
the user.
[nLAt] Non-Latching (60)
[`LAt] Latching (49)
Non-Latching
106 [1 unsigned]
122 [2 unsigned]
rw
always
[`A;bL]
[ A.bL]
Alarm (1 or 2)
Blocking
Select when an alarm will be blocked.
After startup and/or after the set
point changes, the alarm will be
blocked until the process value enters
the normal range.
[`oFF]
[`Str]
[StPt]
[both]
Off
107 [1 unsigned]
123 [2 unsigned]
rw
always
[`A;Si]
[ A.Si]
Alarm (1 or 2)
Silencing
Turn alarm silencing on to allow the
user to disable this alarm.
[`oFF] Off (62)
[``on] On (63)
Off
105 [1 unsigned]
121 [2 unsigned]
rw
always
[A;dSP]
[A.dSP]
Alarm (1 or 2)
Display
Display an alarm message when an
alarm is active.
[`oFF] Off
[``on] On
On
[CUrr]
[`Set]
Current Menu
Off (62)
Startup (88)
Set Point (85)
Both (13)
(menu appears if ST (P, E, J or C) _-_ _ _ _-_ _ _ _)
always
NOTE: To use the current sensing feature, Time
Base (Setup Page, Output Menu) must be set to
0.7 seconds or more.
[`C;Sd]
[ C.Sd]
Current
Sides
Select which side of the current to
monitor.
[`oFF] Off (62)
[high] High (37)
[LoW] Low (53)
[both] Both (13)
Off
[`CU;r]
[ CU.r]
Current
Reading Enable
Display solid-state relay (SSR) failure
and heater failure messages on the
RUI (remote user interface).
[``no] No
[`YES} Yes
No
[`C;LE]
[ C.LE]
Current
Limit Enable
Trip the limit if a shorted solid-state
relay (SSR) is detected.
[``no] No (59)
[`YES} Yes (106)
No
283 [unsigned]
rw
always
always
284 [unsigned]
rw
the controller
includes a limit
(ST_L -_ _ _ _-_
_ _ _).
Note: Some values will be rounded off to fit in the four-character display. Full values can be read with Modbus.
All temperature parameters through Modbus are in °F.
* Low register numbers contain the two lower bytes; high register numbers contain the two higher bytes of the four-byte floating-point value.
Watlow EZ-ZONE ™ ST
•
43
•
Chapter 6 Setup Page
Display
Parameter Name
Description
Settings
Range
Default
Modbus*
Appears If
(less 40,001 offset)
read/write
(Integer values for Modbus in
parenthesis.)
[`C;dt]
[ C.dt]
Current
Detect Threshold
For factory adjustment only.
0 to 32,767
12
[C;oFS]
[C.oFS]
Current
Offset
Calibrate the current reading with an
offset value.
-1,999 to 9,000
0
285 [unsigned]
the controller
includes a limit
(ST_L -_ _ _ _-_
_ _ _).
the controller
includes a limit
(ST_L -_ _ _ _-_
_ _ _).
[`Fun]
[`Set]
Function Key (EZ Key) Menu
[`d;Fn]
[ d.Fn]
Function (EZ) Key
Digital Input Function
Program the EZ Key to trigger an
action.
None
[none] None (61)
[idLE] Idle Set Point Enable [level] (107)
[tUnE] Tune [edge] (98)
[ALM] Alarm Reset [edge]
(6)
[`SiL] Silence Alarms
[edge] (108)
[MAn] Manual/Auto Mode
[level] (54)
[`oFF] Control Outputs Off
[level] (90)
[P;diS] Profile Disable
[level] (206)
[P;hoL] Profile Hold/Resume
[level] (207)
[ProF] Profile Start Number [edge] (79)
[P;StS] Profile Start/Stop
[level] (208)
[LMr] Limit Reset [edge]
(82)
always
[`F;is]
[ F.iS]
Function (EZ) Key
Instance
Select which instance the EZ Key will
affect. If only one instance is available, any selection will affect it.
0 All Instances (except
1
Profile)
(For example, if Digital
Function is set to Silence
Alarms and Function Instance is set to 0, then the
digital input would silence
both alarms.)
1 to 4
always
[```F] °F
[```C] °C
°F
always
[``50] 50 Hz (3)
[``60] 60 Hz (4)
60 Hz
[gLbL]
[`Set]
Global Menu
[`C_F]
[ C_F]
Global
Display Units
Select which units will be displayed.
[AC;LF] Global
[AC.LF] AC Line Frequency
Set the frequency to the applied ac
line power source.
129 [unsigned]
rw
always
Note: Some values will be rounded off to fit in the four-character display. Full values can be read with Modbus.
All temperature parameters through Modbus are in °F.
* Low register numbers contain the two lower bytes; high register numbers contain the two higher bytes of the four-byte floating-point value.
Watlow EZ-ZONE ™ ST
•
44
•
Chapter 6 Setup Page
Display
Parameter Name
Description
Settings
Range
Default
Modbus*
Appears If
(less 40,001 offset)
read/write
(Integer values for Modbus in
parenthesis.)
[P;typ]
[P.tyP]
Global
Profile Type
Set the profile startup to be based on
a set point or a process value.
[StPt] Set Point (85)
[`Pro] Process (75)
Set Point
302 [unsigned]
rw
the controller
includes profiling
(ST_ _-_ _ _ _-_
P _ _ ).
[`GSE]
[ gSE]
Global
Guaranteed Soak Enable
Enables the guaranteed soak deviation function in profiles.
[`oFF] Off (62)
[``on] On (63)
Off
299 [unsigned]
rw
the controller
includes profiling
(ST_ _-_ _ _ _-_
P _ _ ).
[`GSd]
[ gSd]
Global
Guaranteed Soak Deviation
Set the value of the deviation band
that will be used in all profile step
types. The process value must enter
the deviation band before the step can
proceed.
0.0 to 9,999.000°F or units
0.0 to 5,555.000°C
10.0°F or
units
6.0°C
300 [float]
rw
the controller
includes profiling
(ST_ _-_ _ _ _-_
P _ _ ).
Note: Some values will be rounded off to fit in the four-character display. Full values can be read with Modbus.
All temperature parameters through Modbus are in °F.
* Low register numbers contain the two lower bytes; high register numbers contain the two higher bytes of the four-byte floating-point value.
Watlow EZ-ZONE ™ ST
•
45
•
Chapter 6 Setup Page
7
Chapter 7: Profiling Page
Profile
Page
Home
Page
[~~p~]ˆ [~~p1]ˆ
[~~Sp]‰ [ProF]‰
Hold key for 3
seconds.
Profile 1
<
>
ˆ[``P2]ˆ
[Prof]‰
Profile 2
<
>
ˆ[``P3]ˆ
[ProF]‰
Profile 3
<
>
ˆ[``P4]ˆ
[ProF]‰
Profile 4
<
>
Navigating the Profiling Page
Steps
[~~`1]
[``P1]
<
>
Steps 1 to 10
Profile 1
[~~11]
[``P2]
<
>
Steps 11 to 20
Profile 2
[~~21]
[``P3]
<
>
Steps 21 to 30
Profile 3
[~~31]
[``P4]
<
>
Steps 31 to 40
Profile 4
Step Types
ˆ [~~ti]ˆ
‰ [S;tyP]‰ [tg;SP]‰ [hoUr]‰ [Min]‰ [`SEC]‰ [Ent1]‰ [Ent2]‰
Time
<
>
Target Set
Point
Hours
Minutes
Seconds
Event
Output 1
Event
Output 2
[rAtE]ˆ
[S;tyP]‰ [tg;SP]‰ [rAtE]‰ [Ent1]‰ [Ent2]‰
Rate
<
>
Target Set
Point
Rate
Event
Output 1
Event
Output 2
[SoAH]ˆ
[S;tyP]‰ [hoUr]‰ [Min]‰ [`SEC]‰ [Ent1]‰[Ent2]‰
Soak
<
>
Hours
Minutes
Seconds
Event
Output 1
Event
Output 2
[`W;E]ˆ
[S;tyP]‰ [WE;1]‰ [WE;2]‰ [Ent1]‰ [Ent2]‰
Wait Event Wait Event 1
<
>
Wait Event 2
Event
Output 1
Event
Output 2
[W;Pr]ˆ
[S;tyP]‰ [WPr]‰ [Ent1]‰ [Ent2]‰
NOTE: Some of these menus and
parameters may not appear, depending on the controller's options. See
model number information in the Appendix for more information.
Wait For
Process
<
>
Wait for
Process
Value
Event
Output 1
Event
Output 2
[W;bo]ˆ
[S;tyP]‰ [WPr]‰ [WE;1]‰ [WE;2]‰ [Ent1]‰[Ent2]‰
Wait Event 1
Wait For Both Wait for
Process
<
>
Value
Wait Event 2
Event
Output 1
Event
Output 2
[``JL]ˆ
[S;tyP]‰ [``JS]‰ [``JC]‰ [Ent1]‰ [Ent2]‰
Jump Loop Jump Step
Step
<
>
Jump Count
Event
Output 1
Event
Output 2
[`End]ˆ
[S;tyP]‰ [`End]
End Step
<
>
End Set
Point
[UStP]
[S;tyP]
Unused Step
<
>
Watlow EZ-ZONE ™ ST
•
46
•
Chapter
Chapter7 8Profiling
Factor y Page
How to Start a Profile
The Profiling Page allows you to enter your ramp and
soak profile information.
After defining the profile follow the steps below to
run the profile:
1. From the Home Page push the Advance Key ‰ repeatedly until Profile Start [P;St1] appears in the
lower display.
2. Use the Up ¿ or Down ¯ key to choose the file or
step number within a profile where you want the
profile to begin running.
3. Press the Advance Key ‰. This takes you to Profile Action [P;AC1], where you can select the appropriate action.
To go to the Profiling Page from the Home Page, press
the Advance Key ‰ for three seconds, until [ProF]
appears in the lower display and the profile number appears in the upper display. Press the Up ¿ or
Down ¯ key to change to another profile.
• Press the Advance Key ‰ to move to the selected
profile's first step.
• Press the Up ¿ or Down ¯ keys to move through
the steps.
• Press the Advance Key ‰ to move through the
selected step's settings.
• Press the Up ¿ or Down ¯ keys to change the
step's settings.
• Press the Infinity Key ˆ at any time to return to
the step number prompt.
• Press the Infinity Key ˆ again to return to the
profile number prompt.
• From any point press and hold the Infinity Key
ˆ for two seconds to return to the Home Page.
• [none] No action
• [ProF] Begin execution from first step of the
specified profile number, whether it exists or not.
• [PAUS] Pause the currently running profile.
• [rESU] Resume running the profile from the previously paused step.
• [`End] End the profile.
• [StEP] Begin running the profile from the specified step number.
Note: Changes made to profile parameters in the Profiling
Pages will be saved and will also have an immediate impact on
the running profile.
Some parameters in the Profile Status Menu can be changed
for the currently running profile, but should only be changed
by knowledgeable personnel and with caution. Changing parameters via the Profile Status Menu will not change the stored
profile but will have an immediate impact on the profile that is
running.
Display
Parameter name
Description
Settings
Range
(Integer values for Modbus in parentheses.)
Default
Modbus*
Appears If
(less 40,001 offset)
read/write
Profiling parameters appear if the controller includes profiling (ST_ _-_ _ _ _-_P_ _).
[ProF]
[ProF]
Profile
Select the profile to be edited or
viewed.
P1 to P4
[``p1]
[ P1] to
[``p4]
[ P4]
Step
Select a step to edit or view.
1 to 10 [profile 1]
11 to 20 [profile 2]
21 to 30 [profile 3]
31 to 40 [profile 4]
[S;typ]
[S.typ]
Step Type
Select a step type.
[UStP] Unused Step
[``ti] Time
[rAtE] Rate
[SoAH] Soak
[`W;E] Wait For Event
[W;Pr] Wait For Process
[W;bo] Wait For Both
[``JL] Jump Loop
[`End] End
[tg;SP]
[tg.SP]
Step Type Parameters
Target Set Point
Select the set point for this step.
-1,999.000 to
9,999.000°F or units
-1,128 to 5,537.000°C
1
295 [unsigned]
rw
always
296 [unsigned]
rw
always
Unused
500 [unsigned] rw
address = 500 + ((instance - 1} * 20)
always
0.0°F or
units
501 [unsigned] rw
address = 501 + ((instance - 1} * 20)
Step Type is
set to Time,
Rate, Wait for
Process or Wait
for Both.
-18°C
Note: Some values will be rounded off to fit in the four-character display. Full values can be read with another interface.
* Low register numbers contain the two lower bytes; high register numbers contain the two higher bytes of the four-byte floating-point value.
Watlow EZ-ZONE ™ ST
•
47
•
Chapter
Chapter7 8Profiling
Factor y Page
Display
Parameter name
Description
Settings
Range
(Integer values for Modbus in parentheses.)
Default
Modbus*
Appears If
(less 40,001 offset)
read/write
[hoUr]
[hoUr]
Step Type Parameters
Hours
Select the hours (plus Minutes and
Seconds) for a timed step.
0 to 99
0
503 [unsigned] rw
address = 503 + ((instance - 1} * 20)
Step Type is
set to Time or
Soak.
[Min]
[Min]
Step Type Parameters
Minutes
Select the minutes (plus Hours and
Seconds) for a timed step.
0 to 59
0
504 [unsigned] rw
address = 504 + ((instance - 1} * 20)
Step Type is
set to Time or
Soak.
[~SEC]
[ SEC]
Step Type Parameters
Seconds
Select the seconds (plus Hours and
Minutes) for a timed step.
0 to 59
0
505 [unsigned] rw
address = 505 + ((instance - 1} * 20)
Step Type is
set to Time or
Soak.
[rate]
[rAtE]
Step Type Parameters
Rate
Select the rate for ramping in degrees or units per minute.
0 to 9,999.000°F or units
per minute
0 to 5,555.000°C per
minute
0.0
506 [unsigned] rw
address = 506 + ((instance - 1} * 20)
Step Type is
set to Rate.
[WPr]
[WPr]
Step Type Parameters
Wait For Process Value
The step will wait until the process
value is equal to the Wait-for Process Value. Once the Wait For Process is satisfied, this step ends.
-1,999.000 to
9,999.000°F or units
-1,128.000 to
5,537.000°C
0.0°F or
units
-18.0°C
512 [unsigned] rw
address = 512 + ((instance - 1} * 20)
Step Type is
set to Wait For
Process.
[WE;1]
[WE.1]
or
[WE;2]
[WE.2]
Step Type Parameters
Wait Event (1 and 2)
Select the event state that must be
satisfied during this step. Digital
input 5 provides the state of Event
1, and digital input 6 provides the
state of Event 2.
[`oFF] Off
[``on] On
[nonE] None
Off
510 [ unsigned] rw
address = 510 + ((instance - 1} * 20)
511 [ unsigned] rw
address = 511 + ((instance - 1} * 20)
Step Type is
set to Wait
Event or Wait
for Both.
[~~JS]
[ JS]
Step Type Parameters
Jump Step
Select a step to jump to.
1 to 40
0
514 [unsigned] rw
address = 514 + ((instance - 1} * 20)
Step Type is
set to Jump
Loop.
[~~JC]
[ JC]
Step Type Parameters
Jump Count
Set the number of jumps. A value of
0 creates an infinite loop. Loops can
be nested four deep.
0 to 9,999
0
515 [unsigned] rw
address = 515 + ((instance - 1} * 20)
Step Type is
set to Jump
Loop.
[~End]
[ End]
Step Type Parameters
End Type
Select what the controller will do
when this profile ends.
[`oFF] Control Mode
set to Off
[Hold] Hold last closedloop set point in the
profile
[USEr] User, reverts to
previous set point
User
516 [unsigned] rw
address = 516 + ((instance - 1} * 20)
Step Type is
set to End.
[Ent1]
[Ent1]
or
[Ent2]
[Ent2]
Step Type Parameters
Event Output (1 and 2)
Select whether Event Output 1 or 2
is on or off during this step.
[`oFF] Off
[``on] On
Off
508 [1 unsigned] rw
address = 508 + ((instance - 1} * 20)
509 [1 unsigned] rw
address = 509 + ((instance - 1} * 20)
Step Type is
set to Time,
Rate, Soak,
Wait Event,
Wait for Process, Wait for
Both or Jump
Loop.
Note: Some values will be rounded off to fit in the four-character display. Full values can be read with another interface.
* Low register numbers contain the two lower bytes; high register numbers contain the two higher bytes of the four-byte floating-point value.
Watlow EZ-ZONE ™ ST
•
48
•
Chapter
Chapter7 8Profiling
Factor y Page
Calculating the Modbus Address for a Step
Each Step Type parameter has 40 Modbus addresses,
one for each of the 40 instances, or steps. To find a
specific address: subtract 1 from the instance and
multiply the sum by 20, then add that to the Modbus
address listed in the table above.
Display
For instance, the Modbus address for the Event Output 2 parameter for Step 21 = 509 + ((21 - 1) * 20), or
909.
The table on the next page, Modbus Registers for Profiling Parameters, lists all of the Modbus addresses
for Step Type Parameters.
Step Type name
Description
Parameters in Step Type
[``ti]
[ ti]
Time
A Time Step controls at the Target Set Point and maintains two Event
states for the designated time.
[tg;SP] Target Set Point
[hoUr] Hours
[Min] Minutes
[`SEC] Seconds
[Ent1] Event Output 1
[Ent2] Event Output 2
[rAtE]
[rAtE]
Rate
A Rate Step ramps the process value to the Target Set Point in degrees
per minute while maintaining two Event states.
[tg;SP] Target Set Point
[rAtE] Rate
[Ent1] Event Output 1
[Ent2] Event Output 2
[SoAH]
[SoAk]
Soak
A Soak Step maintains the last Target Set Point and two Event states for
the designated time.
[hoUr] Hours
[Min] Minutes
[`SEC] Seconds
[Ent1] Event Output 1
[Ent2] Event Output 2
[`W;E]
[ W.E]
Wait For Event
A Wait Event Step will wait for the event states to match the two Wait
Event settings.
[WE;1] Wait Event 1
[WE;2] Wait Event 2
[Ent1] Event Output 1
[Ent2] Event Output 2
[W;Pr]
[W.Pr]
Wait For Process
If Wait-for Process Enable is on, a Wait for Process Step will wait for the
process value to match the Wait for Process value.
[WPr] Wait For Process
[Ent1] Event Output 1
[Ent2] Event Output 2
[W;bo]
[W.bo]
Wait For Both
If Wait-for Process Enable is on, a Wait for Both Step will wait for the process value to match the Target Set Point and for the event states to match
the two Event settings
[WPr] Wait for Process Value
[WE;1] Wait Event 1
[WE;2] Wait Event 2
[Ent1] Event Output 1
[Ent2] Event Output 2
[``JL]
[ JL]
Jump Loop
A Jump Loop step will jump to the Jump Step the number of times designated in Jump Count. Loops can be nested up to four deep.
[``JS]
[``JC]
[Ent1]
[Ent2]
[`End]
[ End]
End
An End Step will end the profile. If a profile doesn't include an End Step,
control will move to the next step. If no End Step is confronted, after step
40 control will default to the set point in effect before the profile started.
[`End] End Type
[UStP]
[UStP]
Unused Step
This is an empty step that can be used to, in effect, erase a step in a profile.
Watlow EZ-ZONE ™ ST
•
49
•
Jump Step
Jump Count
Event Output 1
Event Output 2
Chapter
Chapter7 8Profiling
Factor y Page
Modbus Registers for Profiling Parameters
Profile 1
Step1
Step Type
Profile 2
2
3
4
5
6
7
8
9
10
12
13
14
15
16
17
18
19
20
500
520
540
560
580
600
620
640
660
680
700
11
720
740
760
780
800
820
840
860
880
501
521
541
561
581
601
621
641
661
681
701
721
741
761
781
801
821
841
861
881
503
523
543
563
583
603
623
643
663
683
703
723
743
763
783
803
823
843
863
883
504
524
544
564
584
604
624
644
664
684
704
724
744
764
784
804
824
844
864
884
505
525
545
565
585
605
625
645
665
685
705
725
745
765
785
805
825
845
865
885
506
526
546
566
586
606
626
646
666
686
706
726
746
766
786
806
826
846
866
886
508
528
548
568
588
608
628
648
668
688
708
728
748
768
788
808
828
848
868
888
509
529
549
569
589
609
629
649
669
689
709
729
749
769
789
809
829
849
869
889
510
530
550
570
590
610
630
650
670
690
710
730
750
770
790
810
830
850
870
890
511
531
551
571
591
611
631
651
671
691
711
731
751
771
791
811
831
851
871
891
512
532
552
572
592
612
632
652
672
692
712
732
752
772
792
812
832
852
872
892
514
534
554
574
594
614
634
654
674
694
714
734
754
774
794
814
834
854
874
894
515
535
555
575
595
615
635
655
675
695
715
735
755
775
795
815
835
855
875
895
516
536
556
576
596
616
636
656
676
696
716
736
756
776
796
816
836
856
876
896
•
50
Unused Step (50)
Time (143)
Rate (81)
Soak (87)
Wait Event (144)
Wait Process (209)
Wait for Both (210)
Jump Loop (116)
End (27)
Target Set Point
-1,999.000 to 9,999.000
Hours
0 to 99
Minutes
0 to 59
Seconds
0 to 59
Rate
0 to 9999
Event Output 1
Off (62)
On (63)
Event Output 2
Off (62)
On (63)
Wait Event 1
Off (62)
On (63)
None (61)
Wait Event 2
Off (62)
On (63)
None (61)
Wait For Process
-1,999.000 to 9,999.000
Jump Step
0 to 40
Jump Count
0 to 9,999
End Type
Off (62)
Hold (47)
User (100)
Watlow EZ-ZONE ™ ST
•
Chapter
Chapter7 8Profiling
Factor y Page
Profile 3
21
Profile 4
22
23
24
25
26
27
28
29
30
32
33
34
35
36
37
38
39
40
900
920
940
960
980
1000
1020
1040
1060
1080
1100
1120
1140
1160
1180
1200
1220
1240
1260
1280
901
921
941
961
981
1001
1021
1041
1061
1081
1101
1121
1141
1161
1181
1201
1221
1241
1261
1281
903
923
943
963
983
1003
1023
1043
1063
1083
1103
1123
1143
1163
1183
1203
1223
1243
1263
1283
904
924
944
964
984
1004
1024
1044
1064
1084
1104
1124
1144
1164
1184
1204
1224
1244
1264
1284
905
925
945
965
985
1005
1025
1045
1065
1085
1105
1125
1145
1165
1185
1205
1225
1245
1265
1285
906
926
946
966
986
1006
1026
1046
1066
1086
1106
1126
1146
1166
1186
1206
1226
1246
1266
1286
908
928
948
968
988
1008
1028
1048
1068
1088
1108
1128
1148
1168
1188
1208
1228
1248
1268
1288
909
929
949
969
989
1009
1029
1049
1069
1089
1109
1129
1149
1169
1189
1209
1229
1249
1269
1289
910
930
950
970
990
1010
1030
1050
1070
1090
1110
1130
1150
1170
1190
1210
1230
1250
1270
1290
911
931
951
971
991
1011
1031
1051
1071
1091
1111
1131
1151
1171
1191
1211
1231
1251
1271
1291
912
932
952
972
992
1012
1032
1052
1072
1092
1112
1132
1152
1172
1192
1212
1232
1252
1272
1292
914
934
954
974
994
1014
1034
1054
1074
1094
1114
1134
1154
1174
1194
1214
1234
1254
1274
1294
915
935
955
975
995
1015
1035
1055
1075
1095
1115
1135
1155
1175
1195
1215
1235
1255
1275
1295
916
936
956
976
996
1016
1036
1056
1076
1096
1116
1136
1156
1176
1196
1216
1236
1256
1276
1296
Watlow EZ-ZONE ™ ST
31
•
51
•
Chapter
Chapter7 8Profiling
Factor y Page
Profile Example Using Modbus
Profile
2
Step
Parameter
11
12
13
14
Modbus Address
(less 40,001 offset)
Value
Comments
Wait Event
700
144
The first step in Profile 2 will be a Wait Event step.
Wait Event 1
710
63
Wait for event 1 to be on.
Wait Event 2
711
61
Wait for event 2 to be off.
Event Output 1
708
62
Set Event 1 to Off.
Event Output 2
709
63
Set Event 2 to On.
Wait For Process
720
209
The second step will be a Wait for Process step.
Target Set Point
721
100
Wait for the process value to reach 100.
Event Output 1
728
63
Set Event 1 to On.
Event Output 2
729
62
Set Event 2 to Off.
Soak
740
87
The third step will be a Soak step.
Hour
743
1
Minutes
744
1
Set the soak time for one hour, one minute and one
second.
Seconds
745
1
Event Output 1
748
62
Set Event 1 to Off.
Event Output 2
749
63
Set Event 2 to On.
End
760
27
The fourth step will be an End step.
End Type
776
100
At the end of the profile the controller will revert to
the set point that was in effect before the profile
began.
Modbus Registers for Controlling and Monitoring a Profile
Function
Range
(Integer values for Modbus in parentheses.)
Modbus Address
(less 40,001 offset)
Read/Write
Profile Start
1 to 40
292 [unsigned]
rw
Monitor Profile State
Off (62)
Running (149)
Pause (146)
294 [unsigned]
read only
Monitor Current File
0 to 40
295 [unsigned]
read only
Active Step
0 to 40
296 [unsigned]
read only
Active Set Point
-1,999.000 to 9,999.000°F or units
1,128.000 to 5,537.000°C
297 [float]
read only
Guaranteed Soak Enable
Off (62)
On (63)
299 [unsigned]
rw
Guaranteed Soak Deviation
-1,999 to 9,999
300 [float]
rw
Profile Start Type
Set Point (85)
Process (75)
302 [unsigned]
rw
Step Time Remaining
0 to 9,999 seconds
303 [float]
read only
Jump Count Remaining
0 to 9,999
305 [unsigned]
read only
Profile Action Request
None (61)
Start Profile (77)
Pause Profile (146)
Resume Profile (147)
Terminate Profile (148)
Start Step (89)
306 [unsigned]
write only
Watlow EZ-ZONE ™ ST
•
52
•
Chapter
Chapter7 8Profiling
Factor y Page
8
Chapter 8: Factory Page
• Press the Up ¿ or Down ¯ keys to change the
parameter value.
• Press the Infinity Key ˆ to return to the Home
Page.
To go to the Factory Page from the Home Page, press
and hold both the Advance ‰ and Infinity ˆ keys for
six seconds.
• Press the Advance Key ‰ to move through the
parameter prompts.
Navigating the Factory Page
Home
Page
Factory Page
Parameters
[~~p~]ˆ [CUST]ˆ[```I]ˆ
[~~Sp]‰ˆ [FCty]‰[CUST]‰[`PAR]
Hold both keys
for 6 seconds.
Custom
Menu
<
>
Custom 1
Submenu
<
>
ˆ Custom 2
to 20
Submenu
NOTE: Some of these menus and parameters may not appear, depending on the
controller's options. See model number
information in the Appendix for more information.
Parameter
Same as above.
ˆ[`LoC]ˆ
[FCty]‰[LoC;O]‰ [LoC;P]‰
Lockout
Menu
<
>
Lock
Operations
Page
Lock
Profiling
Page
ˆ[diAg]ˆ
[FCty]‰[`S;id]‰[`S;rL]‰[`S;Pr]‰[S;bLd]‰[``Sn]‰[dAtE]‰[USr;r]‰[USr;S]‰
Diagnostic Software ID
Menu
Software
Release
Software
Prototype
Software
Build
Serial
Number
Date of
User Restore User Save
Manufacture Set
Set
<
>
ˆ[`CAL]ˆ[~~~I]ˆ
[FCty]‰[`CAl]‰[`Mu]‰ [ELi;o]‰[ELi;S]‰
Calibration Calibration 1 Electrical
Menu
Submenu Measure<
>
<
>
Electrical
Offset
Electrical
Slope
ment
ˆ Calibration 2 Same as above.
Submenu
Watlow EZ-ZONE ™ ST
•
53
•
Chapter 8 Factor y Page
Display
Parameter Name
Description
Settings
Range
(Integer values for Modbus in
parentheses.)
Default
Modbus*
(less 40,001
offset)
read/write
[nonE] None
[`Pro] Process
[StPt] Set Point
[AC;pu] Active Process Value
[AC;SP] Active Set Point
[``op] Open Loop Set Point
[ACtn] Action Prompt
[`i;CA] Calibration Offset
[`C_F] Display Units
[`A;Lo] Alarm Low Set Point
[`A;hi] Alarm High Set Point
[`A;hy] Alarm Hysteresis
[`AUt] Autotune
[`C;M] User Control Mode
[`h;Pr] Heat Power
[`C;Pr] Cool Power
[``ti] Time Integral
[``td] Time Derivative
[``db] Dead Band
[`h;Pb] Heat Proportional
Band
[`h;hy] Heat Hysteresis
[`C;Pb] Cool Proportional Band
[`C;hy] Cool Hysteresis
[`r;rt] Ramp Rate
[`CU;r] Current Read
[t;tUn] TRU-TUNE+™ Enable
[idLE] Idle Set Point
[CUSt] Custom Menu
[P;Str] Profile Start
[P;ACr] Profile Action
[`LL;S] Limit Low Set Point
[`Lh;S] Limit High Set Point
[`L;hy] Limit Hysteresis
Active Process
Value (1, Top
Display)
Active Set Point
(2, Bottom Display)
Action Prompt
(3)
User Control
Mode (4)
Heat Power (5)
Cool Power (6)
Autotune (7)
Idle Set Point (8)
Profile Start (9)
Profile Action
(10)
None (11 to 20)
Appears
If
[CUSt]
[FCty]
Custom Menu
[```1]
[ 1] to
[``20]
[ 20]
Custom Menu
Parameter 1 to 20
Select the parameters that will appear in the Home Page.
The Parameter 1 value will appear in
the upper display of the Home Page.
The Parameter 2 value will appear in
the lower display in the Home Page.
If Parameter 3 is set to the default,
Action Prompt, it will only appear if
there is an error message.
[`iid]
[ iid]
Custom Menu
Instance
Select the parameters that will appear in the Home Page.
1 to 4
always
more than
one instance.
[`LoC]
[FCty]
Lockout Menu
[LoC;o]
[LoC.o]
Lockout Menu
Lock Operations Page
Select the security level of the Operations Page. This affects whether
parameters can be accessed using the
RUI.
1 to 3
2
always
[LoC;P]
[LoC.P]
Lockout Menu
Lock Profiling Page
Select the security level of the Profiling Page. This affects whether parameters can be accessed using the RUI.
1 to 3
3
always
Note: Some values will be rounded off to fit in the four-character display. Full values can be read with Modbus.
All temperature parameters through Modbus are in °F.
* Low register numbers contain the two lower bytes; high register numbers contain the two higher bytes of the four-byte floating-point
value.
Watlow EZ-ZONE ™ ST
•
54
•
Chapter 8 Factor y Page
Display
Parameter Name
Description
Settings
Range
(Integer values for Modbus in
parentheses.)
Default
Modbus*
(less 40,001
offset)
read/write
Appears
If
[diAg]
[FCty]
Diagnostics Menu
[`S;id]
[ S.id]
Diagnostics Menu
Software ID
Display the firmware ID number.
0 to 65,636
2 [unsigned]
read only
always
[`S;rL]
[ S.rL]
Diagnostics Menu
Software Release
Display the firmware revision.
0 to 65,636
4 [unsigned]
read only
always
[`S;Pr]
[ S.Pr]
Diagnostics Menu
Software Prototype
Display the firmware prototype version.
0 to 65,636
6 [unsigned]
read only
always
[S;bLd]
[S.bLd]
Diagnostics Menu
Software Build
Display the firmware build number.
0 to 65,636
8 [unsigned]
read only
always
[``Sn]
[ Sn]
Diagnostics Menu
Serial Number
Display the serial number.
0 to 65,636
12 [unsigned]
rw
always
[dAtE]
[dAtE]
Diagnostics Menu
Date of Manufacture
Display the date code.
0 to 65,636
14 [unsigned]
rw
always
[USr;r]
[USr.r]
Diagnostics Menu
User Restore Set
Replace all of the controller's settings
with another set.
[none]
[SEt1]
[SEt2]
[FCty]
Don't Load
16 [unsigned]
rw
always
[USr;S]
[USr.S]
Diagnostics Menu
User Save Set
Save all of the controller's settings to
the selected set.
[none] Don't Save (61)
[SEt1] User Set 1 (101)
[SEt2] User Set 2 (102)
Don't Load
17 [unsigned]
rw
always
Diagnostics Menu
Hardware ID
Display the hardware ID.
0 to 2,147,483,647
0 [unsigned]
read only
Modbus
only
Diagnostics Menu
Status Light
OK (138)
Fail (32)
18 [unsigned]
read only
Modbus
only
[`CAL]
[FCty]
Calibration Menu
[```1]
[`CAL]
Calibration 1
[```1]
[`CAL]
Calibration 2
Don't Load (61)
User Set 1 (101)
User Set 2 (102)
Factory Default (31)
(Analog input 2 appears it ST_L-_ _ _ _ -_ _ _ _ )
[`Mu]
[ Mv]
Calibration Menu
Electrical Measurement
Read the raw electrical value for this
input in the units corresponding to
the Sensor Type (Setup Page, Analog
Input Menu) setting.
-1,999.000 to 9,999.000
[ELi;o]
[ELi.o]
Calibration Menu
Electrical Offset
Change this value to calibrate the low
end of the input range.
-2,147,483,647 [-3.4E+38] to
2,147,483,647 [3.4E+38]
[ELi;S]
[ELi.S]
Calibration Menu
Electrical Slope
Adjust this value to calibrate the
slope of the input value.
-2,147,483,647 [-3.4E+38] to
2,147,483,647 [3.4E+38]
309 [1 float]
311 [2 float]
read only
always
0.0
47 [1 float]
75 [2 float]
rw
always
1.0
49 [1 float]
77 [2 float]
rw
always
Note: Some values will be rounded off to fit in the four-character display. Full values can be read with Modbus.
All temperature parameters through Modbus are in °F.
* Low register numbers contain the two lower bytes; high register numbers contain the two higher bytes of the four-byte floating-point
value.
Watlow EZ-ZONE ™ ST
•
55
•
Chapter 8 Factor y Page
9
Chapter 9: Features
Saving and Restoring User Settings . . . . . . . . . . . . . . . . . . . . . . . . . . 57
Programming the Home Page . . . . . . . . . . . . . . . . . . . . . . . . . . . . . . 57
Tuning the PID Parameters . . . . . . . . . . . . . . . . . . . . . . . . . . . . . . . . 57
Manual Tuning . . . . . . . . . . . . . . . . . . . . . . . . . . . . . . . . . . . . . . . . . . . 57
General Use of TRU-TUNE+™ . . . . . . . . . . . . . . . . . . . . . . . . . . . . . . . . 58
Inputs . . . . . . . . . . . . . . . . . . . . . . . . . . . . . . . . . . . . . . . . . . . . . . 59
Calibration Offset . . . . . . . . . . . . . . . . . . . . . . . . . . . . . . . . . . . . . . . . . 59
Calibration . . . . . . . . . . . . . . . . . . . . . . . . . . . . . . . . . . . . . . . . . . . . . . 59
Filter Time Constant . . . . . . . . . . . . . . . . . . . . . . . . . . . . . . . . . . . . . . . 60
Sensor Selection . . . . . . . . . . . . . . . . . . . . . . . . . . . . . . . . . . . . . . . . . . 60
Sensor Backup . . . . . . . . . . . . . . . . . . . . . . . . . . . . . . . . . . . . . . . . . . . 60
Low Set Point and High Set Point . . . . . . . . . . . . . . . . . . . . . . . . . . . . 60
Scale High and Scale Low . . . . . . . . . . . . . . . . . . . . . . . . . . . . . . . . . . 60
Range High and Range Low . . . . . . . . . . . . . . . . . . . . . . . . . . . . . . . . . 60
Output Configuration . . . . . . . . . . . . . . . . . . . . . . . . . . . . . . . . . . . . . . 60
Auto (closed loop) and Manual (open loop) Control . . . . . . . . . . . . . . 61
On-Off Control . . . . . . . . . . . . . . . . . . . . . . . . . . . . . . . . . . . . . . . . . . . 61
Proportional Control . . . . . . . . . . . . . . . . . . . . . . . . . . . . . . . . . . . . . . . 62
Proportional plus Integral (PI) Control . . . . . . . . . . . . . . . . . . . . . . . . . 62
Proportional plus Integral plus Derivative (PID) Control . . . . . . . . . . . 62
Dead Band . . . . . . . . . . . . . . . . . . . . . . . . . . . . . . . . . . . . . . . . . . . . . . 63
Variable Time Base . . . . . . . . . . . . . . . . . . . . . . . . . . . . . . . . . . . . . . . . 63
Single Set Point Ramping . . . . . . . . . . . . . . . . . . . . . . . . . . . . . . . . . . . 64
Alarms. . . . . . . . . . . . . . . . . . . . . . . . . . . . . . . . . . . . . . . . . . . . . . 64
Process and Deviation Alarms . . . . . . . . . . . . . . . . . . . . . . . . . . . . . . . 64
Alarm Set Points . . . . . . . . . . . . . . . . . . . . . . . . . . . . . . . . . . . . . . . . . . 64
Alarm Hysteresis . . . . . . . . . . . . . . . . . . . . . . . . . . . . . . . . . . . . . . . . . 64
Alarm Latching . . . . . . . . . . . . . . . . . . . . . . . . . . . . . . . . . . . . . . . . . . . 64
Alarm Silencing . . . . . . . . . . . . . . . . . . . . . . . . . . . . . . . . . . . . . . . . . . 65
Alarm Blocking . . . . . . . . . . . . . . . . . . . . . . . . . . . . . . . . . . . . . . . . . . . 65
Current Sensing . . . . . . . . . . . . . . . . . . . . . . . . . . . . . . . . . . . . . . . 65
Programming the EZ Key . . . . . . . . . . . . . . . . . . . . . . . . . . . . . . . . . 65
Using Lockout to Secure Settings . . . . . . . . . . . . . . . . . . . . . . . . . . . 66
Profiling. . . . . . . . . . . . . . . . . . . . . . . . . . . . . . . . . . . . . . . . . . . . . 67
Watlow
Watlow EZ-ZONE™
EZ-ZONE ™ ST
ST
••
56
56
••
Chapter
Chapter
4 Home
9 Features
Page
Saving and Restoring User Settings
While tuning is underway, the upper display will
flash between the process variable and [tUne], while
the lower display will flash between [Attn] and the
set point. This tuning mode must not be interrupted,
and it can take up to 60 minutes to complete. If not
complete in 60 minutes the autotuning will timeout
and the PID coefficients in effect prior to starting the
autotune will be reapplied and used. When the tuning process is complete, whether successful or not, the
lower display will show the operational set point, and
the controller will control to that set point either using
the newly calculated (successful tune) PID coefficients
or the original values.
The PID parameter values generated by the autotune will continue to be used until one of the following
conditions occurs:
Note: Only perform the above procedure when you are sure that
all the correct settings are programmed into the controller. Saving the settings overwrites any previously saved collection of
settings. Be sure to document all the controller settings.
Programming the Home Page
Watlow’s patented user-defined menu system improves
operational efficiency. The user-defined Home Page
provides you with a shortcut to monitor or change the
parameter values that you use most often.
You can create your own Home Page with as many
as 20 of the active parameters. When a parameter normally located in the Setup Page or Operations Page is
placed in the Home Page, it is accessible through both.
If you change a parameter in the Home Page, it is automatically changed in its original page. If you change
a parameter in its original page it is automatically
changed in the Home Page.
The default parameters will automatically appear
in the Home Page. P1 will display the Active Process
Value in the upper display, and P2 will display the
Active Setpoint in the lower display. Press the arrow
keys to change the set point. Press the Advance Key
‰ to display the P3 value in the upper display and
the P3 prompt in the lower display. Press the Advance
again to display P4, and so on.
Change the list of parameters in the Home Page
from the Custom Menu [CUSt] (Factory Page).
• The autotune process is repeated.
• PID values are manually adjusted.
• TRU-TUNE+ is enabled.
If the tuning is interrupted or the 60 minute time
period is exceeded, the PID coefficients will not be set
to correct autotuned values and the original PID values will be restored. The autotune process will need
to be restarted or the control will need to be tuned
manually.
1. Apply power to the controller and check that the
set point is appropriate for autotuning. If it isn't,
set an Autotune Set Point.
2. Begin the autune from the Home Page or the Loop
Menu (Operations Page).
3. Allow the autotuning to process to continue until
[tUne] stops flashing in the upper display.
Process Set Point
Autotune begins
Autotune complete
Autotune Set Point
(90 percent of Process Set Point)
Temperature
Recording setup and operations parameter settings for
future reference is very important. If you unintentionally change these, you will need to program the correct
settings back into the controller to return the equipment to operational condition.
After you program the controller and verify proper
operation, use User Save Set [USr;S] (Factory Page,
Diagnostics Menu) to save the settings into either of
two files in a special section of memory. If the settings
in the controller are altered and you want to return
the controller to the saved values, use User Restore
Set [USr; r] (Factory Page, Diagnostics Menu) to recall one of the saved settings.
Tuning the PID Parameters
Autotuning
Autotuning without TRU-TUNE+ enabled calculates
the optimum heating and/or cooling PID parameter
settings based on the system’s response to crossing a
set point five times. By default the sixth parameter of
the Home Page [AUt1] allows the user to start and
stop autotuning using the defined Autotune Set Point
[A;tSP] (Operations Page, Loop Menu) value (default:
90% of closed-loop set point). The Autotune Set Point
can be changed if the default value does not suit the
application.
Note: Autotuning is not recommended while a profile is running
or ramping is enabled.
Watlow
Watlow EZ-ZONE™
EZ-ZONE ™ ST
ST
••
Time
Manual Tuning
In some applications, the autotune process may not
provide PID parameters for the process characteristics
you desire. If that is the case, you may want to tune
the controller manually.
1. Apply power to the controller and establish a set
point typically used in your process.
2. Go to the Operations Page, Loop Menu, and set
Heat Proportional Band [`h;Pb] and/or Cool Proportional Band [`C;Pb] to 5. Set Time Integral
[``ti] to 0. Set Time Derivative [``td] to 0.
57
57
••
Chapter
Chapter
4 Home
9 Features
Page
3. When the system stabilizes, watch the process value. If it fluctuates, increase the Heat Proportional
Band or Cool Proportional Band value in 3 to 5°
increments until it stabilizes, allowing time for the
system to settle between adjustments.
4. When the process has stabilized, watch Heat
Power [`h;Pr] or Cool Power [`C;Pr] (Operations
Page, Monitor Menu). It should be stable ±2%. At
this point, the process temperature should also be
stable, but it will have stabilized before reaching
the set point. The difference between the set point
and actual process value can be eliminated with
Integral.
5. Start with an Integral value of 6,000 and allow
10 minutes for the process temperature to reach
the set point. If it has not, reduce the setting by
half and wait another 10 minutes. Continue reducing the setting by half every 10 minutes until the
process value equals the set point. If the process
becomes unstable, the Integral value is too small.
Increase the value until the process stabilizes.
6. Increase Derivative to 0.1. Then increase the set
point by 11° to 17°C. Monitor the system’s approach to the set point. If the process value overshoots the set point, increase Derivative to 0.2.
Increase the set point by 11° to 17°C and watch
the approach to the new set point. If you increase
Derivative too much, the approach to the set point
will be very sluggish. Repeat as necessary until
the system rises to the new set point without overshoot or sluggishness.
For additional information about autotune and PID
control, see related features in this chapter.
General Use of TRU-TUNE+™
TRU-TUNE+, when enabled, can help achieve better process stabilization (process variable equals set
point) by dynamically tuning the PID coefficients
based on current thermal process responses. In the
normal use of TRU-TUNE+ it is recommended that
the user execute the following sequence of steps:
1. Autotune the system at the desired operational set
point.
2. When complete, activate TRU-TUNE+.
3. Monitor the process until satisfactory control performance is attained.
For applications with known disturbances where
additional adaptive tuning is not desired:
4. Deactivate TRU-TUNE+.
5. Return to Step 2 if control performance subsequently deteriorates due to an alteration in the
process, such as: 1) a change in load, 2) a change
in set point, or 3) a change in process dynamics.
Use of TRU-TUNE+ to Fine Tune PID Coefficients
The two-step process above (step 1 & 2) is the
quickest method for fine-tuning a controller to the
process. The first step (autotuning) establishes initial
control settings based on the system’s response to
crossing a set point five times. Sometimes the tradiWatlow
Watlow EZ-ZONE™
EZ-ZONE ™ ST
ST
••
tional auto tune does not result in control performance
that meets expectations or is terminated due to slow
process responses. If one or both of these conditions
exist, as an alternative to the standard autotune,
TRU-TUNE+ can be enabled while placing the control
in automatic mode. When TRU-TUNE+ is activated,
PID coefficients will be further adjusted as the process
runs under automatic control. Once the system is stabilized, where the process variable remains within a
specified deviation from set point, TRU-TUNE+ can be
deactivated, but it is not necessary to do so.
General Application Guidelines
As stated above TRU-TUNE+ adjusts controller parameters to adapt to changing conditions. Bear in
mind if system operation is expected to be interrupted
by known abnormal process variations, and during
this period there is no desire for the PID terms to be
modified, TRU-TUNE+ should be deactivated. Otherwise, the TRU-TUNE+ algorithm will continue to modify PID parameters seeking performance gains when
in fact no further changes are needed or desired.
Examples include:
Batch Processing: During production operations
TRU-TUNE+ should be deactivated when product is
being loaded or unloaded, since processing is not occurring. Once the known interruption has ended re-engage TRU-TUNE+.
Manual Interruption of Load Power but not Controller Power: When the controller is powered but the
load is without power (For instance, when a fuse is
being replaced.), it is an inappropriate time to adjust
PID coefficients since there is an open control loop
condition. TRU-TUNE+ should be disengaged and
then re-engaged once power is restored to the load.
TRU-TUNE+ Settings
Two parameters are provided for adjusting TRUTUNE+ behavior, TRU-TUNE+ Band [t;bnd] and
TRU-TUNE+ Gain [`t;gn], (Setup Page, Loop Menu).
Their default values are designed to be suitable for
the vast majority of industrial applications. For the
few cases where an adjustment is necessary, keep in
mind the following:
TRU-TUNE+ Band is automatically selected by
TRU-TUNE+ when its value is equal to zero. This default value is appropriate for the vast majority of process control systems. The only time it is advisable to
modify it is if TRU-TUNE+ is currently activated, but
the process variable continuously deviates from the
set point at a relatively large amplitude and does not
attenuate. In this case, adjust the Band so it exceeds
the maximum deviation from the set point.
TRU-TUNE+ Gain the default setting of 3 is chosen to provide optimum response to set point and
load changes for a wide range of industrial processes.
It should only be adjusted if the above operational
guidelines have been strictly adhered to. In that case,
a gain may help if control performance is observed
58
58
••
Chapter
Chapter
4 Home
9 Features
Page
to be too slow or too fast. To increase the speed of response, increase the gain. To decrease response speed,
decrease the gain. A time period of up to the Time
Integral [``ti] (Operations Page, Loop Menu) value
multiplied by 10 seconds is required before an effect
can be observed.
Filter Time [`FiL] (Setup Page, Analog Input
Menu)
When TRU-TUNE+ is enabled, the Filter Time is
automatically set by the adaptive tune process, and
adjustment by the user is not permitted.
Follow these steps for a thermocouple or process input:
ç
WARNING! During autotuning, the controller sets the output to
100 percent and attempts to drive the process variable toward
the set point. Enter a set point and heat and cool power limits
that are within the safe operating limits of your system.
Inputs
Calibration Offset
Calibration offset allows a device to compensate for an
inaccurate sensor, lead resistance or other factors that
affect the input value. A positive offset increases the
input value, and a negative offset decreases the input
value.
The input offset value can be viewed or changed
with Calibration Offset [`i;CA] (Operations Page, Analog Input Menu).
Negative Calibration Offset will
compensate for the difference
between the Sensor Reading and
the Actual Temperature
Temperature
Temperature Reading
from Sensor
Actual Process Temperature
Time
Calibration
To calibrate an analog input, you will need to provide
two electrical signals or resistance loads near the extremes of the range that the application is likely to
utilize. See recommended values below:
Sensor Type
Low Source
High Source
thermocouple
0.000 mV
millivolts
0.000 mV
50.000 mV
volts
0.000V
10.000V
milliamps
0.000 mA
20.000 mA
100 Ω RTD
50.00 Ω
350.00 Ω
1,000 Ω RTD
500.00 Ω
3,500.00 Ω
Watlow
Watlow EZ-ZONE™
EZ-ZONE ™ ST
ST
50.000 mV
••
1. Apply the low source signal to the input you are
calibrating. Measure the signal to ensure it is accurate.
2. Read the value of Electrical Measurement [`Mu]
(Factory Page, Calibration Menu) for that input.
3. Calculate the offset value by subtracting this
value from the low source signal.
4. Set Electrical Offset [ELi;o] (Factory Page, Calibration Menu) for this input to the offset value.
5. Check the Electrical Measurement to see whether
it now matches the signal. If it doesn’t match, adjust Electrical Offset again.
6. Apply the high source signal to the input. Measure the signal to ensure it is accurate.
7. Read the value of Electrical Measurement for
that input.
8. Calculate the gain value by dividing the low
source signal by this value.
9. Set Electrical Slope [ELi;S] (Factory Page, Calibration Menu) for this input to the calculated
gain value.
10. Check the Electrical Measurement to see whether it now matches the signal. If it doesn’t match,
adjust Electrical Slope again.
Set Electrical Offset to 0 and Electrical Slope to 1 to
restore factory calibration.
Follow these steps for an RTD input:
1. Measure the low source resistance to ensure it is
accurate. Connect the low source resistance to the
input you are calibrating.
2. Read the value of Electrical Measurement [`Mu]
(Factory Page, Calibration Menu) for that input.
3. Calculate the offset value by subtracting this
value from the low source resistance.
4. Set Electrical Offset [ELi;o] (Factory Page, Calibration Menu) for this input to the offset value.
5. Check the Electrical Measurement to see whether
it now matches the resistance. If it doesn’t match,
adjust Electrical Offset again.
6. Measure the high source resistance to ensure it
is accurate. Connect the high source resistance to
the input.
7. Read the value of Electrical Measurement for
that input.
8. Calculate the gain value by dividing the low
source signal by this value.
9. Set Electrical Slope [ELi;S] (Factory Page, Calibration Menu) for this input to the calculated
gain value.
10. Check the Electrical Measurement to see whether it now matches the signal. If it doesn’t match,
adjust Electrical Slope again.
Set Electrical Offset to 0 and Electrical Slope to 1 to
restore factory calibration.
59
59
••
Chapter
Chapter
4 Home
9 Features
Page
Filter Time Constant
Temperature
Unfiltered Input Signal
Time
Temperature
Filtered Input Signal
Time
Sensor Selection
You need to configure the controller to match the input device, which is normally a thermocouple, RTD or
process transmitter.
Select the sensor type with Sensor Type [`Sen]
(Setup Page, Analog Input Menu).
Sensor Backup
Sensor backup maintains closed-loop control after an
input failure by switching control to input 2.
Ensure that the limit sensor can represent the
likely range of process values.
Turn sensor backup on or off with Sensor Backup
Enable [`S;bA] (Setup Page, Analog Input 1).
Low Set Point and High Set Point
The controller constrains the set point to a value between a set point low limit and a set point high limit.
Set the closed-loop set point limits with Closed
Loop Low Set Point [`L;SP] and Closed Loop High Set
Point [`h;SP] (Setup Page, Loop Menu).
Set the open-loop set point limits with Open Loop
Low Set Point [SP;Lo] and Open Loop High Set Point
[SP;hi] (Setup Page, Loop Menu).
There are two sets of set point low and high limits:
one for a closed-loop set point, another for an openloop set point.
Watlow
Watlow EZ-ZONE™
EZ-ZONE ™ ST
ST
••
High Limit of selected functional range
Range High Range (between High Limit of Sensor and Range Low)
Gas Pressure
Filtering smoothes an input signal by applying a firstorder filter time constant to the signal. Filtering the
displayed value makes it easier to monitor. Filtering
the signal may improve the performance of PID control in a noisy or very dynamic system.
Adjust the filter time interval with Filter Time
[`FiL] (Setup Page, Analog Input Menu).
Example: With a filter value of 0.5 seconds, if the
process input value instantly changes from 0 to 100 and
remained at 100, the display will indicate 100 after five
time constants of the filter value or 2.5 seconds.
Set Point High
Set Point Range (must be between Range High and Range Low)
Set Point Low
Range Low Range (between Low Limit of Sensor and Range High)
Low Limit of selected functional range
Scale High and Scale Low
When an analog input is selected as process voltage
or process current input, you must choose the value
of voltage or current to be the low and high ends. For
example, when using a 4 to 20 mA input, the scale low
value would be 4.00 mA and the scale high value would
be 20.00 mA. Commonly used scale ranges are: 0 to 20
mA, 4 to 20 mA, 0 to 5V, 1 to 5V and 0 to 10V.
You can create a scale range representing other
units for special applications. You can reverse scales
from high values to low values for analog input signals that have a reversed action. For example, if 50 psi
causes a 4 mA signal and 10 psi causes a 20 mA signal.
Scale low and high low values do not have to match
the bounds of the measurement range. These along
with range low and high provide for process scaling and
can include values not measureable by the controller.
Regardless of scaling values, the measured value will
be constrained by the electrical measurements of the
hardware.
Select the low and high values with Scale Low
[`S;Lo] and Scale High [`S;hi]. Select the displayed
range with Range Low [`r;Lo] and Range High
[`r;hi] (Setup Page, Analog Input Menu).
Range High and Range Low
With a process input, you must choose a value to represent the low and high ends of the current or voltage
range. Choosing these values allows the controller’s
display to be scaled into the actual working units of
measurement. For example, the analog input from a
humidity transmitter could represent 0 to 100 percent
relative humidity as a process signal of 4 to 20 mA.
Range Low would be set to 0 to represent 4 mA and
Range High set to 100 to represent 20 mA. The indication on the display would then represent percent humidity and range from 0 to 100 percent with an input
of 4 to 20 mA.
Select the low and high values with Range Low
[`r;Lo] and Range High [`r;hi] (Setup Page, Analog
Input Menu).
Control Methods
Output Configuration
Outputs 1, 2 and 3 can be configured as a heat output, a cool output, an alarm output or deactivated. No
dependency limitations have been placed on the available combinations. The outputs can be configured in
60
60
••
Chapter
Chapter
4 Home
9 Features
Page
any combination. For instance, all three could be set to
cool.
Heat and cool outputs use the set point and Operations parameters to determine the output value. All
heat and cool outputs use the same set point value.
Heat and cool each have their own set of control parameters. All heat outputs use the same set of heat
control parameters and all cool outputs use the same
set of cool output parameters.
Each alarm output has its own set of configuration
parameters and set points, allowing independent operation.
Output 4 can only be used as a limit output.
40%
Power
Output Power
2 minutes
0%
Locks in
Output
Power
Time
The controller has two basic modes of operation, auto
mode and manual mode. Auto mode allows the controller to decide whether to perform closed-loop control or
to follow the settings of Input Error Failure [FAiL]
(Setup Page, Loop Menu). The manual mode only allows open-loop control. The EZ-ZONE™ controller is
normally used in the auto mode. The manual mode
is usually only used for specialty applications or for
troubleshooting.
Manual mode is open-loop control that allows the
user to directly set the power level to the controller’s
output load. No adjustments of the output power level
occur based on temperature or closed-loop set point in
this mode.
In auto mode, the controller monitors the input to
determine if closed-loop control is possible. The controller checks to make certain a functioning sensor is
providing a valid input signal. If a valid input signal
is present, the controller will perform closed-loop control. Closed-loop control uses a process sensor to determine the difference between the process value and the
closed-loop set point. Then the controller applies power to a control output load to reduce that difference.
If a valid input signal is not present, the controller will indicate an input error message in the upper
display and [Attn] in the lower display and respond
to the failure according to the setting of Input Error
Failure [FAiL]. You can configure the controller to
perform a “bumpless” transfer [bPLS], switch power to
output a preset fixed level [MAn], or turn the output
power off.
Bumpless transfer will allow the controller to
transfer to the manual mode using the last power
value calculated in the auto mode if the process had
stabilized at a ±5 percent output power level for the
time interval of Time Integral (Operations Page, Loop)
prior to sensor failure, and that power level is less
than 75 percent.
••
Sensor
Break
100%
Auto (closed loop) and Manual (open loop) Control
Watlow
Watlow EZ-ZONE™
EZ-ZONE ™ ST
ST
Actual Temperature
Temperature
Set Point
Input Error Latching [`i;Er] (Setup Page, Analog
Input Menu) determines the controller’s response once
a valid input signal returns to the controller. If latching is on, then the controller will continue to indicate
an input error until the error is cleared. To clear a
latched alarm, press the Advance Key ‰ then the Up
Key ¿.
If latching is off, the controller will automatically
clear the input error and return to reading the temperature. If the controller was in the auto mode when
the input error occurred, it will resume closed-loop
control. If the controller was in manual mode when
the error occurred, the controller will remain in openloop control.
The Manual Control Indicator Light % is on when
the controller is operating in manual mode.
You can easily switch between modes if the Control
Mode [`C;M] parameter is selected to appear in the
Home Page.
To transfer to manual mode from auto mode, press
the Advance Key ‰ until [`C;M] appears in the lower
display. The upper display will display [AUto] for auto
mode. Use the Up ¿ or Down ¯ keys to select [Man].
The manual set point value will be recalled from the
last manual operation.
To transfer to auto mode from manual mode, press
the Advance Key ‰ until [`C;M] appears in the lower
display. The upper display will display [MAn] for
manual mode. Use the Up ¿ or Down ¯ keys to select
[AUto]. The automatic set point value will be recalled
from the last automatic operation.
Changes take effect after three seconds or immediately upon pressing either the Advance Key ‰ or the
Infinity Key ˆ.
On-Off Control
On-off control switches the output either full on or full
off, depending on the input, set point and hysteresis
values. The hysteresis value indicates the amount
the process value must deviate from the set point to
turn on the output. Increasing the value decreases
the number of times the output will cycle. Decreasing
hysteresis improves controllability. With hysteresis
set to 0.001, the process value would stay closer to the
set point, but the output would switch on and off more
frequently, and may result in the output “chattering.”
On-off control can be selected with Heat Algorithm
61
61
••
Chapter
Chapter
4 Home
9 Features
Page
[`h;Ag] or Cool Algorithm [`C;Ag] (Setup Page, Loop
Menu).
On-off hysteresis can be set with Heat Hysteresis
[`h;hY] or Cool Hysteresis [`C;hY] (Operations Page,
Loop Menu).
fect when the process temperature is higher than the
set point.
Adjust the proportional band with Heat Proportional Band [`h;Pb] or Cool Proportional Band [`C;Pb]
(Operations Page, Loop Menu).
Note: Input Error Failure Mode [faIl] does not function in on-off
control mode. The output goes off.
Temperature
Overshoot
Droop
Proportional Band
Temperature
The heating action switches off when the process
temperature rises above the set point.
Set Point
Set Point
Hysteresis
Process Temperature
Proportional plus Integral (PI) Control
The droop caused by proportional control can be corrected by adding integral (reset) control. When the
system settles down, the integral value is tuned to
bring the temperature or process value closer to the
set point. Integral determines the speed of the correction, but this may increase the overshoot at startup or
when the set point is changed. Too much integral action will make the system unstable. Integral is cleared
when the process value is outside of the proportional
band.
Adjust the integral with Time Integral [``ti] (Operations Page, Loop Menu).
Time
Temperature
The cooling action
switches
on at startup.
The cooling action switches on when
the process temperature rises above
the set point plus the hysteresis.
Process Temperature
Hysteresis
Set Point
The cooling action switches off when the process
temperature drops below the set point.
Proportional plus Integral plus Derivative (PID)
Control
Time
Proportional Control
Some processes need to maintain a temperature or
process value closer to the set point than on-off control can provide. Proportional control provides closer
control by adjusting the output when the temperature
or process value is within a proportional band. When
the value is in the band, the controller adjusts the output based on how close the process value is to the set
point.
The closer the process value is to the set point, the
lower the output power. This is similar to backing off
on the gas pedal of a car as you approach a stop sign.
It keeps the temperature or process value from swinging as widely as it would with simple on-off control.
However, when the system settles down, the temperature or process value tends to “droop” short of the set
point.
With proportional control the output power level
equals (set point minus process value) divided by the
proportional band value.
In an application with one output assigned to heating and another assigned to cooling, each will have a
separate proportional parameter. The heating parameter takes effect when the process temperature is lower
than the set point, and the cooling parameter takes efWatlow
Watlow EZ-ZONE™
EZ-ZONE ™ ST
ST
••
Use derivative (rate) control to minimize the overshoot
in a PI-controlled system. Derivative (rate) adjusts the
output based on the rate of change in the temperature
or process value. Too much derivative (rate) will make
the system sluggish.
Derivative action is active only when the process
value is within twice the proportional value from the
set point.
Adjust the derivative with Time Derivative [``td]
(Operations Page, Loop Menu).
Reduced Overshoot
Set Point
Proportional Band
Proportional Band x 2
Temperature
The heating action
switches on at startup.
Time
The heating action switches on when the process temperature
drops below the set point minus the hysteresis.
Heating Slows
Time
62
62
••
Chapter
Chapter
4 Home
9 Features
Page
Dead Band
Variable Time Base
In a PID application the dead bands above and below
the set point can save an application’s energy and
wear by maintaining process temperature within acceptable ranges.
Proportional action ceases when the process value
is within the dead band. Integral action continues to
bring the process temperature to the set point.
Using a positive dead band value keeps the two
systems from fighting each other.
Variable time base is the preferred method for controlling a resistive load, providing a very short time base
for longer heater life. Unlike phase-angle firing, variable-time-base switching does not limit the current
and voltage applied to the heater.
With variable time base outputs, the PID algorithm
calculates an output between 0 and 100%, but the output is distributed in groupings of three ac line cycles.
For each group of three ac line cycles, the controller
decides whether the power should be on or off. There
is no fixed cycle time since the decision is made for
each group of cycles. When used in conjunction with a
zero cross (burst fire) device, such as a solid-state power controller, switching is done only at the zero cross of
the ac line, which helps reduce electrical noise (RFI).
Variable time base should be used with solid-state
power controllers, such as a solid-state relay (SSR)
or silicon controlled rectifier (SCR) power controller.
Do not use a variable time base output for controlling electromechanical relays, mercury displacement
relays, inductive loads or heaters with unusual resistance characteristics.
The combination of variable time base output and a
solid-state relay can inexpensively approach the effect
of analog, phase-angle fired control.
Select the AC Line Frequency [AC;LF] (Setup Page,
Global Menu), 50 or 60 Hz.
Cool Output Active
Set Point
Temperature
Heat Output Active
Positive Dead Band
Time
When the dead band value is zero, the heating
output activates when the temperature drops below
the set point, and the cooling output switches on when
the temperature exceeds the set point.
Cool Output Active
Set Point
100 percent output
Temperature
Heat Output Active
10 ON, 0 OFF
Zero Dead Band
Time
50 percent output
When the dead band value is a negative value,
both heating and cooling outputs are active when the
temperature is near the set point.
3 ON, 3 OFF
Cool Output Active
Set Point
Heat Output Active
66 percent output
Temperature
6 ON, 3 OFF
Negative Dead Band
Time
Adjust the dead band with Dead Band [``db] (Operations Page, Loop Menu).
Watlow
Watlow EZ-ZONE™
EZ-ZONE ™ ST
ST
••
63
63
••
Chapter
Chapter
4 Home
9 Features
Page
Single Set Point Ramping
Ramping protects materials and systems that cannot tolerate rapid temperature changes. The value of
the ramp rate is the maximum degrees per minute or
hour that the system temperature can change.
Select Ramp Action [``rP] (Setup Page, Loop
Menu):
[`oFF] ramping not active.
[`Str] ramp at startup.
[StPt] ramp at a set point change.
[both] ramp at startup or when the set point
changes.
Select whether the rate is in degrees per minute
or degrees per hour with Ramp Scale [`r;SC]. Set the
ramping rate with Ramp Rate [`r;rt] (Setup Page,
Loop Menu).
Temperature
Set Point
A deviation alarm uses one or two set points that
are defined relative to the control set point. High and
low alarm set points are calculated by adding or subtracting offset values from the control set point. If the
set point changes, the window defined by the alarm
set points automatically moves with it.
Select the alarm type with Type [`A;ty] (Setup
Page, Alarm Menu).
Alarm Set Points
The alarm high set point defines the process value
or temperature that will trigger a high side alarm. It
must be higher than the alarm low set point and lower
than the high limit of the sensor range.
The alarm low set point defines the temperature
that will trigger a low side alarm. It must be lower
than the alarm high set point and higher than the low
limit of the sensor range.
View or change alarm set points with Low Set
Point [`A;Lo] and High Set Point [`A;hi] (Operations
Page, Alarm Menu).
Alarm Hysteresis
An alarm state is triggered when the process value
reaches the alarm high or alarm low set point. Alarm
hysteresis defines how far the process must return
into the normal operating range before the alarm can
be cleared.
Alarm hysteresis is a zone inside each alarm set
point. This zone is defined by adding the hysteresis
value to the alarm low set point or subtracting the
hysteresis value from the alarm high set point.
View or change alarm hysteresis with Hysteresis
[`A;hy] (Setup Page, Alarm Menu).
Temperature reaches Set Point quickly
Time
Temperature
Set Point
degrees
per minute
High Side Alarm Range
Alarm High Set Point
Alarm Hysteresis
Temperature ramps to Set Point at a set rate
Temperature
Time
Normal Operating Range
Alarms
Alarm Hysteresis
Alarms are activated when the output level, process
value or temperature leaves a defined range. A user
can configure how and when an alarm is triggered,
what action it takes and whether it turns off automatically when the alarm condition is over.
Configure alarms in the Setup Page before setting
alarm set points.
Alarms do not have to be assigned to an output.
Alarms can be monitored and controlled through the
front panel or by using software.
Process and Deviation Alarms
A process alarm uses one or two absolute set points to
define an alarm condition.
Watlow
Watlow EZ-ZONE™
EZ-ZONE ™ ST
ST
••
Alarm Low Set Point
Low Side Alarm Range
Time
Alarm Latching
A latched alarm will remain active after the alarm
condition has passed. It can only be deactivated by the
user.
An active message, such as an alarm message, will
cause the display to toggle between the normal settings and the active message in the upper display and
[Attn] in the lower display.
64
64
••
Chapter
Chapter
4 Home
9 Features
Page
Push the Advance Key to display [ignr] in the
upper display and the message source in the lower
display.
Use the Up ¿ and Down ¯ keys to scroll through
possible responses, such as Clear [`CLr] or Silence
[`SiL]. Then push the Advance ‰ or Infinity ˆ key
to execute the action.
See the Keys and Displays chapter and the Home
Page chapter for more details.
An alarm that is not latched (self-clearing) will deactivate automatically when the alarm condition has
passed.
Turn alarm latching on or off with Latching
[`A;LA] (Setup Page, Alarm Menu).
The alarm state begins when the temperature
reaches the Alarm High Set Point
Alarm Hysteresis
Temperature
Current Sensing
Open heater circuit detection
Current Error [`C;Er] (Operations Page, Current
Menu) detects an open load circuit if no current is
flowing through the current transformer when the
output is active and the load is supposed to be on.
Shorted heater circuit detection
Current Error detects a shorted load circuit if current
is flowing through the current transformer when the
output is inactive and the load is supposed to be off.
Set the current detect set points with High Set
Point [`C;hi] and Low Set Point [`C;Lo] (Operations
Page, Current Menu).
View the current level and most recent faults with
Read, Current Error [`C;Er] (Operations Page, Current Menu) and Heater Error [`h;Er] (Operations
Page, Current Menu).
Alarm High
Set Point
Normal Operating Range
Process
Temperature
than the alarm high set point. The process temperature has to enter the normal operating range beyond
the hysteresis zone to activate the alarm function.
If the controller has an output that is functioning
as a deviation alarm, the alarm is blocked when the
set point is changed, until the process value re-enters
the normal operating range.
Turn alarm blocking on or off with Blocking
[`A;bL] (Setup Page, Alarm Menu).
The alarm state continues until the
temperature drops to the Alarm High
Set Point minus the hysteresis. A
latching alarm could be turned off by
the operator at this point. A nonlatching alarm would turn off
automatically.
Alarm Low
Set Point
Programming the EZ Key
Time
Alarm Silencing
If alarm silencing is on the operator can disable the
alarm output while the controller is in an alarm state.
The process value or temperature has to enter the
normal operating range beyond the hysteresis zone to
activate the alarm output function again.
An active message, such as an alarm message, will
cause the display to toggle between the normal settings and the active message in the upper display and
[Attn] in the lower display.
Push the Advance Key to display [ignr] in the
upper display and the message source in the lower
display.
Use the Up ¿ and Down ¯ keys to scroll through
possible responses, such as Clear [`CLr] or Silence
[`SiL]. Then push the Advance ‰ or Infinity ˆ key
to execute the action.
See the Keys and Displays chapter and the Home
Page chapter for more details.
Turn alarm silencing on or off with Silencing
[`A;Si] (Setup Page, Alarm Menu).
You can program the EZ Key either in the Setup
Menu or with configuration software, such as EZZONE™ Configurator, using a personal computer.
The following examples show how to program the
EZ Key to start and stop a profile.
Using keys and display:
1. To go to the Setup Page from the Home Page,
press both the Up ¿ and Down ¯ keys for six seconds. [``Ai] will appear in the upper display and
[`Set] will appear in the lower display.
2. Press the Up Key ¿ until [`Fun] appears in the
upper display and [`SEt] will appear in the lower
display.
3. Press the Advance Key ‰ until Digital Input Level
[`di;L] appears in the lower display. Use an arrow key to specify the state of the key (high or low)
when the controller is powered up. Functions will
toggle with each press of the EZ Key, such as Profile
Start/Stop.
4. Press the Advance Key ‰. The lower display will
show Digital Function [d;Fn]. Press the Up ¿ or
Down ¯ key to scroll through the functions that
can be assigned to the EZ Key
Alarm Blocking
When Profile Start/Stop [P;StS] appears in the
upper display and [`d;Fn] appears in the lower
display, press the Advance Key ‰ once to select
that function and move to the Function Instance
[`F;iS] parameter.
Alarm blocking allows a system to warm up after it
has been started up. With alarm blocking on, an alarm
is not triggered when the process temperature is initially lower than the alarm low set point or higher
Watlow
Watlow EZ-ZONE™
EZ-ZONE ™ ST
ST
••
65
65
••
Chapter
Chapter
4 Home
9 Features
Page
5. Press the Up ¿ or Down ¯ key to scroll to the profile that you want the EZ Key to control.
6. The instance tells the controller which of the numbered functions should be acted upon. For profiles,
there are 4 instances. Press the Infinity Key ˆ
once to return to the submenu, twice to return
to the main menu or three times to return to the
Home Page.
to. The user can write to the selected level and all
lower levels. (default: 5)
0
Security Levels
2
3
4
5
Home Page: 1
Operations Page: 1
2 default
or 3
Setup Page: 4
Using the software with Standard Bus:
1. Make the necessary physical connections between
the personal computer and the controller. Set Protocol (Setup Page, Communications Menu) to Standard Bus. Run the software and allow it to connect
to the controller by directing it or allowing it to
find the appropriate communications port.
2. After the software connects to the controller, look
on the left side of your screen under the Parameters Menus for Function Key under Setup. Click
on the plus sign to reveal the Function Key 1 submenu.
3. Click on Function Key 1, then select a Digital Input Function and a Function Instance.
If you want to start and stop a profile with the EZ
Key, select Profile Start/Stop and the number of the
profile that you want the EZ Key to control.
Using Lockout to Secure Settings
If unintentional changes to parameter settings might
raise safety concerns or lead to downtime, your can
use the lockout feature to make them more secure.
Each of the menus in the Factory Page and each
of the pages, except the Factory Page, has a security
level assigned to it. You can change the read and write
access to these menus and pages by using the parameters in the Lockout Menu (Factory Page).
Lockout Menu
There are four parameters in the Lockout Menu (Factory Page):
Lock Operations Page [LoC;o] sets the security level
for the Operations Page. (default: 2)
Lock Profiling Page [LoC;P] sets the security level
for the Profiling Page. (default: 3)
Read Lockout Security [rLoC] determines which
pages can be accessed. The user can access the selected level and all lower levels. (default: 5)
Set Lockout Security [SLoC] determines which parameters within accessible pages can be written
Watlow
Watlow EZ-ZONE™
EZ-ZONE ™ ST
ST
1
••
Profiling Page: 1
2
or 3 default
Factory Page Menus
Custom Menu: 5
Lockout Menu: 0
Diagnostic Menu: 0
Calibration Menu: 5
Bars indicate page and menu access by security level.
The following examples show how the Lockout
Menu parameters may be used in applications:
1. You can lock out access to the Operations Page but
allow an operator access to the Profile Menu, by
changing the default Profile Page and Operations
Page security levels. Change Lock Operations
Page [LoC;o] to 3 and Lock Profiling Page [LoC;P]
to 2. If Set Lockout Security [SLoC] is set to 2 or
higher and the Read Lockout Security [rLoC] is
set to 2, the Profiling Page and Home Pages can be
accessed, and all writable parameters can be written to. Pages with security levels greater than 2
will be locked out (unaccessible).
2 If Set Lockout Security [SLoC] is set to 0 and
Read Lockout Security [rLoC] is set to 5, all pages
will be accessible, however, changes will not be allowed on any pages or menus, with one exception:
Set Lockout Security [SLoC] can be changed to a
higher level.
3. The operator wants to read all the menus and not
allow any parameters to be changed.
In the Factory Page, Lockout Menu, set Read
Lockout Security [rLoC] to 5 and Set Lockout Security [SLoC] to 0.
4. The operator wants to read and write to the Home
Page and Profiling Page, and lock all other pages
and menus.
In the Factory Page, Lockout Menu, set Read Lockout Security [rLoC] to 2 and Set Lockout Security
[SLoC] to 2.
In the Factory Page, Lockout Menu, set Lock Operations Page [LoC;O] to 3 and Lock Profiling Page
[LoC;P] to 2.
5. The operator wants to read the Operations Page,
Setup Page, Profiling Page, Diagnostics Menu,
Lock Menu, Calibration Menu and Custom Menus.
The operator also wants to read and write to the
Home Page.
66
66
••
Chapter
Chapter
4 Home
9 Features
Page
In the Factory Page, Lockout Menu, set Read Lockout Security [rLoC] to 1 and Set Lockout Security
[SLoC] to 5.
In the Factory Page, Lockout Menu, set Lock Operations Page [LoC;O] to 2 and Lock Profiling Page
[LoC;P] to 3.
Profiling
With profiling you can program changes in the process
value based on time intervals and events. Set point
changes can be ramped. Event outputs can be programmed to turn on or off during the profile. Profiling
segments can be looped using Jump Step [``JS] and
Jump Count [``JC] steps (Profiling Page, Step Type).
Profiling can be used to ramp to a specified process
value and guarantee that the process value is maintained for a specified period of time.
Forty profiling steps can be divided between as
many as four individual profiles that can be run,
paused and stopped as needed.
Create and edit profiles with the parameters in the
Profiling Page.
Monitor, run, stop and pause profiles with the
parameters in the Profile Status Menu (Operations
Page).
Watlow
Watlow EZ-ZONE™
EZ-ZONE ™ ST
ST
••
67
67
••
Chapter
Chapter
4 Home
9 Features
Page
10
Chapter 10: Appendix
Troubleshooting
Indication
Description
Possible Cause(s)
Alarm won’t clear or
reset
Alarm will not clear or reset • Alarm latching is active
with keypad or digital input
• Alarm set to incorrect output
Alarm won’t occur
Alarm will not activate output • Alarm silencing is active
• Alarm blocking is active
• Alarm is set to incorrect output
• Reset alarm when process is within
range or disable latching.
• Set output to correct alarm source
instance.
• Alarm is set to incorrect source
• Set alarm source to correct input instance.
• Sensor input is out of alarm set point • Correct cause of sensor input out of
alarm range.
range
• Alarm set point is incorrect
• Set alarm set point to correct trip
point.
• Alarm is set to incorrect type
• Set alarm to correct type: process, deviation or power.
• Digital input function is incorrect
• Set digital input function and source
instance.
• Alarm is set to incorrect source
• Alarm set point is incorrect
• Alarm is set to incorrect type
[AL`1] Alarm Error
[AL`2]
Corrective Action
Alarm state cannot be determined due to lack of sensor
input
• Sensor improperly wired or open
• Incorrect setting of sensor type
• Calibration corrupt
• Disable alarm silencing, if required.
• Disable alarm blocking, if required.
• Set output to correct alarm source
instance.
• Set alarm source to correct input instance.
• Set alarm set point to correct trip
point.
• Set alarm to correct type: process, deviation or power.
• Correct wiring or replace sensor.
• Match setting to sensor used.
• Check calibration of controller.
Sensor input below low alarm • Temperature is less than alarm set
set point
point
• Alarm is set to latching and an alarm
occurred in the past
• Incorrect alarm set point
• Incorrect alarm source
• Check cause of under temperature.
Sensor input above high
alarm set point
• Temperature is greater than alarm
set point
• Alarm is set to latching and an alarm
occurred in the past
• Incorrect alarm set point
• Incorrect alarm source
• Check cause of over temperature.
• Sensor improperly wired or open
• Incorrect setting of sensor type
• Calibration corrupt
• Correct wiring or replace sensor.
• Match setting to sensor used.
• Check calibration of controller.
• Clear latched alarm.
• Establish correct alarm set point.
• Set alarm source to proper setting.
• Clear latched alarm.
• Establish correct alarm set point.
• Set alarm source to proper setting.
[Er;i1] Error Input
[Er;i2]
Sensor does not provide a
valid signal to controller
Limit won’t clear or
reset
Limit will not clear or reset
• Sensor input is out of limit set point
with keypad or digital input
range
• Limit set point is incorrect
• Digital input function is incorrect
• Correct cause of sensor input out of
limit range.
• Set limit set point to correct trip point.
• Set digital input function and source
instance.
[LiM] Limit Error
Limit state cannot be determined due to lack of sensor
input, limit will trip
• Correct wiring or replace sensor.
• Match setting to sensor used.
• Check calibration of controller.
Watlow EZ-ZONE™ ST
• Sensor improperly wired or open
• Incorrect setting of sensor type
• Calibration corrupt
•
68
•
Appendix
Indication
Description
Possible Cause(s)
Corrective Action
[Li;L1] Limit Low
[Li;L2]
Sensor input below low limit
set point
[Li;h1] Limit High
[Li;h2]
Sensor input above high limit • Temperature is greater than limit set • Check cause of over temperature.
set point
point
• Limit outputs latch and require reset • Clear limit.
• Incorrect alarm set point
• Establish correct limit set point.
[``rP] Ramping
Controller is ramping to new
set point
• Ramping feature is activated
• Disable ramping feature if not required.
[tUNE] Autotuning
Controller is autotuning the
control loop
• User started the autotune function
• Wait until autotune completes or disable autotune feature.
• Set digital input to function other
than autotune, if desired.
• Temperature is less than limit set
• Check cause of under temperature.
point
• Limit outputs latch and require reset • Clear limit.
• Incorrect alarm set point
• Establish correct limit set point.
• Digital input is set to start autotune
No heat/cool action
Output does not activate load • Output function is incorrectly set
• Control mode is incorrectly set
No Display
No display indication or LED
illumination
No Serial Communication
• Set output function correctly.
• Set control mode appropriately (Open
vs Closed Loop).
• Output is incorrectly wired
• Correct output wiring.
• Load, power or fuse is open
• Correct fault in system.
• Control set point is incorrect
• Set control set point in appropriate
control mode and check source of set
point: remote, idle, profile, closed loop,
open loop.
• Incorrect controller model for applica- • Obtain correct controller model for aption
plication.
Cannot establish serial communications with the controller
• Power to RUI (Remote User Interface)
is off
• Fuse open
• Breaker tripped
• Safety interlock switch open
• Separate system limit control activated
• Wiring error
• Incorrect voltage to controller
• Turn on power.
• Replace fuse.
• Reset breaker.
• Close interlock switch.
• Reset limit.
• Address parameter incorrect
• Incorrect protocol selected
• Baud rate incorrect
• Parity incorrect
• Wiring error
• EIA-485 converter issue
• Incorrect computer or PLC communications port
• Incorrect software setup
•
•
•
•
•
•
•
• Controller not tuned correctly
• Perform autotune or manually tune
system.
• Control mode is incorrectly set
• Set control mode appropriately (Open
vs Closed Loop).
• Control set point is incorrect
• Set control set point in appropriate
control mode and check source of set
point: remote, idle, profile, closed loop,
open loop.
• Correct wiring issue.
• Apply correct voltage, check part number.
Set unique addresses on network.
Match protocol between devices.
Match baud rate between devices.
Match parity between devices.
Correct wiring issue.
Check settings or replace converter.
Set correct communication port.
• Correct software setup to match controller.
• Termination resistor may be required • Place 120 Ω resistor across EIA-485
on last controller.
Process doesn’t control to set point
Process is unstable or never
reaches set point
Watlow EZ-ZONE™ ST
•
69
•
Appendix
Indication
Description
Possible Cause(s)
Temperature runway Process value continues to
• Controller output incorrectly proincrease or decrease past set grammed
point.
[`100] Device Error
[rEtn]
Controller displays internal
malfunction message at
power up.
[`h;Er] Heater Error Heater Error
Corrective Action
• Verify output function is correct (heat
or cool).
• Thermocouple reverse wired
• Correct sensor wiring (red wire negative).
• Controller output wired incorrectly
• Verify and correct wiring.
• Short in heater
• Replace heater.
• Power controller connection to controller defective
• Replace or repair power controller.
• Controller output defective
• Replace or repair controller.
• Controller defective
• Replace or repair controller.
• Current through load is above current • Check that the load current is proper.
trip set point
Correct cause of overcurrent and/or ensure current trip set point is correct.
• Current through load is below current • Check that the load current is proper.
trip set point
Correct cause of undercurrent and/or
ensure current trip set point is correct.
[`C;Er]
Current Error
Load current incorrect.
• Shorted solid-state or mechanical
relay
• Replace relay.
• Open solid-state or mechanical relay
• Replace relay.
• Defective current transformer or con- • Replace or repair sensor or controller.
troller
• Noisy electrical lines
Menus inaccessible
• Security set to incorrect level
Unable to access [`SEt],
[oPEr], [FCty] or [ProF]
menus or particular prompts
in Home Page
EZ-Key doesn’t work EZ-Key does not activate required function
• Route wires appropriately, check for
loose connections, add line filters.
• Check lockout setting in Factory Page.
• Digital input set to lockout keypad
• Change state of digital input.
• Custom parameters incorrect
• Change custom parameters in Factory
Page.
• EZ-Key function incorrect
• Verify EZ-Key function in Setup
Menu.
• EZ-Key function instance not correct
• Check that the function instance is
correct.
• Keypad malfunction
• Replace or repair controller.
[``no] upper display The RUI (Remote User Inter- • Communications wired incorrectly
[`dEu] lower display face) will not communicate • Communications wires routed with
with the controller at the
power wires
selected zone.
• Zone address set out of range
• RUI or controller defective
• Check and correct wiring.
• Check and correct wiring.
[uALU]
• Check scaling.
• Call technical support.
Value cannot be displayed
Watlow EZ-ZONE™ ST
• Scaling is out of range
•
70
•
• Check zone range and address.
• Replace or repair RUI or controller.
Appendix
Modbus Registers For All Parameters
Group
Page - Menu
Location
Name in User’s Manual
Data
Type
Modbus
Address
(less 40,001
offset)
Access
RUI / Modbus
Alarm
Setup - Alarms
Alarm 1 Blocking
unsigned
107
RUI / Modbus
Alarm
Operation - Alarms
Alarm 1 Clear Request
unsigned
108
Modbus only
Alarm
Operation - Alarms
Alarm 1 High Set Point
IEEE Float
97
RUI / Modbus
Alarm
Setup - Alarms
Alarm 1 Hysteresis
IEEE Float
101
RUI / Modbus
Alarm
Setup - Alarms
Alarm 1 Latching
unsigned
106
RUI / Modbus
Alarm
Setup - Alarms
Alarm 1 Logic
unsigned
104
RUI / Modbus
Alarm
Operation - Alarms
Alarm 1 Low Set Point
IEEE Float
99
RUI / Modbus
Alarm
Setup - Alarms
Alarm 1 Sides
unsigned
103
RUI / Modbus
Alarm
Operation - Alarms
Alarm 1 Silence Request
unsigned
109
Modbus only
Alarm
Setup - Alarms
Alarm 1 Silencing
unsigned
105
RUI / Modbus
Alarm
Setup - Alarms
Alarm 1 Source
unsigned
111
RUI / Modbus
Alarm
Setup - Alarms
Alarm 1 Source Instance
unsigned
112
RUI / Modbus
Alarm
Setup - Alarms
Alarm 1 Type
unsigned
110
RUI / Modbus
Alarm
Setup - Alarms
Alarm 2 Blocking
unsigned
123
RUI / Modbus
Alarm
Operation - Alarms
Alarm 2 Clear Request
unsigned
124
Modbus only
Alarm
Operation - Alarms
Alarm 2 High Set Point
IEEE Float
113
RUI / Modbus
Alarm
Setup - Alarms
Alarm 2 Hysteresis
IEEE Float
117
RUI / Modbus
Alarm
Setup - Alarms
Alarm 2 Latching
unsigned
122
RUI / Modbus
Alarm
Setup - Alarms
Alarm 2 Logic
unsigned
120
RUI / Modbus
Alarm
Operation - Alarms
Alarm 2 Low Set Point
IEEE Float
115
RUI / Modbus
Alarm
Setup - Alarms
Alarm 2 Sides
unsigned
119
RUI / Modbus
Alarm
Operation - Alarms
Alarm 2 Silence Request
unsigned
125
Modbus only
Alarm
Setup - Alarms
Alarm 2 Silencing
unsigned
121
RUI / Modbus
Alarm
Setup - Alarms
Alarm 2 Source
unsigned
127
RUI / Modbus
Alarm
Setup Alarms
Alarm 2 Source Instance
unsigned
128
RUI / Modbus
Alarm
Setup - Alarms
Alarm 2 Type
unsigned
126
RUI / Modbus
Analog Input
Factory - Calibration
Input 1 Calibration Electrical Offset
IEEE Float
47
RUI / Modbus
Analog Input
Operation - Analog Input
Input 1 Calibration Offset
IEEE Float
51
RUI / Modbus
Analog Input
Factory - Calibration
Input 1 Electrical Measurement
IEEE Float
309
RUI / Modbus
Analog Input
Factory - Calibration
Input 1 Electrical Slope
IEEE Float
49
RUI / Modbus
Analog Input
Setup - Analog Input
Input 1 Error Latching
unsigned
67
Modbus only
Analog Input
Setup - Analog Input
Input 1 Error Reset
unsigned
68
Modbus only
Analog Input
Operation - Analog Input
Input 1 Error Status
unsigned
41
RUI / Modbus
Analog Input
Setup - Analog Input
Input 1 Filter Time
IEEE Float
55
RUI / Modbus
Analog Input
Setup - Analog Input
Input 1 Linearization
unsigned
43
RUI / Modbus
Analog Input
Setup - Analog Input
Input 1 Range High
IEEE Float
63
RUI / Modbus
Analog Input
Setup - Analog Input
Input 1 Range Low
IEEE Float
61
RUI / Modbus
Analog Input
Setup - Analog Input
Input 1 RTD Leads
unsigned
44
RUI / Modbus
Analog Input
Setup - Analog Input
Input 1 Scale High
IEEE Float
59
RUI / Modbus
Analog Input
Setup - Analog Input
Input 1 Scale Low
IEEE Float
57
RUI / Modbus
Analog Input
Setup - Analog Input
Input 1 Sensor Backup Enable
unsigned
65
RUI / Modbus
Watlow EZ-ZONE™ ST
•
71
•
Note: Excessive
writes to
EEPROM over
Modbus can
cause premature
EEPROM failure.
The EEPROM
is rated for
1,000,000 writes.
See "Saving Settings to Nonvolatile Memory" in
Chapter 2, Install
and Wire.
Appendix
Group
Page - Menu
Location
Name in User’s Manual
Data
Type
Modbus
Address
(less 40,001
offset)
Access
RUI / Modbus
Analog Input
Setup - Analog Input
Input 1 Sensor Type
unsigned
42
RUI / Modbus
Analog Input
Operation - Analog Input
Input 2 Error Status
unsigned
69
RUI / Modbus
Analog Input
Factory - Calibration
Input 2 Calibration Electrical Offset
IEEE Float
75
RUI / Modbus
Analog Input
Operation Analog Input
Input 2 Calibration Offset
IEEE Float
79
RUI / Modbus
Analog Input
Factory - Calibration
Input 2 Electrical Measurement
IEEE Float
311
RUI / Modbus
Analog Input
Factory - Calibration
Input 2 Electrical Slope
IEEE Float
77
RUI / Modbus
Analog Input
Setup - Analog Input
Input 2 Error Latching
unsigned
95
RUI / Modbus
Analog Input
Setup - Analog Input
Input 2 Error Reset
unsigned
96
Modbus only
Analog Input
Setup - Analog Input
Input 2 Filter Time
IEEE Float
83
RUI / Modbus
Analog Input
Setup - Analog Input
Input 2 Linearization
unsigned
71
RUI / Modbus
Analog Input
Setup - Analog Input
Input 2 Range High
IEEE Float
91
RUI / Modbus
Analog Input
Setup - Analog Input
Input 2 Range Low
IEEE Float
89
RUI / Modbus
Analog Input
Setup - Analog Input
Input 2 RTD Leads
unsigned
72
RUI / Modbus
Analog Input
Setup - Analog Input
Input 2 Scale High
IEEE Float
87
RUI / Modbus
Analog Input
Setup - Analog Input
Input 2 Scale Low
IEEE Float
85
RUI / Modbus
Analog Input
Setup - Analog Input
Input 2 Sensor Type
unsigned
70
RUI / Modbus
Communications
See Chapter 2
Address
unsigned
313
Modbus only
Communications
See Chapter 2
Baud
unsigned
314
Modbus only
Communications
See Chapter 2
Non-Volatile Save
unsigned
317
Modbus only
Communications
See Chapter 2
Parity
unsigned
315
Modbus only
Control Loop
Setup - Loop
Autotune Aggressiveness
unsigned
259
RUI / Modbus
Control Loop
Operation - Loop
Autotune Request
unsigned
262
RUI / Modbus
Control Loop
Operation - Loop
Autotune Set Point
IEEE Float
260
RUI / Modbus
Control Loop
Operation - Loop
Control Mode
unsigned
221
RUI / Modbus
Control Loop
Operation - Monitor
Control Mode Active
unsigned
222
RUI / Modbus
Control Loop
Setup - Loop
Cool Algorithm
unsigned
224
RUI / Modbus
Control Loop
Operation - Loop
Cool Hysteresis
IEEE Float
240
RUI / Modbus
Control Loop
Operation - Monitor
Cool Power
IEEE Float
242
RUI / Modbus
Control Loop
Operation - Loop
Cool Proportional Band
IEEE Float
238
RUI / Modbus
Control Loop
Operation - Loop
Dead Band
IEEE Float
230
RUI / Modbus
Control Loop
Setup - Loop
Heat Algorithm
unsigned
223
RUI / Modbus
Control Loop
Operation - Loop
Heat Hysteresis
IEEE Float
234
RUI / Modbus
Control Loop
Operation - Monitor
Heat Power
IEEE Float
236
RUI / Modbus
Control Loop
Operation - Loop
Heat Proportional Band
IEEE Float
232
RUI / Modbus
Control Loop
Operation - Loop
Loop Action
unsigned
225
RUI / Modbus
Control Loop
Operation - Loop
Time Derivative
IEEE Float
228
RUI / Modbus
Control Loop
Operation - Loop
Time Integral
IEEE Float
226
RUI / Modbus
Control Loop
Setup - Loop
Tru-tune Band
unsigned
307
RUI / Modbus
Control Loop
Setup - Loop
Tru-tune Enable
unsigned
257
RUI / Modbus
Control Loop
Setup - Loop
Tru-tune Gain
unsigned
308
RUI / Modbus
Control Loop
Operation - Monitor
Tune Status
unsigned
263
Modbus only
Current Sense
Setup - Current
Current Detect Threshold
unsigned
285
RUI / Modbus
Current Sense
Operation - Current
Current Heater Error
unsigned
282
RUI / Modbus
Current Sense
Operation - Current
Current High Set Point
IEEE Float
286
RUI / Modbus
Current Sense
Setup - Current
Current Limit Enable
unsigned
284
RUI / Modbus
Current Sense
Operation - Current
Current Low Set Point
IEEE Float
288
RUI / Modbus
Current Sense
Setup - Current
Current Sides
unsigned
283
RUI / Modbus
Device
Factory - Diagnostics
Status Light
unsigned
18
Modbus only
Device
Factory - Diagnostics
Custom
unsigned
10
RUI / Modbus
Device
Factory - Diagnostics
Date of Manufacture
unsigned
14
RUI / Modbus
Watlow EZ-ZONE™ ST
•
72
•
Appendix
Group
Page - Menu
Location
Name in User’s Manual
Data
Type
Modbus
Address
(less 40,001
offset)
Access
RUI / Modbus
Device
Factory - Diagnostics
Hardware ID
unsigned
0
Modbus only
Device
Factory - Diagnostics
Serial Number
unsigned
12
RUI / Modbus
Device
Factory - Diagnostics
Software Build
unsigned
8
RUI / Modbus
Device
Factory - Diagnostics
Software ID
unsigned
2
RUI / Modbus
Device
Factory - Diagnostics
Software Prototype Version
unsigned
6
RUI / Modbus
Device
Factory - Diagnostics
Software Release Version
unsigned
4
RUI / Modbus
Device
Factory - Diagnostics
User Restore Set
unsigned
16
RUI / Modbus
Device
Factory - Diagnostics
User Save Set
unsigned
17
RUI / Modbus
Digital I/O
Setup - Global
AC Line Frequency
unsigned
129
RUI / Modbus
Digital I/O
Setup - Digital I/O
Digital I/O 5 Direction
unsigned
169
RUI / Modbus
Digital I/O
Setup - Digital I/O
Digital I/O 6 Direction
unsigned
182
RUI / Modbus
Digital I/O
Setup - Digital I/O
Digital Output 5 Function
unsigned
173
RUI / Modbus
Digital I/O
Setup - Digital I/O
Digital Output 5 Function Instance
unsigned
174
Modbus only
Digital I/O
Operation - Digital I/O
Digital Output 5 State
unsigned
175
RUI / Modbus
Digital I/O
Setup - Digital I/O
Digital Output 6 Function
unsigned
186
RUI / Modbus
Digital I/O
Setup - Digital I/O
Digital Output 6 Function Instance
unsigned
187
Modbus only
Digital I/O
Operation Digital I/O
Digital Output 6 State
unsigned
188
RUI / Modbus
Digital I/O
Setup - Output
Output 1 Control
unsigned
131
RUI / Modbus
Digital I/O
Setup - Output
Output 1 Function
unsigned
134
RUI / Modbus
Digital I/O
Setup - Output
Output 1 Function Instance
unsigned
135
RUI / Modbus
Digital I/O
Setup - Output
Output 1 High Power Scale
IEEE Float
141
RUI / Modbus
Digital I/O
Setup - Output
Output 1 Low Power Scale
IEEE Float
139
RUI / Modbus
Digital I/O
Setup - Output
Output 1 Time Base
IEEE Float
132
RUI / Modbus
Digital I/O
Setup - Output
Output 2 Control
unsigned
144
RUI / Modbus
Digital I/O
Setup - Output
Output 2 Function
unsigned
147
RUI / Modbus
Digital I/O
Setup - Output
Output 2 Function Instance
unsigned
148
RUI / Modbus
Digital I/O
Setup - Output
Output 2 High Power Scale
IEEE Float
154
RUI / Modbus
Digital I/O
Setup - Output
Output 2 Low Power Scale
IEEE Float
152
RUI / Modbus
Digital I/O
Setup - Output
Output 2 Time Base
IEEE Float
145
RUI / Modbus
Digital I/O
Setup - Output
Output 3 Control
unsigned
157
RUI / Modbus
Digital I/O
Setup - Output
Output 3 Function
unsigned
160
RUI / Modbus
Digital I/O
Setup - Output
Output 3 Function Instance
unsigned
161
RUI / Modbus
Digital I/O
Setup - Output
Output 3 High Power Scale
IEEE Float
167
RUI / Modbus
Digital I/O
Setup - Output
Output 3 Low Power Scale
IEEE Float
165
RUI / Modbus
Digital I/O
Setup - Output
Output 3 Time Base
IEEE Float
158
RUI / Modbus
Event
Setup - Digital I/O
Digital Input 5 Level
unsigned
264
RUI / Modbus
Event
Setup - Digital I/O
Digital Input 5 Source Instance
unsigned
265
Modbus only
Event
Setup - Digital I/O
Digital Input 6 Level
unsigned
268
RUI / Modbus
Event
Setup - Digital I/O
Digital Input 6 Source Instance
unsigned
269
Modbus only
Event
Setup - Digital I/O
Digtial Input 5 Function
unsigned
266
RUI / Modbus
Event
Setup - Digital I/O
Digtial Input 5 Function Instance
unsigned
267
RUI / Modbus
Event
Setup - Digital I/O
Digtial Input 6 Function
unsigned
270
RUI / Modbus
Event
Setup - Digital I/O
Digtial Input 6 Function Instance
unsigned
271
RUI / Modbus
Limit
Operation - Limit
Limit Clear Request
unsigned
272
Modbus only
Limit
Operation - Limit
Limit High Set Point
IEEE Float
277
RUI / Modbus
Limit
Setup - Limit
Limit Hysteresis
IEEE Float
273
RUI / Modbus
Limit
Setup - Limit
Limit Integrate
unsigned
316
RUI / Modbus
Limit
Operation - Limit
Limit Low Set Point
IEEE Float
275
RUI / Modbus
Limit
Setup - Limit
Limit Sides
unsigned
279
RUI / Modbus
Limit
Operation - Limit
Limit State
unsigned
280
Modbus only
Watlow EZ-ZONE™ ST
•
73
•
Appendix
Group
Profile Control
Page - Menu
Location
Name in User’s Manual
Data
Type
Modbus
Address
(less 40,001
offset)
Access
RUI / Modbus
Setup - Global
Guaranteed Soak Enable
unsigned
299
RUI / Modbus
Profile Control
Setup - Global
Guranteed Soak Deviation
IEEE Float
300
RUI / Modbus
Profile Control
Operation - Profile Status
Jump Count Remaining
unsigned
305
RUI / Modbus
Profile Control
Operation - Profile Status
Monitor Current File
unsigned
295
RUI / Modbus
Profile Control
Operation - Profile Status
Active Step
unsigned
296
RUI / Modbus
RUI / Modbus
Profile Control
Operation - Profile Status
Monitor Profile State
unsigned
294
Profile Control
Operation - Profile Status
Step Time Remaining
IEEE Float
303
RUI / Modbus
Profile Control
Operation - Profile Status
Monitor Target Set Point
IEEE Float
297
RUI / Modbus
Profile Control
Operation - Profile Status
Profile Action Request
unsigned
306
RUI / Modbus
Profile Control
Operation - Profile Status
Profile Start Type
unsigned
302
RUI / Modbus
Profile Control
Operation - Profile Status
Profile Start
unsigned
292
RUI / Modbus
Profile Management
Profiling Page
Step 1 - End Type
unsigned
516
RUI / Modbus
Profile Management
Profiling Page
Step 1 - Event Output 1
unsigned
508
RUI / Modbus
Profile Management
Profiling Page
Step 1 - Event Output 2
unsigned
509
RUI / Modbus
Profile Management
Profiling Page
Step 1 - Hours
unsigned
503
RUI / Modbus
Profile Management
Profiling Page
Step 1 - Jump Count
unsigned
515
RUI / Modbus
Profile Management
Profiling Page
Step 1 - Jump Step
unsigned
514
RUI / Modbus
Profile Management
Profiling Page
Step 1 - Minutes
unsigned
504
RUI / Modbus
Profile Management
Profiling Page
Step 1 - Rate
IEEE Float
506
RUI / Modbus
Profile Management
Profiling Page
Step 1 - Seconds
unsigned
505
RUI / Modbus
RUI / Modbus
Profile Management
Profiling Page
Step 1 - Step Type
unsigned
500
Profile Management
Profiling Page
Step 1 - Target Set Point
IEEE Float
501
RUI / Modbus
Profile Management
Profiling Page
Step 1 - Wait Event Event 1
unsigned
510
RUI / Modbus
Profile Management
Profiling Page
Step 1 - Wait Event Event 2
unsigned
511
RUI / Modbus
Profile Management
Profiling Page
Step 1 - Wait For Process
IEEE Float
512
RUI / Modbus
Profile Management
Profiling Page
Step 2 - End Type
unsigned
536
RUI / Modbus
Profile Management
Profiling Page
Step 2 - Event Output 1
unsigned
528
RUI / Modbus
Profile Management
Profiling Page
Step 2 - Event Output 2
unsigned
529
RUI / Modbus
Profile Management
Profiling Page
Step 2 - Hours
unsigned
523
RUI / Modbus
Profile Management
Profiling Page
Step 2 - Jump Count
unsigned
535
RUI / Modbus
Profile Management
Profiling Page
Step 2 - Jump Step
unsigned
534
RUI / Modbus
Profile Management
Profiling Page
Step 2 - Minutes
unsigned
524
RUI / Modbus
Profile Management
Profiling Page
Step 2 - Rate
IEEE Float
526
RUI / Modbus
Profile Management
Profiling Page
Step 2 - Seconds
unsigned
525
RUI / Modbus
Profile Management
Profiling Page
Step 2 - Step Type
unsigned
520
RUI / Modbus
Profile Management
Profiling Page
Step 2 - Target Set Point
IEEE Float
521
RUI / Modbus
Profile Management
Profiling Page
Step 2 - Wait Event Event 1
unsigned
530
RUI / Modbus
Profile Management
Profiling Page
Step 2 - Wait Event Event 2
unsigned
531
RUI / Modbus
Profile Management
Profiling Page
Step 2 - Wait For Process
IEEE Float
532
RUI / Modbus
Profile Management
Profiling Page
Step 3 - End Type
unsigned
556
RUI / Modbus
RUI / Modbus
Profile Management
Profiling Page
Step 3 - Event Output 1
unsigned
548
Profile Management
Profiling Page
Step 3 - Event Output 2
unsigned
549
RUI / Modbus
Profile Management
Profiling Page
Step 3 - Hours
unsigned
543
RUI / Modbus
Profile Management
Profiling Page
Step 3 - Jump Count
unsigned
555
RUI / Modbus
Profile Management
Profiling Page
Step 3 - Jump Step
unsigned
554
RUI / Modbus
Profile Management
Profiling Page
Step 3 - Minutes
unsigned
544
RUI / Modbus
Profile Management
Profiling Page
Step 3 - Rate
IEEE Float
546
RUI / Modbus
Profile Management
Profiling Page
Step 3 - Seconds
unsigned
545
RUI / Modbus
Profile Management
Profiling Page
Step 3 - Step Type
unsigned
540
RUI / Modbus
Profile Management
Profiling Page
Step 3 - Target Set Point
IEEE Float
541
RUI / Modbus
Watlow EZ-ZONE™ ST
•
74
•
Appendix
Group
Profile Management
Page - Menu
Location
Name in User’s Manual
Data
Type
Modbus
Address
(less 40,001
offset)
Access
RUI / Modbus
Profiling Page
Step 3 - Wait Event Event 1
unsigned
550
RUI / Modbus
RUI / Modbus
Profile Management
Profiling Page
Step 3 - Wait Event Event 2
unsigned
551
Profile Management
Profiling Page
Step 3 - Wait For Process
IEEE Float
552
RUI / Modbus
Profile Management
Profiling Page
Step 4 - End Type
unsigned
576
RUI / Modbus
Profile Management
Profiling Page
Step 4 - Event Output 1
unsigned
568
RUI / Modbus
Profile Management
Profiling Page
Step 4 - Event Output 2
unsigned
569
RUI / Modbus
Profile Management
Profiling Page
Step 4 - Hours
unsigned
563
RUI / Modbus
Profile Management
Profiling Page
Step 4 - Jump Count
unsigned
575
RUI / Modbus
Profile Management
Profiling Page
Step 4 - Jump Step
unsigned
574
RUI / Modbus
RUI / Modbus
Profile Management
Profiling Page
Step 4 - Minutes
unsigned
564
Profile Management
Profiling Page
Step 4 - Rate
IEEE Float
566
RUI / Modbus
Profile Management
Profiling Page
Step 4 - Seconds
unsigned
565
RUI / Modbus
Profile Management
Profiling Page
Step 4 - Step Type
unsigned
560
RUI / Modbus
Profile Management
Profiling Page
Step 4 - Target Set Point
IEEE Float
561
RUI / Modbus
Profile Management
Profiling Page
Step 4 - Wait Event Event 1
unsigned
570
RUI / Modbus
Profile Management
Profiling Page
Step 4 - Wait Event Event 2
unsigned
571
RUI / Modbus
Profile Management
Profiling Page
Step 5 - End Type
unsigned
596
RUI / Modbus
Profile Management
Profiling Page
Step 5 - Event Output 1
unsigned
588
RUI / Modbus
Profile Management
Profiling Page
Step 5 - Event Output 2
unsigned
589
RUI / Modbus
Profile Management
Profiling Page
Step 5 - Hours
unsigned
583
RUI / Modbus
Profile Management
Profiling Page
Step 5 - Jump Count
unsigned
595
RUI / Modbus
Profile Management
Profiling Page
Step 5 - Jump Step
unsigned
594
RUI / Modbus
Profile Management
Profiling Page
Step 5 - Minutes
unsigned
584
RUI / Modbus
Profile Management
Profiling Page
Step 5 - Rate
IEEE Float
586
RUI / Modbus
Profile Management
Profiling Page
Step 5 - Seconds
unsigned
585
RUI / Modbus
Profile Management
Profiling Page
Step 5 - Step Type
unsigned
580
RUI / Modbus
Profile Management
Profiling Page
Step 5 - Target Set Point
IEEE Float
581
RUI / Modbus
Profile Management
Profiling Page
Step 5 - Wait Event Event 1
unsigned
590
RUI / Modbus
RUI / Modbus
Profile Management
Profiling Page
Step 5 - Wait Event Event 2
unsigned
591
Profile Management
Profiling Page
Step 5 - Wait For Process
IEEE Float
592
RUI / Modbus
Profile Management
Profiling Page
Step 6 - End Type
unsigned
616
RUI / Modbus
Profile Management
Profiling Page
Step 6 - Event Output 1
unsigned
608
RUI / Modbus
Profile Management
Profiling Page
Step 6 - Event Output 2
unsigned
609
RUI / Modbus
Profile Management
Profiling Page
Step 6 - Hours
unsigned
603
RUI / Modbus
Profile Management
Profiling Page
Step 6 - Jump Count
unsigned
615
RUI / Modbus
Profile Management
Profiling Page
Step 6 - Jump Step
unsigned
614
RUI / Modbus
RUI / Modbus
Profile Management
Profiling Page
Step 6 - Minutes
unsigned
604
Profile Management
Profiling Page
Step 6 - Rate
IEEE Float
606
RUI / Modbus
Profile Management
Profiling Page
Step 6 - Seconds
unsigned
605
RUI / Modbus
Profile Management
Profiling Page
Step 6 - Step Type
unsigned
600
RUI / Modbus
Profile Management
Profiling Page
Step 6 - Target Set Point
IEEE Float
601
RUI / Modbus
Profile Management
Profiling Page
Step 6 - Wait Event Event 1
unsigned
610
RUI / Modbus
Profile Management
Profiling Page
Step 6 - Wait Event Event 2
unsigned
611
RUI / Modbus
Profile Management
Profiling Page
Step 6 - Wait For Process
IEEE Float
612
RUI / Modbus
Profile Management
Profiling Page
Step 7 - End Type
unsigned
636
RUI / Modbus
Profile Management
Profiling Page
Step 7 - Event Output 1
unsigned
628
RUI / Modbus
Profile Management
Profiling Page
Step 7 - Event Output 2
unsigned
629
RUI / Modbus
Profile Management
Profiling Page
Step 7 - Hours
unsigned
623
RUI / Modbus
Profile Management
Profiling Page
Step 7 - Jump Count
unsigned
635
RUI / Modbus
Profile Management
Profiling Page
Step 7 - Jump Step
unsigned
634
RUI / Modbus
Watlow EZ-ZONE™ ST
•
75
•
Appendix
Group
Profile Management
Page - Menu
Location
Name in User’s Manual
Data
Type
unsigned
Modbus
Address
(less 40,001
offset)
624
Access
RUI / Modbus
Profiling Page
Step 7 - Minutes
RUI / Modbus
Profile Management
Profiling Page
Step 7 - Rate
IEEE Float
626
RUI / Modbus
Profile Management
Profiling Page
Step 7 - Seconds
unsigned
625
RUI / Modbus
Profile Management
Profiling Page
Step 7 - Step Type
unsigned
620
RUI / Modbus
Profile Management
Profiling Page
Step 7 - Target Set Point
IEEE Float
621
RUI / Modbus
Profile Management
Profiling Page
Step 7 - Wait Event Event 1
unsigned
630
RUI / Modbus
Profile Management
Profiling Page
Step 7 - Wait Event Event 2
unsigned
631
RUI / Modbus
Profile Management
Profiling Page
Step 7 - Wait For Process
IEEE Float
632
RUI / Modbus
Profile Management
Profiling Page
Step 8 - End Type
unsigned
656
RUI / Modbus
RUI / Modbus
Profile Management
Profiling Page
Step 8 - Event Output 1
unsigned
648
Profile Management
Profiling Page
Step 8 - Event Output 2
unsigned
649
RUI / Modbus
Profile Management
Profiling Page
Step 8 - Hours
unsigned
643
RUI / Modbus
Profile Management
Profiling Page
Step 8 - Jump Count
unsigned
655
RUI / Modbus
Profile Management
Profiling Page
Step 8 - Jump Step
unsigned
654
RUI / Modbus
Profile Management
Profiling Page
Step 8 - Minutes
unsigned
644
RUI / Modbus
Profile Management
Profiling Page
Step 8 - Rate
IEEE Float
646
RUI / Modbus
Profile Management
Profiling Page
Step 8 - Seconds
unsigned
645
RUI / Modbus
Profile Management
Profiling Page
Step 8 - Step Type
unsigned
640
RUI / Modbus
Profile Management
Profiling Page
Step 8 - Target Set Point
IEEE Float
641
RUI / Modbus
Profile Management
Profiling Page
Step 8 - Wait Event Event 1
unsigned
650
RUI / Modbus
RUI / Modbus
Profile Management
Profiling Page
Step 8 - Wait Event Event 2
unsigned
651
Profile Management
Profiling Page
Step 8 - Wait For Process
IEEE Float
652
RUI / Modbus
Profile Management
Profiling Page
Step 9 - End Type
unsigned
676
RUI / Modbus
Profile Management
Profiling Page
Step 9 - Event Output 1
unsigned
668
RUI / Modbus
Profile Management
Profiling Page
Step 9 - Event Output 2
unsigned
669
RUI / Modbus
Profile Management
Profiling Page
Step 9 - Hours
unsigned
663
RUI / Modbus
Profile Management
Profiling Page
Step 9 - Jump Count
unsigned
675
RUI / Modbus
Profile Management
Profiling Page
Step 9 - Jump Step
unsigned
674
RUI / Modbus
RUI / Modbus
Profile Management
Profiling Page
Step 9 - Minutes
unsigned
664
Profile Management
Profiling Page
Step 9 - Rate
IEEE Float
666
RUI / Modbus
Profile Management
Profiling Page
Step 9 - Seconds
unsigned
665
RUI / Modbus
Profile Management
Profiling Page
Step 9 - Step Type
unsigned
660
RUI / Modbus
Profile Management
Profiling Page
Step 9 - Target Set Point
IEEE Float
661
RUI / Modbus
Profile Management
Profiling Page
Step 9 - Wait Event Event 1
unsigned
670
RUI / Modbus
Profile Management
Profiling Page
Step 9 - Wait Event Event 2
unsigned
671
RUI / Modbus
Profile Management
Profiling Page
Step 9 - Wait For Process
IEEE Float
672
RUI / Modbus
Profile Management
Profiling Page
Step 10 - End Type
unsigned
696
RUI / Modbus
Profile Management
Profiling Page
Step 10 - Event Output 1
unsigned
688
RUI / Modbus
Profile Management
Profiling Page
Step 10 - Event Output 2
unsigned
689
RUI / Modbus
Profile Management
Profiling Page
Step 10 - Hours
unsigned
683
RUI / Modbus
Profile Management
Profiling Page
Step 10 - Jump Count
unsigned
695
RUI / Modbus
Profile Management
Profiling Page
Step 10 - Jump Step
unsigned
694
RUI / Modbus
Profile Management
Profiling Page
Step 10 - Minutes
unsigned
684
RUI / Modbus
Profile Management
Profiling Page
Step 10 - Rate
IEEE Float
686
RUI / Modbus
Profile Management
Profiling Page
Step 10 - Seconds
unsigned
685
RUI / Modbus
Profile Management
Profiling Page
Step 10 - Step Type
unsigned
680
RUI / Modbus
Profile Management
Profiling Page
Step 10 - Target Set Point
IEEE Float
681
RUI / Modbus
Profile Management
Profiling Page
Step 10 - Wait Event Event 1
unsigned
690
RUI / Modbus
Profile Management
Profiling Page
Step 10 - Wait Event Event 2
unsigned
691
RUI / Modbus
Profile Management
Profiling Page
Step 10 - Wait For Process
IEEE Float
692
RUI / Modbus
Watlow EZ-ZONE™ ST
•
76
•
Appendix
Group
Profile Management
Page - Menu
Location
Name in User’s Manual
Data
Type
Modbus
Address
(less 40,001
offset)
Access
RUI / Modbus
Profiling Page
Step 11 - End Type
unsigned
716
RUI / Modbus
RUI / Modbus
Profile Management
Profiling Page
Step 11 - Event Output 1
unsigned
708
Profile Management
Profiling Page
Step 11 - Event Output 2
unsigned
709
RUI / Modbus
Profile Management
Profiling Page
Step 11 - Hours
unsigned
703
RUI / Modbus
Profile Management
Profiling Page
Step 11 - Jump Count
unsigned
715
RUI / Modbus
Profile Management
Profiling Page
Step 11 - Jump Step
unsigned
714
RUI / Modbus
Profile Management
Profiling Page
Step 11 - Minutes
unsigned
704
RUI / Modbus
Profile Management
Profiling Page
Step 11 - Rate
IEEE Float
706
RUI / Modbus
Profile Management
Profiling Page
Step 11 - Seconds
unsigned
705
RUI / Modbus
RUI / Modbus
Profile Management
Profiling Page
Step 11 - Step Type
unsigned
700
Profile Management
Profiling Page
Step 11 - Target Set Point
IEEE Float
701
RUI / Modbus
Profile Management
Profiling Page
Step 11 - Wait Event Event 1
unsigned
710
RUI / Modbus
Profile Management
Profiling Page
Step 11 - Wait Event Event 2
unsigned
711
RUI / Modbus
Profile Management
Profiling Page
Step 11 - Wait For Process
IEEE Float
712
RUI / Modbus
Profile Management
Profiling Page
Step 12 - End Type
unsigned
736
RUI / Modbus
Profile Management
Profiling Page
Step 12 - Event Output 1
unsigned
728
RUI / Modbus
Profile Management
Profiling Page
Step 12 - Event Output 2
unsigned
729
RUI / Modbus
Profile Management
Profiling Page
Step 12 - Hours
unsigned
723
RUI / Modbus
Profile Management
Profiling Page
Step 12 - Jump Count
unsigned
735
RUI / Modbus
Profile Management
Profiling Page
Step 12 - Jump Step
unsigned
734
RUI / Modbus
RUI / Modbus
Profile Management
Profiling Page
Step 12 - Minutes
unsigned
724
Profile Management
Profiling Page
Step 12 - Rate
IEEE Float
726
RUI / Modbus
Profile Management
Profiling Page
Step 12 - Seconds
unsigned
725
RUI / Modbus
Profile Management
Profiling Page
Step 12 - Step Type
unsigned
720
RUI / Modbus
Profile Management
Profiling Page
Step 12 - Target Set Point
IEEE Float
721
RUI / Modbus
Profile Management
Profiling Page
Step 12 - Wait Event Event 1
unsigned
730
RUI / Modbus
Profile Management
Profiling Page
Step 12 - Wait Event Event 2
unsigned
731
RUI / Modbus
Profile Management
Profiling Page
Step 12 - Wait For Process
IEEE Float
732
RUI / Modbus
Profile Management
Profiling Page
Step 13 - End Type
unsigned
756
RUI / Modbus
Profile Management
Profiling Page
Step 13 - Event Output 1
unsigned
748
RUI / Modbus
Profile Management
Profiling Page
Step 13 - Event Output 2
unsigned
749
RUI / Modbus
Profile Management
Profiling Page
Step 13 - Hours
unsigned
743
RUI / Modbus
Profile Management
Profiling Page
Step 13 - Jump Count
unsigned
755
RUI / Modbus
Profile Management
Profiling Page
Step 13 - Jump Step
unsigned
754
RUI / Modbus
Profile Management
Profiling Page
Step 13 - Minutes
unsigned
744
RUI / Modbus
Profile Management
Profiling Page
Step 13 - Rate
IEEE Float
746
RUI / Modbus
Profile Management
Profiling Page
Step 13 - Seconds
unsigned
745
RUI / Modbus
Profile Management
Profiling Page
Step 13 - Step Type
unsigned
740
RUI / Modbus
Profile Management
Profiling Page
Step 13 - Target Set Point
IEEE Float
741
RUI / Modbus
Profile Management
Profiling Page
Step 13 - Wait Event Event 1
unsigned
750
RUI / Modbus
RUI / Modbus
Profile Management
Profiling Page
Step 13 - Wait Event Event 2
unsigned
751
Profile Management
Profiling Page
Step 13 - Wait For Process
IEEE Float
752
RUI / Modbus
Profile Management
Profiling Page
Step 14 - End Type
unsigned
776
RUI / Modbus
Profile Management
Profiling Page
Step 14 - Event Output 1
unsigned
768
RUI / Modbus
Profile Management
Profiling Page
Step 14 - Event Output 2
unsigned
769
RUI / Modbus
Profile Management
Profiling Page
Step 14 - Hours
unsigned
763
RUI / Modbus
Profile Management
Profiling Page
Step 14 - Jump Count
unsigned
775
RUI / Modbus
Profile Management
Profiling Page
Step 14 - Jump Step
unsigned
774
RUI / Modbus
Profile Management
Profiling Page
Step 14 - Minutes
unsigned
764
RUI / Modbus
Profile Management
Profiling Page
Step 14 - Rate
IEEE Float
766
RUI / Modbus
Watlow EZ-ZONE™ ST
•
77
•
Appendix
Group
Profile Management
Page - Menu
Location
Name in User’s Manual
Data
Type
Modbus
Address
(less 40,001
offset)
Access
RUI / Modbus
Profiling Page
Step 14 - Seconds
unsigned
765
RUI / Modbus
RUI / Modbus
Profile Management
Profiling Page
Step 14 - Step Type
unsigned
760
Profile Management
Profiling Page
Step 14 - Target Set Point
IEEE Float
761
RUI / Modbus
Profile Management
Profiling Page
Step 14 - Wait Event Event 1
unsigned
770
RUI / Modbus
Profile Management
Profiling Page
Step 14 - Wait Event Event 2
unsigned
771
RUI / Modbus
Profile Management
Profiling Page
Step 14 - Wait For Process
IEEE Float
772
RUI / Modbus
Profile Management
Profiling Page
Step 15 - End Type
unsigned
796
RUI / Modbus
Profile Management
Profiling Page
Step 15 - Event Output 1
unsigned
788
RUI / Modbus
Profile Management
Profiling Page
Step 15 - Event Output 2
unsigned
789
RUI / Modbus
RUI / Modbus
Profile Management
Profiling Page
Step 15 - Hours
unsigned
783
Profile Management
Profiling Page
Step 15 - Jump Count
unsigned
795
RUI / Modbus
Profile Management
Profiling Page
Step 15 - Jump Step
unsigned
794
RUI / Modbus
Profile Management
Profiling Page
Step 15 - Minutes
unsigned
784
RUI / Modbus
Profile Management
Profiling Page
Step 15 - Rate
IEEE Float
786
RUI / Modbus
Profile Management
Profiling Page
Step 15 - Seconds
unsigned
785
RUI / Modbus
Profile Management
Profiling Page
Step 15 - Step Type
unsigned
780
RUI / Modbus
Profile Management
Profiling Page
Step 15 - Target Set Point
IEEE Float
781
RUI / Modbus
Profile Management
Profiling Page
Step 15 - Wait Event Event 1
unsigned
790
RUI / Modbus
Profile Management
Profiling Page
Step 15 - Wait Event Event 2
unsigned
791
RUI / Modbus
Profile Management
Profiling Page
Step 15 - Wait For Process
IEEE Float
792
RUI / Modbus
Profile Management
Profiling Page
Step 16 - End Type
unsigned
816
RUI / Modbus
Profile Management
Profiling Page
Step 16 - Event Output 1
unsigned
808
RUI / Modbus
Profile Management
Profiling Page
Step 16 - Event Output 2
unsigned
809
RUI / Modbus
Profile Management
Profiling Page
Step 16 - Hours
unsigned
803
RUI / Modbus
Profile Management
Profiling Page
Step 16 - Jump Count
unsigned
815
RUI / Modbus
Profile Management
Profiling Page
Step 16 - Jump Step
unsigned
814
RUI / Modbus
Profile Management
Profiling Page
Step 16 - Minutes
unsigned
804
RUI / Modbus
Profile Management
Profiling Page
Step 16 - Rate
IEEE Float
806
RUI / Modbus
Profile Management
Profiling Page
Step 16 - Seconds
unsigned
805
RUI / Modbus
Profile Management
Profiling Page
Step 16 - Step Type
unsigned
800
RUI / Modbus
Profile Management
Profiling Page
Step 16 - Target Set Point
IEEE Float
801
RUI / Modbus
Profile Management
Profiling Page
Step 16 - Wait Event Event 1
unsigned
810
RUI / Modbus
RUI / Modbus
Profile Management
Profiling Page
Step 16 - Wait Event Event 2
unsigned
811
Profile Management
Profiling Page
Step 16 - Wait For Process
IEEE Float
812
RUI / Modbus
Profile Management
Profiling Page
Step 17 - End Type
unsigned
836
RUI / Modbus
Profile Management
Profiling Page
Step 17 - Event Output 1
unsigned
828
RUI / Modbus
Profile Management
Profiling Page
Step 17 - Event Output 2
unsigned
829
RUI / Modbus
Profile Management
Profiling Page
Step 17 - Hours
unsigned
823
RUI / Modbus
Profile Management
Profiling Page
Step 17 - Jump Count
unsigned
835
RUI / Modbus
Profile Management
Profiling Page
Step 17 - Jump Step
unsigned
834
RUI / Modbus
RUI / Modbus
Profile Management
Profiling Page
Step 17 - Minutes
unsigned
824
Profile Management
Profiling Page
Step 17 - Rate
IEEE Float
826
RUI / Modbus
Profile Management
Profiling Page
Step 17 - Seconds
unsigned
825
RUI / Modbus
Profile Management
Profiling Page
Step 17 - Step Type
unsigned
820
RUI / Modbus
Profile Management
Profiling Page
Step 17 - Target Set Point
IEEE Float
821
RUI / Modbus
Profile Management
Profiling Page
Step 17 - Wait Event Event 1
unsigned
830
RUI / Modbus
Profile Management
Profiling Page
Step 17 - Wait Event Event 2
unsigned
831
RUI / Modbus
Profile Management
Profiling Page
Step 17 - Wait For Process
IEEE Float
832
RUI / Modbus
Profile Management
Profiling Page
Step 18 - End Type
unsigned
856
RUI / Modbus
Profile Management
Profiling Page
Step 18 - Event Output 1
unsigned
848
RUI / Modbus
Watlow EZ-ZONE™ ST
•
78
•
Appendix
Group
Profile Management
Page - Menu
Location
Name in User’s Manual
Data
Type
Modbus
Address
(less 40,001
offset)
Access
RUI / Modbus
Profiling Page
Step 18 - Event Output 2
unsigned
849
RUI / Modbus
RUI / Modbus
Profile Management
Profiling Page
Step 18 - Hours
unsigned
843
Profile Management
Profiling Page
Step 18 - Jump Count
unsigned
855
RUI / Modbus
Profile Management
Profiling Page
Step 18 - Jump Step
unsigned
854
RUI / Modbus
Profile Management
Profiling Page
Step 18 - Minutes
unsigned
844
RUI / Modbus
Profile Management
Profiling Page
Step 18 - Rate
IEEE Float
846
RUI / Modbus
Profile Management
Profiling Page
Step 18 - Seconds
unsigned
845
RUI / Modbus
Profile Management
Profiling Page
Step 18 - Step Type
unsigned
840
RUI / Modbus
Profile Management
Profiling Page
Step 18 - Target Set Point
IEEE Float
841
RUI / Modbus
Profile Management
Profiling Page
Step 18 - Wait Event Event 1
unsigned
850
RUI / Modbus
Profile Management
Profiling Page
Step 18 - Wait Event Event 2
unsigned
851
RUI / Modbus
Profile Management
Profiling Page
Step 18 - Wait For Process
IEEE Float
852
RUI / Modbus
Profile Management
Profiling Page
Step 19 - End Type
unsigned
876
RUI / Modbus
Profile Management
Profiling Page
Step 19 - Event Output 1
unsigned
868
RUI / Modbus
Profile Management
Profiling Page
Step 19 - Event Output 2
unsigned
869
RUI / Modbus
Profile Management
Profiling Page
Step 19 - Hours
unsigned
863
RUI / Modbus
Profile Management
Profiling Page
Step 19 - Jump Count
unsigned
875
RUI / Modbus
Profile Management
Profiling Page
Step 19 - Jump Step
unsigned
874
RUI / Modbus
Profile Management
Profiling Page
Step 19 - Minutes
unsigned
864
RUI / Modbus
Profile Management
Profiling Page
Step 19 - Rate
IEEE Float
866
RUI / Modbus
Profile Management
Profiling Page
Step 19 - Seconds
unsigned
865
RUI / Modbus
Profile Management
Profiling Page
Step 19 - Step Type
unsigned
860
RUI / Modbus
Profile Management
Profiling Page
Step 19 - Target Set Point
IEEE Float
861
RUI / Modbus
Profile Management
Profiling Page
Step 19 - Wait Event Event 1
unsigned
870
RUI / Modbus
RUI / Modbus
Profile Management
Profiling Page
Step 19 - Wait Event Event 2
unsigned
871
Profile Management
Profiling Page
Step 19 - Wait For Process
IEEE Float
872
RUI / Modbus
Profile Management
Profiling Page
Step 20 - End Type
unsigned
896
RUI / Modbus
Profile Management
Profiling Page
Step 20 - Event Output 1
unsigned
888
RUI / Modbus
Profile Management
Profiling Page
Step 20 - Event Output 2
unsigned
889
RUI / Modbus
Profile Management
Profiling Page
Step 20 - Hours
unsigned
883
RUI / Modbus
Profile Management
Profiling Page
Step 20 - Jump Count
unsigned
895
RUI / Modbus
Profile Management
Profiling Page
Step 20 - Jump Step
unsigned
894
RUI / Modbus
RUI / Modbus
Profile Management
Profiling Page
Step 20 - Minutes
unsigned
884
Profile Management
Profiling Page
Step 20 - Rate
IEEE Float
886
RUI / Modbus
Profile Management
Profiling Page
Step 20 - Seconds
unsigned
885
RUI / Modbus
Profile Management
Profiling Page
Step 20 - Step Type
unsigned
880
RUI / Modbus
Profile Management
Profiling Page
Step 20 - Target Set Point
IEEE Float
881
RUI / Modbus
Profile Management
Profiling Page
Step 20 - Wait Event Event 1
unsigned
890
RUI / Modbus
Profile Management
Profiling Page
Step 20 - Wait Event Event 2
unsigned
891
RUI / Modbus
Profile Management
Profiling Page
Step 20 - Wait For Process
IEEE Float
892
RUI / Modbus
Profile Management
Profiling Page
Step 21 - End Type
unsigned
916
RUI / Modbus
Profile Management
Profiling Page
Step 21 - Event Output 1
unsigned
908
RUI / Modbus
Profile Management
Profiling Page
Step 21 - Event Output 2
unsigned
909
RUI / Modbus
Profile Management
Profiling Page
Step 21 - Hours
unsigned
903
RUI / Modbus
Profile Management
Profiling Page
Step 21 - Jump Count
unsigned
915
RUI / Modbus
Profile Management
Profiling Page
Step 21 - Jump Step
unsigned
914
RUI / Modbus
Profile Management
Profiling Page
Step 21 - Minutes
unsigned
904
RUI / Modbus
Profile Management
Profiling Page
Step 21 - Rate
IEEE Float
906
RUI / Modbus
Profile Management
Profiling Page
Step 21 - Seconds
unsigned
905
RUI / Modbus
Profile Management
Profiling Page
Step 21 - Step Type
unsigned
900
RUI / Modbus
Watlow EZ-ZONE™ ST
•
79
•
Appendix
Group
Profile Management
Page - Menu
Location
Name in User’s Manual
Data
Type
Modbus
Address
(less 40,001
offset)
Access
RUI / Modbus
Profiling Page
Step 21 - Target Set Point
IEEE Float
901
RUI / Modbus
Profile Management
Profiling Page
Step 21 - Wait Event Event 1
unsigned
910
RUI / Modbus
Profile Management
Profiling Page
Step 21 - Wait Event Event 2
unsigned
911
RUI / Modbus
Profile Management
Profiling Page
Step 21 - Wait For Process
IEEE Float
912
RUI / Modbus
Profile Management
Profiling Page
Step 22 - End Type
unsigned
936
RUI / Modbus
RUI / Modbus
Profile Management
Profiling Page
Step 22 - Event Output 1
unsigned
928
Profile Management
Profiling Page
Step 22 - Event Output 2
unsigned
929
RUI / Modbus
Profile Management
Profiling Page
Step 22 - Hours
unsigned
923
RUI / Modbus
Profile Management
Profiling Page
Step 22 - Jump Count
unsigned
935
RUI / Modbus
Profile Management
Profiling Page
Step 22 - Jump Step
unsigned
934
RUI / Modbus
Profile Management
Profiling Page
Step 22 - Minutes
unsigned
924
RUI / Modbus
Profile Management
Profiling Page
Step 22 - Rate
IEEE Float
926
RUI / Modbus
Profile Management
Profiling Page
Step 22 - Seconds
unsigned
925
RUI / Modbus
RUI / Modbus
Profile Management
Profiling Page
Step 22 - Step Type
unsigned
920
Profile Management
Profiling Page
Step 22 - Target Set Point
IEEE Float
921
RUI / Modbus
Profile Management
Profiling Page
Step 22 - Wait Event Event 1
unsigned
930
RUI / Modbus
RUI / Modbus
Profile Management
Profiling Page
Step 22 - Wait Event Event 2
unsigned
931
Profile Management
Profiling Page
Step 22 - Wait For Process
IEEE Float
932
RUI / Modbus
Profile Management
Profiling Page
Step 23 - End Type
unsigned
956
RUI / Modbus
Profile Management
Profiling Page
Step 23 - Event Output 1
unsigned
948
RUI / Modbus
Profile Management
Profiling Page
Step 23 - Event Output 2
unsigned
949
RUI / Modbus
Profile Management
Profiling Page
Step 23 - Hours
unsigned
943
RUI / Modbus
Profile Management
Profiling Page
Step 23 - Jump Count
unsigned
955
RUI / Modbus
Profile Management
Profiling Page
Step 23 - Jump Step
unsigned
954
RUI / Modbus
RUI / Modbus
Profile Management
Profiling Page
Step 23 - Minutes
unsigned
944
Profile Management
Profiling Page
Step 23 - Rate
IEEE Float
946
RUI / Modbus
Profile Management
Profiling Page
Step 23 - Seconds
unsigned
945
RUI / Modbus
Profile Management
Profiling Page
Step 23 - Step Type
unsigned
940
RUI / Modbus
Profile Management
Profiling Page
Step 23 - Target Set Point
IEEE Float
941
RUI / Modbus
Profile Management
Profiling Page
Step 23 - Wait Event Event 1
unsigned
950
RUI / Modbus
Profile Management
Profiling Page
Step 23 - Wait Event Event 2
unsigned
951
RUI / Modbus
Profile Management
Profiling Page
Step 23 - Wait For Process
IEEE Float
952
RUI / Modbus
Profile Management
Profiling Page
Step 24 - End Type
unsigned
976
RUI / Modbus
Profile Management
Profiling Page
Step 24 - Event Output 1
unsigned
968
RUI / Modbus
Profile Management
Profiling Page
Step 24 - Event Output 2
unsigned
969
RUI / Modbus
Profile Management
Profiling Page
Step 24 - Hours
unsigned
963
RUI / Modbus
Profile Management
Profiling Page
Step 24 - Jump Count
unsigned
975
RUI / Modbus
Profile Management
Profiling Page
Step 24 - Jump Step
unsigned
974
RUI / Modbus
Profile Management
Profiling Page
Step 24 - Minutes
unsigned
964
RUI / Modbus
Profile Management
Profiling Page
Step 24 - Rate
IEEE Float
966
RUI / Modbus
Profile Management
Profiling Page
Step 24 - Seconds
unsigned
965
RUI / Modbus
Profile Management
Profiling Page
Step 24 - Step Type
unsigned
960
RUI / Modbus
Profile Management
Profiling Page
Step 24 - Target Set Point
IEEE Float
961
RUI / Modbus
Profile Management
Profiling Page
Step 24 - Wait Event Event 1
unsigned
970
RUI / Modbus
RUI / Modbus
Profile Management
Profiling Page
Step 24 - Wait Event Event 2
unsigned
971
Profile Management
Profiling Page
Step 24 - Wait For Process
IEEE Float
972
RUI / Modbus
Profile Management
Profiling Page
Step 25 - End Type
unsigned
996
RUI / Modbus
Profile Management
Profiling Page
Step 25 - Event Output 1
unsigned
988
RUI / Modbus
Profile Management
Profiling Page
Step 25 - Event Output 2
unsigned
989
RUI / Modbus
Profile Management
Profiling Page
Step 25 - Hours
unsigned
983
RUI / Modbus
Watlow EZ-ZONE™ ST
•
80
•
Appendix
Group
Profile Management
Page - Menu
Location
Name in User’s Manual
Data
Type
Modbus
Address
(less 40,001
offset)
Access
RUI / Modbus
Profiling Page
Step 25 - Jump Count
unsigned
995
RUI / Modbus
Profile Management
Profiling Page
Step 25 - Jump Step
unsigned
994
RUI / Modbus
Profile Management
Profiling Page
Step 25 - Minutes
unsigned
984
RUI / Modbus
Profile Management
Profiling Page
Step 25 - Rate
IEEE Float
986
RUI / Modbus
Profile Management
Profiling Page
Step 25 - Seconds
unsigned
985
RUI / Modbus
RUI / Modbus
Profile Management
Profiling Page
Step 25 - Step Type
unsigned
980
Profile Management
Profiling Page
Step 25 - Target Set Point
IEEE Float
981
RUI / Modbus
Profile Management
Profiling Page
Step 25 - Wait Event Event 1
unsigned
990
RUI / Modbus
Profile Management
Profiling Page
Step 25 - Wait Event Event 2
unsigned
991
RUI / Modbus
Profile Management
Profiling Page
Step 25 - Wait For Process
IEEE Float
992
RUI / Modbus
Profile Management
Profiling Page
Step 26 - End Type
unsigned
1016
RUI / Modbus
Profile Management
Profiling Page
Step 26 - Event Output 1
unsigned
1008
RUI / Modbus
Profile Management
Profiling Page
Step 26 - Event Output 2
unsigned
1009
RUI / Modbus
Profile Management
Profiling Page
Step 26 - Hours
unsigned
1003
RUI / Modbus
Profile Management
Profiling Page
Step 26 - Jump Count
unsigned
1015
RUI / Modbus
Profile Management
Profiling Page
Step 26 - Jump Step
unsigned
1014
RUI / Modbus
RUI / Modbus
Profile Management
Profiling Page
Step 26 - Minutes
unsigned
1004
Profile Management
Profiling Page
Step 26 - Rate
IEEE Float
1006
RUI / Modbus
Profile Management
Profiling Page
Step 26 - Seconds
unsigned
1005
RUI / Modbus
Profile Management
Profiling Page
Step 26 - Step Type
unsigned
1000
RUI / Modbus
Profile Management
Profiling Page
Step 26 - Target Set Point
IEEE Float
1001
RUI / Modbus
Profile Management
Profiling Page
Step 26 - Wait Event Event 1
unsigned
1010
RUI / Modbus
Profile Management
Profiling Page
Step 26 - Wait Event Event 2
unsigned
1011
RUI / Modbus
Profile Management
Profiling Page
Step 26 - Wait For Process
IEEE Float
1012
RUI / Modbus
Profile Management
Profiling Page
Step 27 - End Type
unsigned
1036
RUI / Modbus
Profile Management
Profiling Page
Step 27 - Event Output 1
unsigned
1028
RUI / Modbus
Profile Management
Profiling Page
Step 27 - Event Output 2
unsigned
1029
RUI / Modbus
Profile Management
Profiling Page
Step 27 - Hours
unsigned
1023
RUI / Modbus
Profile Management
Profiling Page
Step 27 - Jump Count
unsigned
1035
RUI / Modbus
Profile Management
Profiling Page
Step 27 - Jump Step
unsigned
1034
RUI / Modbus
Profile Management
Profiling Page
Step 27 - Minutes
unsigned
1024
RUI / Modbus
Profile Management
Profiling Page
Step 27 - Rate
IEEE Float
1026
RUI / Modbus
Profile Management
Profiling Page
Step 27 - Seconds
unsigned
1025
RUI / Modbus
Profile Management
Profiling Page
Step 27 - Step Type
unsigned
1020
RUI / Modbus
Profile Management
Profiling Page
Step 27 - Target Set Point
IEEE Float
1021
RUI / Modbus
Profile Management
Profiling Page
Step 27 - Wait Event Event 1
unsigned
1030
RUI / Modbus
RUI / Modbus
Profile Management
Profiling Page
Step 27 - Wait Event Event 2
unsigned
1031
Profile Management
Profiling Page
Step 27 - Wait For Process
IEEE Float
1032
RUI / Modbus
Profile Management
Profiling Page
Step 28 - End Type
unsigned
1056
RUI / Modbus
Profile Management
Profiling Page
Step 28 - Event Output 1
unsigned
1048
RUI / Modbus
Profile Management
Profiling Page
Step 28 - Event Output 2
unsigned
1049
RUI / Modbus
Profile Management
Profiling Page
Step 28 - Hours
unsigned
1043
RUI / Modbus
Profile Management
Profiling Page
Step 28 - Jump Count
unsigned
1055
RUI / Modbus
Profile Management
Profiling Page
Step 28 - Jump Step
unsigned
1054
RUI / Modbus
RUI / Modbus
Profile Management
Profiling Page
Step 28 - Minutes
unsigned
1044
Profile Management
Profiling Page
Step 28 - Rate
IEEE Float
1046
RUI / Modbus
Profile Management
Profiling Page
Step 28 - Seconds
unsigned
1045
RUI / Modbus
Profile Management
Profiling Page
Step 28 - Step Type
unsigned
1040
RUI / Modbus
Profile Management
Profiling Page
Step 28 - Target Set Point
IEEE Float
1041
RUI / Modbus
Profile Management
Profiling Page
Step 28 - Wait Event Event 1
unsigned
1050
RUI / Modbus
Watlow EZ-ZONE™ ST
•
81
•
Appendix
Group
Profile Management
Page - Menu
Location
Name in User’s Manual
Data
Type
unsigned
Modbus
Address
(less 40,001
offset)
1051
Access
RUI / Modbus
Profiling Page
Step 28 - Wait Event Event 2
RUI / Modbus
Profile Management
Profiling Page
Step 28 - Wait For Process
IEEE Float
1052
RUI / Modbus
Profile Management
Profiling Page
Step 29 - End Type
unsigned
1076
RUI / Modbus
Profile Management
Profiling Page
Step 29 - Event Output 1
unsigned
1068
RUI / Modbus
Profile Management
Profiling Page
Step 29 - Event Output 2
unsigned
1069
RUI / Modbus
Profile Management
Profiling Page
Step 29 - Hours
unsigned
1063
RUI / Modbus
Profile Management
Profiling Page
Step 29 - Jump Count
unsigned
1075
RUI / Modbus
Profile Management
Profiling Page
Step 29 - Jump Step
unsigned
1074
RUI / Modbus
Profile Management
Profiling Page
Step 29 - Minutes
unsigned
1064
RUI / Modbus
Profile Management
Profiling Page
Step 29 - Rate
IEEE Float
1066
RUI / Modbus
Profile Management
Profiling Page
Step 29 - Seconds
unsigned
1065
RUI / Modbus
Profile Management
Profiling Page
Step 29 - Step Type
unsigned
1060
RUI / Modbus
Profile Management
Profiling Page
Step 29 - Target Set Point
IEEE Float
1061
RUI / Modbus
Profile Management
Profiling Page
Step 29 - Wait Event Event 1
unsigned
1070
RUI / Modbus
Profile Management
Profiling Page
Step 29 - Wait Event Event 2
unsigned
1071
RUI / Modbus
Profile Management
Profiling Page
Step 29 - Wait For Process
IEEE Float
1072
RUI / Modbus
Profile Management
Profiling Page
Step 30 - End Type
unsigned
1096
RUI / Modbus
Profile Management
Profiling Page
Step 30 - Event Output 1
unsigned
1088
RUI / Modbus
Profile Management
Profiling Page
Step 30 - Event Output 2
unsigned
1089
RUI / Modbus
Profile Management
Profiling Page
Step 30 - Hours
unsigned
1083
RUI / Modbus
Profile Management
Profiling Page
Step 30 - Jump Count
unsigned
1095
RUI / Modbus
Profile Management
Profiling Page
Step 30 - Jump Step
unsigned
1094
RUI / Modbus
Profile Management
Profiling Page
Step 30 - Minutes
unsigned
1084
RUI / Modbus
Profile Management
Profiling Page
Step 30 - Rate
IEEE Float
1086
RUI / Modbus
Profile Management
Profiling Page
Step 30 - Seconds
unsigned
1085
RUI / Modbus
Profile Management
Profiling Page
Step 30 - Step Type
unsigned
1080
RUI / Modbus
Profile Management
Profiling Page
Step 30 - Target Set Point
IEEE Float
1081
RUI / Modbus
Profile Management
Profiling Page
Step 30 - Wait Event Event 1
unsigned
1090
RUI / Modbus
RUI / Modbus
Profile Management
Profiling Page
Step 30 - Wait Event Event 2
unsigned
1091
Profile Management
Profiling Page
Step 30 - Wait For Process
IEEE Float
1092
RUI / Modbus
Profile Management
Profiling Page
Step 31 - End Type
unsigned
1116
RUI / Modbus
Profile Management
Profiling Page
Step 31 - Event Output 1
unsigned
1108
RUI / Modbus
Profile Management
Profiling Page
Step 31 - Event Output 2
unsigned
1109
RUI / Modbus
Profile Management
Profiling Page
Step 31 - Hours
unsigned
1103
RUI / Modbus
Profile Management
Profiling Page
Step 31 - Jump Count
unsigned
1115
RUI / Modbus
Profile Management
Profiling Page
Step 31 - Jump Step
unsigned
1114
RUI / Modbus
RUI / Modbus
Profile Management
Profiling Page
Step 31 - Minutes
unsigned
1104
Profile Management
Profiling Page
Step 31 - Rate
IEEE Float
1106
RUI / Modbus
Profile Management
Profiling Page
Step 31 - Seconds
unsigned
1105
RUI / Modbus
Profile Management
Profiling Page
Step 31 - Step Type
unsigned
1100
RUI / Modbus
Profile Management
Profiling Page
Step 31 - Target Set Point
IEEE Float
1101
RUI / Modbus
Profile Management
Profiling Page
Step 31 - Wait Event Event 1
unsigned
1110
RUI / Modbus
Profile Management
Profiling Page
Step 31 - Wait Event Event 2
unsigned
1111
RUI / Modbus
Profile Management
Profiling Page
Step 31 - Wait For Process
IEEE Float
1112
RUI / Modbus
Profile Management
Profiling Page
Step 32 - End Type
unsigned
1136
RUI / Modbus
Profile Management
Profiling Page
Step 32 - Event Output 1
unsigned
1128
RUI / Modbus
Profile Management
Profiling Page
Step 32 - Event Output 2
unsigned
1129
RUI / Modbus
Profile Management
Profiling Page
Step 32 - Hours
unsigned
1123
RUI / Modbus
Profile Management
Profiling Page
Step 32 - Jump Count
unsigned
1135
RUI / Modbus
Profile Management
Profiling Page
Step 32 - Jump Step
unsigned
1134
RUI / Modbus
Watlow EZ-ZONE™ ST
•
82
•
Appendix
Group
Profile Management
Page - Menu
Location
Name in User’s Manual
Data
Type
unsigned
Modbus
Address
(less 40,001
offset)
1124
Access
RUI / Modbus
Profiling Page
Step 32 - Minutes
RUI / Modbus
Profile Management
Profiling Page
Step 32 - Rate
IEEE Float
1126
RUI / Modbus
Profile Management
Profiling Page
Step 32 - Seconds
unsigned
1125
RUI / Modbus
Profile Management
Profiling Page
Step 32 - Step Type
unsigned
1120
RUI / Modbus
Profile Management
Profiling Page
Step 32 - Target Set Point
IEEE Float
1121
RUI / Modbus
Profile Management
Profiling Page
Step 32 - Wait Event Event 1
unsigned
1130
RUI / Modbus
Profile Management
Profiling Page
Step 32 - Wait Event Event 2
unsigned
1131
RUI / Modbus
Profile Management
Profiling Page
Step 32 - Wait For Process
IEEE Float
1132
RUI / Modbus
Profile Management
Profiling Page
Step 33 - End Type
unsigned
1156
RUI / Modbus
RUI / Modbus
Profile Management
Profiling Page
Step 33 - Event Output 1
unsigned
1148
Profile Management
Profiling Page
Step 33 - Event Output 2
unsigned
1149
RUI / Modbus
Profile Management
Profiling Page
Step 33 - Hours
unsigned
1143
RUI / Modbus
Profile Management
Profiling Page
Step 33 - Jump Count
unsigned
1155
RUI / Modbus
Profile Management
Profiling Page
Step 33 - Jump Step
unsigned
1154
RUI / Modbus
Profile Management
Profiling Page
Step 33 - Minutes
unsigned
1144
RUI / Modbus
Profile Management
Profiling Page
Step 33 - Rate
IEEE Float
1146
RUI / Modbus
Profile Management
Profiling Page
Step 33 - Seconds
unsigned
1145
RUI / Modbus
Profile Management
Profiling Page
Step 33 - Step Type
unsigned
1140
RUI / Modbus
Profile Management
Profiling Page
Step 33 - Target Set Point
IEEE Float
1141
RUI / Modbus
Profile Management
Profiling Page
Step 33 - Wait Event Event 1
unsigned
1150
RUI / Modbus
RUI / Modbus
Profile Management
Profiling Page
Step 33 - Wait Event Event 2
unsigned
1151
Profile Management
Profiling Page
Step 33 - Wait For Process
IEEE Float
1152
RUI / Modbus
Profile Management
Profiling Page
Step 34 - End Type
unsigned
1176
RUI / Modbus
Profile Management
Profiling Page
Step 34 - Event Output 1
unsigned
1168
RUI / Modbus
Profile Management
Profiling Page
Step 34 - Event Output 2
unsigned
1169
RUI / Modbus
Profile Management
Profiling Page
Step 34 - Hours
unsigned
1163
RUI / Modbus
Profile Management
Profiling Page
Step 34 - Jump Count
unsigned
1175
RUI / Modbus
Profile Management
Profiling Page
Step 34 - Jump Step
unsigned
1174
RUI / Modbus
RUI / Modbus
Profile Management
Profiling Page
Step 34 - Minutes
unsigned
1164
Profile Management
Profiling Page
Step 34 - Rate
IEEE Float
1166
RUI / Modbus
Profile Management
Profiling Page
Step 34 - Seconds
unsigned
1165
RUI / Modbus
Profile Management
Profiling Page
Step 34 - Step Type
unsigned
1160
RUI / Modbus
Profile Management
Profiling Page
Step 34 - Target Set Point
IEEE Float
1161
RUI / Modbus
Profile Management
Profiling Page
Step 34 - Wait Event Event 1
unsigned
1170
RUI / Modbus
Profile Management
Profiling Page
Step 34 - Wait Event Event 2
unsigned
1171
RUI / Modbus
Profile Management
Profiling Page
Step 34 - Wait For Process
IEEE Float
1172
RUI / Modbus
Profile Management
Profiling Page
Step 35 - End Type
unsigned
1196
RUI / Modbus
Profile Management
Profiling Page
Step 35 - Event Output 1
unsigned
1188
RUI / Modbus
Profile Management
Profiling Page
Step 35 - Event Output 2
unsigned
1189
RUI / Modbus
Profile Management
Profiling Page
Step 35 - Hours
unsigned
1183
RUI / Modbus
Profile Management
Profiling Page
Step 35 - Jump Count
unsigned
1195
RUI / Modbus
Profile Management
Profiling Page
Step 35 - Jump Step
unsigned
1194
RUI / Modbus
Profile Management
Profiling Page
Step 35 - Minutes
unsigned
1184
RUI / Modbus
Profile Management
Profiling Page
Step 35 - Rate
IEEE Float
1186
RUI / Modbus
Profile Management
Profiling Page
Step 35 - Seconds
unsigned
1185
RUI / Modbus
Profile Management
Profiling Page
Step 35 - Step Type
unsigned
1180
RUI / Modbus
Profile Management
Profiling Page
Step 35 - Target Set Point
IEEE Float
1181
RUI / Modbus
Profile Management
Profiling Page
Step 35 - Wait Event Event 1
unsigned
1190
RUI / Modbus
Profile Management
Profiling Page
Step 35 - Wait Event Event 2
unsigned
1191
RUI / Modbus
Profile Management
Profiling Page
Step 35 - Wait For Process
IEEE Float
1192
RUI / Modbus
Watlow EZ-ZONE™ ST
•
83
•
Appendix
Group
Profile Management
Page - Menu
Location
Name in User’s Manual
Data
Type
Modbus
Address
(less 40,001
offset)
Access
RUI / Modbus
Profiling Page
Step 36 - End Type
unsigned
1216
RUI / Modbus
RUI / Modbus
Profile Management
Profiling Page
Step 36 - Event Output 1
unsigned
1208
Profile Management
Profiling Page
Step 36 - Event Output 2
unsigned
1209
RUI / Modbus
Profile Management
Profiling Page
Step 36 - Hours
unsigned
1203
RUI / Modbus
Profile Management
Profiling Page
Step 36 - Jump Count
unsigned
1215
RUI / Modbus
Profile Management
Profiling Page
Step 36 - Jump Step
unsigned
1214
RUI / Modbus
Profile Management
Profiling Page
Step 36 - Minutes
unsigned
1204
RUI / Modbus
Profile Management
Profiling Page
Step 36 - Rate
IEEE Float
1206
RUI / Modbus
Profile Management
Profiling Page
Step 36 - Seconds
unsigned
1205
RUI / Modbus
RUI / Modbus
Profile Management
Profiling Page
Step 36 - Step Type
unsigned
1200
Profile Management
Profiling Page
Step 36 - Target Set Point
IEEE Float
1201
RUI / Modbus
Profile Management
Profiling Page
Step 36 - Wait Event Event 1
unsigned
1210
RUI / Modbus
Profile Management
Profiling Page
Step 36 - Wait Event Event 2
unsigned
1211
RUI / Modbus
Profile Management
Profiling Page
Step 36 - Wait For Process
IEEE Float
1212
RUI / Modbus
Profile Management
Profiling Page
Step 37 - End Type
unsigned
1236
RUI / Modbus
Profile Management
Profiling Page
Step 37 - Event Output 1
unsigned
1228
RUI / Modbus
Profile Management
Profiling Page
Step 37 - Event Output 2
unsigned
1229
RUI / Modbus
Profile Management
Profiling Page
Step 37 - Hours
unsigned
1223
RUI / Modbus
Profile Management
Profiling Page
Step 37 - Jump Count
unsigned
1235
RUI / Modbus
Profile Management
Profiling Page
Step 37 - Jump Step
unsigned
1234
RUI / Modbus
RUI / Modbus
Profile Management
Profiling Page
Step 37 - Minutes
unsigned
1224
Profile Management
Profiling Page
Step 37 - Rate
IEEE Float
1226
RUI / Modbus
Profile Management
Profiling Page
Step 37 - Seconds
unsigned
1225
RUI / Modbus
Profile Management
Profiling Page
Step 37 - Step Type
unsigned
1220
RUI / Modbus
Profile Management
Profiling Page
Step 37 - Target Set Point
IEEE Float
1221
RUI / Modbus
Profile Management
Profiling Page
Step 37 - Wait Event Event 1
unsigned
1230
RUI / Modbus
Profile Management
Profiling Page
Step 37 - Wait Event Event 2
unsigned
1231
RUI / Modbus
Profile Management
Profiling Page
Step 37 - Wait For Process
IEEE Float
1232
RUI / Modbus
Profile Management
Profiling Page
Step 38 - End Type
unsigned
1256
RUI / Modbus
Profile Management
Profiling Page
Step 38 - Event Output 1
unsigned
1248
RUI / Modbus
Profile Management
Profiling Page
Step 38 - Event Output 2
unsigned
1249
RUI / Modbus
Profile Management
Profiling Page
Step 38 - Hours
unsigned
1243
RUI / Modbus
Profile Management
Profiling Page
Step 38 - Jump Count
unsigned
1255
RUI / Modbus
Profile Management
Profiling Page
Step 38 - Jump Step
unsigned
1254
RUI / Modbus
Profile Management
Profiling Page
Step 38 - Minutes
unsigned
1244
RUI / Modbus
Profile Management
Profiling Page
Step 38 - Rate
IEEE Float
1246
RUI / Modbus
Profile Management
Profiling Page
Step 38 - Seconds
unsigned
1245
RUI / Modbus
Profile Management
Profiling Page
Step 38 - Step Type
unsigned
1240
RUI / Modbus
Profile Management
Profiling Page
Step 38 - Target Set Point
IEEE Float
1241
RUI / Modbus
Profile Management
Profiling Page
Step 38 - Wait Event Event 1
unsigned
1250
RUI / Modbus
RUI / Modbus
Profile Management
Profiling Page
Step 38 - Wait Event Event 2
unsigned
1251
Profile Management
Profiling Page
Step 38 - Wait For Process
IEEE Float
1252
RUI / Modbus
Profile Management
Profiling Page
Step 39 - End Type
unsigned
1276
RUI / Modbus
Profile Management
Profiling Page
Step 39 - Event Output 1
unsigned
1268
RUI / Modbus
Profile Management
Profiling Page
Step 39 - Event Output 2
unsigned
1269
RUI / Modbus
Profile Management
Profiling Page
Step 39 - Hours
unsigned
1263
RUI / Modbus
Profile Management
Profiling Page
Step 39 - Jump Count
unsigned
1275
RUI / Modbus
Profile Management
Profiling Page
Step 39 - Jump Step
unsigned
1274
RUI / Modbus
Profile Management
Profiling Page
Step 39 - Minutes
unsigned
1264
RUI / Modbus
Profile Management
Profiling Page
Step 39 - Rate
IEEE Float
1266
RUI / Modbus
Watlow EZ-ZONE™ ST
•
84
•
Appendix
Group
Profile Management
Page - Menu
Location
Name in User’s Manual
Data
Type
Modbus
Address
(less 40,001
offset)
Access
RUI / Modbus
Profiling Page
Step 39 - Seconds
unsigned
1265
RUI / Modbus
RUI / Modbus
Profile Management
Profiling Page
Step 39 - Step Type
unsigned
1260
Profile Management
Profiling Page
Step 39 - Target Set Point
IEEE Float
1261
RUI / Modbus
Profile Management
Profiling Page
Step 39 - Wait Event Event 1
unsigned
1270
RUI / Modbus
Profile Management
Profiling Page
Step 39 - Wait Event Event 2
unsigned
1271
RUI / Modbus
Profile Management
Profiling Page
Step 39 - Wait For Process
IEEE Float
1272
RUI / Modbus
Profile Management
Profiling Page
Step 40 - End Type
unsigned
1296
RUI / Modbus
Profile Management
Profiling Page
Step 40 - Event Output 2
unsigned
1289
RUI / Modbus
Profile Management
Profiling Page
Step 40 - Event Output 40
unsigned
1288
RUI / Modbus
RUI / Modbus
Profile Management
Profiling Page
Step 40 - Hours
unsigned
1283
Profile Management
Profiling Page
Step 40 - Jump Count
unsigned
1295
RUI / Modbus
Profile Management
Profiling Page
Step 40 - Jump Step
unsigned
1294
RUI / Modbus
Profile Management
Profiling Page
Step 40 - Minutes
unsigned
1284
RUI / Modbus
Profile Management
Profiling Page
Step 40 - Rate
IEEE Float
1286
RUI / Modbus
Profile Management
Profiling Page
Step 40 - Seconds
unsigned
1285
RUI / Modbus
Profile Management
Profiling Page
Step 40 - Step Type
unsigned
1280
RUI / Modbus
Profile Management
Profiling Page
Step 40 - Target Set Point
IEEE Float
1281
RUI / Modbus
Profile Management
Profiling Page
Step 40 - Wait Event Event 2
unsigned
1291
RUI / Modbus
Profile Management
Profiling Page
Step 40 - Wait Event Event 40
unsigned
1290
RUI / Modbus
Profile Management
Profiling Page
Step 40 - Wait For Process
IEEE Float
1292
RUI / Modbus
Set Point Manager
Operation - Monitor
Bumpless Set Point
IEEE Float
209
Modbus only
Set Point Manager
Setup - Loop
Closed Loop Active Set Point
IEEE Float
203
Modbus only
Set Point Manager
Home Page
Closed Loop Set point
IEEE Float
21
RUI / Modbus
Set Point Manager
Setup - Loop
Loop Input Error Failure
unsigned
214
RUI / Modbus
Set Point Manager
Setup - Loop
Loop Manual Power
IEEE Float
211
RUI / Modbus
Set Point Manager
Setup - Loop
Closed Loop High Set Point
IEEE Float
197
RUI / Modbus
Set Point Manager
Setup - Loop
Closed Loop Low Set Point
IEEE Float
195
RUI / Modbus
Set Point Manager
Operation - Loop
Idle Set Point
IEEE Float
207
RUI / Modbus
Set Point Manager
Setup - Loop
Open Loop Active Set Point
IEEE Float
205
Modbus only
Set Point Manager
Setup - Loop
Open Loop High Set Point
IEEE Float
201
Modbus only
Set Point Manager
Setup - Loop
Open Loop Low Set Point
IEEE Float
199
Modbus only
Set Point Manager
Home Page
Open Loop Set Point
IEEE Float
23
RUI / Modbus
Set Point Manager
Setup - Loop
Ramp Action
unsigned
215
RUI / Modbus
Set Point Manager
Setup - Loop
Ramp Rate
IEEE Float
219
RUI / Modbus
Set Point Manager
Setup - Loop
Ramp Scale
unsigned
216
RUI / Modbus
Set Point Manager
Operation - Monitor
Ramp Set Point
IEEE Float
217
Modbus only
Set Point Manager
Setup - Loop
User Action Failure
unsigned
213
Modbus only
Status
Operation - Monitor
Alarm 1 State
unsigned
29
Modbus only
Status
Operation - Monitor
Alarm 2 State
unsigned
30
Modbus only
Status
Operation - Monitor
Ambient Temperature
IEEE Float
34
Modbus only
Status
Operation - Analog Input
Analog Input 1 Process Value
IEEE Float
19
RUI / Modbus
Status
Operation - Monitor
Analog Input 2 Process Value
IEEE Float
25
RUI / Modbus
Status
Operation - Monitor
Control Loop Output Power
IEEE Float
27
Modbus only
Status
Operation - Current
Current Error
unsigned
40
RUI / Modbus
Status
Operation - Current
Current Read
IEEE Float
38
RUI / Modbus
Status
Operation - Monitor
Event 1 Status
unsigned
32
Modbus only
Status
Operation - Monitor
Event 2 Status
unsigned
33
Modbus only
Status
Operation - Monitor
Limit State
unsigned
31
Modbus only
Watlow EZ-ZONE™ ST
•
85
•
Appendix
Specifications
Line Voltage/Power
• 100 to 240VÅ (ac), +10/-15 percent; (85-264VÅ [ac]), 50/60 Hz, ±5
percent
• 24Vı (ac/dc), +10/-15 percent; 50/60Hz, ±5 percent
• 12VA maximum power consumption without mechanical contactor in system
• 50VA maximum power consumption with mechanical contactor in
system
• 140VA maximum power consumption with external contactor
• Data retention upon power failure via nonvolatile memory
Current Measurement
• Nominal operating frequency 50 to 60 Hz.
• Accuracy ±15% of displayed value
• Accuracy range 5 to 50 A
• Operating range 2 to 50 A
Digital Output
• Update rate 10 Hz
• Output voltage 24V, current limit 10 mA
Input Accuracy Span Ranges
Type J: 0 to 815°C or 32 to 1500°F
Type K: -200 to 1370°C or -328 to 2500°F
Type T: -200 to 400°C or -328 to 750°F
Type N: 0 to 1300°C or 32 to 2372°F
Type E: -200 to 800°C or -328 to 1470°F
Type C: 0 to 2315°C or 32 to 4200°F
Type D: 0 to 2315°C or 32 to 4200°F
Type PTII: 0 to 1395°C or 32 to 2543°F
Type R: 0 to 1760°C or 32 to 3200°F
Type S: 0 to 1760°C or 32 to 3200°F
Type B: 0 to 1816°C or 32 to 3300°F
RTD (DIN): -200 to 800°C or -328 to 1472°F
Process: -1999 to 9999 units
Environment (See Derating Curves in Declaration of Conformity)
• -18 to 70°C (0 to 158°F) operating temperature
• -40 to 85°C (-40 to 185°F) storage temperature
• 0 to 90 percent RH, non-condensing
Accuracy
• Calibration accuracy and sensor conformity: ±0.1 percent of span,
±1°C @ the calibrated ambient temperature and rated line voltage
• Calibration ambient temperature: 25°C, ±3°C (77°F, ±5°F)
• Accuracy span: 540°C (1000°F) minimum
• Temperature stability: ±0.1°C/°C (±0.1°F/°F) rise in ambient
maximum
Agency Approvals
• UL® 508 file E102269, cULus, CE, IP66/NEMA 4X (RUI), RoHS,
W.E.E.E.
Product is UL recognized when purchased as components. Product is UL listed when purchased as a complete assembly.
• CSA approved C22.2#14 file 158031
• Limit version features FM approval
Output Hardware
• User selectable for heat-cool as on-off, P, PI, PD, PID, alarm or
limit action.
• Output 1: SSR drive 20 to 28VÎ (dc) low side open collector
switch
• Output 2: Solid-state relay, Form A, 0.5 A @ 24VÅ (ac) minimum,
264VÅ (ac) maximum, opto-isolated, without contact suppression
• Output 4: Electromechanical relay. Form A, rated 2 A, 125VA, pilot duty, 120/240VÅ (ac); 25VA, 24VÅ (ac)
• Output 2: Electromechanical relay. Form A, rated 5 A, 125VA, pilot duty, 120/240VÅ (ac); 25VA, 24VÅ (ac)
• Output 3: Electromechanical relay. Form C, rated 5 A, 125VA, pilot duty, 120/240VÅ (ac); 25VA, 24VÅ (ac)
Controller
• Microprocessor-based, user-selectable control modes
• PID module: Single universal input, 2 outputs
• Limit module: Single universal input, 2 outputs
• 2 additional digital input/outputs shared between PID and limit
functions
• Control sampling rates: input 10 Hz, outputs 10 Hz
• Isolated EIA 485 Modbus™ serial communications
Weight:
• 40 A heat sink assembly only, 431 g (0.95 lb)
• 25 A heat sink assembly only, 340 g (0.75 lb)
• solid-state relay controller only, 177 g (0.39 lb)
• solid-state relay controller only with base without heat sink, 345g
(0.76 lb)
• full system with 25 A heat sink, 1.134 kg (2.5 lb)
Wiring Termination Touch-Safe Terminals
• Input, power and controller output terminals touch safe removable 4 to 0.34 mm2 (12 to 22 AWG), 7.0 lb-in. torque.
• Power load terminals 3.3 to 0.324 mm2 (6 to 12 AWG) STR 90°C
(194°F) copper conductor only, 3.96 Nm (35 lb-in) torque
• Temperature rating for line and lug loads 90°C (194°F)
Universal Input
• Thermocouple, grounded or ungrounded sensors
• RTD 2- or 3-wire, platinum, 100 Ω @ 0°C calibration to DIN curve
(0.00385 Ω/Ω/°C)
• Process, 0 to 20 mA @ 100 Ω, or 0 to 10VÎ (dc) @ 20 kΩ input impedance; scalable
• Inverse scaling
• >20 MΩ input impedance
• Maximum of 20 Ω source resistance
• 42VÎ (dc) isolation voltage for input 1 to input 2
Basic Remote User Interface (RUI)
Operator Interface
• Dual 4-digit, 7-segment LED displays
• Forward, backward, up and down keys plus a customer programmable function key
• Isolated EIA 485 Modbus™ serial communications
• Typical display update rate 1Hz
• Agency approved to IP66/NEMA 4X
(indoor use only)
Digital Input
• Update rate 1 Hz
• Dry contact or dc voltage
Line Voltage/Power
• 100 to 240VÅ (ac), +10/-15 percent; (85 to 264VÅ [ac]) 50/60 Hz,
±5 percent 6VA maximum
• 24Vı (ac/dc), +10/-15 percent; 50/60 Hz, ±5 percent
DC voltage
• Maximum input 36V at 3 mA
• Minimum high state 3V at 0.25 mA
• Maximum low state 2V
Weight:
• 99.8 g (0.22 lb)
Note: These specifications are subject to change without prior
notice.
Dry contact
• Maximum short circuit 13 mA
• Minimum open resistance 500 Ω
• Maximum closed resistance 100 Ω
Watlow EZ-ZONE™ ST
•
86
•
Appendix
Ordering Information
Ordering Information for EZ-ZONE™ ST Accessory Kit
E Z K __
Code Number
-
__
__ __ __
-
__ __ __ __
Remote User Interface (RUI)
A
B
None
Basic 1⁄16 DIN
Power Supply Voltage for Remote User Interface (RUI)
A
L
H
None, if no RUI is being ordered
Low voltage 24 to 28V‡ (ac/dc)
Universal high voltage 100 to 240V‡ (ac/dc)
For Future Use
A
None
Custom Remote User Interface (RUI)
AA
XX
None
Custom options, consult factory
For Future Use
A
None
Central Communication Module
A
None
PC Based Software
AA
None
NOTE
Configurator PC software can be downloaded for free from the Watlow website (www.watlow.com).
Ordering Information for EZ-ZONE™ ST Replacement Base
Code Number
S
T
R
T
-
B
A
S
E
-
__
__
__
__
Series ST Replacement Base
Integrated Mechanical Controller
0000
Compact base version (no space for mechanical contactor)
DPB1 Base housing with single-pole, 40 A Watlow contactor, 24VÅ (ac) power supply
DPB2 Base housing with single-pole, 40 A Watlow contactor, 110/120VÅ (ac) power supply
DPB3 Base housing with single-pole, 40 A Watlow contactor, 208/240VÅ (ac) power supply
DPF1 Base housing with dual-pole, 40 A Watlow contactor, 24VÅ (ac) power supply
DPF2 Base housing with dual-pole, 40 A Watlow contactor, 110/120VÅ (ac) power supply
DPF3 Base housing with dual-pole, 40 A Watlow contactor, 208/240VÅ (ac) power supply
Watlow EZ-ZONE™ ST
•
87
•
Appendix
Ordering Information for EZ-ZONE™ ST Replacement Heat Sink
Code Number
S
T
R
T
-
H
S
-
__
__
0
0
0
__
Series ST Replacement Heat Sink
Heat Sink Base Configuration (Integrated Mechanical Contactor)
AA
Heat sink for mounting to compact base with no mechanical contactor
(ordered separately STRT-BASE-_ _ _ _)
CB
Heat sink for mounting to large base with integrated mechanical contactor
(base and contactor ordered separately under STRT-BASE-_ _ _ _)
Heat Sink Amperage Rating
B
25 A
C
40 A
Ordering Information for EZ-ZONE™ ST Replacement Solid State
Relays (SSRs)
0003-0214-0000
10 A and 25 A replacement (24 to 240VÅ (ac) output)
0003-0215-0000
40 A and 50 A replacement (24 to 240VÅ (ac) output)**
0802-0952-0000
90 A replacement (24 to 240VÅ (ac) output)**
0003-0216-0000
24 A replacement (48 to 600VÅ (ac) output)
0003-0217-0000
40 A replacement (48 to 600VÅ (ac) output)
0802-0951-0000
90 A replacement (48 to 600VÅ (ac) output)**
** EZ-ZONE ST rated for maximum 40 A
Watlow EZ-ZONE™ ST
•
88
•
Appendix
Ordering Information and Model Numbers for EZ-ZONE™ ST
EZ-ZONE™ ST
Integrated Thermal Loop Hybrid Control Switch System
S T __ __
-
__
__ __ __
-
__ __ __ __
Output 1 is dedicated to controlling the internal solid-state relay.
Output 2, Digital I/O and Current Measurement
K
B
P
E
H
D
J
C
0.5 A solid-state relay
0.5 A solid-state relay with 2 digital i/o points
0.5 A solid-state relay with current measurement
0.5 A solid-state relay with 2 digital i/o points and current measurement
5 A mechanical relay form A
5 A mechanical relay form A, 2 digital i/o points
5 A mechanical relay form A, current measurement
5 A mechanical relay form A, 2 digital i/o points, current measurement
Integrated Limit Controller
1 universal input and 2 outputs
A
None
L
Limit control module (output 3, 5 A, Form C mech. relay; out. 4, 2 A, Form A mech. relay)
B
Terminal block access to mechanical contactor coil contacts
If the limit controller was ordered, the contactor will come internally connected to output 4 on the limit module. The contactor has
external contacts available for daisy chaining to other branch circuit
components.
No contactor and universal high voltage power supply 100 to 240V‡ (ac/dc)
No contactor and universal low voltage power supply 24 to 28V‡ (ac/dc)
Single pole, 40 A Watlow contactor, 24VÅ (ac) power supply
Single pole, 40 A Watlow contactor, 110 / 120VÅ (ac) power supply
Single pole, 40 A Watlow contactor, 208 / 240VÅ (ac) power supply
Dual pole, 40 A Watlow contactor, 24VÅ (ac) power supply
Dual pole, 40 A Watlow contactor, 110 / 120VÅ (ac) power supply
Dual pole, 40 A Watlow contactor, 208 / 240VÅ (ac) power supply
Mechanical Contactor and
Power Supply
AH
AL
B1
B2
B3
F1
F2
F3
Communications
A
M
Standard software to connect to pc software, remote user interface (RUI) and other EZ-ZONE™ STs
Modbus™ RTU communication port to connect to non-ST products
Solid-State Relay
B
C
D
*E
*F
G
H
*J
10 A, 24 to 240VÅ (ac) output
25 A, 24 to 240VÅ (ac) output
40 A, 24 to 240VÅ (ac) output
50 A, 24 to 240VÅ (ac) output
90 A, 48 to 240VÅ (ac) output
25 A, 24 to 600VÅ (ac) output
40 A, 48 to 600VÅ (ac) output
90 A, 24 to 600VÅ (ac) output
*EZ-ZONE™ ST only rated for maximum 40 A.
Heat Sinks
A
B
C
None (no DIN-rail mount)
25 A (See Derating Curves in the Declaration of Conformity.)
40 A (See Derating Curves in the Declaration of Conformity.)
Firmware
A
P
S
Standard Watlow
Profile ramp and soak (4 profiles, 40 steps)
Custom
Customization (logo, parameters, hardware, firmware)
AA
XX
Standard
{letters to be determined, consult factory}
Watlow EZ-ZONE™ ST
•
89
•
Appendix
Index
Prompt Index
[`A;bL] Alarm Blocking 43, 65
[AC;LF] AC Line Frequency 44, 63
[AC;SP] Active Set Point 36
[`Ad;S] RUI Address 24
[A;dSP] Alarm Display 43
[`A;hi] Alarm High Set Point 34, 64
[`A;hy] Alarm Hysteresis 43, 64
[``Ai] Analog Input Menu 31, 38
[`A;iS] Alarm Source Instance 43
[AL`1] Alarm 1 29
[AL`1] Alarm Error 68
[AL`2] Alarm 2 29
[AL`2] Alarm Error 68
[`A;LA] Alarm Latching 43, 65
[`A;Lg] Alarm Logic 43
[ALM] Alarm Menu 34, 42
[`A;Lo] Alarm Low Set Point 34, 64
[`A;Sd] Alarm Sides 43
[`A;Si] Alarm Silencing 43, 65
[`A;Sr] Alarm Source 42
[A;tSP] Autotune Set Point 33
[Attn] Message Action 23, 28, 29,
64, 65
[`A;ty] Alarm Type 42, 64
[`Aut] Autotune Request 33
[Aut1] Autotune 28
[`bUS] Communications Menu 24
[`C;Ag] Cool Algorithm 40, 62
[`CAL] Calibration Menu 55
[`C;dt] Current Detect Threshold 44
[`C;Er] Current Error 23, 29, 35, 65,
70
[`C_F] Display Units 44
[`C;hi] Current High Set Point 35,
65
[`C;hy] Cool Hysteresis 34, 62
[`C;LE] Current Limit Enable 43
[C;LEd] Communications LED Assignment 25
[`C;Lo] Current Low Set Point 35,
65
[`C;M] Control Mode 33, 61
[C;M1] Control Mode 28
[C;MA] Control Mode Active 31
[C;oFS] Current Offset 44
[`C;Pb] Cool Proportional Band 33,
57, 62
[`C;Pr] Cool Power 32, 58
[C;Pr1] Cool Power 28
[`C;Sd] Current Sides 43
[`C;SP] Closed Loop Set Point 32,
33
Watlow EZ-ZONE™ ST
[C;SSr] Solid-state Relay Fault 23
[`CU;r] Current Read 35
[`CU;r] Current Reading Enable 43
[CUrr] Current Menu 35, 43
[CUSt] Custom Menu 28, 54, 57
[dAtE] Date of Manufacture 24, 55
[``db] Dead Band 34, 63
[`dEC] Decimal 38
[d;Err] Device Error 23, 29
[`d;Fn] Digital Input Function 39, 44
[diAg] Diagnostics Menu 24, 55
[`di;L] Digital Input Level 39
[`dio] Digital Input/Output Menu
31
[`dir] Direction 39
[`do;S] Output State 31
[`Ei;S] Event Status 31
[ELi;o] Electrical Offset 55, 59
[ELi;S] Electrical Slope 55, 59
[`End] End 47, 49
[`End] End Type 48
[Ent1] Event Output 1 36, 48
[Ent2] Event Output 2 36, 48
[Er;i2] Error Input 2 23, 29, 68
[Er;i1] Error Input 1 23, 29, 68
[FAiL] Input Error Failure 41, 61
[`FiL] Filter 38
[`F;iS] Digital Input Function Instance 40
[`F;iS] Function Key Instance 44
[`Fun] Function Key Menu 44
[gLbL] Global Menu 44
[`gSd] Guaranteed Soak Deviation
45
[`gSE] Guaranteed Soak Enable
45
[`h;Ag] Heat Algorithm 40, 61
[`h;Er] Heater Error 23, 29, 35, 65,
70
[`h;hy] Heat Hysteresis 33, 62
[hoUr] Hours 48
[`h;Pb] Heat Proportional Band 33,
57, 62
[`h;Pr] Heat Power 32, 58
[h;Pr1] Heat Power 28
[`h;SP] Closed Loop High Set Point
41
[`i;CA] Calibration Offset 31, 59–60
[`id;S] Idle Set Point 33
[id;S1] Idle Set Point 28
[`i;Er] Input Error 31, 38
[`iid] Instance 54
[``JC] Jump Count 48
•
90
•
[``JC] Jump Count Remaining 36
[``JL] Jump Loop 47, 49
[``JS] Jump Step 48
[`Lh;S] Limit High Set Point 31
[`L;hy] Limit Hysteresis 40
[LiM] Limit 23, 29
[LiM] Limit Error 68
[LiM] Limit Menu 31, 40
[`Lin] Linearization 38
[`L;it] Limit Integrate 40
[`LL;S] Limit Low Set Point 31
[`LoC] Lockout Menu 24, 54
[LoC;o] Lock Operations Page 54,
66
[LoC;P] Lock Profiling Page 54, 66
[LooP] Loop Menu 33, 40
[`L;Sd] Limit Sides 40
[`L;SP] Closed Loop Low Set Point
41
[MAn] Manual Power 41
[Min] Minutes 48
[Mon] Monitor Menu 31
[`Mu] Electrical Measurement 55,
59
[nU;2n] Number of Zones 24
[`o;Ct] Output Control 42
[`o;Fi] Digital Output Function
Instance 39
[`o;Fi] Output Function Instance 42
[`o;Fn] Digital Output Function 39
[`o;Fn] Output Function 42
[`o;hi] Output High Power Scale 42
[`o;Lo] Output Low Power Scale 42
[`o;SP] Open Loop Set Point 34
[`o;tb] Output Time Base 42
[otPt] Output Menu 42
[``P1] Parameter 1 (to 20) Custom
54
[``p1] to [``p4] Step 47
[P;AC1] Profile Action Request 28,
29
[P;ACr] Profile Action Request 35
[ProF] Profile 47
[P;St1] Profile Start 28, 29
[P;StA] Profile Status Menu 35
[P;Str] Profile Start 35
[P;tyP] Profile Type 45
[``Pu] Process Value 31
[`Pu;A] Process Value Active 32
[rAtE] Rate 47, 48, 49
[`r;hi] Range High 38, 60
[`r;Lo] Range Low 38, 60
[rLoC] Read Lockout Security 66
Appendix
[rLoC] Read Lock 24
[``rP] Ramping 23, 29, 69
[``rP] Ramp Action 41, 64
[`r;rt] Ramp Rate 41, 64
[`r;SC] Ramp Scale 41, 64
[`rt;L] RTD Leads 38
[`S;bA] Sensor Backup Enable 39,
60
[S;bLd] Software Build 24, 55
[`SEC] Seconds 48
[`SEn] Sensor Type 38, 60
[`S;hi] Scale High 38, 60
[`S;id] Software ID 24, 55
[`S;Lo] Scale Low 38, 60
[SLoC] Set Lockout Security 66
[SLoC] Set Lock 24
[``Sn] Serial Number 24, 55
[SoAH] Soak 47, 49
[SP;hi] Open Loop High Set Point
41
[SP;Lo] Open Loop Low Set Point
41
[`S;Pr] Software Prototype 24, 55
[`S;rL] Software Release 24, 55
[St;2n] Start Zone 24
[`S;ti] Step Time Remaining 36
[`StP] Current Step 35
[S;tyP] Step Type 35, 47
[t;Agr] Autotune Aggressiveness
41
[t;bnd] TRU-TUNE+™ Band 40
[``td] Time Derivative 34, 57, 62
[`t;gn] TRU-TUNE+™ Gain 40
[tg;SP] Target Set Point 36, 47
[``ti] Time 47, 49
[``ti] Time Integral 34, 57, 62
[t;tUn] TRU-TUNE+™ Enable 40
[tUnE] Tuning 23, 29
[tUNE] Autotuning 69
[USr;r] User Restore Set 24, 55, 57
[USr;S] User Save Set 25, 55, 57
[UStP] Unused Step 47, 49
[uALU] 70
[W;bo] Wait For Both 47, 49
[`W;E] Wait For Event 47, 49
[WE;1] Wait Event 1 48
[WE;2] Wait Event 2 48
[WPr] Wait For Process Value 48
[W;Pr] Wait For Process 47, 49
A
accessory kit 87
Active Process Value 28
Active Set Point 28, 36, 52
Active Step 35, 52
Watlow EZ-ZONE™ ST
AC Line Frequency 44, 63
address
Modbus 21
Advance Key 23
agency approvals 2, 86
alarms 64
Blocking 43, 65
clearing 23
deviation 64
Display 43
Hysteresis 43, 64
Latching 43, 64
Logic 43
process 64
set points 64
Sides 43
Silencing 43, 65
Source 42
Source Instance 43
Type 42
Alarm 1 State 32
Alarm 2 State 32
alarm blocking 65
Alarm Menu 34, 42
Ambient Temperature 32
analog input 3
Analog Input Menu 31, 38
Autotune 28
Autotune Aggressiveness 41
Autotune Request 33
Autotune Set Point 33
autotuning 57–58
auto (closed loop) control 61
B
Baud 21
Blocking 43, 65
Bumpless Set Point 32
bumpless transfer 61
C
calibrating an analog input 59
Calibration Menu 55
Calibration Offset 31, 59–60
chattering output 61
Clear Request 31, 34
Closed Loop Active Set Point 41
Closed Loop High Set Point 41, 60
Closed Loop Low Set Point 41, 60
Closed Loop Set Point 32, 33
Communications LED Assignment
25
Communications Menu 24
conceptual view 3
Configurator 26
Control 42
Control Loop Menu 40
•
91
•
Control Loop Output Power 32
control methods 60
Control Mode 28, 33, 61
Control Mode Active 31
Cool Algorithm 40, 62
Cool Hysteresis 34, 62
Cool Power 28, 32, 58
Cool Proportional Band 33, 57, 62
Current Error 23, 65
Current Menu 35, 43
current sensing 65
Custom Menu 28, 54, 57
D
Date of Manufacture 24, 55
Dead Band 34, 63
Decimal 38
Declaration of Conformity 94
default Home Page parameters 28
Detect Threshold 44
deviation alarms 64
Device Error 23
Diagnostics Menu 24, 55
digital input 3
Digital Input/Output Menu 31, 39
Digital Input Function 44
Direction 39
Display 43
displays 23
Display Units 44
Down Key 23
E
Electrical Measurement 55, 59
Electrical Offset 55, 59
Electrical Slope 55, 59
End 47, 49
End Set Point Value 48
Error 35
errors
limit 23
ramping 23
tuning 23
error and alarm messages 23
Error Latching 38
Error Reset 39
Error Status 31, 38
Event 1 Status 32
Event 2 Status 32
Event Output (1 and 2) 36, 48
Event Status 31
EZ-ZONE™ ST
inputs and outputs 4
without contactor 5
with contactor 5
EZ Key 3, 23, 26, 44, 65
Appendix
F
L
Factory Page 53
features and benefits 2
Filter 38
Filter Time 60
filter time constant 60
Function 39, 42
functions 3
Function Instance 39, 42
Function Key Menu 26, 44, 65
labels. See sub-assembly labels
Latching 43, 65
Level 39
Limit Enable 43
Limit Menu 31, 40
Limit State 32
Linearization 38
Lockout Menu 24, 54, 66
Lock Operations Page 54, 66
Lock Profiling Page 54, 66
Logic 43
Loop Menu 33
lower display 23
Low Power Scale 42
low range 60
low scale 60
Low Set Point
Alarm 34, 64
Current 35, 65
Limit 31
G
Global Menu 44
Guaranteed Soak Deviation 45, 52
Guaranteed Soak Enable 45, 52
H
Hardware ID 55
Heater Error 23, 29, 35, 65
Heat Algorithm 40, 61
Heat Hysteresis 33, 62
Heat Power 28, 32, 58
Heat Proportional Band 33, 57, 62
High Power Scale 42
high range 60
high scale 60
High Set Point
Alarm 34, 64
Current 35, 65
Limit 31
Loop 60
Home Page 57
Hours 48
Hysteresis 40, 43, 64
I
Idle Set Point 28, 33
Infinity Key 23
Input Error Failure 41, 61
Input Error Latching 61
input events 3
Input Function Instance 40
installation 5–12
Instance 44, 54
instance, defined 3
Integrate 40
J
Jump Count 48
Jump Count Remaining 36, 52
Jump Loop 47, 49
Jump Step 48
K
keys 23
Watlow EZ-ZONE™ ST
M
manual (open loop) control 61
Manual Control Indicator Light 61
Manual Power 41
manual tuning 57
Message Action 28, 29
Minutes 48
Modbus registers 71–85
profiling 50–51
model numbers 89
Monitor Current File 52
Monitor Menu 31
Monitor Profile State 52
mounting and unmounting from a
DIN rail 11
mounting the Remote User Interface
(RUI) 11
N
National Electric (NEC) 6–7
navigating
Factory Page 53
Operations Page 30
pages and menus 29
Profiling Page 46
Setup Page 37
network wiring 20
Non-Volatile Save 21
Number of Zones 24
O
Offset 44
on-off control 61
Open Loop High Set Point 41, 60
Open Loop Low Set Point 41, 60
•
92
•
Open Loop Set Point 34
Operations Page 30, 54
ordering information
accessory kit 87
EZ-ZONE ST 89
replacement base 87
replacement heat sink 88
replacement solid state relays
(SSRs) 88
outputs 3
output configuration 60
output events 3
Output Function 39
Output Menu 42
Output State 31
P
Parameter 1 to 20 54
Parity 21
process alarms 64
Process Value 31
Process Value Active 32
Profile 47
Profile Action Request 28, 29, 35, 52
Profile Start 28, 29, 35, 52
Profile Start Type 52
Profile Status Menu 35
Profile Type 45
profiling 67
Profiling Page 46, 54
programming the Home Page 57
proportional control 62
plus integral (PI) control 62
plus integral plus derivative (PID)
control 62
Q
R
Ramp Action 41
Ramp Rate 41, 64
Ramp Scale 41, 64
Ramp Set Point 32
Range High 38, 60
Range Low 38, 60
Rate 47, 48, 49
Read 35, 65
Reading Enable 43
Read Lock 24
Read Lockout Security 66
Remote User Interface. See RUI
replacing the solid-state relay 12–13
restoring user settings 57
RTD Leads 38
RUI 23
and standard bus address 21
mounting 11
Appendix
panel cutout dimensions 5
specifications 86
RUI Address 24
RUI Page 24
TRU-TUNE+™ Gain 40
Tune Status 33
tuning the PID parameters 57
Type 42, 64
S
U
saving user settings 57
Scale High 38, 60
Scale Low 38, 60
Seconds 48
secure settings 66
sensor backup 60
Sensor Backup Enable 39, 60
sensor selection 60
Sensor Type 38, 60
Serial Number 24, 55
Setup Page 37
Set Lock 24
Set Lockout Security 66
set point 57
set point, adjusting 23
set point high limit 60
set point low limit 60
Sides
Alarm 43
Current 43
Limit 40
Silence Request 34
Silencing 43, 65
single set point ramping 63
Soak 47, 49
Software Build 24, 55
Software ID 24, 55
Software Prototype 24, 55
Software Release 24, 55
Source 42
specifications 86
Start Zone 24
State 31
status indicator light 6
Status Light 55
Step 47
Step Time Remaining 36, 52
Step Type 35, 47
sub-assembly labels 10
Unused Step 47, 49
upper display 23
Up Key 23
User Action Failure 42
User Restore Set 24, 55, 57
User Save Set 25, 55, 57
using the software 66
T
Target Set Point 36, 47
temperature units indicator lights 23
thermal system control 2
Time 47, 49
Time Base 42
Time Derivative 34, 57, 62
Time Integral 34, 57, 62
troubleshooting 68
TRU-TUNE+™ Band 40
TRU-TUNE+™ Enable 40
Watlow EZ-ZONE™ ST
Z
zone display 23
V
variable time base 63
W
Wait Event (1 and 2) 48
Wait For Both 47, 49
Wait For Event 47, 49
Wait For Process 47, 48, 49
wiring 5–12
digital input or output 5 14
digital input or output 6 14
input 1 process 15
input 1 RTD 15
input 1 thermocouple 15
input 2 process 16
input 2 RTD 16
input 2 thermocouple 16
Modbus RTU or standard bus EIA485 communications 19
output 1 solid-state relay without a
contactor 17
output 1 solid-state relay with a
contactor 17
output 2 mechanical relay, form A
17
output 2 solid-state relay, form A
17
output 3 mechanical relay, form C
18
output 4 mechanical relay, form A
18
power 14
standard bus EIA-485 communications 19
without a contactor 7
with a contactor 6
wiring a network 20
X
Y
•
93
•
Appendix
Declaration of Conformity
Series EZ-ZONE™ ST Tower
Watlow Winona, Inc.
1241 Bundy Blvd.
Winona, MN 55987 USA
Declares that the following product:
Designation:
Series EZ-ZONE™ ST Tower
Model Numbers:
ST, followed by K, B, P, E, H, D, J or C, followed by A, L or B, followed by A, B
or F, followed by L, H, 1, 2 or 3, followed by any letter or number, followed by A
– H or J, followed by A, B or C, followed by any three numbers or letters.
Classification:
Temperature control, Installation Category II, Pollution degree 2
Rated Voltage and Frequency:
Control 100 to 240V~ (ac 50/60 Hz) or 24 to 28V‡ (ac 50/60 Hz or dc) Load 24
to 240V~ (ac 50/60 Hz) or 48 to 600V~ (ac 50/60 Hz)
Rated Power Consumption:
Control 12VA, Control with Contactor 50 VA, Control with external contactor 140
VA.
Load Current 25 or 40 A depending upon heatsink. (see derating curve)
Meets the essential requirements of the following European Union Directives by using the relevant standards show below to indicate compliance.
89/336/EEC Electromagnetic Compatibility Directive
EN 61326
1997
A1:1998
A2:2002
Electrical equipment for measurement, control and laboratory use – EMC
requirements (Industrial Immunity, Class A Emissions*). Not for use in a
Class B environment without additional filtering.
EN 61000-4-2
1996
A1, 1998
Electrostatic Discharge Immunity
EN 61000-4-3
1997
Radiated Field Immunity
EN 61000-4-4
1995
Electrical Fast-Transient / Burst Immunity
EN 61000-4-5
1995
EN 61000-4-6
1996
EN 61000-4-8
1994
EN 61000-4-11
1994
EN 61000-3-2
2000
ED.2.
Harmonic Current Emissions
EN 61000-3-32
1995
A1:1998
Voltage Fluctuations and Flicker
A1, 1996
Surge Immunity
Conducted Immunity
A1, 2001
Magnetic Field Immunity
Voltage Dips, Short Interruptions and Voltage Variations Immunity
*NOTE 1: Use of an external filter is required to comply with conducted emissions limits for load terminals. For 230VÅ (ac) or
less, use Watlow P/N 14-0019 or Crydom P/N 1F25 filters. For voltages up to 440VÅ (ac) use Watlow P/N 14-0020 or Crydom P/N
3F20 filters.
*NOTE 2: A Line Impedance Stabilization Network (LISN) was used for conducted emissions measurements.
2NOTE 3: To comply with flicker requirements cycle time must be set greater than 4 seconds if Load Power is ≤ 16 A; or meet EN
61000-3-11 impedance requirements for load currents > 16 A.
Watlow EZ-ZONE™ ST
•
94
•
Appendix
Series EZ ZONE™ ST Tower (cont.)
73/23/EEC Low-Voltage Directive
EN 61010-1
2001
Safety Requirements of electrical equipment for measurement, control and laboratory
use. Part 1: General requirements
Compliant with 2002/95/EC RoHS Directive
Equipment Requires Recycling
2002/96/EC WEEE Directive
Amperage/Temperature Derating Curves
EZ ZONE™ ST
55
50
47.5
45
45.0
42.5
40.0
40
37.5
Amps (Full On)
35
35.0
32.5
30
25
23.3
21.5
20
30.0
19.8
25 A
40 A
18.0
15
10
5
0
0
5
10
15
20
25
30
35
40
45
50
55
60
65
70
75
Deg C (Heatsink Inlet Temperature)
Raymond D. Feller III
Winona, Minnesota, USA
Name of Authorized Representative
Place of Issue
General Manager
February 2006
Title of Authorized Representative
Date of Issue
Signature of Authorized Representative
Watlow EZ-ZONE™ ST
•
95
•
Appendix
How to Reach Us
Corporate Headquarters
Europe
Watlow Electric Manufacturing Company
12001 Lackland Road
St. Louis, MO 63146
Sales: 1-800-WATLOW2
Manufacturing Support: 1-800-4WATLOW
Email: [email protected]
Website: www.watlow.com
From outside the USA and Canada:
Tel: +1 (314) 878-4600
Fax: +1 (314) 878-6814
Watlow France SARL
Immeuble Somag
16, Rue Ampère
95307 Cergy-Pontoise CEDEX
France
Tel: + 33 (0)1 30 73 24 25
Fax: + 33 (0)1 30 73 28 75
Email: [email protected]
Website: www.watlow.fr
Latin America
Watlow de México S.A. de C.V.
Av. Fundición No. 5
Col. Parques Industriales
Querétaro, Qro. CP-76130
Mexico
Tel: +52 442 217-6235
Fax: +52 442 217-6403
Watlow GmbH
Postfach 11 65, Lauchwasenstr. 1
D-76709 Kronau
Germany
Tel: +49 (0) 7253 9400-0
Fax: +49 (0) 7253 9400-900
Email: [email protected]
Website: www.watlow.de
Watlow Italy S.r.l.
Viale Italia 52/54
20094 Corsico MI
Italy
Tel: +39 024588841
Fax: +39 0245869954
Email: [email protected]
Website: www.watlow.it
Watlow Ibérica, S.L.U.
CME - Avda. de la Vía Láctea, s/n. Oficina 24
28830 - San Fernando de Henares Madrid
Spain
Tel: +34.91.675.1292
Fax: +34.91.648.7380
Email: [email protected]
Website: www.watlow.es
Watlow
Storgatan 24
302 43 Halmstad
Sweden
Tel: + 46 (0)35 27 11 66
Fax: +46 (0)35 27 11 67
Email: [email protected]
Website: www.watlow.se
Watlow UK Ltd.
Linby Industrial Estate
Linby, Nottingham, NG15 8AA
United Kingdom
Telephone: (0) 115 964 0777
Fax: (0) 115 964 0071
Email: [email protected]
Website: www.watlow.co.uk
From outside The United Kingdom:
Tel: +44 115 964 0777
Fax: +44 115 964 0071
Asia and Pacific
Watlow Singapore Pte Ltd.
16 Ayer Rajah Crescent,
#06-03/04,
Singapore 139965
Tel: +65 6773 9488
Email: [email protected]
Fax: +65 6778 0323
Website:www.watlow.com.sg
Watlow Korea Co., Ltd.
#1406, E&C Dream Tower, 46, Yangpyeongdong-3ga
Yeongdeungpo-gu, Seoul 150-103
Republic of Korea
Tel: +82 (2) 2628-5770
Fax: +82 (2) 2628-5771
Website: www.watlow.co.kr
Watlow Australia Pty., Ltd.
4/57 Sharps Road
Tullamarine, VIC 3043
Australia
Tel: +61 3 9335 6449
Fax: +61 3 9330 3566
Website: www.watlow.com
Watlow Malaysia Sdn Bhd
No. 14-3 Jalan 2/114
Kuchai Business Centre
Jalan Kuchai Lama
58200 Kuala Lumpur
Malaysia
Tel: +60 3 7980 7741
Fax: +60 3 7980 7739
瓦特隆电子科技(上海)有限公司
(销售办事处)
上海市浦东新区张江工业园区碧波路115号572弄22棟 *
邮编: 201203
电话: 86 21 5080-0902
传真: 86 21 5080-0906
电子邮箱: [email protected] Website: www.watlow.cn
瓦特龍電機股份有限公司
80143 高雄市前金區七賢二路189號 10樓之一
傳真: 07-2885568
電話: 07-2885168
Watlow Electric Manufacturing (Shanghai) Company
115-22#, 572nd Lane, Bibo Road, Zhangjiang High-Tech Park,
Shanghai, PRC 201203
People’s Republic of China
Tel: +86 21 5080-0902
Fax: +86 21 5080-0906
Email: [email protected]
Website: www.watlow.cn
ワトロー・ジャパン株式会社
〒101-0047 東京都千代田区内神田1-14-4
四国ビル別館9階
Tel: 03-3518-6630
Email: [email protected]
Fax: 03-3518-6632
Website: www.watlow.co.jp
Watlow Japan Ltd.
1-14-4 Uchikanda, Chiyoda-Ku
Tokyo 101-0047
Japan
Tel: +81-3-3518-6630
Fax: +81-3-3518-6632
Email: [email protected]
Website: www.watlow.co.jp
Revised: September 20, 2007
Watlow Electric Taiwan Corporation
10F-1 No.189 Chi-Shen 2nd Road Kaohsiung 80143
Taiwan
Tel: +886-7-2885168
Fax: +886-7-2885568
Your Authorized Watlow Distributor