1
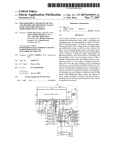
SHAPE SENSOR USER MANUAL
SPECIAL NOTES
SPECIAL NOTES
S
P
E
C
I
A
L
N
O
T
E
S
WARNING/CAUTION notices as used in this manual apply to hazards or unsafe practices which could result in personal injury or property damage.
NOTICE
As regards restraints - seat belts - it is the obligation of the DME dealer, therapists
and other health care professionals to determine if a seating restraint is required to
ensure the safe operation of this equipment by the user. SERIOUS INJURY CAN OCCUR IN THE EVENT OF A FALL FROM A SHAPE SENSOR.
It is also Invacare’s position that the SHAPE SENSOR be in a proper transport position and secured before transporting the shape sensor in a vehicle of any type.
NEVER transport the back sensor panel unless it is locked in the retracted position
or the back sensor panel removed and position standing up or on its side. DO NOT
position the back sensor panel on its front side (w/printed grid).
When transporting the shape sensor, ALWAYS loosen the clamp blocks at the front of
the frame and fold the support legs.
WARNING
DO NOT OPERATE THIS EQUIPMENT WITHOUT FIRST READING AND UNDERSTANDING THIS MANUAL. IF YOU ARE UNABLE TO UNDERSTAND THE
WARNINGS AND INSTRUCTIONS, CONTACT AN INVACARE REPRESENTATIVE BEFORE ATTEMPTING TO USE THIS EQUIPMENT - OTHERWISE INJURY OR DAMAGE MAY RESULT.
98-110
2
SAFETY SUMMARY
SAFETY SUMMARY
WARNINGS
DO NOT use unauthorized parts, accessories, or adapters other than authorized by
Invacare.
Both gas cylinders MUST be operational and adjusted properly BEFORE using adjustable back. DO NOT operate the adjustable back if only one (1) of the gas cylinders
is operational or adjusted properly.
Extreme caution is advised when it is necessary to move an UNOCCUPIED shape
sensor. Invacare recommends using two (2) assistants and making thorough preparations. Make sure to use ONLY secure, nondetachable parts for hand-hold supports. DO NOT attempt to lift the Shape Sensor by the seat sensor, back sensor,
armrests, or legrests. Use the base frame for lifting purposes. Lifting by means of
the removable (detachable) parts of a Shape Sensor may result in injury to the
assistants or damage to the Shape Sensor.
Before attempting to transfer in or out of the Shape Sensor, every precaution should
be taken to reduce the gap distance. Turn both casters toward the object you are
transferring onto. When transferring to and from the Shape Sensor, ALWAYS ENGAGE BOTH WHEEL LOCKS. NOTE: This activity may be performed independently
provided you have adequate mobility and upper body strength.
A NOTE TO WHEELCHAIR ASSISTANTS
When assistance to the client is required, remember to use good body mechanics.
Keep your back straight and bend your knees.
ALWAYS engage both wheel locks while changing the orientation of the Shape
Sensor modules.
When adjusting the seat depth, make sure the adjustment knobs are securely locked
in place.
To maintain stability and safety, make sure the client is properly positioned in the
Shape Sensor before reclining or inclining (reverse recline).
When adjusting the back angle, DO NOT remove the back angle adjustment knobs,
as they help secure the back sensor to the frame.
When returning the client in the Shape Sensor to the full upright position, more body
strength will be required for approximately the last twenty (20) degrees of incline
(reverse recline). Make sure to use proper body mechanics (use your legs) or seek
assistance to avoid injury.
The Shape Sensor has a weight limit of 300 lbs.
3
98-110
S
A
F
E
T
Y
S
U
M
M
A
R
Y
TABLE OF CONTENTS
TABLE OF CONTENTS
T
A
B
L
E
O
F
C
O
N
T
E
N
T
S
Special Notes ........................................................................................................................... 2
Safety Summary ...................................................................................................................... 3
Introduction to the Manual ...................................................................................................... 5
Quick Start ............................................................................................................................... 5
History ..................................................................................................................................... 5
Appropriate Applications of the Technology .......................................................................... 7
Client Profiles and Disability Types ......................................................................................................... 7
Terminology and Parts Description ........................................................................................ 8
Unpacking and Assembly ....................................................................................................... 9
Transporting ...........................................................................................................................11
Locking the Back Sensor Panel ........................................................................................................... 11
Transporting a disassembled Shape Sensor ........................................................................................... 12
Transporting an Assembled Shape Sensor .......................................................................................... 12
Transfers ................................................................................................................................ 13
Independent......................................................................................................................................... 13
With a Sliding Board ............................................................................................................................ 13
With a Mechanical Lift Aid .................................................................................................................... 13
Stand and Pivot ................................................................................................................................... 14
Two Person Lift ................................................................................................................................... 14
Creating a Silhouette® System .............................................................................................. 14
Commonly Asked Questions ................................................................................................ 21
Troubleshooting .................................................................................................................... 22
Technical Notes ..................................................................................................................... 22
98-110
4
INTRODUCTION
INTRODUCTION TO THE MANUAL
QUICK START (CONTINUED)
A user centered approach is needed to meet the
unique needs of each individual. The use of this
manual requires that the clinician have an understanding of their own needs as well as the clients
they are serving. Individuals with good clinical skills
may find the sections on “Orienting the client on the
surfaces” to be common sense and be totally baffled
by some of the more technical aspects. The
“techies” may shy away from manipulating
someone’s pelvis with their hands, but be right at
home electronically digitizing these same surfaces.
11. Readjust surfaces to fit client.
The “Quick Start” section will allow those with previ®
ous Silhouette experience to confirm the necessary steps to successful completion of a system. It
can also be used by everyone as a checklist to make
sure steps and information are not left out of the
process.
17. Transfer client off of Shape Sensor.
12. Adjust footrests and armrests.
13. Stabilize client and pull back sensor lever forward.
14. Modify back shape to fit client (scapula, lateral
trunk, etc.).
15. Record seat and back shape.
16. Confirm measurements for seat depth/tilt, back
height/angle.
18. Remove the data panels.
19. Record serial numbers onto order form.
20. Determine necessary modifications/options and
fill in order form. (cushion density, cushion cover,
rail cuts, leg length discrepancy, solid insert, lateral supports, headrest, pelvic strap, Performance™.)
The clinician has a responsibility when using
®
the Silhouette System as there is a process
involved, not just a product. This process allows for increased flexibility and versatility, but
if not fully understood and practiced, it can lead
to misapplication.
21. Determine interfacing.
22. Complete order form.
23. Fax or modem in order.
Please read this manual at least once, cover to
cover. Do this before the first client arrives! Hopefully, most of your questions will be answered, but if
they aren’t, call the customer service staff at
Invacare (1-800-451-3553).
HISTORY
In the late 1980’s the National Institute on Disability
and Rehabilitation Research (NIDRR) provided grant
funds to the University of Virginia’s Rehabilitation Engineering Center to study the usefulness of custom
contoured cushions by individuals with a spinal cord
injury. This research was conducted primarily by
Drs. Steven Sprigle and Kao-Chi Chung along with
Tom Faisant RPT.
®
Good luck using the Silhouette system!
QUICK START
1. Lock castors at the rear of the frame.
2. Check the seat and back surfaces for flatness
and plunger position.
The results of this research showed that custom
contoured foam cushions provided statistically lower
pressure distributions than the clients’ usual cushions. Along with a decrease in pressure, the authors felt that improvements in posture and balance
were also realized. The researchers used an array
of 64 spring loaded plungers that were fitted with
linear potentiometers. When a client sat upon the
array of sensors, the amount of displacement at
each point was recorded by computer. The data
was later used to fabricate a cushion through the
use of a three-axis milling machine that carved a
block of HR (high-resilience) foam. This electronic
shape sensing system and computer assisted
manufacturing process was the start of the Silhou®
ette System used today.
3. Lock the back sensor panel. Depress the handle
and pivot forward.
4. Set and lock the seat depth. (Makes sure both
pointers read the same.)
5. Set and lock the back angle.
6. Apply data forms to the data panels.
7. Insert data forms into receiving channels.
8. Take baseline for seat and back.
9. Transfer client to Shape Sensor.
10. Orient client on Shape Sensor surfaces.
5
98-110
I
N
T
R
O
D
U
C
T
I
O
N
HISTORY
H
I
S
T
O
R
Y
FIGURE 1 THE ORIGINAL ELECTRONIC
SHAPE SENSOR
HISTORY (CONTINUED)
FIGURE 2 THE MECHANICAL SHAPE SENSOR
High quality polyurethane foam was chosen for custom carving because of its low cost, low
maintenance,and dynamic qualities. Pressure
against the foam is equalized due to the contouring
of the surfaces which makes fatiguing of this material less of an issue. Beta site testing was conducted
at five separate facilities to help prove the effectiveness of this technology. The centers included: The
Institute for Rehabilitation and Research, Houston
Texas; Helen Hayes Hospital, West Haverstraw, NY;
Newington Children’s Hospital, Newington, CT; National Rehabilitation Hospital, Washington, DC;
Rancho Los Amigos Medical Center, Downey, CA.
the electronic sensing unit (Figure 1) into a mechanical measuring device that could be interfaced to a
central computer using simple paper forms. The individual would still sit upon a blanket of individual
plungers, but their position would be recorded mechanically in a manner similar to a credit card imprinter. When a plunger is moved, it pushes a cable.
This cable is attached to a pointer whose position is
recorded when a pressure roller is moved across its
surface. The pointer presses against a carbonless
form making a mark that corresponds to the depth of
the plunger at that location. The imprinted form can
be then faxed to a central location where it is digitized
to produce the custom contoured cushion.
Some of the results of this Beta site testing were
presented by Anita Perr OTR/L, Andrew Lincoln, MS,
and Thomas McGovern, MS, from the Rehabilitation Engineering center of the National Rehabilitation Hospital. The conclusion of their study was that
®
the Silhouette cushion effectively shifted pressure
from the users ishial tuberosities, an area prone to
tissue breakdown, to the thighs, an area better suited
for weight bearing.
The first mechanical shape sensors (Figure 2) were
designed to record only the shapes of seat cushions. The technology quickly proved its worth and
was expanded to include a back sensing panel.
When a client is seated on a Shape Sensor, gravity
is the only force necessary to produce the seat contour. Gravity can’t be used to form the back cushion, and a mechanism was developed that gently
pushes the plungers around the individuals back.
Invacare saw the potential for this technology as a
natural progression of the company’s already strong
focus on customized contoured seating, and technology transfer process was initiated. The electronic
shape sensing apparatus, along with the necessary
computer interface and software made this technology difficult and expensive to apply. A group of
people, including Colin Mclaurin, Clifford Brubaker,
Dave Brienza, Stephen Springle, Peter Axelson,
Michael Heinrich, Eric-Jan Ginder and Michael
Silverman worked to develop a relatively low cost
and simple process.The idea was to change
98-110
Along with the development of the Shape Sensor,
Invacare has created software (SeatMaker), interfacing hardware, and the machinery used to produce the cushions. A good idea has become a complete system.
6
APPROPRIATE APPLICATIONS OF THE TECHNOLOGY
Arthritis
Spina Bifida
Geriatric
Multiple Sclerosis
Muscular Dystrophy, early stages
Contraindications
Open skin ulcers (unless the client, clinician, and
caregivers have carefully designed the cushions surface to reduce pressure in this area, are able to carefully monitor the wound site, and understand that
the cushion may require additional modifications or
replacement.)
High, or fluctuating tone that would collapse
the cushions support surfaces.
FIGURE 3 ACTIVE USERS BENEFIT FROM
ENHANCED STABILITY
Severe orthopedic complications that require
maximum support and accommodation.
APPROPRIATE APPLICATIONS OF
THE TECHNOLOGY
Significant effort is required during the simulation to
maintain the client in the desired posture. The support to the client that is provided by the clinician should
be gentle in nature and able to be maintained during
the recording process.
®
The first step in producing a Silhouette System is determining if the client is an appropriate candidate. The
following information on disability types and
contraindications is meant only as a general guideline. The decision whether or not to proceed with
this technology requires that the clinician have sufficient background information and a solid understanding of the clients physical needs. A mat evaluation should always precede the fitting of the
client in the Shape Sensor. This assessment will
help determine the basic parameters of the support
surfaces.
The client can not shift their position independently or
be placed within the seating system consistently by
caregivers.
The client is either too large or too small to fit on the
Shape Sensor.
Client Profiles and Disability Types
Seat only
The seat cushion can promote stability and balance,
(Figure 3) and provide good pressure relief for individuals with the disability of:
Paraplegia
Quadriplegia, low level
Amputee
Seat and back
A system will provide a pressure relieving seat cushion that promotes stability and balance, along with a
back cushion that supports and aligns the trunk.
This can be used by individuals who have the disability of:
Quadriplegia, low/high level
Cerebral Palsy, mild-moderate
CVA
7
98-110
A
P
P
R
O
P
R
I
A
T
E
A
P
P
L
I
C
A
T
I
O
N
S
O
F
T
E
C
H
N
O
L
O
G
Y
TERMINOLOGY AND PARTS DESCRIPTION
P
T A
R
E
R T
S
M
I
D
N
O E
S
L
O C
R
G
Y I
P
A T
I
N
D O
N
S
K
TERMINOLOGY AND PARTS DESCRIPTION (FIGURE 1)
N
A. Armrest Receiving Sockets. The armrest receiving sockets are located on the left and right side plates.
These sockets act as receptacles for the armrests.
The height of the arm rest is adjusted by loosening
and tightening the knob attached to this receptacle.
The armrests index into the receiving sockets and can
provide a surface that the client can use to reposition
themselves or to help with balance and pressure relief. The armrests are height adjustable.
D
G
H
Q
B. Back Angle Adjustment Knobs. These knobs
are used to change the back to seat angle. The back
angle adjustment knobs travel in these slots providing
angle adjustability to the back.
K
R
L
C. Back Grid. This grid is printed on the back sensor
panel to assist with determining back height and client
symmetry.
I
D. Back Imprint Handle. This handle is located at
the top of the back sensor panel and is used to move
the imprinter across the data panel. This handle
screws into the imprinter.
U
H
E. Back Location Pointers. These blue pointers are
located on the left and right side plates, just forward of
the armrest sockets and are used to help align the back
sensor panel. The pointers should read the same number on each side before locking the back sensor panel
into position. The location of these pointers is a critical
part of the requested information on the order form.
O
C
G
T
E
F. Back Pivot Pins. The back pivot pins are found on
both sides of the back sensor panel and are used to
suspend the back within the side plate receiving
notches.
S
F
B
A
G. Back Sensor Lever. This lever is located on the
left side of the back sensor panel and is used to push
the back plungers forward. This lever has a secondary function that locks the back sensor panel in place.
N
J
H. Back Sensor. The back sensor panel contains
100 cable driven plungers that are used to capture the
shape of an individuals back.
I
L
I. Casters. These are the rear wheels which can be
locked to prevent rotation or rolling.
P
FIGURE 1 TERMINOLOGY AND PARTS
DESCRIPTION
J. Clamping Blocks. The clamping blocks are located at the bottom front side of the frame and are
used to hold the folding legs into a locked position.
WARNING
Data Forms. These are carbonless, pressure sensitive forms that attach to the data panels using self adhesive strips. There are separate forms for the seat
front and back. (Not Shown)
98-110
M
DO NOT use unauthorized parts, accessories, or adapters other than authorized by Invacare.
8
UNPACKING AND ASSEMBLY
K. Data Panel Receiving Slots. The data panels
are indexed into these slots to insure proper alignment
with the imprinters. The panels are clear plastic devices that hold the data forms within the imprinters.
These panels have short indexing pins that match
holes prepunched into the data forms. The panels are
fitted with a flexible handle to assist in removing them
from the receiving slots.
S. Side Plates. The side plates are used to connect
the back sensor panel to the seat sensor panel. They
slide into the slotted seat rails and are made in a left
hand and right hand configuration.
T. Stop Blocks. The stop blocks are black plastic
components located on both sides of the back sensor
panels. These blocks are used to help store the back
in a forward folded position. The stop block on the left
side also controls the back sensor lever’s forward position.
Footrests. The footrests attach to the front vertical
frame members and are held in place by friction. (Not
Shown)
U. Tilt Adjustment Lever. The tilt adjustment lever is
located at the bottom rear of the frame. This lever
controls the tilt angle of the Shape Sensor. The lever
is retractable, allowing it to be stored underneath the
frame.
L. Frame. The frame is the lower tubular portion of
the Shape Sensor.
M. Gas Cylinders. The gas cylinders are used to
change the tilt angle of the Shape Sensor. They are
lockable anywhere along their travel, giving an infinite
adjustment range between 0-20 degrees.
UNPACKING AND ASSEMBLY
Note: Please refer to the “Terminology and Parts Description” portion of this manual to assist in identifying
the components referred to in this section.
WARNING
Both gas cylinders must be operational and
adjusted properly BEFORE using adjustable
back. DO NOT operate the adjustable
back if only one (1) of the gas cylinders is
operational or adjusted properly.
Unpacking
The Shape Sensor will come shipped in three boxes.
These boxes should contain the following:
1. The lower frame
N. Imprinters. These devices are located within the
back and seat sensor panels and are used to record
the position of the plungers onto the data forms. They
operate in a similar fashion as a credit card imprinter.
2. The back sensor panel
3. The seat sensor panel
4. Two data panels (clear plastic panels with handles)
Plunger Caps. Each plunger is attached to a cable
using a snap fitting cap. The end of the cable is shaped
like a ball with the cap formed as the receptacle. These
caps are replaceable if necessary. (Not Shown)
5. One back sensor panel handle
O. Plungers. The plungers consist of a section of
cable and the snap fitted caps. There are 100 plungers for the seat and 100 plungers for the back. They
are located 1.75” apart and move approximately 4”.
8. Data forms for the back
P. Seat Depth Adjustment Knobs. Are located on the
side plates directly behind the armrest sockets. They
lock the side plates into the slotted seat rail and control
the placement of the back sensor panels position.
11. Two Side plates ( left and right)
6. Two pins for attaching the gas cylinders
7. Data forms for the seat
9. One pair of footrests
10. One pair of armrests
12. Two back angle adjustment knobs
To remove the contents first open the boxes and lay
them on their sides. Slide the components out of the
boxes and make sure you have all of the parts listed
above before discarding the packing materials.
Q. Seat Imprint Handle. This is a flat handle located
at the rear of the seat sensor and is used to move the
imprinter across the data panel.
R. Seat Sensor. The seat sensor panel consists of
100 cable driven plungers housed within a section of
segmented foam. This component is used to capture
the shape of an individuals seat.
9
98-110
U
N
P
A
C
K
I
N
G
A
N
D
A
S
S
E
M
B
L
Y
ASSEMBLY
Assembly
1. Install the gas cylinder clevis pins through the frame
clevis and gas cylinder receiving sockets (Figure
1).
A
S
S
E
M
B
L
Y
FIGURE 3 ASSEMBLED BASE FRAME
6. Lock the rear wheel castors.
7. Carefully lift the seat sensor panel (using the provided handle) and position the forward locking clips
under the front horizontal support bar. Make sure
the rear rubber bumpers are seated forward of the
rear horizontal support bar (Figure 4). The seat
sensor panel is not overly heavy (46 pounds) but
its overall size (25” x 32” x 9”) can make handling
the unit somewhat awkward until the process of
assembly has been practiced a few times. Please
be cautious and practice good body mechanics when lifting this component into place.
FIGURE 1 INSERTING THE CLEVIS AND HAIR
PINS
2. Lock the pins in place using the hairpin clips (Figure 2).
FIGURE 2 TIGHTENING THE CLAMP BLOCKS
3. Position the round lower frame tube underneath
the two semicircular clamp blocks and tighten
down the clamping knobs.
FIGURE 4 REAR RUBBER BUMPERS
4. Install the left and right side plates into the slotted
seat rails with the blue pointer positioned at the
front of the frame.
5. Tighten down the adjustment knobs on these side
plates so both pointers are locked at the #18.
98-110
10
8. Carefully lift the back sensor panel and place the
backs pivot pins into the side plate receiving
notches (Figure 5). This may require two people
as the back sensor is slightly larger and heavier
than the seat. Use the provided handles and once
again practice good body mechanics.
TRANSPORTING
12. Install the Back Imprint Handle into the threaded
hole on the back imprinter (Figure 7). Be careful
not to cross thread the handle while screwing it
into place. The handle should screw easily into the
threaded receptacle.
FIGURE 5 ALIGNING THE PIVOT PINS
9. Install the back angle adjustment knobs through
the back angle adjustment slots into the threaded
receivers mounted on the back sensor panel (Figure 6). Tighten these knobs to position the back
at the 95 degree angle mark.
FIGURE 7 INSTALLING THE BACK
IMPRINTER
TRANSPORTING
The Shape Sensor can be transported either fully assembled, or in parts. What method is chosen is dependent upon the type of vehicle to be used and if a
portable ramp is available. The Shape Sensor should
be secured in a manner that will prevent it from shifting
around while the vehicle is moving and from becoming a projectile if an accident should occur.
Locking the back sensor panel
Anytime a client is going to transfer onto the Shape
Sensor or whenever it is transported/disassembled,
the back sensor panel must be locked.
1. Make sure all of the plungers are flattened out and
that the back sensor lever is pushed all of the way
to the most rearward position (Figure 8).
FIGURE 6 INSERTING THE ADJUSTMENT
KNOBS
10. Install the footrests by placing them on the front,
vertical, frame tubes. The footrests hook around
these tubes and are held in place by friction.
11. Install the armrests by sliding them into the receiving sockets located on the left and right side plates.
Knobs are used to adjust the height of these armrests.
FIGURE 8 PUSHING IN THE SENSOR
LEVER
11
98-110
T
R
A
N
S
P
O
R
T
I
N
G
TRANSPORTING
T
R
A
N
S
P
O
R
T
I
N
G
2. Push the back sensor lever’s attaching block inwards towards the center of the back sensor panel.
This will release the handle from its plunger moving position into its locking position.
3.
With the attaching block depressed, push the lever forward until it rests against the stop block. The
handle should “pop” back out and lock the back
sensor into position. If the handle does not pop back
out, and the back sensor does not lock, then repeat the above steps.
be stored as a complete unit or disassembled into
a more compact package. If the most compact
package is desired then proceed as follows:
6. (Optional) Loosen the clamp blocks at the front of
the frame and fold the support legs. When reassembling the frame make sure these clamps are
fully engaged.
7. (Optional) Remove the gas cylinder clevis pins and
fold the frame. Reinstall the pins into the clevis to
help prevent loss. Do not misplace these pins.
Transporting a disassembled Shape Sensor
Transporting an assembled Shape Sensor
1. Lock the back sensor panel into its retracted
position (See above). Never transport or lift the
back sensor panel without it locked in the retracted
position (Figure 9)!
The Shape Sensor can be transported fully assembled
in a van. A ramp with a full width platform should be
used to make this process a safer procedure. The
back sensor panel can be folded forward or reclined to
improve access and handling. The method used will
be dependent upon the available head room in the van.
Folding the back sensor forward
1. Lock the back sensor panel (Page 10). Never
transport or lift the back sensor panel without it
locked in the retracted position!
2. Place cardboard on the seat sensor to protect the
sensors. Loosen the back angle adjustment knobs
and rotate the back sensor panel forward (Figure
10) until the stop blocks index into the receiving
notches located on the front of each side plate.
FIGURE 9 ROTATING THE IMPRINT HANDLE TO
THE “LOCKED” POSITION
2. Depress the tilt adjustment lever and position the
Shape Sensor in the fully tilted position. Depressing the gas cylinders will help create the smallest
frame package.
3. Remove the back sensor and store it either standing up, or on its back side. Do not store the back
sensor on its front side (The side with the grid printed
on it.)
4. Remove both side plates.
5. Remove the seat sensor panel and store it either
standing up, or on its bottom side. The frame can
98-110
12
FIGURE 10 FOLDING THE SENSOR FORWARD
3. Lift the back sensor upwards just enough to move
the stop blocks forward into the second receiving
notch (Figure 11). The stop blocks attaching bolts
will then rest into both receiving notches.
TRANSFERS
TRANSFERS
FIGURE 11 MOVING THE SENSOR TO THE
“FULL FLAT” POSITION
4. The back angle adjustment knobs can now be removed and reinserted into the second threaded
receptacle to lock the back into position (Figure
12).
Care must always be taken whenever an individual
transfers onto or off of the Shape Sensor. The Shape
Sensor’s back panel and the rear castors must both
be locked before attempting a transfer. There are several methods of transfers, and what style is used should
be determined by the client and/or caregivers. The
ability to transfer can vary from total independence, to
total dependence. Never assist in a transfer unless
you are completely confident in your skills and solicit
any help needed to complete this important procedure.
When necessary, assist the client in moving across
the Shape Sensor’s seat so as not to disengage the
plunger caps. Once the transfer has been completed,
make sure that the client is stable and secure upon
the surfaces before letting them sit independently.
Independent
If the client normally performs independent transfers,
then the clinicians role is to help prepare/position the
Shape Sensor and “spot” the client during the process.
The client knows best how to prepare their own chair
and the clinician may be asked to remove or position
accessories.
1. Remove the footrests.
2. Remove whatever armrests the client requests.
Some clients may prefer that the armrest furthest
away from them be left in place as a point of stabilization and support. Other clients may require both
armrests be left in place.
3. Position yourself in a location that will allow you to
assist in the process if the client is experiencing difficulty. Keep close, but don’t inhibit the maneuver.
FIGURE 12 REINSERTING THE KNOBS TO
LOCK THE SENSOR BACK
4. Reinstall footrests and armrests.
With a sliding board
WA R N I N G
Follow steps 1-3 above
Extreme caution is advised when it is
necessary to move an UNOCCUPIED
Shape Sensor. Invacare recommends
using two (2) assistants and making thorough preparations. Make sure to use
ONLY secure, nondetachable parts for
hand hold supports. DO NOT attempt
to lift the Shape Sensor by the seat sensor, back sensor, armrests, or legrests.
Use the base frame for lifting purposes.
Lifting by means of the removable (detachable) parts of a Shape Sensor may
result in injury to the assistants, or damage to the Shape Sensor.
5. Help keep the sliding board from moving away from
the support surfaces, and assist with its removal
when the transfer is complete.
With a mechanical lift aid
Only use a mechanical lift aid if you have been trained
in its operation and have all of the necessary components to safely complete the task. There should be
sufficient background information to determine if the
client remains seated on the sling at all times. Remove the footrests and armrests before starting the
transfer.
13
98-110
T
R
A
N
S
F
E
R
S
CREATING A SILHOUETTE® SYSTEM
Stand and Pivot
C
R
E
A
T
I
N
G
Only assist with this maneuver if you have been trained
in the process, and you have a second person available as a “spotter”.
Follow steps 1-4 above.
A
Two person lift
S
I
L
H
O
U
E
T
T
E
®
Once again, only perform this style of transfer if you
have been trained and understand the use of proper
body mechanics.
S
Y
S
T
E
M
gentle tug or push will put them back in place. With
the plungers as even as possible, accurate data
production can be assured.
WARNING
Before attempting to transfer in or out
of the Shape Sensor, every precaution
should be taken to reduce the gap distance. Turn both casters toward the
object you are transferring onto. When
transferring to and from the Shape Sensor, ALWAYS ENGAGE BOTH WHEEL
LOCKS. NOTE: This activity may be performed independently provided you
have adequate mobility and upper
body strength.
FIGURE 1 CHECK FOR IRREGULARITIES
A NOTE TO WHEELCHAIR ASSISTANTS
When assistance to the client is required, remember to use good body
mechanics. Keep your back straight
and bend your knees.
3. Lock the back sensor panel (Figure 2) by pressing in the handle and pulling it forward (Page 11).
CREATING A SILHOUETTE®
SYSTEM
®
The process of creating a Silhouette System is a combination of mechanical adjustments, measuring, client posturing, interfacing and paperwork. The Quick
Start guide (Page 5) is a condensed version of this
section and can be used as an easily accessible checklist once you have familiarized yourself with the following steps.
1. Lock the rear castors. The rear castors of the
Shape Sensor are equipped with a locking mechanism that stops the swiveling of the castor as well
as the wheels rotation. Depressing the lever on
top of the castor will lock it into position. The castors should be locked when a client is transferred
on or off of the Shape Sensor, the Shape Sensor
is disassembled, or surfaces or system orientation is adjusted.
2. Check the seat and back for flatness and
plunger position. This is accomplished by running your hand across the surfaces and feeling for
irregularities (Figure 1). Only minor indentations
should be felt. The plungers can at times become
stuck in a depressed or extended position and a
98-110
14
FIGURE 2 MOVE THE SEAT SENSOR BACK
4. Set and lock the seat depth. The back sensor
panel should be moved to its most rearward position. This is accomplished by loosening the seat
depth adjustment knobs and sliding the side plates
along the slotted rail. Once in place, the blue pointer
found at the front of the side plates should indicate
the same number on both sides of the frame.
Tighten the knobs securely to help prevent unwanted movement of the back during transfers.
CREATING A SILHOUETTE® SYSTEM
5. Set and lock the back sensor angle. There are
printed graduations on the back panel to assist in
accurately recording this measurement. It is suggested that a setting of 95 degrees be used initially
and that the final angle be determined with the client in place. The back angle is adjusted by loosening/tightening the back angle adjustment knobs.
Make sure this adjustment is tight before transferring or adjusting tilt and depth. The knobs used to
adjust back angle and back sensor placement must
be tightened sufficiently to prevent any unwanted
movement during the simulation process. This is
especially important when the system tilt angle is
changed. Armrest tightness requires checking as
these components can become critical places of
stability and support during transfers.
7. Insert the data panels into the imprinters. The
imprint handle must be all of the way to one side
for the data panel to have access into the channels. Care must be taken at this point to make
sure the data panel is properly inserted into the
channels. The clinician should have a clear view
of the panels and the channels during this operation. Do not force the data panels into place and
make sure they enter evenly. Some resistance
may be felt but the panel should advance smoothly
into position (Figure 4).
FIGURE 4 INSERT THE DATA BOARDS
8. Take a baseline for the seat and back. The
base line is the starting position for the shape sensing plungers. In order for depths to be recorded
there must be a reference point. This reference
point is produced by sliding the imprinter handles
all of the way across the data panels. This should
be performed with a smooth continuous movement and a slight resistance may be felt at the
beginning of the stroke. If the handle does not
move, check to make sure the data panel is inserted fully (Figure 5).
15
A
S
I
L
H
O
U
E
T
T
E
®
S
Y
S
T
E
M
6. Apply data forms to the data panels. There are
different forms for the back and for the seat. The
forms are clearly marked and can only be applied
to the data panels in the correct orientation. The
data panels have short metal pegs that line up with
holes prepunched in the carbonless data forms.
Orient the forms holes to match the data panel’s
pegs and apply the form using the adhesive strips.
The strips should be placed on the data panel one
at a time with care taken to make sure the form is
attached as flat as possible (Figure 3).
FIGURE 3 APPLY THE DATA FORMS
C
R
E
A
T
I
N
G
98-110
CREATING A SILHOUETTE® SYSTEM
Check for pelvic obliquity. Accommodate if fixed,
andcorrect if flexible.
C
R
E
A
T
I
N
G
Check for rotation of the pelvis and trunk. Derotate if the forces are not excessive and improved
posture is realized. An apparent leg length discrepancy may actually be rotation of the pelvis.
A
Set the footrest height so each thigh is level and
at the same height. The footrest height can also
control the depth of the leg channels and influences
clearance under tables.
S
I
L
H
O
U
E
T
T
E
®
S
Y
S
T
E
M
FIGURE 5 TAKING A BASELINE
MEASUREMENT
9. Transfer the client onto the Shape Sensor.
Please refer to the section regarding transfers
(Page 13) to assist with this important step.
10. Orient the client on the Shape Sensor’s seat.
This orientation process requires that the clinician
have a strong background in seating/positioning
and that a thorough mat evaluation was performed
(Figure 6). It is suggested that the following guidelines be used with the understanding that each
person is unique and there are always exceptions.
Position the lower extremities in the desired
amount of ab/adduction taking into account the limitations of the wheelchair frame and the therapeutic benefits of the posture. Increased abduction
can mean a more stable posture, but may exceed
the overall width of the clients chair.
Adjust the armrests to help support the upper
extremities and trunk. Be careful to not elevate or
depress the shoulder girdle.
11. Orient the client to the Shape Sensor back.
WARNINGS
ALWAYS engage both wheel locks while
changing the orientation of the Shape
Sensor modules.
When adjusting the seat depth, make
sure the adjustment knobs are securely
locked in place.
To maintain stability and safety, make
sure the client is properly positioned in
the Shape Sensor before reclining or inclining (reverse recline).
When adjusting the back angle, DO NOT
remove back angle adjustment knobs
as they help secure the back sensor to
the frame.
FIGURE 6 POSITIONING THE CLIENT ON THE
SEAT
Center the client on the Shape Sensor so that
an equal amount of cushion shows on both sides.
Asymmetries of the client may not allow for equal
space on both sides.
Check pelvic tilt and position the client with a neutral to slightly anterior orientation. Use your thumbs
and forefingers of each hand to gently hold the clients pelvis. The need for excessive force to position the pelvis may require that smaller adjustments
be made. A neutral to anteriorly tilted pelvis can
assist with spinal extension and reduced
kyphotic posturing.
98-110
16
Adjust the seat depth with the clients pelvis oriented to the desired tilt and the thighs fully supported. Do not cause posterior pelvic tilt by overextending the seat depth. If there is a significant
amount of thigh that remains unsupported, even
with the seat depth set to the maximum amount,
then the remaining surfaces can be produced at
the factory by extrapolating the cushions shape
forward. This will be covered more fully in the “measurements” section.
Adjust the back angle for the desired comfort
level and to accommodate any limitations of movement. The head should be balanced over the
CREATING A SILHOUETTE® SYSTEM
shoulders and hips. The client should have a natural
forward gaze and not be pushed forward in the
system (Figure 7).
14. Take the back shape. Gently place one hand on
the individuals sternum while pulling the back sensor lever all of the way forward. Tell the client they
may feel a slight pressure against their sacrum
(buttocks) during this phase (Figure 8).
15. Quickly, visually check to make sure that all of
the extended plungers are touching the client in
the areas desired. The clinician can manually extend or depress the plungers to fine tune the shape
(Figure 9). The area behind the scapula should
be flattened to reduce interference with upper extremity movement (unless protraction of
the shoulders is a desired feature) (Figure 10). If
for any reason the client’s posture or the back’s
shape does not seem right, then retract the lever
and start over. Make sure the shapes are right
before recording them.
FIGURE 7 ADJUSTING THE BACK ANGLE
Adjust the tilt angle to help balance the client and
to allow gravity to assist in the fitting process. The
clinician should be aware of the limitations that the
clients wheelchair may have upon the ability to tilt.
Functional issues such as forward reach and swallowing must also be taken into consideration.
Center the clients trunk on the back surface
using the printed grid as a guide.
Check the clients trunk for rotation and the
shoulders for a level orientation. It is important at this time to critically evaluate the amount of
force and support an individual will need to maintain the desired posture. Only gentle assistance
should be necessary to support the client during
the fitting phase. If significant force is necessary
then other intervention strategies should be considered.
FIGURE 9 EXTENDING THE PLUNGERS
12. Release the back sensor lever from its locked
position by pressing it in and moving it rearwards
into the plunger activation position.
13. Confirm the clients posture from the feet up to
the head.
FIGURE 10 FLATTENING THE AREA BEHIND
THE SCAPULA
FIGURE 8 TAKING THE BACK SHAPE
17
98-110
C
R
E
A
T
I
N
G
A
S
I
L
H
O
U
E
T
T
E
®
S
Y
S
T
E
M
CREATING A SILHOUETTE® SYSTEM
C
R
E
A
T
I
N
G
A
S
I
L
H
O
U
E
T
T
E
®
S
Y
S
T
E
M
16. Record the back and seat shape by pulling the
imprinting handles across the data panels. Pull
each imprinting handle only once. A baseline and
a contour line should now be printed on each data
form. If the base line was not recorded, it can be
taken once the client transfers out of the Shape
Sensor.
17. Confirm measurements with the client still seated
in the Shape Sensor.
Cushion length. Retract the back sensor lever
to create a flat panel and measure from this surface to the place on the clients thighs that the cushion is to end. What you are measuring is the actual cushion length not the clients seat depth. Take
into account the wheelchairs available depth. Silhouette® seat cushions are produced with a
rounded rear section that allows them to be fully
inserted into the wheelchair with minimum interference from the back push handles. Issues such
as the clients activity level and propulsion method
should be taken into account when determining
the cushions length. If the client has their knees
pulled into a tucked position for improved maneuverability then the cushion may be quite short. If
the client propels using their lower extremities then
clearance should be provided for the calf to allow
sufficient movement rearwards. Lengths can be
produced from 8”-22”.
Back height. The individuals back height is dependent upon activity level and the need for postural support. There is no magic rule for determining back height. In order to promote upper extremity function the scapula area should be free from
interference. This can be accomplished by stopping the back height below the scapula or flattening the area behind it. The number printed on the
back grid is used to determine back height (Figure 11). Do not measure the back height with a
tape measure, but write down the number printed
on the front of the back sensor grid.
Leg length. This measurement is taken to help
determine footrest height and desired floor to seat
height. This is especially important for individuals
who propel using their feet or who transfer using
the stand and pivot technique.
Back Angle. The back angle measurements are
printed on the side of the back sensor panel.
Tilt Angle. The tilt angle can be taken using an
inclinometer or bubble level. This angle will assist
with setting up the clients finished system.
WARNING
When returning the client in the Shape
Sensor to the full upright position, more
body strength will be required for approximately the last twenty (20) degrees
of incline (reverse recline). Make sure
to use proper body mechanics (use your
legs) or seek assistance to avoid injury.
18. Transfer the client off of the Shape Sensor and
position them in their own wheelchair. Make sure
the back sensor panel is locked before the transfer, and that the client is supported properly and all
belting/strapping is secured in their chair.
19. Remove the data panels from the imprinters.
The data panels have a flexible strap to assist with
their removal. Make sure the imprinters are all of
the way to one side to allow the panels to be pulled
out of their channels.
20. Remove the data forms from the panels and fill
in the requested information on each section (date,
dealer name and number, client name, contact
person, and phone number)
21. Copy the Shape Sensor’s serial number onto
the order form. There is a separate serial number
for the back and seat. This is a very important
step! Each Shape Sensor has its own “personality” that assists in fabrication and this is recorded
by Invacare in their computer system. The cushions can not be produced without this number.
FIGURE 11 INDICATING BACK HEIGHT
98-110
18
CREATING A SILHOUETTE® SYSTEM
22. Determine the necessary cushion modifications and options and write this information on the
order form. Additional changes in the cushion are
available to the clinician if they are using SeatMaker
software and can modify the cushion on screen
before sending the data to Invacare.
Cushion density. There are two choices for cushion density, soft or firm. Soft foam is generally chosen for instances were maximum pressure relief
is desired. Firm foam will provide increased stability and support.
Cushion thickness. Cushions are available in
4”,5”, and 7” thickness. The thickness of the cushion is determined by the overall depth of the contour and the functional characteristics desired. A
7” cushion can only be provided if the clinician uses
SeatMaker software to design the cushion.
Cushion width. The cushions width is determined
by the clients width and the dimensions of the
wheelchair. Widths can be produced from 10”22”.
Cushion fabric. Cushion covers are available in
four different styles, but only in one color (black).
The variety chosen is dependent upon the clients
function and the environment where the individual
resides. Consideration should be given for the purchase of a second cover as they are custom made.
If an additional cover is desired at a later date then
the dimensions of the cushion would have to be
sent back to the factory to serve as a pattern.
®
Lycra . The smooth texture of this fabric can make
transfers easier. It should not be used if the client
is incontinent.
®
Waterproof Lycra . This cover has a layer of thin,
stretchable material bonded to the lycra making it
waterproof. The top surface of the cover can still
absorb moisture but fluids can’t pass into the cushion. If the cover does become wet it can be dried
easily. This cover would be appropriate for individuals that experience incontinence on a periodic
basis.
®
Stretch Vinyl . The waterproof coating is on the
outside of this cover making cleanup a much easier
task. This is the suggested option for persons who
are incontinent.
®
Polartec . This fabric is a polyester fleece material commonly used for jackets and sporting apparel. It is very durable and comfortable to sit upon.
It is not waterproof.
19
Rail Cuts. Rail cuts can be specified if a cushion
needs to drop between the seat rails of a wheelchair in order to create a specific floor to seat height.
Rail cuts on the back will allow the cushion to extend between the push handles helping to increase
seat depth with maximum surface contact maintained to the back. Rail cuts will require that the
clinician provide the necessary mounting materials.
Leg Length Discrepancy. If a client has a leg
length discrepancy then the cushion will need to
be cut back for the shorter leg. The overall length
of the cushion should be measured with the longer
leg. This will be the cushion length recorded on
the order form. The length of the discrepancy for
the shorter leg should then be indicated on the options portion of the order form.
Solid Insert. A solid insert consists of a 1/4” thick
panel of rigid plywood, cut to be 2” less than the
width of the cushion. This panel is meant to be
used with a seat cushion that is placed directly
upon the sling upholstery of the wheelchair. This
can be a low cost alternative to a drop seat or
modular shell. An insert should only be used by
individuals that can independently regulate the
placement of the cushion within the chair.
Lateral supports. When a cushions lateral trunk
supports require additional depth or strength, then
auxiliary supports should be considered. The optional trunk supports are made with a quick release
feature and can be purchased with varying degrees
of offset. The offsets are available in 1/2”,1”, 1-1/
2” out and 1/2”, 1”, 1-1/2” in, and straight configurations. It is best to have all of these brackets available to assist in the fitting process. The hardware
used to attach the supports to the cushion is
mounted inside the modular shell. The support
can be moved along an extruded rail within the shell
to adjust the desired height. The metal support
bracket can be bent to create a curved surface.
The bracket can only be bent with significant force
applied and requires that the padding be removed.
The padding will slide off of the bracket once the
locking dot has been pressed out of position (Figure 12).
Headrest. There are many clinical reasons for
using a headrest. This can vary from helping to
reduce neck hyperextension to providing a surface
upon which to rest the head when the individual is
tilted back. There are three styles of headrest pads
available; small, large, and two step. The mounting hardware is removable and adjustable
98-110
C
R
E
A
T
I
N
G
A
S
I
L
H
O
U
E
T
T
E
®
S
Y
S
T
E
M
CREATING A SILHOUETTE® SYSTEM
ions on sling, modular shells, KwikFit, and custom.
C
R
E
A
T
I
N
G
®
Cushions on sling. The Silhouette cushions can
work quite effectively, in some instances, when
placed directly on a sling. The most common application is when a seat cushion is used by active
user in an ultra-light base. It is beneficial if the sling
®
is tight and matching Velcro is available on the
slings fabric. Additional firmness of support can
be achieved by using the optional solid insert.
There are many wheelchair styles that have an
integral seatboard as part of the chair. This is usu®
ally a metal pan with Velcro attached to the surface.
A
S
I
L
H
O
U
E
T
T
E
®
S
Y
S
T
E
M
Modular Shells. The modular shells are made
to the dimensions of the cushion in 14”,16”, or 18”
widths and between 10”-21” in length. These shells
consist of two extruded aluminum channels, and
two plastic endcaps (Figure 13). The channels
are used for attaching the mounting hardware and
auxiliary supports such as lateral trunk supports.
The end caps connect the channels, and create a
smooth and attractive surface. The cushions are
covered with the fabric of choice and are held into
®
the shells using Velcro . The modular shells come
complete with all hardware for mounting into the
wheelchair.
FIGURE 12 REMOVING LATERAL INSERTS
in all directions. If it is unknown whether or not an
individual requires a headrest then the modular
shell for mounting the back cushion should be
specified as “headrest ready”. The mounting holes
for the headrest will be prepared and then filled
with attractive caps.
Pelvic strap. Every seating system should use a
pelvic positioning strap. This is a necessary safety
option and will help stabilize the pelvis. The variety
®
offered for the Silhouette System attaches to the
wheelchair seat rails. This will allow for precise
positioning and optimum angle of pull.
Performance Shaping. When a client is very active and is using an ultra-light chair then Performance™ Shaping should be considered. This option will maintain the leg troughs produced during
the simulation and add an undercut behind the calf
to allow for increased flexion of the knees. The leg
troughs will help to stabilize the lower extremities
and the undercut allows for an increased “tucked”
posture that can improve stability and maneuverability.
23. Determine the interfacing of the cushions to the
wheelbase. There are four basic choices; cush
®
FIGURE 13 SILHOUETTE MODULAR SHELL
98-110
20
COMMONLY ASKED QUESTIONS
KwikFit. The back KwikFit system consists of
two aluminum channels connected together with
a solid ABS panel. This system has all of the benefits of the modular shell design, but is a broader
range of sizes. The back comes complete with
attaching hardware that is adjustable in depth and
angulation. The seat KwikFit system is a flat ABS
panel with hardware that snaps easily onto the
wheelchair’s seat tubes. Both the back and seat
KwikFit systems are covered by the fabric of
choice.
Custom. Silhouette® seat and back cushions can
be interfaced into a chair using standard hooks
and hangers. The seat cushion can be placed
directly upon a drop seat. The back cushion can
be glued to a board that has been prepared with
the necessary T-nuts. The attaching hardware can
then be bolted through the cover. Custom mounting is an easy process for those that have the necessary equipment for fabrication.
24. Fill in order form and fax to Invacare at 1-800870-4928.
COMMONLY ASKED QUESTIONS
The following should address some of the common
questions that clinicians and clients may have regard®
ing the Silhouette System. Unfortunately, not all situations or applications can be predicted and some questions may still remain. If this is the case, then please
feel free to contact Customer Service (1-800-4513553).
Cushion Life. The life of a Silhouette® cushion depends upon the type of environment, and the use it is
exposed to. There is a 60-day unconditional guarantee and a two year replacement warrantee.
®
Growth. How much growth a Silhouette cushion can
accommodate is dependent on what kind of growth is
experienced. If the growth is linear, then the back can
be shifted in the wheelchair. One method of extending
the life of a seat system is to purchase the interfacing
(modular shells or custom) oversized with the additional foam extending underneath the back. When a
new cushion is made then the interfacing can still be
used. This method of accommodating growth is limited by the type of wheelchair being used. When growth
is actually weight gain, then the amount that can be
accommodated is proportional to the individuals size.
The cushions are soft in their construction and some
accommodation is possible. The cushions can also
be carved by hand to adjust for weight gain,and then
re-coated.
21
Large Clients. How large of an individual can use Silhouette® The Shape Sensor is 18” wide, and any part
of the client that extends over these surfaces will be
extrapolated by the computer following the clients recorded curve (up to 21”). The measuring limits of the
Shape Sensor for cushion length is similar, but the extrapolation of leg length is a much more accurate procedure. The Shape Sensor is rated for up to 300 lbs.
Low Floor to Seat Heights. When a low floor to
seat height is desired, the proper chair should first be
chosen. Custom interfacing using a drop seat may
be necessary for extreme conditions, or when the optimum chair can’t be provided. Care should also be
taken when specifying the thickness of the cushion.
Restriction of Movement. Clients and clinicians alike
may have concerns that a custom contoured seat
cushion will restrict an individuals capacity to freely
move about. Comments such as “I don’t like to sit in
just one spot,” and “I like to move around a lot” are
frequently heard. The Silhouette® cushion is made
from soft polyurethane foam and shifts in position are
readily achievable. Invacare has found through interviewing previously skeptical clients, that the reason they
had moved around so much in the past, was that they
were often uncomfortable. The Silhouette® cushion
increased their comfort making constant shifting less
of a necessity.
Shear. Shear is a difficult phenomena to measure
and quantify. The less a surface has to deform, the
less shear it will exert on the client’s tissue. The Sil®
houette surface is contoured to the client’s shape and
should theoretically, cause less shear.
Shorter Seat Depths. When only a seat cushion is
being produced, then a dense material of known thickness can be added to the front of the back sensor’s
surface. This thickness will have to be related back to
the factory to assist in the fabrication process. If the
client requires both back and seat, then the attachment hardware holding the seat sensor panel will have
to be modified. This modification process can be performed at the factory or written directions can be given.
The modification will require the purchase of two retaining clips and two bumpers. It will also require the
drilling and tapping of four holes.
Small Clients. Cushions can be made as small as
10” x 10”, and Invacare rates the low end capacity of
®
the Silhouette at 50 lbs. Very small clients do not have
sufficient weight to press into the Shape Sensor’s seat.
Some clinicians have had good success in applying
additional force onto the client to produce the desired
98-110
C
O
M
M
O
N
L
Y
A
S
K
E
D
Q
U
E
S
T
I
O
N
S
TROUBLESHOOTING
contour. This can be a tricky procedure, and caution
should be taken so that asymmetries are not introduced
T
R
O
U
B
L
S
H
O
O
T
I
N
G
Seat Depth Won’t Lock. If the seat depth can’t be
locked, and the knob keeps spinning, then remove the
back sensor panel and slide out the side plate. Inspect the carriage bolt that attaches the knob to the
side plate. Chances are, the edges of the bolt have
worn, and a new one should be installed.
Transfers. The ability to transfer must be considered
when screening a candidate for a Silhouette® seat. The
ease of transfer will be dependent upon the type of
cover used and depth of contour. The depth can be
adjusted for individuals whose abilities may be compromised by a deeper cushion.
TECHNICAL NOTES
TROUBLESHOOTING
The process of producing a Silhouette® seating system using the mechanical Shape Sensor, quickly becomes an easy and rewarding method of intervention.
The tools are durable and simple in design, but as with
all things, problems may arise. Refer to this trouble
shooting guide for answers to some of those problems.
Bent Cable. If a cable becomes bent, attempt to
straighten it. If the bend can’t be sufficiently repaired to
allow operation then it will have to be replaced. If the
bent cable is located in a nonessential area then note
this on the order form and cushions can be produced.
A bent cable is easy to find on the computer and its
position can be adjusted.
Periodic maintenance of the Shape Sensor and Silhouette® seating systems is recommended. Information regarding the care of the cushions and interfacing
should be passed on to the client.
Shape Sensor
Keep the slotted seat rail free from debris.
If the Shape Sensor is used to make ContourU® cushions, then plaster should be prevented from getting into
any moving parts and surfaces kept clean.
Replace the gas cylinders when they no longer lock in
position.
Check before each fitting that the clamping blocks,
used to fold the frame, are securely tightened.
Do not store objects on top of the Shape Sensors seat.
Data Form put into Wrong Imprinter. This really
isn’t a problem. Make sure to indicate on the form
which sensor made the impressions.
Cushions and Interfacing
Footrest Length. There can be times when the footrests can’t accommodate the clients leg length. Use
any surface available such as books or boards to support the feet. The feet need to be supported for the
legs to be positioned properly.
Do not immerse the cushions into water as they are
made from open cell foam and will soak up water like
a sponge. The urethane coating does not make the
foam waterproof only water resistant. If the cushion
must be immersed, then squeeze out the excess water and dry thoroughly before returning to service.
Jammed Data Panel. This condition can be averted
by always confirming the panel is seated properly in
the receiving channels before pushing it into the imprinter. When a jam does occur, firmly grasp the stuck
end of the panel with a pair of pliers and pull it out. If
you pull too hard on the cord style handle it could break
away from the panel. If this technique does not work,
then the sensor should be returned to the factory.
Plunger Disconnected. When a plunger becomes
disconnected simply snap it back over the ball end of
the cable. If the cable is pressed down into the foam,
then depress the foam cell around it, and pull it back
up. If the ball end of the cable is broken or missing
then it will have to be replaced. If the damaged cell is
located in a nonessential area then notify this on the
order form and cushions can be produced. A stuck or
broken sensor is easy to find on the screen of the computer and its position can be adjusted.
98-110
22
Wash the covers in cold water and tumble dry on low
heat.
Periodically check the fasteners that hold the interfacing hardware, and tighten if they have become loose.
Data Forms
The data forms are used to record the contour of the
client and are clearly marked for installation onto the
data panels. There is a form for the seat, and a form
for the back. There is a front and back to the back
form, and a top and bottom to the seat form. Inspection of the data form will show 50 rows along the
Topshape and 50 rows along the Bottomshape, Each
one of these rows corresponds to one of the plungers.
A finished data form should have imprinted upon it one
base line and one contour line. Always bring duplicate
forms to a fitting in case one is incorrectly printed.
Tear off the side stubs along the perforations and discard the portion of the foam with the adhesive.
TECHNICAL NOTES
General Shape Sensor specifications
Separate the Topshape section from the Bottomshape
section by tearing along the two perforations.
Fill in the requested information including; Dealer name,
dealer number, dealer phone number, contact person,
date, client name and any remarks.
Make sure the data form’s serial number is recorded
on the order form.
Fax the data forms along with the order form to Invacare
at 1-800-870-4928. This fax line can accommodate
the longer forms.
Order Form
Information regarding the order form and available options is presented in the section titled “Creating a Silhouette® System”. It is important that all parts of the
order form be filled out. Within the order form, the type
of simulator back is requested. If the model being used
is complete with a Sensor panel then mark Sensor.
Earlier models of the Shape Sensor were made for
producing seats only. These models used a strap style
back.
Guarantee
Invacare unconditionally guarantees Silhouette®
cushions for 60 days from the date of shipment. The
cushions are also covered for a full two years for defects in materials or workmanship.
Measuring grid:
10 x 10 data grid spaced 1.75” apart
Maximum depth of contour measuring capacity:
4.5” (seat and back)
Cushion construction:
HR 32 polyurethane foam with segmented top
section
Seat sensor depth:
17.5” front to back, adjustable to 11”
Seat sensor width:
20” (17.5” measuring area)
Back sensor height:
19.5” from top of seat (17.5” measuring area)
Back sensor width:
20” total (17.5” measuring area)
Seat-to-back angle adjustment:
80-110 degrees
Tilt-in-space angle adjustment:
0-20 degrees
Wheelchair transfer height:
23.5” from floor
Weight Limitation:
300 lbs.
Shape Sensor dimensions
Serial Numbers
Each Shape Sensor has a separate serial number for
the back and seat sensor. These numbers must be
recorded on the order form as they give Invacare important information regarding the “personality” of the
machine. The serial numbers are located on the back
of the Shape Sensor.
SeatMaker
SeatMaker is a computer program created by Invacare
to input and manipulate the data produced on the
Shape Sensor. This software can be used by the clinician to further refine the cushions and as a method
to review the data before sending it off for production.
The inputting of data into the computer is accomplished
by touching each of the imprinted data points using a
stylus and digitizing tablet. The cushions shape can
be modified and fine tuned to exactly meet the clients
needs. Once the changes are made, then the data
can be sent by modem to the factory.
23
Fully assembled:
30.5”W x 43”L x 57”H
With back sensor folded flat: 30.5”W x 48”L x 35”H
Base frame:
30.5”W x 37”L x 11”H
(folded flat for transport)
Seat sensor module:
25”W x 32”L x 9”H
Back sensor module:
26”W x 32”L x 12”H
Shape Sensor weight:
Frame
Back sensor module
Seat sensor module
50 lb.
68 lb.
46 lb.
Features
Direct measurement and recording of total posture
Tilt-in-space adjustment for more accurate simulation
Seat depth adjustable.
Sturdy 8” wheels and 5” casters with brakes and rotational lock.
Removable arm rests and foot rests
98-110
T
E
C
H
N
I
C
A
L
N
O
T
E
S
INVACARE CORPORATION l 1200 TAYLOR STREET l Elyria, Ohio 44036-2125 l
Phone 1-(800)-333-6900
INVACARE CANADA l 5970 Chedworth Way l Mississauga, Ontario Canada L5R 3T9 l
Phone (905) 890-8300, 1-800-668-5324, Fax (905) 890-5244
Form No. 98-110
Part No. 0900117
Rev. B (5/99)
Printed in USA