1
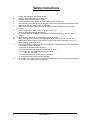
N8WTS
Fanless Inwall Touch Screen PC
User’s Manual
NOBU, LLC.
151 Kalmus Drive
Suite J2
Costa Mesa, CA 92626
1
June 2008 v1.2
Copyright Notice
Copyright © 2008 Nobu, LLC. All rights reserved. Nobu reserves the right to make improvements to
the products described in this manual at any time without notice. No part of this manual may be
reproduced, copied, translated, or transmitted in any form or by any means without the prior written
permission of the original manufacturer. Information provided in this manual is intended to be
accurate and reliable. However, the original manufacturer assumes no responsibility for its use, nor
for any infringements upon the rights of third parties, which may result from its use. The material in
this document is for product information only and is subject to change without notice. While
reasonable efforts have been made in the preparation of this document to assure its accuracy, Nobu,
LLC, assumes no liabilities resulting from errors or omissions in this document, or from the use of the
information contained herein. Nobu, LLC reserves the right to make changes in the product design
without notice to its users.
Trademarks
Windows CE™, Windows XP™, Windows 2000™, Windows ME™,
Windows 98™ and plug and play™ are registered trademarks of Microsoft Corporation.
PS/2 is a registered trademark of IBM Corporation.
AwardBIOS is a registered trademark of Phoenix Technologies Ltd.
All trademarks are the property of their respective holders.
Disclaimer
No license is granted, implied or otherwise, under any patent or patent rights of Nobu, LLC. Nobu,
LLC. makes no warranties, implied or otherwise, in regard to this document and to the products
described in this document. The information provided in this document is believed to be accurate and
reliable as of the publication date of this document. However, Nobu, LLC. assumes no responsibility
for any errors in this document, Furthermore, Nobu, LLC. assumes no responsibility for the use or
misuse of the information of this document and for any patent infringements that may arise from the
use of this document. The information and product specifications within this document are subject to
change at any time, without notice, and without obligation to notify any person of such change.
Notice
Given the variety of factors that can affect the use and performance of a Nobu Product (the
“Product”), including that solid state equipment has operation characteristics different from
electromechanical equipment, some of which factors are uniquely within User’s knowledge and
control, it is essential that User evaluate the Nobu Product and software to determine whether it is
suitable for User’s particular purpose and suitable for the User’s method of application. Nobu’s
statements, engineering/technical information, and recommendations are provided for User’s
convenience, but their accuracy or completeness is not warranted. Nobu products and software are
not specifically designed for use in medical devices as defined by United States federal law. Nobu
products and software should not be used in such applications without Nobu’s express written
consent. User should contact its sales representative if User’s opportunity involves a medical device
application.
Important Notice to Purchaser
Specifications are subject to change without notice. These Nobu Products and software are
warranted to meet their published specifications from the date of shipment and for the period stated in
the specification. Nobu makes no additional warranties, expressed or implied, including but not limited
to any implied warranties of merchantability or fitness for a particular purpose.
User is responsible for determining whether the Nobu Products and software are fit for User’s
particular purpose and suitable for its method of production, including intellectual property liability for
User's application. If the Product, software, or software media is proven to be defective, then Nobu’s
sole obligation and User’s and Purchaser’s exclusive remedy, will be, at Nobu’s option, to repair or
replace that Product quantity or software media or to refund its purchase price. Nobu has no
2
June 2008 v1.2
obligation under Nobu’s warranty for any Product, software, or software media that has been modified
or damaged through misuse, accident, neglect, or subsequent manufacturing operations or
assemblies by anyone other than Nobu. Nobu shall not be liable in any action against it in any way
related to the Products or software for any loss or damages, whether non-specified direct, indirect,
special, incidental or consequential (including downtime, loss of profits or goodwill) regardless of the
legal theory asserted.
3
June 2008 v1.2
Safety Instructions
1.
2.
3.
4.
5.
6.
7.
8.
9.
10.
11.
12.
4
Always read the safety instructions carefully.
Keep this User’s Manual for future reference.
Keep this equipment away from humidity.
Lay this equipment on a reliable flat surface during initial configuration.
The openings on the case are for air convection hence they help protect the equipment from
overheating. DO NOT COVER THE OPENINGS.
Make sure the voltage of the power source to be used with the N8WTS is between 90264VAC.
Follow all precautions listed on the Temporary Power Cord
reference sheet included with the N8WTS.
It is recommended to disconnect the power source before inserting any add-on card or
module.
All cautions and warnings on the equipment should be noted.
When cleaning screen or bezel never apply fluids of any kind directly onto the unit. See
Maintenance section of this manual. Never pour any liquid into the openings. Liquid can
cause damage or electrical shock.
If any of the following situations arise, get the equipment checked by Nobu service personnel:
• The power terminal is damaged
• Liquid has penetrated into the equipment
• The equipment has been exposed to significant moisture
• The equipment is not functioning properly according
to the User’s Manual.
• The equipment has been dropped and/or damaged
• If the equipment has obvious signs of damage
Do not leave this equipment in an environment unconditioned such as in temperatures above
60˚ C (140˚F), it may damage the equipment.
June 2008 v1.2
Package Contents
•
•
•
•
•
•
1 x N8WTS Inwall Touchscreen PC
1 x RFKT8 Mounting Bracket
1 x Temporary Power Cord
1 x Mounting Screws
1 x Software License COA (Certificate of Authenticity)
1 x CD - N8WTS User’s Manual & Driver Utilities CD
If any of these items are missing or damaged upon delivery, please contact your
distributor or sales representative immediately.
5
June 2008 v1.2
Temporary Power Cord
The included power cable is for configuring the NOBU Touchscreen PC prior to
installation only. The installation of this NOBU unit should be performed by a
licensed/certified electrician.
CAUTION:
The cable consists of (3) 18 gauge wires stripped ½” from end. Connect the wires to
the corresponding terminals inside the power compartment on the PC BEFORE
plugging the cord into a live outlet. Unplug the cord from outlet BEFORE removing
the wires from the power terminals. Please use extreme caution during this
portion of setup.
Black
White
Green
= POWER
= NEUTRAL
= GROUND
Category
3 conductor plastic original
equipment cords
Shielding
unshielded
Jacket Color
Grey
Length Feet
6’
Length Meters
1.83
Temperature Rating 60°C
Color Coding
North America
AWG Stranding
18 (41x34)
Nominal OD Inch
0.246
Nominal OD
millimeter
6.25
Rating
1250 Watts,10A-125V
6
June 2008 v1.2
Figure 1.3 Temporary Power Cord
Figure 1.35 Accessories (Shown with optional antenna)
7
June 2008 v1.2
Figure 1.36 Cable Strap
8
June 2008 v1.2
The N8WTS
The N8WTS is a fully functional inwall touchscreen PC with all the necessary
input/output ports to control any subsystem or automation hardware in your
home. The N8WTS has the following I/O ports as seen in Figure 1.2: USB 2.0,
Ethernet 10/100Mb/s, Serial RS232, VGA Out, Compact Flash type I/II, PS/2
keyboard & mouse, and Audio line out/line in/mic.
Figure 1.1 I/O Ports
The unit comes preconfigured with Windows XP Professional or XP Embedded and
all necessary drivers from the motherboard driver CD. For home control applications
the user has the option to install their favorite flavor of home control software which
will provide the custom, intuitive, button-type interface or interactive voice
recognition for controlling the hardware within the home.
The N8WTS requires only a small amount of power. It is powered by an internal
power supply with standard AC input wired directly to the unit with standard interior
home grade 12 or 14-gauge wire (see Figure 5). The power supply is universal; it
can accept 90-264VAC.
The unit does not need a dedicated circuit, special grounding, special ventilation, or
any other special treatment except that it should be handled carefully and stay as
dry as possible. The ventilation slots on the case should not be blocked or covered
except by what is normally covered by the mounting bracket. The unit mounts flush
to the wall with the exception of the slightly raised bezel which attaches to the face
after installation.
9
June 2008 v1.2
N8WTS Features
Figure 1.2 - Front
10
June 2008 v1.2
Front
Figure 1.21 Front (Shown with optional antenna)
Bottom
Figure 1.22 Bottom (Shown with optional antenna)
11
June 2008 v1.2
Side
Figure 1.23 Side (Shown with optional antenna)
12
June 2008 v1.2
Installation
WARNING:
The unit should be installed by a licensed electrician.
Installation by anyone other than a licensed electrician will void the
limited warranty.
There are some factors to consider when choosing a location for installation of the
N8WTS. The unit should not be installed where it will receive direct sunlight during
any portion of the day. A licensed electrician should determine an installation
location that is feasible, legal, and safe to run power and other cabling to. The
installation process is surprisingly simple. The N8WTS fits into any standard interior
wall with a simple mounting bracket supplied with the unit.
Figure 1.3 Mounting Bracket
13
June 2008 v1.2
1) Install wall mount bracket.
A rectangular hole should be cut out of the wall corresponding to the size of the
bracket. It is easiest to trace the outer diameter of the bracket with a pencil for
proper sizing. Pick a location where you know for certain that you can get
power (inside the wall) to the N8. Once the hole has been cut, slide the bracket
into the wall opening. The bracket can be screwed onto a stud or can be secured by
bending the numerous perforated metal tabs. The tabs are more than sufficient to
secure the unit in place.
Figure 1.4
14
June 2008 v1.2
2) Remove power cover.
Figure 2 Use access holes to release screws.
15
June 2008 v1.2
CAUTION:
The power to the corresponding electrical circuit and/or all structural power
should be safely turned off before connecting the 110/220v bare wire to the
terminal block on the N8WTS
(see Figure 5). Installation should be performed only by a licensed electrician.
Installation by an unlicensed person will void the warranty.
Figure 3
16
June 2008 v1.2
3) Strip plastic jacket from Romex 1.25”.
3b) Strip plastic jacket from HOT and Neutral wires 3/8”.
Figure 4 Prepare wiring as shown above.
4) Attached wires as shown.
P=Power, N=Neutral, G=Ground/Earth
Figure 5
17
June 2008 v1.2
5) Slightly bend Romex into the shape shown below.
Figure 6 Romex is bent to accommodate power cover.
Figure 7 Romex is bent to accommodate power cover.
18
June 2008 v1.2
6) Position the N8 touchpanel with the power terminal facing up.
•
•
Place the screws into their respective holes on the power cover as shown below.
Lower the power cover into position and tighten the 2 mounting screws.
Figure 8
Figure 9 Perform this step with the power terminal facing up.
19
June 2008 v1.2
7) Tighten the 2-screw NM connector as shown below.
Figure 10
Once the power cable is secured, any necessary cables/modules should be
connected to the N8WTS such as: Ethernet, microphone, USB wireless
mouse/keyboard, serial connector, etc.
20
June 2008 v1.2
8) Insert N8 into wall
Figure 11
21
June 2008 v1.2
Figure 12 Side view of installed N8
22
June 2008 v1.2
9) Fasten 4 screws to secure N8 to mounting bracket
Figure 13
Once all of the necessary cables have been properly connected the N8WTS slides
into the mounting bracket and should be securely attached to the bracket with the 4
small mounting screws provided. The bezel attaches to the front face of the unit last.
23
June 2008 v1.2
Finished Installation
Figure 14 Finished installation
24
June 2008 v1.2
The following information was taken in part from the 3M Profile Sensor Planning Guide (
October 2001)
Touch Application Design:
With any touch application, the design can be crucial to the usability of the final product. Clear icons,
bright contrasting colors, large buttons, and simple layouts will go a long way towards the success of
your installation.
Parallax, the effect of a target object appearing in different positions when looked at from different
angles, is a common problem in touch applications.
The combination of the touch screen in front of the display and differing heights of users can cause
parallax. When designing your touch system software application, use the following guidelines to help
reduce the effects of parallax.
•
25
Design large buttons to facilitate touch. Remember that a fingertip is much
larger than a cursor.
June 2008 v1.2
•
Design larger active border areas for buttons. For example, if the button
graphic is 1" X 1" the active touch area behind it could be 2" X 2". Also
consider the target system’s screen resolution when selecting graphics and
sizing buttons.
•
Keep buttons away from the edges and corners of the screen. If this is
impossible, make sure the active touch areas extend to the outer edges of the
viewing area.
• Place buttons horizontally whenever possible. One size does not fit all!
Consider the varying heights of users when designing the application.
26
June 2008 v1.2
Maintenance
The N8WTS requires very little maintenance. From time to time it may be necessary
to clean the screen or bezel.
Screen
The resistive touch screen includes a coating (Indium Tin Oxide on polyester
substrate) on the front surface of the screen that is substantially harder and more
abrasion-resistant than uncoated touch screens
Typically, isopropyl alcohol and water solution ratio of 50:50 is the best cleaning
agent for your touch screen. You can also use straight isopropyl alcohol. As with any
electronics, be sure to spray the cleaner onto a soft cloth and NOT directly onto the
touch screen. It is important to avoid using any caustic chemicals on the touch
screen. Be sure to follow solvent manufacturer's precautions and directions for use
when using solvents.
Although the touchglass contains the above mentioned protective substances, the
touchglass is NOT indestructible. It may still break and/or scratch if it is not treated
with care and respect.
Bezel
The bezel can be very sensitive to chemical damage as well as scratches and dents.
The bezel should be removed from the face of the unit before cleaning. The bezel
should be cleaned with normal dish soap and water with a soft sponge..
Case
Over time some dust may collect on the case. The unit does not require cleaning
maintenance but may be cleaned with compressed canned air or dusted with a light
brush. The unit should be disconnected from any power source before cleaning.
27
June 2008 v1.2
Limited Warranty
Nobu, LLC. warrants this Product to be free from defects in material and
workmanship and, subject to the conditions set forth below, agrees to repair or
replace (at Nobu’s sole option) any part of the enclosed unit which proves defective
for a period of one (1) year from the date of the first consumer purchase. Spare parts
are warranted for thirty (30) days. Replacement parts or unit may be new or
refurbished and will meet specifications of the original parts or unit.
This warranty gives you specific legal rights and you may also have other rights,
which vary from state to state. This warranty is limited to the original purchaser of
the Product and is not transferable. This warranty covers only Nobu-supplied
components. Service required as a result of third party components is not covered
under this warranty. In order to be covered under this warranty, the Product must
have been purchased from a Nobu Authorized Dealer or directly from Nobu. Proof of
purchase will be required by Nobu to substantiate date of purchase. Such proof of
purchase must be an original bill of sale or receipt containing name and address of
seller, purchaser, and the serial number of the product.
It shall be your obligation and expense to have the Product shipped, freight prepaid,
or delivered to the authorized reseller from whom it was purchased or other facility
authorized by Nobu to render the services provided hereunder in the original
package. All Products returned to Nobu for service MUST have prior approval, which
may be obtained by calling 1-800-519-3858 or by visiting the Nobu website at
http://www.nobuusa.com/support . The Product shall not have been previously
altered, repaired, or serviced by anyone other than a service facility authorized by
Nobu to render such service, the serial number of the product and tamper-evident
sticker/seals on the case shall not have been altered or removed. In order to be
covered by this warranty the Product shall not have been subjected to displaying of
fixed images for long periods of time resulting in image persistence (afterimage
effects), image burn-in, accident, misuse or abuse, or operated contrary to the
instructions contained in the User’s Manual. Any such conditions will void this
warranty.
NOBU SHALL NOT BE LIABLE FOR DIRECT, INDIRECT, INCIDENTAL,
CONSEQUENTIAL, OR OTHER TYPES OF DAMAGES RESULTING FROM THE
USE OF ANY NOBU PRODUCT OTHER THAN THE LIABILITY STATED ABOVE.
THESE WARRANTIES ARE IN LIEU OF ALL OTHER WARRANTIES EXPRESSED
OR IMPLIED, INCLUDING, BUT NOT LLIMITED TO, THE IMPLIED WARRANTIES
OF MERCHANTABILITY OR FITNESS FOR A PARTICULAR PURPOSE. SOME
STATES DO NOT ALLOW THE EXCLUSION OF IMPLIED WARRANTIES OR THE
LIMIIATION OR EXCLUSION OF LIABILITY FOR INCIDENTAL OR
CONSEQUENTIAL DAMAGES SO THE ABOVE EXCLUSIONS OR LIMITATIONS
MAY NOT APPLY TO YOU.
This Product is warranted in accordance with the terms of this limited warranty.
Consumers are cautioned that Product performance is affected by system
configuration, software, the application, customer data, and operator control of the
28
June 2008 v1.2
system, among other factors. While Nobu Products are considered to be compatible
with many systems, specific functional implementation by the customers of the
Product may vary. Therefore, suitability of a Product for a specific purpose or
application must be determined by the consumer and is not warranted by Nobu.
The limited warranty does not cover:
•
•
•
•
Software, including the operating system and software added to the Nobu
hardware products through our factory-integration system, third-party
software, or the reloading of software.
Non-Nobu branded and Solution Provider Direct products and accessories.
Products with missing or altered tamper-evident seals or serial numbers.
Products for which Nobu has not received payment.
Problems that result from:
•
•
•
•
•
External causes such as accident, abuse, misuse, or problems with electrical
power.
Servicing not authorized by Nobu.
Usage that is not in accordance with product instructions.
Failure to follow the product instructions or failure to perform preventive
maintenance.
Problems caused by using accessories, parts, or components not supplied by
Nobu.
For the name of your nearest authorized Nobu service facility, contact Nobu, LLC. at
1-800-519-3858 or visit us on the web at:
http://www.nobuusa.com/support
29
June 2008 v1.2