1
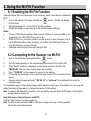
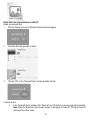
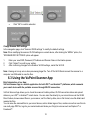
6. Using the Wi-Fi® Function 6.1 Enabling the Wi-Fi® Function View and transfer files from the scanner to your computer, laptop, smart device or tablets via Wi-Fi. 1. Turn on the scanner, then press and hold the button. “Starting” will display on the screen. 2. Wait approximately 30 - 40 seconds for Wi-Fi® to initialize. 3. “Ready” will display on the screen once the Wi-Fi® finishes initializing. Notes: The use of Wi-Fi® will consume a larger amount of battery. To preserve battery, it is suggested to turn off the Wi-Fi® when not in use. When Wi-Fi® is on, you will be unable to use the scanner to scan. Exception: Use of the SCAN Direct feature. Refer to section 6.3 to utilize the SCAN Direct function to scan files directly to your smart device. Calibration cannot be performed while using Wi-Fi®. 6.2 Connecting to the Scanner via Wi-Fi® 1. Turn on the Wi-Fi® by pressing and holding button. 2. 3. Go to the network setting on the computer/smart device and turn on the Wi-Fi® When "Ready" indication is displayed on the scanner's screen, search for the “WIFISCAN” network in the computer/smart device setting 4. Enter “123456789” as the password to connect to the scanner 5. “Connected” will be display on the scanner’s screen once Wi-Fi® is connected on the device. 6. Open an Internet browser and enter “192.168.1.2” or “wifi.scan/” in the address bar to enter the navigation page. In the navigation page, all the scanned images will be shown on the browser in thumbnails. You can view and delete files stored in the scanner or change the scanner Wi-Fi® settings. Note: If a new Wi-Fi® password is forgotten, it can be reset by using the Reset Wi-Fi® option in the Scanner settings. Refer to section 6.4 View files from an Internet Browser via Wi-Fi® Click the “View” button to preview a single file. Note: If a JPG format file exceeds 4MB, a notification “Image is too large” will be presented and the file cannot be previewed. 12