1
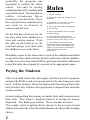
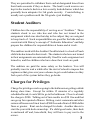
Classroom...
Micro Economy!!!
Copyright 1995 • All Rights Reserved
Paul Fretheim, PerSoft
P.O. Box 238
Independence, CA
[email protected]
Micro Economy™ User Manual
Contents
Chapter 1. Classroom Organization .... 1
The Micro Economy™ Classroom .............................................. 1
Introducing the Classroom Micro Economy to Your Room ....... 1
Paying the Students ..................................................................... 2
Student Auditors .......................................................................... 3
Charges for Privileges ................................................................. 3
Rewarding the Students ............................................................... 4
Enforcing the Rules ..................................................................... 5
Chapter 2. Getting Started.................... 6
Copying the Program to Your Hard Drive .................................. 6
Creating An Alias ........................................................................ 8
Renaming the New Alias ............................................................. 9
Placing the Alias In The Apple Items Folder ............................ 10
Chapter 3. Setting Up Your Bank....... 12
The Teacher Utilities ................................................................. 12
Setting the Passwords ................................................................ 15
Creating One File ...................................................................... 18
Deleting One File ...................................................................... 19
Setting the Interest ..................................................................... 20
Chapter 4. Using the Bank .................. 22
Paying All the Students ............................................................. 22
Paying Individual Students ........................................................ 24
Accessing the Accounts ............................................................. 25
Viewing Balances ...................................................................... 27
Printing a Statement .................................................................. 28
Using Accounts ......................................................................... 28
Chapter 5
Setting Up the Auditor Checklists .......... 32
Using the Teacher Utilities ......................................................... 32
Naming the Checklists ................................................................ 34
Creating a Special Name List ..................................................... 35
Setting Bonuses .......................................................................... 37
Setting Fines ............................................................................... 41
Setting a Password ...................................................................... 42
Chapter 6
Using the Auditor Checklists ................ 44
Accessing the Checklists ............................................................ 45
Calculating Fines and Bonuses ................................................... 46
Chapter 7 - Records ............................... 48
The Records Stack ...................................................................... 48
Searching for a Record ............................................................... 49
Chapter 8 - Creating Reports ............... 51
Generating Reports ..................................................................... 52
Printing Reports .......................................................................... 54
Accessing a Single Report .......................................................... 56
Printing One Report .................................................................... 58
Deleting All Reports ................................................................... 59
Deleting One Reports ................................................................. 59
Chapter 9
Printing the Classroom Money ............. 61
Opening the Pict Files ................................................................ 61
Creating Printing Masters ........................................................... 62
Printer Requirements .................................................................. 63
Classroom Organization
1
The Micro Economy™ Classroom
Classroom Micro Economy provides the teacher or an entire school
with an easy, effective, planned, and painless system for classroom
or all-school management.
Introducing the Classroom Micro
Economy to Your Room
Introducing the Micro Economy management system to your
classroom or school can be accomplished with a minimum amount
of time and effort. The plan outlined below is not meant to be
adhered to religiously. Each teacher will probably make alterations
to the plan to fit their specific needs and style.
One of the beauties of the Micro Economy is its flexibility and
adaptability to varying situations.
Hundreds of schools all across the US and Canada are using the
program to great benefit. In the my school and many others the
program is in use building-wide. Our librarian fines for overdue
books in the classroom money. If a child helps the custodian, the
custodian has her own supply of cash with which to reward students.
We started with just one classroom using the system and
1
gradually the program has
expanded to include the entire
school. You may be starting
something that will eventually help
your entire school. The steps below
outline introducing Micro
Economy to one classroom. If you
have any questions, remember you
can reach us via Internet at
[email protected].
On the first day of school, lay out
the class rules to the children in a
clear and concise manner. Write
the rules on the board or on the
overhead and go over them with
the children as you write them.
Rules
1) Obey the teacher.
2) Respect the rights and feelings of your
classmates.
3) Remain in your seat unless you have
permission to be out of your seat.
4) Listen when the teacher is talking and
do not interrupt.
5) Raise your hand and wait to be called
on before talking.
6) Come into the room as quickly as
possible when the bell rings. Sit down in
your seat at once, quiet, ready to work.
7) All students are expected to do all
assignments and to work as hard as they
can at school to finish all assignments at
school! Any work that is not finished at
school automatically becomes
homework!!!
Distribute copies of the class rules to each of the children and attach
a copy of the class rules to a letter which is sent home with the children.
In order to receive their initial $300 to get them started the child must
return the rules sheet signed by a parent in the appropriate space.
Paying the Students
After each child returns the rules paper with their parent’s signature
and gets the $300 in cash, you can operate for the time being on a cash
basis. Tell the students about the bank and let them know that in the
next few days they will have the opportunity to deposit their cash into
a bank account.
Interest in depositing their money is usually slow until someone loses
their cash. This tends to heighten interest in having the money
deposited. The Bank pays interest. This is another incentive.
The weekly salary is paid by direct deposit to the account of each
student automatically when the student bankers do the weekly banking
chores.
2
They are permitted to withdraw their cash at designated times from
their bank accounts if they so desire. The bank’s cash reserves are
kept in the teacher's desk in a low security locked drawer which has
generally been adequate for 3rd grade security. Counterfeiting is
usually not a problem until the 5th grade. (just kidding)
Student Auditors
Children love the responsibility of serving as as “Auditors.” These
students check to see who has and who has not turned in the
assignment which was due that day in the subject they are assigned
to keep track of. Such responsibilities are good for the kids and are
consistent with Dewey's concept of "Authentic Education" and help
prepare the children for responsibilities at home and at work.
The auditors work with the Auditor Checklist stack to check off each
child who has turned in their work. The students who have not turned
in their assignments are automatically fined for each assignment not
turned in, and the children who have done their work are paid.
The auditors are paid the same salary as the bankers. You will
probably want to wait a while after the start of school to impose this
regimen as that gives everyone a chance to get a cash balance so they
feel a part of the system before they go broke.
Charges for Privileges
Charge for privileges such as going to the bathroom or getting a drink
during class time. Except for within 15 minutes of a regularly
scheduled break, it costs $40 to go to the bathroom. Close to a break
the charge is $200. Talking out of turn results in a $50 fine and that
can go up for repeated offenses. Hitting, racist comments and other
serious offenses result in at least a $500 fine and often in $1000 dollar
fines or greater. Rent can be charged for desks. Another idea is to
start the year with desk ownership. If a child goes broke, their desk
is auctioned off and, henceforth, they will have to pay rent to the
owner.
3
Another way of dealing with "going broke" is that they “lose their
chair” and must stand. They earn money at the rate of $5 for every
minute they stand, so a $50 fine to a broke student forces them to stand
for 10 minutes.
To impose a fine, simply announce it. The bankers then record the
debit and take care of any record keeping. Since being a banker
requires learning to use the software don’t rotate that job as often.
Choose good role models for the job of banker. For example, a useful
rule is that you must have a “clean record” for at least a month to
qualify to be a banker.
The operation of the software is detailed in the later sections of this
manual. You probably can just boot the Bank and Checklists up and
run them, but the later chapters of this manual give a complete,
illustrated, explanation of all the functions of the programs.
Rewarding the Students
The first opportunity to spend their money is usually at auctions
which are held during the last period on Fridays. The teacher can go
to a novelty store and purchase trinkets and other items to auction off,
but a more useful method for obtaining items for sale is to ask the
children to bring in items from home that they no longer want. Often
these items turn out to be books that have been read, so that the Friday
auctions turn into a book exchange. Be sure to encourage this. Kids
can start businesses selling items they manufacture. Desk cleaning is
a service which is often marketable and the number of businesses that
the children come up with can be very surprising. The creativity this
authentic education allows to flower in your students will amaze you!
Once the businesses are functioning, the money takes on a great deal
of value for the students and becomes a powerful tool of persuasion
for the teacher and the students themselves. Disputes between
students result in lawsuits and expensive settlements the children
abhor and avoid at all costs. Your discipline becomes studentcentered and exemplary behavior seems to magically appear and stay
with a minimum effort by the teacher!
4
Enforcing the Rules
The list of classroom rules should be relatively short. You can post
the rules in the classroom. A sample “fine sheet” appears below.
Award a bonus for any assignment or help a child gives. We have
a class meeting and decide what jobs need to be done and make sure
there are enough jobs so everyone has one. One job is to make sure
that the other kids do their jobs and to pay them for their work. I am
working on getting a listServe discussion group on Micro Economies
going on the internet. Please send your e-mail address to
[email protected] so you can be included in the list.
Fines
Fines will increase for repeat
offences. People without money
will lose their chair and will
have to stand.
Failure to follow instructions
Interrupting
Late homework
Assignment not turned in
Out of your seat without permission
Name calling
Famous flying objects
Bad language
Racist Comments
Hitting or other
physical injuries to another person
Other
200
50
50
50
50
200
500
500
1000
1000
Teacher discretion
5
Getting Started
2
Copying the Program to
Your Hard Drive
You should always lock the master disk of any
software by sliding the small plastic square in
the upper corner of the disk up so there is a
small square opening in the corner before inserting it in your drive. Also, it is a good idea to
make a backup copy on a floppy disk as soon as
you have copied the program to your hard
drive. The procedures for copying the program
to your hard drive are detailed below.
This chapter also includes instructions for making an alias and placing it in your Apple Items
Folder, so you can access the Bank and Checklists from your Apple Menu.
Figure 2-1. After you
place your locked disk
in your drive the drive
will whir for a moment and then your
desktop will look like
this, with an icon for
your hard drive and
an icon for the Micro
Economy™ disk.
6
Figure 2-2. Now
point at the Micro
Economy™ icon and
hold down the button
on your mouse. The
icon will change
color as you select it.
Figure 2-3. Now
double-click the
icon .
Figure 2-4. The disk's
window will appear.
Double-click the Total Bank.sea icon.
Figure 2-5. This
dialog box will
appear. Click the
"Desktop" button.
When the files are
extracted they will
appear on your
Macintosh desktop.
You can put them in a
folder later.
7
Creating a folder
You may want to keep your Bank in its own folder. To create
a folder choose "New Folder" from the File menu when you are in
Finder. Name your new folder and then move the 3 money picts
and the "Total Bank" file to the new folder.
Accessing the Program
With System 7 the best way to access the program is to put an
alias of the each stack in your Apple Menu Items folder. This
process is detailed below.
Creating An Alias
To create an alias you begin by selecting the object you want to create
an alias of by clicking on its icon to highlight it.
Figure 2-6. First select the item for which
you wish an alias, in
this case, "Total
Bank."
Figure 2-9. Then you
choose "Make Alias"
from the file menu.
8
Renaming the New Alias
Two items in the same folder cannot have the
same name, but as soon as you move the alias
to another location you can give it any name
you wish, including the same name as the
original item.
Figure 2-10. The alias
then appears next to the
icon of the original
item, with the word
"alias" appended to the
name. Alias names are
also distinguishable by
their type style, as they
appear in italics.
Figure 2-11. If you
wish the alias to have
the same name as the
original, move the
alias from the folder
the original is in before renaming it.
9
Placing an Alias In
TheApple Items Folder
Figure 2-12. Place the
new alias into the
Apple Menu Items
folder in the System
folder.
Figure 2-13. After the
alias is in the Apple
Items Menu, (found in
the system folder) the
Bank can be opened
from the Apple Menu.
10
11
Setting Up Your Bank
3
The Teacher Utilities
The first step in using the bank for your classroom electronic banking machine is to enter the
students names and establish an account for
each student. This process is detailed in figures
1-10 of this chapter. Later in the chapter you
will find instructions for setting the dollar
amounts of the various student salaries, setting
the passwords, adding just one account, and
deleting one account.
Figure 3-1. When the
bank opens, after the
copyright page dissolves you will see the
"Teller card." To begin the setup process,
click on "Setup."
Figure 3-2. Until a
password is set, you
just click on OK to go
to the "Teacher Utilities" card. After a
password is set you
will have to type the
password in before
clicking on OK to go
to the "Teacher Utilities" card.
12
Figure 3-3. The
"Teacher Utilities"
card.
Figure 3-4. To start
setting up the files click
on "Create files."
Figure 3-5. Click on
"Initialize" to continue.
13
Figure 3-6. Click on
"Initialize" if you do not
wish to save a copy of
the existing account
files (if any). Skip
ahead to figure 9 if you
do wish to save a copy
of the bank and its current files.
Figure 3-7. Now type
in the names of each
student for whom you
wish an account created. You need not
enter the names in alphabetical order as the
accounts will be automatically alphabetized, by last name, although you enter them
first name first.
Figure 3-8. Now click
on "Initialize." Creating the files will take a
few moments. The
beach ball cursor will
appear as the stack is
compacted at the end
of the process.
14
This manual is not complete. After I return from a business trip on 08/12/99 a
complete version will be posted.
Thank you for your patience.
Paul Fretheim